序言
虽然tf1仍然在维护,但tf2毕竟是主流,如果不是项目有明确要求,建议直接选择tf2。本文以tf2为例展开,总结从环境准备到使用自己的数据和tensorflow预训练模型进行快速训练和调用。对tensorflow和目标检测算法有深入了解的,可以在此基础上,进行完全独立的模型搭建。tf1和tf2在目标检测API的使用上差异不算太大,文中会尽量单独列出。
一、数据准备
1、目标检测公开数据集
图像数据的收集及标注都是十分耗时的工作,因此,若只是单纯研究算法或存在场景高度重合的公开数据集,首选一定是使用公开数据集。在此列举几个常见的:
(1)coco数据集
全称:Microsoft Common Objects in Context,包含90种对象(80种大类),30万张图片,总共包含150万个对象。支持物体检测、分割、文字识别。
下载地址:
训练集:http://images.cocodataset.org/zips/train2017.zip
验证集:http://images.cocodataset.org/zips/val2017.zip
测试集:http://images.cocodataset.org/zips/test2017.zip
训练集和验证集的标注:http://images.cocodataset.org/annotations/annotations_trainval2017.zip
(不要尝试直接访问官网,网页加载很慢)
(2)wider face
用于人脸检测的数据集,包含32203个图像和393703个人脸图像。
下载地址:
WIDER FACE: A Face Detection Benchmark
(3)kitti
自动驾驶相关数据集,包含车辆、行人,交通标识的识别。
下载地址:
The KITTI Vision Benchmark Suite
图像相关数据集介绍,可以参考这位大神的文章,总结得很全面
图像数据库-CSDN博客
2、自行标注
(1)labelimg工具安装
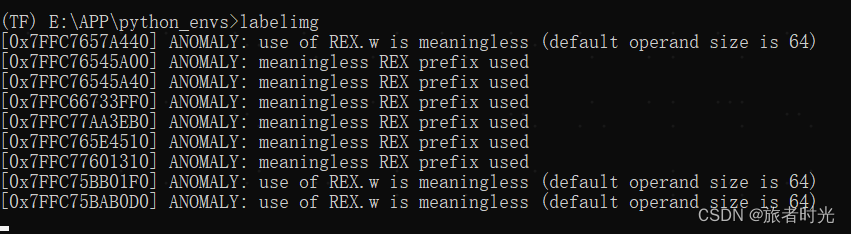
如果以上数据无法覆盖实际业务场景,那就需要自行标注图片。这里介绍基于python开发的工具labelimg,使用pip install labelimg安装,然后执行labelimg即可打开。
(2)labelimg工具使用
(3)标注文件格式转换
如图,工具支持多种标注类型。有时候标注的类型不是我们想要的,需要进行转换(不可能重新标注)。常见的有YOLO(txt) ,VOC(xml)相互转换。
import os
import cv2
import xml.etree.ElementTree as ET


def txt_to_xml(input_txt_dir, output_xml_dir, image_dir, class_txt):
    # 获取txt文件的目录列表
    txt_files = os.listdir(input_txt_dir)
    # 获取图像的目录列表
    image_files = os.listdir(image_dir)
    image_infos = []
    for txt_file in txt_files:
        file_name, file_ext = os.path.splitext(txt_file)
        for image_file in image_files:
            images = []
            image_name, image_ext = os.path.splitext(image_file)
            if image_ext in ['.jpg', '.png', '.jpeg']:
                # 判断图像名是否与txt文件名相同
                if image_name == file_name:
                    images.append(image_file)
                    # 读取txt文件中的标注信息
                    with open(os.path.join(input_txt_dir, txt_file), 'r') as f:
                        bboxes = []
                        for line in f.readlines():
                            bbox_id, x_center, y_center, width, height = line.strip().split()
                            x_center = float(x_center)  # 相对坐标
                            y_center = float(y_center)  # 相对坐标
                            width = float(width)  # 相对坐标
                            height = float(height)  # 相对坐标

                            bbox = (bbox_id, x_center, y_center, width, height)
                            bboxes.append(bbox)
                        images.append(bboxes)
                    image_infos.append(images)
    # 获取标注框的类别列表
    class_names = []
    with open(class_txt, 'r') as classes:
        for class_name in classes.readlines():
            class_names.append(class_name.strip())

    # 遍历每个图像文件,获取图像的高度和宽度,并将标注信息写入XML文件
    for image_info in image_infos:
        image_file = image_info[0]
        image_name, image_ext = os.path.splitext(image_file)
        image_path = os.path.join(image_dir, image_file)
        img = cv2.imread(image_path)
        image_height, image_width, num_channels = img.shape[:3]  # 获取图片的高度、宽度和通道数

        # 创建XML文件并写入标注信息
        with open(os.path.join(output_xml_dir, image_name + '.xml'), mode='a') as f:
            f.write('<annotation>\n')
            # 图像位置信息
            f.write('\t<filename>{}</filename>\n'.format(image_file))
            f.write('\t<path>{}</path>\n'.format(image_path))
            # 图像尺寸信息
            f.write('\t<size>\n')
            f.write('\t\t<width>{}</width>\n\t\t<height>{}</height>\n\t\t<depth>{}</depth>\n'.format(image_width,
                                                                                                     image_height,
                                                                                                     num_channels))
            f.write('\t</size>\n')
            # 图像类别、坐标信息
            bboxes = image_info[1]
            for bbox in bboxes:
                bbox_id, x_center, y_center, width, height = bbox
                xmin = (x_center * image_width) - (width * image_width) / 2  # 计算标注框左上角x坐标值
                ymin = (y_center * image_height) - (height * image_height) / 2  # 计算标注框左上角y坐标值
                xmax = (x_center * image_width) + (width * image_width) / 2  # 计算标注框右下角x坐标值
                ymax = (y_center * image_height) + (height * image_height) / 2  # 计算标注框右下角y坐标值

                f.write('\t<object>\n')
                f.write('\t\t<name>{}</name>\n'.format(class_names[int(bbox_id)].strip()))
                f.write('\t\t<pose>Unspecified</pose>\n')
                f.write('\t\t<truncated>0</truncated>\n')
                f.write('\t\t<difficult>0</difficult>\n')
                f.write('\t\t<bndbox>\n')
                f.write(
                    '\t\t\t<xmin>{}</xmin>\n\t\t\t<ymin>{}</ymin>\n\t\t\t<xmax>{}</xmax>\n\t\t\t<ymax>{}</ymax>\n'.format(
                        int(xmin), int(ymin), int(xmax), int(ymax)))
                f.write('\t\t</bndbox>\n')

                f.write('\t</object>\n')
            f.write('</annotation>')
def xml_to_txt(input_dir, output_dir, class_txt):
# 获取所有XML文件列表
xml_files = os.listdir(input_dir)
# 获取标注框的类别列表
class_names = []
with open(class_txt, 'r') as classes:
for class_name in classes.readlines():
class_names.append(class_name.replace('\n', ''))
# 遍历每个XML文件
for xml_file in xml_files:
# 获取文件名和扩展名
file_name, file_ext = os.path.splitext(xml_file)
# 确保是XML文件
if file_ext == '.xml':
# 解析XML文件并获取标注信息
tree = ET.parse(os.path.join(input_dir, xml_file))
root = tree.getroot()
# 获取图像的最大宽度和高度
max_width = float(root.find('size').find('width').text)
max_height = float(root.find('size').find('height').text)
# 获取标注框的坐标信息
bndbox_coords = []
for obj in root.findall('object'):
bbox_type = obj.find('name').text
type_id = class_names.index(bbox_type)
bndbox = obj.find('bndbox')
xmin = float(bndbox.find('xmin').text)
ymin = float(bndbox.find('ymin').text)
xmax = float(bndbox.find('xmax').text)
ymax = float(bndbox.find('ymax').text)
bndbox_coords.append((type_id, xmin, ymin, xmax, ymax))
# 计算YOLO所需的格式并写入输出文件
with open(os.path.join(output_dir, file_name + '.txt'), 'w') as f:
for coords in bndbox_coords:
type_id, xmin, ymin, xmax, ymax = coords
x_center = (xmin + xmax) / 2 / max_width # x_center字段计算,相对坐标
y_center = (ymin + ymax) / 2 / max_height # y_center字段计算,相对坐标
width = (xmax - xmin) / max_width # width字段(相对宽)计算
height = (ymax - ymin) / max_height # height字段(相对高)计算
f.write('{} {:.6f} {:.6f} {:.6f} {:.6f}\n'.format(type_id, x_center, y_center, width, height)) 
二、环境准备及目标检测API安装
1、目标检测API安装
直接从github上拉或者去网页下载(压缩包解压后重命名为models)
git clone https://github.com/tensorflow/models.git将models下面的2个文件夹路径添加到python的环境变量,否则无法正常导入相关模块,因为这个模块并非通过pip安装的。
export PYTHONPATH=$PYTHONPATH:/your_path/models/research:/your_path/models/research/slim
2、基础环境准备
tf1要求python≥3.6、tensorflow≥1.15、protobuf compiler>3.0
tf2要求python≥3.6、tensorflow≥2.2、protobuf compiler>3.0
Protocol Buffers(通常简称为protobuf)的目的是为了序列化和反序列化数据结构,以便于数据的存储、传输和跨平台交换。这里重点介绍一下protobuf和其编译器protoc的安装。
(1)安装protobuf
pip install protobuf==3.20.0这将保证python能正确处理proto文件。
(2)下载protoc编译器
根据自己的环境选择相应版本,地址:
Releases · protocolbuffers/protobuf · GitHub
下载解压后将其bin路径添加到环境变量,如 vi ~/.bashrc
export PATH="/your_path/protoc/bin:$PATH"
(3)编译python接口
在……\models\research 目录开执行:
protoc object_detection/protos/*.proto --python_out=. 表示使用protoc编译.proto文件,它将.proto文件转换为python代码。
(4) 安装其他依赖
将……/models/research/object_detection/packages/tf2/setup.py复制到……/models/research
目录下,然后执行
python -m pip install .(5)验证
python object_detection/builders/model_builder_tf2_test.py如果正确显示了耗时,则安装成功。报错一般都是依赖缺失或版本冲突。
三、模型训练及调用
1、数据格式转换
(1)公开数据集格式转换
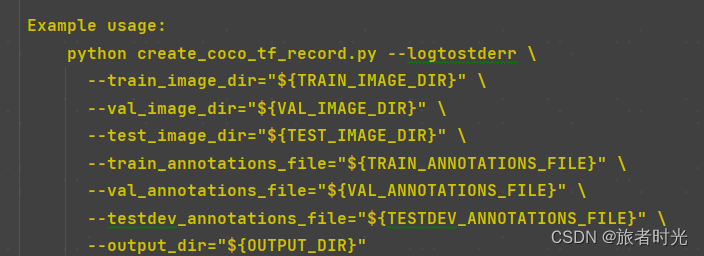
不同的框架都会对输入数据格式进行一定要求,tensorflow目标检测API要求数据格式为tf record,在models/research/object_detection/dataset_tools文件下下,提供了一些针对主要公开数据集的格式转换的代码。

①调用方法1
如代码提示,在终端中通过指定数据集和标注文件以及输出路径来运行程序
②调用方法2
也可以直接修改代码,在代码中指定相关路径,然后双击运行。

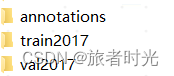
原始数据(下载解压后)
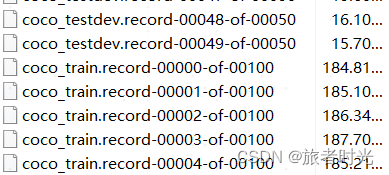
转换后
(2)转换自己的数据集
①基于labelimg标注的xml文件,先将其转换为csv文件,顺便做数据集划分。指定标注文件所在文件夹和输出的2个csv文件即可。
import glob
import pandas as pd
import xml.etree.ElementTree as ET


def xml_to_csv(path):
    xml_list = []
    # 读取注释文件
    for xml_file in glob.glob(path + '/*.xml'):
        tree = ET.parse(xml_file)
        root = tree.getroot()
        for member in root.findall('object'):
            value = (root.find('filename').text,
                     int(root.find('size')[0].text),
                     int(root.find('size')[1].text),
                     member[0].text,
                     int(member[4][0].text),
                     int(member[4][1].text),
                     int(member[4][2].text),
                     int(member[4][3].text)
                     )
            xml_list.append(value)
    column_name = ['filename', 'width', 'height', 'class', 'xmin', 'ymin', 'xmax', 'ymax']

    # 将所有数据分为样本集和验证集,一般按照3:1的比例
    train_list = xml_list[0: int(len(xml_list) * 0.67)]
    eval_list = xml_list[int(len(xml_list) * 0.67) + 1:]

    # 保存为CSV格式
    train_df = pd.DataFrame(train_list, columns=column_name)
    eval_df = pd.DataFrame(eval_list, columns=column_name)
    train_df.to_csv('/image_identify/data/ad/csv/train.csv', index=False)
    eval_df.to_csv('/image_identify/data/ad/csv/eval.csv', index=False)


path = '/image_identify/data/ad/anotations_xml'
xml_to_csv(path)
②再将csv转tf_record,需要指定csv文件、图片路径以及输出路径。
from __future__ import division
from __future__ import print_function
from __future__ import absolute_import

import os
import io
import pandas as pd
# 如果本身就是tf1,直接导入即可
import tensorflow.compat.v1 as tf
from PIL import Image
from object_detection.utils import dataset_util
from collections import namedtuple

flags = tf.app.flags
flags.DEFINE_string('csv_input', '', 'Path to the CSV input')
flags.DEFINE_string('output_path', '', 'Path to output TFRecord')
FLAGS = flags.FLAGS


# 将分类名称转成ID号,根据自己实际打的标签进行修改
def class_text_to_int(row_label):
    if row_label == 'car':
        return 1
    elif row_label == 'people':
        return 2
    else:
        # 其他都归为一类
        return 3


def split(df, group):
    data = namedtuple('data', ['filename', 'object'])
    gb = df.groupby(group)
    return [data(filename, gb.get_group(x)) for filename, x in zip(gb.groups.keys(), gb.groups)]


def create_tf_example(group, path):
    print(os.path.join(path, '{}'.format(group.filename)))
    with tf.gfile.GFile(os.path.join(path, '{}'.format(group.filename)), 'rb') as fid:
        encoded_jpg = fid.read()
    encoded_jpg_io = io.BytesIO(encoded_jpg)
    image = Image.open(encoded_jpg_io)
    width, height = image.size

    filename = (group.filename + '.jpg').encode('utf8')
    image_format = b'jpg'
    xmins = []
    xmaxs = []
    ymins = []
    ymaxs = []
    classes_text = []
    classes = []

    for index, row in group.object.iterrows():
        xmins.append(row['xmin'] / width)
        xmaxs.append(row['xmax'] / width)
        ymins.append(row['ymin'] / height)
        ymaxs.append(row['ymax'] / height)
        classes_text.append(row['class'].encode('utf8'))
        classes.append(class_text_to_int(row['class']))

    tf_example = tf.train.Example(features=tf.train.Features(feature={
        'image/height': dataset_util.int64_feature(height),
        'image/width': dataset_util.int64_feature(width),
        'image/filename': dataset_util.bytes_feature(filename),
        'image/source_id': dataset_util.bytes_feature(filename),
        'image/encoded': dataset_util.bytes_feature(encoded_jpg),
        'image/format': dataset_util.bytes_feature(image_format),
        'image/object/bbox/xmin': dataset_util.float_list_feature(xmins),
        'image/object/bbox/xmax': dataset_util.float_list_feature(xmaxs),
        'image/object/bbox/ymin': dataset_util.float_list_feature(ymins),
        'image/object/bbox/ymax': dataset_util.float_list_feature(ymaxs),
        'image/object/class/text': dataset_util.bytes_list_feature(classes_text),
        'image/object/class/label': dataset_util.int64_list_feature(classes),
    }))
    return tf_example


def main(csv_input, output_path, imgPath):
    writer = tf.python_io.TFRecordWriter(output_path)
    path = imgPath
    examples = pd.read_csv(csv_input)
    grouped = split(examples, 'filename')
    for group in grouped:
        tf_example = create_tf_example(group, path)
        writer.write(tf_example.SerializeToString())

    writer.close()


if __name__ == '__main__':
    imgPath = '/image_identify/data/ad/images'

    # 生成训练集
    output_path = '/image_identify/data/ad/tf_record/train.record'
    csv_input = '/image_identify/data/ad/csv/train.csv'
    main(csv_input, output_path, imgPath)

    # 生成验证集
    # output_path = '/image_identify/data/ad/tf_record/eval.record'
    # csv_input = '/image_identify/data/ad/csv/eval.csv'
    # main(csv_input, output_path, imgPath)
2、模型训练
(1)下载预训练模型
tf1的地址:
https://github.com/tensorflow/models/blob/master/research/object_detection/g3doc/tf1_detection_zoo.md
tf2的地址:
https://github.com/tensorflow/models/blob/master/research/object_detection/g3doc/tf2_detection_zoo.md
这个网页只提供了模型下载地址,不支持直接下载,可以使用tf自带的文件下载方法
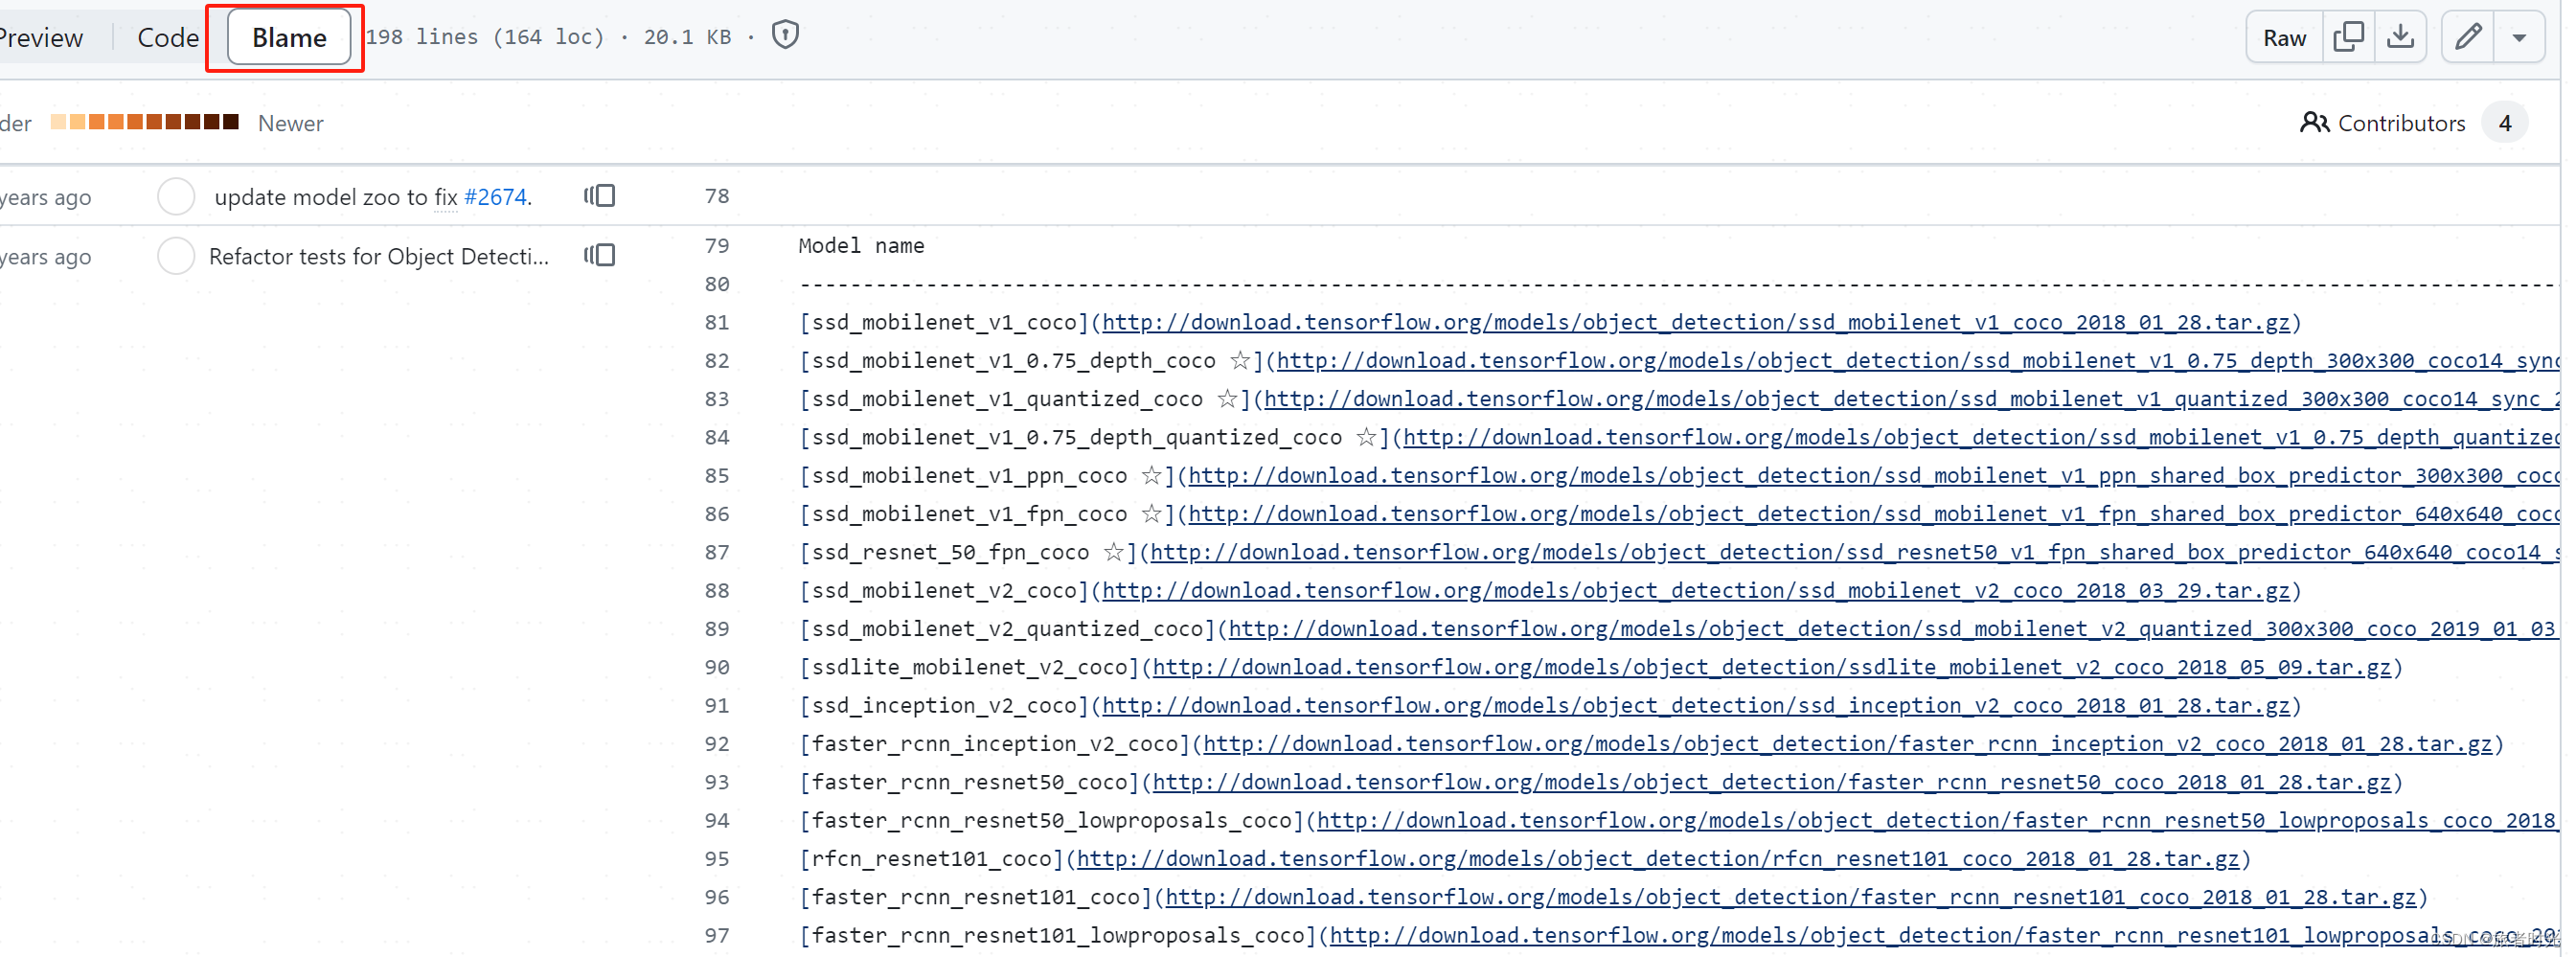
自己注意url拼接正确。
import tensorflow as tf


# 下载模型,并解压缩
def download_model(model_name):
    base_url = 'http://download.tensorflow.org/models/object_detection/tf2/20200713/'
    # 返回的是下载文件的路径
    model_dir = tf.keras.utils.get_file(fname=model_name,
                                        origin=base_url + model_name,
                                        # 是否需要解压
                                        untar=True)
    return str(model_dir)


MODEL_NAME = 'centernet_hg104_512x512_coco17_tpu-8.tar.gz'
PATH_TO_MODEL_DIR = download_model(MODEL_NAME)
print(PATH_TO_MODEL_DIR)
当然,也可以将url复制后,新开一个页面,输入链接后回车,也可以下载。
补充:标注文件的下载
# 下载标签
def download_labels(filename):
    base_url = 'https://raw.githubusercontent.com/tensorflow/models/master/research/object_detection/data/'
    label_dir = tf.keras.utils.get_file(fname=filename,
                                        origin=base_url + filename,
                                        untar=False)
    return str(label_dir)


LABEL_FILENAME = 'mscoco_label_map.pbtxt'
# 下载 Label 对照表文件
PATH_TO_LABELS = download_labels(LABEL_FILENAME)
(2)使用预训练模型进行训练
图像领域,一则数据量较大,二来大量的卷积也导致计算量较大。因此,使用预训练模型进行二次训练(结合自己的数据)是一个靠谱的路子(快速落地)。而这个地方tf1和tf2就有区别了
①针对tf2
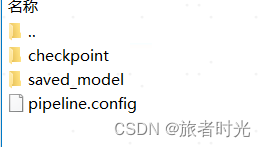
编辑下载的模型文件中的pipline.config文件,修改其中关于数据集以及模型的路径相关部分。
检测类型要改成“detection”,ckpt-0表示临时文件的第0个,如果有多个,也可以指定其他。
在object_detection文件夹里找到model_main_tf2.py文件,同样的,可以按照说明去命令行调用,也可以跟我一样,修改代码,然后直接运行。

②针对tf1
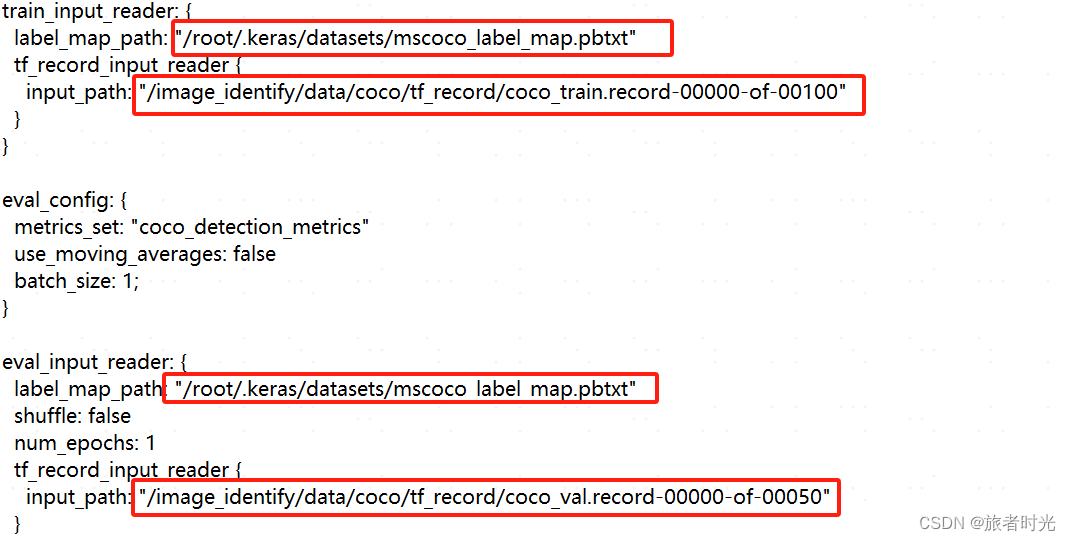
在research/object_detection/samples/configs文件夹下找到和下载的模型对应的配置文件,修改其中关于模型路径以及训练、验证集的路径。当然,其他参数也可以调整。
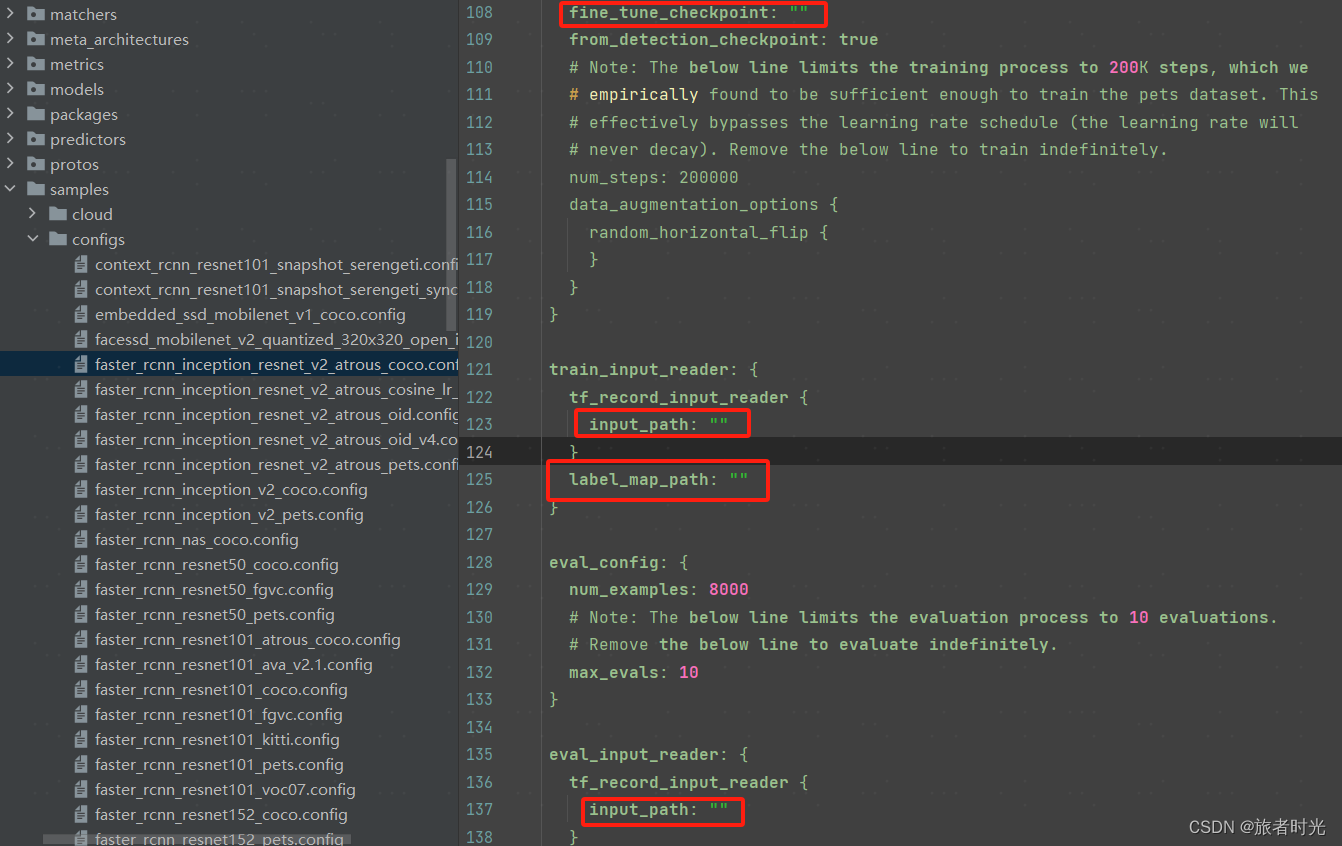
再执行research/object_detection/legacy/train.py
python train.py \
--logtostderr \
--train_dir=your_path/output \
--pipeline_config_path=your_path/models/research/object_detection/samples/configs/faster_rcnn_inception_resnet_v2_atrous_coco.config
注意,训练图像数据,最好有GPU支持。如果只是学习和测试,建议选择mobilenet等轻量网络,batch_size和num_steps可以设置小一点,否则,要么内存溢出要么等到天荒地老。
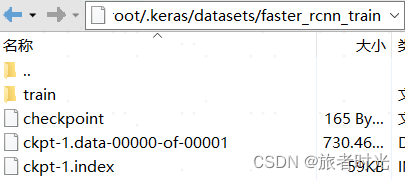
(3)训练完成后
训练完成后,在你指定的输出文件夹就生成了新的checkpoint文件
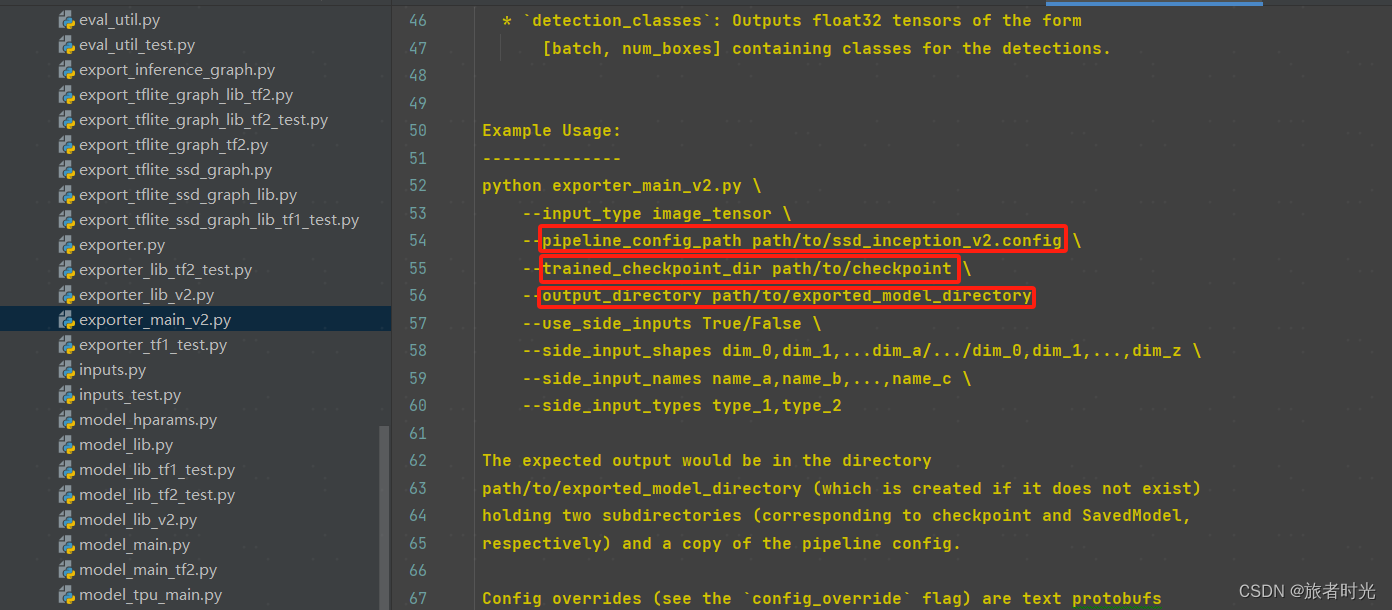
checkpoint转pb文件
在object_detection文件夹下找到exporter_main_v2.py文件,按照使用说明指定参数。
3、模型调用
上述训练生成的模型(也可以直接使用下载的模型)就可以用于预测验证了。不过,一般checkpoint只作为临时文件,正式部署都需要保存成pb文件。
(1)加载pb文件
# 图片 目标检测
import os
import tensorflow as tf
import warnings
import time
from object_detection.utils import label_map_util, config_util
from object_detection.utils import visualization_utils as viz_utils
import numpy as np
from PIL import Image
import matplotlib.pyplot as plt
from object_detection.builders import model_builder

warnings.filterwarnings('ignore')

# GPU 设定为 记忆体动态调整 (dynamic memory allocation)
# 通过 tf.config.experimental.list_physical_devices,我们可以获得当前主机上某种特定运算设备类型(如 GPU 或 CPU )的列表
gpus = tf.config.experimental.list_physical_devices('GPU')
for gpu in gpus:
    # 可以通过 tf.config.experimental.set_memory_growth 将 GPU 的显存使用策略设置为 “仅在需要时申请显存空间”
    tf.config.experimental.set_memory_growth(gpu, True)

#  GPU 设定为固定为 2GB
if gpus:
    tf.config.experimental.set_virtual_device_configuration(gpus[0],
        [tf.config.experimental.VirtualDeviceConfiguration(memory_limit=1024*2)])


MODEL_DATE = '20200711'
MODEL_NAME = 'centernet_hg104_1024x1024_coco17_tpu-32'
# 一般用keras下载下来的文件存储在"C:\Users\用户名\.keras" 下,linux在"/root/.keras"
PATH_TO_MODEL_DIR = '/root/.keras/datasets/centernet_hg104_1024x1024_coco17_tpu-32'


PATH_TO_LABELS = '/root/.keras/datasets/mscoco_label_map.pbtxt'
# 建立 Label 的对照表 (代码与名称) 标签映射将索引号对应于类别名称,如5对应于飞机。
category_index = label_map_util.create_category_index_from_labelmap(PATH_TO_LABELS, use_display_name=True)


# 测试图片
image_np = np.array(Image.open('../../data/images_Object_Detection/test.jpeg'))
# 转为 TensorFlow tensor
input_tensor = tf.convert_to_tensor(image_np)
# 加一维,变为 (批处理数, 宽, 高, 3通道颜色)
input_tensor = input_tensor[tf.newaxis, ...]


"""加载模型方法1:Saved Model(包含完整的网络结构和权重等参数)"""

# 从下载的目录载入模型
PATH_TO_SAVED_MODEL = PATH_TO_MODEL_DIR + "/saved_model"
print('载入模型...', end='')
start_time = time.time()
# 载入模型
detect_fn = tf.saved_model.load(PATH_TO_SAVED_MODEL)
elapsed_time = time.time() - start_time
print(f'共花费 0.0611 秒.')


# 进行检测,信息包含:候选框, 类别, 机率
detections = detect_fn(input_tensor)
# 得到检测到的目标数
num_detections = int(detections.pop('num_detections'))
print(f'检测到的物件个数:{num_detections}')
# 转换数据类型
detections = {key: value[0, :num_detections].numpy() for key, value in detections.items()}
detections['num_detections'] = num_detections
detections['detection_classes'] = detections['detection_classes'].astype(np.int64)

# 打印检测到的结果
print(f'物件资讯 (候选框, 类别, 机率):')
for detection_boxes, detection_classes, detection_scores in \
        zip(detections['detection_boxes'], detections['detection_classes'], detections['detection_scores']):
    print(np.around(detection_boxes, 4), detection_classes, round(detection_scores*100, 2))

image_np_with_detections = image_np.copy()
# 加框
viz_utils.visualize_boxes_and_labels_on_image_array(
      image_np_with_detections,
      detections['detection_boxes'],
      detections['detection_classes'],
      detections['detection_scores'],
      category_index,                   # 分类的映射
      use_normalized_coordinates=True,  # 框的坐标是否为归一化的值
      max_boxes_to_draw=200,            # 最多绘制多少框,不指定将会全部绘制
      min_score_thresh=.30,             # 过滤概率过低的
      agnostic_mode=True)              # 默认False,表示每个类别的边界框独立(不同的颜色、标注)

plt.figure(figsize=(12, 8))
plt.imshow(image_np_with_detections, cmap='viridis')
saved_file = '../../data/images_Object_Detection/test._detection2.png'
# 删除旧文件
if os.path.isfile(saved_file):
    os.remove(saved_file)
plt.savefig(saved_file)
(2)加载checkpoint
# 图片 目标检测
import os
import tensorflow as tf
import warnings
import time
from object_detection.utils import label_map_util, config_util
from object_detection.utils import visualization_utils as viz_utils
import numpy as np
from PIL import Image
import matplotlib.pyplot as plt
from object_detection.builders import model_builder
warnings.filterwarnings('ignore')
# GPU 设定为 记忆体动态调整 (dynamic memory allocation)
# 通过 tf.config.experimental.list_physical_devices,我们可以获得当前主机上某种特定运算设备类型(如 GPU 或 CPU )的列表
gpus = tf.config.experimental.list_physical_devices('GPU')
for gpu in gpus:
# 可以通过 tf.config.experimental.set_memory_growth 将 GPU 的显存使用策略设置为 “仅在需要时申请显存空间”
tf.config.experimental.set_memory_growth(gpu, True)
# GPU 设定为固定为 2GB
if gpus:
tf.config.experimental.set_virtual_device_configuration(gpus[0],
[tf.config.experimental.VirtualDeviceConfiguration(memory_limit=1024*2)])
# 一般用keras下载下来的文件存储在"C:\Users\用户名\.keras" 下,linux在"/root/.keras"
PATH_TO_MODEL_DIR = '/root/.keras/datasets/centernet_hg104_1024x1024_coco17_tpu-32'
PATH_TO_LABELS = '/root/.keras/datasets/mscoco_label_map.pbtxt'
# 建立 Label 的对照表 (代码与名称) 标签映射将索引号对应于类别名称,如5对应于飞机。
category_index = label_map_util.create_category_index_from_labelmap(PATH_TO_LABELS, use_display_name=True)
# 测试图片
image_np = np.array(Image.open('../../data/images_Object_Detection/test.jpeg'))
# 转为 TensorFlow tensor
input_tensor = tf.convert_to_tensor(image_np)
# 加一维,变为 (批处理数, 宽, 高, 3通道颜色)
input_tensor = input_tensor[tf.newaxis, ...]
"""加载模型方法2:Checkpoint(只包含权重信息,需要重新构建模型。一般是训练过程中临时保存,加载速度相对更快)"""
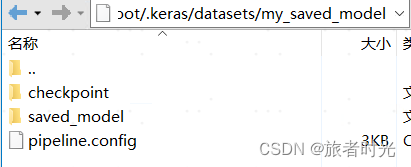
PATH_TO_CFG = PATH_TO_MODEL_DIR + "/pipeline.config"
PATH_TO_CKPT = PATH_TO_MODEL_DIR + "/checkpoint"
# 计时开始
print('Loading model... ', end='')
start_time = time.time()
configs = config_util.get_configs_from_pipeline_file(PATH_TO_CFG)
model_config = configs['model']
detection_model = model_builder.build(model_config=model_config, is_training=False)
# 还原模型
ckpt = tf.compat.v2.train.Checkpoint(model=detection_model)
# 恢复变量当在其他地方需要为模型重新载入之前保存的参数时,需要再次实例化一个 checkpoint,同时保持键名的一致。再调用 checkpoint 的 restore 方法。
ckpt.restore(os.path.join(PATH_TO_CKPT, 'ckpt-0')).expect_partial()
elapsed_time = time.time() - start_time
print(f'共花费 0.0611 秒.')
# # 任选一张图片进行物件侦测
# # 虽然默认的即时执行模式(Eager Execution)为我们带来了灵活及易调试的特性,但在特定的场合,例如追求高性能或部署模型时,我们依然希望
# # 使用 TensorFlow 1.X 中默认的图执行模式(Graph Execution),将模型转换为高效的 TensorFlow 图模型。此时,TensorFlow 2 为我们提供
# # 了 tf.function 模块,结合 AutoGraph 机制,使得我们仅需加入一个简单的 @tf.function 修饰符,就能轻松将模型以图执行模式运行。
@tf.function
def detect_fn(image):
image, shapes = detection_model.preprocess(image)
prediction_dict = detection_model.predict(image, shapes)
detections = detection_model.postprocess(prediction_dict, shapes)
return detections
# 进行检测,信息包含:候选框, 类别, 机率
detections = detect_fn(input_tensor)
# 得到检测到的目标数
num_detections = int(detections.pop('num_detections'))
print(f'检测到的物件个数:{num_detections}')
# 转换数据类型
detections = {key: value[0, :num_detections].numpy() for key, value in detections.items()}
detections['num_detections'] = num_detections
detections['detection_classes'] = detections['detection_classes'].astype(np.int64)
# 打印检测到的结果
print(f'物件资讯 (候选框, 类别, 机率):')
for detection_boxes, detection_classes, detection_scores in \
zip(detections['detection_boxes'], detections['detection_classes'], detections['detection_scores']):
print(np.around(detection_boxes, 4), detection_classes, round(detection_scores*100, 2))
image_np_with_detections = image_np.copy()
# 加框
viz_utils.visualize_boxes_and_labels_on_image_array(
image_np_with_detections,
detections['detection_boxes'],
detections['detection_classes'],
detections['detection_scores'],
category_index, # 分类的映射
use_normalized_coordinates=True, # 框的坐标是否为归一化的值
max_boxes_to_draw=200, # 最多绘制多少框,不指定将会全部绘制
min_score_thresh=.30, # 过滤概率过低的
agnostic_mode=True) # 默认False,表示每个类别的边界框独立(不同的颜色、标注)
plt.figure(figsize=(12, 8))
plt.imshow(image_np_with_detections, cmap='viridis')
saved_file = '../../data/images_Object_Detection/test._detection2.png'
# 删除旧文件
if os.path.isfile(saved_file):
os.remove(saved_file)
plt.savefig(saved_file)
(3)检测效果示例