书接上回,在前端项目开发中,有时候需要对特殊的元素进行特殊的处理,但有时候元素的位置不确定、层级不确定、数量不确定等问题,导致我们没办法进行元素的选择,这个时候我们就需要用到元素选择器了。
一、css选择器
1、:last-of-type
| 选择器 | 例子 | 例子描述 |
|---|---|---|
| :last-of-type | p:last-of-type | 选择属于其父元素的最后 <p> 元素的每个 <p> 元素。 |
代码:
<!DOCTYPE html>
<html>
<head>
<style>
p:last-of-type
{
background:yellow;
}
</style>
</head>

<body>
<div class="test">
   <p>我是第一个</p>
   <p>我是第二个</p>
</div>
<p>我是第三个</p>


</body>
</html>
页面展示:

2、:link
代码:
<!DOCTYPE html>
<html>
<head>
<style>
a:link{
    color: red;
}
</style>
</head>

<body>
<a href="www.baidu.com">前往百度</a>


</body>
</html>
页面展示:

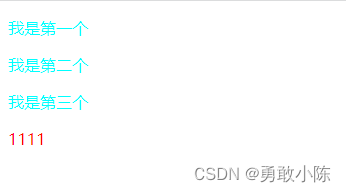
3、:not(p)
代码:
<!DOCTYPE html>
<html>

<head>
	<style>
		p {
			color: aqua;
		}

		:not(p) {
			color: red;
		}
	</style>
</head>

<body>
	<p>我是第一个</p>
	<p>我是第二个</p>
	<p>我是第三个</p>
	<div>1111</div>


</body>

</html>
页面展示:
4、:nth-child(n)
代码:
<!DOCTYPE html>
<html>

<head>
	<style>
		.test p:nth-child(2){
			color: red;
		}
	</style>
</head>

<body>
<div class="test">
	<p>111</p>
	<p>1111</p>
	<div>
		<p>222</p>
		<p>2222</p>
	</div>

</div>
</body>

</html>
页面展示:

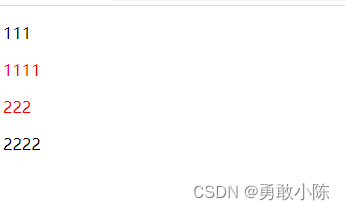
5、:nth-last-child(n)
代码:
<!DOCTYPE html>
<html>

<head>
	<style>
		.test p:nth-last-child(2){
			color: red;
		}
	</style>
</head>

<body>
<div class="test">
	<p>111</p>
	<p>1111</p>
	<div>
		<p>222</p>
		<p>2222</p>
	</div>

</div>
</body>

</html>
页面展示:
6、:nth-of-type(n)
代码:
<!DOCTYPE html>
<html>

<head>
	<style>
		p:nth-of-type(2){
			color: red;
		}
	</style>
</head>

<body>
<div class="test">
	<p>111</p>
	<div>111</div>
	<p>1111</p>
	<div>
		<p>222</p>
		<p>2222</p>
	</div>

</div>
</body>

</html>
页面展示:

7、:nth-last-of-type(n)
8、:only-of-type
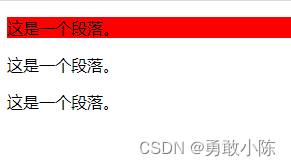
代码:
<!DOCTYPE html>
<html>
<head>
<style>
p:only-of-type
{
background:#ff0000;
}
</style>
</head>

<body>

<div>
<p>这是一个段落。</p>
</div>

<div>
<p>这是一个段落。</p>
<p>这是一个段落。</p>
</div>

</body>
</html>
页面展示:
9、:only-child
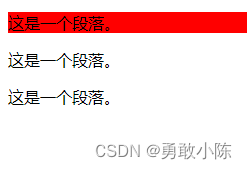
代码:
<!DOCTYPE html>
<html>
<head>
<style>
p:only-of-type
{
background:#ff0000;
}
</style>
</head>

<body>

<div>
<div><p>这是一个段落。</p></div>
</div>

<div>
<p>这是一个段落。</p>
<p>这是一个段落。</p>
</div>

</body>
</html>
页面展示:
10、:optional
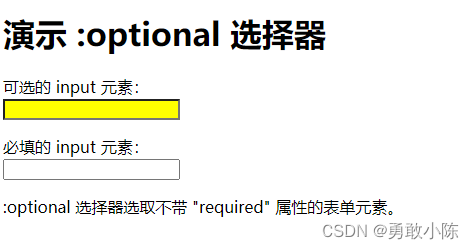
代码:
<!DOCTYPE html>
<html>
<head>
<style>
input:optional {
  background-color: yellow;
}
</style>
</head>
<body>

<h1>演示 :optional 选择器</h1>

<p>可选的 input 元素:<br><input></p>

<p>必填的 input 元素:<br><input required></p>

<p>:optional 选择器选取不带 "required" 属性的表单元素。</p>


</body>
</html>
页面展示:
11、:out-of-range
代码:
<!DOCTYPE html>
<html>
<head>
<style>
input:out-of-range {
  border: 2px solid red;
}
</style>
</head>
<body>

<h1>演示 :out-of-range 选择器</h1>

<input type="number" min="5" max="10" value="17">

<p>请尝试在给定范围(5 到 10)之间输入数字,来查看样式消失。</p>

</body>
</html>
页面展示:

12、::placeholder
代码:
<!DOCTYPE html>
<html>
<head>
<style>
::-webkit-input-placeholder { /* Edge */
  color: red;
}

:-ms-input-placeholder { /* Internet Explorer */
  color: red;
}

::placeholder {
  color: red;
}
</style>
</head>
<body>

<p>请使用 ::placeholder 选择器来改变占位文本的颜色:</p>

<input type="text" name="fname" placeholder="First name">

</body>
</html>
页面展示:

13、:read-only
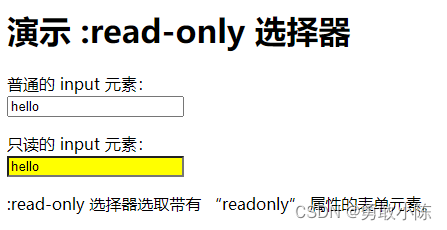
代码:
<!DOCTYPE html>
<html>
<head>
<style>
input:read-only {
  background-color: yellow;
}
</style>
</head>
<body>

<h1>演示 :read-only 选择器</h1>

<p>普通的 input 元素:<br><input value="hello"></p>

<p>只读的 input 元素:<br><input readonly value="hello"></p>

<p>:read-only 选择器选取带有 “readonly” 属性的表单元素。</p>

</body>
</html>
页面展示:
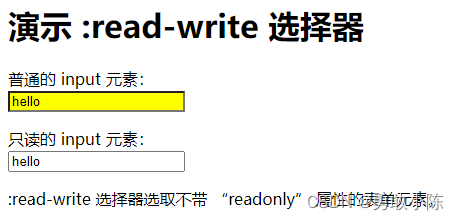
14、:read-write
代码:
<!DOCTYPE html>
<html>
<head>
<style>
input:read-write {
  background-color: yellow;
}
</style>
</head>
<body>

<h1>演示 :read-write 选择器</h1>

<p>普通的 input 元素:<br><input value="hello"></p>

<p>只读的 input 元素:<br><input readonly value="hello"></p>

<p>:read-write 选择器选取不带 “readonly” 属性的表单元素。</p>

</body>
</html>
页面展示:
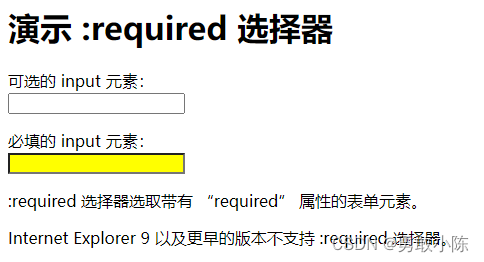
15、:required
代码:
<!DOCTYPE html>
<html>
<head>
<style>
input:required {
  background-color: yellow;
}
</style>
</head>
<body>

<h1>演示 :required 选择器</h1>

<p>可选的 input 元素:<br><input></p>

<p>必填的 input 元素:<br><input required></p>

<p>:required 选择器选取带有 “required” 属性的表单元素。</p>

<p>Internet Explorer 9 以及更早的版本不支持 :required 选择器。</p>

</body>
</html>
页面展示:
16、:root
代码:
<!DOCTYPE html>
<html>
<head>
<style>
:root
{
background:#ff0000;
}
</style>
</head>
<body>

<h1>这是标题</h1>
<p>第一个段落。</p>
<p>第二个段落。</p>
<p>第三个段落。</p>
<p>第四个段落。</p>
<p>第五个段落。</p>

</body>
</html>
页面展示:

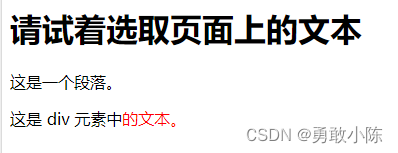
17、::selection
代码:
<!DOCTYPE html>
<html>
<head>
<style>
::selection
{
color:#ff0000;
}
::-moz-selection
{
color:#ff0000;
}
</style>
</head>
<body>

<h1>请试着选取页面上的文本</h1>

<p>这是一个段落。</p>

<div>这是 div 元素中的文本。</div>

<br>

</body>
</html>
页面展示:
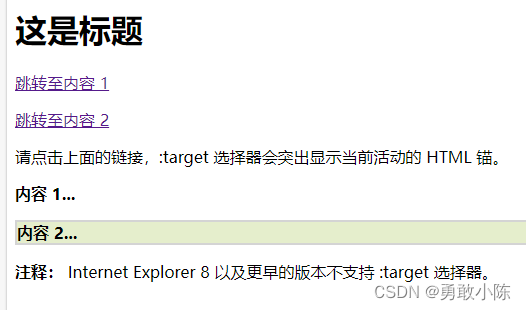
18、:target
代码:
<!DOCTYPE html>
<html>
<head>
<style>
:target
{
border: 2px solid #D4D4D4;
background-color: #e5eecc;
}
</style>
</head>
<body>

<h1>这是标题</h1>

<p><a href="#news1">跳转至内容 1</a></p>
<p><a href="#news2">跳转至内容 2</a></p>

<p>请点击上面的链接,:target 选择器会突出显示当前活动的 HTML 锚。</p>

<p id="news1"><b>内容 1...</b></p>
<p id="news2"><b>内容 2...</b></p>

<p><b>注释:</b> Internet Explorer 8 以及更早的版本不支持 :target 选择器。</p>

</body>
</html>
页面展示:
19、:valid
代码:
<!DOCTYPE html>
<html>
<head>
<style>
input:valid {
  background-color: yellow;
}
</style>
</head>
<body>

<h1>演示 :valid 选择器</h1>

<input type="email" value="support@example.com">

<p>请尝试输入一个非法的电子邮件地址,来查看样式消失。</p>

<p><b>注释:</b>Internet Explorer 9 以及更早的版本不支持 :valid 选择器。</p>

</body>
</html>
页面展示:

20、:visited
代码:
<!DOCTYPE html>
<html>
<head>
<style>
a:visited
{
background-color:yellow;
}
</style>
</head>
<body>

<a href="http://www.w3school.com.cn">W3Sschool</a>
<a href="http://www.google.com">Google</a>
<a href="http://www.wikipedia.org">Wikipedia</a>

<p><b>注释:</b>:visited 选择器为已被访问的链接设置样式。</p>

</body>
</html>
页面展示:


