目录
- 1. 概述
- 2. 参考
- 3. 环境
- 4. 部署
- 4.1 操作系统
- 4.1.1 修改系统参数
- 4.1.2 关闭透明大页内存
- 4.1.3 修改系统限制
- 4.2 安装Redis
- 4.2.1 下载Redis
- 4.2.2 创建redis账号
- 4.2.3 添加Redis环境变量
- 4.2.4 创建Redis使用目录
- 4.2.5 安装Redis
- 4.2.6 手动修改配置文件(**可跳过,直接使用4.2.7命令修改**)
- 4.2.7 命令修改配置文件
- 4.2.8 Redis使用目录赋权
- 4.2.9 启动Redis验证
- 4.2.10 目录结构
- 4.3 配置systemd管理
- 4.3.1 编译安装时未使用systemd
- 4.3.2 编译安装时使用了systemd方式
- 4.3.3 加载并验证服务
- 4.3 部署常见问题
- 4.3.1 编译时环境问题
- 4.3.2 编译时缺少文件
1. 概述
之前一直使用Redis,最近遇到一些问题,整理Redis的单例安装部署过程,记录如下。
2. 参考
- 链接: Install Redis
- 链接: github-Redis
- 链接: gitcode-Redis
3. 环境
- 虚机Virtual-Machine-203
- Ubuntu 22.04(Centos7.9也可以)
- Redis 7.2.5
4. 部署
4.1 操作系统
4.1.1 修改系统参数
- 添加以下系统参数(必须)
cat >> /etc/sysctl.conf << EOF
# Redis 必须使用参数
#定义了系统中每一个端口最大的监听队列的长度,默认4096 可调整到8192/16384/32768
net.core.somaxconn = 32768

# Redis 必须使用参数
# 1表示内核允许分配所有的物理内存,而不管当前的内存状态如何,默认0。
vm.overcommit_memory = 1

# Redis 建议使用参数
# 物理内存使用90%,才开始使用swap,默认60,也可以设置为0,优先使用100%物理内存
vm.swappiness = 10

# 大于100将更积极的回收cache,默认100,
vm.vfs_cache_pressure = 100

EOF
- 添加以下系统参数(可选)
cat >> /etc/sysctl.conf << EOF
# 系统调优参数
# 允许存在time_wait状态的最大数值,超过则立刻被清除并且警告
# 默认是262144, ubuntu默认8192,防止过多的time_wait导致端口资源被耗尽
net.ipv4.tcp_max_tw_buckets = 30000

# 开启SYN Cookies,当出现SYN 等待队列溢出时,启用cookies 来处理。
net.ipv4.tcp_syncookies = 1

# 该参数决定了,每个网络接口接收数据包的速率比内核处理这些包的速率快时,允许送到队列的数据包的最大数目,默认1000
net.core.netdev_max_backlog = 32768

# 表示SYN队列的长度,默认2048
net.ipv4.tcp_max_syn_backlog = 32768

# 建立连接syn+ack 与syn 包重试次数
net.ipv4.tcp_synack_retries = 2
net.ipv4.tcp_syn_retries = 2

EOF
- 参数生效
sysctl -p
4.1.2 关闭透明大页内存
- 关闭透明大页内存动态分配,需要关闭让 redis 或 mongo 负责内存管理
cat >> /etc/rc.local << EOF
# Redis Mongo建议参数
# Disable Transparent Huge Pages, redis and mongo configure
echo never > /sys/kernel/mm/transparent_hugepage/enabled
echo never > /sys/kernel/mm/transparent_hugepage/defrag
EOF
- 加载生效
source /etc/rc.local
4.1.3 修改系统限制
cp /etc/security/limits.conf /etc/security/limits.conf.bak
cat>>/etc/security/limits.conf <<EOF
* soft nproc 655350
* hard nproc 655350
* soft nofile 655350
* hard nofile 655350

# ubuntu 需要针对账号设置
root soft nproc 655350
root hard nproc 655350
root soft nofile 655350
root hard nofile 655350
EOF
- 重启或重新登录生效
或 - 修改当前设置生效
ulimit -n 655350
ulimit -u 655350
4.2 安装Redis
4.2.1 下载Redis
- 从官网或 github下载,需要看一下版本,选择没有重大安全问题的版本
- https://github.com/redis/redis/releases
- http://download.redis.io/releases/redis-7.2.5.tar.gz
wget http://download.redis.io/releases/redis-7.2.5.tar.gz
4.2.2 创建redis账号
useradd -s /sbin/nologin redis
4.2.3 添加Redis环境变量
- 确定Redis安装路径,例如/usr/local/redis7.2.5
- 增加环境变量 REDIS_HOME ,不要与已有路径冲突
cat >>/etc/profile<<EOF

export REDIS_HOME=/usr/local/redis7.2.5
PATH=\$REDIS_HOME/bin:\$PATH
export PATH
EOF
- 加载生效,查看路径
source /etc/profile && echo $PATH
4.2.4 创建Redis使用目录
- 创建Redis使用目录
- /usr/local/redis7.2.5(REDIS_HOME):程序存放目录
- /var/log/redis:日志存放目录
- /var/run/redis:服务PID存放目录
- /etc/redis:配置文件存放目录(可选),当前默认存放在“程序存放目录”下
mkdir -p ${REDIS_HOME} && chown -R redis:redis ${REDIS_HOME}
mkdir -p /var/log/redis && chown redis:redis /var/log/redis
mkdir -p /var/run/redis && chown -R redis:redis /var/run/redis
# mkdir -p /etc/redis && chown -R redis:redis /etc/redis
4.2.5 安装Redis
安装可以根据Redis服务启动管理,选择安装方式。可提供以下几种方式,供选择:
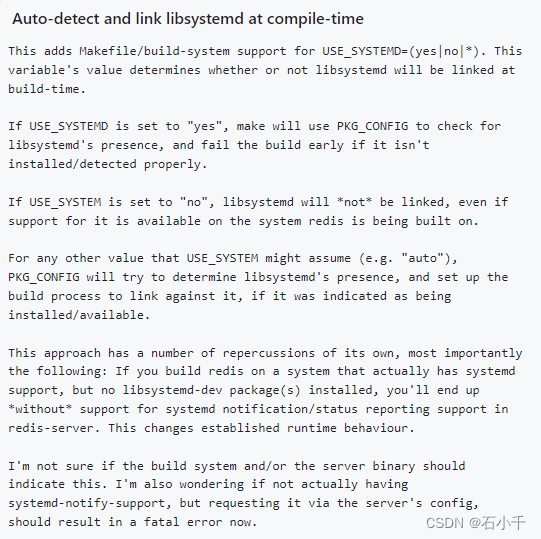
- 使用systemctl命令管理(Centos7、Ubuntu),编译安装时指定 USE_SYSTEMD=yes 选项,配置systemd服务管理文件时Type使用notify
- 使用systemctl命令管理(Centos7、Ubuntu),编译安装,配置systemd服务管理文件时Type使用simple
- 使用service命令管理(Centos6),编译安装,配置/etc/init.d下启动文件
- Ubuntu支持systemd方式编译安装,能够支持Type=notify
- PREFIX 指定安装路径
- USE_SYSTEMD 支持systemd
# Ubuntu 安装
tar -zxvf redis-7.2.5.tar.gz && cd redis-7.2.5
# 安装依赖包
apt install -y libsystemd-dev pkg-config
# 可以使用支持systemd方式编译安装,能够支持Type=notify
make PREFIX=${REDIS_HOME} USE_SYSTEMD=yes install
- Centos支持systemd方式编译安装,能够支持Type=notify
- PREFIX 指定安装路径
- USE_SYSTEMD 支持systemd
# Centos 安装
tar -zxvf redis-7.2.5.tar.gz && cd redis-7.2.5
# 安装依赖包
yum install -y systemd-notify-devel
# 可以使用支持systemd方式编译安装,能够支持Type=notify
make PREFIX=${REDIS_HOME} USE_SYSTEMD=yes install
- 其他编译安装,可用于service命令(如Centos6)或systemd的simple
- PREFIX 指定安装路径
tar -zxvf redis-6.2.9.tar.gz && cd redis-6.2.9
make PREFIX=${REDIS_HOME} install
- 验证安装版本
${REDIS_HOME}/bin/redis-server --version
4.2.6 手动修改配置文件(可跳过,直接使用4.2.7命令修改)
- 拷贝配置文件到安装路径下并修改。
cp ./redis.conf ${REDIS_HOME}/ && cd ${REDIS_HOME}
- 修改监听地址,IPv4和IPv6均监听
#bind 127.0.0.1 -::1
bind * -::*
- 根据需要修改监听端口
# Accept connections on the specified port, default is 6379 (IANA #815344).
# If port 0 is specified Redis will not listen on a TCP socket.
port 6379
- 修改监听队列长度,小于sysctl.conf文件中的somaxconn 设置
# In high requests-per-second environments you need a high backlog in order
# to avoid slow clients connection issues. Note that the Linux kernel
# will silently truncate it to the value of /proc/sys/net/core/somaxconn so
# make sure to raise both the value of somaxconn and tcp_max_syn_backlog
# in order to get the desired effect.
#tcp-backlog 511
tcp-backlog 4096
- timeout保持不变,配合应用程序保持长连接。
注意它不是超时连接,它是空闲后等待多久后关闭。
# Close the connection after a client is idle for N seconds (0 to disable)
timeout 0
- tcp-keepalive保持不变
服务端于探测客户端的检测时间周期。可根据需要调整
tcp-keepalive 300
- 启动后台运行
#daemonize no
daemonize yes
- 修改pid文件路径
#pidfile /var/run/redis_6379.pid
pidfile /var/run/redis/redis_6379.pid
- 修改日志文件路径
#logfile ""
logfile "/var/log/redis/redis_6379.log"
- 修改snapshotting配置
需要综合考虑数据是否允许丢失和写入rdb的频率。
这里是允许数据丢失的,而且变更的频次不高,所以只修改了900秒内有500个变更的值
################################ SNAPSHOTTING  ################################

# Save the DB to disk.
#
# You can set these explicitly by uncommenting the following line.
#
# save 3600 1 300 100 60 10000
save 3600 1 900 500 60 10000
- 修改了dump.rdb的文件名称
# The filename where to dump the DB
 dbfilename dump_6379.rdb
- 修改了dump.rdb的存储路径
注意路径是否有足够的磁盘空间。最合理方式应该存储在单独的数据分区,创建目录并给redis账号赋权
# dir ./
dir /usr/local/redis/
- 修改连接密码
# requirepass foobared
 requirepass yourpassword
- 重命名危险命令
- config命令使用别名
- 其它命令被禁用
# rename-command CONFIG ""
 rename-command CONFIG "kkconfig"
 rename-command FLUSHALL ""
 rename-command FLUSHDB ""
 rename-command DEBUG ""
- 修改最大客户端连接数
# maxclients 10000
maxclients 50000
- 修改最大内存限制
如果是redis专用服务器,建议不超过物理内存的3/4
# maxmemory <bytes>
maxmemory 32GB
- 保持淘汰策略不变-不淘汰
通常情况下应该选择一个淘汰策略,而不是不淘汰
# maxmemory-policy noeviction
- 打开异步操作,防止单线程阻塞
- lazyfree-lazy-eviction:表示当 Redis 运行内存超过 maxmeory 时,是否开启 lazy free 机制删除;
- lazyfree-lazy-expire:表示设置了过期时间的键值,当过期之后是否开启 lazy free 机制删除;
- lazyfree-lazy-server-del:有些指令在处理已存在的键时,会带有一个隐式的 del 键的操作,比如 rename 命令,当目标键已存在,Redis 会先删除目标键,如果这些目标键是一个 big key,就会造成阻塞删除的问题,此配置表示在这种场景中是否开启 lazy free 机制删除;
- slave-lazy-flush:针对 slave(从节点) 进行全量数据同步,slave 在加载 master 的 RDB 文件前,会运行 flushall 来清理自己的数据,它表示此时是否开启 lazy free 机制删除。
- lazyfree-lazy-user-del:表示是否将 DEL 指令的默认行为替换成 lazy free 机制删除,效果就跟 UNLINK 一样。
############################# LAZY FREEING ####################################
lazyfree-lazy-eviction yes
lazyfree-lazy-expire yes
lazyfree-lazy-server-del yes
replica-lazy-flush yes
lazyfree-lazy-user-del yes
- 修改慢查询日志设置
################################## SLOW LOG ###################################
# 修改为20000微秒,默认是10000微秒
slowlog-log-slower-than 20000
# 修改为保存1000条记录,默认128条
slowlog-max-len 1000
4.2.7 命令修改配置文件
- 拷贝配置文件到安装路径下并修改。
cp ./redis.conf ${REDIS_HOME}/ && cd ${REDIS_HOME}
- 先定义以下变量
- PORT: Redis服务监听端口
- MAXMEMORY:Redis服务最大内存限制
- YPWD:Redis服务密码
cd ${REDIS_HOME}
PORT=6379
MAXMEMORY='32GB'
YPWD='yourpassword'
sed -i "s|bind 127.0.0.1 -::1| bind * -::* |" ./redis.conf \
&& sed -i "s|port 6379| port ${PORT}|" ./redis.conf \
&& sed -i "s|tcp-backlog 511| tcp-backlog 4096|" ./redis.conf \
&& sed -i "s|daemonize no| daemonize yes|" ./redis.conf \
&& sed -i "s|pidfile /var/run/redis_6379.pid| pidfile /var/run/redis/redis_${PORT}.pid|" ./redis.conf \
&& sed -i "s|logfile \"\"| logfile \"/var/log/redis/redis_${PORT}.log\"|" ./redis.conf \
&& sed -i "s|# save 3600 1 300 100 60 10000| save 3600 1 900 500 60 10000|" ./redis.conf \
&& sed -i "s|# save 3600 1| save 3600 1|" ./redis.conf \
&& sed -i "s|# save 300 100| save 900 500|" ./redis.conf \
&& sed -i "s|# save 60 10000| save 60 10000|" ./redis.conf \
&& sed -i "s|dbfilename dump.rdb| dbfilename dump_${PORT}.rdb|" ./redis.conf \
&& sed -i "s|dir ./| dir ${REDIS_HOME}/|" ./redis.conf \
&& sed -i "s|# requirepass foobared| requirepass ${YPWD}|" ./redis.conf \
&& sed -i "/# rename-command CONFIG \"\"/ a\\ rename-command CONFIG 'xkconfig'\n rename-command FLUSHALL ''\n rename-command FLUSHDB ''\n rename-command DEBUG ''\n"  ./redis.conf \
&& sed -i "s|# maxclients 10000| maxclients 50000|" ./redis.conf \
&& sed -i "s|# maxmemory <bytes>| maxmemory ${MAXMEMORY}|" ./redis.conf \
&& sed -i "s|lazyfree-lazy-eviction no| lazyfree-lazy-eviction yes|" ./redis.conf \
&& sed -i "s|lazyfree-lazy-expire no| lazyfree-lazy-expire yes|" ./redis.conf \
&& sed -i "s|lazyfree-lazy-server-del no| lazyfree-lazy-server-del yes|" ./redis.conf \
&& sed -i "s|replica-lazy-flush no| replica-lazy-flush yes|" ./redis.conf \
&& sed -i "s|lazyfree-lazy-user-del no| lazyfree-lazy-user-del yes|" ./redis.conf \
&& sed -i "s|slowlog-log-slower-than 10000| slowlog-log-slower-than 20000|" ./redis.conf \
&& sed -i "s|slowlog-max-len 128| slowlog-max-len 1000|" ./redis.conf \
- 验证修改配置
cat ${REDIS_HOME}/redis.conf | grep -E "^[^;#]"
4.2.8 Redis使用目录赋权
# 日志目录赋权
chown -R redis:redis /var/log/redis
# 程序目录赋权
chown -R redis:redis /usr/local/redis
# pid文件目录赋权
chown -R redis:redis /var/run/redis
# 数据目录赋权(如果单独指定了数据目录),与配置文件中rdb存储路径一致
#chown -R redis:redis /data/redis/
chown -R redis:redis /var/log/redis \
&& chown -R redis:redis /var/run/redis \
&& chown -R redis:redis ${REDIS_HOME} \
4.2.9 启动Redis验证
- 使用普通用户启动Redis
sudo -u redis /usr/local/redis/bin/redis-server /usr/local/redis/redis.conf
- Redis已经监听6379端口
root@Virtual-Machine-203:~# netstat -ntlp| grep redis
tcp        0      0 127.0.0.1:6379          0.0.0.0:*               LISTEN      19821/redis-server
tcp6       0      0 ::1:6379                :::*                    LISTEN      19821/redis-server
root@Virtual-Machine-203:~# redis-cli
127.0.0.1:6379> auth yourpassword
OK
127.0.0.1:6379> select 0
OK
127.0.0.1:6379> dbsize
(integer) 0
127.0.0.1:6379> kkconfig get save
1) "save"
2) "3600 1 900 500 60 10000"
127.0.0.1:6379>
4.2.10 目录结构
- Redis安装目录
- ${REDIS_HOME} = /etc/usr/redis7.2.5
- bin 程序目录,已添加到系统环境变量PATH中
- dump_port.rdb 持久化rdb文件,每个对应一个节点
- redis.conf 单例服务配置文件
[root@localhost redis7.2.5]# tree
.
├── bin
│   ├── redis-benchmark
│   ├── redis-check-aof -> redis-server
│   ├── redis-check-rdb -> redis-server
│   ├── redis-cli
│   ├── redis-sentinel -> redis-server
│   └── redis-server
├── dump_6379.rdb
└── redis.conf
- Redis日志目录
- /var/log/redis
- 每个Redis服务实例对应一个日志文件
[root@localhost redis]# tree
.
└── redis_6379.log
- Redis PID目录
- /var/run/redis
- 每个Redis服务实例对应一个PID文件
[root@localhost redis]# tree
.
└── redis_6379.pid
4.3 配置systemd管理
4.3.1 编译安装时未使用systemd
非正规做法!正常应该编译时指定使用systemd
https://github.com/redis/redis/commit/129d14e1431e913426485526663e1a9aac67838c
vim /etc/systemd/system/redis-server.service
# example systemd service unit file for redis-server
#
# In order to use this as a template for providing a redis service in your
# environment, _at the very least_ make sure to adapt the redis configuration
# file you intend to use as needed (make sure to set "supervised systemd"), and
# to set sane TimeoutStartSec and TimeoutStopSec property values in the unit's
# "[Service]" section to fit your needs.
#
# Some properties, such as User= and Group=, are highly desirable for virtually
# all deployments of redis, but cannot be provided in a manner that fits all
# expectable environments. Some of these properties have been commented out in
# this example service unit file, but you are highly encouraged to set them to
# fit your needs.
#
# Please refer to systemd.unit(5), systemd.service(5), and systemd.exec(5) for
# more information.

[Unit]
Description=Redis data structure server
Documentation=https://redis.io/documentation
#Before=your_application.service another_example_application.service
#AssertPathExists=/var/lib/redis
Wants=network-online.target
After=network-online.target

[Service]
# 配置正确的服务和配置文件路径
ExecStart=/usr/local/redis/bin/redis-server /usr/local/redis/redis.conf --supervised systemd --daemonize no
## Alternatively, have redis-server load a configuration file:
#ExecStart=/usr/local/bin/redis-server /path/to/your/redis.conf
ExecStop=/bin/kill -s TERM $MAINPID
LimitNOFILE=65535
NoNewPrivileges=yes
#OOMScoreAdjust=-900
PrivateTmp=yes
#Type=notify  # 默认 simple
TimeoutStartSec=infinity
TimeoutStopSec=infinity
UMask=0077
User=redis
Group=redis
WorkingDirectory=/usr/local/redis

[Install]
WantedBy=multi-user.target
- 替换配置文件中Redis路径
如果使用默认路径/usr/local/redis,不用执行
# sed -i "s|/usr/local/redis|${REDIS_HOME}|g" /etc/systemd/system/redis-server.service
4.3.2 编译安装时使用了systemd方式
vim /etc/systemd/system/redis-server.service
# example systemd service unit file for redis-server
#
# In order to use this as a template for providing a redis service in your
# environment, _at the very least_ make sure to adapt the redis configuration
# file you intend to use as needed (make sure to set "supervised systemd"), and
# to set sane TimeoutStartSec and TimeoutStopSec property values in the unit's
# "[Service]" section to fit your needs.
#
# Some properties, such as User= and Group=, are highly desirable for virtually
# all deployments of redis, but cannot be provided in a manner that fits all
# expectable environments. Some of these properties have been commented out in
# this example service unit file, but you are highly encouraged to set them to
# fit your needs.
#
# Please refer to systemd.unit(5), systemd.service(5), and systemd.exec(5) for
# more information.

[Unit]
Description=Redis data structure server
Documentation=https://redis.io/documentation
#Before=your_application.service another_example_application.service
#AssertPathExists=/var/lib/redis
Wants=network-online.target
After=network-online.target

[Service]
# 配置正确的服务和配置文件路径
ExecStart=/usr/local/redis/bin/redis-server /usr/local/redis/redis.conf --supervised systemd --daemonize no
## Alternatively, have redis-server load a configuration file:
#ExecStart=/usr/local/bin/redis-server /path/to/your/redis.conf
LimitNOFILE=65535
NoNewPrivileges=yes
#OOMScoreAdjust=-900
PrivateTmp=yes
Type=notify
#TimeoutStartSec=infinity
#TimeoutStopSec=infinity
TimeoutStartSec=180
TimeoutStopSec=180
UMask=0077
User=redis
Group=redis
WorkingDirectory=/usr/local/redis

[Install]
WantedBy=multi-user.target
- 替换配置文件中Redis路径
如果使用默认路径/usr/local/redis,不用执行
# sed -i "s|/usr/local/redis|${REDIS_HOME}|g" /etc/systemd/system/redis-server.service
4.3.3 加载并验证服务
- 加载systemd配置文件,每次修改后都需要重新加载
systemctl daemon-reload
- 验证服务启动
# 启动
systemctl start redis-server
# 查看进程
netstat -ntlp | grep redis
- 验证服务重启
# 测试重启
systemctl restart redis-server
# 查看进程ID是否变更
netstat -ntlp | grep redis
- 验证服务停止
# 测试重启
systemctl stop redis-server
# 查看进程ID是否变更
netstat -ntlp | grep redis
4.3 部署常见问题
4.3.1 编译时环境问题
- 现象:Ubuntu 没装 GCC
make[1]: Entering directory '/root/redis-7.2.5/src'
sh: 1: cc: not found
/bin/sh: 1: pkg-config: not found
/bin/sh: 1: pkg-config: not found
/bin/sh: 1: pkg-config: not found
    CC Makefile.dep
sh: 1: cc: not found
- 处理:Ubuntu 22.04 安装
apt install build-essential pkg-config -y
- 处理:如果是CentOS 7.9,参考安装
yum install make automake gcc gcc-c++ kernel-devel -y
4.3.2 编译时缺少文件
- 现象:编译时缺文件
/usr/bin/ld: cannot find ../deps/hiredis/libhiredis.a: No such file or directory
/usr/bin/ld: cannot find ../deps/lua/src/liblua.a: No such file or directory
/usr/bin/ld: cannot find ../deps/hdr_histogram/libhdrhistogram.a: No such file or directory
/usr/bin/ld: cannot find ../deps/fpconv/libfpconv.a: No such file or directory
/usr/bin/ld: cannot find ../deps/jemalloc/lib/libjemalloc.a: No such file or directory
collect2: error: ld returned 1 exit status
make[1]: *** [Makefile:403: redis-server] Error 1
make[1]: Leaving directory '/root/redis-7.2.5/src'
make: *** [Makefile:9: install] Error 2
- 处理:先编译缺少的文件
root@Virtual-Machine-203:~# cd deps/
root@Virtual-Machine-203:~# make hiredis lua hdr_histogram fpconv jemalloc linenoise

# 如果jemalloc仍然不行,可以试试以下方式
#root@Virtual-Machine-203:~# cd  deps/jemalloc/
#root@Virtual-Machine-203:~#  ./configure
#root@Virtual-Machine-203:~#  make && make install_bin install_include install_lib