程序设计流程图

TCP 服务器
ui界面搭建


Tcp服务器建立连接 - listen() + connect()
1.在构造函数中进行如下初始化:
通过 QNetworkInterface 类的 allAddresses 这一API 获得可用IP地址(包括IPv4 和 IPv6)
然后通过QHostAddress类的 protocol 这一API 进行筛选,只读取IPv4的数据
(QAbstractSocket::IPv4Protocol)
    server = new QTcpServer(this); // 初始化TcpServer对象

    //当有新的客户端接入时候建立连接:
    connect(server,SIGNAL(newConnection()),this,SLOT(on_NewClient_Connect()));
    // 设置控件状态 -> 没连接前不能断开连接
    ui->btnStopListen->setEnabled(false);
    ui->btnDisconnect->setEnabled(false);

    //  获取本机可用的ip
    //QList<QHostAddress> QNetworkInterface::allAddresses()
    QList<QHostAddress> addrs =QNetworkInterface::allAddresses();
    for(QHostAddress tmp:addrs){
     if(tmp.protocol() == QAbstractSocket::IPv4Protocol)  // 协议是IPV4协议才读取
        ui->comboBoxAddr->addItem(tmp.toString()); // 把读取到的ip地址添加到comboBox的框中
    }
2.处理新的连接的槽函数
//处理新连接槽函数
void Widget::on_NewClient_Connect()
{
    //qDebug()<<"new Cline In";
    if(server->hasPendingConnections()){ //有新的连接接入
    QTcpSocket *connect = server->nextPendingConnection();//获取新的连接的信息
    qDebug()<<"Client Addr:"<<connect->peerAddress().toString()<<" host:"<<connect->peerPort();
    ui->textEditRev->insertPlainText("客户端地址:"+connect->peerAddress().toString()+
                                     "\n端口号:"+QString::number(connect->peerPort()));
    }

}
3.监听按钮槽函数
//监听按键槽函数
void Widget::on_btnListen_clicked()
{

    //QHostAddress addr("10.171.24.231"); // 构造合适类型的ip地址 -- 固定IP
    int port = ui->lineEditPort->text().toInt();
    //if(!server->listen(QHostAddress::Any,port)){ //Any -- 监听任意
     if(!server->listen(QHostAddress(ui->comboBoxAddr->currentText()),port)){ //根据combboBox选择的ip地址监听,QHostAddress(QString) -- 构造出合适对象
      qDebug()<<"listen error";
      return;
    }
      qDebug()<<"listen success";
    //监听成功,设置控件状态
    ui->btnListen->setEnabled(false);
    ui->btnStopListen->setEnabled(true);
    ui->btnDisconnect->setEnabled(true);

}
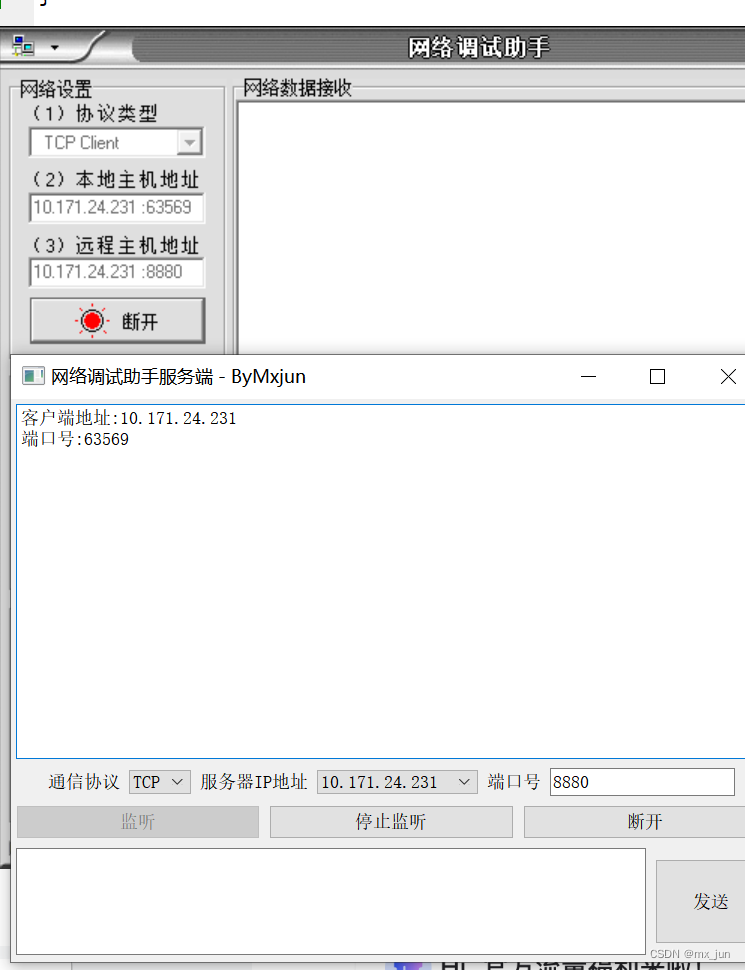
效果演示:
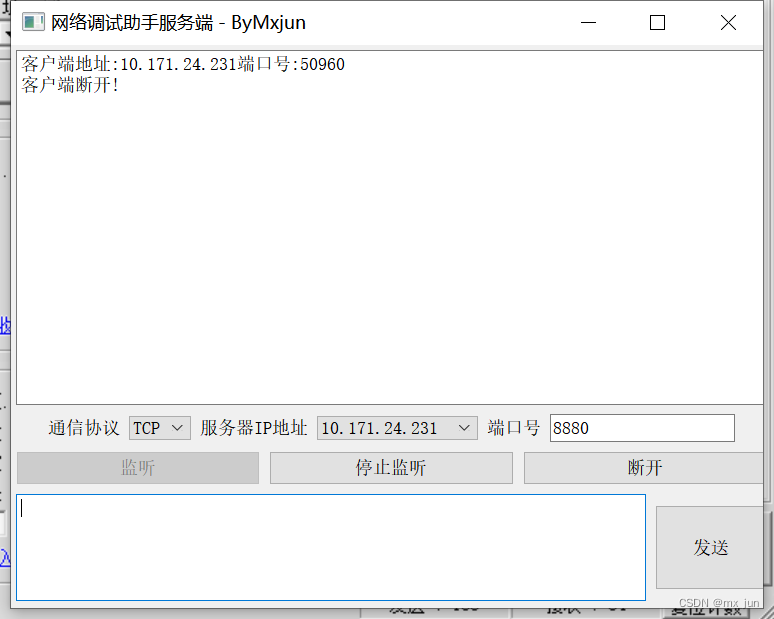
通过下图可以发现,我们已经成功建立连接并且获得了正确的IP地址和端口号
添加串口被占用弹窗提示
添加代码到监听槽函数
//监听按键槽函数
void Widget::on_btnListen_clicked()
{

    //QHostAddress addr("10.171.24.231"); // 构造合适类型的ip地址 -- 固定IP
    int port = ui->lineEditPort->text().toInt();
    //if(!server->listen(QHostAddress::Any,port)){ //Any -- 监听任意
     if(!server->listen(QHostAddress(ui->comboBoxAddr->currentText()),port)){ //根据combboBox选择的ip地址监听,QHostAddress(QString) -- 构造出合适对象
      qDebug()<<"listen error";
      QMessageBox msgBox;
      msgBox.setWindowTitle("监听失败");
      msgBox.setText("端口号被占用");
      msgBox.exec();
      return;
    }
      qDebug()<<"listen success";
    //监听成功,设置控件状态
    ui->btnListen->setEnabled(false);
    ui->btnStopListen->setEnabled(true);
    ui->btnDisconnect->setEnabled(true);

}
效果演示

Tcp服务器接收
添加信号与槽
在处理新连接槽函数中,添加读取消息的信号与槽
//建立信号与槽来读取内容:connect(connection,SIGNAL(readyRead()),this,SLOT(on_readyRead_hanler()));
实现接收槽函数
//  读取数据的信号处理函数
void Widget::on_readyRead_hanler()
{
    //使用sender() --来获得信号额发出者 -- 局部变量
    QTcpSocket *tmpSock = qobject_cast<QTcpSocket *>(sender());
    QByteArray revData = tmpSock->readAll();
    ui->textEditRev->insertPlainText("客户端: "+revData);
}
效果演示

客户端断开检测
实现方法一 - disconnected
在建立新连接那建立信号连接
connect(connection,SIGNAL(disconnected()),this,SLOT(mdisconnected()));
实现断开检测槽函数
// 断开连接检测
void Widget::mdisconnected()
{
     QTcpSocket *tmpSock = qobject_cast<QTcpSocket *>(sender());
    //qDebug()<<"client  out!";
    ui->textEditRev->insertPlainText("客户端断开!");
    tmpSock->deleteLater(); //资源回收
}
方法二 - statechanged
同上建立信号连接
connect(connection,SIGNAL(stateChanged(QAbstractSocket::SocketState)),
this,SLOT(mstateChanged(QAbstractSocket::SocketState)));
实现断开检测槽函数
void Widget::mstateChanged(QAbstractSocket::SocketState socketState)
{
  qDebug()<<"client  out In state"<<socketState;
  switch (socketState) {
   case QAbstractSocket::UnconnectedState:
   //case QAbstractSocket::ClosingState:
       ui->textEditRev->insertPlainText("客户端断开!");
      break;


  }
实现效果:
