博主也是刚开始学习SSM,为了帮大家节省时间,写下SSM快速入门博客
有什么不对的地方还请私信或者评论区指出
只是一个简单的整合项目,让初学者了解一下SSM的大致结构
项目先把框架写好,之后在填写内容
项目压缩包
完整的蓝奏压缩包在文末链接
目录
SSM整合原始方法
数据库
创建Maven项目
先修改pox.xml
项目结构创建
编写逻辑结构
创建实体类对应的Mapper接口
创建业务层接口
创建业务层的实现方法
编写Web层Controller包
编写添加页面和列表展示页面
添加save页面
添加accountList页面
编写配置文件
添加jdbc和log4j文件
修改web.xml
添加applicationContext.xml和spring-mvc.xml文件
添加mapper配置文件
添加mybatis配置文件
项目内容填充
填充mybatis配置文件
修改sqlMapConfig.xml
修改AccountMapper.xml
填充Spring配置文件
修改applicationContext.xml
修改spring-mvc.xml
填充web.xml配置文件
修改web.xml
编写逻辑代码
修改AccountController类文件
修改AccountServiceImpl类文件
测试
配置Tomcat
运行
测试添加方法
测试查询方法
mybatis整合spring
修改配置文件
创建sqlMapConfig-spring.xml文件
修改加载jdbc.properties文件的代码
修改数据库环境的代码
修改加载映射的代码
配置sessionFactory
修改AccountServiceImpl类
声明式事务控制
mybatis整合spring阶段修改后完整代码
测试mybatis整合spring
SSM整合原始方法
数据库
就一个表
后面会放上DataGrip的SQL导出文件

创建Maven项目
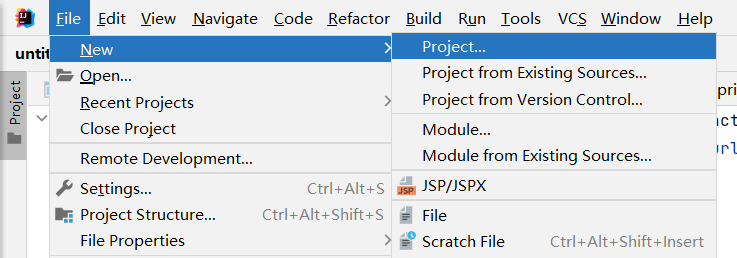
这里搜索会匹配对应的模板(选择路径尽量只使用英文和下划线,(中文路径如果出现问题,有的时候很难找到))
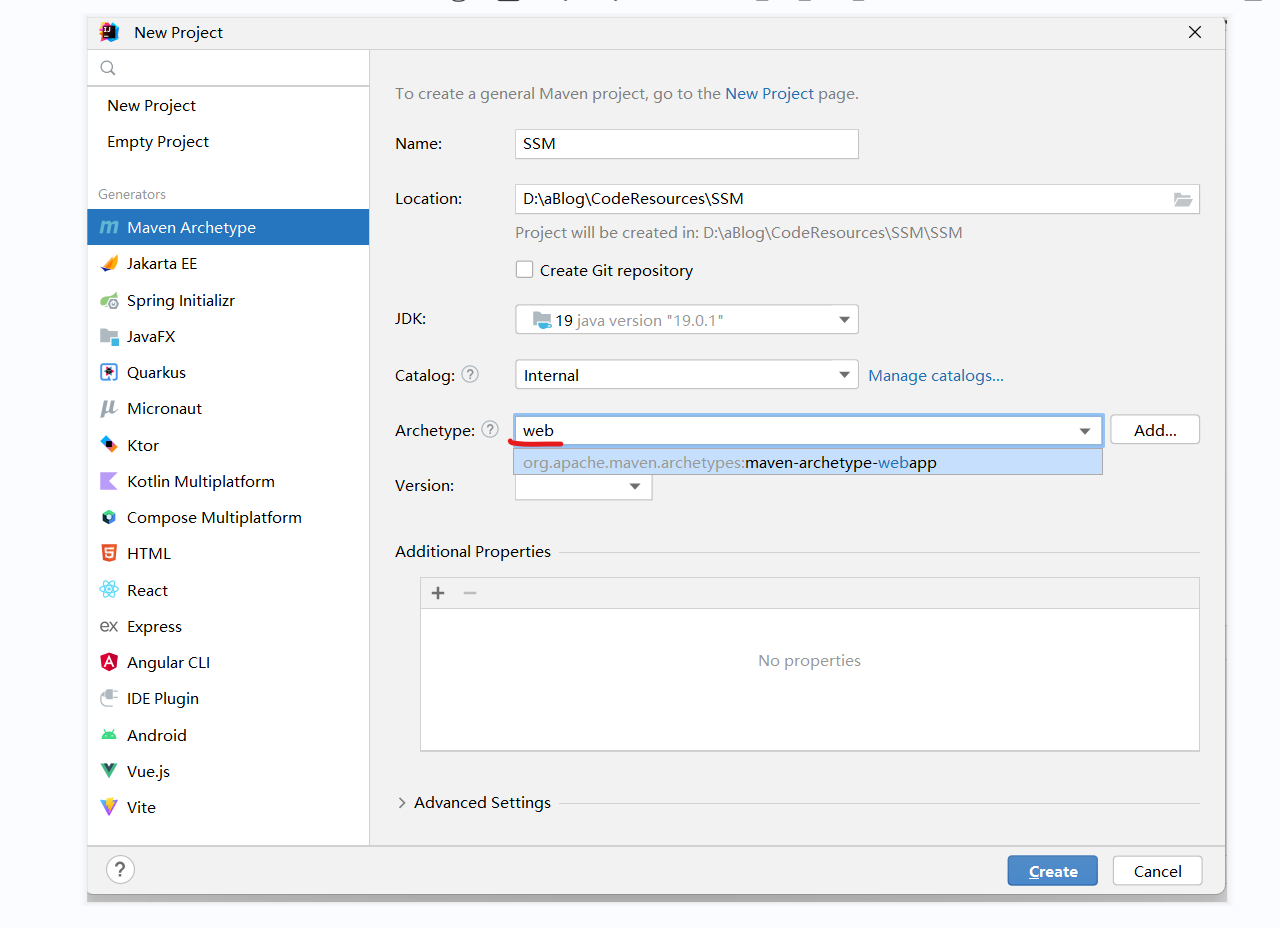
先修改pox.xml
依赖加到对应位置,各个依赖的版本要根据当前tomcat和jdk版本
Tips:tomcat10没有Javax包 要用jakarta包 tomcat9及以下要把jakarta换成javax
不知道怎么修改依赖看这里
依赖仓库(找到需要的依赖直接复制,防止自己写错)
    <dependencies>
        <!--spring相关-->
        <dependency>
            <groupId>org.springframework</groupId>
            <artifactId>spring-context</artifactId>
            <version>6.0.0</version>
        </dependency>
        <!-- https://mvnrepository.com/artifact/org.aspectj/aspectjweaver -->
        <dependency>
            <groupId>org.aspectj</groupId>
            <artifactId>aspectjweaver</artifactId>
            <version>1.9.19</version>
            <scope>runtime</scope>
        </dependency>

        <dependency>
            <groupId>org.springframework</groupId>
            <artifactId>spring-jdbc</artifactId>
            <version>6.0.0</version>
        </dependency>
        <dependency>
            <groupId>org.springframework</groupId>
            <artifactId>spring-tx</artifactId>
            <version>6.0.0</version>
        </dependency>
        <dependency>
            <groupId>org.springframework</groupId>
            <artifactId>spring-test</artifactId>
            <version>6.0.0</version>
        </dependency>
        <dependency>
            <groupId>org.springframework</groupId>
            <artifactId>spring-webmvc</artifactId>
            <version>6.0.0</version>
        </dependency>

        <!--servlet和jsp-->
        <dependency>
            <groupId>jakarta.servlet</groupId>
            <artifactId>jakarta.servlet-api</artifactId>
            <version>6.0.0</version>
            <scope>provided</scope>
        </dependency>


        <!-- https://mvnrepository.com/artifact/jakarta.servlet.jsp/jakarta.servlet.jsp-api -->
        <dependency>
            <groupId>jakarta.servlet.jsp</groupId>
            <artifactId>jakarta.servlet.jsp-api</artifactId>
            <version>3.1.0</version>
            <scope>provided</scope>
        </dependency>
        <!-- https://mvnrepository.com/artifact/org.glassfish.web/jakarta.servlet.jsp.jstl -->
        <!--    一定要重视scope,否则报错-->
        <dependency>
            <groupId>org.glassfish.web</groupId>
            <artifactId>jakarta.servlet.jsp.jstl</artifactId>
            <version>2.0.0</version>
            <scope>compile</scope>
        </dependency>

        <!--mybatis相关-->
        <dependency>
            <groupId>org.mybatis</groupId>
            <artifactId>mybatis</artifactId>
            <version>3.5.11</version>
        </dependency>
        <dependency>
            <groupId>org.mybatis</groupId>
            <artifactId>mybatis-spring</artifactId>
            <version>3.0.1</version>
        </dependency>
        <dependency>
            <groupId>mysql</groupId>
            <artifactId>mysql-connector-java</artifactId>
            <version>8.0.28</version>
            <!--     有的时候会出现找不到com.mysql.cj.jdbc.Driver 运行时不再与tomcat的lib冲突,在依赖项的范围我限制为provided-->
            <!--            <scope>provided</scope>-->
        </dependency>
        <dependency>
            <groupId>com.mchange</groupId>
            <artifactId>c3p0</artifactId>
            <version>0.9.5.2</version>
            <type>jar</type>
            <scope>compile</scope>
        </dependency>

        <dependency>
            <groupId>junit</groupId>
            <artifactId>junit</artifactId>
            <version>4.12</version>
        </dependency>
        <dependency>
            <groupId>jstl</groupId>
            <artifactId>jstl</artifactId>
            <version>1.2</version>
        </dependency>
    </dependencies>
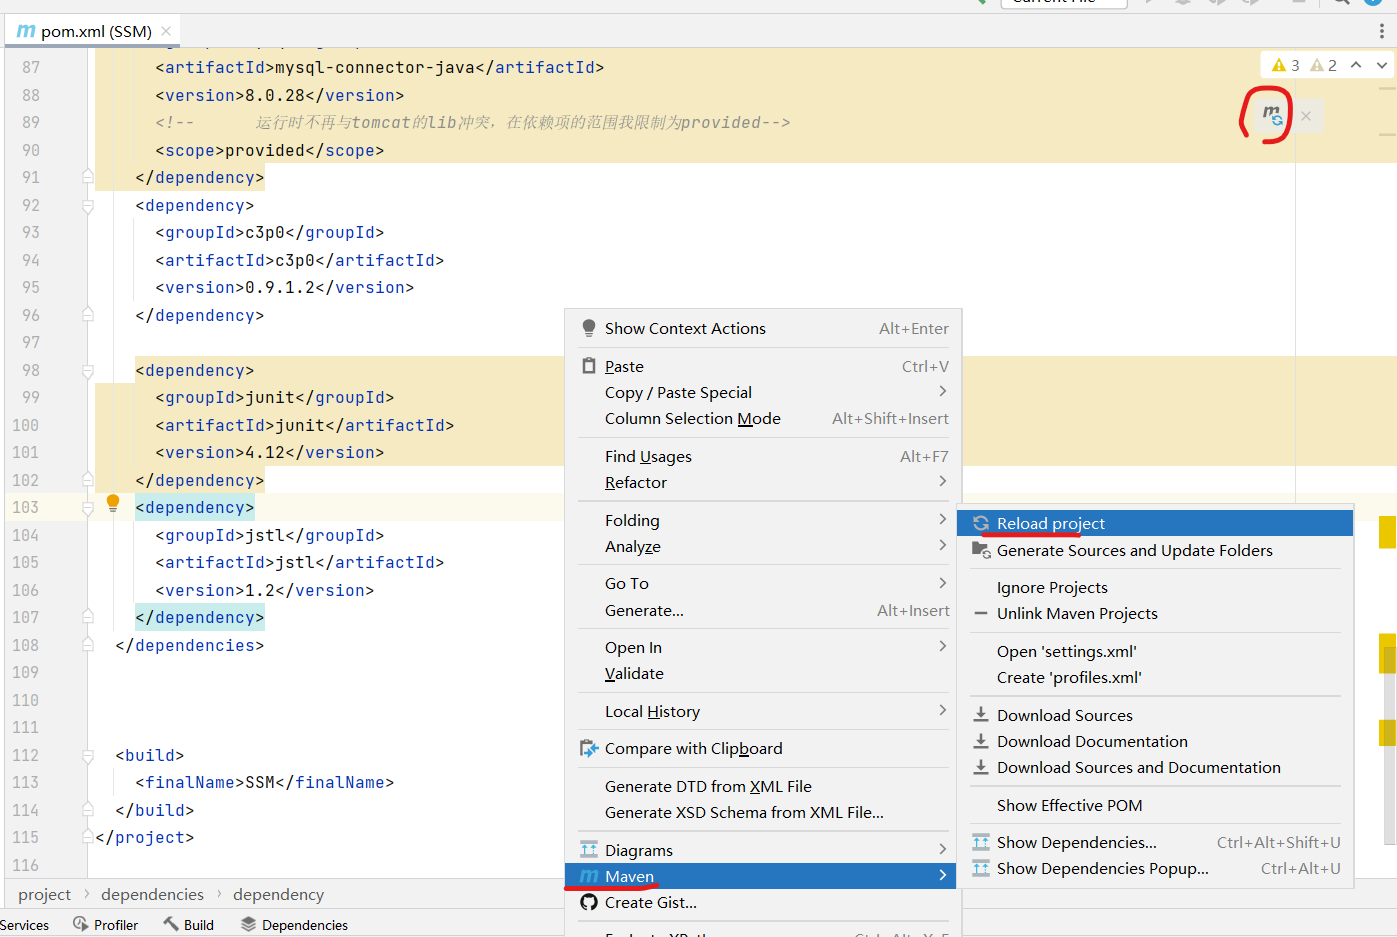
添加依赖后记得导入一下
两种导入方法是一样的,你修改pom后右上角会有个提示,点击右上角提示,或者 右键->选择Maven->Reload project 添加依赖
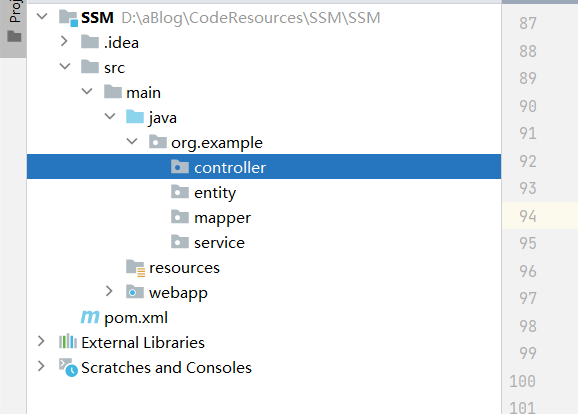
项目结构创建
编写逻辑结构
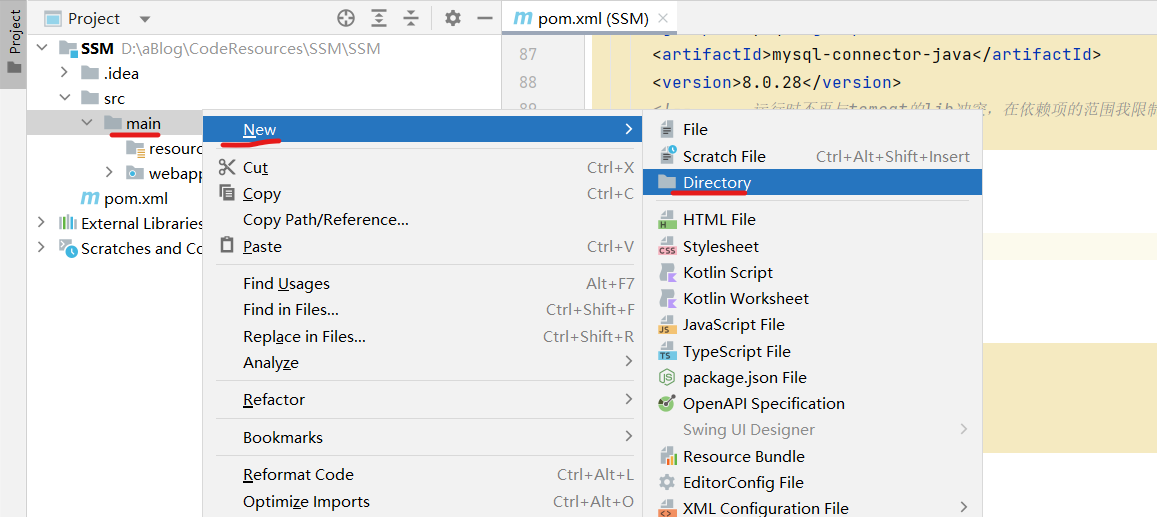
如果Maven项目没有 蓝色Java包
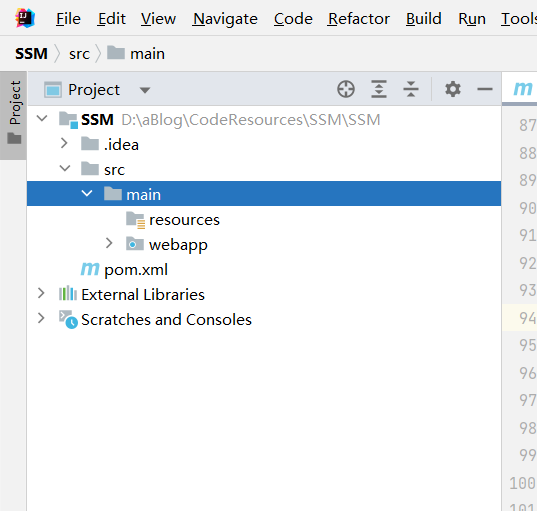
右键main -> New -> Directory -> 直接选择下面的那个Java蓝色包就可以

在Java包下面建好目录
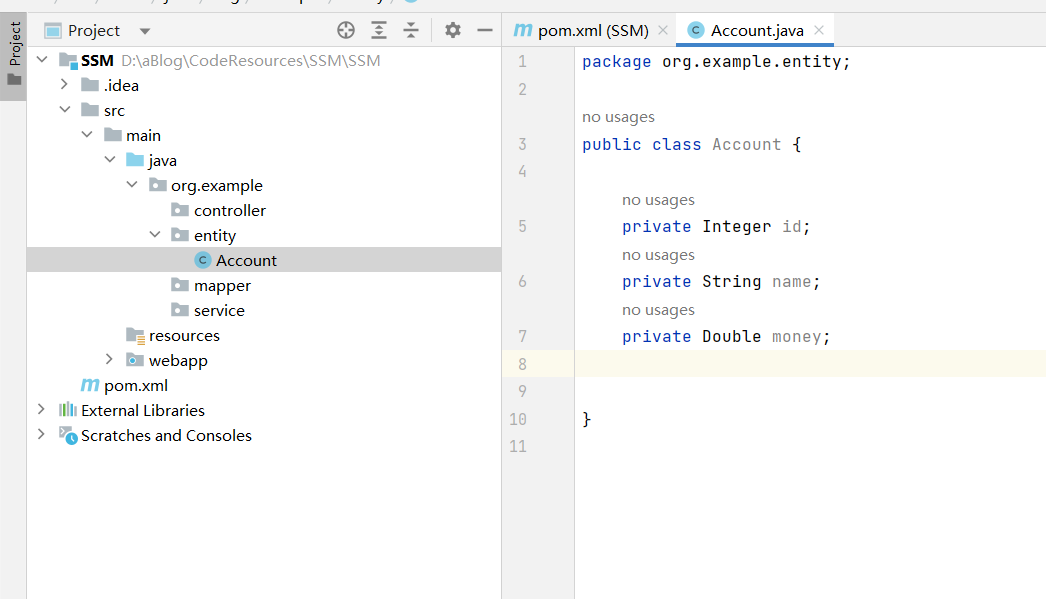
现在entity包下面建实体类(对应数据列的类)
快速创建get() set() toString() 方法
下面附上实体类Account代码 (一定要把属性和数据库对应)
package org.example.entity;

public class Account {

    private Integer id;
    private String name;
    private Double money;

    public Integer getId() {
        return id;
    }

    public void setId(Integer id) {
        this.id = id;
    }

    @Override
    public String toString() {
        return "Account{" +
                "id=" + id +
                ", name='" + name + '\'' +
                ", money=" + money +
                '}';
    }

    public String getName() {
        return name;
    }

    public void setName(String name) {
        this.name = name;
    }

    public Double getMoney() {
        return money;
    }

    public void setMoney(Double money) {
        this.money = money;
    }
}
创建实体类对应的Mapper接口
在mapper包创建完接口,添加两个业务方法 添加用户 和 查找所有用户
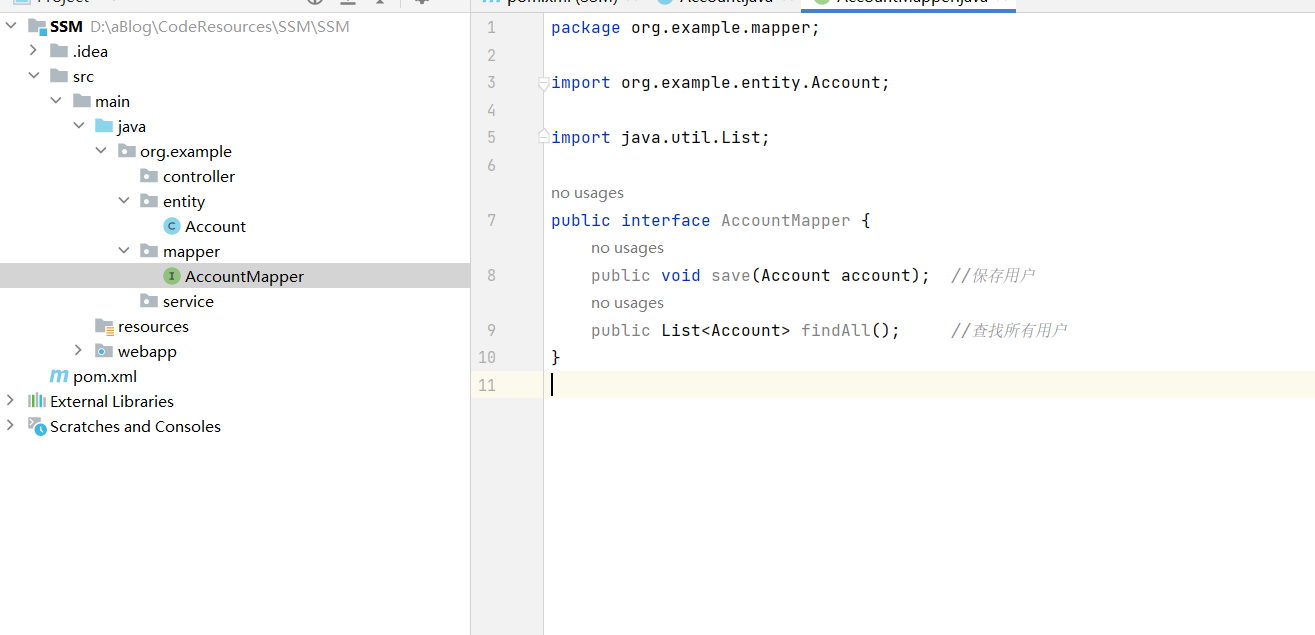
mapper包下的AccountMapper接口
package org.example.mapper;

import org.example.entity.Account;

import java.util.List;

public interface AccountMapper {
    public void save(Account account);  //保存用户
    public List<Account> findAll();     //查找所有用户
}
创建业务层接口
和上面一样: 在service包创建完接口,添加两个业务方法 添加用户 和 查找所有用户
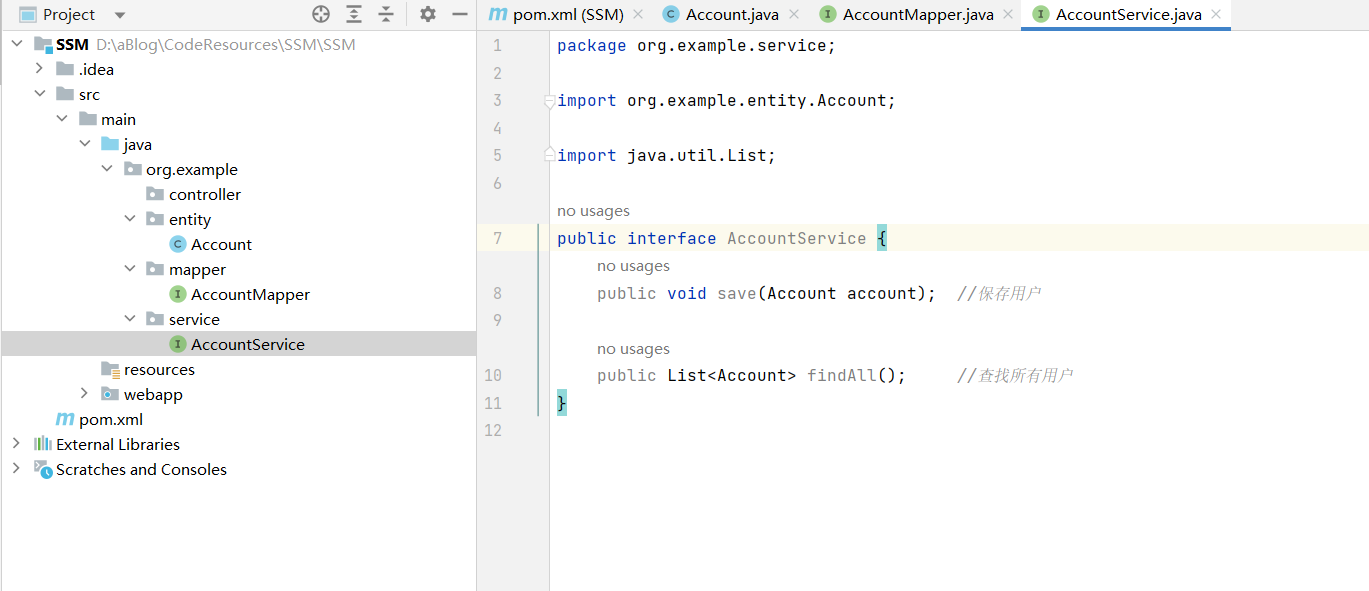
Service层接口AccountService代码
package org.example.service;

import org.example.entity.Account;

import java.util.List;

public interface AccountService {
    public void save(Account account);  //保存用户

    public List<Account> findAll();     //查找所有用户
}
创建业务层的实现方法
在service包创建一个impl包 在这个包下面创建AccountServiceImpl类,实现AccountService接口 ,
实现两个方法 添加用户 和 查找所有用户 (可以根据错误提示,鼠标对着报错位置点左上角小红灯泡或者快捷键Alt+Enter直接实现)
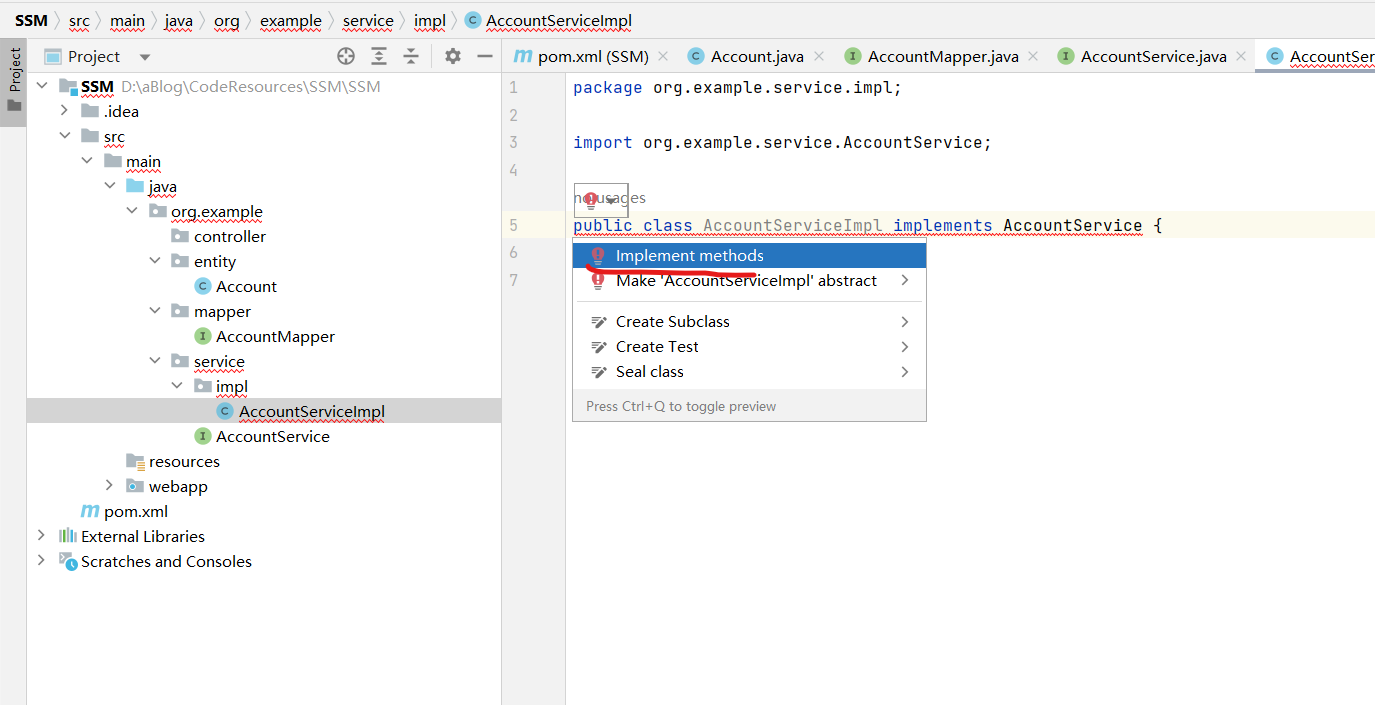
选中需要实现的方法,点击OK
Service层实现类AccountServiceImpl代码
package org.example.service.impl;

import org.example.entity.Account;
import org.example.service.AccountService;

import java.util.List;

public class AccountServiceImpl implements AccountService {
    @Override
    public void save(Account account) {

    }

    @Override
    public List<Account> findAll() {
        return null;
    }
}
编写Web层Controller包
Controller包下面创建AccountController类 ,添加两个之前接口对应的方法(后面在填充内容)

编写添加页面和列表展示页面
jsp页面是固定的,这里就直接写好了
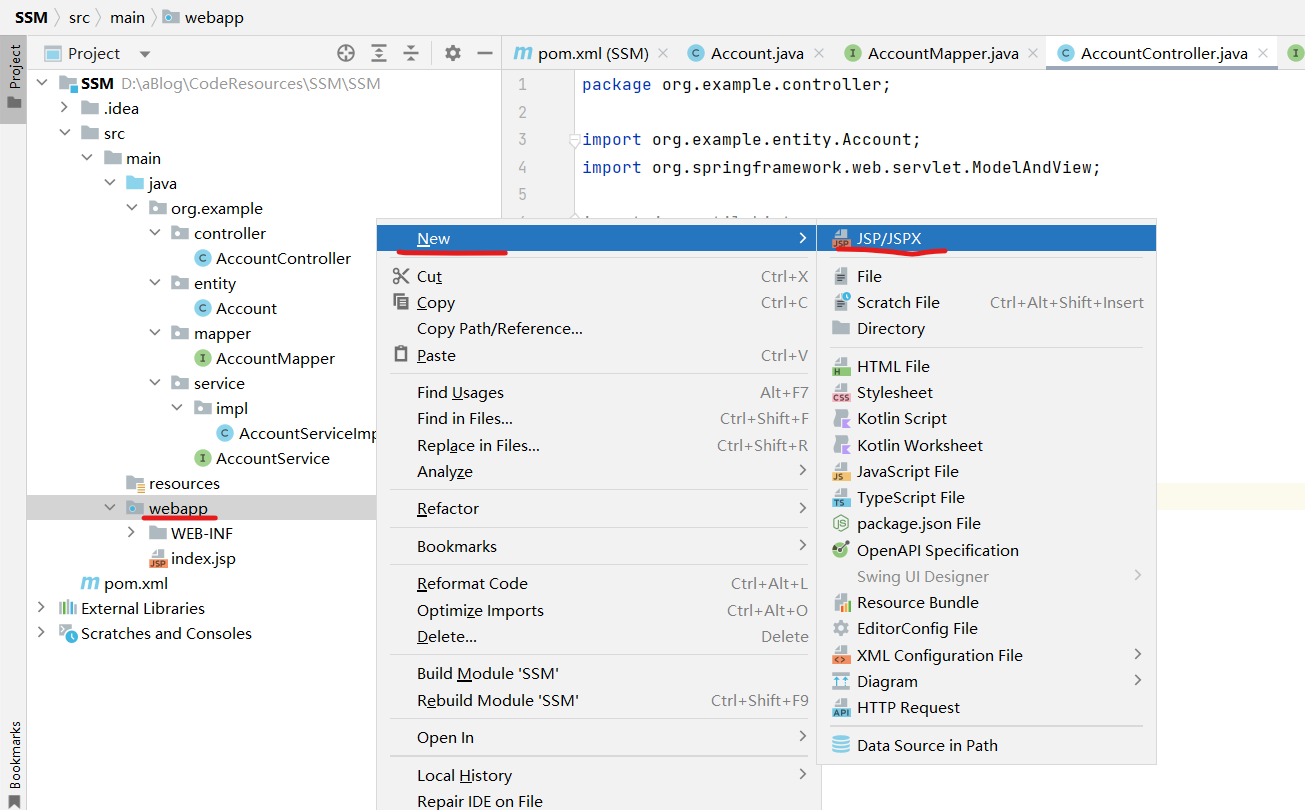
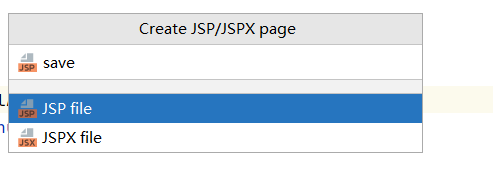
添加save页面
在webapp文件夹下面创建添加页面save.jsp
webapp右键 -> New -> JSP/JSPX -> 名字为save,选择jsp即可
下面是save.jsp的代码
<%--
  Created by IntelliJ IDEA.
  User: 14397
  Date: 2023/1/25
  Time: 20:33
  To change this template use File | Settings | File Templates.
--%>
<%@ page contentType="text/html;charset=UTF-8" language="java" %>
<html>
<head>
    <title>Title</title>
</head>
<body>
<h1>添加账户信息表单</h1>
<form name="accountForm" action="${pageContext.request.contextPath}/account/save" method="post">
    账户名称:<input type="text" name="name"><br>
    账户金额:<input type="text" name="money"><br>
    <input type="submit" value="保存"><br>
</form>
</body>
</html>
添加accountList页面
在 WEB-INF文件夹 下面创建 pages文件夹 ,里面创建 accountList.jsp (文件夹创建以后就pass了,只为了防止初学者不太熟悉IDEA)
Tips:引入taglib才能添加controller层传过来的数据
<%--
  Created by IntelliJ IDEA.
  User: 14397
  Date: 2023/1/25
  Time: 20:41
  To change this template use File | Settings | File Templates.
--%>
<%@ page contentType="text/html;charset=UTF-8" language="java" %>
<%--    下面这一行是从数据库向页面添加数据需要的内容--%>
<%@ taglib prefix="c" uri="http://java.sun.com/jsp/jstl/core" %>
<html>
<head>
    <title>Title</title>
</head>
<body>
<h1>展示账户数据列表</h1>
<table border="1">
    <tr>
        <th>账户id</th>
        <th>账户名称</th>
        <th>账户金额</th>
    </tr>
    <%--        循环添加,从controller层传过来的数据--%>
    <c:forEach items="${accountList}" var="account">
        <tr>
            <td>${account.id}</td>
            <td>${account.name}</td>
            <td>${account.money}</td>
        </tr>
    </c:forEach>

</table>
</body>
</html>
编写配置文件
添加jdbc和log4j文件
在resources文件夹下面创建 jdbc.properties 和 log4j.properties 文件,大家可以自行复制
jdbc.properties中的mysql信息要进行更改 具体更改内容
jdbc.properties中的内容
jdbc.driver=com.mysql.cj.jdbc.Driver
jdbc.url=jdbc:mysql://localhost:3306/ssm
jdbc.username=root
jdbc.password=123456
log4j.properties 中的内容
#
# Hibernate, Relational Persistence for Idiomatic Java
#
# License: GNU Lesser General Public License (LGPL), version 2.1 or later.
# See the lgpl.txt file in the root directory or <http://www.gnu.org/licenses/lgpl-2.1.html>.
#

### direct log messages to stdout ###
log4j.appender.stdout=org.apache.log4j.ConsoleAppender
log4j.appender.stdout.Target=System.err
log4j.appender.stdout.layout=org.apache.log4j.PatternLayout
log4j.appender.stdout.layout.ConversionPattern=%d{ABSOLUTE} %5p %c{1}:%L - %m%n

### direct messages to file hibernate.log ###
#log4j.appender.file=org.apache.log4j.FileAppender
#log4j.appender.file.File=hibernate.log
#log4j.appender.file.layout=org.apache.log4j.PatternLayout
#log4j.appender.file.layout.ConversionPattern=%d{ABSOLUTE} %5p %c{1}:%L - %m%n

### set log levels - for more verbose logging change 'info' to 'debug' ###

log4j.rootLogger=all, stdout
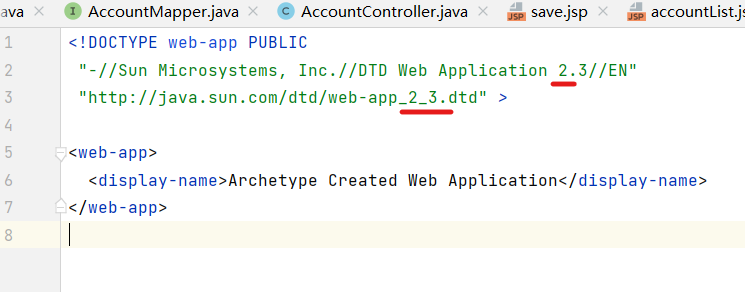
修改web.xml
修改 webapp/WEB-INF/web.xml文件 主要是添加 spring监听器 springmvc前端控制器 乱码过滤器
头文件原始是2.3 要修改为2.5 这边建议你直接复制下面的web.xml代码比较保险
web.xml内容
<?xml version="1.0" encoding="UTF-8"?>
<web-app xmlns:xsi="http://www.w3.org/2001/XMLSchema-instance"
         xmlns="http://java.sun.com/xml/ns/javaee"
         xsi:schemaLocation="http://java.sun.com/xml/ns/javaee http://java.sun.com/xml/ns/javaee/web-app_2_5.xsd"
         id="WebApp_ID" version="2.5">


    <display-name>Archetype Created Web Application</display-name>

    <!--  spring监听器-->

    <!--  springmvc前端控制器-->

    <!--  乱码过滤器-->


</web-app>
添加applicationContext.xml和spring-mvc.xml文件
在resources文件夹下面创建 applicationContext.xml 和 spring-mvc.xml 文件,大家可以自行复制
applicationContext.xml代码(先把头文件引入)
<?xml version="1.0" encoding="UTF-8"?>
<beans xmlns="http://www.springframework.org/schema/beans"
       xmlns:xsi="http://www.w3.org/2001/XMLSchema-instance"
       xmlns:aop="http://www.springframework.org/schema/aop"
       xmlns:tx="http://www.springframework.org/schema/tx"
       xmlns:context="http://www.springframework.org/schema/context"
       xsi:schemaLocation="http://www.springframework.org/schema/beans
http://www.springframework.org/schema/beans/spring-beans.xsd
http://www.springframework.org/schema/tx
http://www.springframework.org/schema/tx/spring-tx.xsd
http://www.springframework.org/schema/aop
http://www.springframework.org/schema/aop/spring-aop.xsd
http://www.springframework.org/schema/context
http://www.springframework.org/schema/context/spring-context.xsd">


</beans>
spring-mvc.xml代码(先把头文件引入)
<?xml version="1.0" encoding="UTF-8"?>
<beans xmlns="http://www.springframework.org/schema/beans"
       xmlns:mvc="http://www.springframework.org/schema/mvc"
       xmlns:context="http://www.springframework.org/schema/context"
       xmlns:xsi="http://www.w3.org/2001/XMLSchema-instance"
       xsi:schemaLocation="http://www.springframework.org/schema/beans
http://www.springframework.org/schema/beans/spring-beans.xsd
http://www.springframework.org/schema/mvc
http://www.springframework.org/schema/mvc/spring-mvc.xsd
http://www.springframework.org/schema/context
http://www.springframework.org/schema/context/spring-context.xsd">


</beans>
添加mapper配置文件
在 resources 文件夹下面创建和Java包一样路径的xml文件
Tips: 这次不能用 .创建要用 / resources文件下的路径一定要用 / 创建

看起来可能效果一样,但是 . 创建的是文件夹叫 . ,而 / 创建的是路径,具体可以去文件夹打开看一下效果
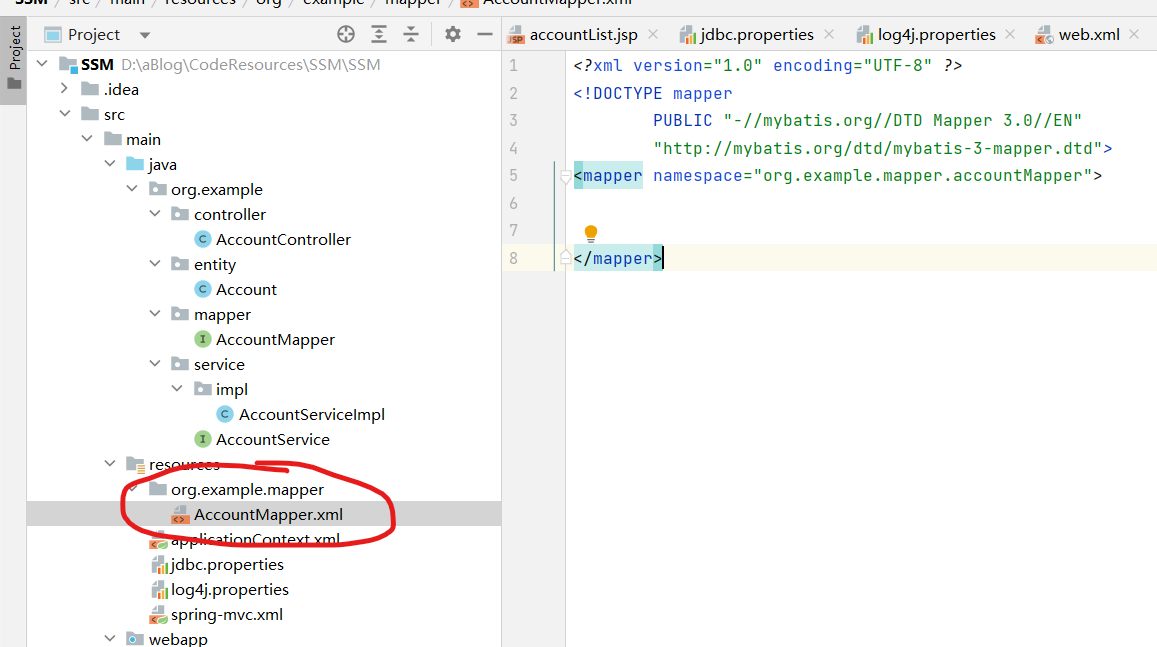
AccountMapper.xml代码
<?xml version="1.0" encoding="UTF-8" ?>
<!DOCTYPE mapper
        PUBLIC "-//mybatis.org//DTD Mapper 3.0//EN"
        "http://mybatis.org/dtd/mybatis-3-mapper.dtd">
<mapper namespace="org.example.mapper.accountMapper">


</mapper>
添加mybatis配置文件
在resources文件夹下面创建 sqlMapConfig.xml 文件,大家可以自行复制
AccountMapper.xml代码
<?xml version="1.0" encoding="UTF-8" ?>
<!DOCTYPE configuration
        PUBLIC "-//mybatis.org//DTD Config 3.0//EN"
        "http://mybatis.org/dtd/mybatis-3-config.dtd">
<configuration>


</configuration>
项目内容填充
填充mybatis配置文件
修改sqlMapConfig.xml
修改resources下的sqlMapConfig.xml
主要内容:引入jdbc.properties 定义类的别名 数据库环境 加载映射
sqlMapConfig.xml代码
<?xml version="1.0" encoding="UTF-8" ?>
<!DOCTYPE configuration
        PUBLIC "-//mybatis.org//DTD Config 3.0//EN"
        "http://mybatis.org/dtd/mybatis-3-config.dtd">
<configuration>

    <!--    加载jdbc.properties文件-->
    <properties resource="jdbc.properties"></properties>

    <!--    定义类的别名,方便xml使用,两种方式都可以-->
    <typeAliases>
        <typeAlias type="org.example.entity.Account" alias="account"/>
        <!--        <package name="org.example.entity"/>-->
    </typeAliases>

    <!--    数据库环境,引用jdbc.properties文件,一定要注意对应好名字-->
    <environments default="development">
        <environment id="development">
            <transactionManager type="JDBC"></transactionManager>
            <dataSource type="POOLED">
                <property name="driver" value="${jdbc.driver}"/>
                <property name="url" value="${jdbc.url}"/>
                <property name="username" value="${jdbc.username}"/>
                <property name="password" value="${jdbc.password}"/>
            </dataSource>
        </environment>
    </environments>

    <!--    加载映射-->
    <!--    mybatis不让用. 必须用/  两种方式都可以-->
    <mappers>
        <mapper resource="org/example/mapper/AccountMapper.xml"/>
        <!--        <package name="org/example/mapper"/>-->
    </mappers>


</configuration>
修改AccountMapper.xml
修改resources下的AccountMapper.xml
主要内容:编写保存和查询所有的SQL语句
AccountMapper.xml代码
<?xml version="1.0" encoding="UTF-8" ?>
<!DOCTYPE mapper
        PUBLIC "-//mybatis.org//DTD Mapper 3.0//EN"
        "http://mybatis.org/dtd/mybatis-3-mapper.dtd">
<mapper namespace="org.example.mapper.AccountMapper">

    <!--    保存-->
    <insert id="save" parameterType="account">
        insert into account
        values (#{id}, #{name}, #{money})
    </insert>

    <!--    查询所有-->
    <select id="findAll" resultType="account">
        select *
        from account
    </select>
</mapper>
填充Spring配置文件
修改applicationContext.xml
修改resources下的applicationContext.xml
主要内容:Spring扫描service和mapper包
applicationContext.xml代码
<?xml version="1.0" encoding="UTF-8"?>
<beans xmlns="http://www.springframework.org/schema/beans"
       xmlns:xsi="http://www.w3.org/2001/XMLSchema-instance"
       xmlns:aop="http://www.springframework.org/schema/aop"
       xmlns:tx="http://www.springframework.org/schema/tx"
       xmlns:context="http://www.springframework.org/schema/context"
       xsi:schemaLocation="http://www.springframework.org/schema/beans
http://www.springframework.org/schema/beans/spring-beans.xsd
http://www.springframework.org/schema/tx
http://www.springframework.org/schema/tx/spring-tx.xsd
http://www.springframework.org/schema/aop
http://www.springframework.org/schema/aop/spring-aop.xsd
http://www.springframework.org/schema/context
http://www.springframework.org/schema/context/spring-context.xsd">

    <!--    Spring扫描service和mapper-->
    <context:component-scan base-package="org.example">
        <!--        删除Controller注解          mvc扫controller-->
        <context:exclude-filter type="annotation" expression="org.springframework.stereotype.Controller"/>
    </context:component-scan>

</beans>
修改spring-mvc.xml
修改resources下的spring-mvc.xml
主要内容:mvc扫描controller包 配置mvc注解驱动 内部资源视图解析器 开放静态资源访问权限
spring-mvc.xml代码
<?xml version="1.0" encoding="UTF-8"?>
<beans xmlns="http://www.springframework.org/schema/beans"
       xmlns:mvc="http://www.springframework.org/schema/mvc"
       xmlns:context="http://www.springframework.org/schema/context"
       xmlns:xsi="http://www.w3.org/2001/XMLSchema-instance"
       xsi:schemaLocation="http://www.springframework.org/schema/beans
http://www.springframework.org/schema/beans/spring-beans.xsd
http://www.springframework.org/schema/mvc
http://www.springframework.org/schema/mvc/spring-mvc.xsd
http://www.springframework.org/schema/context
http://www.springframework.org/schema/context/spring-context.xsd">

    <!--    扫描controller-->
    <context:component-scan base-package="org.example.controller"></context:component-scan>

    <!--    配置mvc注解驱动-->
    <mvc:annotation-driven></mvc:annotation-driven>

    <!--    内部资源视图解析器-->
    <bean id="resourceViewResolver" class="org.springframework.web.servlet.view.InternalResourceViewResolver">
        <property name="prefix" value="/WEB-INF/pages/"></property>
        <property name="suffix" value=".jsp"></property>
    </bean>

    <!--    开放静态资源访问权限-->
    <mvc:default-servlet-handler></mvc:default-servlet-handler>

</beans>
填充web.xml配置文件
修改web.xml
修改webapp/WEB-INF下的web.xml
主要内容:spring监听器 springmvc前端控制器 乱码过滤器
web.xml代码
<?xml version="1.0" encoding="UTF-8"?>
<web-app xmlns:xsi="http://www.w3.org/2001/XMLSchema-instance"
         xmlns="http://java.sun.com/xml/ns/javaee"
         xsi:schemaLocation="http://java.sun.com/xml/ns/javaee http://java.sun.com/xml/ns/javaee/web-app_2_5.xsd"
         id="WebApp_ID" version="2.5">

    <display-name>Archetype Created Web Application</display-name>

    <!--  spring监听器-->
    <context-param>
        <param-name>contextConfigLocation</param-name>
        <param-value>classpath:applicationContext.xml</param-value>
    </context-param>
    <listener>
        <listener-class>org.springframework.web.context.ContextLoaderListener</listener-class>
    </listener>

    <!--  springmvc前端控制器-->
    <servlet>
        <servlet-name>DispatcherServlet</servlet-name>
        <servlet-class>org.springframework.web.servlet.DispatcherServlet</servlet-class>
        <init-param>
            <param-name>contextConfigLocation</param-name>
            <param-value>classpath:spring-mvc.xml</param-value>
        </init-param>
        <load-on-startup>1</load-on-startup>
    </servlet>
    <servlet-mapping>
        <servlet-name>DispatcherServlet</servlet-name>
        <url-pattern>/</url-pattern>
    </servlet-mapping>

    <!--  乱码过滤器-->
    <filter>
        <filter-name>CharacterEncodingFilter</filter-name>
        <filter-class>org.springframework.web.filter.CharacterEncodingFilter</filter-class>
        <init-param>
            <param-name>encoding</param-name>
            <param-value>UTF-8</param-value>
        </init-param>
    </filter>
    <filter-mapping>
        <filter-name>CharacterEncodingFilter</filter-name>
        <url-pattern>/*</url-pattern>
    </filter-mapping>


</web-app>
编写逻辑代码
修改AccountController类文件
修改org.example.controller下的AccountController类文件
主要内容:编写保存和查询所有的web层方法
AccountController代码
package org.example.controller;

import org.example.entity.Account;
import org.example.service.AccountService;
import org.springframework.beans.factory.annotation.Autowired;
import org.springframework.stereotype.Controller;
import org.springframework.web.bind.annotation.RequestMapping;
import org.springframework.web.bind.annotation.ResponseBody;
import org.springframework.web.servlet.ModelAndView;

import java.io.IOException;
import java.util.List;

@Controller //声明控制器,指定一个路径前缀,设置utf格式(不设置容易出现乱码)
@RequestMapping(value = "/account", produces = "text/html;charset=UTF-8")
public class AccountController {
    @Autowired
    private AccountService accountService;  //先报错因为没有配置

    //保存    从save.jsp的form表单提交跳转过来的
    @RequestMapping("/save")    //  /save访问当前方法
    @ResponseBody               //不进行页面跳转
    public String save(Account account) throws IOException {
        accountService.save(account);   //调用Service层的保存方法
        return "保存成功";
    }

    //查询
    @RequestMapping("/findAll")    //  /findAll访问当前方法
    public ModelAndView findAll() throws IOException {
        List<Account> list = accountService.findAll();
        ModelAndView modelAndView = new ModelAndView(); //返回视图
        modelAndView.addObject("accountList", list);    //添加视图的数据
        modelAndView.setViewName("accountList");    //指定视图的页面
        return modelAndView;
    }
}
修改AccountServiceImpl类文件
修改org.example.service.impl下的AccountServiceImpl类文件
主要内容:编写保存和查询所有的业务层方法
AccountServiceImpl代码
package org.example.service.impl;

import org.apache.ibatis.io.Resources;
import org.apache.ibatis.session.SqlSession;
import org.apache.ibatis.session.SqlSessionFactory;
import org.apache.ibatis.session.SqlSessionFactoryBuilder;
import org.example.entity.Account;
import org.example.mapper.AccountMapper;
import org.example.service.AccountService;
import org.springframework.stereotype.Service;

import java.io.IOException;
import java.io.InputStream;
import java.util.List;


@Service("accountService")      //Service注解,声明
public class AccountServiceImpl implements AccountService {


    @Override
    public void save(Account account) {
        InputStream resourceAsStream = null;
        try {
            resourceAsStream = Resources.getResourceAsStream("sqlMapConfig.xml");   //找对应文件
            SqlSessionFactory sqlSessionFactory = new SqlSessionFactoryBuilder().build(resourceAsStream);//获得工厂对象
            SqlSession sqlSession = sqlSessionFactory.openSession(true);    //得到Session对象,这里如果不添加参数,下面需要加一个commit
            AccountMapper mapper = sqlSession.getMapper(AccountMapper.class);   //获得AccountMapper
            mapper.save(account);   //执行save操作
//            sqlSession.commit();  //如果上面sqlsession不加参数,就要commit
            sqlSession.close(); //关闭对象
        } catch (IOException e) {
            e.printStackTrace();
        }

    }

    @Override
    public List<Account> findAll() {    //和上面一样,调用不一样的方法,这个需要接收返回数据
        InputStream resourceAsStream = null;
        try {
            resourceAsStream = Resources.getResourceAsStream("sqlMapConfig.xml");
            SqlSessionFactory sqlSessionFactory = new SqlSessionFactoryBuilder().build(resourceAsStream);
            SqlSession sqlSession = sqlSessionFactory.openSession(true);
            AccountMapper mapper = sqlSession.getMapper(AccountMapper.class);
            List<Account> accountList = mapper.findAll();
            sqlSession.close();
            return accountList;
        } catch (IOException e) {
            e.printStackTrace();
        }
        return null;
    }
}
测试
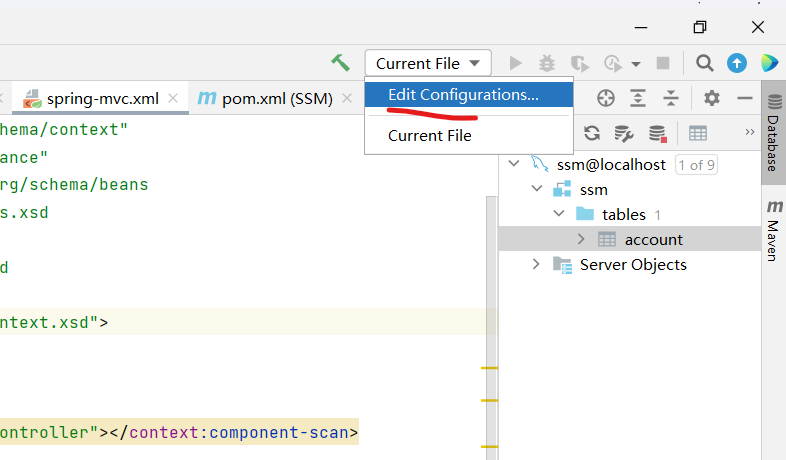
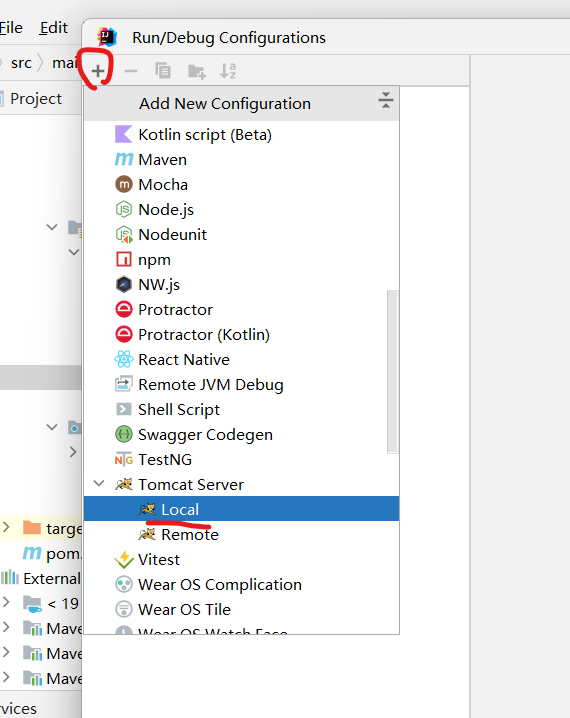
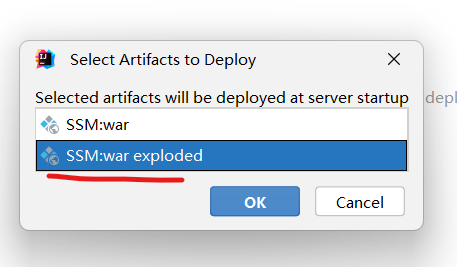
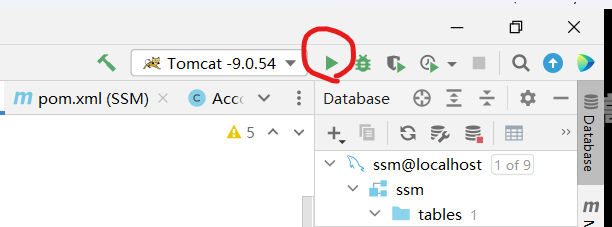
配置Tomcat
点击右上角的Current File -> Edit Configurations -> 点击+ -> Tomcat Serve/Local(看好下面有个TomEE Serve,别选错了) -> Deployment -> 点击+ ->Artifact -> 选择项目: war exploded -> 点击OK


运行
测试添加方法
手动修改地址栏:http://localhost:8080/项目名/save.jsp
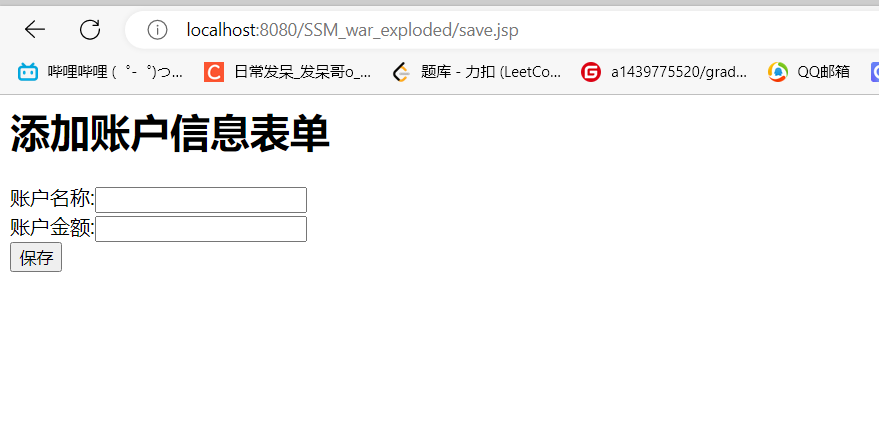
输入信息点击保存 -> 地址栏跳到account/save并且页面显示保存成功即为添加成功,再去数据库看一下有没有数据

测试查询方法
手动修改地址栏:http://localhost:8080/项目名/account/findAll
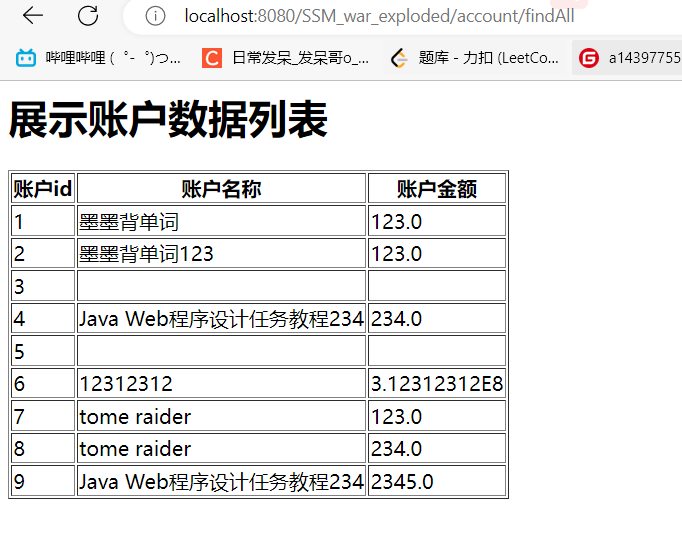
显示即为运行成功
mybatis整合spring
修改配置文件
主要缺点:AccountServiceImpl代码中每一个方法都需要创建Session工厂 ,每次都需要提交关闭sqlSession
主要修改方法:Session工厂给Spring容器管理,获得Mapper实例 ,把事务控制交给spring容器进行声明式事务控制
创建sqlMapConfig-spring.xml文件
添加resources包下
主要内容:sqlMapConfig的很多内容可以通过spring实现,复制sqlMapConfig内容到sqlMapConfig-spring,在新文件进行修改,保留原来的文件
修改加载jdbc.properties文件的代码
在sqlMapConfig-spring删除加载jdbc.properties文件的代码
在applicationContext.xml文件,中间添加一段代码
 <!--    加载jdbc.properties文件-->
    <context:property-placeholder location="classpath:jdbc.properties"></context:property-placeholder>
修改数据库环境的代码
在sqlMapConfig-spring删除数据库环境的代码
在applicationContext.xml文件,中间添加一段代码
 <!--    配置数据库环境-->
    <bean id="dataSource" class="com.mchange.v2.c3p0.ComboPooledDataSource">
        <property name="driverClass" value="${jdbc.driver}"></property>
        <property name="jdbcUrl" value="${jdbc.url}"></property>
        <property name="user" value="${jdbc.username}"></property>
        <property name="password" value="${jdbc.password}"></property>
    </bean>
修改加载映射的代码
在sqlMapConfig-spring删除加载映射的代码
在applicationContext.xml文件,中间添加一段代码
<!--    加载映射,扫描mapper所在包-->
    <bean class="org.mybatis.spring.mapper.MapperScannerConfigurer">
        <property name="basePackage" value="org.example.mapper"></property>
    </bean>
到目前为止,sqlMapConfig-spring.xml里面只剩下定义别名了
配置sessionFactory
在applicationContext.xml文件,中间添加一段代码(pom文件中我们导入mybatis-spring依赖了,直接用)
<!--    配置sessionFactory-->
    <bean id="sqlSessionFactory" class="org.mybatis.spring.SqlSessionFactoryBean">
        <property name="dataSource" ref="dataSource"></property>
        <!--        加载mybatis核心文件-->
        <property name="configLocation" value="classpath:sqlMapConfig-spring.xml"></property>
    </bean>
修改AccountServiceImpl类
接下来AccountServiceImpl类中的AccountMapper会自动注入,可以把原来的方法中的内容删除了,变成如下图
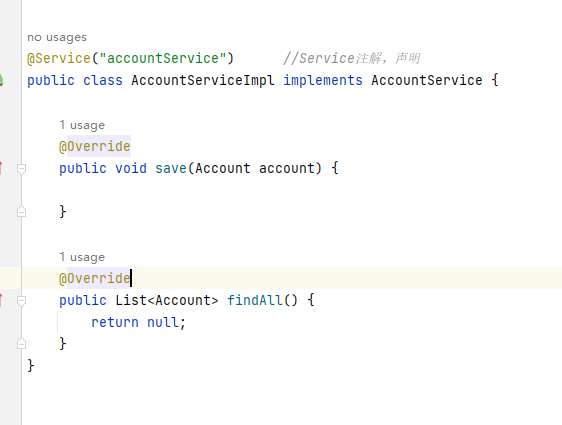
创建一个私有全局AccountMapper变量,声明AutoWired注解,然后方法里面和原来一样调用方法就可以了(不需要创建工厂和提交)
	@Autowired
    private AccountMapper accountMapper;

    @Override
    public void save(Account account) {
        accountMapper.save(account);
    }

    @Override
    public List<Account> findAll() {
        return accountMapper.findAll();
    }
此时就可以运行了查看效果了
声明式事务控制
主要内容:平台事务管理器 配置事务增强 事务的aop织入
在applicationContext.xml文件,中间添加一段代码
<!--    声明式事务控制-->
    <!--    平台事务管理器-->
    <bean id="transactionManager" class="org.springframework.jdbc.datasource.DataSourceTransactionManager">
        <property name="dataSource" ref="dataSource"></property>
    </bean>

    <!--    配置事务增强-->
    <tx:advice id="txAdvice">
        <tx:attributes>
            <tx:method name="*"/>
        </tx:attributes>
    </tx:advice>

    <!--    事务的aop织入-->
    <aop:config>
        <aop:advisor advice-ref="txAdvice" pointcut="execution(* org.example.service.impl.*.*(..))"></aop:advisor>
    </aop:config>
mybatis整合spring阶段修改后完整代码
sqlMapConfig-spring.xml代码
<?xml version="1.0" encoding="UTF-8" ?>
<!DOCTYPE configuration
        PUBLIC "-//mybatis.org//DTD Config 3.0//EN"
        "http://mybatis.org/dtd/mybatis-3-config.dtd">
<configuration>

    <!--    定义类的别名,方便xml使用,两种方式都可以-->
    <typeAliases>
        <typeAlias type="org.example.entity.Account" alias="account"/>
        <!--        <package name="org.example.entity"/>-->
    </typeAliases>

</configuration>
applicationContext.xml代码
<?xml version="1.0" encoding="UTF-8"?>
<beans xmlns="http://www.springframework.org/schema/beans"
       xmlns:xsi="http://www.w3.org/2001/XMLSchema-instance"
       xmlns:aop="http://www.springframework.org/schema/aop"
       xmlns:tx="http://www.springframework.org/schema/tx"
       xmlns:context="http://www.springframework.org/schema/context"
       xsi:schemaLocation="http://www.springframework.org/schema/beans
http://www.springframework.org/schema/beans/spring-beans.xsd
http://www.springframework.org/schema/tx
http://www.springframework.org/schema/tx/spring-tx.xsd
http://www.springframework.org/schema/aop
http://www.springframework.org/schema/aop/spring-aop.xsd
http://www.springframework.org/schema/context
http://www.springframework.org/schema/context/spring-context.xsd">


    <context:component-scan base-package="org.example">
        <!--        删除Controller注解          mvc扫controller-->
        <context:exclude-filter type="annotation" expression="org.springframework.stereotype.Controller"/>
    </context:component-scan>

    <!--    加载jdbc.properties文件-->
    <context:property-placeholder location="classpath:jdbc.properties"></context:property-placeholder>


    <!--    配置数据库环境-->
    <bean id="dataSource" class="com.mchange.v2.c3p0.ComboPooledDataSource">
        <property name="driverClass" value="${jdbc.driver}"></property>
        <property name="jdbcUrl" value="${jdbc.url}"></property>
        <property name="user" value="${jdbc.username}"></property>
        <property name="password" value="${jdbc.password}"></property>
    </bean>

    <!--    配置sessionFactory-->
    <bean id="sqlSessionFactory" class="org.mybatis.spring.SqlSessionFactoryBean">
        <property name="dataSource" ref="dataSource"></property>
        <!--        加载mybatis核心文件-->
        <property name="configLocation" value="classpath:sqlMapConfig-spring.xml"></property>
    </bean>

    <!--    加载映射,扫描mapper所在包-->
    <bean class="org.mybatis.spring.mapper.MapperScannerConfigurer">
        <property name="basePackage" value="org.example.mapper"></property>
    </bean>

    <!--    声明式事务控制-->
    <!--    平台事务管理器-->
    <bean id="transactionManager" class="org.springframework.jdbc.datasource.DataSourceTransactionManager">
        <property name="dataSource" ref="dataSource"></property>
    </bean>

    <!--    配置事务增强-->
    <tx:advice id="txAdvice">
        <tx:attributes>
            <tx:method name="*"/>
        </tx:attributes>
    </tx:advice>

    <!--    事务的aop织入-->
    <aop:config>
        <aop:advisor advice-ref="txAdvice" pointcut="execution(* org.example.service.impl.*.*(..))"></aop:advisor>
    </aop:config>

</beans>
AccountServiceImpl类代码
package org.example.service.impl;

import org.example.entity.Account;
import org.example.mapper.AccountMapper;
import org.example.service.AccountService;
import org.springframework.beans.factory.annotation.Autowired;
import org.springframework.stereotype.Service;

import java.util.List;


@Service("accountService")      //Service注解,声明
public class AccountServiceImpl implements AccountService {

    @Autowired
    private AccountMapper accountMapper;

    @Override
    public void save(Account account) {
        accountMapper.save(account);
    }

    @Override
    public List<Account> findAll() {
        return accountMapper.findAll();
    }

}
测试mybatis整合spring
手动修改地址栏:http://localhost:8080/项目名/save.jsp
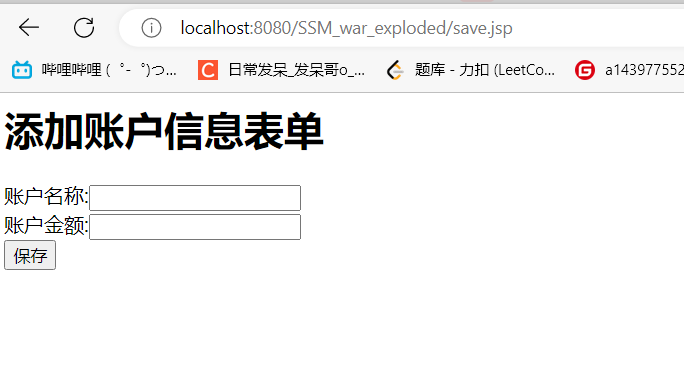
输入信息点击保存 -> 地址栏跳到account/save并且页面显示保存成功即为添加成功,再去数据库看一下有没有数据
手动修改地址栏:http://localhost:8080/项目名/account/findAll

显示即为运行成功
项目压缩包,失效请联系博主,有什么问题欢迎讨论


![C#中[]的几种用法](https://img-blog.csdnimg.cn/c9f6bb41a0f24f06b985b645b89348c6.png)