本篇文章主要介绍一下Stepper,这个组件在UIKit中也已经有较长的历史了,下面看看在SwiftUI中如何使用,有哪些更加便捷的方法呢?
Stepper减号(-)和加号(+)按钮,可以点击后以指定的数值进行加减。
基础初始化方法
Stepper提供了很多初始化方法,先从最简单的一个入手:
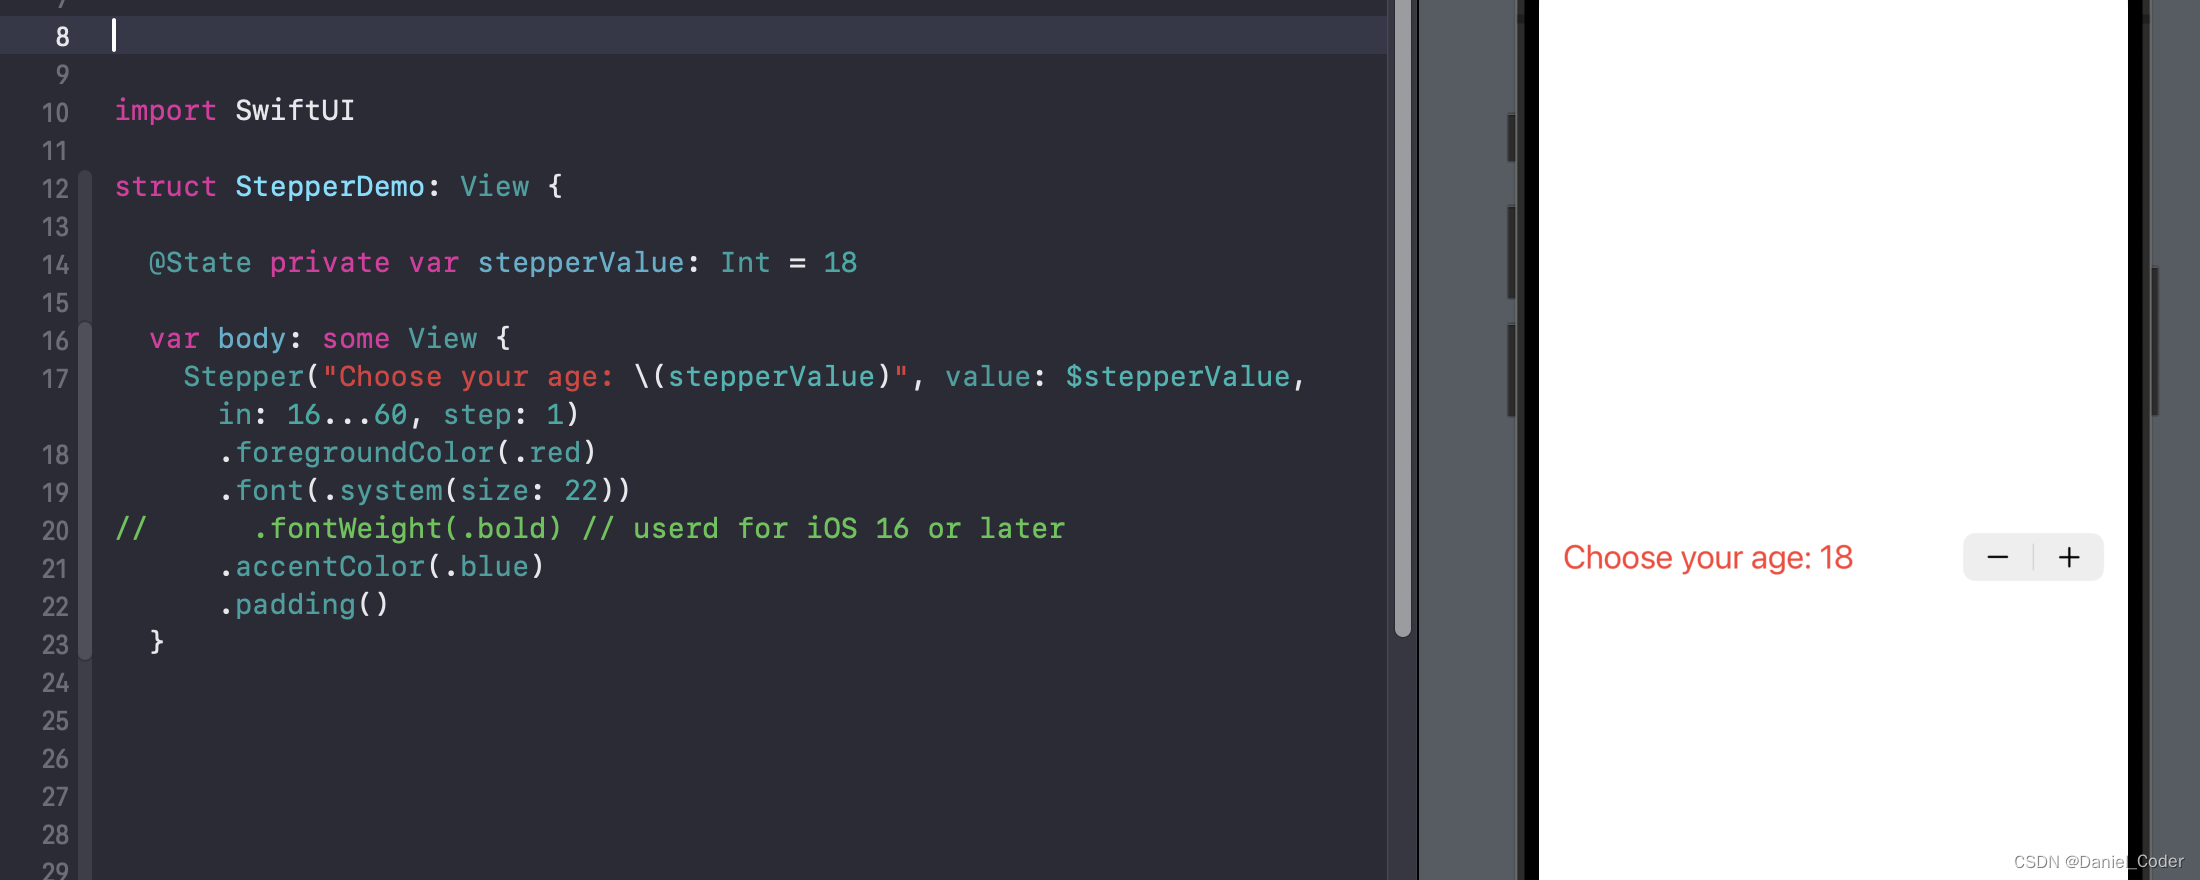
  @State private var stepperValue: Int = 18
  var body: some View {
    Stepper("Choose your age: \(stepperValue)", value: $stepperValue, in: 16...60, step: 1)
      .foregroundColor(.red)
      .font(.system(size: 22))
//      .fontWeight(.bold) // userd for iOS 16 or later
      .accentColor(.blue)
      .padding()
  }
上面代码中我们设置了几个初始化参数:
titleKey:Stepper组件左侧的提示文字。
value:一个被@State包装的属性值,用于记录Stepper的数值。
in:Stepper可以选择的范围,当达到最低数值时,减号变成disabled,当达到最大值时,加号变成disabled。
step:每次加减的步长,即数值。
在这里可以设置提示文字的外观样式,比如foregroundColor、font、fontWeight等等,不过有些修饰符是iOS 16之后才能用的,比如fontWeight。
上面添加了accentColor修饰符,但是没有起作用,我们只能设置提示文字的样式,而右侧的加减小组建无法设置外观样式。
上面的初始化中提示文字的外观自定义还是比较有限的,下面的方法就自定义一个提示文字:
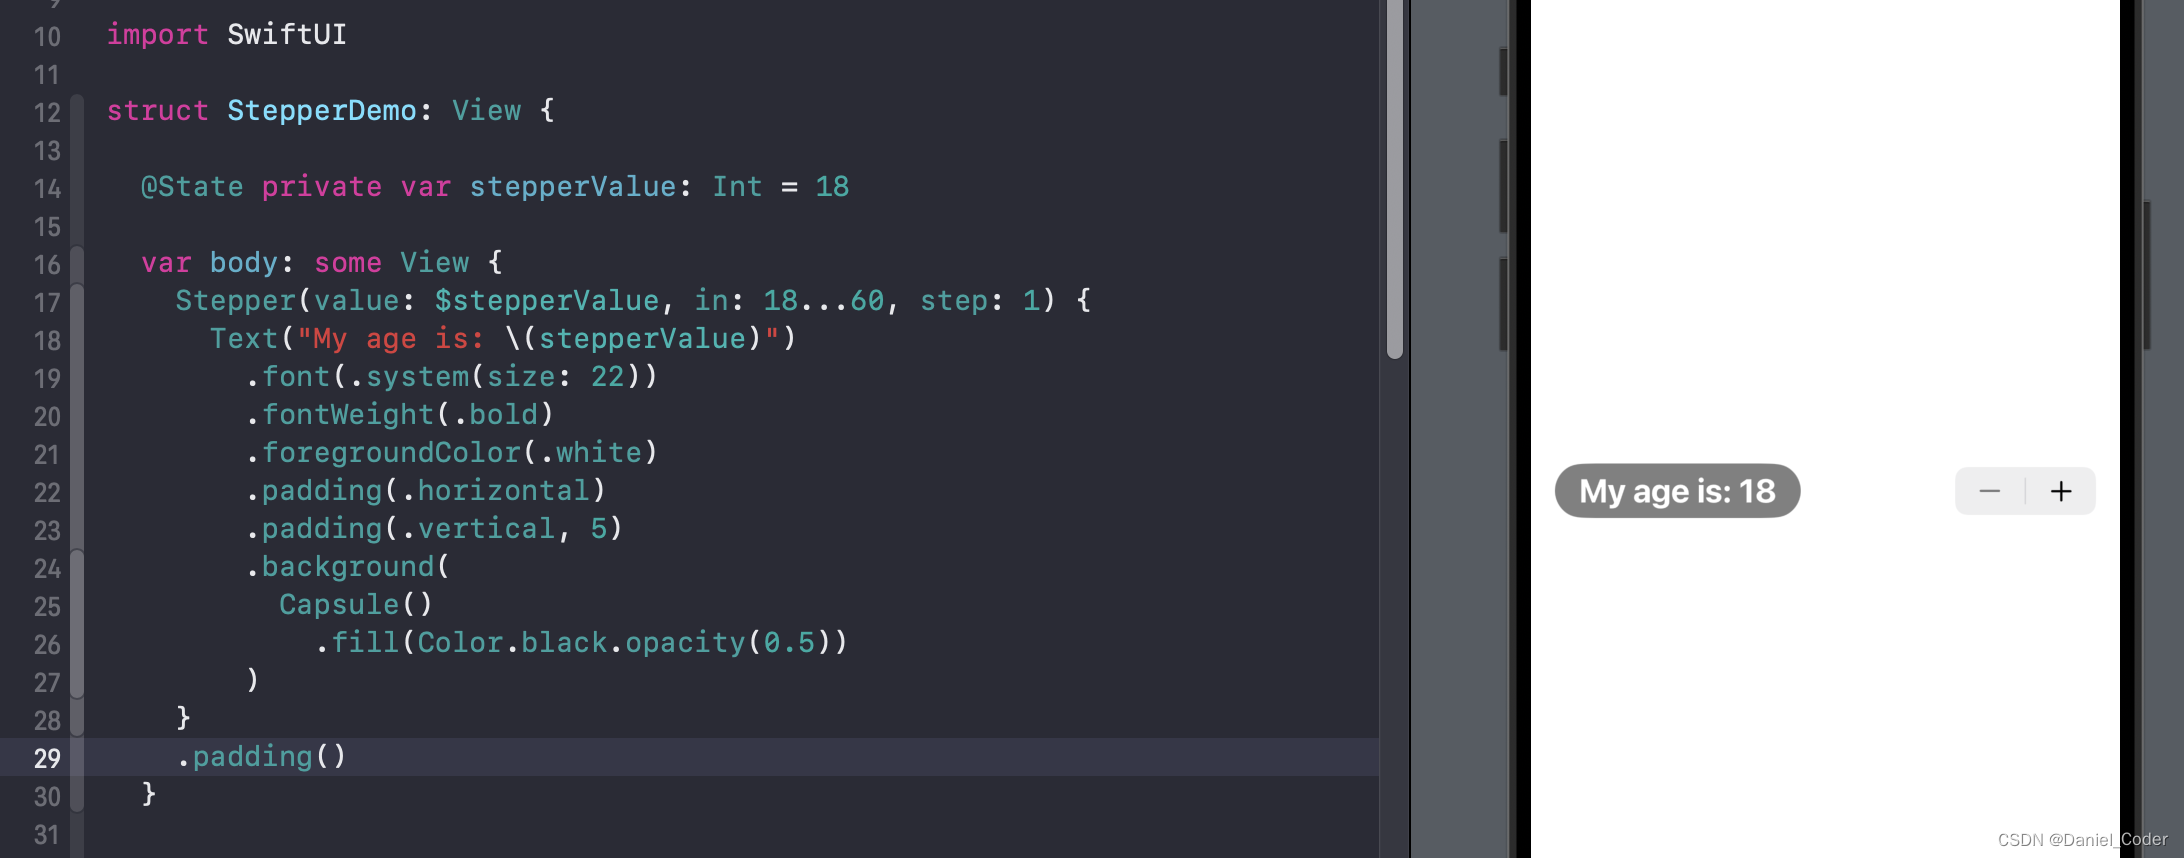
    Stepper(value: $stepperValue, in: 18...60, step: 1) {
      Text("My age is: \(value)")
        .font(.system(size: 22))
        .fontWeight(.bold)
        .foregroundColor(.white)
        .padding(.horizontal)
        .padding(.vertical, 5)
        .background(
          Capsule()
            .fill(Color.black.opacity(0.5))
        )
    }
该初始化方法中使用了label参数,这个参数是一个闭包,支持自定义一个提示文字,上面代码中通过Text组件配置了一个提示文字,Text组件的外观设置还是比较丰富的,效果图如上图。
onEditingChanged
Stepper的初始化方法中还提供了一个闭包onEditingChanged,当用户点击的时候调用。
    Stepper("Choose your age: \(stepperValue)", value: $stepperValue, in: 16...60, step: 1, onEditingChanged: { value in
      print("---> value: \(value)")
    })
当用户按下或者长按的时候onEditingChanged返回的value值为true,当用户松手的时候,返回的value值为false.
onIncrement和onDecrement
如果在数值改变的时候,我们想做一些逻辑操作,那么就需要用到下面的初始化方法,该方法提供了onIncrement和onDecrement两个闭包,分别在点击加号和减号的时候调用。比如下面这个示例:

上面示例中在点击Stepper的时候,对图形进行倒角设置。代码如下:
struct StepperDemo: View {
  @State private var stepperValue: Int = 50

  var body: some View {
    VStack(spacing: 40) {
      RoundedRectangle(cornerRadius: CGFloat(stepperValue))
        .frame(width: 200, height: 200)

      Stepper("The cornerRadius is: \(stepperValue)", onIncrement: {
        // Increment
        onSteperChanged(10)
      }, onDecrement: {
        // Decrement
        onSteperChanged(-10)
      })
        .padding()
    }
  }

  func onSteperChanged(_ value: Int) {
    let newValue = stepperValue + value
    if newValue < 0 || newValue > 100 {
      return
    }
    withAnimation(.easeInOut) {
      stepperValue = newValue
    }
  }
}
自定义Stepper
除了系统的Stepper,我们也可以仿照系统的自定义一个Stepper,下面就是自定义的Stepper以及完整代码。

struct StepperDemo: View {

  @State private var stepperValue: Int = 50

  var body: some View {
    VStack {
        MyStepper(value: $stepperValue, in: 0...100, label: { Text("Value: \(stepperValue)") }, style: DefaultStepperStyle())

        MyStepper(value: $stepperValue, in: 0...100, label: { Text("Value: \(stepperValue)") }, style: DefaultStepperStyle())
            .controlSize(.mini)

        MyStepper(value: $stepperValue, in: 0...100, label: { Text("Value: \(stepperValue)") }, style: CapsuleStepperStyle())
            .controlSize(.large)
            .font(.largeTitle)
    }
    .padding()
  }
}
自定义Stepper组件:
import SwiftUI

struct MyStepper<Label: View, Style: MyStepperStyle>: View {
    @Binding var value: Int
    var `in`: ClosedRange<Int> // todo
    @ViewBuilder var label: Label
    var style: Style

    var body: some View {
        style.makeBody(.init(value: $value, label: .init(underlyingLabel: AnyView(label)), range: `in`))
    }
}

protocol MyStepperStyle {
  associatedtype Body: View
  func makeBody(_ configuration: MyStepperStyleConfiguration) -> Body
}

extension MyStepperStyle where Self == DefaultStepperStyle {
    static var `default`: DefaultStepperStyle { return .init() }
}

struct MyStepperStyleConfiguration {
  var value: Binding<Int>
  var label: Label
  var range: ClosedRange<Int>

  struct Label: View {
    var underlyingLabel: AnyView

    var body: some View {
      underlyingLabel
    }
  }
}

struct DefaultStepperStyle: MyStepperStyle {
  func makeBody(_ configuration: MyStepperStyleConfiguration) -> some View {
      Stepper(value: configuration.value, in: configuration.range) {
          configuration.label
      }
  }
}

struct CapsuleStepperStyle: MyStepperStyle {
    func makeBody(_ configuration: MyStepperStyleConfiguration) -> some View {
        CapsuleStepper(configuration: configuration)
    }
}

struct CapsuleStepper: View {
    var configuration: MyStepperStyleConfiguration

    @Environment(\.controlSize)
    var controlSize

    var padding: Double {
        switch controlSize {
        case .mini: return 4
        case .small: return 6
        default: return 8
        }
    }

    var body: some View {
        HStack {
            configuration.label
            Spacer()
            HStack {
                Button("-") { configuration.value.wrappedValue -= 1 }
                Text(configuration.value.wrappedValue.formatted())
                Button("+") { configuration.value.wrappedValue += 1 }
            }
            .transformEnvironment(\.font, transform: { font in
                if font != nil { return }
                switch controlSize {
                case .mini: font = .footnote
                case .small: font = .callout
                default: font = .body
                }

            })
            .padding(.vertical, padding)
            .padding(.horizontal, padding * 2)
            .foregroundColor(.white)
            .background {
                Capsule()
                    .fill(.tint)
            }
        }
        .buttonStyle(.plain)
    }
}
自定义的Stepper组件这里就不做过多的说明了,仅供大家参考,有需要的朋友可以研究研究。
最后,希望能够帮助到有需要的朋友,如果觉得有帮助,还望点个赞,添加个关注,笔者也会不断地努力,写出更多更好用的文章。
