springCloud集成activiti5.22.0流程引擎
点关注不迷路,欢迎再访!
精简博客内容,尽量已行业术语来分享。
努力做到对每一位认可自己的读者负责。
帮助别人的同时更是丰富自己的良机。
小编最近工作需要涉及到流程,由于网络上5.22版本资料最多,所以选用了5.22版本作为项目集成。
文章目录
- springCloud集成activiti5.22.0流程引擎
- 一.Activiti表介绍
- 1 .表前缀说明
- 二.Spring boot2.x与Activiti 5.22.0整合
- 1.POM文件中添加依赖
- 2.启动类配置
- 3.ActivitiConfiguration 配置
- 4.封装activiti工具类
- 三.制作bpmn流程文件
- 1.安装actiBPM插件
- 2.创建bpmn文件
- 3.生成png文件
- 四.流程演示
- 1.流程定义
- 2.启动流程
- 3.查询我的待办
- 4.完成任务
一.Activiti表介绍
不同版本的activiti自带表是不一样的,其实我们也不用去关心不同版本的activiti需要那些表,只要配置好数据源,系统启动的时候,会去检查数据库是否包含这些数据库表,如果没有会自动去创建这些表。下面先介绍简单介绍一下,这些表的含义。
表关系图介博客(引用):https://blog.csdn.net/claram/article/details/73277358
1 .表前缀说明
ACT_RE RE表示Repository资源库,保存流程定义,模型等设计阶段的数据。
ACT_RU RU表示Runtime运行时,保存流程实例,任务,变量等运行阶段的数据。
ACT_HI 表示History历史,保存历史实例,历史任务等流程历史数据。
ACT_ID ID表示Identity身份,保存用户,群组,关系等组织机构相关数据(Activiti中的组织机构过于简单,仅用于演示。) 。
ACT_GE GE表示General通用,属于一些通用配置。
其他 ACT_EVT_LOG和ACT_PROCDEF_INFO没有按照规则来,两者分别属于HI和RE。
二.Spring boot2.x与Activiti 5.22.0整合
1.POM文件中添加依赖
<dependency>
		<groupId>org.activiti</groupId>
			<artifactId>activiti-spring-boot-starter-basic</artifactId>
		<version>5.22.0</version>
		<exclusions>
		<!-- 排除activiti的mybatis,避免和外面的mybatis-plus冲突 -->
			<exclusion>
				<artifactId>mybatis</artifactId>
				<groupId>org.mybatis</groupId>
			</exclusion>
		</exclusions>
</dependency>
2.启动类配置
注意:SecurityAutoConfiguration.class导入的包是activiti的
/**
*因为GlobalAuthenticationConfigurerAdapter  是spring-boot-starter-security 依赖中的属于安全配置类,  而 引入的activiti-spring-boot-starter-basic 依赖中存在了一个自动安全配置类,  两个安全配置,  所以排除掉 activiti-spring-boot-starter-basic中的安全配置类  SecurityAutoConfiguration
*/
@EnableAutoConfiguration(exclude={org.activiti.spring.boot.SecurityAutoConfiguration.class})
@SpringCloudApplication
public class App {
    public static void main(String[] args) {
        SpringApplication.run(App.class, args);
    }
}
3.ActivitiConfiguration 配置
@Configuration
public class ActivitiConfiguration {

    @Autowired
    private DataSource dataSource;
    @Autowired
    private PlatformTransactionManager platformTransactionManager;

    public ActivitiConfiguration() {
    }

    //通过@Bean注解将SpringProcessEngineConfiguration实例声明为Spring Bean,使其可供其他组件注入和使用
    @Bean
    public SpringProcessEngineConfiguration springProcessEngineConfiguration() {
        SpringProcessEngineConfiguration spec = new SpringProcessEngineConfiguration();
        //设置数据源,将注入的数据源设置到SpringProcessEngineConfiguration实例中
        spec.setDataSource(this.dataSource);
        //设置事务管理器将注入的事务管理器设置到SpringProcessEngineConfiguration实例中
        spec.setTransactionManager(this.platformTransactionManager);
        //设置数据库模式更新策略 true表示在启动时自动创建或更新Activiti引擎所需的数据库表结构
        spec.setDatabaseSchemaUpdate("true");
        Resource[] resources = null;
        //配置流程部署资源
        //使用PathMatchingResourcePatternResolver从classpath中的bpmn目录下加载所有以.bpmn为扩展名的文件作为流程定义资源,
        // 并将它们设置到SpringProcessEngineConfiguration实例中。
        try {
            resources = (new PathMatchingResourcePatternResolver()).getResources("processes/*.bpmn");
        } catch (IOException var4) {
            var4.printStackTrace();
        }

        spec.setDeploymentResources(resources);
        return spec;
    }
}
4.封装activiti工具类
/**
 * 载入 BPMN 文件并部署流程定义
 */
@Slf4j
@Component
public class QuestWorkFlowUtils {

	@Autowired
	private RepositoryService repositoryService;
	@Autowired
	private RuntimeService runtimeService;

	/**
	 * 声明定义流程
	 * @return
	 */
	public String createProcessDefinition() throws FileNotFoundException {
		ProcessEngine processEngine = ProcessEngines.getDefaultProcessEngine();
		Deployment deployment = processEngine.getRepositoryService()
				.createDeployment()
				.addClasspathResource("processes/quest_flow.bpmn")
				.addClasspathResource("processes/quest_flow.png")
				.deploy();
		return deployment.getId();
	}

	/**
	 * 启动流程
	 * @param userId  用户ID
	 * @return
	 */
	public ProcessInstance createProcessInstance(String userId){
		//启动流程时传递的参数列表 这里根据实际情况 也可以选择不传
		Map<String, Object> variables = new HashMap<String, Object>();
		variables.put("userId", userId);
		// 根据流程定义ID查询流程定义  process_test:1:10004部署的流程定义的id
		ProcessDefinition processDefinition = repositoryService.createProcessDefinitionQuery()
				.processDefinitionId("quest_flow:1:10004")     //act_re_procdef主键ID
				.singleResult();

		// 获取流程定义的Key
		String processDefinitionKey = processDefinition.getKey();
		//定义businessKey  businessKey一般为流程实例key与实际业务数据的结合
		String businessKey = processDefinitionKey + ":" + "001";
		//设置启动流程的人
		Authentication.setAuthenticatedUserId("sysadmin");
		ProcessInstance processInstance = this.runtimeService.startProcessInstanceByKey(processDefinitionKey, businessKey, variables);
		System.out.println("流程启动成功:" + processInstance);
		return processInstance;
	}

	/**
	 * 我的待办
	 * @param userId  用户ID
	 * @param processDefinitionKey  定义流程key
	 * @return
	 */
	public List<Task> getProcessEngineList(String userId,String processDefinitionKey){
		ProcessEngine processEngine = ProcessEngines.getDefaultProcessEngine();
		TaskService taskService = processEngine.getTaskService();
		List<Task> list = taskService.createTaskQuery()
				.processDefinitionKey(processDefinitionKey)
				.taskAssignee(userId)
				.list();
		for (Task task : list) {
			System.out.println("流程实例id = " + task.getProcessInstanceId());
			System.out.println("任务id = " + task.getId());
			System.out.println("任务负责人id = " + task.getAssignee());
			System.out.println("任务名称 = " + task.getName());
		}
		return list;
	}

	/**
	 * 通过taskId办理任务
	 * @param taskId  流程任务ID
	 */
	public void getProcessEngine(String taskId,Map<String, Object> variables){
		ProcessEngine processEngine = ProcessEngines.getDefaultProcessEngine();
		processEngine.getTaskService().complete(taskId,variables);
	}

	/**
	 * 完成任务
	 * @return
	 */
	public void finishProcessTask(){
		// 1.获取流程引擎
		ProcessEngine processEngine = ProcessEngines.getDefaultProcessEngine();
		// 2.获取taskService
		TaskService taskService = processEngine.getTaskService();
		Task task = taskService.createTaskQuery()
				.processDefinitionKey("quest_work")
				.taskAssignee("sysadmin")
				.singleResult();
		taskService.complete(task.getId());
	}

	/**
	 * 查看流程图附件
	 * @param deploymentId  流程定义ID
	 */
	public void get(String deploymentId){
		ProcessEngine processEngine = ProcessEngines.getDefaultProcessEngine();
		List<String> resourceNames = processEngine.getRepositoryService()
				.getDeploymentResourceNames(deploymentId);
		resourceNames.forEach(resourceName -> {
			System.err.println(resourceName);
			File file = new File("e:/" + resourceName);
			InputStream inputStream = processEngine.getRepositoryService()
					.getResourceAsStream(deploymentId, resourceName);
			try {
				FileOutputStream fileOutputStream = new FileOutputStream(file);
				byte[] bytes = new byte[1024];
				while (inputStream.read(bytes) > 0) {
					fileOutputStream.write(bytes);
				}
				fileOutputStream.flush();
				inputStream.close();
				fileOutputStream.close();
			} catch (Exception e) {

			}
		});
	}

	/**
	 * 撤销任务
	 * @param processInstanceId  流程实例ID
     * @param deleteReason  原因
	 */
	public void deleteProcessTask(String processInstanceId, String deleteReason){
		runtimeService.deleteProcessInstance(processInstanceId,deleteReason);
	}
}
三.制作bpmn流程文件
1.安装actiBPM插件
地址: https://plugins.jetbrains.com/
搜索: actiBPM
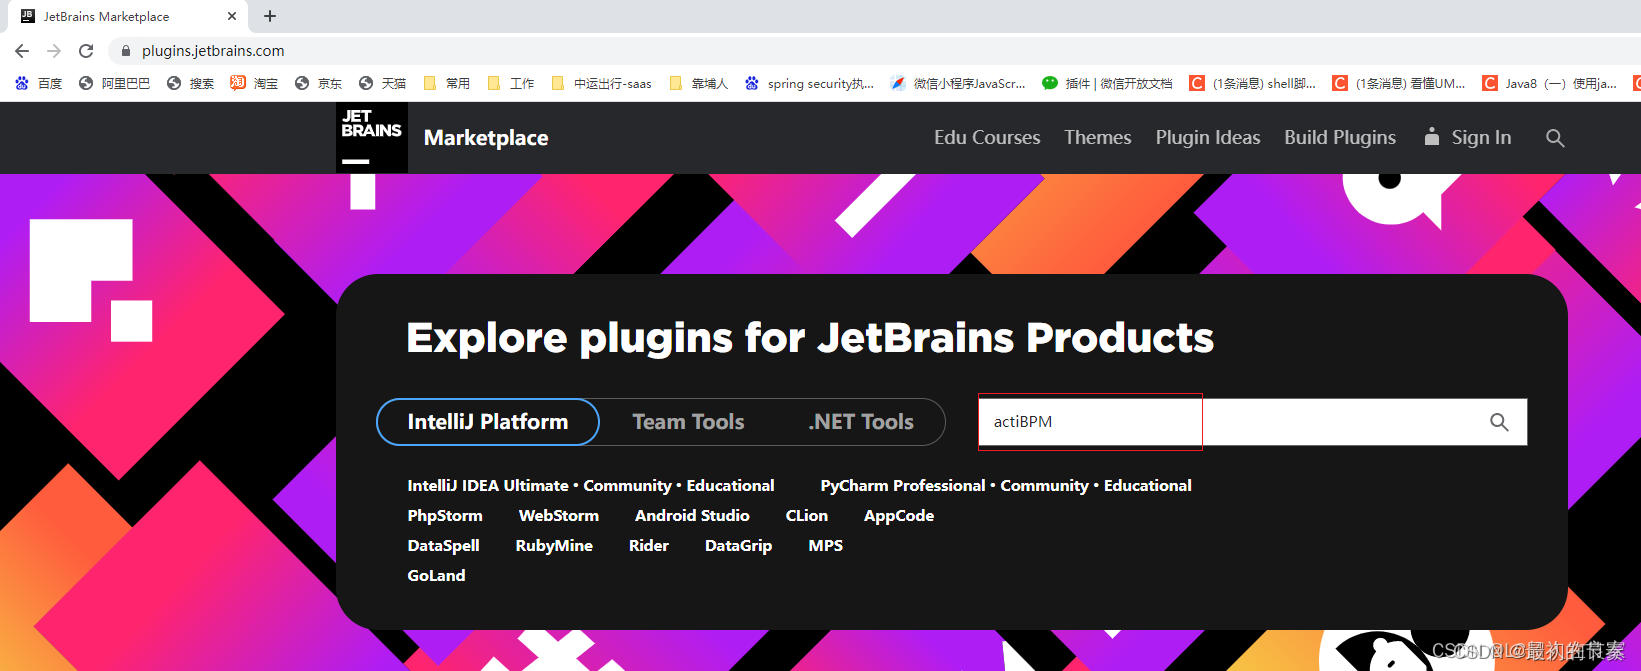
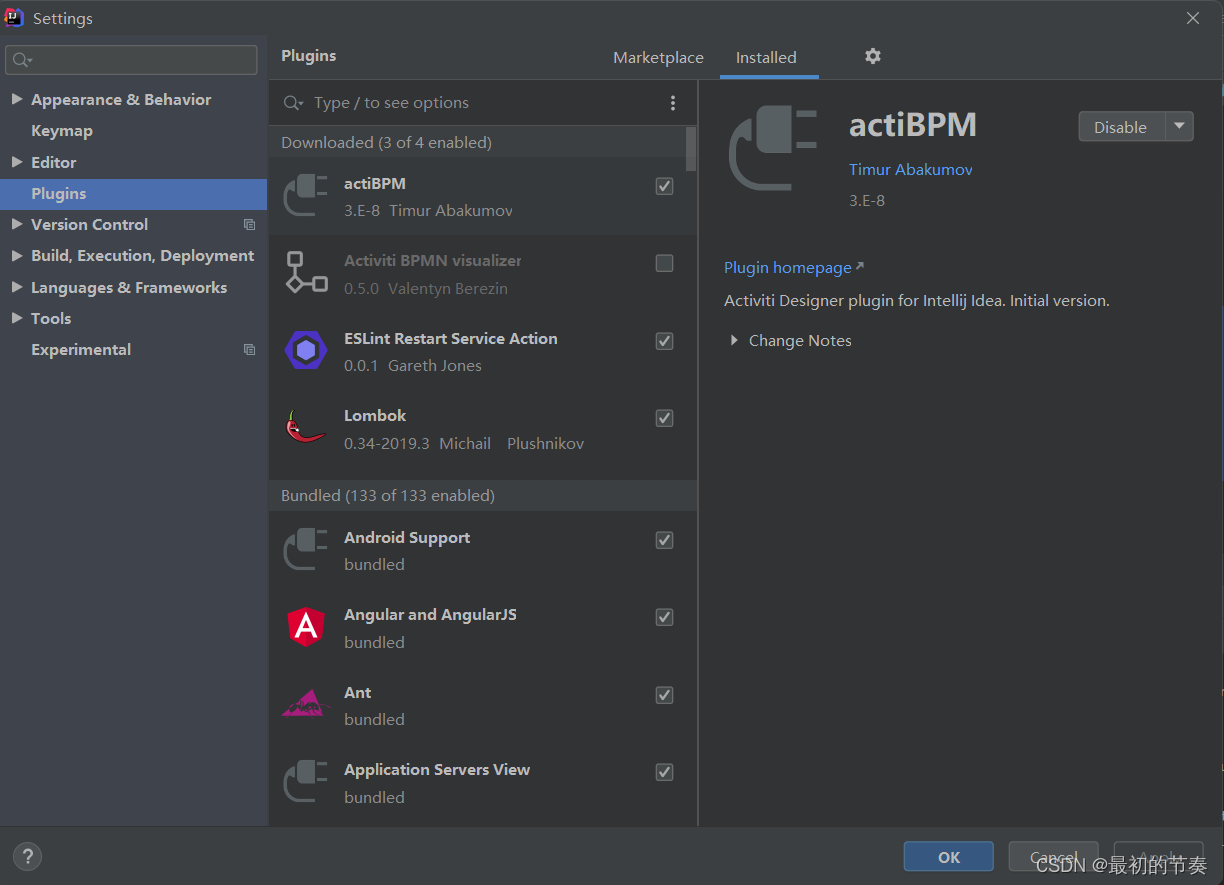
IDEA 插件安装 File->Settings->Plugins 安装新插件actiBPM插件
可能出现查找不到该插件的情况,则可以actiBPM下载通过插件jar文件本地安装
](https://img-blog.csdnimg.cn/direct/5e4247575e294715bdaf38234aa58f3e.png)
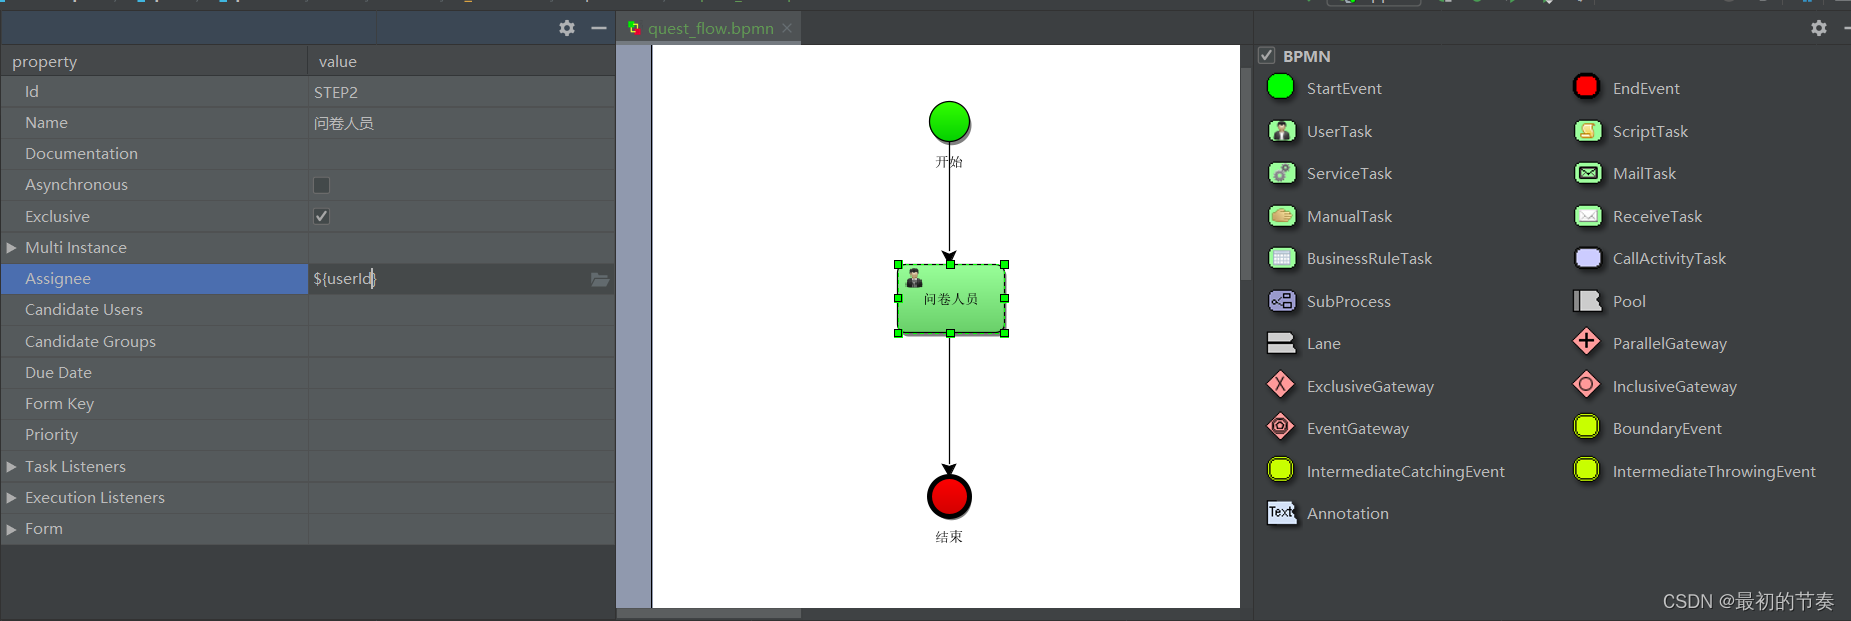
2.创建bpmn文件
右键该文件夹New–>BPMN File 创建名为quest_flow的流程文件
文件名"xxx.bpmn" 更改为 “xxx.bpmn.xml”
注: 因为activiti的默认流程图格式是bpmn, 但是idea必须xml格式才能生成图片, 所以改为这样, 后面部署流程的时候才可以部署上去, 否则是存不进数据库.
<?xml version="1.0" encoding="UTF-8" standalone="yes"?>
<definitions xmlns="http://www.omg.org/spec/BPMN/20100524/MODEL" xmlns:activiti="http://activiti.org/bpmn" xmlns:bpmndi="http://www.omg.org/spec/BPMN/20100524/DI" xmlns:omgdc="http://www.omg.org/spec/DD/20100524/DC" xmlns:omgdi="http://www.omg.org/spec/DD/20100524/DI" xmlns:tns="http://www.activiti.org/test" xmlns:xsd="http://www.w3.org/2001/XMLSchema" xmlns:xsi="http://www.w3.org/2001/XMLSchema-instance" expressionLanguage="http://www.w3.org/1999/XPath" id="m1713244634324" name="" targetNamespace="http://www.activiti.org/test" typeLanguage="http://www.w3.org/2001/XMLSchema">
  <process id="quest_work" isClosed="false" isExecutable="true" processType="None">
    <startEvent id="STEP1" name="开始"/>
    <endEvent id="STEP3" name="结束"/>
    <userTask activiti:assignee="${userId}" activiti:exclusive="true" id="STEP2" name="问卷人员"/>
    <sequenceFlow id="_5" sourceRef="STEP1" targetRef="STEP2"/>
    <sequenceFlow id="_6" sourceRef="STEP2" targetRef="STEP3"/>
  </process>
  <bpmndi:BPMNDiagram documentation="background=#3C3F41;count=1;horizontalcount=1;orientation=0;width=842.4;height=1195.2;imageableWidth=832.4;imageableHeight=1185.2;imageableX=5.0;imageableY=5.0" id="Diagram-_1" name="New Diagram">
    <bpmndi:BPMNPlane bpmnElement="quest_work">
      <bpmndi:BPMNShape bpmnElement="STEP1" id="Shape-STEP1">
        <omgdc:Bounds height="32.0" width="32.0" x="200.0" y="40.0"/>
        <bpmndi:BPMNLabel>
          <omgdc:Bounds height="32.0" width="32.0" x="0.0" y="0.0"/>
        </bpmndi:BPMNLabel>
      </bpmndi:BPMNShape>
      <bpmndi:BPMNShape bpmnElement="STEP3" id="Shape-STEP3">
        <omgdc:Bounds height="32.0" width="32.0" x="200.0" y="340.0"/>
        <bpmndi:BPMNLabel>
          <omgdc:Bounds height="32.0" width="32.0" x="0.0" y="0.0"/>
        </bpmndi:BPMNLabel>
      </bpmndi:BPMNShape>
      <bpmndi:BPMNShape bpmnElement="STEP2" id="Shape-STEP2">
        <omgdc:Bounds height="55.0" width="85.0" x="175.0" y="170.0"/>
        <bpmndi:BPMNLabel>
          <omgdc:Bounds height="55.0" width="85.0" x="0.0" y="0.0"/>
        </bpmndi:BPMNLabel>
      </bpmndi:BPMNShape>
      <bpmndi:BPMNEdge bpmnElement="_5" id="BPMNEdge__5" sourceElement="_2" targetElement="_4">
        <omgdi:waypoint x="216.0" y="72.0"/>
        <omgdi:waypoint x="216.0" y="170.0"/>
        <bpmndi:BPMNLabel>
          <omgdc:Bounds height="0.0" width="0.0" x="0.0" y="0.0"/>
        </bpmndi:BPMNLabel>
      </bpmndi:BPMNEdge>
      <bpmndi:BPMNEdge bpmnElement="_6" id="BPMNEdge__6" sourceElement="_4" targetElement="_3">
        <omgdi:waypoint x="216.0" y="225.0"/>
        <omgdi:waypoint x="216.0" y="340.0"/>
        <bpmndi:BPMNLabel>
          <omgdc:Bounds height="0.0" width="0.0" x="0.0" y="0.0"/>
        </bpmndi:BPMNLabel>
      </bpmndi:BPMNEdge>
    </bpmndi:BPMNPlane>
  </bpmndi:BPMNDiagram>
</definitions>
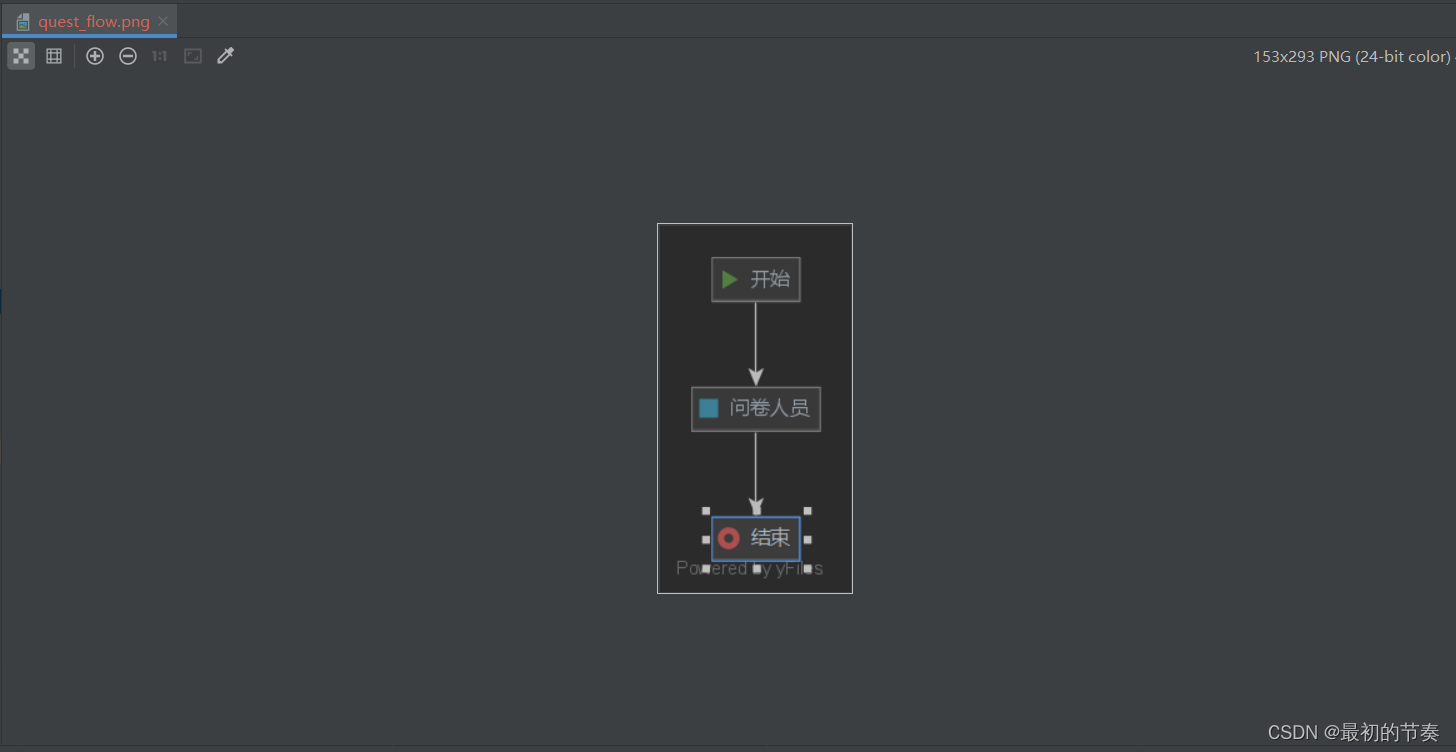
3.生成png文件
右键更改后文件 Diagrams–>Show BPMN 2.0 Designer…
四.流程演示
1.流程定义
自动部署:将bpmn文件放到resources下的processes下,启动时会自动部署

查看数据库表 act_re_procdef:

2.启动流程
	//启动流程时传递的参数列表 这里根据实际情况 也可以选择不传
	Map<String, Object> variables = new HashMap<String, Object>();
	variables.put("userId","sysadmin");
	// 根据流程定义ID查询流程定义  quest_work:1:47504是我们刚才部署的流程定义的id
	ProcessDefinition processDefinition = repositoryService.createProcessDefinitionQuery()
				.processDefinitionId("quest_work:1:47504")     //act_re_procdef主键ID
				.singleResult();

	// 获取流程定义的Key
	String processDefinitionKey = processDefinition.getKey();
	//定义businessKey  businessKey一般为流程实例key与实际业务数据的结合
	String businessKey = processDefinitionKey + ":" + "001";
	//设置启动流程的人
	Authentication.setAuthenticatedUserId("sysadmin");
	ProcessInstance processInstance = this.runtimeService.startProcessInstanceByKey(processDefinitionKey, businessKey, variables);
	System.out.println("流程启动成功:" + processInstance);
3.查询我的待办
    ProcessEngine processEngine = ProcessEngines.getDefaultProcessEngine();
	TaskService taskService = processEngine.getTaskService();
	List<Task> list = taskService.createTaskQuery()
				.processDefinitionKey(processDefinitionKey)
				.taskAssignee("sysadmin")
				.list();
		for (Task task : list) {
			System.out.println("流程实例id = " + task.getProcessInstanceId());
			System.out.println("任务id = " + task.getId());
			System.out.println("任务负责人id = " + task.getAssignee());
			System.out.println("任务名称 = " + task.getName());
		}
4.完成任务
	ProcessEngine processEngine = ProcessEngines.getDefaultProcessEngine();
	processEngine.getTaskService().complete(taskId);