准备:yum install rpcbind
yum install nfs-server
一台服务器:192.168.220.131
一台客户端:192.168.220.220
服务器:
先启动rpcbind服务:systemctl restart rpcbind
在启动nfs-server服务:systemctl restart nfs-server
进入/etc/exports 文件中配置可以允许那些主机来使用我这共享内存
配置格式:目标 主机(权限)
具体权限请用命令man 5 exports查看
配置完成之后重新读取配置:exportfs -r
检查配置:showmount -e
因为客户端相比较于服务器是别的人,不是root用户,所以在客户端需要将该目录文件权限设置为757,这样客户端才可以正常使用该目录:chmod 757 目录
客户端:
将网络内存挂载在本地目录上即可正常使用
演示:
在服务器192.168.220.131上的配置
[root@rhce ~]# systemctl restart rpcbind
[root@rhce ~]# systemctl restart nfs-server
[root@rhce ~]# mkdir /nfs/shared #创建对应目录
[root@rhce ~]# vim /etc/exports
在文件中写入内容/nfs/shared *(rw)
写入后退出 :wq
[root@rhce ~]# exportfs -r    #更新rpc登记表
[root@rhce ~]# showmount -e    #查看rpc登记表
Export list for rhce:
/nfs/shared *
[root@rhce ~]# ll /nfs
total 0
drwxr-xr-x 2 root root 6 Apr 22 15:29 shared    #对于这个目录,其他人的权限为读,执行,不能在这个目录里边添加、删除或修改文件,即客户端的所有用户,包括root用户在内都不能添加、删除、修改任何文件,所以需要修改权限以便可以正常使用这块网络共享内存
[root@rhce ~]# chmod 777 /nfs/shared/
在客户端192.168.220.220上的配置
[root@localhost ~]# mount 192.168.220.131:/nfs/shared /shared/
之后就可以正常使用该网络共享内存了
使用演示:
[root@rhce ~]# ll /nfs/shared/
total 0
以上是服务器在使用之前的目录,什么都没有
接下来到客户端给该目录中添加一个file文件
[root@localhost ~]# cd /shared/
[root@localhost shared]# touch file
[root@localhost shared]# ll
total 0
-rw-r--r--. 1 nobody nobody 0 Apr 22 15:41 file
[root@localhost shared]#
接下来再到服务器端看一下
[root@rhce ~]# cd /nfs/shared/
[root@rhce shared]# ll
total 0
-rw-r--r-- 1 nobody nobody 0 Apr 22 15:41 file
注:因为是网络共享内存,所以一旦服务器端down掉,那么所有在该内存中的文件都会消失
接下来顺着说一个自动挂载(按需挂载)autofs
首先安装autofs :yum install autofs -y
接着在进入/etc/auto.master中写将要自动挂载的位置和挂载信息文件
vim /etc/auto.master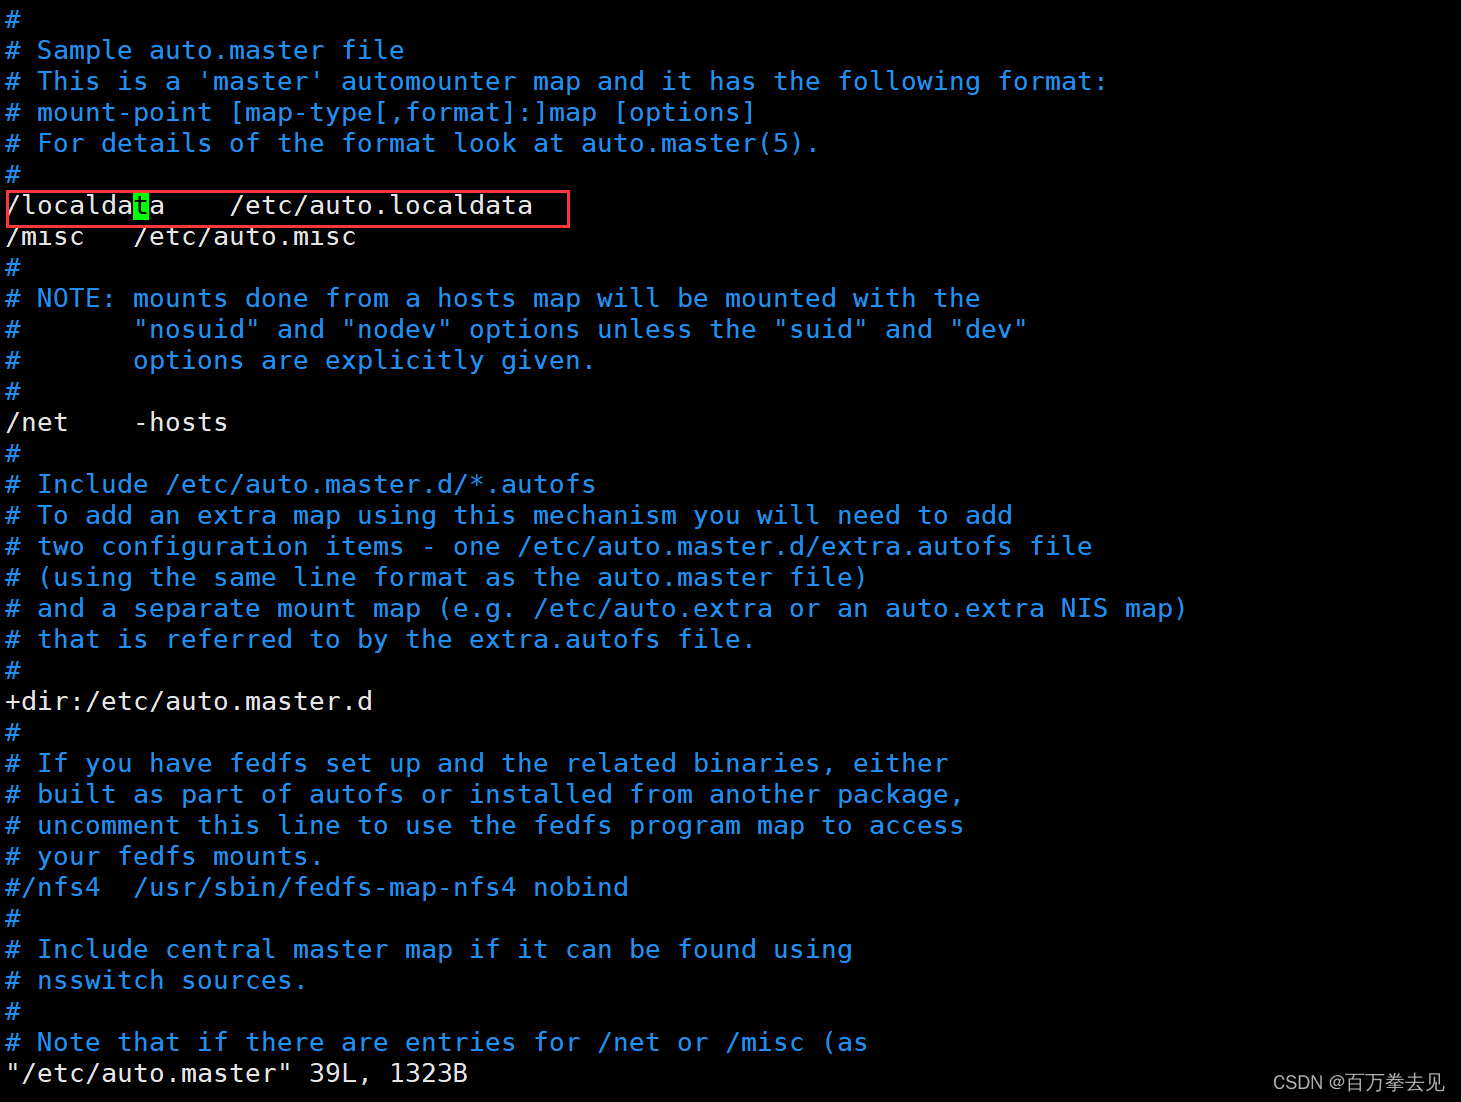
接着去写挂载信息文件:vim /etc/auto.localdata
写完保存并退出
重启autofs服务:systemctl restart autofs
最后进行验证 
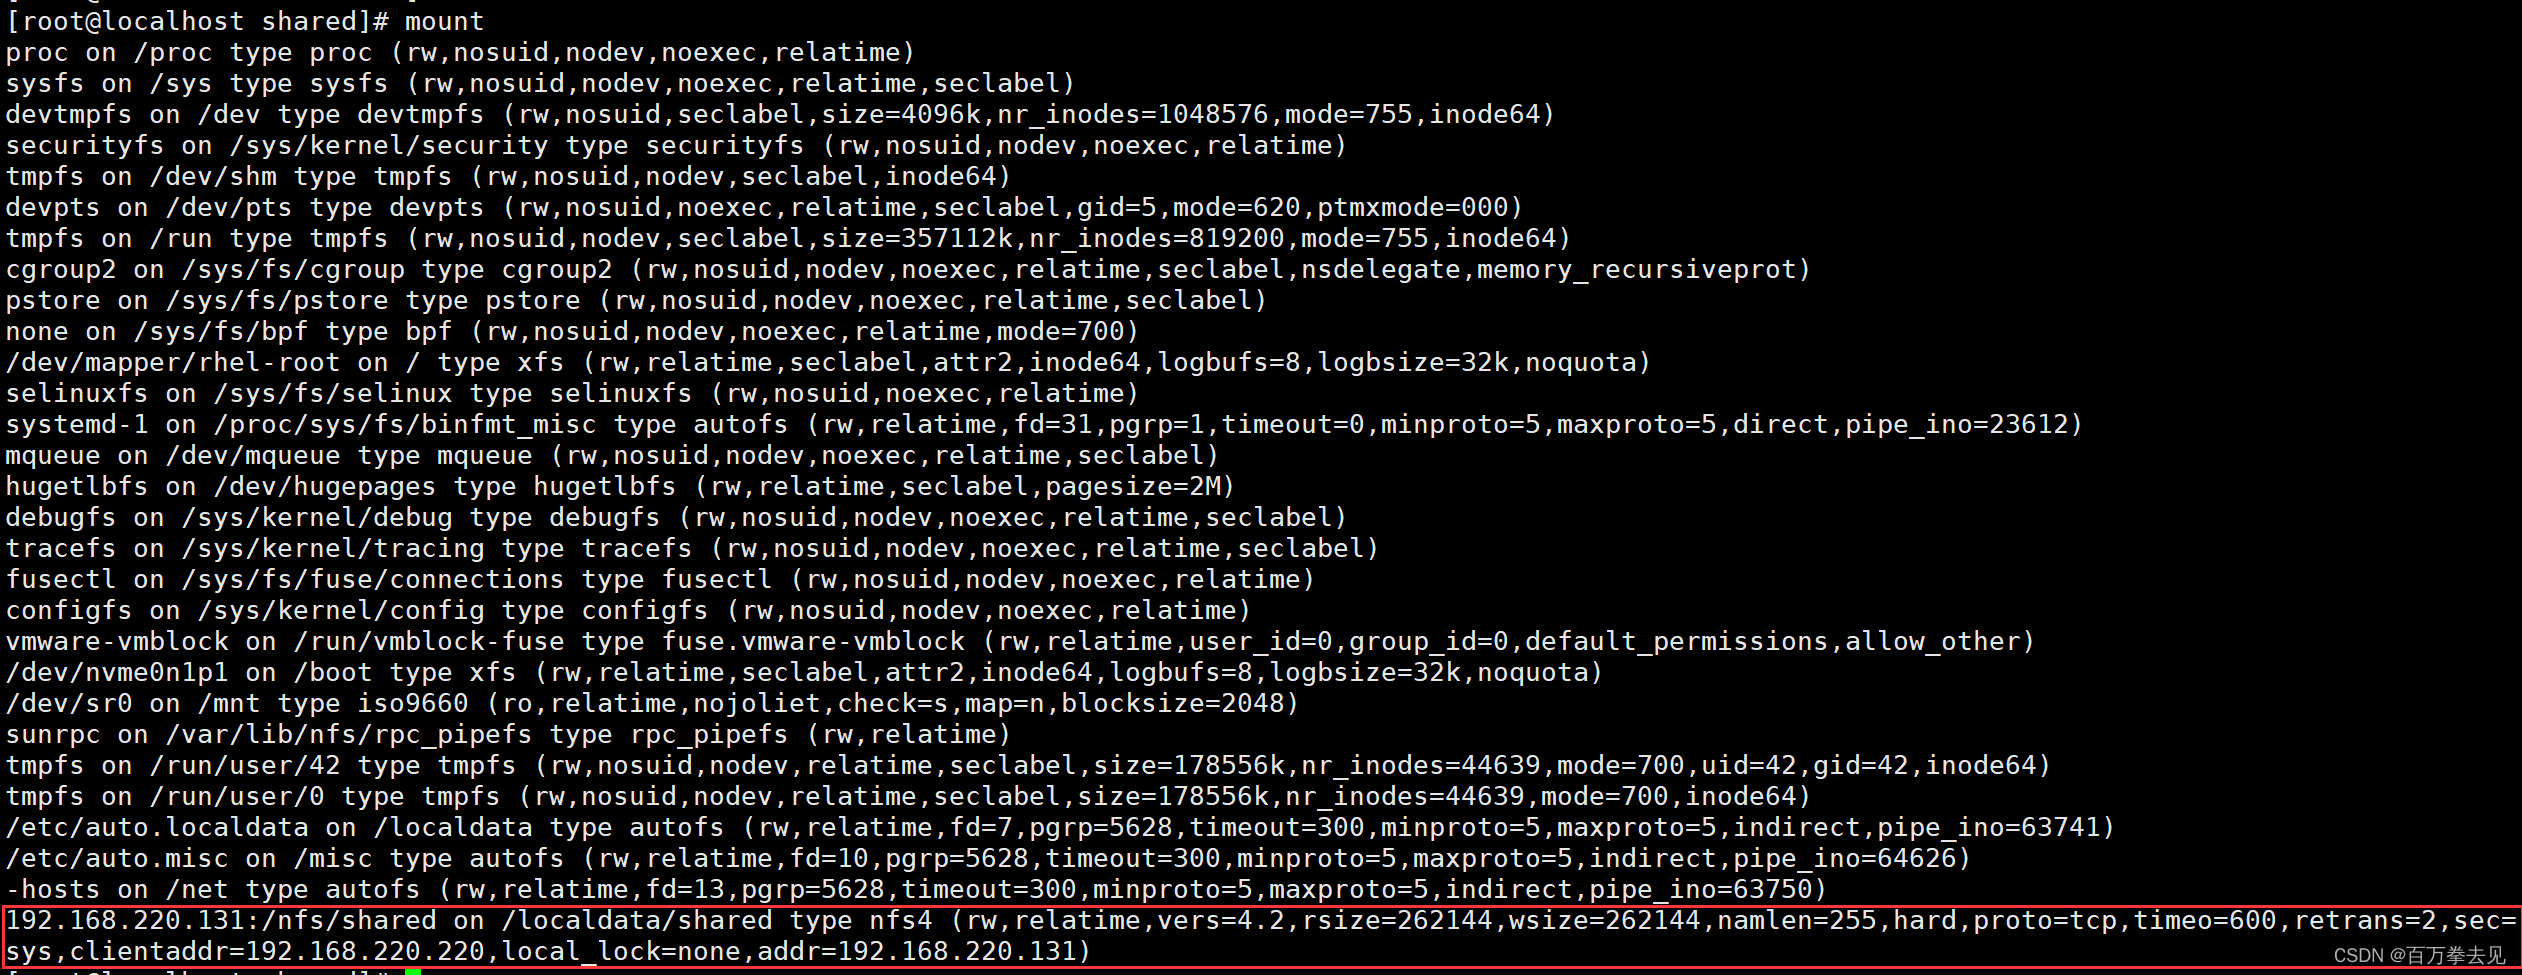
上图是自动挂载前的挂载信息
进入到/localdata中:cd /localdata
上图是自动挂载前localdata目录的内容
接着自动挂载一下,只需要我们进入挂载目录即可 
就会进行自动挂载,下图是自动挂载后的mount信息