好久没有进行过WebService开发了,由于项目需要,重拾WebService,记录一下简单的服务调用方法。
拿到需求,仅半页word,其他的就没有了,为了快速开发,尝试过使用插件逆向生成调用的一大堆类,发现调用不通,又尝试了其他办法,结合资料,终于摸索出了下述办法。
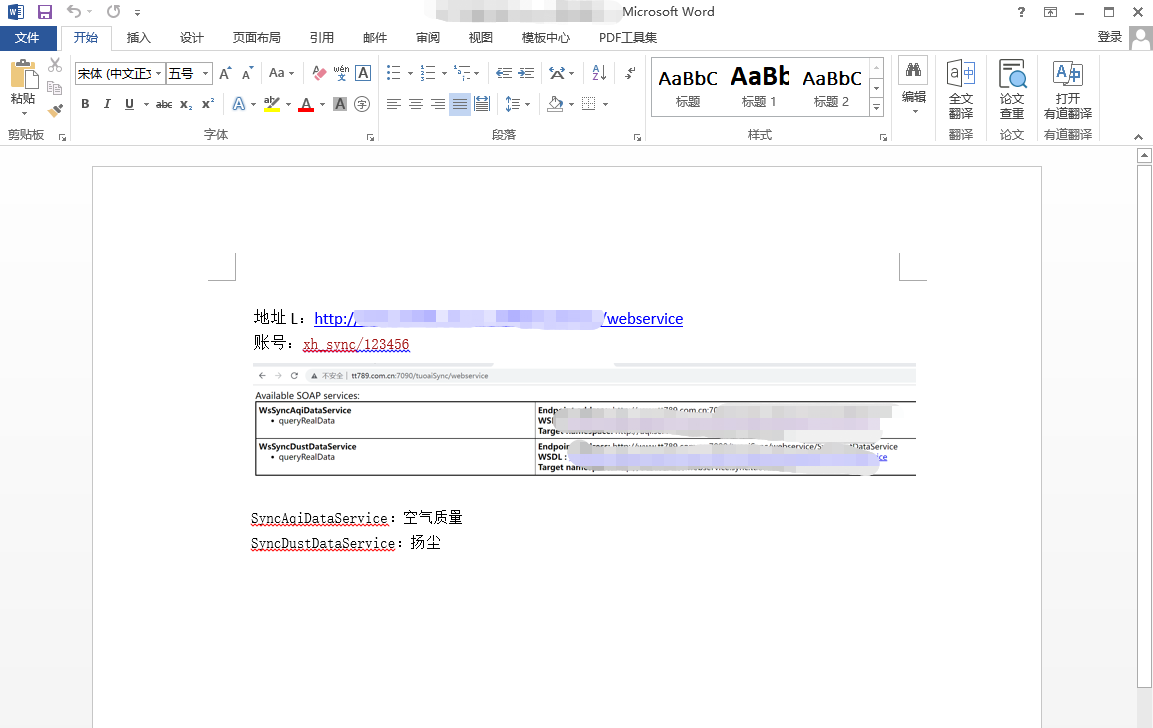
下载WebServiceStudio.exe并安装
打开软件在WSDL EndPoint中输入服务提供者提供的Endpoint address,这个地址就是访问地址,当然也可能是其他形式的,输入后别忘了添加?wsdl,如http://IP:PORT/ServiceName/SyncAqiDataService?wsdl

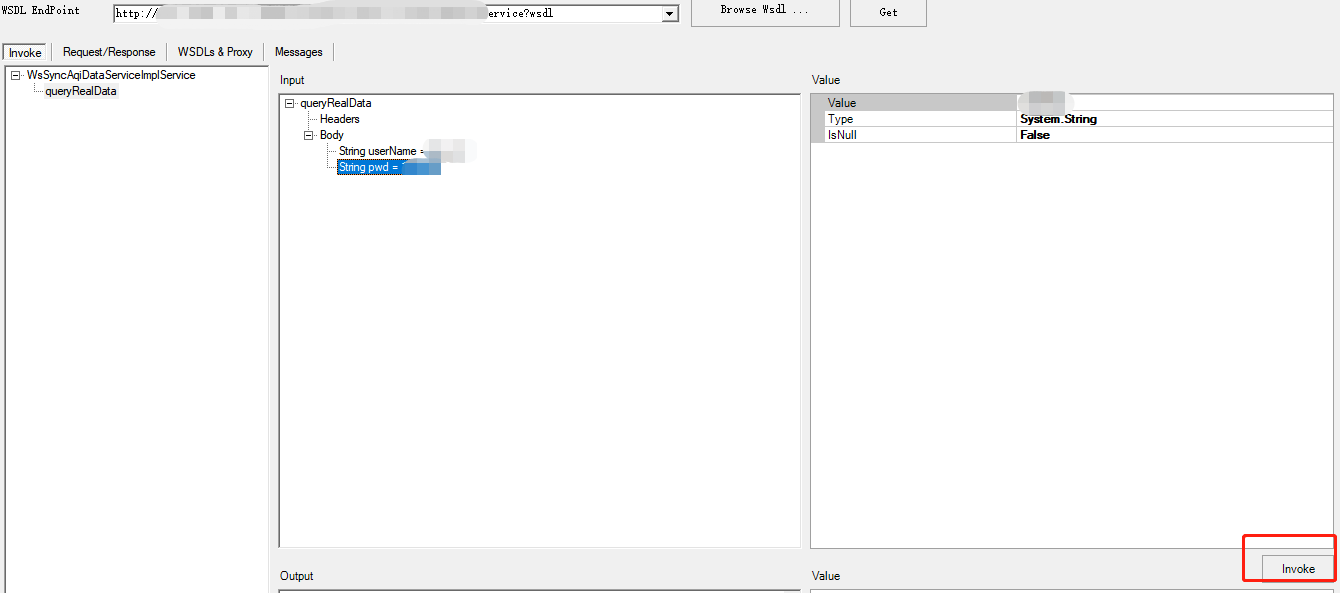
接着点击GET,程序会自动解析请求,如果有账号密码会出现下边这种形式:

输入完后点击下边的Invoke,如下:
等待一下就会出现请求的结果:
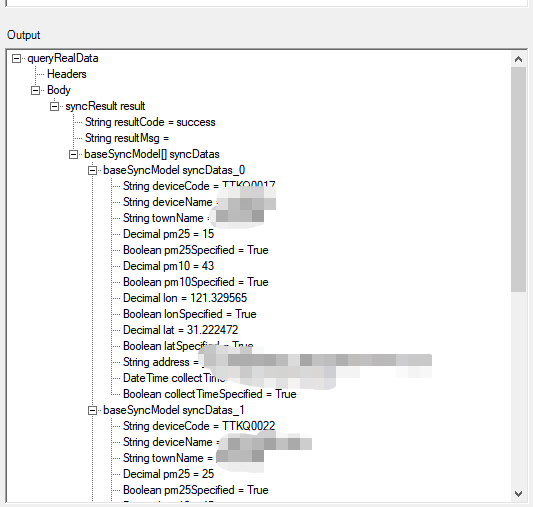
以上说明对服务的请求没有问题,接下来就是编写了。
3.打开左上角的Request/Response标签,就是请求的一些内容,包含字符编码,请求地址、超时时间等,这部分在后续构造请求时会用到,右边是请求体,很容易发现是个xml的格式,为了方便起见,我们可以把这个请求封装成一个请求字符串,内部的参数直接拼接上去,是不是很容易?
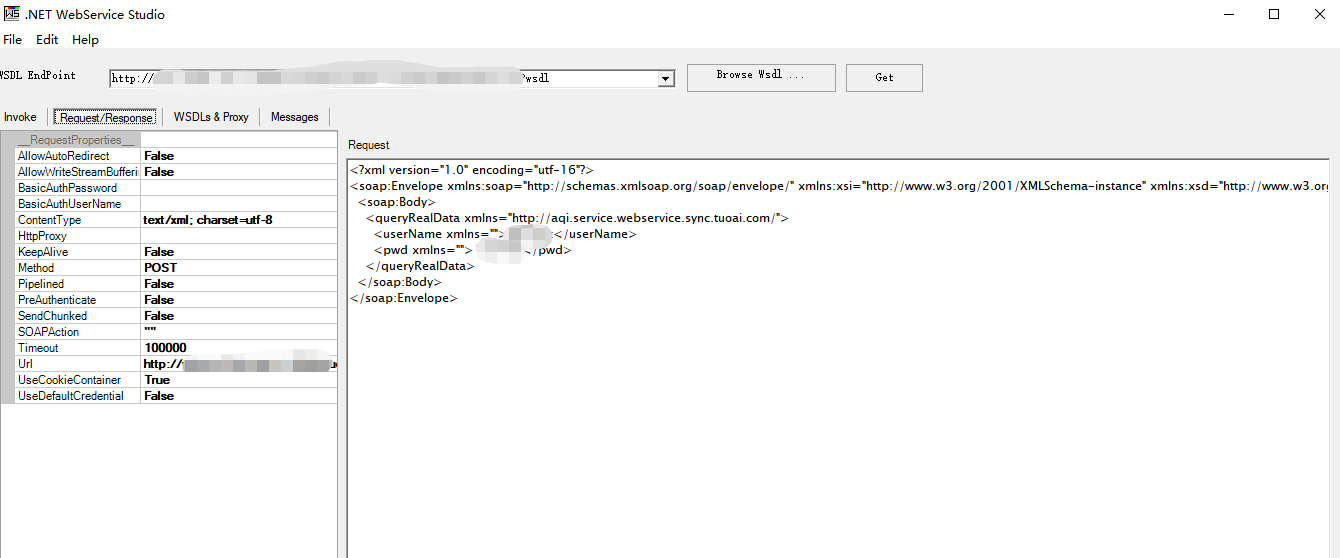
上边的内容熟悉后,下边就是编码部分了,首先创建请求方法,调用类可自行封装,这里只提供方法:
 public static String sendSoapPost(String url, String xml) {
        HttpURLConnection conn = null;
        OutputStream out = null;
        String contentType = "text/xml; charset=utf-8";
        //注意转义
        String soapAction = "\"\"";
        String returnXml = "";
        try {
            conn = (HttpURLConnection) new URL(url).openConnection();
            //WebServiceStudio请求中拿过来
            conn.setRequestProperty("Content-Type", contentType);
            if (null != soapAction) {
                //WebServiceStudio请求中拿过来
                conn.setRequestProperty("SOAPAction", soapAction);
            }
            //WebServiceStudio请求中拿过来
            conn.setRequestMethod("POST");
            //WebServiceStudio请求中拿过来
            conn.setConnectTimeout(100000);
            conn.setDoOutput(true);
            conn.setDoInput(true);
            conn.connect();
            out = conn.getOutputStream();
            out.write(xml.getBytes("UTF-8"));
            out.flush();
            out.close();
            int code = conn.getResponseCode();
            String tempString = null;
            StringBuffer sb = new StringBuffer();
            BufferedReader bufferedReader = null;
            if (code == HTTP_OK) {
                bufferedReader = new BufferedReader(new InputStreamReader(conn.getInputStream(), "UTF-8"));
            } else {
                bufferedReader = new BufferedReader(new InputStreamReader(conn.getErrorStream(), "UTF-8"));
            }
            while ((tempString = bufferedReader.readLine()) != null) {
                sb.append(tempString);
            }
            if (null != bufferedReader) {
                bufferedReader.close();
            }
            returnXml = sb.toString();
            conn.disconnect();
        } catch (Exception e) {
            e.printStackTrace();
        }
        log.info("######################报文解析为字符串:{}",returnXml);
        return returnXml;
    }
接下来创建请求(把它当成一个Pojo对象,里边的参数就是对对象赋值,虽然这样比喻是错的,但是很直观),需要注意标签中的命名空间和目标方法,尽量配置成可变的,增加灵活性:
public class SoapDataParam {
    public static String getXmlParam(String userName,String pwd,String nameSpace,String targetMethod){
        String xml = "<?xml version=\"1.0\" encoding=\"utf-16\"?>\n" +
                "<soap:Envelope xmlns:soap=\"http://schemas.xmlsoap.org/soap/envelope/\" xmlns:xsi=\"http://www.w3.org/2001/XMLSchema-instance\" xmlns:xsd=\"http://www.w3.org/2001/XMLSchema\">\n" +
                "  <soap:Body>\n" +
                "    <"+targetMethod+" xmlns=\""+nameSpace+"\">\n" +
                "      <userName xmlns=\"\">"+userName+"</userName>\n" +
                "      <pwd xmlns=\"\">"+pwd+"</pwd>\n" +
                "    </"+targetMethod+">\n" +
                "  </soap:Body>\n" +
                "</soap:Envelope>";
        return xml;
    }
}
调用sendSoapPost(String url, String xml)方法,xml就是上边的getXmlParam(tring userName,String pwd,String nameSpace,String targetMethod)方法返回的xml字符串,url就是请求的目标地址。
发送请求查看结果:

不难看出,已经请求成功了,当然,对我们需要的数据来说,需要用SOAPEnvelope类和JSONObject类进行解析拿到我们需要的数据:
    public static JSONObject parseXmlStr(String xmlStr) {
        SOAPMessage msgs = formatSoapString(xmlStr);
        SOAPBody body = null;
        try {
            SOAPEnvelope envelope = msgs.getSOAPPart().getEnvelope();
            body = envelope.getBody();
        } catch (SOAPException e) {
            e.printStackTrace();
        }
        Iterator itr = body.getChildElements();
        JSONObject json = new JSONObject();
        json = GetDate(itr, json);
        log.info("######################字符串报文解析为JSONObject:{}",json.toString());
        return json;
    }
以上,就是完整解析报文的简单方法,你学废了吗?😂
