C/C++制作macOS .app
一、 .app
APP其实是一个文件夹结构,只不过mac的界面中让它看起来像一个单独的文件。
在shell终端或者右键查看包结构即可看到APP的目录结构。
通常的app目录结构如下:
_CodeSignature,CodeResources- 一般为Mac APP Store上架程序所包含。里面含有数字签名,以防非法篡改。
Frameworks- 一般放置了此程序所使用的第三方FrameWork。
Info.plist- 包含了一个程序的基本信息,如最低系统版本要求、版本号,copyright。
- 也可能包含程序的类型信息,比如这个文件如果有LSUIElement字段并且值为TRUE,则这个程序启动后不会在Dock上显示图标或图标下有表示此程序正在运行的小亮点。
MacOS文件夹- 包含了此应用程序真正的可执行文件。一个程序可能包含不只一个可执行文件。
Resources- 资源文件,图标,语言包等其他文件,这个没有严格的限制。
参考博客:https://blog.51cto.com/maxma/5708529
二、 实例分析
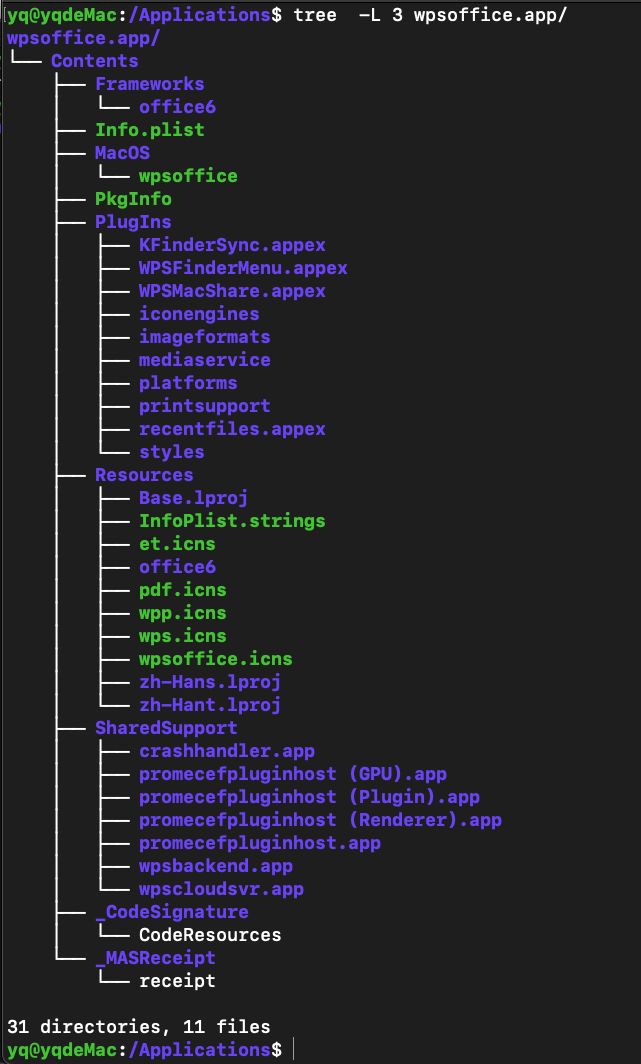
例如WPS,可以观察到,wps中有一个SharedSupport目录,还包含多个.app:
QQ也是,不过.app在别的路径:

ToDesk.app的Info.plist,可以看到里面还包含摄像头、麦克风权限的获取:
<?xml version="1.0" encoding="UTF-8"?>
<!DOCTYPE plist PUBLIC "-//Apple//DTD PLIST 1.0//EN" "http://www.apple.com/DTDs/PropertyList-1.0.dtd">
<plist version="1.0">
<dict>
	<key>Application is agent(UI Element)</key>
	<false/>
	<key>BuildMachineOSBuild</key>
	<string>22A380</string>
	<key>CFBundleDevelopmentRegion</key>
	<string>en</string>
	<key>CFBundleDisplayName</key>
	<string>ToDesk</string>
	<key>CFBundleExecutable</key>
	<string>ToDesk</string>
	<key>CFBundleIconFile</key>
	<string>ToDesk</string>
	<key>CFBundleIconName</key>
	<string>ToDesk</string>
	<key>CFBundleIdentifier</key>
	<string>com.youqu.todesk.mac</string>
	<key>CFBundleInfoDictionaryVersion</key>
	<string>6.0</string>
	<key>CFBundleName</key>
	<string>ToDesk</string>
	<key>CFBundlePackageType</key>
	<string>APPL</string>
	<key>CFBundleShortVersionString</key>
	<string>4.7.2.1</string>
	<key>CFBundleSupportedPlatforms</key>
	<array>
		<string>MacOSX</string>
	</array>
	<key>CFBundleURLTypes</key>
	<array>
		<dict>
			<key>CFBundleTypeRole</key>
			<string>Editor</string>
			<key>CFBundleURLName</key>
			<string>toc</string>
			<key>CFBundleURLSchemes</key>
			<array>
				<string>todesk</string>
			</array>
		</dict>
	</array>
	<key>CFBundleVersion</key>
	<string>921</string>
	<key>DTCompiler</key>
	<string>com.apple.compilers.llvm.clang.1_0</string>
	<key>DTPlatformBuild</key>
	<string>14B47b</string>
	<key>DTPlatformName</key>
	<string>macosx</string>
	<key>DTPlatformVersion</key>
	<string>13.0</string>
	<key>DTSDKBuild</key>
	<string>22A372</string>
	<key>DTSDKName</key>
	<string>macosx13.0</string>
	<key>DTXcode</key>
	<string>1410</string>
	<key>DTXcodeBuild</key>
	<string>14B47b</string>
	<key>ITSAppUsesNonExemptEncryption</key>
	<false/>
	<key>LSApplicationCategoryType</key>
	<string>public.app-category.utilities</string>
	<key>LSMinimumSystemVersion</key>
	<string>10.11</string>
	<key>NSAppTransportSecurity</key>
	<dict>
		<key>NSAllowsArbitraryLoads</key>
		<true/>
	</dict>
	<key>NSCameraUsageDescription</key>
	<string>是否允许访问摄像头?</string>
	<key>NSMainNibFile</key>
	<string>MainMenu</string>
	<key>NSMainStoryboardFile</key>
	<string>MainMenu</string>
	<key>NSMicrophoneUsageDescription</key>
	<string>是否允许访问麦克风?</string>
	<key>NSPrincipalClass</key>
	<string>NSApplication</string>
	<key>NSRequiresAquaSystemAppearance</key>
	<string>true</string>
	<key>SUAllowsAutomaticUpdates</key>
	<false/>
	<key>SUAutomaticallyUpdate</key>
	<false/>
	<key>SUEnableInstallerLauncherService</key>
	<true/>
	<key>SUEnableSystemProfiling</key>
	<true/>
	<key>SUFeedURL</key>
	<string>http://dl.todesk.com/macos/sparkletestcast.xml</string>
	<key>SUPublicEDKey</key>
	<string>pz7QOaRHU3QI0Nq7IElJPP8WFl52KAFfRNz1D+j1McA=</string>
</dict>
</plist>
三、 用cmake 构建 .app
下载demo示例
以构建具有两个可执行程序的.app为例:
1. 目录结构
其中MacOSXBundleInfo.plist.in是cmake安装目录下自带的Info.plist模板(例如通过homebrew安装的路径是/opt/homebrew/share/cmake/Modules/MacOSXBundleInfo.plist.in)
cmake中
.in文件一般是模板文件,在执行cmake时,会用CMakeLists.txt中的变量替换模板中的变量。
yq@yqdeMac:~/desktop/ipc$ ls -l
total 72
-rw-r--r--@ 1 yq  staff   986  4  8 19:10 CMakeLists.txt
-rw-r--r--  1 yq  staff  1214  4  8 15:51 MacOSXBundleInfo.plist.in
-rw-r--r--@ 1 yq  staff    27  4  8 17:56 ReaderWindow.cpp
-rw-r--r--@ 1 yq  staff  1061  4  8 20:09 ReaderWindow.hpp
-rw-r--r--@ 1 yq  staff    27  4  8 17:55 WriterWindow.cpp
-rw-r--r--@ 1 yq  staff  1331  4  8 19:08 WriterWindow.hpp
-rw-r--r--@ 1 yq  staff    48  4  8 18:01 config.hpp
-rw-r--r--@ 1 yq  staff   172  4  8 19:10 reader.cpp
-rw-r--r--@ 1 yq  staff   821  4  8 19:50 writer.cpp
2. CMakeLists.txt:
cmake_minimum_required(VERSION 3.20)
project(TestIPC)

set(CMAKE_AUTOMOC ON)
set(CMAKE_AUTOUIC ON)
set(CMAKE_AUTORCC ON)

set(CMAKE_PREFIX_PATH "/Library/Qt/5.15.4_macos_arm64")
find_package(Qt5 REQUIRED COMPONENTS Widgets)

##### Write端
##添加writer构建目标,同时作为app的主程序
add_executable(${PROJECT_NAME} MACOSX_BUNDLE writer.cpp WriterWindow.cpp)

##填写.app的信息
set(MACOSX_BUNDLE_ICON_FILE MyIcon.icns)
set(MACOSX_BUNDLE_INFO_PLIST ${CMAKE_CURRENT_SOURCE_DIR}/MacOSXBundleInfo.plist.in)
set_target_properties(${PROJECT_NAME} PROPERTIES
    MACOSX_BUNDLE_INFO_PLIST ${MACOSX_BUNDLE_INFO_PLIST}
    MACOSX_BUNDLE_BUNDLE_NAME ${PROJECT_NAME}
    MACOSX_BUNDLE_BUNDLE_VERSION "5.20"
    MACOSX_BUNDLE_SHORT_VERSION_STRING "VersionString"
    MACOSX_BUNDLE_GUI_IDENTIFIER "com.yangqing.Test"
    XCODE_ATTRIBUTE_ENABLE_HARDENED_RUNTIME YES
)
target_link_libraries(${PROJECT_NAME} PRIVATE Qt::Widgets)## 链接Qt

#### Read端
set(EXE2 reader)
add_executable(${EXE2} reader.cpp ReaderWindow.cpp)## 添加reader构建目标
target_link_libraries(${EXE2} PRIVATE Qt::Widgets)## 链接Qt

##修改生成路径
#set_target_properties(${EXE2} PROPERTIES RUNTIME_OUTPUT_DIRECTORY "${PROJECT_NAME}.app/Contents/MacOS")
3. 构建
$ mkdir build && cd build
$ cmake ../
$ cmake --build .
生成了TestIPC以及一个可执行文件reader。
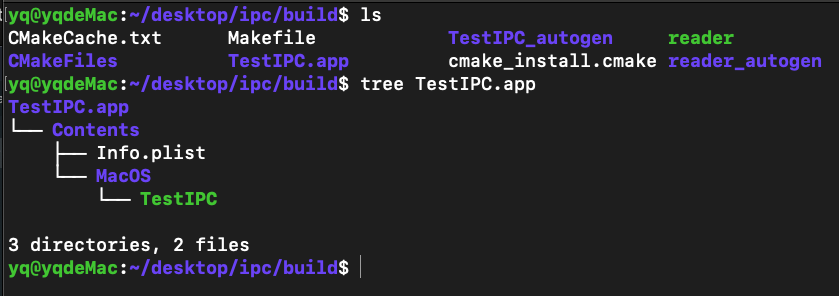
若要将reader也加入到TestIPC,可以额外编写脚本。
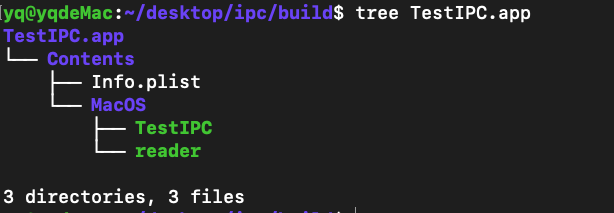
或者,在CMakeLists.txt一并完成:
set_target_properties(${EXE2} PROPERTIES RUNTIME_OUTPUT_DIRECTORY "${PROJECT_NAME}.app/Contents/MacOS")
四、将app制作成dmg
-
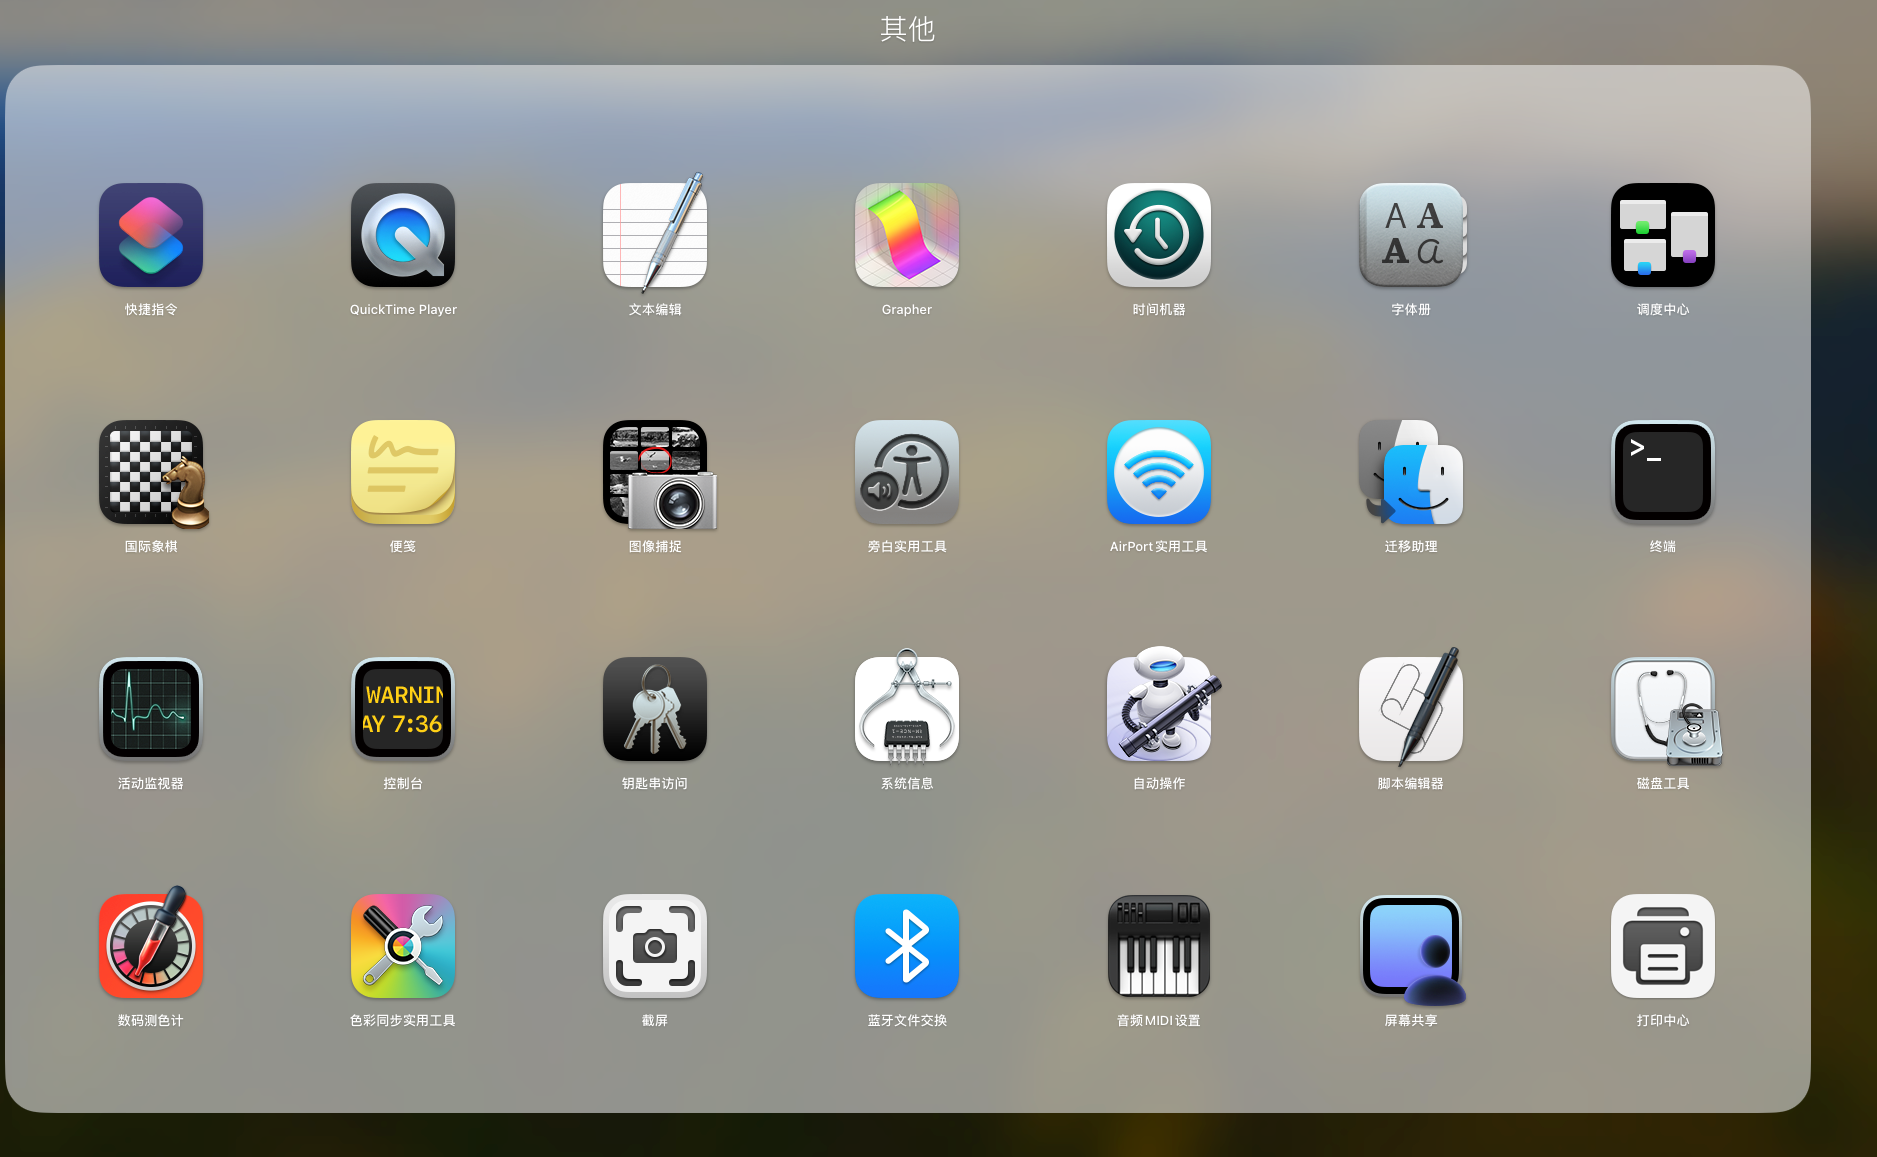
在启动器选择“磁盘工具”;
-
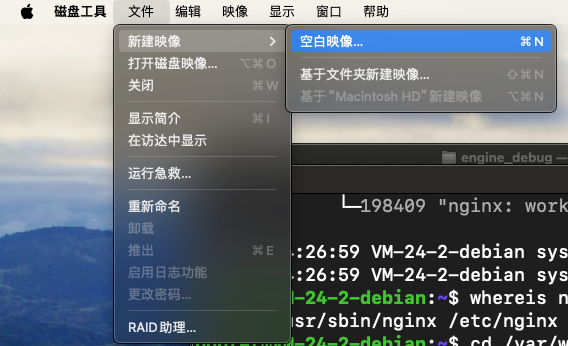
顶部栏选择新建映像–>空白映像
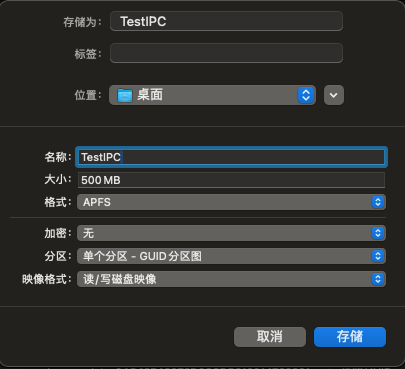
3.命名后点存储
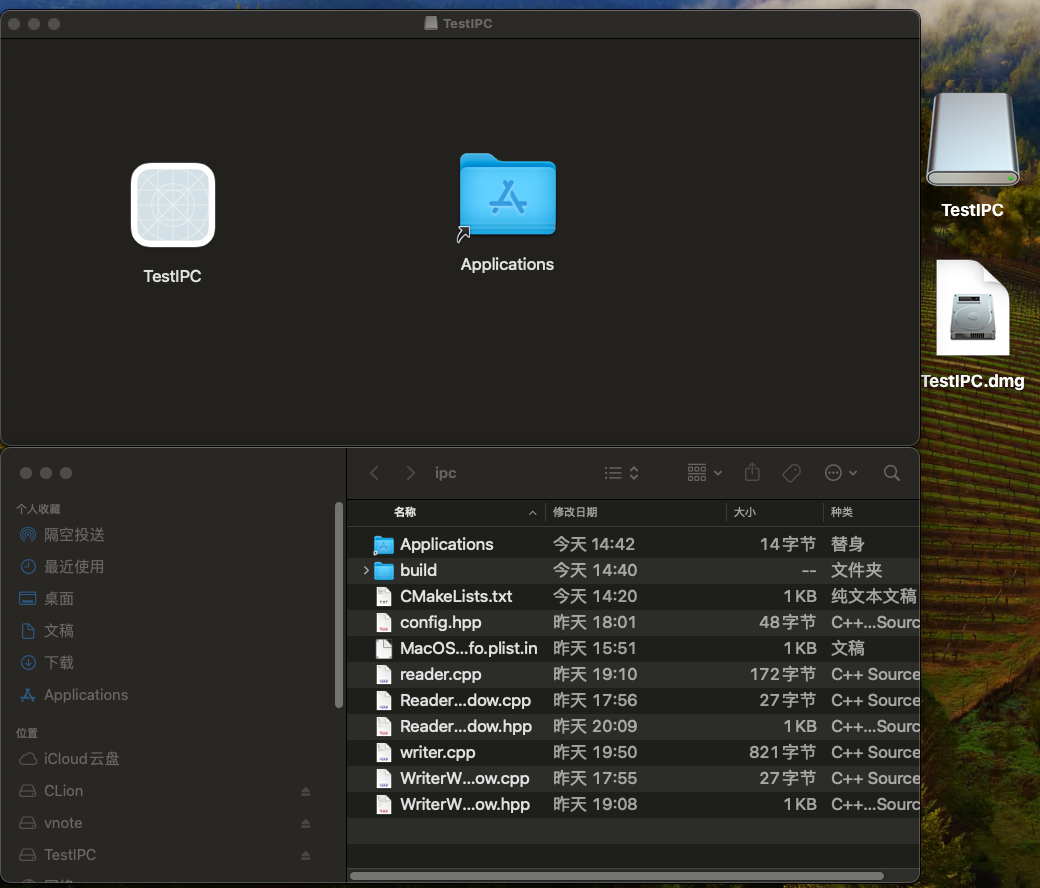
4.右键打开TestIPC,把app拖进去,Applications的软链接也拖进去
-
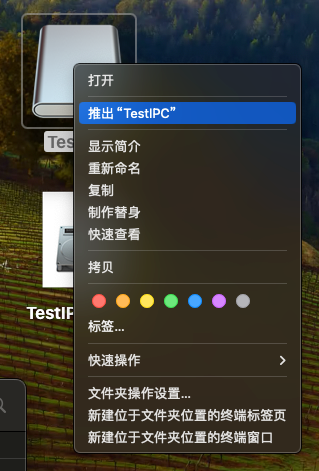
推出
-
在磁盘工具顶部选择"映像"–>“转换”

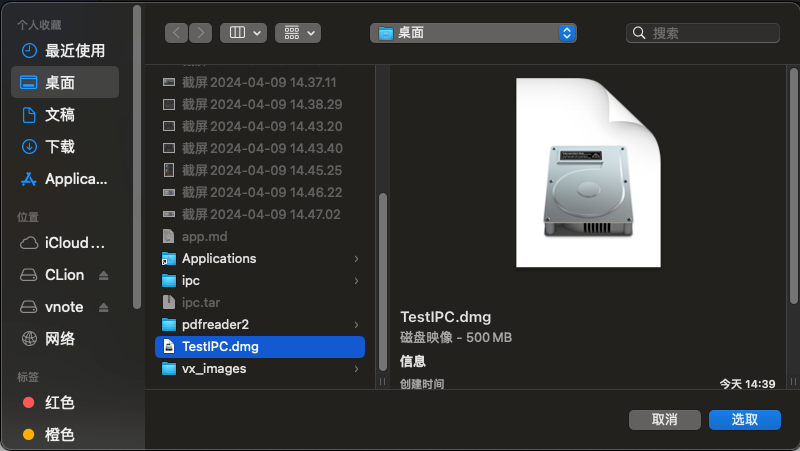
即可得到制作后的dmg,还可以更换背景图片等。

