ArkUI即方舟开发框架是HarmonyOS应用的UI开发提供了完整的基础设施,包括简洁的UI语法、丰富的UI功能(组件、布局、动画以及交互事件),以及实时界面预览工具等,可以支持开发者进行可视化界面开发。
开发文档地址 : 文档中心
基本概念
- UI:即用户界面。开发者可以将应用的用户界面设计为多个功能页面,每个页面进行单独的文件管理,并通过页面路由API完成页面间的调度管理如跳转、回退等操作,以实现应用内的功能解耦。
-
组件:UI构建与显示的最小单位,如列表、网格、按钮、单选框、进度条、文本等。开发者通过多种组件的组合,构建出满足自身应用诉求的完整界面。
两种开发范式
针对不同的应用场景及技术背景,方舟开发框架提供了两种开发范式,分别是基于ArkTS的声明式开发范式(简称“声明式开发范式”)和兼容JS的类Web开发范式(简称“类Web开发范式”)。
- 声明式开发范式:采用基于TypeScript声明式UI语法扩展而来的ArkTS语言,从组件、动画和状态管理三个维度提供UI绘制能力。
- 类Web开发范式:采用经典的HML、CSS、JavaScript三段式开发方式,即使用HML标签文件搭建布局、使用CSS文件描述样式、使用JavaScript文件处理逻辑。该范式更符合于Web前端开发者的使用习惯,便于快速将已有的Web应用改造成方舟开发框架应用。
在开发一款新应用时,推荐采用声明式开发范式来构建UI,主要基于以下几点考虑:
- 开发效率:声明式开发范式更接近自然语义的编程方式,开发者可以直观地描述UI,无需关心如何实现UI绘制和渲染,开发高效简洁。
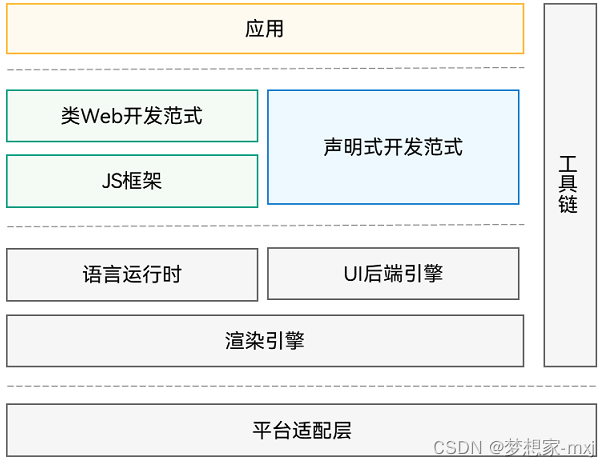
- 应用性能:如下图所示,两种开发范式的UI后端引擎和语言运行时是共用的,但是相比类Web开发范式,声明式开发范式无需JS框架进行页面DOM管理,渲染更新链路更为精简,占用内存更少,应用性能更佳。
- 发展趋势:声明式开发范式后续会作为主推的开发范式持续演进,为开发者提供更丰富、更强大的能力。
方舟开发框架示意图:
常用的UI组件
1、Image组件
声明Image组件并设置图片源
Image(src:string|PixelMap|Resource
① string格式,通常用来加载网络图片,需要申请网络访问权限:ohos.permission.INTERNET
Image('https://xxxxx.png')
② PixelMap格式,以加载像素图,常用在图片编辑中
Image(pixelMapObject)
③ Resource格式,加载本地图片
Image($r('app.media.icon'))
Image($rowfile('icon.png'))
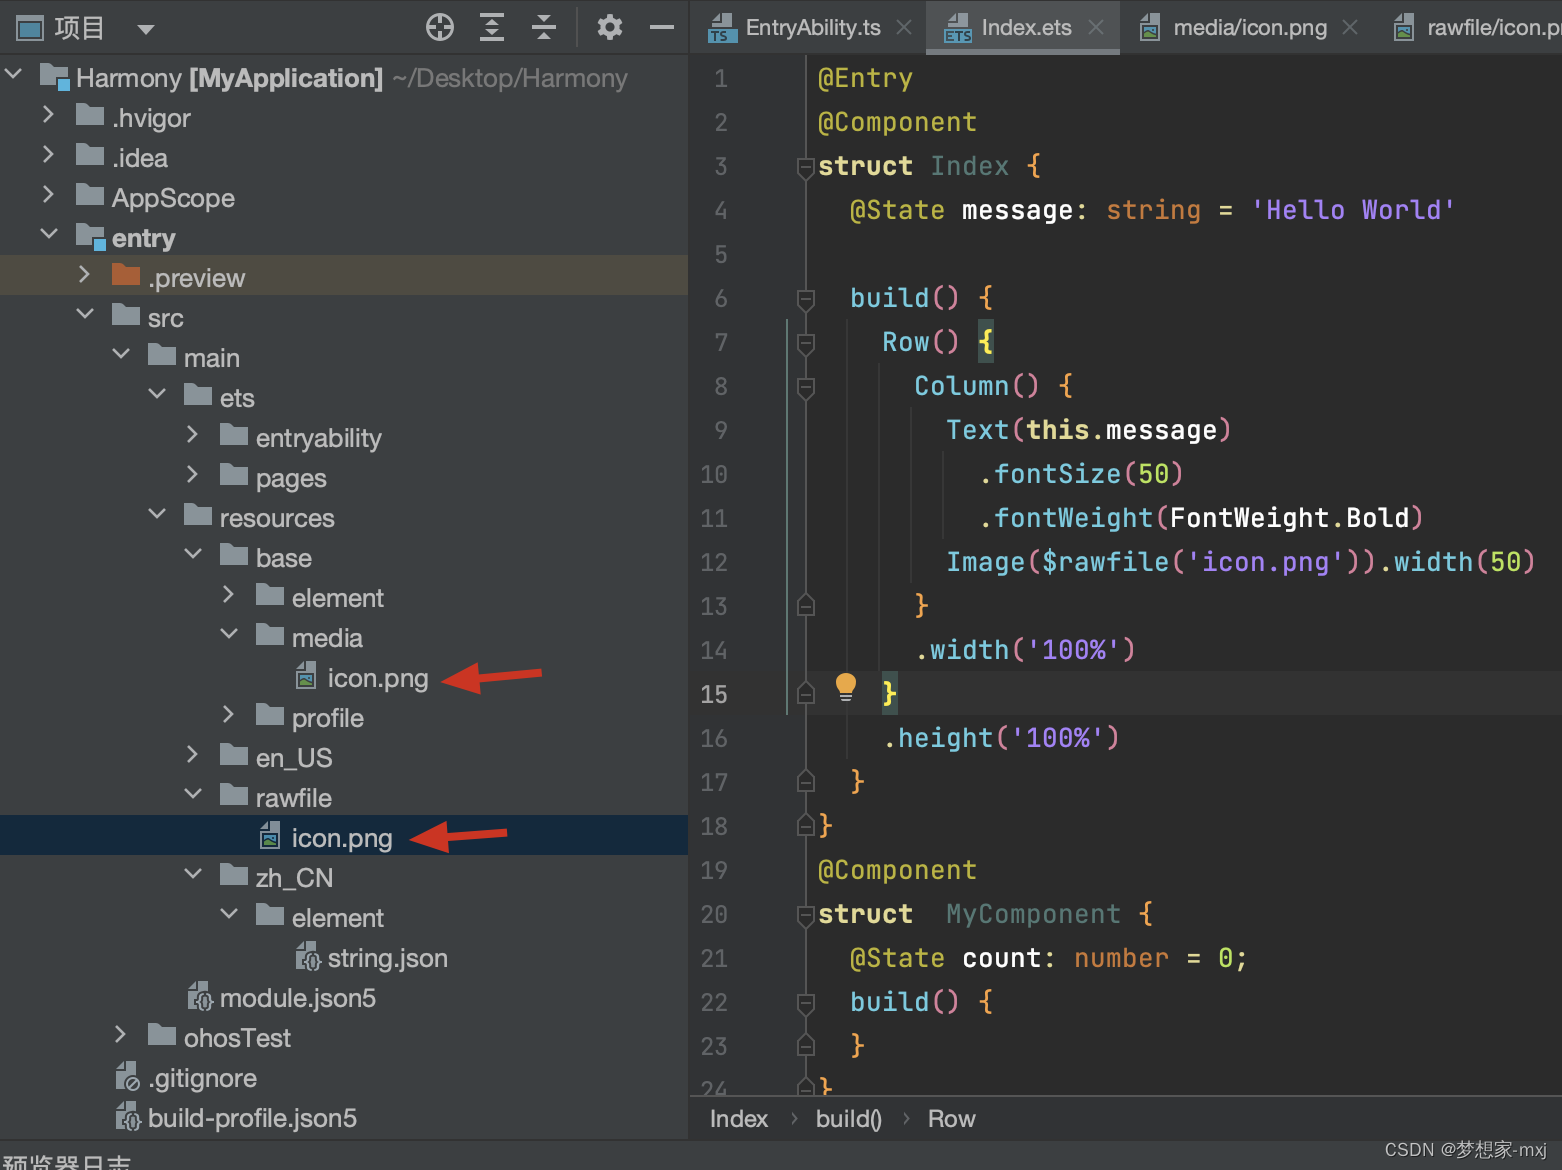
使用$rowfile 得到的icon图片放在了rawfile里面
使用$r 得到的图片在media文件夹下
图片属性: width() 高度 ,height()宽度 , borderRadius() 边框圆角 , interpolation()图片插值(弥补像素锯齿)
 Image($rawfile('car.png'))
          .backgroundColor('#fff000')
          .width(200) //宽度
          .borderRadius(50) //圆角
Image('http://t14.baidu.com/it/u=3542627100,2757422516&fm=224&app=112&f=JPEG?w=363&h=500')
          .height(300)
效果图 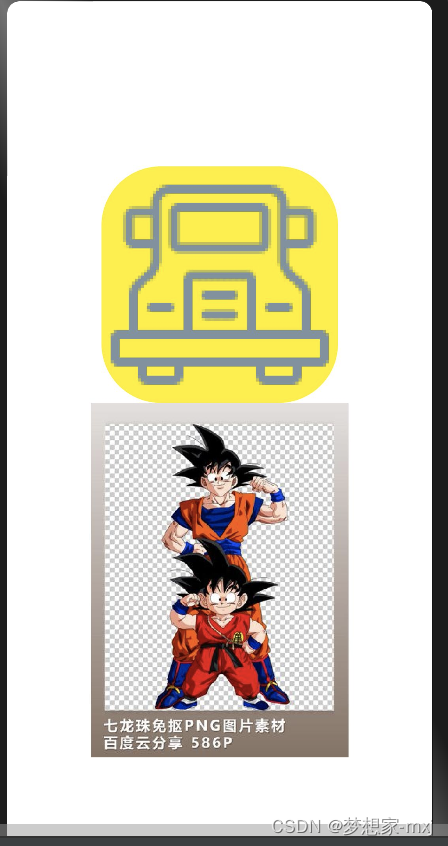
这是在预览器上显示的,网络图片如果要显示在模拟器或者真机上,需要申请网络权限
官网地址 文档中心
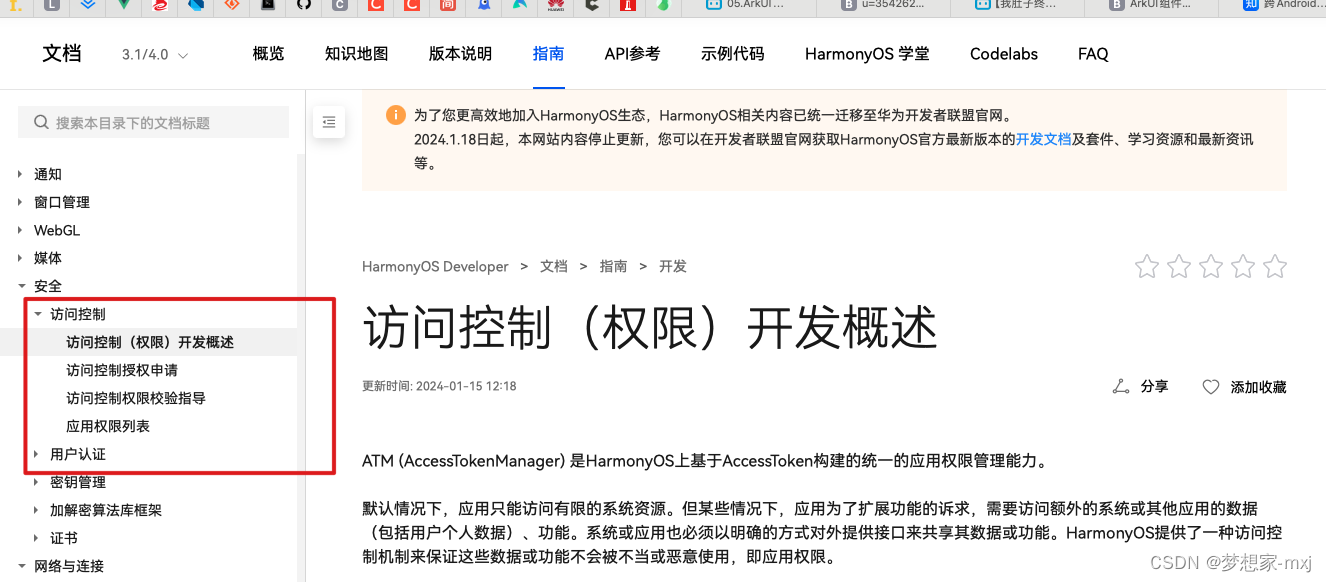
在工程目录中找到如果所示的module.json5文件添加网络权限

这样我们就可以在模拟器和真机上显示网络图片了。
2、文本组件 Text/Span
Text是文本组件,通常用于展示用户的视图,如显示文章的文字。
声明Text组件并设置文本内容
Text(content?:string|Resource)
①string格式,直接填写文本内容 Text("文本content")
②Resource格式,读取本地资源文件
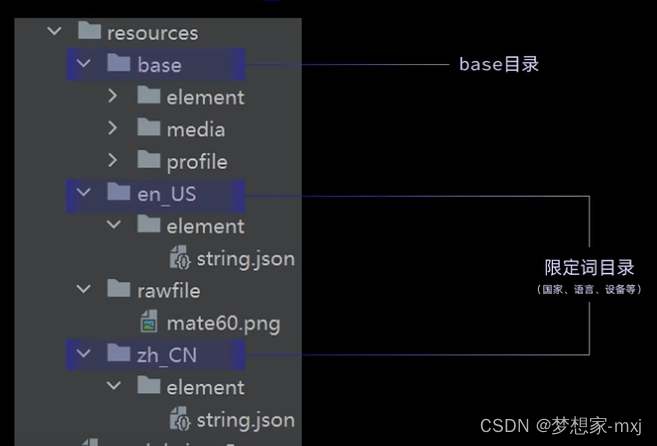
Text($r('app.string.tab_Home')) //读取tab的首页文本,对应中英文,实现国际化
文本属性
lineHeight()行高 fontSize()字体大小 fontColor()字体颜色 fontWeight()字体粗细 padding()内间距,margin()外边距
Text($r('app.string.module_desc'))
  .baselineOffset(0)
  .fontSize(30)
  .border({ width: 1 })
  .padding(10)
  .width(300)
  .margin(20)
添加子组件
Span只能作为Text组件的子组件显示文本内容。可以在一个Text内添加多个Span来显示一段信息,例如产品说明书、承诺书等。
Span组件需要写到Text组件内,单独写Span组件不会显示信息,Text与Span同时配置文本内容时,Span内容覆盖Text内容。
创建Span
Text('我是Text') {
          Span('我是Span')
        }
        .padding(10)
        .borderWidth(1)
        .margin(30)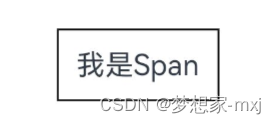
设置文本装饰线及颜色 , 通过decoration设置文本装饰线及颜色。
Text() {
          Span('我是Span1,').fontSize(16).fontColor(Color.Grey)
            .decoration({ type: TextDecorationType.LineThrough, color: Color.Red })
          Span('我是Span2').fontColor(Color.Blue).fontSize(16)
            .fontStyle(FontStyle.Italic)
            .decoration({ type: TextDecorationType.Underline, color: Color.Black })
          Span(',我是Span3').fontSize(16).fontColor(Color.Grey)
            .decoration({ type: TextDecorationType.Overline, color: Color.Green })
        }
        .borderWidth(1)
        .padding(10)
        .margin(30)
通过TextCase设置文字一直保持大写或者小写状态
Text() {
  Span('I am Upper-span').fontSize(12)
    .textCase(TextCase.UpperCase)
}
这样文本的字体都是大写的

添加事件
由于Span组件无尺寸信息,事件仅支持点击事件onClick。
Text() {
          Span('I am Upper-span').fontSize(12)
            .textCase(TextCase.UpperCase)
            .onClick(()=>{
              console.info('Span点击了!!!')
            })
        }.margin(40)
这样点击span会有点击事件的响应
自定义组件
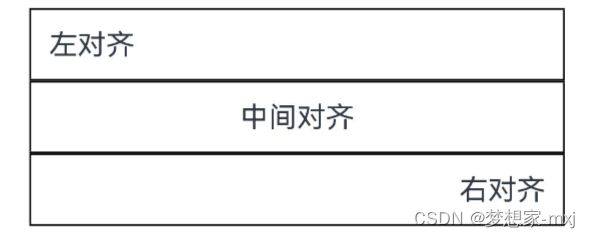
①通过textAlign属性设置文本对齐样式
Text('左对齐')
  .width(300)
  .textAlign(TextAlign.Start)
  .border({ width: 1 })
  .padding(10)
Text('中间对齐')
  .width(300)
  .textAlign(TextAlign.Center)
  .border({ width: 1 })
  .padding(10)
Text('右对齐')
  .width(300)
  .textAlign(TextAlign.End)
  .border({ width: 1 })
  .padding(10)
TextAlign是枚举,有Start、Center、End
②通过textOverflow属性控制文本超长处理
textOverflow需配合maxLines一起使用(默认情况下文本自动折行)。
    Text('This is the setting of textOverflow to Clip text content This is the setting of textOverflow to None text content. This is the setting of textOverflow to Clip text content This is the setting of textOverflow to None text content.')
          .width(250)
          .textOverflow({ overflow: TextOverflow.None })
          .maxLines(1)
          .fontSize(12)
          .border({ width: 1 }).padding(10)
    Text('我是超长文本,超出的部分显示省略号。I am an extra long text, with ellipses displayed for any excess。')
          .width(250)
          .textOverflow({ overflow: TextOverflow.Ellipsis })
          .maxLines(1)
          .fontSize(12)
          .border({ width: 1 }).padding(10)
TextOverflow是枚举,有Clip裁切 Ellipsis省略号 None不裁切
如果去掉maxLines文本会自动折行
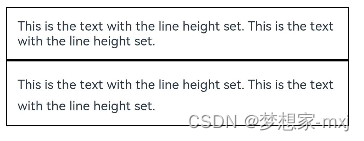
③通过lineHeight属性设置文本行高
Text('This is the text with the line height set. This is the text with the line height set.')
  .width(300).fontSize(12).border({ width: 1 }).padding(10)
Text('This is the text with the line height set. This is the text with the line height set.')
  .width(300).fontSize(12).border({ width: 1 }).padding(10)
  .lineHeight(20)
④通过decoration属性设置文本装饰线样式及其颜色
Text('This is the text')
  .decoration({
    type: TextDecorationType.LineThrough,
    color: Color.Red
  })
  .borderWidth(1).padding(10).margin(5)
Text('This is the text')
  .decoration({
    type: TextDecorationType.Overline,
    color: Color.Red
  })
  .borderWidth(1).padding(10).margin(5)
Text('This is the text')
  .decoration({
    type: TextDecorationType.Underline,
    color: Color.Red
  })
  .borderWidth(1).padding(10).margin(5)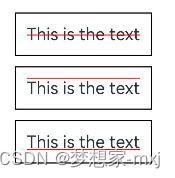
⑤通过baselineOffset属性设置文本基线的偏移量
Text('This is the text content with baselineOffset 0.')
  .baselineOffset(0)
  .fontSize(12)
  .border({ width: 1 })
  .padding(10)
  .width('100%')
  .margin(5)
Text('This is the text content with baselineOffset 30.')
  .baselineOffset(30)
  .fontSize(12)
  .border({ width: 1 })
  .padding(10)
  .width('100%')
  .margin(5)

Text('This is the text content with baselineOffset -20.')
  .baselineOffset(-20)
  .fontSize(12)
  .border({ width: 1 })
  .padding(10)
  .width('100%')
  .margin(5)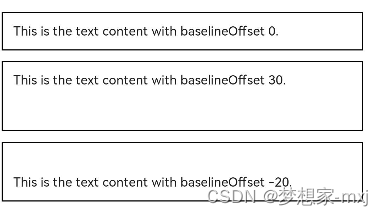
⑥通过letterSpacing属性设置文本字符间距
Text('This is the text content with letterSpacing 0.')
  .letterSpacing(0)
  .fontSize(12)
  .border({ width: 1 })
  .padding(10)
  .width('100%')
  .margin(5)
Text('This is the text content with letterSpacing 3.')
  .letterSpacing(3)
  .fontSize(12)
  .border({ width: 1 })
  .padding(10)
  .width('100%')
  .margin(5)
Text('This is the text content with letterSpacing -1.')
  .letterSpacing(-1)
  .fontSize(12)
  .border({ width: 1 })
  .padding(10)
  .width('100%')
  .margin(5)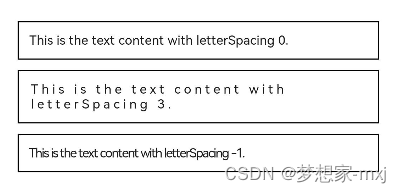
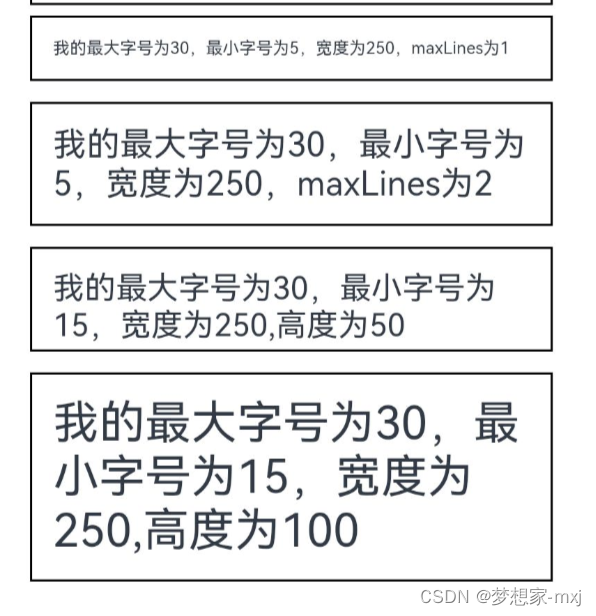
⑦通过minFontSize与maxFontSize自适应字体大小
Text('我的最大字号为30,最小字号为5,宽度为250,maxLines为1')
  .width(250)
  .maxLines(1)
  .maxFontSize(30)
  .minFontSize(5)
  .border({ width: 1 })
  .padding(10)
  .margin(5)
Text('我的最大字号为30,最小字号为5,宽度为250,maxLines为2')
  .width(250)
  .maxLines(2)
  .maxFontSize(30)
  .minFontSize(5)
  .border({ width: 1 })
  .padding(10)
  .margin(5)
Text('我的最大字号为30,最小字号为15,宽度为250,高度为50')
  .width(250)
  .height(50)
  .maxFontSize(30)
  .minFontSize(15)
  .border({ width: 1 })
  .padding(10)
  .margin(5)
Text('我的最大字号为30,最小字号为15,宽度为250,高度为100')
  .width(250)
  .height(100)
  .maxFontSize(30)
  .minFontSize(15)
  .border({ width: 1 })
  .padding(10)
  .margin(5)
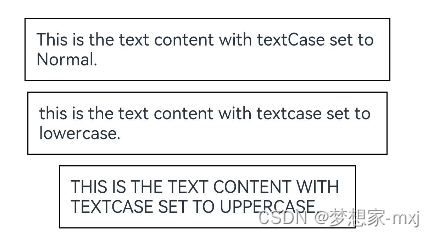
⑧通过textCase属性设置文本大小写
Text('This is the text content with textCase set to Normal.')
  .textCase(TextCase.Normal)
  .padding(10)
  .border({ width: 1 })
  .padding(10)
  .margin(5)

// 文本全小写展示
Text('This is the text content with textCase set to LowerCase.')
  .textCase(TextCase.LowerCase)
  .border({ width: 1 })
  .padding(10)
  .margin(5)

// 文本全大写展示
Text('This is the text content with textCase set to UpperCase.')
  .textCase(TextCase.UpperCase)
  .border({ width: 1 })
  .padding(10)
  .margin(5)
⑨通过copyOption属性设置文本是否可复制粘贴
Text("这是一段可复制文本")
  .fontSize(30)
  .copyOption(CopyOptions.InApp)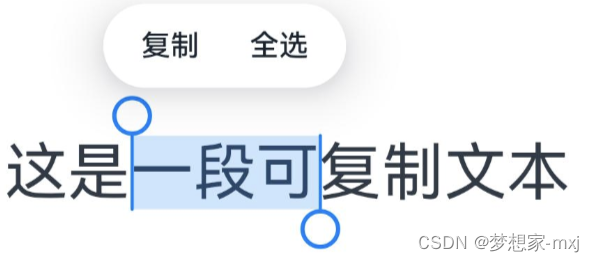
CopyOptions是枚举有none不允许拷贝,InApp只允许在app内 ,LocationDevice 本地设备
添加事件
Text组件可以添加通用事件,可以绑定onClick、onTouch等事件来响应操作。
 Text("这个文本可点击")
          .fontSize(30)
          .onClick(()=>{
            console.log("点击的这个文本")
          })

