NBlog部署维护流程记录(持续更新):https://blog.csdn.net/qq_43349112/article/details/136129806
由于项目是fork的,所以我本身并不清楚哪里使用了图床,因此下面就是我熟悉项目期间边做边调整的。
目前已经调整的功能点:
- QQ头像存储
- 后端管理-图床管理
!更改配置和写代码的时候,注意不要把敏感信息上传到git仓库!
不小心上传了配置文件,又搞了好久。。。
如果已经上传了,可以参考这个博客进行处理:git 删除历史提交中的某个文件,包含所有记录,过滤所有记录_git filter-branch --index-filter "git rm -rf --cac-CSDN博客

1.QQ头像存储
1.1 修改配置
修改配置文件applicaiton-dev.properties
# 评论中QQ头像存储方式: 本地:local GitHub:github 又拍云:upyun 阿里云:aliyun
upload.channel=aliyun

# 阿里云OSS
upload.aliyun.endpoint=oss-cn-shanghai.aliyuncs.com
upload.aliyun.bucket-name=chaobk-img-repo
upload.aliyun.path=cblog-qq
upload.aliyun.access-key-id=LTAI5tMbd4PzFjzLkPMssheu
upload.aliyun.secret-access-key=xxxxxxxxxxxxxxxxxxxxxxxxxx
1.2 新增实体类
新加入实体类,用来存放配置的值:
package com.chaobk.config.properties;

import lombok.Data;
import org.springframework.boot.context.properties.ConfigurationProperties;
import org.springframework.context.annotation.Configuration;

@Data
@Configuration
@ConfigurationProperties(prefix = "upload.aliyun")
public class AliyunProperties {
    private String endpoint;
    private String bucketName;
    private String path;
    private String accessKeyId;
    private String secretAccessKey;
}
1.3 修改bean工厂
修改上传方式bean生成器,即新增的第四个case块:
package com.chaobk.util.upload.channel;

import com.chaobk.constant.UploadConstants;
import com.chaobk.util.common.SpringContextUtils;

/**
 * 文件上传方式
 *
 * @author: Naccl
 * @date: 2022-01-23
 */
public class ChannelFactory {
	/**
	 * 创建文件上传方式
	 *
	 * @param channelName 方式名称
	 * @return 文件上传Channel
	 */
	public static FileUploadChannel getChannel(String channelName) {
		switch (channelName.toLowerCase()) {
			case UploadConstants.LOCAL:
				return SpringContextUtils.getBean(LocalChannel.class);
			case UploadConstants.GITHUB:
				return SpringContextUtils.getBean(GithubChannel.class);
			case UploadConstants.UPYUN:
				return SpringContextUtils.getBean(UpyunChannel.class);
			case UploadConstants.ALIYUN:
				return SpringContextUtils.getBean(AliyunChannel.class);
		}
		throw new RuntimeException("Unsupported value in [application.properties]: [upload.channel]");
	}
}
1.4 新增上传类
添加上传的操作类:
package com.chaobk.util.upload.channel;

import com.aliyun.oss.OSS;
import com.aliyun.oss.OSSClientBuilder;
import com.aliyun.oss.model.PutObjectRequest;
import com.chaobk.config.properties.AliyunProperties;
import com.chaobk.util.upload.UploadUtils;
import org.springframework.context.annotation.Lazy;
import org.springframework.stereotype.Component;

import java.io.ByteArrayInputStream;
import java.util.UUID;

/**
 * 阿里云OSS存储上传
 */
@Lazy
@Component
public class AliyunChannel implements FileUploadChannel {

    private AliyunProperties aliyunProperties;

    private OSS ossClient;

    public AliyunChannel(AliyunProperties aliyunProperties) {
        this.aliyunProperties = aliyunProperties;
        this.ossClient = new OSSClientBuilder().build(aliyunProperties.getEndpoint(), aliyunProperties.getAccessKeyId(), aliyunProperties.getSecretAccessKey());
    }

    @Override
    public String upload(UploadUtils.ImageResource image) throws Exception {
        String uploadName = aliyunProperties.getPath() + "/" + UUID.randomUUID() + "." + image.getType();
        PutObjectRequest putObjectRequest = new PutObjectRequest(aliyunProperties.getBucketName(), uploadName, new ByteArrayInputStream(image.getData()));
        try {
            ossClient.putObject(putObjectRequest);
            return String.format("https://%s.%s/%s", aliyunProperties.getBucketName(), aliyunProperties.getEndpoint(), uploadName);
        } catch (Exception e) {
            throw new RuntimeException("阿里云OSS上传失败");
        } finally {
            putObjectRequest.getInputStream().close();
        }
    }
}
后端处理完成,进行测试
1.5 测试
测试前需要先确保redis中没有要测试账号的缓存数据。
首先在博客页面填写评论:
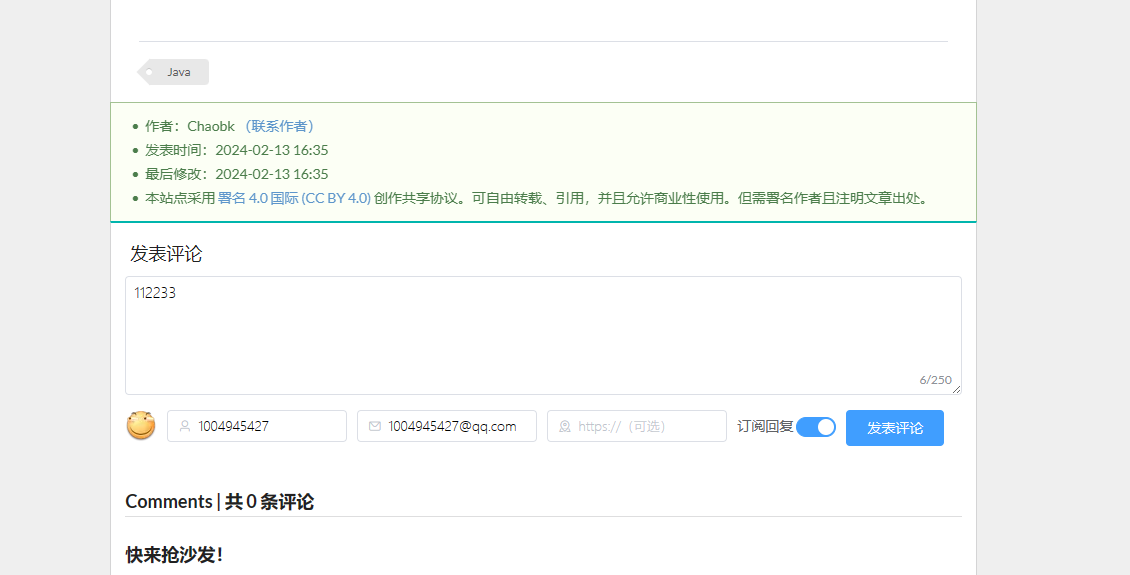
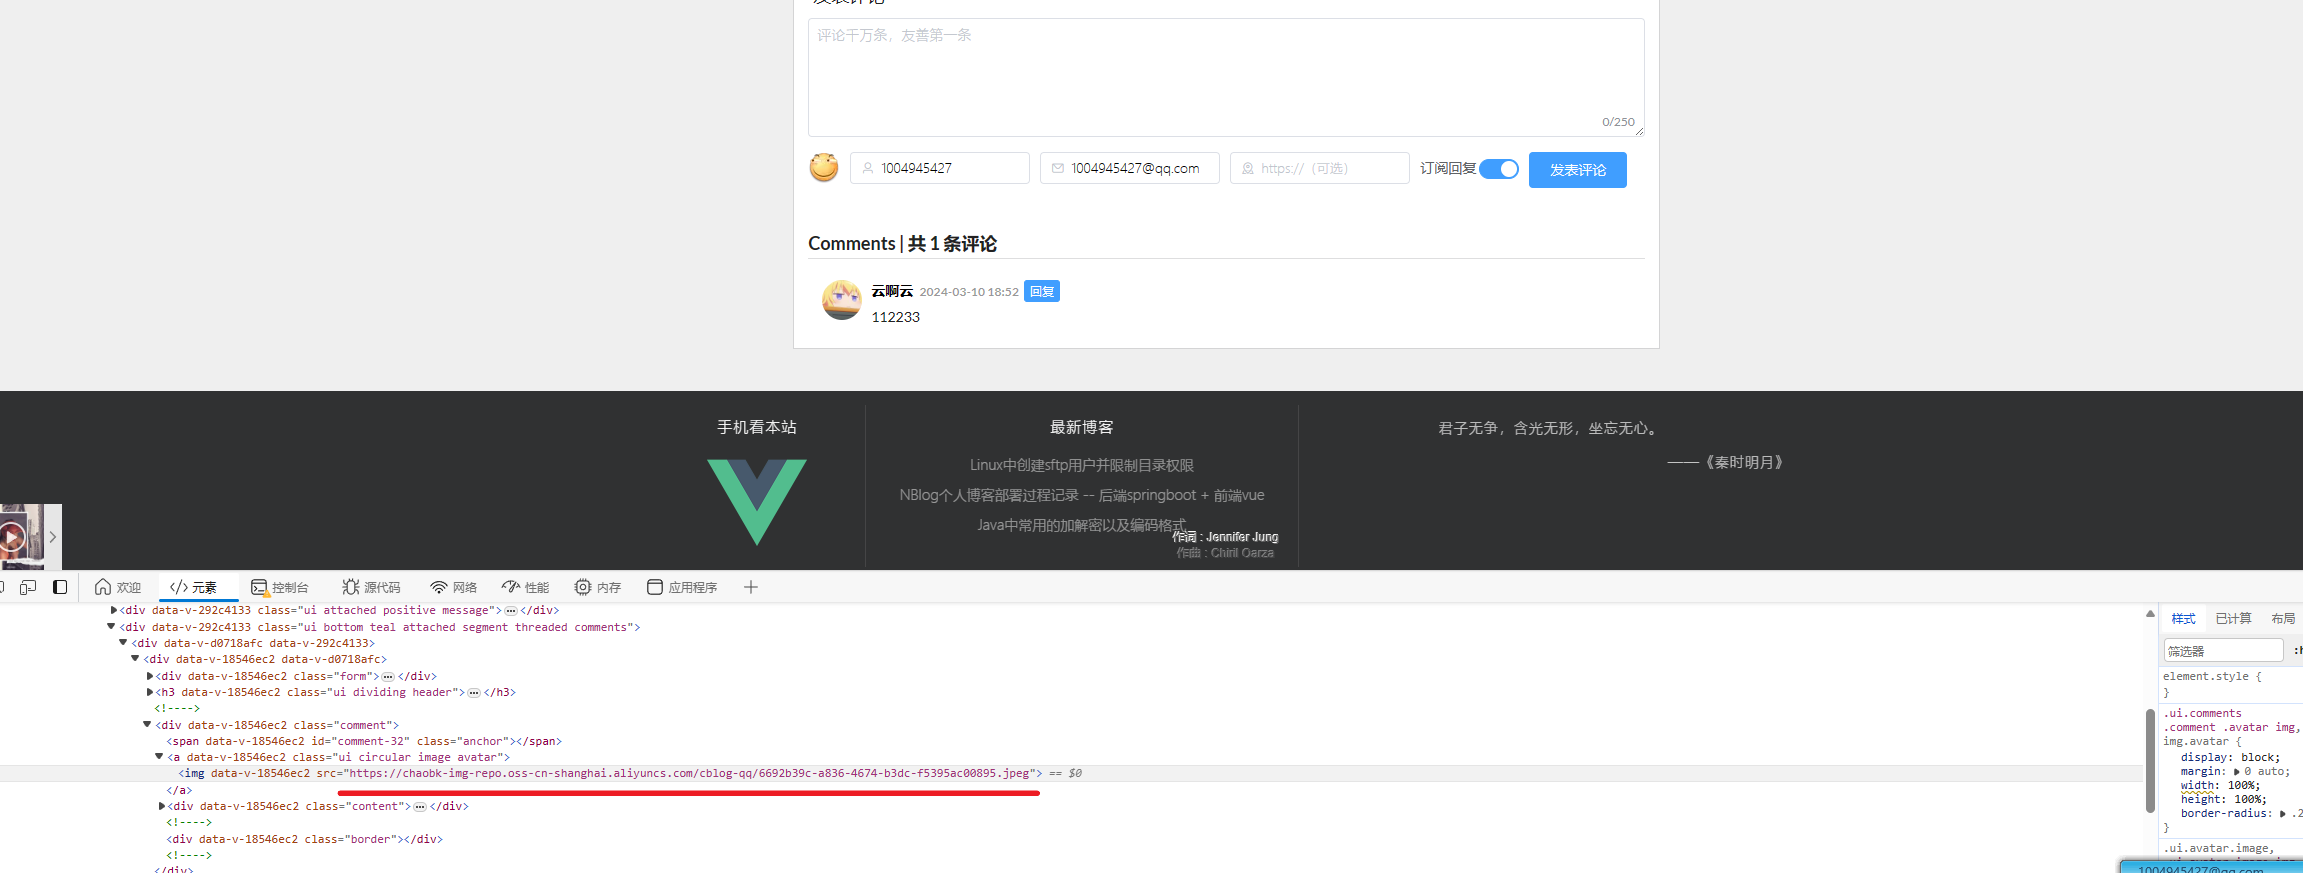
评论成功,路径正确,完成。
2.后端管理-图床管理
纯前端代码。
主要是参考着官方的文档操作:安装和使用OSS Node.js SDK_对象存储(OSS)-阿里云帮助中心 (aliyun.com)
2.1 安装OSS
npm install ali-oss --save
2.2 调整setting.vue
照猫画虎,新增方法、aliyunConfig对象以及各种标签
<template>
  <div>
    <el-alert title="图床配置及用法请查看:https://github.com/Naccl/PictureHosting" type="warning" show-icon
              v-if="hintShow"></el-alert>
    <el-card>
      <div slot="header">
        <span>GitHub配置</span>
      </div>
      <el-row>
        <el-col>
          <el-input placeholder="请输入token进行初始化" v-model="githubToken" :clearable="true"
                    @keyup.native.enter="searchGithubUser" style="min-width: 500px">
            <el-button slot="append" icon="el-icon-search" @click="searchGithubUser">查询</el-button>
          </el-input>
        </el-col>
      </el-row>
      <el-row>
        <el-col>
          <span class="middle">当前用户:</span>
          <el-avatar :size="50" :src="githubUserInfo.avatar_url">User</el-avatar>
          <span class="middle">{{ githubUserInfo.login }}</span>
        </el-col>
      </el-row>
      <el-row>
        <el-col>
          <el-button type="primary" size="medium" icon="el-icon-check" :disabled="!isGithubSave"
                     @click="saveGithub(true)">保存配置
          </el-button>
          <el-button type="info" size="medium" icon="el-icon-close" @click="saveGithub(false)">清除配置</el-button>
        </el-col>
      </el-row>
    </el-card>

    <el-card>
      <div slot="header">
        <span>又拍云存储配置</span>
      </div>
      <el-form :model="upyunConfig" label-width="100px">
        <el-form-item label="操作员名称">
          <el-input v-model="upyunConfig.username"></el-input>
        </el-form-item>
        <el-form-item label="操作员密码">
          <el-input v-model="upyunConfig.password"></el-input>
        </el-form-item>
        <el-form-item label="存储空间名">
          <el-input v-model="upyunConfig.bucketName"></el-input>
        </el-form-item>
        <el-form-item label="CDN访问域名">
          <el-input v-model="upyunConfig.domain"></el-input>
        </el-form-item>
        <el-button type="primary" size="medium" icon="el-icon-check" :disabled="!isUpyunSave" @click="saveUpyun(true)">
          保存配置
        </el-button>
        <el-button type="info" size="medium" icon="el-icon-close" @click="saveUpyun(false)">清除配置</el-button>
      </el-form>
    </el-card>

    <el-card>
      <div slot="header">
        <span>腾讯云存储配置</span>
      </div>
      <el-form :model="txyunConfig" label-width="100px">
        <el-form-item label="secret-id">
          <el-input v-model="txyunConfig.secretId"></el-input>
        </el-form-item>
        <el-form-item label="secret-key">
          <el-input v-model="txyunConfig.secretKey"></el-input>
        </el-form-item>
        <el-form-item label="存储空间名">
          <el-input v-model="txyunConfig.bucketName"></el-input>
        </el-form-item>
        <el-form-item label="地域">
          <el-input v-model="txyunConfig.region"></el-input>
        </el-form-item>
        <el-form-item label="CDN访问域名">
          <el-input v-model="txyunConfig.domain"></el-input>
        </el-form-item>
        <el-button type="primary" size="medium" icon="el-icon-check" :disabled="!isTxyunSave" @click="saveTxyun(true)">
          保存配置
        </el-button>
        <el-button type="info" size="medium" icon="el-icon-close" @click="saveTxyun(false)">清除配置</el-button>
      </el-form>
    </el-card>
    <el-card>
      <div slot="header">
        <span>阿里云存储配置</span>
      </div>
      <el-form :model="aliyunConfig" label-width="100px">
        <el-form-item label="endpoint">
          <el-input v-model="aliyunConfig.endpoint"></el-input>
        </el-form-item>
        <el-form-item label="bucket-name">
          <el-input v-model="aliyunConfig.bucketName"></el-input>
        </el-form-item>
        <el-form-item label="access-key-id">
          <el-input v-model="aliyunConfig.accessKeyId"></el-input>
        </el-form-item>
        <el-form-item label="secret-access-key">
          <el-input v-model="aliyunConfig.secretAccessKey"></el-input>
        </el-form-item>
        <el-button type="primary" size="medium" icon="el-icon-check" :disabled="!isAliyunSave"
                   @click="saveAliyun(true)">保存配置
        </el-button>
        <el-button type="info" size="medium" icon="el-icon-close" @click="saveUpyun(false)">清除配置</el-button>
      </el-form>
    </el-card>
  </div>
</template>

<script>
import {getUserInfo} from "@/api/github";

export default {
  name: "Setting",
  data() {
    return {
      githubToken: '',
      githubUserInfo: {
        login: '未配置'
      },
      isGithubSave: false,
      hintShow: false,
      upyunConfig: {
        username: '',
        password: '',
        bucketName: '',
        domain: ''
      },
      txyunConfig: {
        secretId: '',
        secretKey: '',
        bucketName: '',
        region: '',
        domain: ''
      },
      aliyunConfig: {
        endpoint: '',
        bucketName: '',
        accessKeyId: '',
        secretAccessKey: ''
      }
    }
  },
  computed: {
    isUpyunSave() {
      return this.upyunConfig.username && this.upyunConfig.password && this.upyunConfig.bucketName && this.upyunConfig.domain
    },
    isTxyunSave() {
      return this.txyunConfig.secretId && this.txyunConfig.secretKey && this.txyunConfig.bucketName && this.txyunConfig.region && this.txyunConfig.domain
    },
    isAliyunSave() {
      return this.aliyunConfig.endpoint && this.aliyunConfig.bucketName && this.aliyunConfig.accessKeyId && this.aliyunConfig.secretAccessKey
    }
  },
  created() {
    this.githubToken = localStorage.getItem("githubToken")
    const githubUserInfo = localStorage.getItem('githubUserInfo')
    if (this.githubToken && githubUserInfo) {
      this.githubUserInfo = JSON.parse(githubUserInfo)
      this.isGithubSave = true
    } else {
      this.githubUserInfo = {login: '未配置'}
    }

    const upyunConfig = localStorage.getItem('upyunConfig')
    if (upyunConfig) {
      this.upyunConfig = JSON.parse(upyunConfig)
    }

    const txyunConfig = localStorage.getItem('txyunConfig')
    if (txyunConfig) {
      this.txyunConfig = JSON.parse(txyunConfig)
    }

    const aliyunConfig = localStorage.getItem('aliyunConfig')
    if (aliyunConfig) {
      this.aliyunConfig = JSON.parse(aliyunConfig)
    }


    const userJson = window.localStorage.getItem('user') || '{}'
    const user = JSON.parse(userJson)
    if (userJson !== '{}' && user.role !== 'ROLE_admin') {
      //对于访客模式,增加个提示
      this.hintShow = true
    }
  }
  ,
  methods: {
    // 获取用户信息
    searchGithubUser() {
      getUserInfo(this.githubToken).then(res => {
        this.githubUserInfo = res
        this.isGithubSave = true
      })
    }
    ,
    saveGithub(save) {
      if (save) {
        localStorage.setItem('githubToken', this.githubToken)
        localStorage.setItem('githubUserInfo', JSON.stringify(this.githubUserInfo))
        this.msgSuccess('保存成功')
      } else {
        localStorage.removeItem('githubToken')
        localStorage.removeItem('githubUserInfo')
        this.msgSuccess('清除成功')
      }
    }
    ,
    saveUpyun(save) {
      if (save) {
        localStorage.setItem('upyunToken', btoa(`${this.upyunConfig.username}:${this.upyunConfig.password}`))
        localStorage.setItem('upyunConfig', JSON.stringify(this.upyunConfig))
        this.msgSuccess('保存成功')
      } else {
        localStorage.removeItem('upyunConfig')
        this.msgSuccess('清除成功')
      }
    }
    ,
    saveTxyun(save) {
      if (save) {
        localStorage.setItem('txyunConfig', JSON.stringify(this.txyunConfig))
        this.msgSuccess('保存成功')
      } else {
        localStorage.removeItem('txyunConfig')
        this.msgSuccess('清除成功')
      }
    },
    saveAliyun(save) {
      if (save) {
        localStorage.setItem('aliyunConfig', JSON.stringify(this.aliyunConfig))
        this.msgSuccess('保存成功')
      } else {
        localStorage.removeItem('aliyunConfig')
        this.msgSuccess('清楚成功')
      }
    }
  }
  ,
}
</script>
2.3 index.js新增路由
index.js新增路由
{
	path: 'aliyun',
	name: 'AliyunManage',
	component: () => import('@/views/pictureHosting/AliyunManage.vue'),
	meta: {title: '阿里云', icon: 'el-icon-folder-opened'}
},

2.4 新增AliyunManage.vue
把UpyunManage.vue的拿过来复制修改下即可,整体的页面框架差不多,重写里面的增删查方法:
<template>
  <div>
    <el-row>
      <el-select v-model="aliyunConfig.bucketName" disabled style="min-width: 200px"></el-select>
      <el-cascader v-model="activePath" placeholder="请选择目录" :options="pathArr" :props="pathProps" style="min-width: 450px"></el-cascader>
      <el-button type="primary" size="medium" icon="el-icon-search" @click="search">查询</el-button>
      <el-button class="right-item" type="primary" size="medium" icon="el-icon-upload" @click="isDrawerShow=!isDrawerShow">上传</el-button>
    </el-row>
    <el-alert title="只显示<img>标签支持的 apng,avif,bmp,gif,ico,cur,jpg,jpeg,jfif,pjpeg,pjp,png,svg,tif,tiff,webp 格式的图片,见 https://developer.mozilla.org/zh-CN/docs/Web/HTML/Element/img" type="warning" show-icon close-text="不再提示" v-if="hintShow1" @close="noDisplay(1)"></el-alert>
    <el-alert title="最多显示100个文件" type="warning" show-icon close-text="不再提示" v-if="hintShow2" @close="noDisplay(2)"></el-alert>
    <el-row v-viewer>
      <div class="image-container" v-for="(file,index) in fileList" :key="index">
        <el-image :src="file.url" fit="scale-down"></el-image>
        <div class="image-content">
          <div class="info">
            <span>{{ file.name }}</span>
          </div>
          <div class="icons">
            <el-tooltip class="item" effect="dark" content="复制图片url" placement="bottom">
              <i class="icon el-icon-link" @click="copy(1,file)"></i>
            </el-tooltip>
            <el-tooltip class="item" effect="dark" content="复制MD格式" placement="bottom">
              <SvgIcon icon-class="markdown" class-name="icon" @click="copy(2,file)"></SvgIcon>
            </el-tooltip>
            <i class="icon el-icon-delete" @click="delFile(file)"></i>
          </div>
        </div>
      </div>
    </el-row>

    <el-drawer title="上传文件" :visible.sync="isDrawerShow" direction="rtl" size="40%" :wrapperClosable="false" :close-on-press-escape="false">
      <el-row>
        <el-radio v-model="nameType" label="1">使用源文件名</el-radio>
        <el-radio v-model="nameType" label="2">使用UUID文件名</el-radio>
        <el-button size="small" type="primary" icon="el-icon-upload" v-throttle="[submitUpload,`click`,3000]">确定上传</el-button>
      </el-row>
      <el-row>
        当前目录:{{ realPath }}
      </el-row>
      <el-row>
        <el-switch v-model="isCustomPath" active-text="自定义目录"></el-switch>
        <el-input placeholder="例:oldFolder/newFolder/" v-model="customPath" :disabled="!isCustomPath" size="medium" style="margin-top: 10px"></el-input>
      </el-row>
      <el-upload ref="uploadRef" action="" :http-request="upload" drag multiple :file-list="uploadList" list-type="picture" :auto-upload="false">
        <i class="el-icon-upload"></i>
        <div class="el-upload__text">将文件拖到此处,或<em>点击上传</em></div>
      </el-upload>
    </el-drawer>
  </div>
</template>

<script>
import SvgIcon from "@/components/SvgIcon";
import {isImgExt} from "@/util/validate";
import {randomUUID} from "@/util/uuid";
import {copy} from "@/util/copy";
import OSS from 'ali-oss';

export default {
  name: "AliyunManage",
  components: {SvgIcon},
  data() {
    return {
      ossClient: {},
      aliyunConfig: {
        endpoint: '',
        bucketName: '',
        path: '',
        accessKeyId: '',
        secretAccessKey: ''
      },
      pathArr: [{value: '', label: '根目录'}],
      activePath: [''],//默认选中根目录
      pathProps: {
        lazy: true,
        checkStrictly: true,
        lazyLoad: async (node, resolve) => {
          let path = node.path.join('/')
          let nodes = []
          await this.getReposContents(nodes, path)
          resolve(nodes)
        }
      },
      hintShow1: true,
      hintShow2: true,
      fileList: [],
      isDrawerShow: false,
      nameType: '1',
      uploadList: [],
      isCustomPath: false,
      customPath: '',
    }
  },
  computed: {
    realPath() {
      if (this.isCustomPath) {
        return `/${this.customPath}`
      }
      return `${this.activePath.join('/')}/`
    }
  },
  created() {
    this.hintShow1 = localStorage.getItem('aliyunHintShow1') ? false : true
    this.hintShow2 = localStorage.getItem('aliyunHintShow2') ? false : true

    const aliyunConfig = localStorage.getItem('aliyunConfig')
    if (aliyunConfig) {
      this.aliyunConfig = JSON.parse(aliyunConfig)

      // 初始化OSS客户端。请将以下参数替换为您自己的配置信息。
      this.ossClient = new OSS({
        region: this.aliyunConfig.endpoint.substring(0, this.aliyunConfig.endpoint.indexOf('.')), // 示例:'oss-cn-hangzhou',填写Bucket所在地域。
        accessKeyId: this.aliyunConfig.accessKeyId, // 确保已设置环境变量OSS_ACCESS_KEY_ID。
        accessKeySecret: this.aliyunConfig.secretAccessKey, // 确保已设置环境变量OSS_ACCESS_KEY_SECRET。
        bucket: this.aliyunConfig.bucketName, // 示例:'my-bucket-name',填写存储空间名称。

      });

    } else {
      this.msgError('请先配置阿里云')
      this.$router.push('/pictureHosting/setting')
    }
  },
  methods: {
    //换成懒加载
    async getReposContents(arr, path) {
      await this.ossClient.list({
        prefix: path,
        delimiter: (path ? '' : '/')
      }).then(res => {
        if (res && res.prefixes) {
          res.prefixes.forEach(item => {
            item = item.substring(0, item.indexOf("/"))
            arr.push({value: item, label: item, leaf: false})
          })
        }
      })
    },
    async search() {
      this.fileList = []
      let path = this.activePath.join('/') + '/'
      path = path.startsWith('/') ? path.substring(1) : path
      this.ossClient.list({
        prefix: path,
        delimiter: '/'
      }).then(res => {
        if (res && res.objects) {
          res.objects.forEach(item => {
            if (isImgExt(item.name)) {
              item.path = ''
              this.fileList.push(item)
            }
          })
        }
      })

    },
    noDisplay(id) {
      localStorage.setItem(`aliyunHintShow${id}`, '1')
    },
    copy(type, file) {
      // type 1 cdn link  2 Markdown
      let copyCont = ''
      copyCont = file.url

      copy(copyCont)
      this.msgSuccess('复制成功')
    },
    delFile(file) {
      this.$confirm("此操作将永久删除该文件, 是否删除?", "提示", {
        confirmButtonText: '确定',
        cancelButtonText: '取消',
        type: 'warning',
      }).then(() => {
        this.ossClient.delete(file.name).then(() => {
          this.msgSuccess('删除成功')
          this.search()
        })
      }).catch(() => {
        this.$message({
          type: 'info',
          message: '已取消删除',
        })
      })
    },
    submitUpload() {
      //https://github.com/ElemeFE/element/issues/12080
      this.uploadList = this.$refs.uploadRef.uploadFiles
      if (this.uploadList.length) {
        //触发 el-upload 中 http-request 绑定的函数
        this.$refs.uploadRef.submit()
      } else {
        this.msgError('请先选择文件')
      }
    },
    upload(data) {
      let fileName = data.file.name
      if (this.nameType === '2') {
        fileName = randomUUID() + fileName.substr(fileName.lastIndexOf("."))
      }

      // upload(this.aliyunConfig.bucketName, this.realPath, fileName, data.file).then(() => {
      //   this.msgSuccess('上传成功')
      //   data.onSuccess()
      // })
      if (!this.realPath.endsWith('/')) {
        this.realPath += '/'
      }
      this.ossClient.put(this.realPath + fileName, data.file, {
        'x-oss-storage-class': 'Standard',
        // 指定Object的访问权限。
        'x-oss-object-acl': 'private',
        // 指定PutObject操作时是否覆盖同名目标Object。此处设置为true,表示禁止覆盖同名Object。
        'x-oss-forbid-overwrite': 'true',
      }).then(() => {
        this.msgSuccess('上传成功')
        data.onSuccess()
      })
    },
  },
}
</script>
2.5 测试
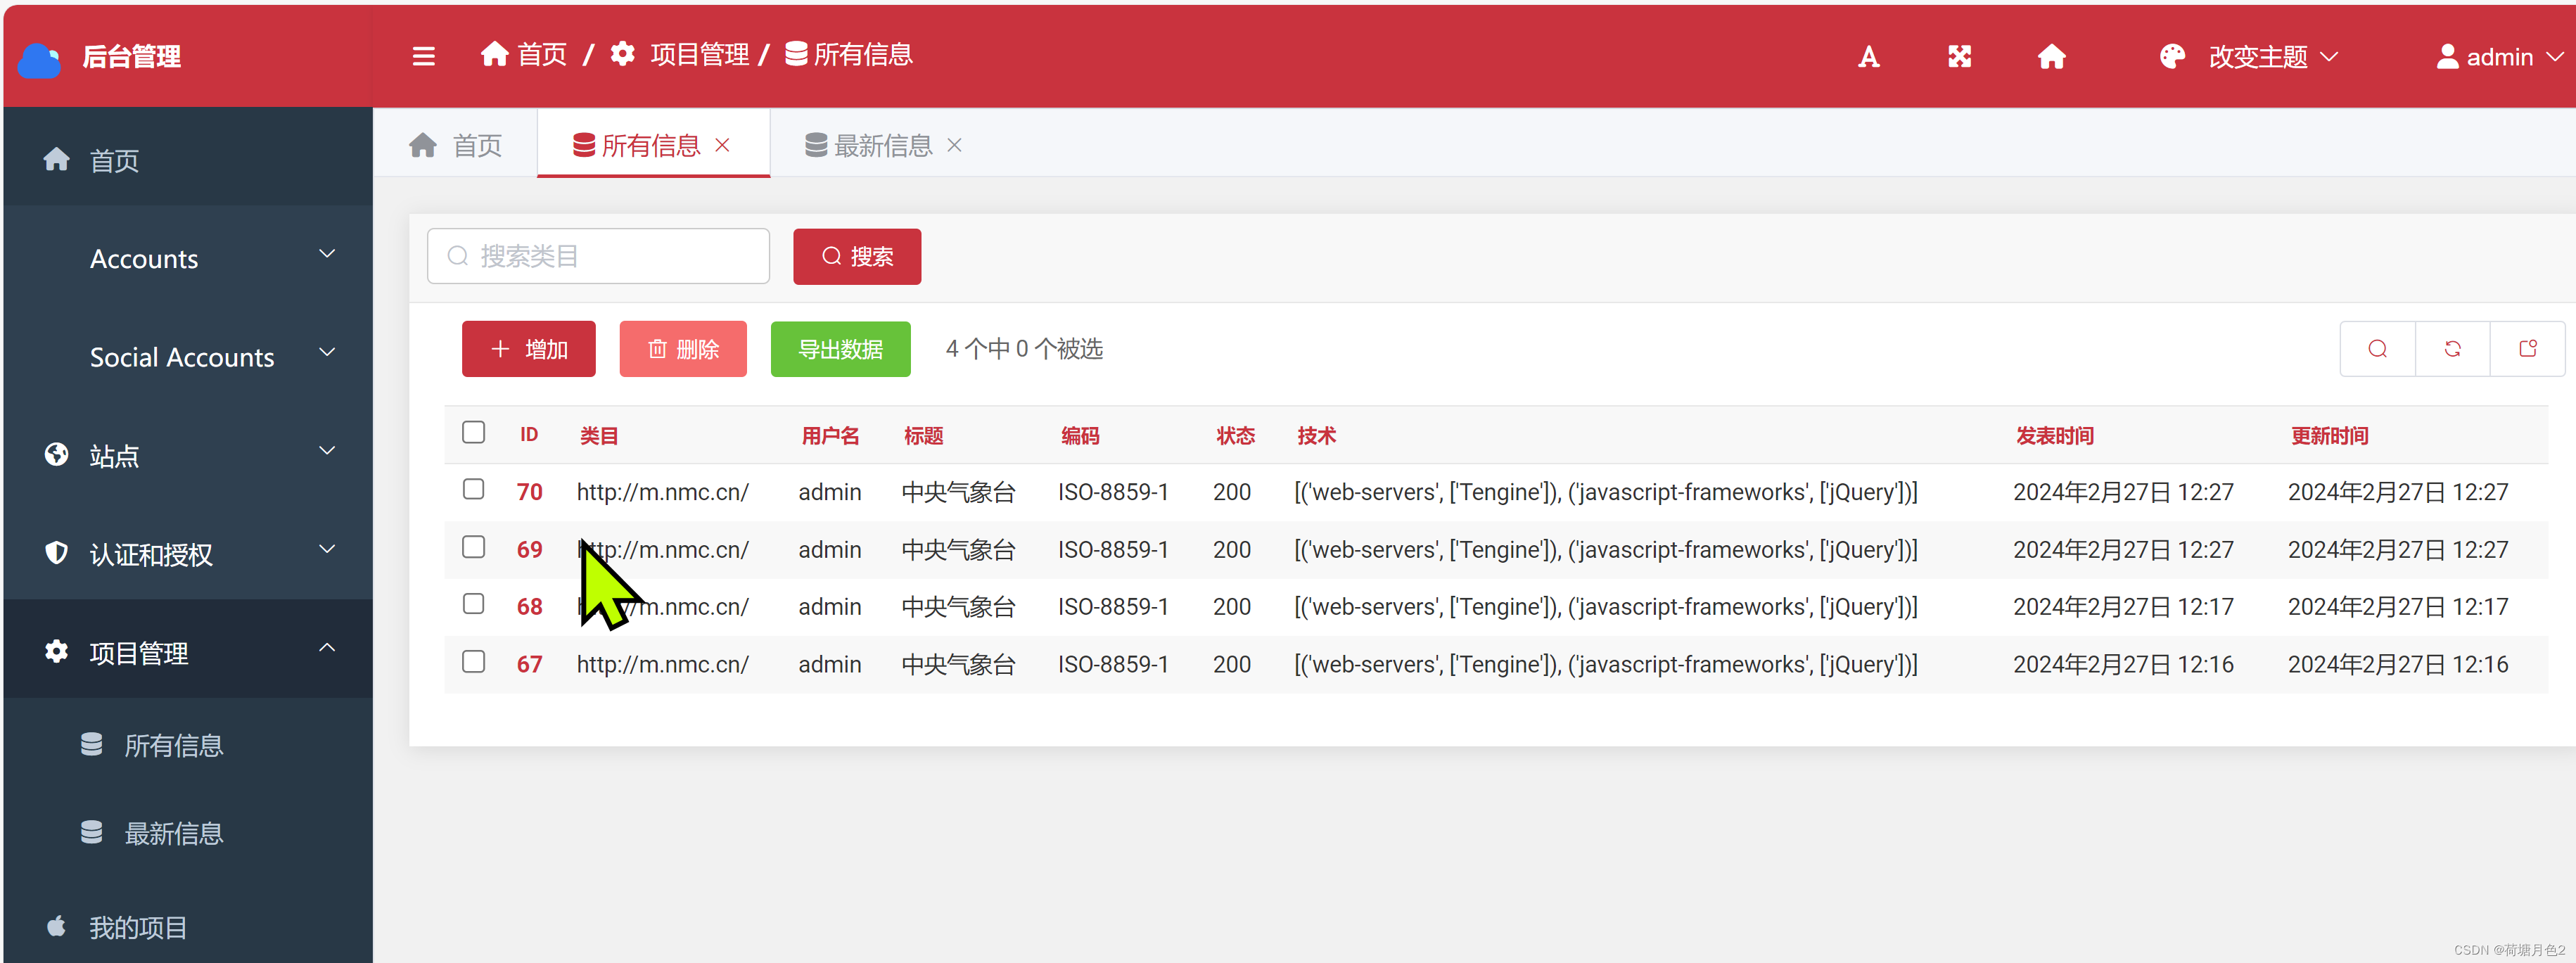
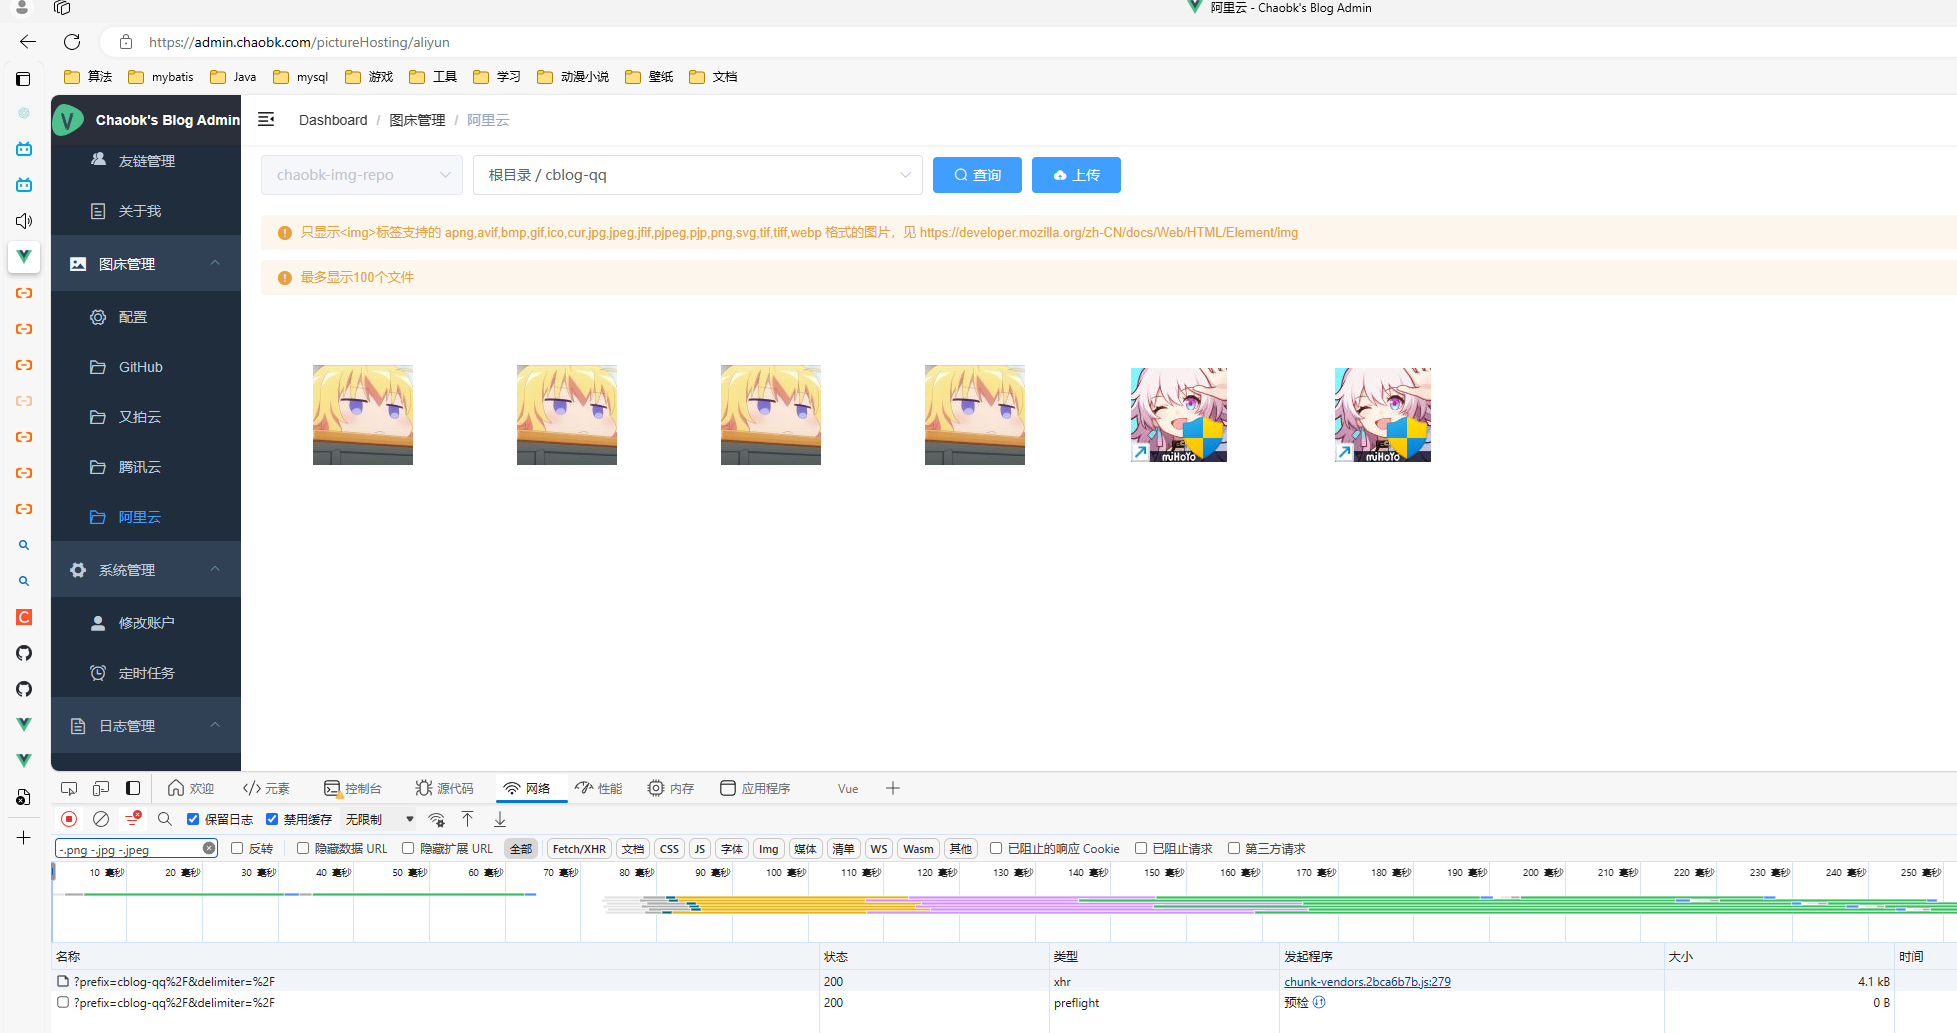
部署后查询,成功:






![[Spark SQL]Spark SQL读取Kudu,写入Hive](https://img-blog.csdnimg.cn/06e551a7a0d54922bff511126b300587.png)
