参考: 阿里云上Openshift-4.10.5搭建
OpenShift4.8在oVirt下的自动化安装
红帽OpenShift安装部署-阿里云帮助中心
安装配置操作节点(Operator),并获取OCP离线安装文件
OCP安装定制文件准备_frank0521的博客-CSDN博客
第 23 章 在任意平台上安装 OpenShift Container Platform 4.11 | Red Hat Customer Portal
Openshift4.x -- 基于裸机(Bare Metal) UPI方式的集群安装(参考)
安装openshift 4.X - 码农教程
快速安装openshift的步骤详解(安装小编) - YINGSOO
OpenShift 容器平台社区版 OKD 4.10.0部署--use
安装前说明:
首先,Openshift是不能基于Centos或者其它Linux主机进行安装的,无论在任何云平台或者裸机上,它的所有安装节点(包括Bootstrap)只能基于它自己的相应的容器操作系统(这里为RHCOS,其它操作系统,参考: Kubernetes的最小容器操作系统简介)进行安装,通俗点就是,Openshift集群的每个节点机器的操作系统均为RHCOS。可以参考:rhos-download 页面,里面包含了各个云平台相应的RHCOS相应的操作系统。
一、最低资源要求
| Machine | Operating System | vCPU | RAM | Storage | Number |
|---|---|---|---|---|---|
| Bootstrap | RHCOS | 2 | 16 GB | 120 GB | 1 |
| Control Plane | RHCOS | 2 | 16 GB | 120 GB | 3 |
| Compute | RHCOS | 2 | 16 GB | 120 GB | 2 |
主机和描述:
| 主机 | 描述 |
|---|---|
| 一个临时 bootstrap 机器 | 集群需要 bootstrap 机器在三台 control plane 机器上部署 OpenShift Container Platform 集群。您可在安装集群后删除 bootstrap 机器。 |
| 三台 control plane 机器 | control plane 机器运行组成 control plane 的 Kubernetes 和 OpenShift Container Platform 服务。 |
| 至少两台计算机器,也称为 worker 机器。 | OpenShift Container Platform 用户请求的工作负载在计算机器上运行。 |
二、常用术语
Bootstrap 节点
一个临时的机器,它运行最小的 Kubernetes 配置来部署 OpenShift Container Platform 控制平面(control plane)。
Control plane(控制平面)
一个容器编配层,用于公开 API 和接口来定义、部署和管理容器的生命周期。也称为 control plane 机器。
Compute 节点
负责执行集群用户工作负载的节点。也称为 worker 节点。
断开连接的安装
在有些情况下,数据中心的部分环境可能无法访问互联网,甚至无法通过代理服务器访问。您仍可在这些环境中安装 OpenShift Container Platform,但需要先下载所需的软件和镜像,并将其保存在离线环境中。
OpenShift Container Platform 安装程序
置备基础架构并部署集群的程序。
安装程序置备的基础架构
安装程序部署并配置运行集群的基础架构。
Ignition 配置文件
Ignition 在操作系统初始化过程中用来配置 Red Hat Enterprise Linux CoreOS (RHCOS) 的文件。安装程序生成不同的 Ignition 配置文件来初始化 bootstrap、control plane 和 worker 节点。
Kubernetes 清单
JSON 或 YAML 格式的 Kubernetes API 对象的规格。配置文件可以包含部署、配置映射、secret 和 daemonset 等。
Kubelet
一个主节点 代理,它在集群中的每个节点上运行,以确保容器在 pod 中运行。
负载均衡器
负载均衡器是客户端的单点联系。API 的负载均衡器在 control plane 节点之间分布传入的流量。
Machine Config Operator
一个 Operator,管理并应用基本操作系统和容器运行时的配置和更新,包括内核和 kubelet 之间的所有配置和更新。
Operator
在 OpenShift Container Platform 集群中打包、部署和管理 Kubernetes 应用程序的首选方法。Operator 将人类操作知识编码到一个软件程序中,易于打包并与客户共享。
用户置备的基础架构
您可以在自己提供的基础架构上安装 OpenShift Container Platform。您可以使用安装程序来生成置备集群基础架构所需的资产,再创建集群基础架构,然后将集群部署到您提供的基础架构中。
三、安装过程说明及软件下载
安装期间使用三组文件:
- 安装配置文件
install-config.yaml- Kubernetes 清单
- 以及您的机器类型适用的 Ignition 配置文件
运行安装程序时,所有配置文件会被修剪,因此请务必备份需要再次使用的所有配置文件。
3.1 下载软件
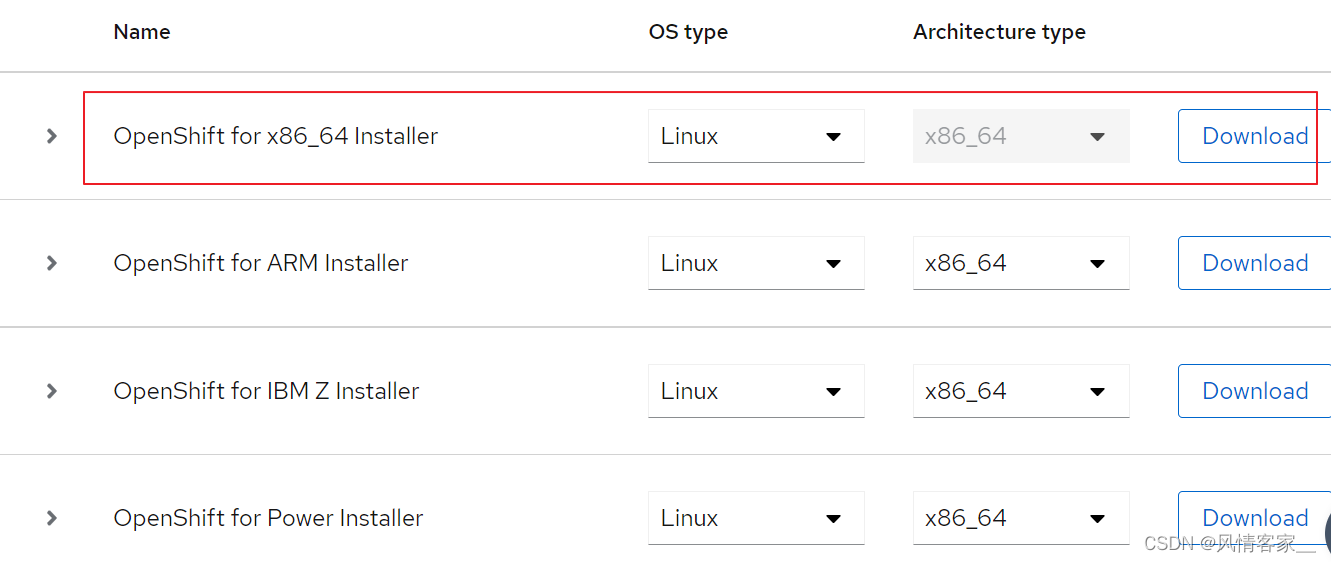
3.1.1 下载Openshift Installer
下载地址:console.redhat.com
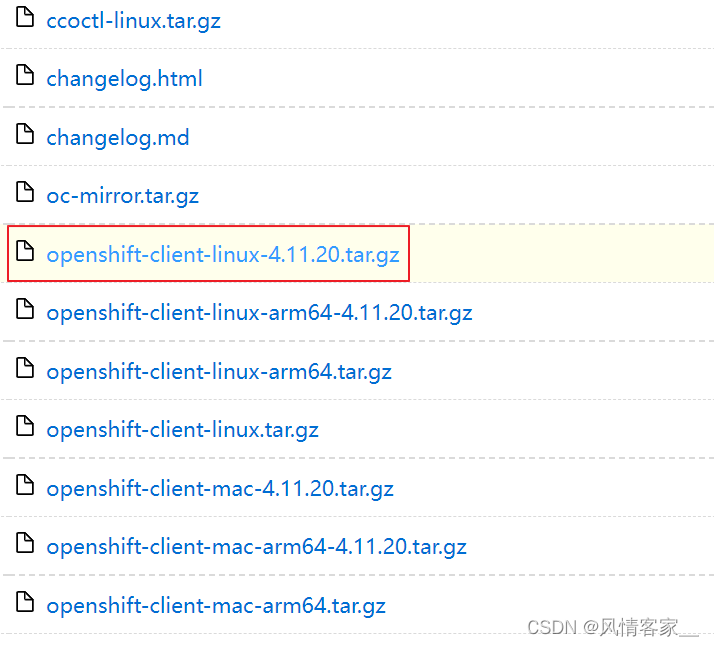
3.1.2 下载Openshift client
下载地址: https://mirror.openshift.com/pub/openshift-v4/clients/ocp/latest/
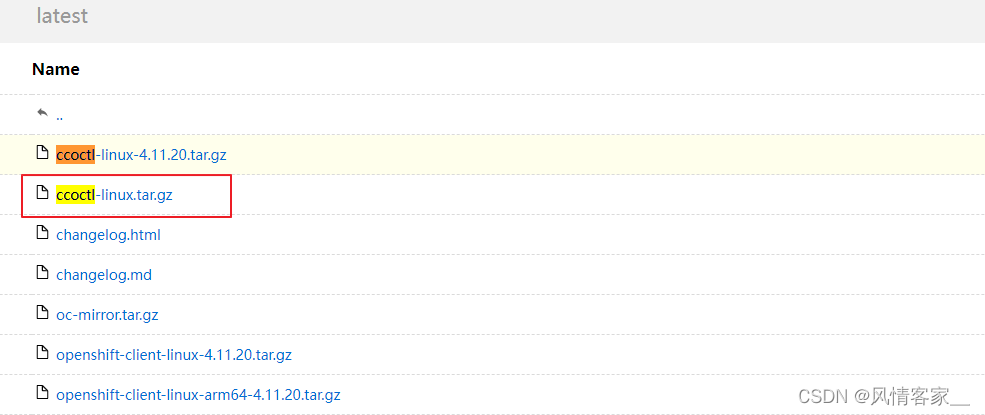
3.1.3 下载 ccoctl 工具
ccoctl 下载地址: ccoctl-linux.tar.gz
ccoctl:命令工具, 用途是集群外部创建和管理云凭证, 生成一些[凭据文件], 放到[安装清单]中
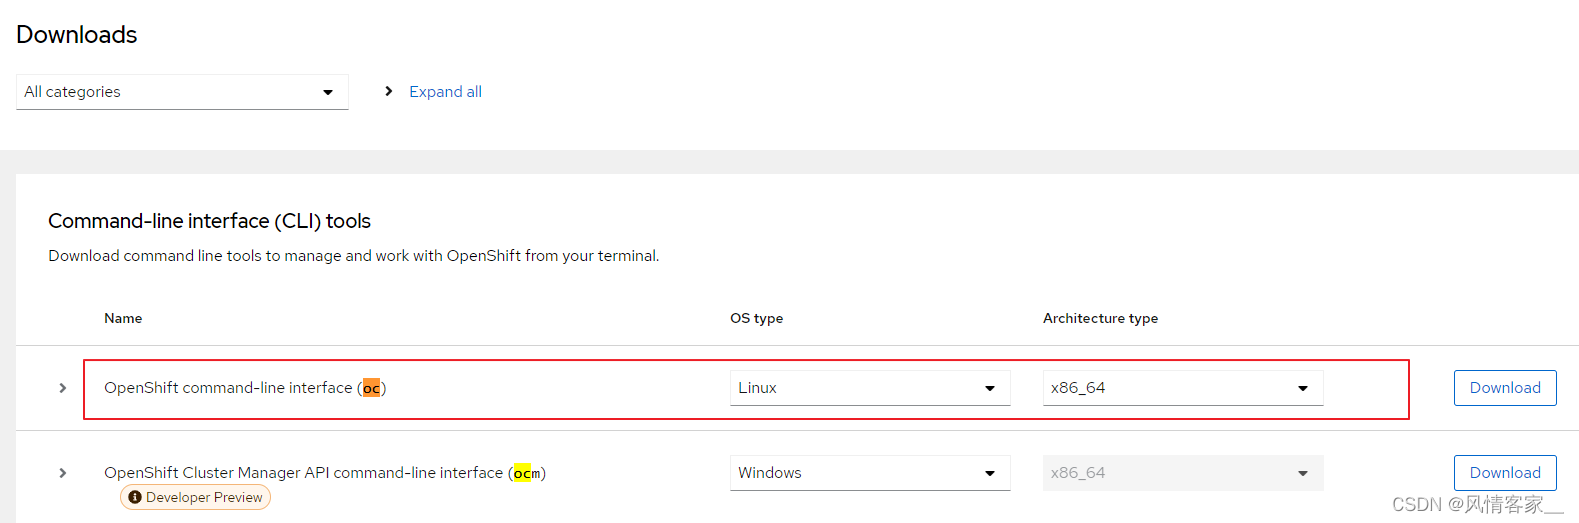
3.1.4 下载 oc 工具
oc工具下载地址: console.redhat.com
3.1.5 获取Pull Secret
Pull Secret是注册成Red Hat Develper后获取的体验Secret:
console.redhat.com
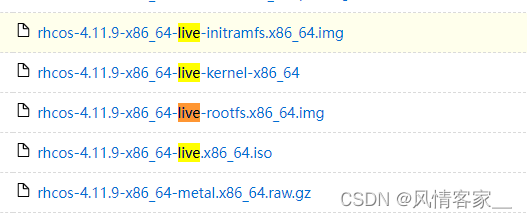
3.1.6 下载RHCOS
下载地址: RHCOS-download
下载如下文件:
四、bootstrap集群安装步骤说明:
- bootstrap 机器启动并开始托管 control plane 机器引导所需的远程资源。(如果自己配置基础架构,则需要人工干预)
- bootstrap 机器启动单节点 etcd 集群和一个临时 Kubernetes control plane。
- control plane 机器从 bootstrap 机器获取远程资源并完成启动。(如果自己配置基础架构,则需要人工干预)
- 临时 control plane 将生产环境的 control plane 调度到生产环境 control plane 机器。
- Cluster Version Operator(CVO)在线并安装 etcd Operator。etcd Operator 在所有 control plane 节点上扩展 etcd。
- 临时 control plane 关机,并将控制权交给生产环境 control plane。
- bootstrap 机器将 OpenShift Container Platform 组件注入生产环境 control plane。
- 安装程序关闭 bootstrap 机器。(如果自己配置基础架构,则需要人工干预)
- control plane 设置计算节点。
- control plane 以一组 Operator 的形式安装其他服务。
五、安装步骤
5.1 环境准备
5.1.1 机器清单配置
| 机器角色 | IP地址 |
|---|---|
| Bootstrap | 10.11.0.134 |
| Control Plane | 10.11.0.120 |
| Control Plane | 10.11.0.122 |
| Control Plane | 10.11.0.123 |
| Compute | 10.11.0.124 |
| Compute | 10.11.0.125 |
<cluster_name> | ocp4.my-ocp-cluster |
<base_domain> | com |
5.1.2 配置Bootstrap机器的免密访问其它节点机器
配置免密访问,可参考:centos7开通SSH免密码登录
# Bootstrap机器执行如下命令:
# 回车几次,会在~/.ssh目录下生成[id_rsa]和[id_rsa.pub]文件
[root@master ~]$ ssh-keygen -t rsa
Generating public/private rsa key pair.
Enter file in which to save the key (/root/.ssh/id_rsa):
Enter passphrase (empty for no passphrase):
Enter same passphrase again:
Your identification has been saved in /root/.ssh/id_rsa.
Your public key has been saved in /root/.ssh/id_rsa.pub.
The key fingerprint is:
SHA256:uQ/B0OnhIiG8P2Uj6NmVZ1+ZiXgRNiBFoCqMI82HzDI root@master
The key's randomart image is:
+---[RSA 2048]----+
|      o++.+      |
| .   . o o o     |
|  o o . + .      |
|o= * . * + o +   |
|E.X + B S o =    |
|.* = * = = .     |
|  o +   o .      |
|     .   o       |
|          .      |
+----[SHA256]-----+
[root@master ~]$
5.1.2 配置DNS服务
DNS配置,详细配置可参考:centos7搭建DNS服务(use)
# 临时关闭SELinux与防火墙
[root@localhost ~]# setenforce 0
[root@localhost ~]# systemctl stop firewalld

# 永久关闭
[root@localhost ~]# sed -i 's/SELINUX=enforcing/SELINUX=disabled/g' /etc/selinux/config
[root@localhost ~]# systemctl disable firewalld

#查看selinux, firewalld 状态
[root@localhost ~]# getenforce
Permissive
[root@localhost ~]# systemctl status firewalld

# 1. 安装DNS服务
[root@vm ~]# yum -y install bind bind-utils

# 2. 启动DNS服务
[root@vm ~]# systemctl enable named --now
[root@vm ~]# systemctl status named
[root@vm ~]# systemctl stop named
[root@vm ~]# systemctl start named
[root@vm ~]# systemctl restart named

# 3. 修改 NAME_SERVER 和 ifcfg 文件
[root@vm ~]# vi /etc/resolv.conf
nameserver 127.0.0.1

[root@vm ~]# vi /etc/sysconfig/network-scripts/ifcfg-ens3
# 添加或修改如下内容(10.11.0.134为本机DNS所在机器ip)
DNS1=10.11.0.134
# 重启网络服务
[root@vm ~]# systemctl restart network

# 4. 修改named.conf配置文件
[root@vm ~]# cp /etc/named.conf{,_bak}
# 说明:
# listen-on port 53 {192.168.80.150;}; 设置为本地的IP地址即可。
# listen-on port 53 { any; }; 。设置为所有IP地址均可访问
# allow-query {any;}  设置为所有人都可以访问。
[root@Centos7-1 ~]# vi /etc/named.conf
// named.conf
//
// Provided by Red Hat bind package to configure the ISC BIND named(8) DNS
// server as a caching only nameserver (as a localhost DNS resolver only).
//
// See /usr/share/doc/bind*/sample/ for example named configuration files.
//
// See the BIND Administrator Reference Manual (ARM) for details about the
// configuration located in /usr/share/doc/bind-{version}/Bv9ARM.html
options {
        # 设置为所有IP地址均可访问
        listen-on port 53 { any; };
        listen-on-v6 port 53 { ::1; };
        directory       "/var/named";
        dump-file       "/var/named/data/cache_dump.db";
        statistics-file "/var/named/data/named_stats.txt";
        memstatistics-file "/var/named/data/named_mem_stats.txt";
        recursing-file  "/var/named/data/named.recursing";
        secroots-file   "/var/named/data/named.secroots";
        # 设置为所有人都可以访问。
        allow-query { any; };
        /*
         - If you are building an AUTHORITATIVE DNS server, do NOT enable recursion.
         - If you are building a RECURSIVE (caching) DNS server, you need to enable
           recursion.
         - If your recursive DNS server has a public IP address, you MUST enable access
           control to limit queries to your legitimate users. Failing to do so will
           cause your server to become part of large scale DNS amplification
           attacks. Implementing BCP38 within your network would greatly
           reduce such attack surface
        */
        # 配置 recursion, forward, forwarders   字段
        recursion yes;
        forward first;
        forwarders { 114.114.114.114; 8.8.8.8; };
        # 配置 dnssec-enable, dnssec-validation 字段
        dnssec-enable no;
        dnssec-validation no;
        /* Path to ISC DLV key */
        bindkeys-file "/etc/named.root.key";
        managed-keys-directory "/var/named/dynamic";
        pid-file "/run/named/named.pid";
        session-keyfile "/run/named/session.key";
};
logging {
        channel default_debug {
                file "data/named.run";
                severity dynamic;
        };
};
zone "." IN {
        type hint;
        file "named.ca";
};
# 关联 zones 文件
include "/etc/named.rfc1912.zones";
include "/etc/named.root.key";

# 5. 修改 zones 文件 及 解析文件
5.1 编辑 zone 文件
[root@vm ~]# cp /etc/named.rfc1912.zones{,_bak}
[root@vm ~]# cat >> /etc/named.rfc1912.zones << EOF
zone "ocp4.my-ocp-cluster.com" IN {
        type master;
        file "openshift.hosts";
        allow-update { none; };
};
zone "134.0.11.10.in-addr.arpa" IN {
        type master;
        file "openshift.hosts.arpa";
        allow-update { none; };
};
EOF

5.2 编辑正向解析文件
[root@vm ~]# vi /var/named/openshift.hosts
$TTL 1D
@       IN      SOA     @       root. (
                        2019070700      ; serial
                        3H              ; refresh
                        30M             ; retry
                        2W              ; expiry
                        1W )    	; minimum

@       NS              ns1.ocp4.my-ocp-cluster.com.

ns1                     IN      A       10.11.0.134

helper  IN      A       10.11.0.134

api                     IN      A       10.11.0.134
api-int         IN      A       10.11.0.134
*.apps          IN      A       10.11.0.134
bootstrap       IN      A       10.11.0.134
master0         IN      A       10.11.0.120
master1         IN      A       10.11.0.122
master2         IN      A       10.11.0.123
worker0         IN      A       10.11.0.124
worker1         IN      A       10.11.0.125

# 5.3 编辑反向解析文件
[root@vm ~]# vi /var/named/openshift.hosts.arpa
$TTL 1D
@       IN      SOA     @       root. (
                                        2019070700      ; serial
                                        3H              ; refresh
                                        30M             ; retry
                                        2W              ; expiry
                                        1W )            ; minimum
@       IN      NS      ns1.ocp4.my-ocp-cluster.com.

10      IN      PTR     api.ocp4.my-ocp-cluster.com
11      IN      PTR     api-int.ocp4.my-ocp-cluster.com
12      IN      PTR     bootstrap.ocp4.my-ocp-cluster.com
100     IN      PTR     master0.ocp4.my-ocp-cluster.com
101     IN      PTR     master1.ocp4.my-ocp-cluster.com
102     IN      PTR     master2.ocp4.my-ocp-cluster.com
103     IN      PTR     worker0.ocp4.my-ocp-cluster.com
104     IN      PTR     worker1.ocp4.my-ocp-cluster.com

# 添加完文件后修改文件属性
[root@vm ~]# chown :named /var/named/openshift*

# 6. 重启DNS服务
[root@vm ~]# systemctl restart named
# 检测配置文件
[root@vm ~]# named-checkconf -z /etc/named.rfc1912.zones
# 检测正向解析文件
[root@vm ~]# named-checkzone openshift /var/named/openshift.hosts
# 检测反向解析文件
[root@vm ~]# named-checkzone 134.0.11.10.in-addr.arpa /var/named/openshift.hosts.arpa

# 7. 分别配置集群其它节点DNS访问地址
[root@vm ~]# vi /etc/resolv.conf
[root@openshift-base ~]# cat /etc/resolv.conf
# Generated by NetworkManager
nameserver 10.11.0.133
[root@vm ~]# vi /etc/sysconfig/network-scripts/ifcfg-ens3
# 添加或修改如下内容(10.11.0.134为本机DNS所在机器ip)
DNS1=10.11.0.134
# 重启网络服务
[root@vm ~]# systemctl restart network

# 8. 正向检测解析
# 其它按此方法域名依次检测即可
[root@centos7 ~]# nslookup master0.ocp4.my-ocp-cluster.com
Server: 10.11.0.120
Address: 10.11.0.120#53

Name: smb.ssx.com
Address: 10.11.0.133

# 9. 反向检测解析
[root@localhost ~]# nslookup 10.11.0.120
Server: 10.11.0.133
Address: 10.11.0.133#53

120.0.11.10.in-addr.arpa name = master0.ocp4.my-ocp-cluster.com.
Openshift需要访问的DNS记录说明:
| 组件 | 记录 | 描述 |
|---|---|---|
| Kubernetes API |
| DNS A/AAAA 或 CNAME 记录,以及用于标识 API 负载均衡器的 DNS PTR 记录。这些记录必须由集群外的客户端和集群中的所有节点解析。 |
|
| DNS A/AAAA 或 CNAME 记录,以及用于内部标识 API 负载均衡器的 DNS PTR 记录。这些记录必须可以从集群中的所有节点解析。 重要 API 服务器必须能够根据 Kubernetes 中记录的主机名解析 worker 节点。如果 API 服务器无法解析节点名称,则代理的 API 调用会失败,且您无法从 pod 检索日志。 | |
| Routes |
| 通配符 DNS A/AAAA 或 CNAME 记录,指向应用程序入口负载均衡器。应用程序入口负载均衡器以运行 Ingress Controller Pod 的机器为目标。默认情况下,Ingress Controller Pod 在计算机器上运行。这些记录必须由集群外的客户端和集群中的所有节点解析。 例如,console |
| bootstrap 机器 |
| DNS A/AAAA 或 CNAME 记录,以及用于标识 bootstrap 机器的 DNS PTR 记录。这些记录必须由集群中的节点解析。 |
| control plane 机器 |
| DNS A/AAAA 或 CNAME 记录,以识别 control plane 节点的每台机器。这些记录必须由集群中的节点解析。 |
| 计算机器 |
| DNS A/AAAA 或 CNAME 记录,用于识别 worker 节点的每台机器。这些记录必须由集群中的节点解析。 |
注意:
在 OpenShift Container Platform 4.4 及更新的版本中,您不需要在 DNS 配置中指定 etcd 主机和 SRV 记录。
Openshift DNS 正向解析和反向解析示例:
# 正向解析示例
$TTL 1W
@	IN	SOA	ns1.example.com.	root (
			2019070700	; serial
			3H		; refresh (3 hours)
			30M		; retry (30 minutes)
			2W		; expiry (2 weeks)
			1W )	; minimum (1 week)
	IN	NS	ns1.example.com.
	IN	MX 10	smtp.example.com.
;
;
ns1.example.com.		IN	A	192.168.1.5
smtp.example.com.		IN	A	192.168.1.5
;
helper.example.com.		IN	A	192.168.1.5
helper.ocp4.example.com.	IN	A	192.168.1.5
;

# 为 Kubernetes API 提供名称解析。记录引用 API 负载均衡器的 IP 地址。
api.ocp4.example.com.		IN	A	192.168.1.5

# 为 Kubernetes API 提供名称解析。记录引用 API 负载均衡器的 IP 地址,用于内部集群通信。
api-int.ocp4.example.com.	IN	A	192.168.1.5
;

# 为通配符路由提供名称解析。记录引用应用程序入口负载均衡器的 IP 地址。
# 应用程序入口负载均衡器以运行 Ingress Controller Pod 的机器为目标。
# 默认情况下,Ingress Controller Pod 在计算机器上运行。
# 在生产环境中,可以单独部署 API 和应用程序入口负载均衡器,从而隔离扩展每个负载均衡器基础架构
*.apps.ocp4.example.com.	IN	A	192.168.1.5
;

# 为 bootstrap 机器提供名称解析。
bootstrap.ocp4.example.com.	IN	A	192.168.1.96
;

# 为 control plane 机器提供名称解析。
master0.ocp4.example.com.	IN	A	192.168.1.97
master1.ocp4.example.com.	IN	A	192.168.1.98
master2.ocp4.example.com.	IN	A	192.168.1.99
;

# 为计算机器提供名称解析。
worker0.ocp4.example.com.	IN	A	192.168.1.11
worker1.ocp4.example.com.	IN	A	192.168.1.7

# ========================================================== #
# 反向解析示例
$TTL 1W
@	IN	SOA	ns1.example.com.	root (
			2019070700	; serial
			3H		; refresh (3 hours)
			30M		; retry (30 minutes)
			2W		; expiry (2 weeks)
			1W )		; minimum (1 week)
	IN	NS	ns1.example.com.
;

# 为 Kubernetes API 提供反向 DNS 解析。PTR 记录引用 API 负载均衡器的记录名称。
5.1.168.192.in-addr.arpa.	IN	PTR	api.ocp4.example.com.

# 为 Kubernetes API 提供反向 DNS 解析。PTR 记录引用 API 负载均衡器的记录名称,用于内部集群通信。
5.1.168.192.in-addr.arpa.	IN	PTR	api-int.ocp4.example.com.
;

# 为 bootstrap 机器提供反向 DNS 解析。
96.1.168.192.in-addr.arpa.	IN	PTR	bootstrap.ocp4.example.com.
;

# 为 control plane 机器提供反向 DNS 解析。
97.1.168.192.in-addr.arpa.	IN	PTR	master0.ocp4.example.com.
98.1.168.192.in-addr.arpa.	IN	PTR	master1.ocp4.example.com.
99.1.168.192.in-addr.arpa.	IN	PTR	master2.ocp4.example.com.
;

# 为计算机器提供反向 DNS 解析。
11.1.168.192.in-addr.arpa.	IN	PTR	worker0.ocp4.example.com.
7.1.168.192.in-addr.arpa.	IN	PTR	worker1.ocp4.example.com.
5.1.3 配置haproxy
参考:Centos7 -- OpenShift 4 - OCP 之 CRC(Codeready Container)单机版安装
中的3.2.1章节
5.2 Bootstrap节点环境配置
5.2.1 创建软件目录
# <installation_directory>: /opt/ocp
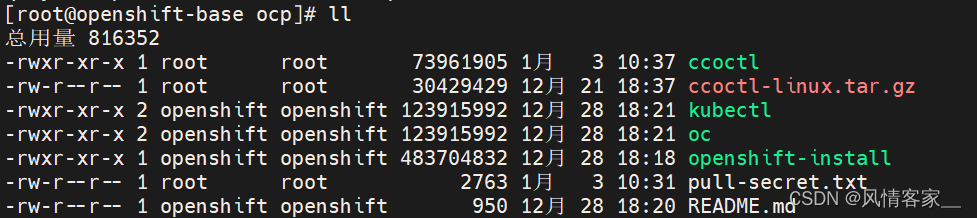
mkdir /opt/ocp5.2.2 上传ccoctl, openshift-install, oc, Openshift client, pull-secret文件
将3.1章节下载的文件上传到Bootstrap机器的/opt/ocp目录下,并将 ccoctl, openshift-install, oc, Openshift client 文件添加可执行权限:
5.2.3 将 /opt/ocp 添加到PATH路径
1. 执行命令
[root@openshift-base ocp]# vi /etc/profile

2. 添加如下内容
PATH=$PATH:/opt/ocp

3. 执行命令
[root@openshift-base ocp]# source /etc/profile

4. 验证效果(能正确执行如下命令,说明已生效)
[root@openshift-base ocp]# openshift-install version
openshift-install 4.11.20
built from commit 7e60d787431c862a90f6ffc918b24251516f0585
release image quay.io/openshift-release-dev/ocp-release@sha256:e86e058f7f66a687e273792f2e4ec70f3cc43ec9d2894bebee5caf5c4d4851a3
release architecture amd64
5.3 获取OpenShift Container Platform镜像
5.3.1 获取 OpenShift Container Platform 发布镜像
[root@openshift-base ocp]# RELEASE_IMAGE=$(openshift-install version | awk '/release image/ {print $3}')
[root@openshift-base ocp]# echo $RELEASE_IMAGE
quay.io/openshift-release-dev/ocp-release@sha256:e86e058f7f66a687e273792f2e4ec70f3cc43ec9d2894bebee5caf5c4d4851a3
[root@openshift-base ocp]#
5.3.2 从 OpenShift Container Platform 发布镜像中获取 CCO 容器镜像:
[root@openshift-base ocp]# CCO_IMAGE=$(oc adm release info --image-for='cloud-credential-operator' $RELEASE_IMAGE)
[root@openshift-base ocp]# echo $CCO_IMAGE
quay.io/openshift-release-dev/ocp-v4.0-art-dev@sha256:1b7decd31048829ff577554f93703650bbbe2ba8315e8e937c870c8ffcc39a1c
[root@openshift-base ocp]#
5.3.3 ccoctl从 OpenShift Container Platform 发布镜像中的 CCO 容器镜像中提取二进制文件
[root@openshift-base ocp]# cd /opt/ocp
[root@openshift-base ocp]# oc image extract $CCO_IMAGE --file="/opt/ocp/ccoctl" -a ./pull-secret.txt
[root@openshift-base ocp]#
5.4 部署Bootstrap节点
5.4.1 创建install-config.yaml文件
- openshift-install当前无法为裸机(baremetal )创建安装配置,必须手动创建此文件。
- 即,无法通过命令: openshift-install create install-config --dir installation_directory 创建install-config.yaml文件
- install-config.yaml文件在安装过程中会被删除,安装前务必备份。
- 配置文件必须命名为
install-config.yaml
install-config.yaml文件参数说明:
| 参数 | 描述 | 值 |
|---|---|---|
|
|
| 字符串 |
|
| 云供应商的基域。基域用于创建到 OpenShift Container Platform 集群组件的路由。集群的完整 DNS 名称是 | 完全限定域名或子域名,如 |
|
| Kubernetes 资源 | 对象 |
|
| 集群的名称。集群的 DNS 记录是 | 小写字母和连字符 ( |
|
| 执行安装的具体平台配置: | 对象 |
|
| 从 Red Hat OpenShift Cluster Manager 获取 pull secret,验证从 Quay.io 等服务中下载 OpenShift Container Platform 组件的容器镜像。 | {
"auths":{
"cloud.openshift.com":{
"auth":"b3Blb=",
"email":"you@example.com"
},
"quay.io":{
"auth":"b3Blb=",
"email":"you@example.com"
}
}
} |
裸机UPI(bare-metal UPI)的安装配置示例如下:
apiVersion: v1
## 集群的基域。所有 DNS 记录都必须是这个基域的子域,并包含集群名称。
baseDomain: example.com

# controlPlane 部分是一个单个映射,但 compute 部分是一系列映射。
# 为满足不同数据结构的要求,compute 部分的第一行必须以连字符 - 开头,
# controlPlane 部分 的第一行则不以连字符开头。仅使用一个 control plane 池。
compute:
  # hyperthreading参数:
  #   指定要启用或禁用并发多线程(SMT)还是超线程。
  #   默认情况下,启用 SMT 可提高机器中内核的性能。
  #   通过将 参数值设置为 Disabled 来禁用它。
  #   如果禁用 SMT,则必须在所有集群机器中禁用它;这包括 control plane 和计算机器。
  # 默认启用并发多线程(SMT)。如果 BIOS 设置中没有启用 SMT,超线程参数无效。
  # 如果禁用 超线程,则会导致机器性能的显著降低。
  - hyperthreading: Enabled
    name: worker
    # replicas:
    #   在用户置备的基础架构上安装 OpenShift Container Platform 时,必须将这个值设置为 0。
    #   在安装程序置备的安装中,该参数控制集群中创建和管理的计算机器数量。
    #   在用户置备的安装中,必须在完成集群安装前手动部署计算机器。
    # 注意: 如果安装一个三节点集群,在安装 Red Hat Enterprise Linux CoreOS(RHCOS)机器时不要部署任何计算机器。
    replicas: 0
controlPlane:
  hyperthreading: Enabled
  name: master
  # control plane 的机器数量
  replicas: 3
metadata:
  ## The name for the cluster
  name: test

networking:
  clusterNetwork:
    # 从中分配 Pod IP 地址的 IP 地址块, 此块不得与现有物理网络重叠。
    #  这些 IP 地址用于 pod 网络。
    #  如果需要从外部网络访问 pod,您必须配置负载均衡器和路由器来管理流量。
    - cidr: 192.168.0.0/14
      # 分配给每个节点的子网前缀长度。例如,如果 hostPrefix 设为 23,
      # 则每个节点从 given cidr 中分配 a /23 子网,
      # 这样就能有 510(2^(32 - 23)- 2)个 pod IP 地址。
      # 如果需要从外部网络访问节点,请配置负载均衡器和路由器来管理流量。
      hostPrefix: 23
    - cidr: fd01::/48
      hostPrefix: 64

  networkType: OpenShiftSDN

  # 用于服务 IP 地址的 IP 地址池。您只能输入一个 IP 地址池。
  # 此块不得与现有物理网络重叠。
  # 如果您需要从外部网络访问服务,请配置负载均衡器和路由器来管理流量。
  serviceNetwork:
    - 172.30.0.0/16
    ## ip6地址
    - fd00:172:16::/112

# 必须将平台设置为 none, 裸机安装时无法为您的平台提供额外的平台配置变量。
platform:
  none: { }

# 默认值为 false
# 如果启用 FIPS 模式,运行 OpenShift Container Platform 的 Red Hat Enterprise Linux CoreOS(RHCOS)机器
#  会绕过默认的 Kubernetes 加密套件,并使用由 RHCOS 提供的加密模块。
# 只有在 x86_64 架构的 OpenShift Container Platform 部署中才支持使用 FIPS 验证的/Modules in Process 加密库。
# 如果使用 Azure File 存储,则无法启用 FIPS 模式。
fips: false

## The pull secret that provides components in the cluster access to images for OpenShift components.
pullSecret: ''
## Red Hat Enterprise Linux CoreOS(RHCOS)中 core 用户的 SSH 公钥。
sshKey: ''
install-config.yaml (use)示例:
## install-config.yaml 文件
apiVersion: v1
baseDomain: my-ocp.com
compute:
  - hyperthreading: Enabled
    name: worker
    replicas: 0
controlPlane:
  hyperthreading: Enabled
  name: master
  replicas: 1

metadata:
  name: my-ocp-cluster

networking:
  clusterNetworks:
    - cidr: 192.168.0.0/14
      hostPrefix: 23
  networkType: OpenShiftSDN
  serviceNetwork:
    - 172.30.0.0/16

fips: false

platform:
  none: {}

## The pull secret that provides components in the cluster access to images for OpenShift components.
pullSecret: '{"auths":{"..."}}}'

## The default SSH key that will be programmed for `core` user.
## Bootstrap sshKey, 查看命令: cat ~/.ssh/id_rsa.pub
sshKey: 'ssh-rsa ...'
生成的install-config.yaml位于/opt/ocp/安装目录下。
5.4.2 生成安装清单
- 命令范例:openshift-install create manifests --dir <installation_directory>
- use: openshift-install create manifests --dir /opt/ocp
1. 生成安装清单命令
# 执行该命令后, install-config.yaml 文件会被删除
[root@openshift-base ocp]# openshift-install create manifests --dir /opt/ocp

2. 查看生成结果 -- (安装tree命令: yum install tree -y)
[root@openshift-base ocp]# tree
.
├── ccoctl
├── ccoctl-linux.tar.gz
├── kubectl
├── manifests
│   ├── cluster-config.yaml
│   ├── cluster-dns-02-config.yml
│   ├── cluster-infrastructure-02-config.yml
│   ├── cluster-ingress-02-config.yml
│   ├── cluster-network-01-crd.yml
│   ├── cluster-network-02-config.yml
│   ├── cluster-proxy-01-config.yaml
│   ├── cluster-scheduler-02-config.yml
│   ├── cvo-overrides.yaml
│   ├── kube-cloud-config.yaml
│   ├── kube-system-configmap-root-ca.yaml
│   ├── machine-config-server-tls-secret.yaml
│   └── openshift-config-secret-pull-secret.yaml
├── oc
├── openshift
│   ├── 99_kubeadmin-password-secret.yaml
│   ├── 99_openshift-cluster-api_master-user-data-secret.yaml
│   ├── 99_openshift-cluster-api_worker-user-data-secret.yaml
│   ├── 99_openshift-machineconfig_99-master-ssh.yaml
│   ├── 99_openshift-machineconfig_99-worker-ssh.yaml
│   └── openshift-install-manifests.yaml
├── openshift-install
├── pull-secret.txt
检查cluster-scheduler-02-config.yml 文件
检查
<installation_directory>/manifests/cluster-scheduler-02-config.yml,
这里为/opt/ocp/manifests/cluster-scheduler-02-config.yml.
Kubernetes 清单文件中的mastersSchedulable参数是否已设置为false。此设置可防止在 control plane 机器上调度 pod:
- 打开
<installation_directory>/manifests/cluster-scheduler-02-config.yml文件。这里打开:/opt/ocp/manifests/cluster-scheduler-02-config.yml- 找到
mastersSchedulable参数,并确保它被设置为false。- 保存并退出 文件。
[root@openshift-base ocp]# vi /opt/ocp/manifests/cluster-scheduler-02-config.yml
apiVersion: config.openshift.io/v1
kind: Scheduler
metadata:
  creationTimestamp: null
  name: cluster
spec:
  mastersSchedulable: false
  policy:
    name: ""
status: {}
[root@openshift]# vi /opt/ocp/openshift/99_openshift-machineconfig_99-worker-ssh.yaml 5.4.3 创建 Ignition 配置文件
- 命令范例:openshift-install create ignition-configs --dir <installation_directory>
- use: openshift-install create ignition-configs --dir /opt/ocp
- 为安装目录中的 bootstrap、control plane 和计算节点创建 Ignition 配置文件。
- 生成 auth文件夹,bootstrap.ign, master.ign, metadata.json, worker.ign文件。创建完成后,
kubeadmin-password和kubeconfig文件在<installation_directory>/auth目录中。
# 通用demo:
#   对于 <installation_directory>, 请指定相同的安装目录。
# 执行该命令后, manifests和openshift 文件夹会被删除
[root@ ocp]# openshift-install create ignition-configs --dir /opt/ocp/install

# 查看创建结果
[root@openshift-base install]# tree
.
├── auth
│   ├── kubeadmin-password
│   └── kubeconfig
├── bootstrap.ign
├── master.ign
├── metadata.json
└── worker.ign
5.4.4 安装 RHCOS 并启动 OpenShift Container Platform bootstrap
- 在裸机基础架构上安装 OpenShift Container Platform,必须在机器上安装 RHCOS。
- 安装 RHCOS 时,必须为您要安装的机器类型提供 Ignition 配置文件。
- 如果配置了网络、DNS 和负载均衡基础架构,OpenShift Container Platform bootstrap 过程会在 RHCOS 机器重启后自动启动。
在机器上安装 RHCOS,可以使用 ISO 镜像或网络 PXE 方式安装。
# 获取每个 Ignition 配置文件的 SHA512 摘要
[root@ocp]# cd /opt/ocp

# demo: sha512sum <installation_directory>/bootstrap.ign
[root@ocp]# sha512sum bootstrap.ign
[root@ocp]# sha512sum master.ign
[root@ocp]# sha512sum worker.ign
获取 RHCOS 镜像
[root@ocp]# openshift-install coreos print-stream-json | grep '\.iso[^.]'
openshift-install coreos print-stream-json | grep '\.iso[^.]'

# 输出示例
"location": "https://rhcos.mirror.openshift.com/art/storage/releases/rhcos-4.11-aarch64/411.86.202210032347-0/aarch64/rhcos-411.86.202210032347-0-live.aarch64.iso",
"location": "https://rhcos.mirror.openshift.com/art/storage/releases/rhcos-4.11-ppc64le/411.86.202210032141-0/ppc64le/rhcos-411.86.202210032141-0-live.ppc64le.iso",
"location": "https://rhcos.mirror.openshift.com/art/storage/releases/rhcos-4.11-s390x/411.86.202210032129-0/s390x/rhcos-411.86.202210032129-0-live.s390x.iso",
"location": "https://rhcos.mirror.openshift.com/art/storage/releases/rhcos-4.11/411.86.202210041459-0/x86_64/rhcos-411.86.202210041459-0-live.x86_64.iso",
提示:RHCOS 镜像可能不会随着 OpenShift Container Platform 的每个发行版本而改变。必须下载最高版本的镜像,其版本号应小于或等于安装的 OpenShift Container Platform 版本。如果可用,请使用与 OpenShift Container Platform 版本匹配的镜像版本。这个过程只使用 ISO 镜像。此安装类型不支持 RHCOS qcow2 镜像。
5.4.4 ccoctl 工具创建凭证
生成一些[凭据文件],放到上面[安装清单]中。
a. 提取对象列表
[root@ocp]# mkdir -p /opt/ocp/credrequests

# 之前已在Bootstrap机器上执行:
#  1. RELEASE_IMAGE=$(./openshift-install version | awk '/release image/ {print $3}')
#  2. CCO_IMAGE=$(oc adm release info --image-for='cloud-credential-operator' $RELEASE_IMAGE)
[root@ocp]# oc adm release extract \
--credentials-requests \
--cloud=alibabacloud \
--to=/opt/ocp/credrequests \
$RELEASE_IMAGE

# 查看执行效果
[root@openshift-base ocp]# ll /opt/ocp/credrequests/
总用量 16
-rw-r--r-- 1 root root  767 1月   3 16:55 0000_30_machine-api-operator_00_credentials-request.yaml
-rw-r--r-- 1 root root 2257 1月   3 16:55 0000_50_cluster-image-registry-operator_01-registry-credentials-request-alibaba.yaml
-rw-r--r-- 1 root root  763 1月   3 16:55 0000_50_cluster-ingress-operator_00-ingress-credentials-request.yaml
-rw-r--r-- 1 root root 1458 1月   3 16:55 0000_50_cluster-storage-operator_03_credentials_request_alibaba.yaml
b. ccoctl工具处理对象
[root@ocp]# mkdir -p /opt/ocp/path_to_ccoctl_output_dir

[root@ocp]# ccoctl completion create-ram-users \
--name alitanker \
--region=hongkong \
--credentials-requests-dir=/opt/ocp/credrequests \
--output-dir=/opt/ocp/path_to_ccoctl_output_dir
c. 生成文件放到安装清单
[root@ocp]# cp /opt/ocp/path_to_ccoctl_output_dir/manifests/*credentials.yaml \
/root/installation_directory/manifests/
5.5 部署集群
执行如下命令:
[root@ocp]# openshift-install \
create cluster --dir /opt/ocp \
--log-level=debug
5.5.2 等待 bootstrap 过程完成
# demo
./openshift-install \
--dir <installation_directory> \
wait-for bootstrap-complete \
--log-level=info

# use
./openshift-install \
--dir /opt/ocp \
wait-for bootstrap-complete \
--log-level=info

# 输出示例
INFO Waiting up to 30m0s for the Kubernetes API at https://api.test.example.com:6443...
INFO API v1.24.0 up
INFO Waiting up to 30m0s for bootstrapping to complete...
INFO It is now safe to remove the bootstrap resources
使用浏览器,进行访问:
地址:https://console-openshift-console.apps.tanker.i2docker.site
账号:kubeadmin
密码:IcAxR-jxb4U-zDF9T-AxyTy
访问页面: