- 分类维护
- 一、三级分类
- 后端实现
- 准备工作
- 跨域问题
- 关闭 ESLint 检查
- 前端实现
- 二、分类删除
- 前端完善分类列表
- 后端实现——删除
- 配置发送请求代码片段
- 前端实现——删除
- 三、分类增加
- 前端实现
- 四、分类修改
- 五、拖拽菜单
- 拖拽效果实现
- 拖拽数据收集
- 拖拽功能完成
- 拖拽功能完善
- 六、批量删除
- 品牌管理
- 一、效果优化及快速显示开关
- 二、品牌Logo上传
- 阿里云OSS
- 整合阿里云OSS
- 获取服务端签名
- 前后端联调上传文件
- 三、前端表单校验
- 四、后端数据验证
- JSR303
- 如何使用 JSR303
- 提取校验错误信息
- 统一错误状态码
- 统一异常处理
- 分组校验
- 自定义校验注解
- 五、SPU&SKU
- SPU
- SKU
- 基本属性【规格参数】与销售属性
- 商品表设计分析
- 平台属性
- 一、属性分组
- 组件抽取
- 父子组件交互
- 获取分类属性分组
- 后端实现
- 前端实现
- 分组新增&级联选择器
- JsonInclude
- 分组修改&级联选择器显示
- 二、品牌分类关联与级联更新
- 增加MyBatis-Plus分页插件
- 品牌管理模糊查询
- 前端模块复制
- 品牌管理&关联分类
- 新增品牌关联分类
- 级联更新
- 三、规格参数
- Object对象划分
- 规格参数新增
- 规格参数列表
- 规格参数修改
- 规格参数回显
- 规格参数修改
- 四、销售属性
- 五、分组关联属性&删除关联
- 分组关联属性
- 删除关联
- 查询分组未关联的属性
- 新增分组属性关联
- 新增属性小bug
- 商品维护
- 一、发布商品
- 环境准备与测试
- 获取分类关联的所有品牌
- 获取分类下的所有分组&关联属性
- BUG: 规格参数无法单选多选
- 新增商品
- 新增商品业务流程分析
- 业务代码
- 二、Spu管理
- Spu检索
- 规格维护
- 小BUG
- 获取 spu 规格
- 修改 spu 规格
- 三、商品管理
- sku 检索
- 库存系统
- 一、整合ware服务&获取库存列表
- 二、查询商品库存&创建采购需求
- 模糊查询商品库存
- 模糊查询采购需求
- 合并采购需求
- 获取未领取的采购单
- 合并采购单
- 领取采购单
- 完成采购
- 分布式基础篇总结
视频来源: 【Java项目《谷粒商城》Java架构师 | 微服务 | 大型电商项目】
分类维护
一、三级分类
后端实现
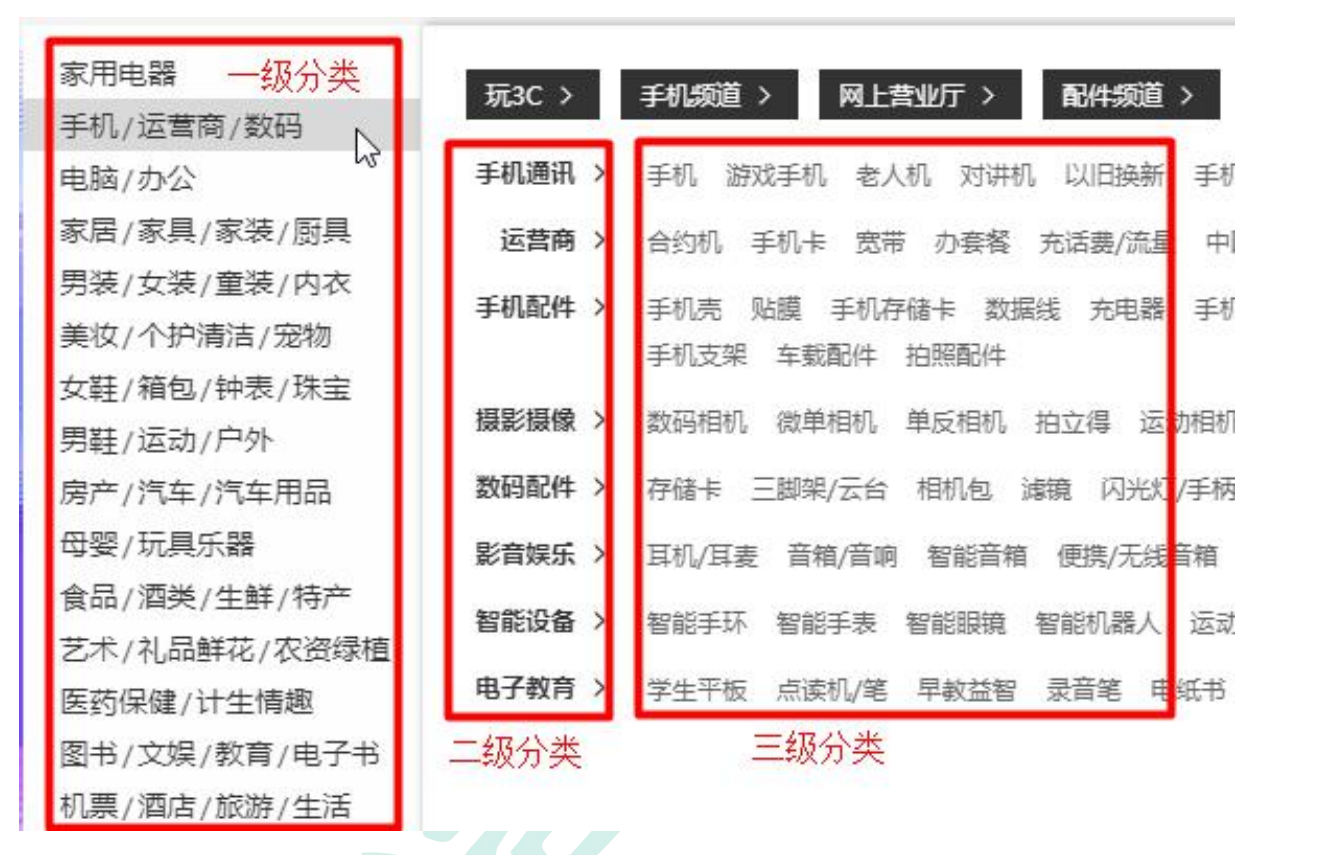
查询出数据库中的所有分类:

导入 SQL 语句:

数据库表字段含义:

一级分类的parent_id 为 0,一级分类的 cat_id 为二级分类的 parent_id,二级分类的 cat_id 为三级分类的 parent_id.
1、在 gulimall-product 模块下完成分类功能
2、在 CategoryEntity 实体类中,增加一个属性
用于保存每个分类的子分类
	// 分类的子级分类
	@TableField(exist = false)
	List<CategoryEntity> childrenLevel;
3、CategoryController
    /**
     * 查询所有分类,封装成树形结构
     */
    @RequestMapping("/list/tree")
    //@RequiresPermissions("product:category:list")
    public R list(@RequestParam Map<String, Object> params){

        List<CategoryEntity> entities = categoryService.listWithTree();

        return R.ok().put("data", entities);
    }
4、CategoryService 接口
    // 查询所有分类,封装成树形结构
    List<CategoryEntity> listWithTree();
5、CategoryServiceImpl 实现类
@Service("categoryService")
public class CategoryServiceImpl extends ServiceImpl<CategoryDao, CategoryEntity> implements CategoryService {


    // 查询所有分类,封装成树形结构
    @Override
    public List<CategoryEntity> listWithTree() {
        // 1、查询出所有分类
        List<CategoryEntity> all = baseMapper.selectList(null);

        List<CategoryEntity> level1 = all.stream()
                .filter(categoryEntity -> { // 2、先找出所有的一级分类
                    return categoryEntity.getParentCid() == 0;
                }).map(categoryEntity -> { // 3、找出每个一级分类下的所有子分类
                    categoryEntity.setChildrenLevel(getChildrens(categoryEntity, all));
                    return categoryEntity;
                }).sorted((menu1, menu2) -> {   // 4、根据 Sort 字段排序
                    return (menu1.getSort() == null ? 0 : menu1.getSort()) - (menu2.getSort() == null ? 0 : menu2.getSort());
                }).collect(Collectors.toList());

        return level1;
    }

    /**
     * @description
     * @date 2022/12/25 19:50
     * @param entity 父级分类
     * @param all 所有分类的集合
     * @return java.util.List<com.atguigu.gulimall.product.entity.CategoryEntity>
     */
    private List<CategoryEntity> getChildrens(CategoryEntity entity, List<CategoryEntity> all) {

        List<CategoryEntity> treeList = all.stream()
                .filter(categoryEntity -> { // 1、找出集合中分类对应的所有子分类
                    return categoryEntity.getParentCid() == entity.getCatId();
                }).map(categoryEntity -> { // 2、递归查找所有的子分类
                    categoryEntity.setChildrenLevel(getChildrens(categoryEntity, all));
                    return categoryEntity;
                }).sorted((menu1, menu2) -> {
                    return (menu1.getSort() == null ? 0 : menu1.getSort()) - (menu2.getSort() == null ? 0 : menu2.getSort());
                }).collect(Collectors.toList());

        return treeList;
    }
}
6、使用 PostMan 测试

7、将 gulimall-product 注册到 Nacos,并配置网关
gulimall-product 模块配置:

gulimall-gateway 模块配置:
注意和 admin_route 的顺序,精确路径在前,否则会交给 admin_route 服务

准备工作
1、启动 renren-fast-vue 项目, 新增 商品系统 的 菜单

2、新增子级菜单——分类维护

动态生成的菜单会在数据库中sys_menu表中生成对应的路由路径
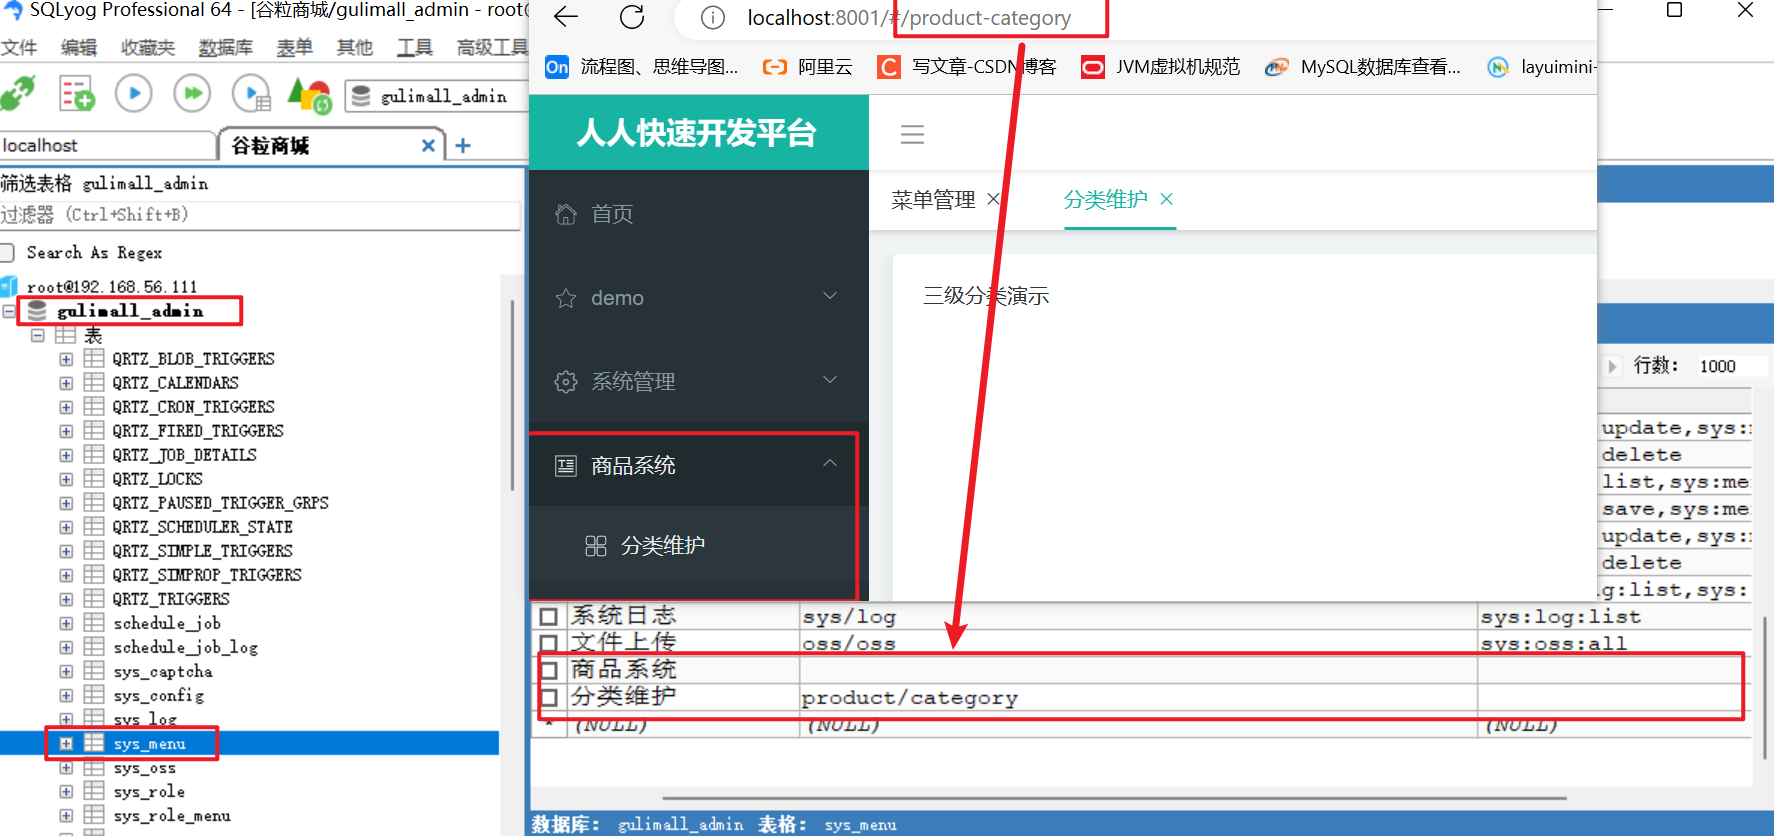
3、路由 路径的对应规则,前缀代表页面所在的目录,后缀代表页面名称。
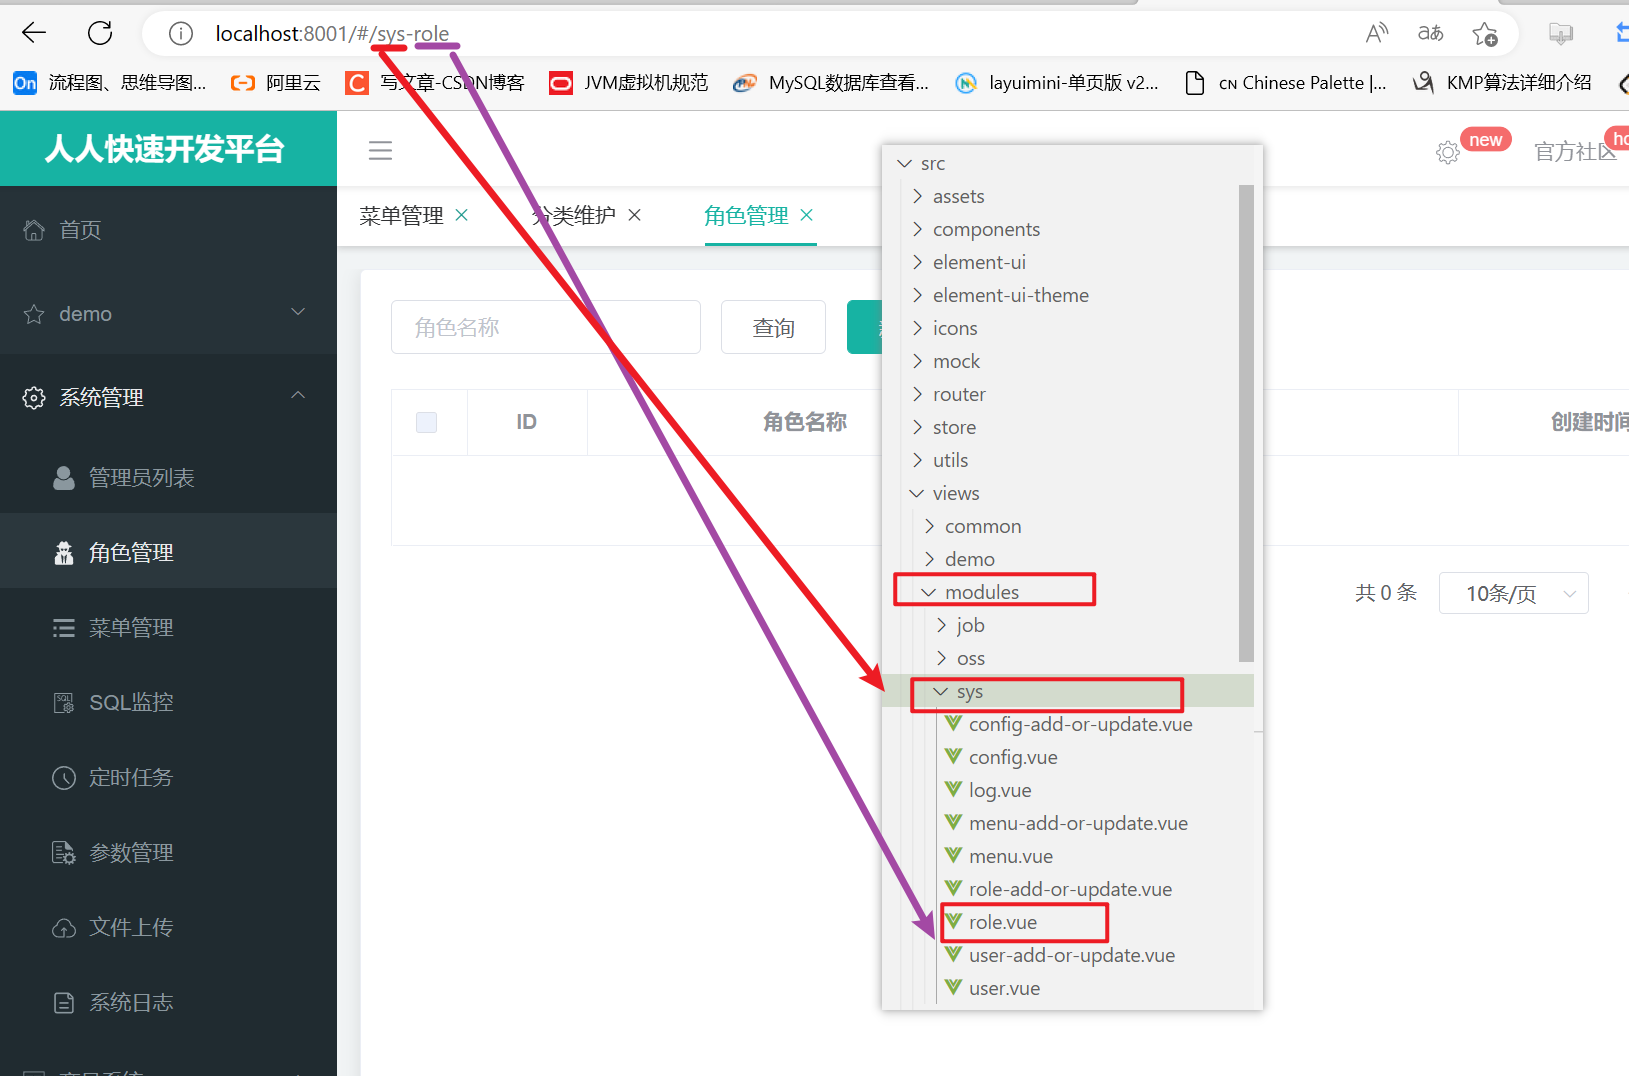
那么 product-category 所对应的就是: modules/product/category.vue 页面,创建对应的页面

4、
在前端向后端发送请求之前,我们需要先修改请求的路径,修改 /static/config/index.js 中的路径,统一由Gateway 网关进行转发

统一向网关发送请求,就需要将 renren-fast 注册到 Nacos 注册中心
renren-fast模块引入所需的依赖- 这里建议不要直接引入 gulimall-common 依赖,renren-fast 的版本和common的依赖有很多冲突。
- 增加guava 这个依赖主要是因为我报了这个错误:
com.google.common.collect.Sets$SetView.iterator()Lcom/google/common/collect/UnmodifiableIterator大概由于版本冲突导致的
	<dependencyManagement>
		<dependencies>
			<dependency>
				<groupId>com.alibaba.cloud</groupId>
				<artifactId>spring-cloud-alibaba-dependencies</artifactId>
				<version>2021.0.4.0</version>
				<type>pom</type>
				<scope>import</scope>
			</dependency>
		</dependencies>
	</dependencyManagement>

		<dependency>
			<groupId>com.google.guava</groupId>
			<artifactId>guava</artifactId>
			<version>30.1-jre</version>
		</dependency>

		<!--Nacos注册中心-->
		<dependency>
			<groupId>com.alibaba.cloud</groupId>
			<artifactId>spring-cloud-starter-alibaba-nacos-discovery</artifactId>
		</dependency>
- application配置nacos注册中心地址、application.name
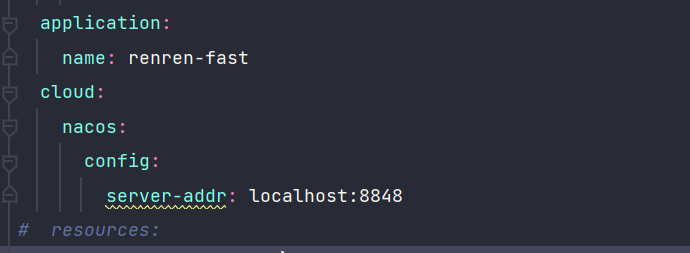
- 主启动类增加
@EnableDiscoveryClient注解 - 最终注册成功

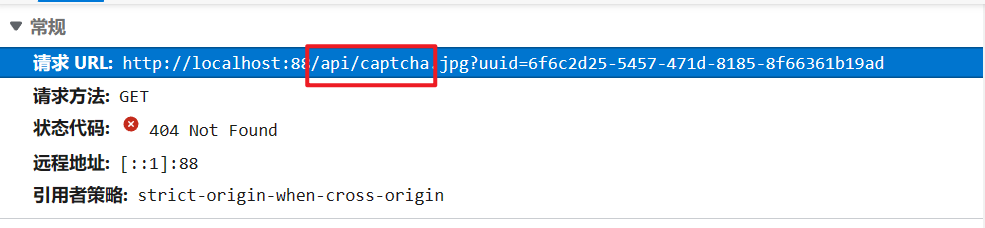
5、向网关发送请求后,会出现 404, 主要是因为我们在 index.js 中修改了请求路径为http://localhost:88/api,正确的路径应该是: localhost:8080/renren-fast/captcha
因此我们需要使用 GateWay 中的 filters 对路径进行重写
在 Gateway 中配置:

                - id: admin_route
                  uri: lb://renren-fast # 负载均衡
                  predicates:
                      - Path=/api/**
                  filters:
                      - RewritePath=/api/?(?<segment>.*), /renren-fast/$\{segment}  #路径重写
跨域问题
接着在登录时,由于俩次url不一样,因此会报出 跨域问题。

跨域:指的是浏览器不能执行其他网站的脚本。它是由浏览器的同源策略造成的,是 浏览器对javascript施加的安全限制。
同源策略:是指协议,域名,端口都要相同,其中有一个不同都会产生跨域;

跨域流程

跨域文档: 跨源资源共享(CORS) - HTTP | MDN (mozilla.org)
解决跨域问题的方式
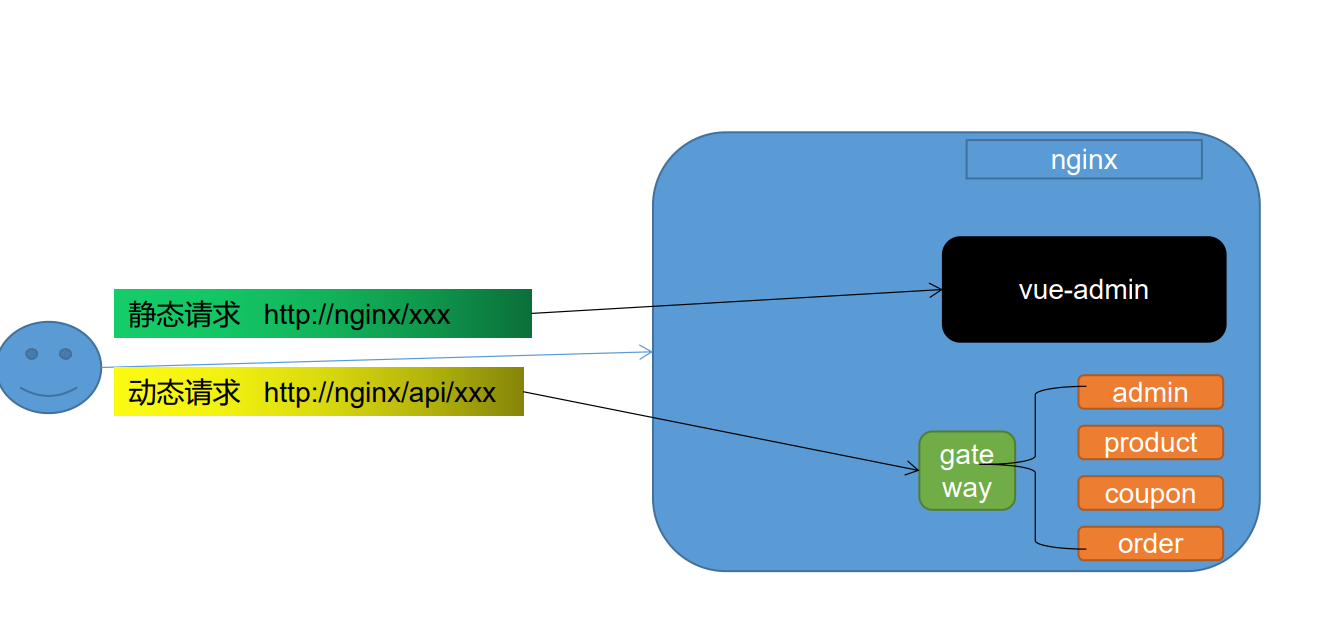
方式一:使用 Nginx 部署为同一域
方式二:设置请求头允许跨域
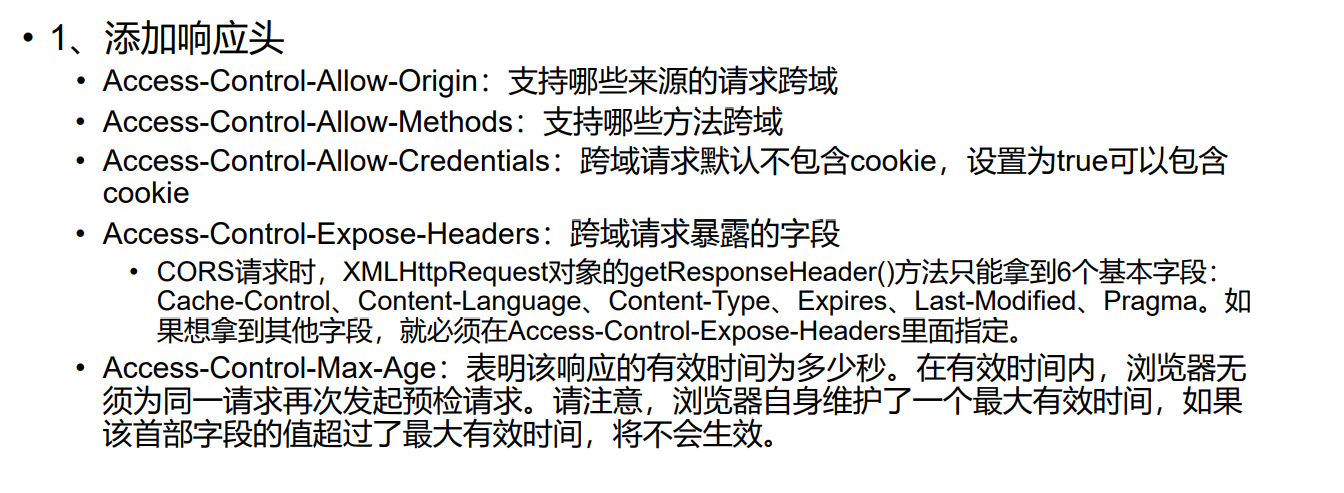
这样太麻烦,我们可以直接在网关模块中编写配置类,因为每个请求都会经过网关,这样就无需在每次请求都设置一遍请求头。
在 Gateway 模块创建 /config/CorsConfig 配置类
/**
 * description: 跨域配置类
 *
 * @author YZG
 * @date 2022/12/24
 */
@Configuration
public class CorsConfig {
    @Bean
    public CorsWebFilter corsFilter() {
        CorsConfiguration config = new CorsConfiguration();
        config.addAllowedMethod("*");
        config.addAllowedOrigin("*");
        config.addAllowedHeader("*");
        config.setAllowCredentials(true);

        UrlBasedCorsConfigurationSource source = new UrlBasedCorsConfigurationSource(new PathPatternParser());
        source.registerCorsConfiguration("/**", config);

        return new CorsWebFilter(source);
    }
}
在 renren-fast 中也提供了一个跨域配置类,需要把这个注释掉,使用我们自己配置的跨域类
登陆成功!!~~

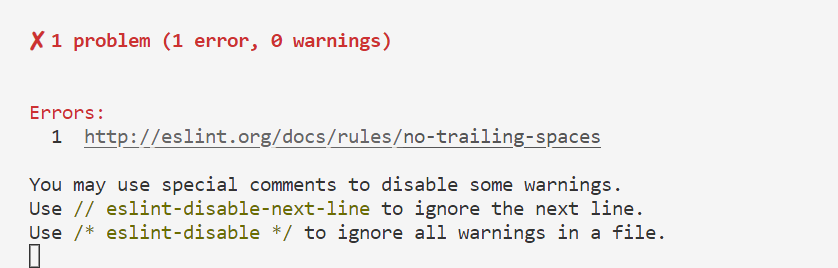
关闭 ESLint 检查
VSCode在保存过程中,有可能出现以下警告,虽然不影响代码,但是看着是真烦,这是因为ESLint 语法检查太严格了,在 .eslintignore 这个文件中增加 * 忽略即可,。
前端实现
category.vue 页面
<template lang="">
    <div>
        <!-- 树形控件 -->
        <el-tree :data="menus" :props="defaultProps" @node-click="handleNodeClick()"></el-tree>
    </div>
</template>

<script>
export default {
  data() {
    return {
      menus: [],
      defaultProps: {
        children: "childrenLevel",
        label: "name", // 展示的属性名
      },
    };
  },
  methods: {
    handleNodeClick(data) {
      console.log(data);
    },
    //   获取所有菜单
    getMenus() {
      this.$http({
        url: this.$http.adornUrl("/product/category/list/tree"),
        method: "get",
      }).then(({data}) => {
        console.log("成功获取菜单数据:", data.data);
        this.menus = data.data
      });
    },
  },
  // 渲染页面之前执行
  created() {
    this.getMenus();
  },
};
</script>

<style lang="">
</style>
Element-UI 参数说明:

label 对应 展示的分类名称,对应 name,children 指定子级分类,对应 childrenLevel

二、分类删除
前端完善分类列表
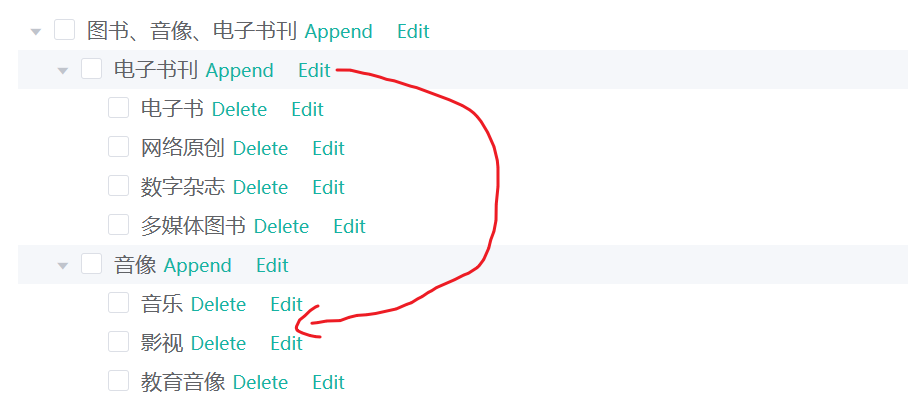
1、将以下代码放入 el-tree 标签内: 删除、增加菜单按钮
      <span class="custom-tree-node" slot-scope="{ node, data }">
        <span>{{ node.label }}</span>
        <span>
          <el-button type="text" size="mini" @click="() => append(data)">
            Append
          </el-button>
          <el-button type="text" size="mini" @click="() => remove(node, data)">
            Delete
          </el-button>
        </span>
      </span>
其中 data、node俩个对象属性中保存的内容:

2、对分类菜单删除的规则:如果是三级分类,不显示 append,三级分类无法继续增加分类,如果分类没有子级分类允许 delete,可以利用 node 对象中的 level 判断是几级分类,childNode 判断是否有子级分类。

3、为分类增加勾选框
效果:

后端实现——删除
对于删除功能,使用MyBatis-Plus逻辑删除,通过修改数据库中的字段达到逻辑上的删除功能。
1、在 CategoryEntity 实体类中增加逻辑删除注解

2、
CategoryController:
	/**
     * 删除
     * 删除需要判断是否分类还在别的地方引用
     * @RequestBody: 获取请求体中的内容,只能发送 POST请求
     */
    @RequestMapping("/delete")
   // @RequiresPermissions("product:category:delete")
    public R delete(@RequestBody Long[] catIds){
        categoryService.removeMenuByIds(Arrays.asList(catIds));
		// categoryService.removeByIds(Arrays.asList(catIds));

        return R.ok();
    }

CategoryService:
    // 删除菜单
    void removeMenuByIds(List<Long> asList);

CategoryServiceImpl:
    /**
     * 删除菜单
     * @param asList
     */
    @Override
    public void removeMenuByIds(List<Long> asList) {
        // TODO: 判断别的地方是否存在引用
        baseMapper.deleteBatchIds(asList);
    }
配置发送请求代码片段
将get、post请求封装成代码片段,方便开发
VSCode :文件 ——> 首选项 ——> 配置用户代码片段
  "http-get 请求": {
    "prefix": "httpget",
    "body": [
      "this.\\$http({",
      "url: this.\\$http.adornUrl(''),",
      "method: 'get',",
      "params: this.\\$http.adornParams({})",
      "}).then(({data}) => {",
      "})"
    ],
    "description": "httpGET 请求"
  },
  "http-post 请求": {
    "prefix": "httppost",
    "body": [
      "this.\\$http({",
      "url: this.\\$http.adornUrl(''),",
      "method: 'post',",
      "data: this.\\$http.adornData(data, false)",
      "}).then(({ data }) => { });"
    ],
    "description": "httpPOST 请求"
  }
前端实现——删除
删除需要实现的功能:
- 使用ELement-UI 设置一个提示框
- 确定:进行删除操作
- 取消: 不进行删除操作
- 删除完,刷新页面的时候,仍然保留在删除菜单的展示页面。
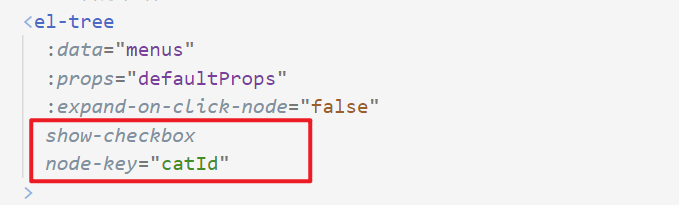
1、设置默认展开的菜单,也就是说,删除哪个菜单,删除成功刷新页面后,展示删除菜单的父级菜单
:default-expanded-keys="expandedKeys"
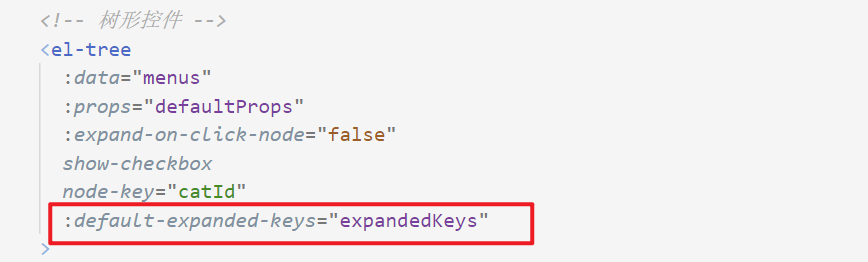
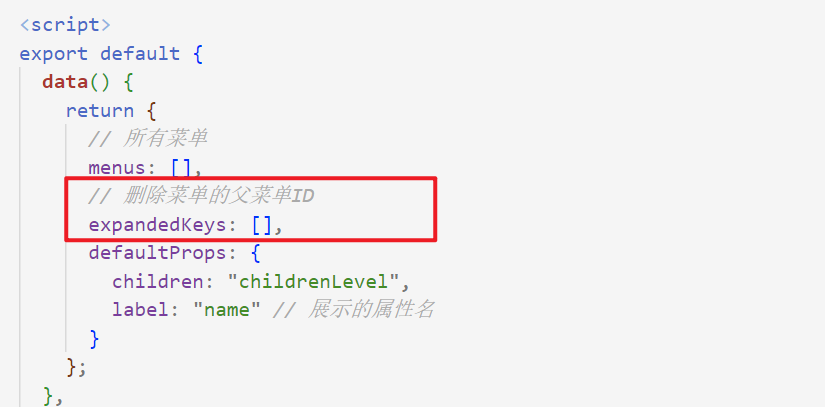
在 data 中进行绑定:
      // 删除菜单的父菜单ID
      expandedKeys: [],
2、发送删除请求
删除成功后:
- 重新刷新页面,展示菜单
- 设置删除菜单的父级菜单ID
remove(node, data) {
      console.log("node:", node, "data: ", data);

      this.$confirm(`是否删除【${data.name}】 菜单`, "提示", {
        confirmButtonText: "确定",
        cancelButtonText: "取消",
        type: "warning"
      })
        //  点击确定执行 then
        .then(() => {
          var ids = [data.catId];
          this.$http({
            url: this.$http.adornUrl("/product/category/delete"),
            method: "post",
            data: this.$http.adornData(ids, false)
          }).then(({ data }) => {
            // 删除成功
            this.$message({
              type: "success",
              message: "删除成功!"
            });
            // 重新获取菜单
            this.getMenus();
            // 设置删除菜单的父菜单ID
            this.expandedKeys = [node.parent.data.catId]
          });
        })
        // 点击取消删除执行catch方法
        .catch(() => {
          this.$message({
            type: "info",
            message: "已取消删除"
          });
        });
    }
三、分类增加
前端实现
在点击 Append 时,弹出一个对话框,在对话框输入增加分类的信息,然后增加到数据库中。

1、增加对话框
    <!--
        对话框
        dialogVisible 是否打开对话框
     -->
    <el-dialog title="提示" :visible.sync="dialogVisible" width="30%">
      <!-- 表单 -->
      <el-form :model="category">
        <el-form-item label="分类名称">
          <el-input v-model="category.name" autocomplete="off"></el-input>
        </el-form-item>
      </el-form>

      <span slot="footer" class="dialog-footer">
        <el-button @click="dialogVisible = false">取 消</el-button>
        <el-button type="primary" @click="addCategory()">确 定</el-button>
      </span>
    </el-dialog>
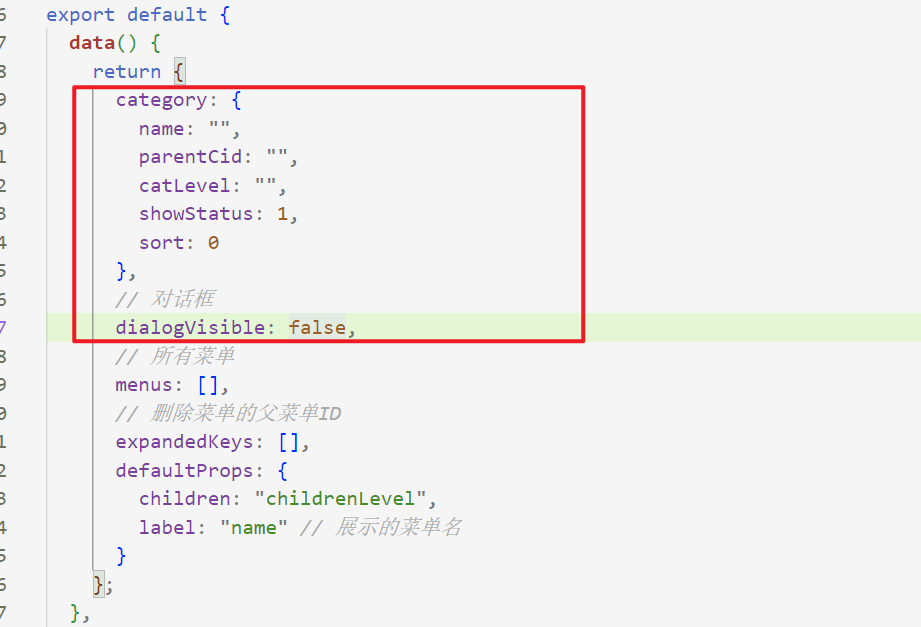
2、在 data 中绑定数据
      category: {
        name: "",
        parentCid: "",
        catLevel: "",
        showStatus: 1,
        sort: 0
      },
      // 对话框
      dialogVisible: false,
3、向后端发送请求
  // 打开对话框
    append(data) {
      console.log("append:", data);
      //   打开对话框
      this.dialogVisible = true;
      // 当前菜单的父级菜单ID
      this.category.parentCid = data.catId;
      // 当前菜单ID
      this.category.catLevel = data.parentCid * 1 + 1;
    },
    // 增加分类菜单实现
    addCategory() {
      console.log("提交的分类菜单: ", this.category);
      this.$http({
        url: this.$http.adornUrl("/product/category/save"),
        method: "post",
        data: this.$http.adornData(this.category, false)
      }).then(({ data }) => {
        this.$message({
          type: "success",
          message: "菜单保存成功!"
        });
        // 关闭对话框
        this.dialogVisible = false
        // 重新获取菜单
        this.getMenus();
        // 设置删除菜单的父菜单ID
        this.expandedKeys = [this.category.parentCid];
      });
    },
后端的增加功能,逆向工程已经帮忙生成了:

四、分类修改
思路分析:
修改操作无非就俩步:
- 回显修改的数据
- 修改
在页面中,修改和增加分类使用同一个对话框,如何区分是修改还是增加呢?
- 可以使用一个标识进行判断,在进行修改、增加时为这个标识设置不同的值。
1、分类菜单中增加修改按钮
          <!-- 修改按钮 -->
          <el-button type="text" size="mini" @click="() => edit(data)">
            Edit
          </el-button>
2、修改对话框
- 增加了 图标、计量单位 俩个输入框。
- 动态修改 title 的值,如果是edit设置为 “修改菜单” ,如果是 add 设置为 “增加菜单”
- 点击 “确定” 通过 submitData 方法判断是修改还是增加
   <!--
        对话框
        dialogVisible 是否打开对话框
        :close-on-click-modal 点击对话框外部,是否可以关闭对话框
     -->
    <el-dialog :title="title" :visible.sync="dialogVisible" width="30%" :close-on-click-modal="false">
      <!-- 表单 -->
      <el-form :model="category">
        <el-form-item label="分类名称">
          <el-input v-model="category.name" autocomplete="off"></el-input>
        </el-form-item>
        <el-form-item label="图标">
          <el-input v-model="category.icon" autocomplete="off"></el-input>
        </el-form-item>
        <el-form-item label="计量单位">
          <el-input
            v-model="category.productUnit"
            autocomplete="off"
          ></el-input>
        </el-form-item>
      </el-form>

      <span slot="footer" class="dialog-footer">
        <el-button @click="dialogVisible = false">取 消</el-button>
        <el-button type="primary" @click="submitData()">确 定</el-button>
      </span>
    </el-dialog>
3、data 中绑定属性
- 对话框主要是根据 dialogType 的值判断是修改还是增加
      // 表单标题
      title: "",
      // 判断是修改还是增加
      dialogType: "add",
      category: {
        name: "",
        parentCid: "",
        catLevel: "",
        showStatus: 1,
        sort: 0,
        icon: "",
        productUnit: "",
        catId: null
      },

4、submitData 方法: 用于判断提交的数据是发送修改请求还是增加请求
    //  用于判断提交的数据是发送修改请求还是增加请求
    submitData() {
      if (this.dialogType == "edit") {
        this.editCategory();
      }
      if (this.dialogType == "add") {
        this.addCategory();
      }
    },
5、edit 方法:设置对话框title、回显修改菜单的数据
在点击 “edit” 按钮时,向后端发送一次请求获取当前修改菜单的最新数据。避免由于多人操作可能造成数据不一致问题。
    // 修改
    edit(data) {
      //  设置标识为修改
      this.dialogType = "edit";
      this.title = "修改菜单";
      //   打开对话框
      this.dialogVisible = true;
      // 获取当前菜单的最新数据
      this.$http({
        url: this.$http.adornUrl(`/product/category/info/${data.catId}`),
        method: "get",
        params: this.$http.adornParams({})
      }).then(({ data }) => {
        console.log("当前菜单的最新数据: ", data);
        this.category.catId = data.data.catId;
        this.category.name = data.data.name;
        this.category.icon = data.data.icon;
        this.category.productUnit = data.data.productUnit;
        // 设置删除菜单的父菜单ID
        this.expandedKeys = [data.data.parentCid];
      });
    },
获取后端返回数据时,注意返回的名称,我是修改成了 data,如果没修改默认是: category

6、editCategory方法: 发送修改请求,完成修改操作
    // 发送修改请求
    editCategory() {
      // 解构表达式
      var { catId, name, icon, productUnit } = this.category;
      this.$http({
        url: this.$http.adornUrl("/product/category/update"),
        method: "post",
        data: this.$http.adornData({ catId, name, icon, productUnit }, false)
      }).then(({ data }) => {
        this.$message({
          type: "success",
          message: "菜单修改成功!"
        });
        // 关闭对话框
        this.dialogVisible = false;
        // 重新获取菜单
        this.getMenus();
      });
    },
7、修改 append 方法: 清空由于修改保存的数据,设置对话框标题,设置标识…
  // 增加分类菜单
    append(data) {
      this.title = "增加菜单";
      //   console.log("append:", data);
      //  设置标识为增加
      this.dialogType = "add";
      //   打开对话框
      this.dialogVisible = true;
      // 当前菜单的父级菜单ID
      this.category.parentCid = data.catId;
      // 当前菜单ID
      this.category.catLevel = data.parentCid * 1 + 1;

      // 清空修改数据时的表单内容
      this.category.catId = null;
      this.category.name = "";
      this.category.icon ="";
      this.category.productUnit = "";
      this.category.showStatus = 1;
      this.category.sort = 0;
    },
五、拖拽菜单
拖拽效果实现
思路分析:
菜单一共有三级菜单,如果超过三级菜单就不允许拖拽,分为三种情况:
- 拖拽菜单在放置目标菜单的上方
- 拖拽菜单在放置目标菜单的下方
- 拖拽菜单在放置目标菜单的内部
针对第一、二种情况,我们只需要判断被拖拽菜单的深度以及目标菜单的父级菜单的层级之和是否大于3。
假设将 手机 拖拽到 大家电的上边,手机 的深度为3,大家电的父级菜单家用电器的层级为1, 加在一起为4,则不允许拖拽
这里需要了解: 层级与深度的关系
层级: 就是 catLevel 的值,几级菜单,比如: 手机是一级菜单,层级就是 1
深度: 菜单的深度,比如家用电器的深度就是3

针对第三种情况,需要判断被拖拽菜单的深度,以及目标菜单的层级之和
假设我们将 电子书刊 拖拽到 音像 内部,电子书刊的深度是2,音像的层级也是2,加在一起层级为4,就不允许拖拽。
被拖拽节点的深度 = 被拖拽节点的最大深度 - 被拖拽节点的层级 + 1
比如: 电子书刊的最大深度是3 - 电子书刊的层级 2 + 1 =2
电子书刊真实的深度则为 2
因此我们现在的核心 就是求出被拖拽节点的最大深度 目标菜单的层级以及目标菜单的父级菜单的层级都是现成的。
1、增加可拖拽的选项

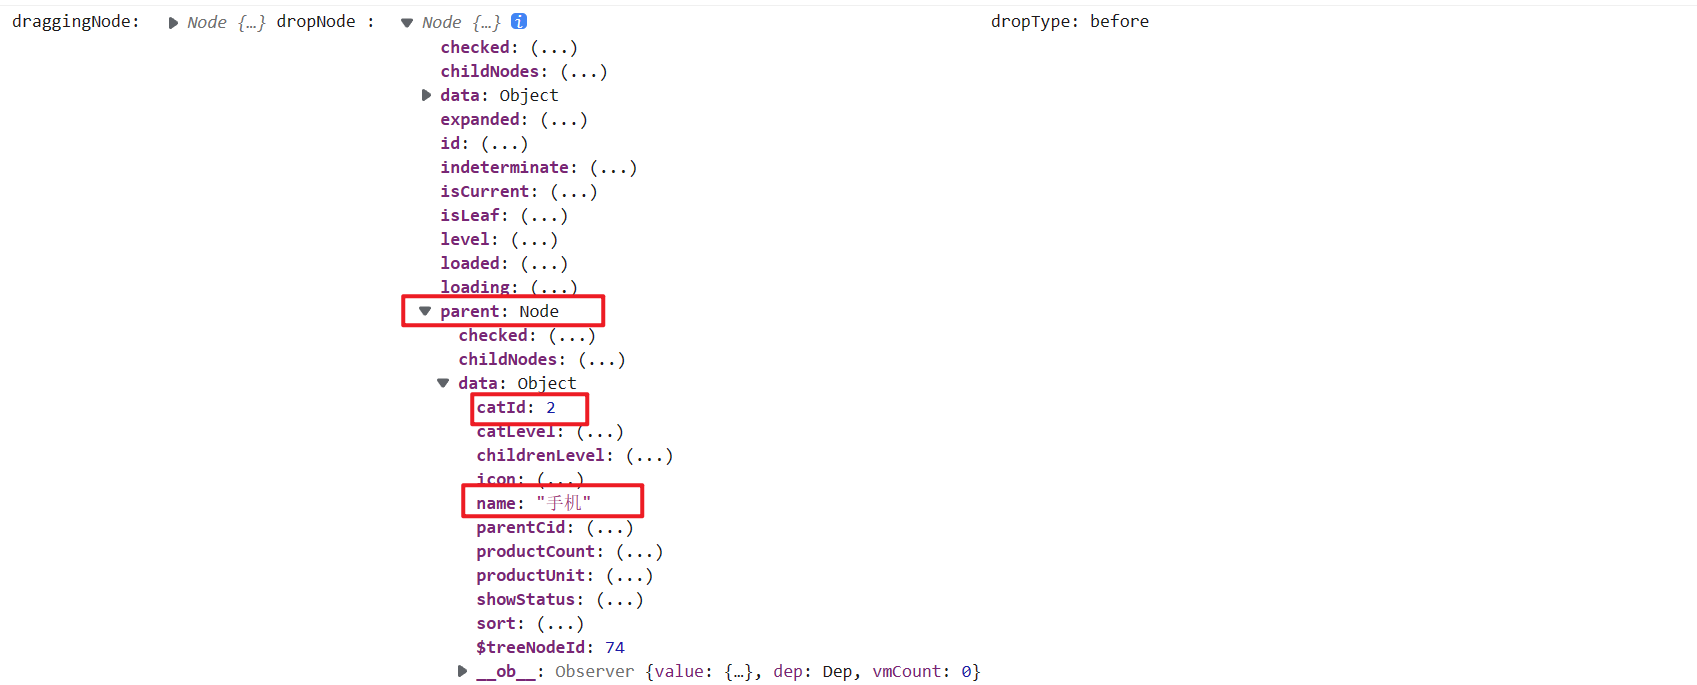
2、allowDrop 方法 有三个参数: draggingNode, dropNode, type,返回true允许拖拽,返回false不允许拖拽
- draggingNode 被拖拽的当前节点(节点==菜单)
- dropNode 放置的目标节点
- type 放置目标节点的位置
draggingNode、dropNode这俩个对象中保存了目标菜单的层级以及目标菜单的父级菜单的层级

3、求出被拖拽节点的最大深度
可以根据被拖拽节点 draggingNode 对象中的 childrenLevel 来求得,遍历节点中的子节点
   //  求出当前被拖拽节点的最大深度
    countNodeLevel(node) {
      // 判断是否有子节点
      if (node.childrenLevel != null && node.childrenLevel.length > 0) {
        for (let i = 0; i < node.childrenLevel.length; i++) {
          // 子节点的层级
          if (node.childrenLevel[i].catLevel > this.maxLevel) {
            this.maxLevel = node.childrenLevel[i].catLevel;
          }
          //  继续递归查找是否有子节点
          this.countNodeLevel(node.childrenLevel[i]);
        }
      }else {
        // 如果没有子节点,将最大深度设置为当前层级
        this.maxLevel = node.catLevel
      }
    },
4、allowDrop方法
 allowDrop(draggingNode, dropNode, type) {
      // 当前被拖拽节点最大深度
      this.countNodeLevel(draggingNode.data);
      //  当前被拖拽节点的真实深度
      let nodeDeep = this.maxLevel - draggingNode.data.catLevel + 1;

      console.log(`${draggingNode.data.name}的深度`, nodeDeep);

      if (type == "inner") {
        this.maxLevel = 0
        // 被拖拽节点的深度,以及目标节点的层级之和
        return nodeDeep + dropNode.level <= 3;
      } else {
        this.maxLevel = 0
        // 被拖拽菜单的深度以及目标菜单的父级菜单的层级之和
        return nodeDeep + dropNode.parent.level <= 3;
      }
    },
拖拽数据收集
上面实现了页面的拖拽效果,需要将修改节点的信息收集起来,并通知后端修改数据库中的信息。
首先在标签内使用 @node-drop 事件,拖拽成功后执行 handleDrop 方法。

对于 handleDrop 有默认的四个参数
- draggingNode 正在拖拽的节点
- dropNode 目标节点
- dropType 拖拽的节点放在目标节点的位置(before、after、inner)
- ev 事件
handleDrop(draggingNode, dropNode, dropType, ev) {}
对于拖拽节点需要修改以下三个信息:
- 当前节点的父节点ID
- 当前节点的层级变化
- 当前节点的最新排序
而对于拖拽节点的位置不同,这些信息的变化又是不一样的:
1、找到当前节点的父节点ID:
(1)如果当前节点在目标节点的 before/after, 那么当前节点的父节点ID就是目标节点的父节点ID
比如:如果我们将 运行商 节点放在手机通讯的前面,那么运行商父节点的ID就是手机通讯父节点 手机 的ID
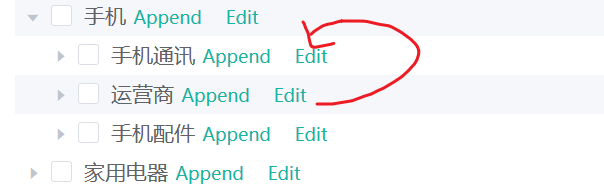
可以通过dropNode对象找到,手机的 catId=2
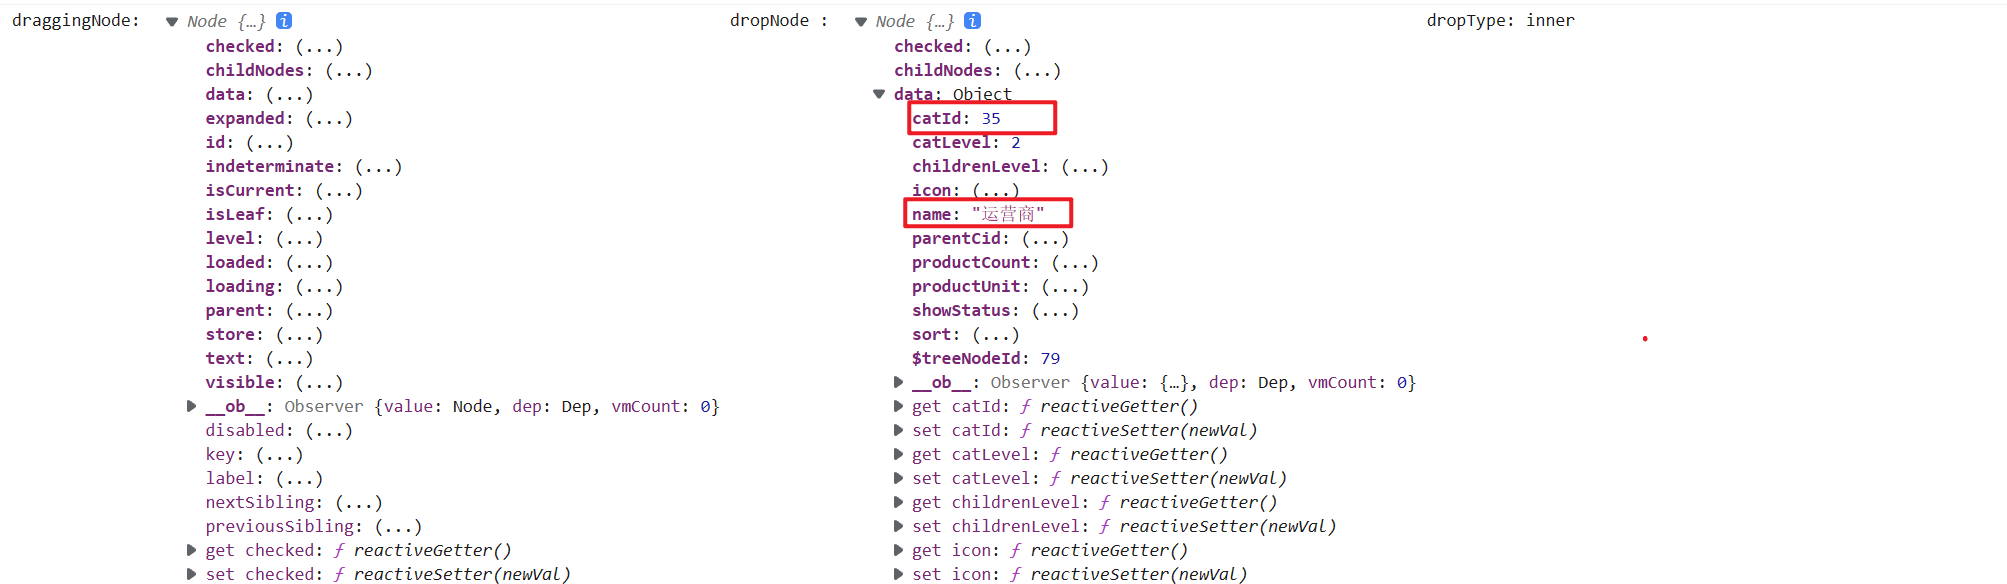
(2)如果如果当前节点在目标节点的 inner, 那么当前节点的父节点ID就是目标节点的ID
比如:将手机放到运行商内部,那么手机的父节点ID就是运营商的ID

其中 运营商 的ID也可以通过 dropNode 找到:
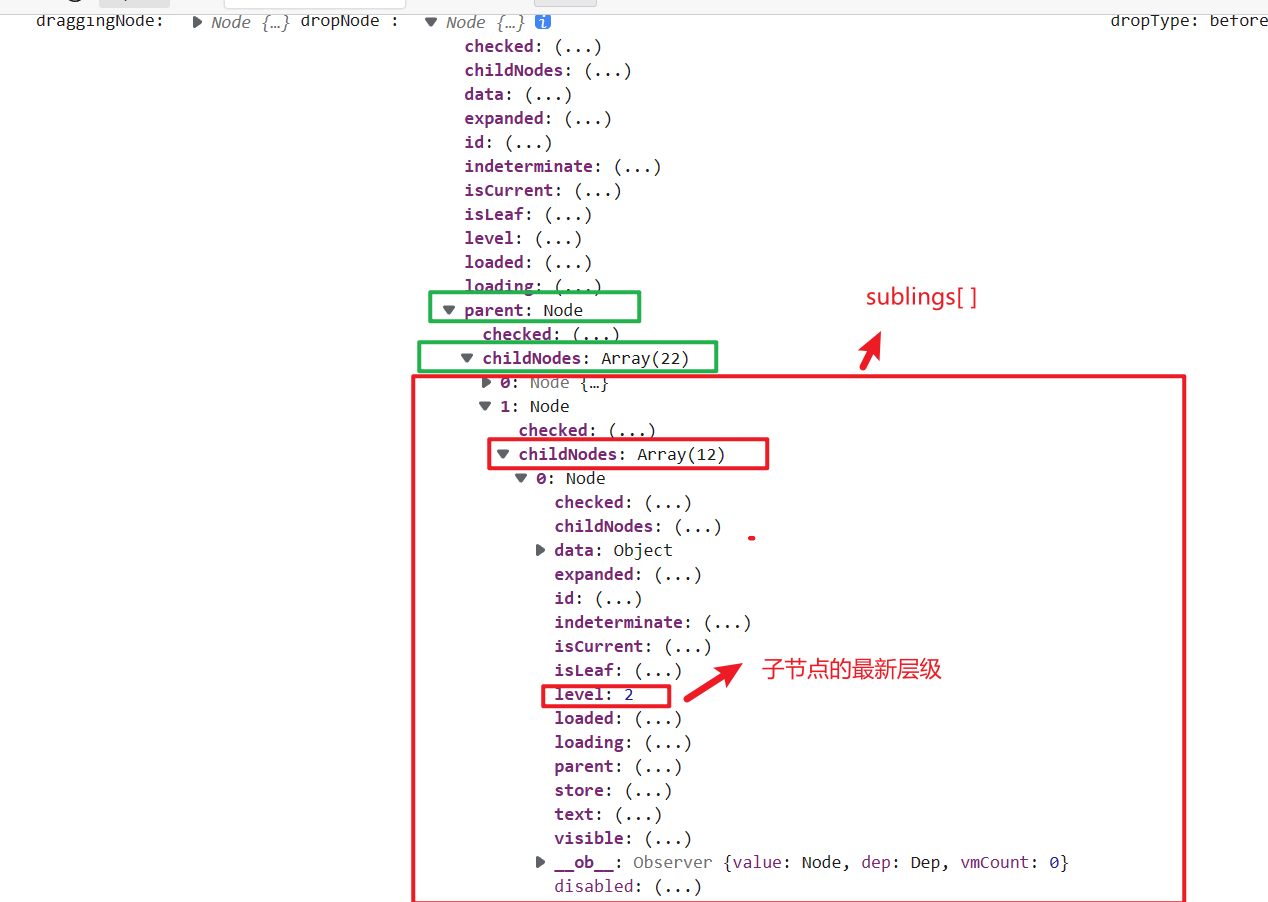
2、找到当前节点以及兄弟节点的信息
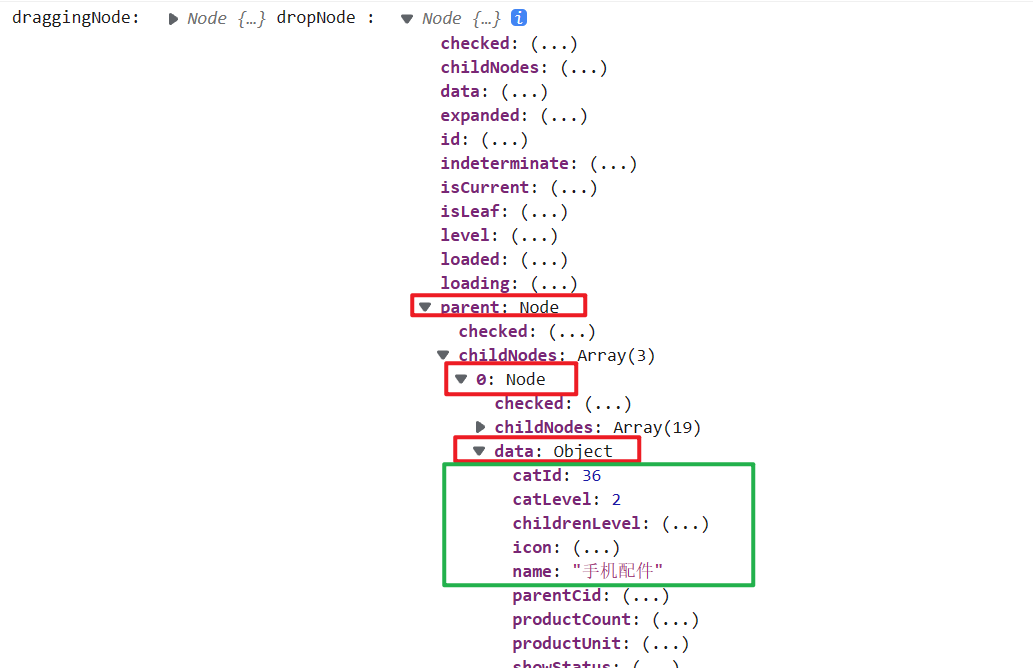
(1)如果当前节点放在目标节点的 before/after,那么当前节点以及兄弟节点的信息在目标节点的父节点的子节点中。
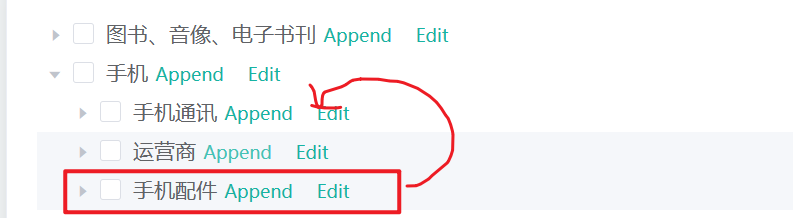
比如:将手机配件放在手机通讯的前面
那么手机配件以及它的兄弟节点都保存在 dropNode.parent.childNodes 里,利用这个信息就可以收集正在拖拽节点的信息。
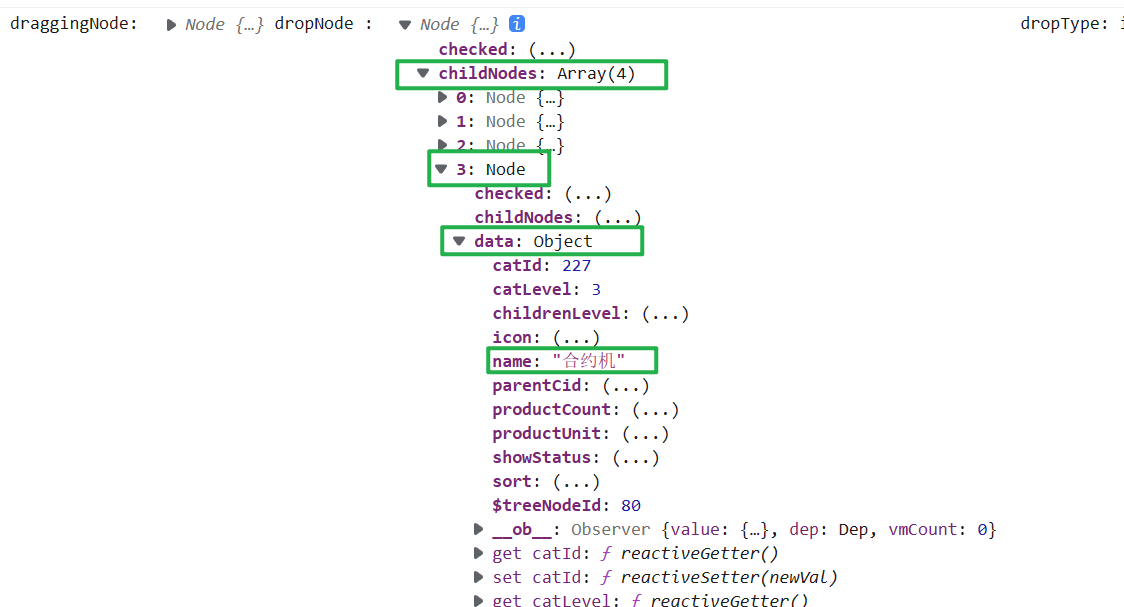
(2) 如果当前节点放在目标节点的 inner, 那么当前节点以及兄弟节点信息在目标节点的子节点中

比如:将合约机放在手机通讯内部,那么合约机 以及它兄弟节点的信息保存在了 dropNode.childNodes 里
以上的逻辑转化为代码为:
    handleDrop(draggingNode, dropNode, dropType, ev) {
      //  1、拖拽节点的父节点ID
      let pCid = 0;
      // 正在拖拽节点的兄弟节点
      let sublings = null;
      if(dropType == 'inner') {
        // 当前节点的父节点iD就是目标节点的ID
        pCid = dropNode.data.catId
        // 2、当前节点的兄弟节点
        sublings = dropNode.childNodes
      }else {
        // 当前节点的父节点iD就是目标节点父节点的ID
        pCid = dropNode.parent.data.catId
        // 2、当前节点的兄弟节点
        sublings = dropNode.parent.childNodes
      }
    }
3、当前节点的最新顺序
找到了当前正在拖拽的节点以及兄弟节点的信息,那么就需要遍历这些节点,为她们重新排序并且保存到数据库中。值得注意的是,当前正在拖拽的节点除了要设置顺序还要重新设置它的父节点ID。
转化为代码:
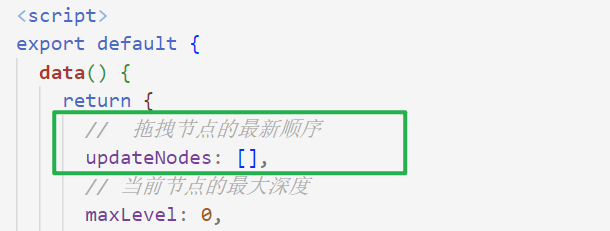
updateNodes定义在data中,保存拖拽节点以及兄弟节点的最新顺序:
      // 3、找到兄弟节点信息后,重新遍历排序
      for(let i =0; i< sublings.length;i++) {
        // 正在遍历的节点是正在拖拽的节点
        if (sublings[i].data.catId == draggingNode.data.catId) {
          // 正在拖拽的节点不仅要设置顺序,还要设置父节点ID
          this.updateNodes.push({catId:sublings[i].data.catId,sort:i,parentCid:pCid})
        }else {
          // 其他兄弟节点只需要设置节点id和顺序
          this.updateNodes.push({catId:sublings[i].data.catId,sort:i})
        }
      }
问题一:
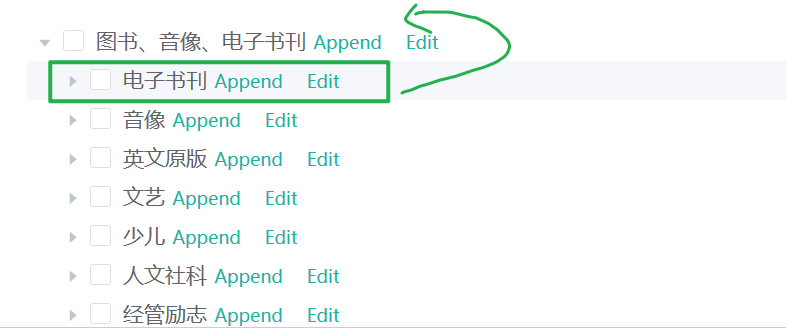
加入 将 电子书刊 放到 图书、音像、电子书刊的 上面

可以看见 电子书刊 的父节点ID竟然是undefined
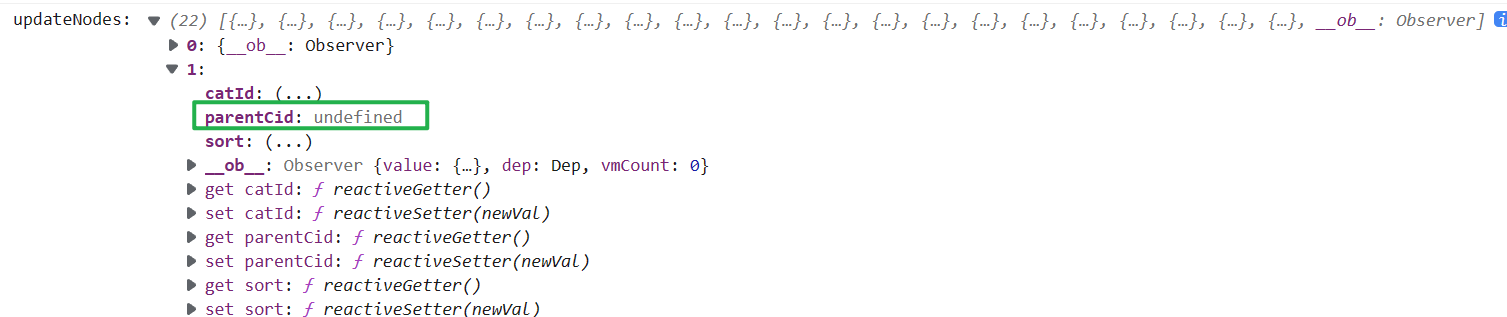
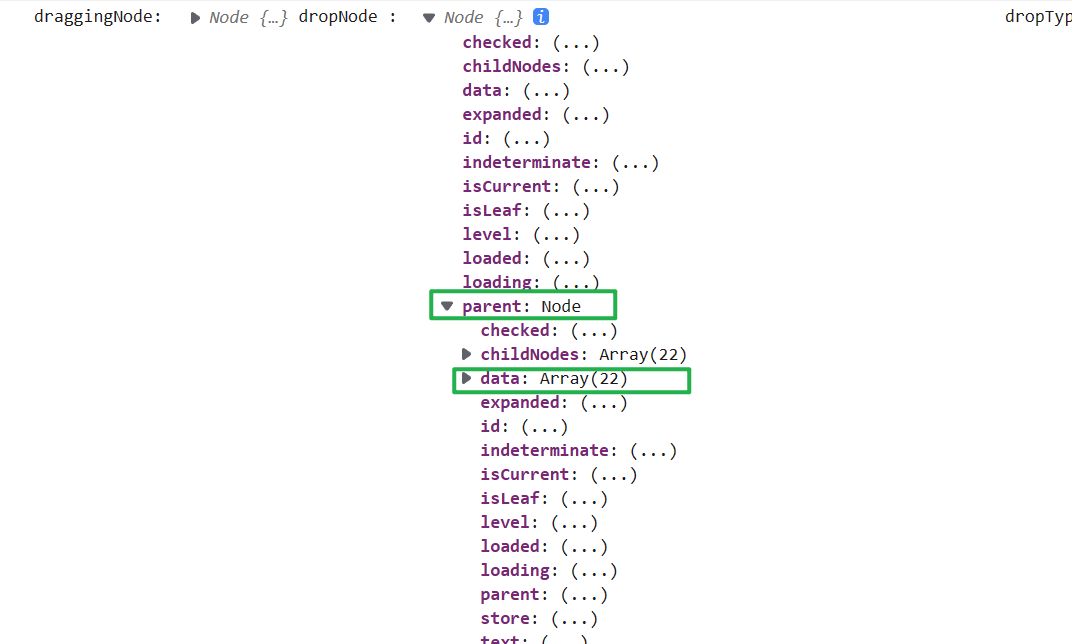
这是由于,由于他放在了图书、音像、电子书刊的 上面,父节点ID = dropNode.parent.data.catId

而 dropNode.parent.data 竟然是一个数组,没有 catId 属性,自然是 undefined 了。
修改:此时我们只需要加一个三目运算符,当拖拽成根节点时,设置父节点ID为0

效果:不再是 undefined 了,而是 0

4、找到拖拽节点的层级变化
拖拽节点的父节点ID、顺序都找到了,但是他的层级变化也得更新。那么这个层级变化关系如何找到呢?
如果我们将电子书刊放到图书、音像、电子书刊的 上面, 那么电子书刊的层级由原来的 2 变成了 1,并且 电子书刊 里的子节点也发生了变化。
电子书刊 原始的层级保存在 draggingNode 的 level 属性中,变化后的层级也可以找到,在第二步的时候,我们将拖拽节点的信息保存到了 sublings 数组中。

找到了正在拖拽节点的层级变化,那么正在拖拽的节点还有可能有子节点,子节点的层级也会发生变化。
而子节点的层级变化保存在 sublings[i].childNode[i].level中,值得注意的是,子节点的层级是需要递归修改的。
完整的代码:
   // 拖拽成功后,收集数据发送给后端进行修改
    handleDrop(draggingNode, dropNode, dropType, ev) {
      //  1、拖拽节点的父节点ID
      let pCid = 0;
      // 正在拖拽节点的兄弟节点
      let sublings = null;
      if (dropType == "inner") {
        // 当前节点的父节点iD就是目标节点的ID
        pCid = dropNode.data.catId;
        // 2、当前节点的兄弟节点
        sublings = dropNode.childNodes;
      } else {
        // 当前节点的父节点iD就是目标节点父节点的ID
        pCid =
          dropNode.parent.data.catId == undefined
            ? 0
            : dropNode.parent.data.catId;
        // 2、当前节点的兄弟节点
        sublings = dropNode.parent.childNodes;
      }

      // 3、找到兄弟节点信息后,重新遍历排序
      for (let i = 0; i < sublings.length; i++) {
        // 正在遍历的节点是正在拖拽的节点
        if (sublings[i].data.catId == draggingNode.data.catId) {
          // 4、修改正在拖拽节点的层级
          // 正在拖拽节点的原始层级
          let catLevel = draggingNode.level;
          if (catLevel != sublings[i].level) {
            // 正在拖拽节点层级发生变化
            catLevel = sublings[i].level;
            // 修改当前节点的子节点的层级
            this.updateChildNodeLevel(sublings[i]);
          }
          // 正在拖拽的节点不仅要设置顺序,还要设置父节点ID
          this.updateNodes.push({
            catId: sublings[i].data.catId,
            sort: i,
            parentCid: pCid,
            catLevel: catLevel
          });
        } else {
          // 其他兄弟节点只需要设置节点id和顺序
          this.updateNodes.push({ catId: sublings[i].data.catId, sort: i });
        }
      }
      console.log("updateNodes:", this.updateNodes);
    },

    //  修改正在拖拽节点的子节点的层级关系
    updateChildNodeLevel(node) {
      if (node.childNodes.length > 0) {
        // 遍历子节点
        for (let i = 0; i < node.childNodes.length; i++) {
          // 当前节点的子节点
          let cNode = node.childNodes[i].data;
          // 修改子节点的catId以及它的层级
          this.updateNodes.push({
            catId: cNode.catId,
            catLevel: node.childNodes[i].level
          });
          this.updateChildNodeLevel(node.childNodes[i])
        }
      }
    },
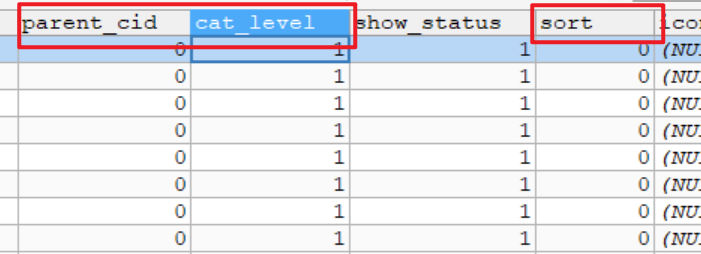
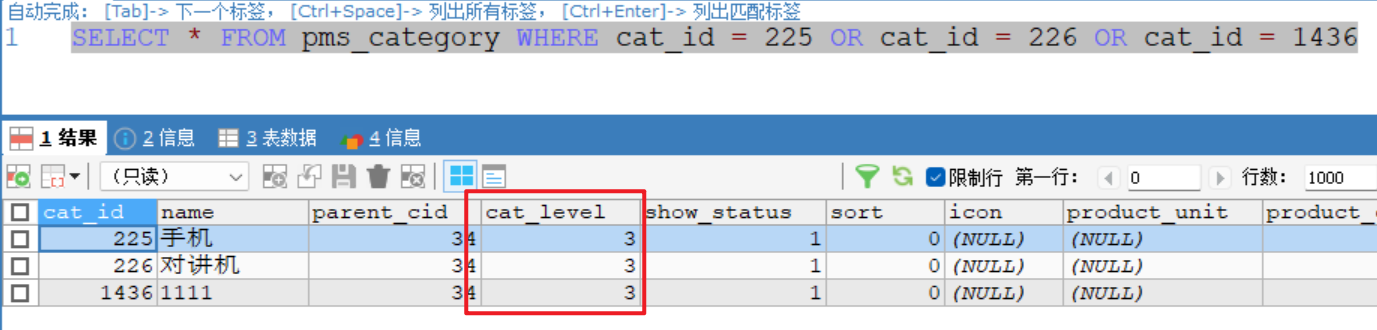
结果验证:
将手机通讯 放在 图书、音像、电子书刊 上面

最终修改的信息:

和数据库中的 cat_level 作对比,手机、对讲机、1111的层级由3变成 了2. 效果正确。
拖拽功能完成
在上一步,完成了拖拽节点数据的收集,需要前端发送请求给后端对数据库完成修改
1、CategoryController
    /**
     * 批量修改
     */
    @RequestMapping("/update/sort")
    // @RequiresPermissions("product:category:update")
    public R updateSort(@RequestBody CategoryEntity[] category){
        // categoryService.updateById(category);
        categoryService.updateBatchById(Arrays.asList(category));
        return R.ok();
    }
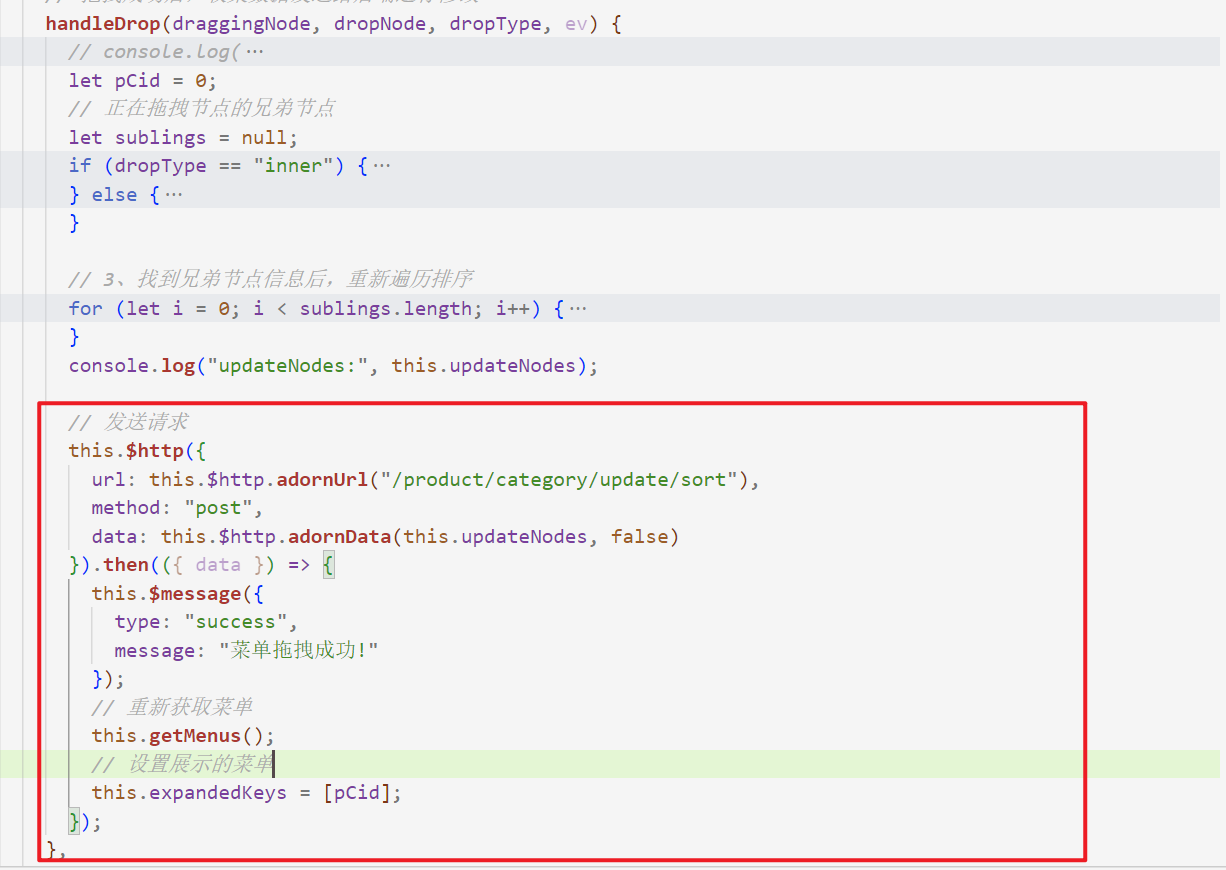
2、收集完数据后,前端发送请求
      // 发送请求
      this.$http({
        url: this.$http.adornUrl("/product/category/update/sort"),
        method: "post",
        data: this.$http.adornData(this.updateNodes, false)
      }).then(({ data }) => {
        this.$message({
          type: "success",
          message: "菜单拖拽成功!"
        });
        // 重新获取菜单
        this.getMenus();
        // 设置删除菜单的父菜单ID
        this.expandedKeys = [pCid];
      });
    },
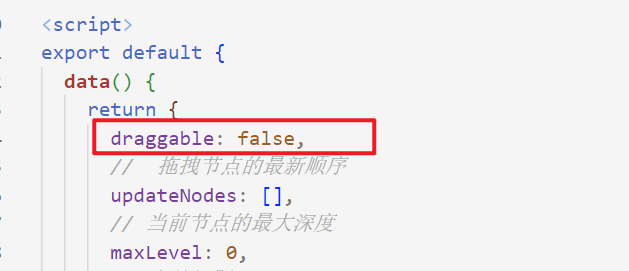
拖拽功能完善
1、为拖拽功能增加一个开关按钮
(1)使用 El 拖拽开关
    <el-switch v-model="draggable" active-text="开启拖拽" inactive-text="关闭拖拽">
    </el-switch>
(2)将 draggable 设置成动态的,在 data 中声明

2、设置批量保存的按钮,等待所有的拖拽完成之后,在向后端发送请求
(1) 增加按钮
<el-button v-if="draggable" @click="batchSave()">批量保存</el-button>
(2) 点击 批量保存 时,发送请求,修改数据库
    // 批量拖拽
    batchSave() {
      // 发送请求
      this.$http({
        url: this.$http.adornUrl("/product/category/update/sort"),
        method: "post",
        data: this.$http.adornData(this.updateNodes, false)
      }).then(({ data }) => {
        this.$message({
          type: "success",
          message: "菜单拖拽成功!"
        });
        // 重新获取菜单
        this.getMenus();
        // 设置展示的菜单
        this.expandedKeys = this.pCid;
        // 清空
        this.updateNodes = [];
        this.maxLevel = 0;
      });
    },
(3) 将 pCid 改成全局属性,在data中声明,现在我们是批量拖拽,有可能需要展示多个菜单。因此父ID还有可能是多个,改成数组。

(4) 在 handleDrop 方法中,对 pCid 赋值

(5) 之前我们拖拽一个菜单就修改一次,菜单的层级都是最新的,而现在 由于批量拖拽,拖拽完成后同意发送请求修改,因此与可能菜单的层级发生变化。
所以在我们计算菜单最大深度时,不在使用数据库中的层级,而是使用ELement-UI帮我们封装好的层级。

将从数据库中查询的数据都改成Element——UI帮忙封装好的
node.childrenLevel 改成 node.childNodes
node.childrenLevel[i].catLevel 改成 node.childNodes[i].level

    //  求出当前被拖拽节点的最大深度
    countNodeLevel(node) {
      // 判断是否有子节点
      if (node.childNodes != null && node.childNodes.length > 0) {
        for (let i = 0; i < node.childNodes.length; i++) {
          // 子节点的层级
          if (node.childNodes[i].level > this.maxLevel) {
            this.maxLevel = node.childNodes[i].level;
          }
          //  继续递归查找是否有子节点
          this.countNodeLevel(node.childNodes[i]);
        }
      } else {
        // 如果没有子节点,将最大深度设置为当前层级
        this.maxLevel = node.level;
      }
    },
六、批量删除
1、增加删除按钮
<el-button type="danger" @click="batchDelete()">批量删除</el-button>
2、获取批删除的菜单
(1)为 树形菜单 增加标识

(2)可通过 this.$refs.menuTree 获取到树形菜单,根据 getCheckedNodes 方法可获取到选择的菜单
具体的删除流程:
  batchDelete() {
      // 保存被删除节点的ID
      let ids = [];
      let menuNames = [];
      // 获取被删除的节点
      let removeNodes = this.$refs.menuTree.getCheckedNodes();
      // 遍历节点,获取catId
      for (let i = 0; i < removeNodes.length; i++) {
        ids.push(removeNodes[i].catId);
        menuNames.push(removeNodes[i].name);
      }
      this.$confirm(`是否要批量删除【${menuNames}】 菜单`, "提示", {
        confirmButtonText: "确定",
        cancelButtonText: "取消",
        type: "warning"
      })
        .then(() => {
          this.$http({
            url: this.$http.adornUrl("/product/category/delete"),
            method: "post",
            data: this.$http.adornData(ids, false)
          }).then(({ data }) => {
            this.$message({
              type: "success",
              message: "批量删除成功"
            });
            this.getMenus();
          });
        })
        .catch(() => {
          this.$message({
            type: "info",
            message: "已取消删除"
          });
        });
      console.log("被删除的节点:", removeNodes);
    },
品牌管理
新增 品牌管理 菜单

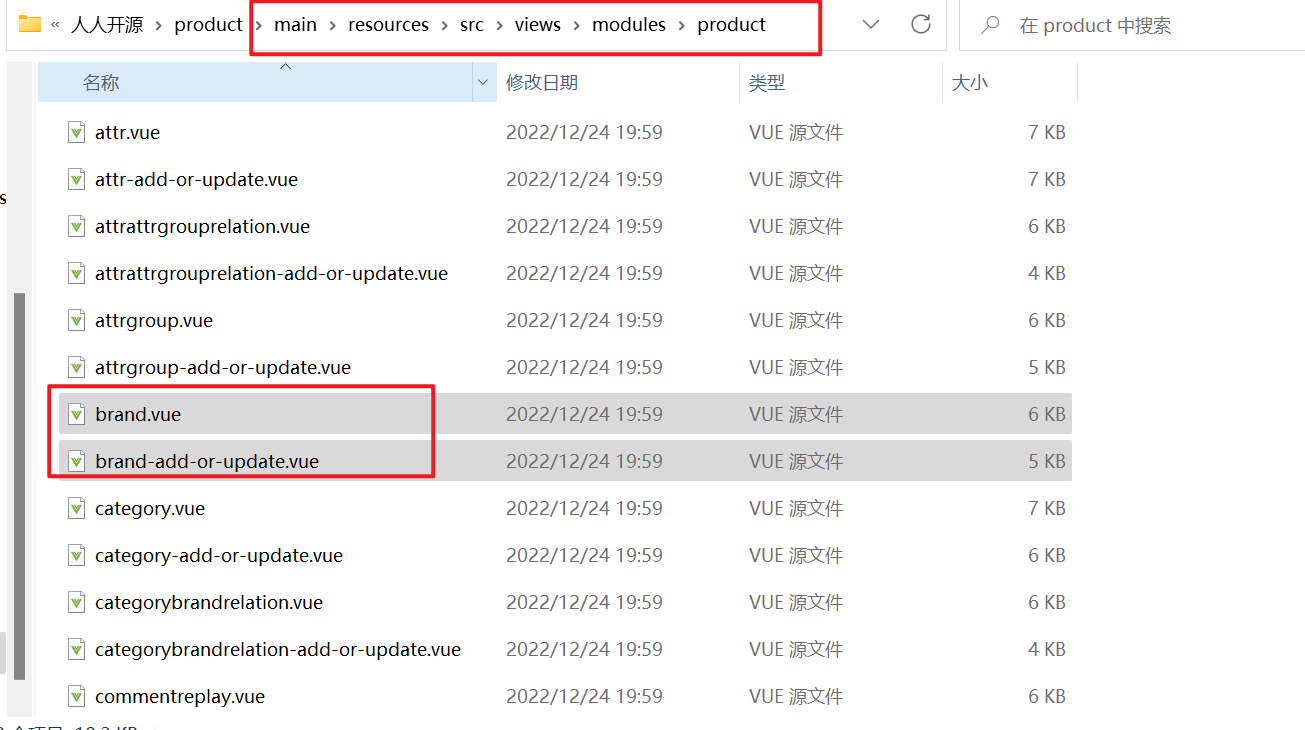
将 使用逆向工程生成好的 前端代码 直接拷贝到 product 目录下
新创、建的菜单是没有增加和修改按钮的,需要修改权限

一、效果优化及快速显示开关
品牌的显示状态希望使用按钮来表示是否显示,可以使用 Element-UI 提供的组件


(1) 使用 ELement-UI 中Table表格提供的自定义模板,template 模板里可组合其他组件使用
修改 brand.vue 页面中的 显示状态 :
        <template slot-scope="scope">
          <el-switch
            v-model="scope.row.showStatus"
            active-color="#13ce66"
            inactive-color="#ff4949"
          >
          </el-switch>
        </template>

(2) 同样修改 brand-add-or-update.vue 中的显示状态:
      <el-form-item label="显示状态" prop="showStatus">
        <el-switch
          v-model="dataForm.showStatus"
          active-color="#13ce66"
          inactive-color="#ff4949"
        >
        </el-switch>
      </el-form-item>
(3) 修改完显示状态,发送请求修改数据库信息
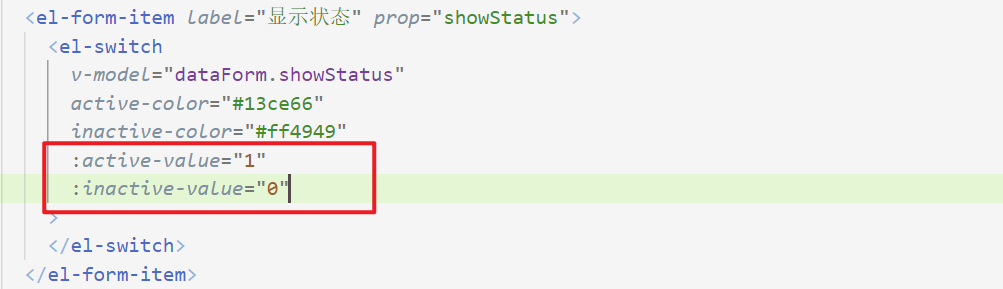
1)、修改开关标签
- active-value 表示打开 开关 传递的值
- inactive-value 关闭 开关 传递的值
- @change 监听开关的变化,一有变化就执行updateshowStatus 方法。
- scope.row 获取表格的内部信息
        <template slot-scope="scope">
          <el-switch
            v-model="scope.row.showStatus"
            active-color="#13ce66"
            inactive-color="#ff4949"
            :active-value="1"
            :inactive-value="0"
            @change="updateshowStatus(scope.row)"
          >
          </el-switch>
        </template>
2)、updateshowStatus 方法
    //  更新品牌显示状态
    updateshowStatus(data) {
      console.log("品牌的最新信息:", data);
      // 解构表达式
      let { brandId, showStatus } = data;
      this.$http({
        url: this.$http.adornUrl("/product/brand/update"),
        method: "post",
        data: this.$http.adornData({ brandId, showStatus }, false)
      }).then(({ data }) => {
        this.$message({
          type: "success",
          message: "状态更新成功"
        });
      });
    },
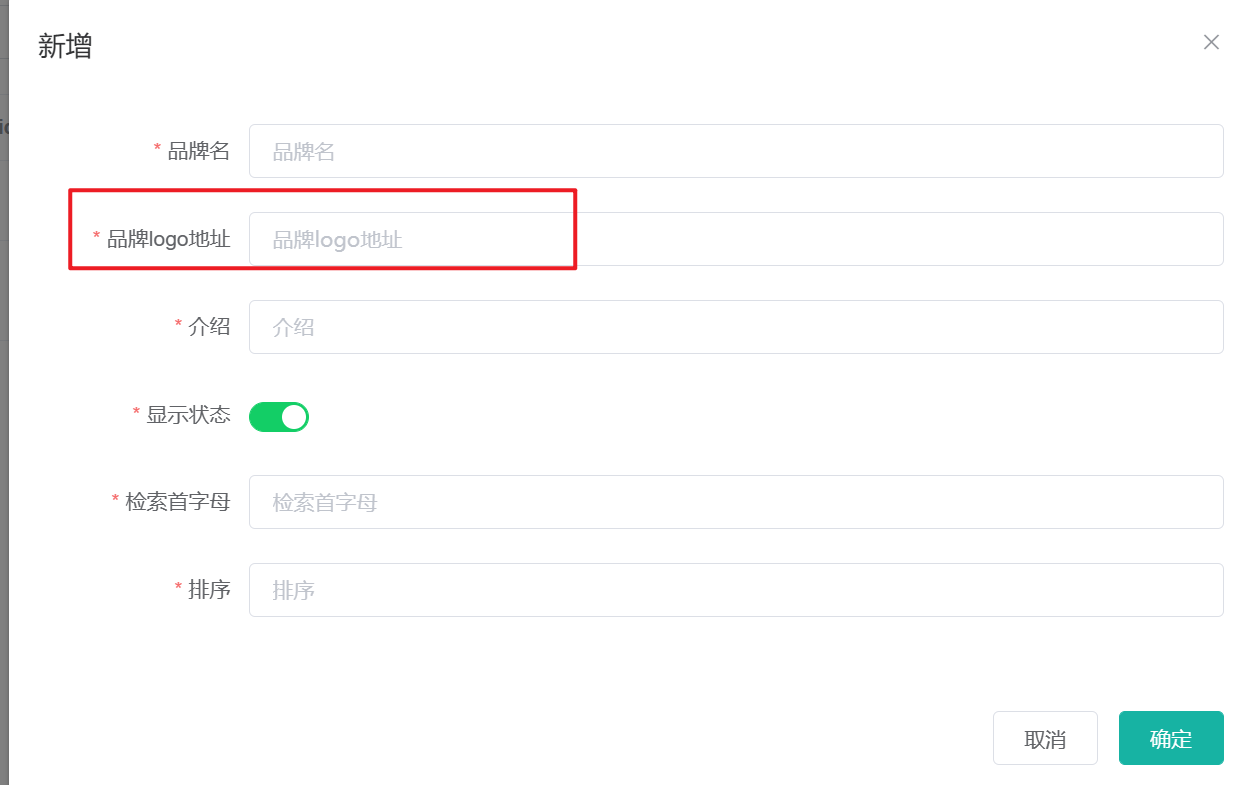
二、品牌Logo上传
将 新增 品牌的Logo改成文件上传的样式。
阿里云OSS
项目的文件存储使用的是阿里云OSS:OSS管理控制台 (aliyun.com)
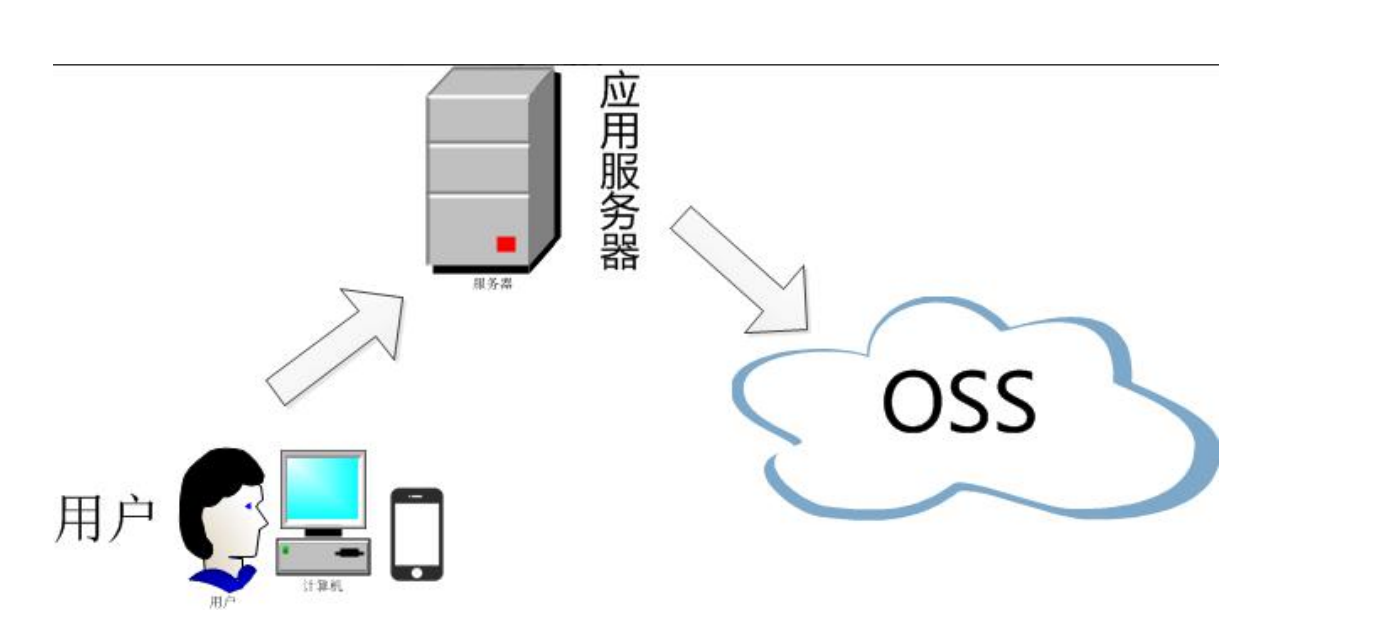
文件的上传方式
普通上传:上传的文件需要经过服务器,通过服务器上传到OSS,当请求多的时候,这种方式给服务器造成了很大的压力,本项目中不使用此方式
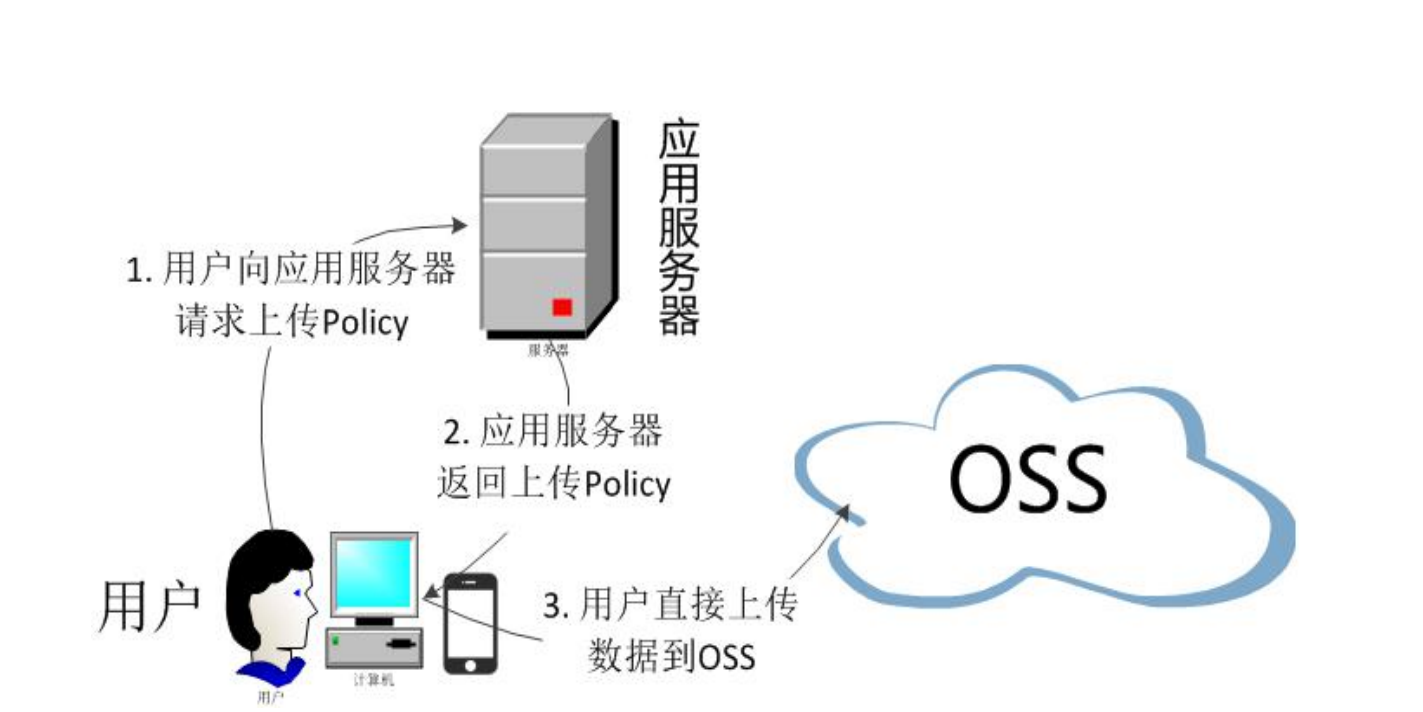
服务端签名后直传: 前端上传文件到OSS之前,后端只需要通过账号、密码生成一个签名(密钥、上传地址…),前端收到这个签名之后直接上传到 阿里云OSS,而阿里云自己会判断签名是否合法。项目中使用该方式
创建 Bucket


整合阿里云OSS
阿里云OSS帮助文档:OSS · alibaba/spring-cloud-alibaba Wiki (github.com)
1、创建模块 gulimall-third-party 专门管理第三方服务


2、POM依赖
<?xml version="1.0" encoding="UTF-8"?>
<project xmlns="http://maven.apache.org/POM/4.0.0" xmlns:xsi="http://www.w3.org/2001/XMLSchema-instance"
         xsi:schemaLocation="http://maven.apache.org/POM/4.0.0 https://maven.apache.org/xsd/maven-4.0.0.xsd">
    <modelVersion>4.0.0</modelVersion>
    <parent>
        <groupId>org.springframework.boot</groupId>
        <artifactId>spring-boot-starter-parent</artifactId>
        <version>2.1.8.RELEASE</version>

        <relativePath/> <!-- lookup parent from repository -->
    </parent>
    <groupId>com.atguigu.gulimall</groupId>
    <artifactId>gulimall-third-party</artifactId>
    <version>0.0.1-SNAPSHOT</version>
    <name>gulimall-third-party</name>
    <description>管理第三方服务</description>
    <properties>
        <java.version>1.8</java.version>
        <spring-cloud.version>Greenwich.SR3</spring-cloud.version>
    </properties>
    <dependencies>
        <dependency>
            <groupId>com.atguigu.gulimall</groupId>
            <artifactId>gulimall-common</artifactId>
            <version>0.0.1-SNAPSHOT</version>
            <exclusions>
                <exclusion>
                    <groupId>com.baomidou</groupId>
                    <artifactId>mybatis-plus-boot-starter</artifactId>
                </exclusion>
                <exclusion>
                    <groupId>mysql</groupId>
                    <artifactId>mysql-connector-java</artifactId>
                </exclusion>
            </exclusions>
        </dependency>
        <!--阿里云OSS-->
        <dependency>
            <groupId>com.alibaba.cloud</groupId>
            <artifactId>spring-cloud-starter-alicloud-oss</artifactId>
        </dependency>
        <dependency>
            <groupId>org.springframework.boot</groupId>
            <artifactId>spring-boot-starter-web</artifactId>
        </dependency>
        <dependency>
            <groupId>org.springframework.cloud</groupId>
            <artifactId>spring-cloud-starter-openfeign</artifactId>
        </dependency>

        <dependency>
            <groupId>org.springframework.boot</groupId>
            <artifactId>spring-boot-starter-test</artifactId>
            <scope>test</scope>
        </dependency>
    </dependencies>
    <dependencyManagement>
        <dependencies>
            <dependency>
                <groupId>org.springframework.cloud</groupId>
                <artifactId>spring-cloud-dependencies</artifactId>
                <version>${spring-cloud.version}</version>
                <type>pom</type>
                <scope>import</scope>
            </dependency>
            <dependency>
                <groupId>com.alibaba.cloud</groupId>
                <artifactId>spring-cloud-alibaba-dependencies</artifactId>
                <version>2.1.0.RELEASE</version>
                <type>pom</type>
                <scope>import</scope>
            </dependency>
        </dependencies>
    </dependencyManagement>

    <build>
        <plugins>
            <plugin>
                <groupId>org.springframework.boot</groupId>
                <artifactId>spring-boot-maven-plugin</artifactId>
            </plugin>
        </plugins>
    </build>

</project>
3、bootstrap.properties
spring.cloud.nacos.config.server-addr=localhost:8848
spring.cloud.nacos.config.namespace=3670d9fb-6e4d-4f9a-bf33-5993095fbe2c

spring.cloud.nacos.config.ext-config[0].data-id=oss.yaml
spring.cloud.nacos.config.ext-config[0].group=DEFAULT_GROUP
spring.cloud.nacos.config.ext-config[0].refresh=true
application.yaml
spring:
    cloud:
      nacos:
          discovery:
              server-addr: localhost:8848
    application:
        name: gulimall-third-party
server:
    port: 30000
Nacos配置中心创建 oss.yaml
spring:
  cloud:
      alicloud:
          access-key: Your Alibaba Cloud AK
          secret-key: Your Alibaba Cloud SK
          oss:
              endpoint: ***.aliyuncs.com
4、主启动类
@SpringBootApplication
@EnableDiscoveryClient
public class GulimallThirdPartyApplication {

    public static void main(String[] args) {
        SpringApplication.run(GulimallThirdPartyApplication.class, args);
    }

}
3、在使用时只需要注入 OSS 即可
@SpringBootTest
@RunWith(SpringRunner.class)
public class GulimallProductApplicationTests {
    @Autowired
    private OSS ossClient;
    @Test
    public void test() throws FileNotFoundException {
        ossClient.putObject("gulimall-bucket-2022", "0d40c24b264aa511.jpg", new FileInputStream("C:\\Java\\java_notes\\其他\\project\\谷粒商城\\资料\\docs\\pics\\0d40c24b264aa511.jpg"));
    }
}
获取服务端签名
阿里云文档:Java (aliyun.com)
OssController :
@RestController
public class OssController {

    @Autowired
    private OSS ossClient;
    @Value("${spring.cloud.alicloud.access-key}")
    private String accessId;
    @Value("${spring.cloud.alicloud.oss.endpoint}")
    private String endpoint;
    @Value("${spring.cloud.alicloud.oss.bucket}")
    private String bucket;


    @RequestMapping("/oss/policy")
    public R policy() {

        // 填写Host地址,格式为https://bucketname.endpoint。
        String host = "https://" + bucket + "." + endpoint;

        // 设置上传回调URL,即回调服务器地址,用于处理应用服务器与OSS之间的通信。OSS会在文件上传完成后,把文件上传信息通过此回调URL发送给应用服务器。
        // String callbackUrl = "https://192.168.0.0:8888";

        // 设置上传到OSS文件的前缀,可置空此项。置空后,文件将上传至Bucket的根目录下。
        String date = new SimpleDateFormat("yyyy-MM-dd").format(new Date());
        String dir = date + "/";

        Map<String, String> respMap = null;
        try {
            long expireTime = 300;
            long expireEndTime = System.currentTimeMillis() + expireTime * 1000;
            Date expiration = new Date(expireEndTime);
            PolicyConditions policyConds = new PolicyConditions();
            policyConds.addConditionItem(PolicyConditions.COND_CONTENT_LENGTH_RANGE, 0, 1048576000);
            policyConds.addConditionItem(MatchMode.StartWith, PolicyConditions.COND_KEY, dir);

            String postPolicy = ossClient.generatePostPolicy(expiration, policyConds);
            byte[] binaryData = postPolicy.getBytes("utf-8");
            String encodedPolicy = BinaryUtil.toBase64String(binaryData);
            String postSignature = ossClient.calculatePostSignature(postPolicy);

            respMap = new LinkedHashMap<String, String>();
            respMap.put("accessId", accessId);
            respMap.put("policy", encodedPolicy);
            respMap.put("signature", postSignature);
            respMap.put("dir", dir);
            respMap.put("host", host);
            respMap.put("expire", String.valueOf(expireEndTime / 1000));
            // respMap.put("expire", formatISO8601Date(expiration));

            // JSONObject jasonCallback = new JSONObject();
            // jasonCallback.put("callbackUrl", callbackUrl);
            // jasonCallback.put("callbackBody",
            //         "filename=${object}&size=${size}&mimeType=${mimeType}&height=${imageInfo.height}&width=${imageInfo.width}");
            // jasonCallback.put("callbackBodyType", "application/x-www-form-urlencoded");
            // String base64CallbackBody = BinaryUtil.toBase64String(jasonCallback.toString().getBytes());
            // respMap.put("callback", base64CallbackBody);
            //
            // JSONObject ja1 = JSONObject.fromObject(respMap);
            // // System.out.println(ja1.toString());
            // response.setHeader("Access-Control-Allow-Origin", "*");
            // response.setHeader("Access-Control-Allow-Methods", "GET, POST");
            // response(request, response, ja1.toString());

        } catch (Exception e) {
            // Assert.fail(e.getMessage());
            System.out.println(e.getMessage());
        }
        return R.ok().put("data",respMap);
    }
}
测试结果:
{
    "accessId": "LTAI5t9kg6KAfWsEzFKszdgD",
    "policy": "eyJleHBpcmF0aW9uIjoiMjAyMi0xMi0yOFQxMTo0ODoxOC44MDhaIiwiY29uZGl0aW9ucyI6W1siY29udGVudC1sZW5ndGgtcmFuZ2UiLDAsMTA0ODU3NjAwMF0sWyJzdGFydHMtd2l0aCIsIiRrZXkiLCIyMDIyLTEyLTI4LyJdXX0=",
    "signature": "0B9txV+OfXM+nkIkV3QOSn3thEo=",
    "dir": "2022-12-28/",
    "host": "https://oss-cn-hangzhou.aliyuncs.com.oss-cn-hangzhou.aliyuncs.com",
    "expire": "1672228098"
}
配置网关:
                - id: third_party_route
                  uri: lb://gulimall-third-party # 负载均衡
                  predicates:
                      - Path=/api/thirdparty/**
                  filters:
                      - RewritePath=/api/thirdparty/?(?<segment>.*), /$\{segment}  #路径重写
前后端联调上传文件
/components/upload/multiUpload.vue:多文件上传
<template>
  <div>
    <el-upload
      action="http://gulimall.oss-cn-shanghai.aliyuncs.com"
      :data="dataObj"
      list-type="picture-card"
      :file-list="fileList"
      :before-upload="beforeUpload"
      :on-remove="handleRemove"
      :on-success="handleUploadSuccess"
      :on-preview="handlePreview"
      :limit="maxCount"
      :on-exceed="handleExceed"
    >
      <i class="el-icon-plus"></i>
    </el-upload>
    <el-dialog :visible.sync="dialogVisible">
      <img width="100%" :src="dialogImageUrl" alt />
    </el-dialog>
  </div>
</template>
<script>
import { policy } from "./policy";
import { getUUID } from '@/utils'
export default {
  name: "multiUpload",
  props: {
    //图片属性数组
    value: Array,
    //最大上传图片数量
    maxCount: {
      type: Number,
      default: 30
    }
  },
  data() {
    return {
      dataObj: {
        policy: "",
        signature: "",
        key: "",
        ossaccessKeyId: "",
        dir: "",
        host: "",
        uuid: ""
      },
      dialogVisible: false,
      dialogImageUrl: null
    };
  },
  computed: {
    fileList() {
      let fileList = [];
      for (let i = 0; i < this.value.length; i++) {
        fileList.push({ url: this.value[i] });
      }

      return fileList;
    }
  },
  mounted() {},
  methods: {
    emitInput(fileList) {
      let value = [];
      for (let i = 0; i < fileList.length; i++) {
        value.push(fileList[i].url);
      }
      this.$emit("input", value);
    },
    handleRemove(file, fileList) {
      this.emitInput(fileList);
    },
    handlePreview(file) {
      this.dialogVisible = true;
      this.dialogImageUrl = file.url;
    },
    beforeUpload(file) {
      let _self = this;
      return new Promise((resolve, reject) => {
        policy()
          .then(response => {
            console.log("这是什么${filename}");
            _self.dataObj.policy = response.data.policy;
            _self.dataObj.signature = response.data.signature;
            _self.dataObj.ossaccessKeyId = response.data.accessid;
            _self.dataObj.key = response.data.dir + "/"+getUUID()+"_${filename}";
            _self.dataObj.dir = response.data.dir;
            _self.dataObj.host = response.data.host;
            resolve(true);
          })
          .catch(err => {
            console.log("出错了...",err)
            reject(false);
          });
      });
    },
    handleUploadSuccess(res, file) {
      this.fileList.push({
        name: file.name,
        // url: this.dataObj.host + "/" + this.dataObj.dir + "/" + file.name; 替换${filename}为真正的文件名
        url: this.dataObj.host + "/" + this.dataObj.key.replace("${filename}",file.name)
      });
      this.emitInput(this.fileList);
    },
    handleExceed(files, fileList) {
      this.$message({
        message: "最多只能上传" + this.maxCount + "张图片",
        type: "warning",
        duration: 1000
      });
    }
  }
};
</script>
<style>
</style>
/components/upload/singleUpload.vue:单文件上传
修改文件上传地址:action
<template>
  <div>
    <el-upload
      action="http://gulimall.oss-cn-shanghai.aliyuncs.com"
      :data="dataObj"
      list-type="picture"
      :multiple="false" :show-file-list="showFileList"
      :file-list="fileList"
      :before-upload="beforeUpload"
      :on-remove="handleRemove"
      :on-success="handleUploadSuccess"
      :on-preview="handlePreview">
      <el-button size="small" type="primary">点击上传</el-button>
      <div slot="tip" class="el-upload__tip">只能上传jpg/png文件,且不超过10MB</div>
    </el-upload>
    <el-dialog :visible.sync="dialogVisible">
      <img width="100%" :src="fileList[0].url" alt="">
    </el-dialog>
  </div>
</template>
<script>
   import {policy} from './policy'
   import { getUUID } from '@/utils'

  export default {
    name: 'singleUpload',
    props: {
      value: String
    },
    computed: {
      imageUrl() {
        return this.value;
      },
      imageName() {
        if (this.value != null && this.value !== '') {
          return this.value.substr(this.value.lastIndexOf("/") + 1);
        } else {
          return null;
        }
      },
      fileList() {
        return [{
          name: this.imageName,
          url: this.imageUrl
        }]
      },
      showFileList: {
        get: function () {
          return this.value !== null && this.value !== ''&& this.value!==undefined;
        },
        set: function (newValue) {
        }
      }
    },
    data() {
      return {
        dataObj: {
          policy: '',
          signature: '',
          key: '',
          ossaccessKeyId: '',
          dir: '',
          host: '',
          // callback:'',
        },
        dialogVisible: false
      };
    },
    methods: {
      emitInput(val) {
        this.$emit('input', val)
      },
      handleRemove(file, fileList) {
        this.emitInput('');
      },
      handlePreview(file) {
        this.dialogVisible = true;
      },
      beforeUpload(file) {
        let _self = this;
        return new Promise((resolve, reject) => {
          policy().then(response => {
            _self.dataObj.policy = response.data.policy;
            _self.dataObj.signature = response.data.signature;
            _self.dataObj.ossaccessKeyId = response.data.accessid;
            _self.dataObj.key = response.data.dir + '/'+getUUID()+'_${filename}';
            _self.dataObj.dir = response.data.dir;
            _self.dataObj.host = response.data.host;
            resolve(true)
          }).catch(err => {
            reject(false)
          })
        })
      },
      handleUploadSuccess(res, file) {
        console.log("上传成功...")
        this.showFileList = true;
        this.fileList.pop();
        this.fileList.push({name: file.name, url: this.dataObj.host + '/' + this.dataObj.key.replace("${filename}",file.name) });
        this.emitInput(this.fileList[0].url);
      }
    }
  }
</script>
<style>

</style>
/components/upload/policy
import http from '@/utils/httpRequest.js'
export function policy() {
   return  new Promise((resolve,reject)=>{
        http({
            url: http.adornUrl("/thirdparty/oss/policy"),
            method: "get",
            params: http.adornParams({})
        }).then(({ data }) => {
            resolve(data);
        })
    });
}
在阿里云OSS里配置跨域规则:


如果配置了跨域规则还是报错 403

并且发现向OSS发送的数据 keyId 没有

将 singleUpload.vue、multiUpload.vue 中的 accessid 改成 accessId ,与服务端发送的签名所对应。

三、前端表单校验
1、修改brand-add-update.vue 中的 显示状态 ,变化值改为 0,1
2、 修改 brand.vue 中的品牌logo 显示

        <template slot-scope="scope">
          <img :src="scope.row.logo" style="width:100px; height:auto" />
        </template>
3、对新增表单中的 检索首字母、排序 进行校验

校验规则:
- 检索首字母:必须在a~z 或 A~Z 之间,并且只能输入一个
- 排序:必须是大于0的整数
使用ELement-UI提供的自定义表单校验规则:组件 | Element
在 el-form表单中增加 rules 可增加校验规则

在 brand-add-update.vue 中的 dataRule 中设置校验规则:
v-model.number 只能输入数字

  firstLetter: [
          {
            validator: (rule, value, callback) => {
              if (value == "") {
                callback(new Error("检索首字母不能为空"));
              } else if (!/^[a-zA-Z]$/.test(value)) {
                callback(new Error("检索首字母必须在a~z或A~Z之间,并只能有一位"));
              } else {
                callback();
              }
            },
            trigger: "blur"
          }
        ],
        sort: [
          {
            validator: (rule, value, callback) => {
              if (!value) {
                callback(new Error("排序不能为空"));
              } else if (!Number.isInteger(value) || value < 0) {
                callback(new Error("排序必须是大于0的正整数"));
              } else {
                callback();
              }
            },
            trigger: "blur"
          }
        ]
四、后端数据验证
JSR303
JSR是Java Specification Requests的缩写,意思是Java 规范提案。是指向JCP(Java Community Process)提出新增一个标准化技术规范的正式请求。任何人都可以提交JSR,以向Java平台增添新的API和服务。JSR已成为Java界的一个重要标准。
如何使用 JSR303
javax.validation.constraints 中定义了非常多的校验注解
- 在需要校验的属性上增加注解
- 使用 @Valid 开启校验功
可以使用 BindingResult 提取校验错误信息 ,这个属性必须紧跟着开启校验的 JavaBean

案例演示:
1、在 BrandEntity 品牌实体类中的 name 增加校验注解。
@NotBlank:字段不能为空
message: 自定义错误信息

2、在 Controller 层使用
@Valid : 开启校验功能
    /**
     * 保存
     * @Valid 开启校验功能
     * BindingResult 提取校验错误信息。必须紧跟着校验的JavaBean
     */
    @RequestMapping("/save")
   // @RequiresPermissions("com.atguigu.gulimall.product:brand:save")
    public R save(@RequestBody @Valid BrandEntity brand){
		brandService.save(brand);

        return R.ok();
    }
3、使用PostMan测试

提取校验错误信息
JSR校验的错误提示信息保存在 ValidationMessages.properties 配置文件里,包括有中文的提示信息

也可以通过 校验注解里的 message 属性自定义错误提示信息。在 代码中可以通过BindingResult 提取出来
  /**
     * 保存
     * @Valid 开启校验功能
     * BindingResult 提取校验错误信息。必须紧跟着校验的JavaBean
     */
    @RequestMapping("/save")
    // @RequiresPermissions("com.atguigu.gulimall.product:brand:save")
    public R save(@RequestBody @Valid BrandEntity brand, BindingResult result) {
        // 是否有错误信息
        if (result.hasErrors()) {
            // 获取所有的错误
            List<FieldError> errors = result.getFieldErrors();
            HashMap<String, String> map = new HashMap<>();
            errors.forEach(item -> {
                // 错误信息
                String message = item.getDefaultMessage();
                // 错误的属性
                String field = item.getField();
                map.put(field, message);
            });
            return R.error(400,"数据提交不合法").put("data", map);
        } else {
            brandService.save(brand);
        }
        return R.ok();
    }
使用 PostMan 测试:

统一错误状态码
使用枚举类统一设置返回的错误状态码,错误状态码的规则:
/***
* 错误码和错误信息定义类
* 1. 错误码定义规则为 5 为数字
* 2. 前两位表示业务场景,最后三位表示错误码。
* 		例如:100001。10:通用 001:系统未知异常
* 3. 维护错误码后需要维护错误描述,将他们定义为枚举形式
* 错误码列表:
* 10: 通用
* 	001:参数格式校验
* 11: 商品
* 12: 订单
* 13: 购物车
* 14: 物流
*/
将枚举类放在 common 模块
public enum BizCodeEnum {
    UNKNOW_EXCEPTION(10000,"未知的系统异常"),
    VALID_EXCEPTION(10001,"数据校验异常");

    private Integer code ;
    private String message;

    private BizCodeEnum(Integer code, String message) {
        this.code = code;
        this.message = message;
    }

    public Integer getCode() {
        return code;
    }

    public String getMessage() {
        return message;
    }
}
统一异常处理
放在 gulimall-product 模块中
@Slf4j
@RestControllerAdvice(basePackages = "com.atguigu.gulimall.product.controller") // == @RestController + ControllerAdvice
public class GuliHandleExceptionAdvice {

    @ExceptionHandler(MethodArgumentNotValidException.class)
    public R handleValidaException(MethodArgumentNotValidException e) {
        HashMap<String, String> map = new HashMap<>();
        List<FieldError> errors = e.getBindingResult().getFieldErrors();
        errors.forEach(fieldError -> {
            map.put(fieldError.getField(),fieldError.getDefaultMessage());
        });
        log.error("错误信息:{},错误类:{}",e.getMessage(),e.getClass());
      return R.error(BizCodeEnum.VALID_EXCEPTION.getCode(),BizCodeEnum.VALID_EXCEPTION.getMessage()).put("data",map);
    }
}
使用PostMan 测试:

分组校验
对于某些字段可能会有不同的校验规则,比如:品牌ID在修改时比如传入,而在增加时没必要传入。这时就可以使用分组校验。

每一个校验的注解都有一个 groups 的属性, 可以进行分组。
使用步骤:
1、在 common 模块中创建AddGroup、UpdateGroup俩个接口,接口仅仅起到标识作用,使用同一接口的属性被认为是同一组。
2、在校验规则中的groups属性中使用接口区分不同的组。如果其他校验注解如果不指明分组,那么校验没有效果。比如:图中的 @NotBlank。

3、在开启校验时,使用 @Validated 注解标注使用哪个分组
  /**
     * 保存
     * @Valid 开启校验功能
     * BindingResult 提取校验错误信息。必须紧跟着校验的JavaBean
     * 使用同一异常处理捕捉娇艳异常
     */
    @RequestMapping("/save")
    // @RequiresPermissions("com.atguigu.gulimall.product:brand:save")
    public R save(@RequestBody @Validated(value = AddGroup.class) BrandEntity brand /*,BindingResult result*/) {
            brandService.save(brand);
        return R.ok();
    }
4、使用 PostMan 测试
虽然name使用校验注解,但是没有设置 groups ,因此是没有效果的。

5、对品牌实体类的所有属性进行校验
@Data
@TableName("pms_brand")
public class BrandEntity implements Serializable {
	private static final long serialVersionUID = 1L;

	/**
	 * 品牌id
	 */
	@TableId
	@Null(message = "新增时不能指定ID",groups = {AddGroup.class})
	@NotNull(message = "修改时必须指定ID",groups = {UpdateGroup.class})
	private Long brandId;
	/**
	 * 品牌名
	 */
	@NotBlank(message = "品牌名成不能为空",groups = {AddGroup.class,UpdateGroup.class})
	private String name;
	/**
	 * 品牌logo地址
	 */
	@NotBlank(message = "logo地址不能为空",groups = {AddGroup.class})
	@URL(message = "url地址不合法",groups = {AddGroup.class,UpdateGroup.class})
	private String logo;
	/**
	 * 介绍
	 */
	private String descript;
	/**
	 * 显示状态[0-不显示;1-显示]
	 */
	private Integer showStatus;
	/**
	 * 检索首字母
	 *  使用正则校验
	 */
	@Pattern(regexp = "^[a-zA-Z]$",message = "检索首字母必须在a~z或A~Z范围内,并且只有一位",groups = {AddGroup.class,UpdateGroup.class})
	@NotBlank(message = "检索首字母不能为空",groups = {AddGroup.class})
	private String firstLetter;
	/**
	 * 排序
	 */
	@Min(value = 0,message = "排序必须是一个大于0的整数",groups = {AddGroup.class,UpdateGroup.class})
	private Integer sort;

}
自定义校验注解
对于某些字段,java提供的校验注解并不能满足需求,因此需要我们自定义校验注解。
步骤:
- 自定义一个校验注解
- 自定义校验解析器: 实现
ConstraintValidator接口 - 将校验解析器与校验注解相关联
@Constraint(validatedBy = { })
由于校验是公共的,放在common模块下:
1、自定义一个校验注解
@Target({ METHOD, FIELD, ANNOTATION_TYPE, CONSTRUCTOR, PARAMETER, TYPE_USE })
@Retention(RUNTIME)
@Documented
@Constraint(validatedBy = { ListValueConstraintValidator.class}) // 使用自定义解析器,可以使用多个
public @interface ListValue {

    // 校验失败提示信息
    String message() default "{com.atguigu.common.valid.ListValue.message}";

    // 分组
    Class<?>[] groups() default { };

    Class<? extends Payload>[] payload() default { };

    // 以上三个是固定的
    // 指定的值
    int[] vals() default {};
}
2、创建 ValidationMessages.properties 配置文件,保存校验失败提示信息。
com.atguigu.common.valid.ListValue.message=提交的数据必须是指定值
3、创建自定义校验解析器
// 泛型中的俩个属性:第一个是自定义的注解,第二个是校验的参数类型
public class ListValueConstraintValidator implements ConstraintValidator<ListValue, Integer> {
    private Set<Integer> set = new HashSet<>();

    /*
     * constraintAnnotation 可以获取使用注解时的指定值
     *  {0,1}
     * */
    @Override
    public void initialize(ListValue constraintAnnotation) {
        int[] vals = constraintAnnotation.vals();
        for (int val : vals) {
            set.add(val);
        }
    }

    /**
     * @description 判断校验是否通过
     * @date 2022/12/29 22:06
     * @param value 需要校验的值
     * @param context
     * @return boolean
     */
    @Override
    public boolean isValid(Integer value, ConstraintValidatorContext context) {
        // 如果指定的值中包含需要校验的值就返回 true
        return set.contains(value);
    }
}
4、自定义注解创建完毕,现在就可以使用了

5、使用PostMan 测试

五、SPU&SKU
SPU
SPU: Standard Product Unit(标准化产品单元)
是商品信息聚合的最小单位,是一组可复用、易检索的标准化信息的集合,该集合描述了一 个产品的特性。
SKU
SKU:Stock Keeping (库存量单位)
即库存进出计量的基本单元,可以是以件,盒,托盘等为单位。SKU 这是对于大型连锁超市 DC(配送中心)物流管理的一个必要的方法。现在已经被引申为产品统一编号的简称,每 种产品均对应有唯一的 SKU 号。
例如:
不同的收集类型Apple13、14、12 这些都是 SPU
而每款收集的不同规格,Apple13 64G 紫色 ,Apple14 1TB 远峰蓝 这些不同的版本都属于SKU。
像是 java 中的类 与对象,类(SPU)中定义功能,真正想要使用还得创建对象(SKU)。

基本属性【规格参数】与销售属性
对于不同的 SPU,也就是不同的手机,他的一些基本属性都是一样的。无非就是属性的值不同。
每款手机都有 主体、基本信息、存储、屏幕.... 这些属性,而这些就属于 SPU 的基本属性,也可以叫规格参数。

而真正决定你要购买的都是这些 销售属性 , 它决定了手机销售的库存,这些都是 SKU 属性。

总结:
每个分类下的商品共享规格参数,与销售属性。只是有些商品不一定要用这个分类下全部的 属性;
- 同一个SPU下的不同 SKU 都共同使用同一组属性
- 属性名确定的,但是值是每一个商品不同来决定的
- 也就是每个手机都有
主体、基本信息、存储、屏幕....这些属性,但是值是不同的。 - 属性是以三级分类组织起来的
- 规格参数中有些是可以提供检索的
- 规格参数也是基本属性,他们具有自己的分组
- 属性的分组也是以三级分类组织起来的
SPU决定了商品的规格参数、SKU决定了商品的销售属性!!
商品表设计分析
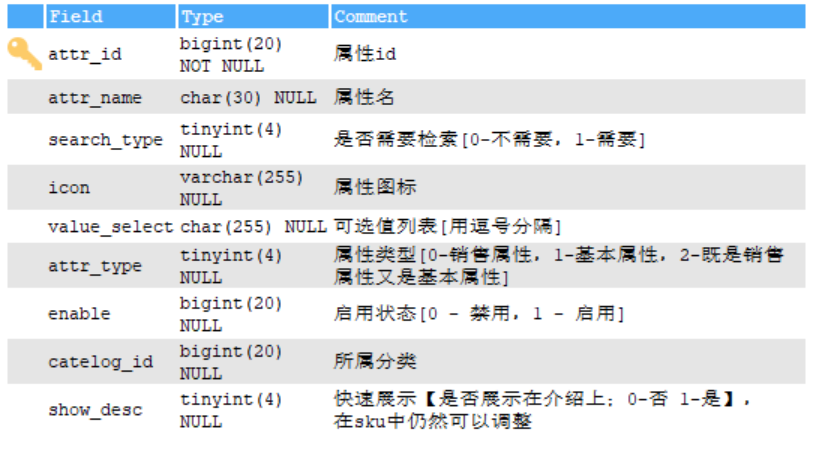
针对以上这些概念,分析数据库的表中的结构
在 gulimall-pms 数据库中的 pms_attr 表,保存了商品的属性名:
pms_attr_group表中保存了属性的分组信息,一个组里面保存了不同的属性。

pms_attr_attrgroup_relation 表保存了 分组 与 属性的关联关系

pms_product_attr_value 表中保存属性的值,将属性值与属性相关联。包括表中也将属性以及属性值与商品相关联。不同的商品有不同的属性与属性值。

举例说明:
主体、基本信息、存储、屏幕 这些信息都是一个个的分组
而每个分组,比如主体里面又包含了入网型号、机型、上市日期多个属性。每个属性的属性值都是不同的。
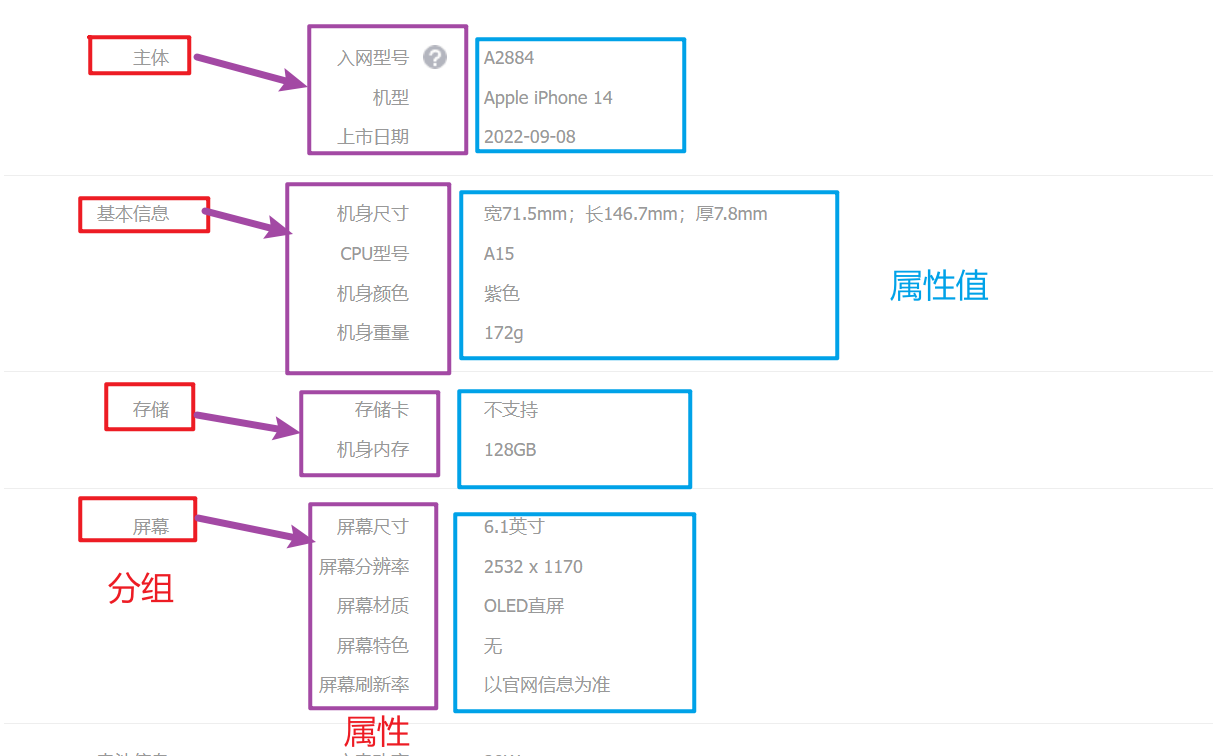
而每一个属性的属性值,根据商品的不同,他的值也是不同的。也就是不同的 SPU,规格参数都是不同的。
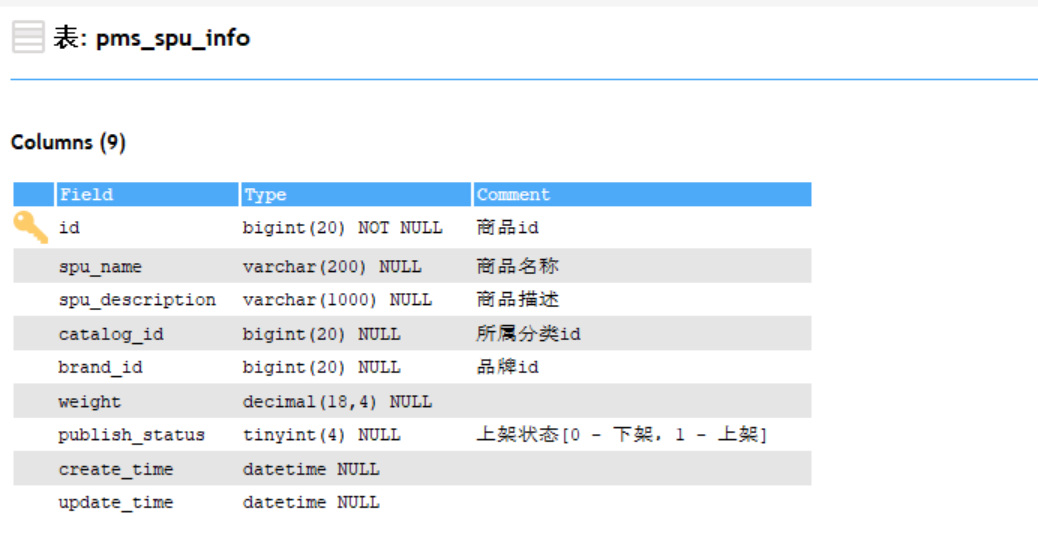
pms_spu_info表中就保存了不同的 商品(spu) 信息
每一个商品都有不同的销售属性,也就是一个SPU对应多个SKU,SPU与SKU 的对应关系都保存在pms_sku_info表中
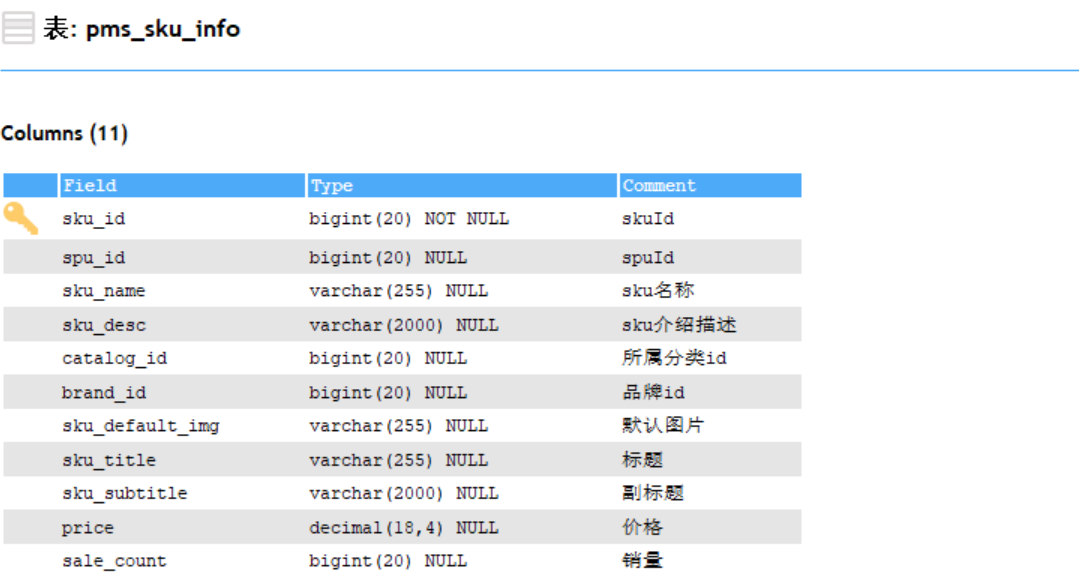
每一个 SKU 的展示图片都保存在 pms_sku_images 里面
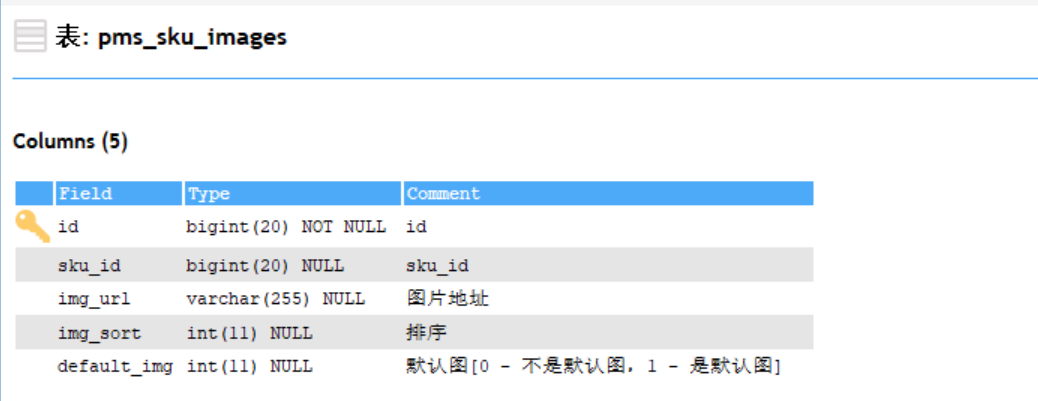
每一个SKU的属性、属性值都是不一样的,SKU的属性名、属性值都保存在 pms_sku_sale_attr_value 表中

举例说明:
一个SPU(Apple14)对应多个SKU属性(颜色、版本…),每一个SKU属性的属性值根据SPU的不同又是不一样的。
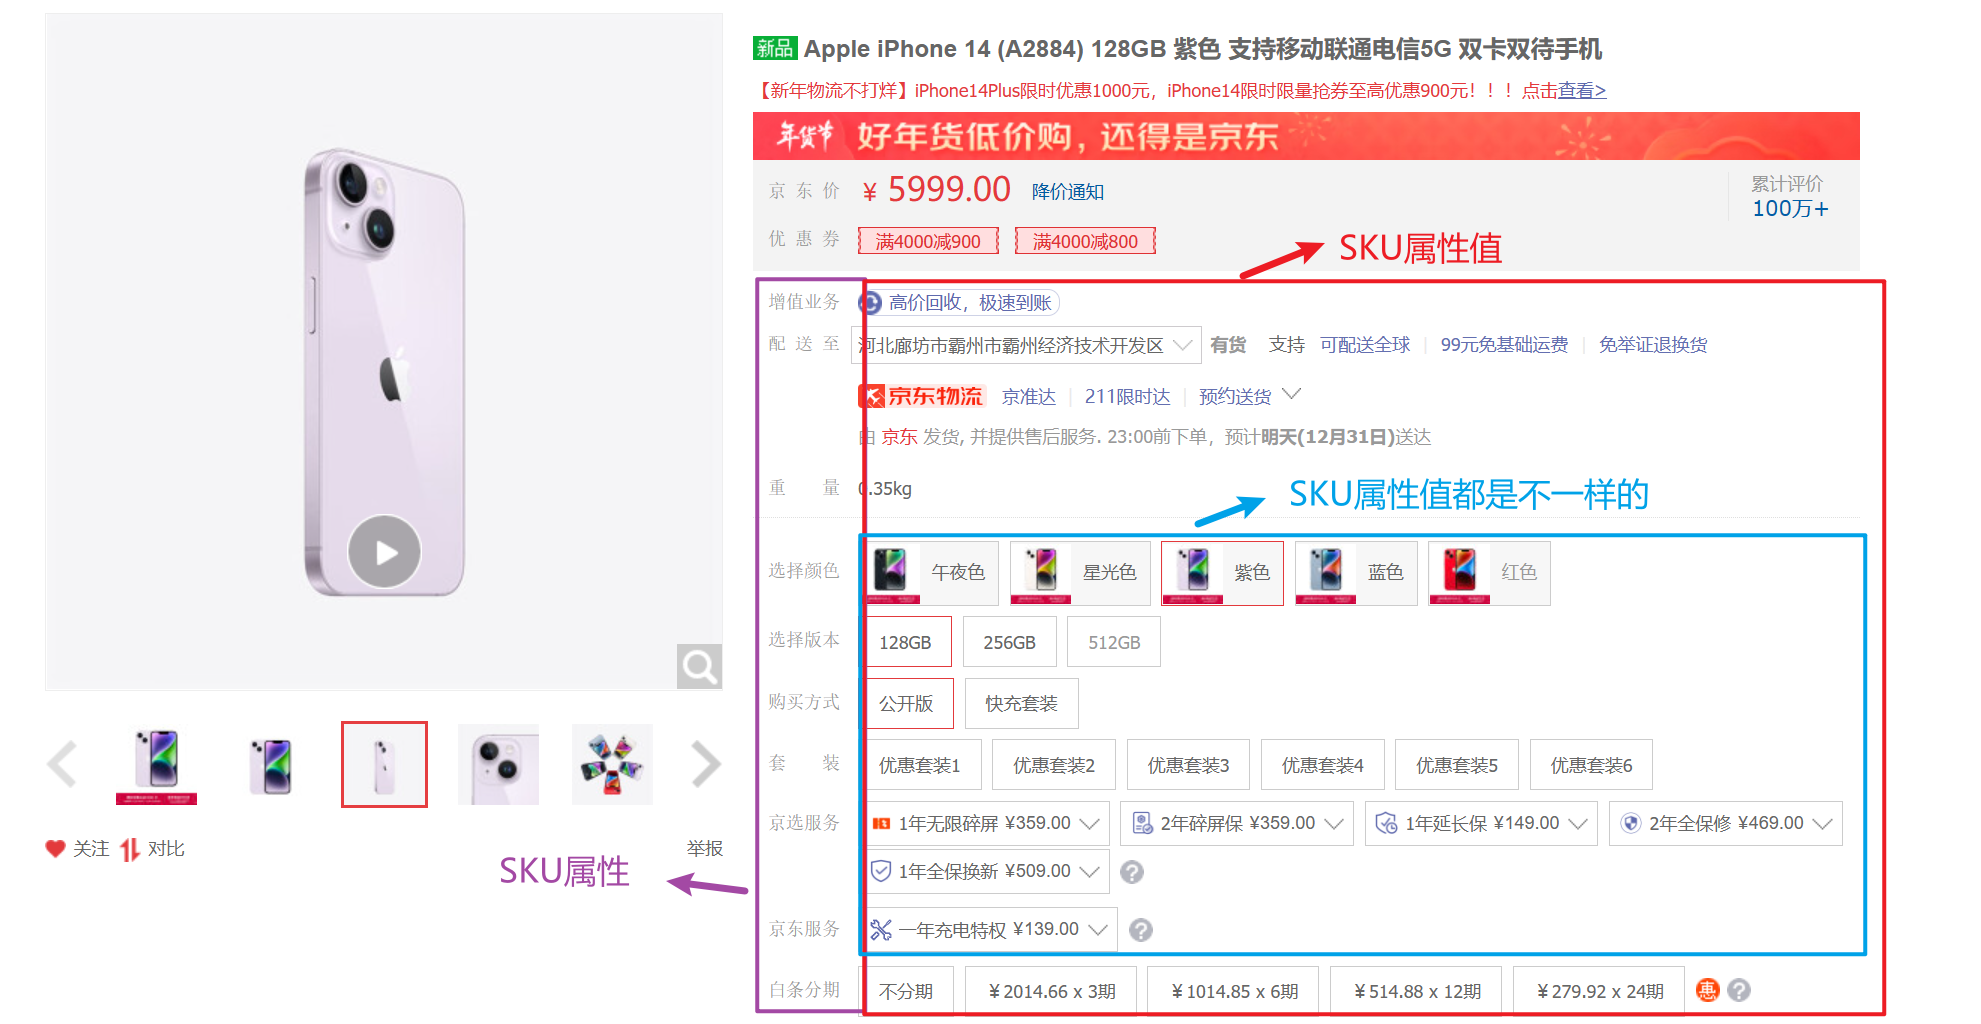
数据库表关联图:
每一个三级分类对应不同的属性分组 , 分组&属性关联表中将属性与分组相关联。
比如: 三级分类里有主体、屏幕属性分组,主体 分组里又有 内存、像素 俩个属性
有一个商品,他的ID(spuId)为 1,对应属性表中有俩个属性 网络、像素 ,属性值分别为: 3000万、3G;4G;5G
一个商品(spu)对应俩个 销售属性(sku):
-
id为1的sku对应的属性
内存,容量,属性值为:6G、128G -
id为2的sku对应的属性
内存,容量,属性值为:4G、64G

平台属性
一、属性分组
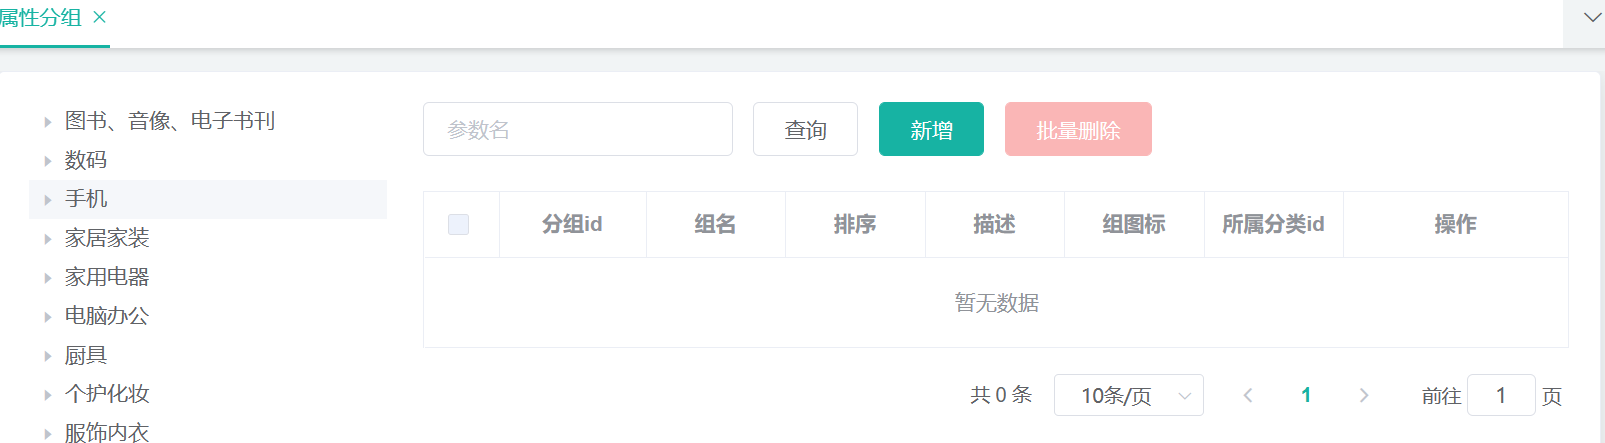
点击不同的分类,展示出分类所属的 属性分组

首先将 菜单表 导入 gulimall_admin 数据库

组件抽取
1、将三级分类封装成一个公共模块,放在 /modules/common/category.vue 里
<template lang="">
  <div>
    <el-tree :data="menus" :props="defaultProps" :expand-on-click-node="false">
    </el-tree>
  </div>
</template>
<script>
export default {
  data() {
    return {
      // 所有菜单
      menus: [],
      // 删除菜单的父菜单ID
      expandedKeys: [],
      defaultProps: {
        children: "childrenLevel",
        label: "name" // 展示的菜单名
      }
    };
  },
  methods: {
    //   获取所有菜单
    getMenus() {
      this.$http({
        url: this.$http.adornUrl("/product/category/list/tree"),
        method: "get"
      }).then(({ data }) => {
        console.log("成功获取菜单数据:", data.data);
        this.menus = data.data;
      });
    }
  },
  created() {
    this.getMenus()
  },
};
</script>
<style lang=""></style>
2、在 /product/attrgroup.vue 中引用三级菜单
使用的是Element-UI中的Layout布局
<template lang="">
  <div>
    <el-row :gutter="24">
      <el-col :span="6"><div class="grid-content bg-purple"></div>
        <category />
    </el-col>
      <el-col :span="18"><div class="grid-content bg-purple"></div>
    表格
    </el-col>
    </el-row>
  </div>
</template>
<script>
// 引入三级菜单
import Category from "@/views/modules/common/category.vue";
export default {
    components:{Category},
    data() {
        return {

        }
    },
    methods: {

    },
};
</script>
<style lang=""></style>
3、attrgroup.vue 引入属性分组表格
<template lang="">
  <div>
    <!-- 三级分类 -->
    <el-row :gutter="24">
      <el-col :span="6"
        ><div class="grid-content bg-purple"></div>
        <category />
      </el-col>
      <!-- 属性分组表格 -->
      <el-col :span="18"
        ><div class="grid-content bg-purple"></div>
        <div class="mod-config">
          <el-form
            :inline="true"
            :model="dataForm"
            @keyup.enter.native="getDataList()"
          >
            <el-form-item>
              <el-input
                v-model="dataForm.key"
                placeholder="参数名"
                clearable
              ></el-input>
            </el-form-item>
            <el-form-item>
              <el-button @click="getDataList()">查询</el-button>
              <el-button
                v-if="isAuth('product:attrgroup:save')"
                type="primary"
                @click="addOrUpdateHandle()"
                >新增</el-button
              >
              <el-button
                v-if="isAuth('product:attrgroup:delete')"
                type="danger"
                @click="deleteHandle()"
                :disabled="dataListSelections.length <= 0"
                >批量删除</el-button
              >
            </el-form-item>
          </el-form>
          <el-table
            :data="dataList"
            border
            v-loading="dataListLoading"
            @selection-change="selectionChangeHandle"
            style="width: 100%;"
          >
            <el-table-column
              type="selection"
              header-align="center"
              align="center"
              width="50"
            >
            </el-table-column>
            <el-table-column
              prop="attrGroupId"
              header-align="center"
              align="center"
              label="分组id"
            >
            </el-table-column>
            <el-table-column
              prop="attrGroupName"
              header-align="center"
              align="center"
              label="组名"
            >
            </el-table-column>
            <el-table-column
              prop="sort"
              header-align="center"
              align="center"
              label="排序"
            >
            </el-table-column>
            <el-table-column
              prop="descript"
              header-align="center"
              align="center"
              label="描述"
            >
            </el-table-column>
            <el-table-column
              prop="icon"
              header-align="center"
              align="center"
              label="组图标"
            >
            </el-table-column>
            <el-table-column
              prop="catelogId"
              header-align="center"
              align="center"
              label="所属分类id"
            >
            </el-table-column>
            <el-table-column
              fixed="right"
              header-align="center"
              align="center"
              width="150"
              label="操作"
            >
              <template slot-scope="scope">
                <el-button
                  type="text"
                  size="small"
                  @click="addOrUpdateHandle(scope.row.attrGroupId)"
                  >修改</el-button
                >
                <el-button
                  type="text"
                  size="small"
                  @click="deleteHandle(scope.row.attrGroupId)"
                  >删除</el-button
                >
              </template>
            </el-table-column>
          </el-table>
          <el-pagination
            @size-change="sizeChangeHandle"
            @current-change="currentChangeHandle"
            :current-page="pageIndex"
            :page-sizes="[10, 20, 50, 100]"
            :page-size="pageSize"
            :total="totalPage"
            layout="total, sizes, prev, pager, next, jumper"
          >
          </el-pagination>
          <!-- 弹窗, 新增 / 修改 -->
          <add-or-update
            v-if="addOrUpdateVisible"
            ref="addOrUpdate"
            @refreshDataList="getDataList"
          ></add-or-update>
        </div>
      </el-col>
    </el-row>
  </div>
</template>

<script>
import Category from "@/views/modules/common/category.vue";
import AddOrUpdate from "./attrgroup-add-or-update";
export default {
  data() {
    return {
      dataForm: {
        key: ""
      },
      dataList: [],
      pageIndex: 1,
      pageSize: 10,
      totalPage: 0,
      dataListLoading: false,
      dataListSelections: [],
      addOrUpdateVisible: false
    };
  },
  components: {
    AddOrUpdate,
    Category
  },
  activated() {
    this.getDataList();
  },
  methods: {
    // 获取数据列表
    getDataList() {
      this.dataListLoading = true;
      this.$http({
        url: this.$http.adornUrl("/product/attrgroup/list"),
        method: "get",
        params: this.$http.adornParams({
          page: this.pageIndex,
          limit: this.pageSize,
          key: this.dataForm.key
        })
      }).then(({ data }) => {
        if (data && data.code === 0) {
          this.dataList = data.page.list;
          this.totalPage = data.page.totalCount;
        } else {
          this.dataList = [];
          this.totalPage = 0;
        }
        this.dataListLoading = false;
      });
    },
    // 每页数
    sizeChangeHandle(val) {
      this.pageSize = val;
      this.pageIndex = 1;
      this.getDataList();
    },
    // 当前页
    currentChangeHandle(val) {
      this.pageIndex = val;
      this.getDataList();
    },
    // 多选
    selectionChangeHandle(val) {
      this.dataListSelections = val;
    },
    // 新增 / 修改
    addOrUpdateHandle(id) {
      this.addOrUpdateVisible = true;
      this.$nextTick(() => {
        this.$refs.addOrUpdate.init(id);
      });
    },
    // 删除
    deleteHandle(id) {
      var ids = id
        ? [id]
        : this.dataListSelections.map(item => {
            return item.attrGroupId;
          });
      this.$confirm(
        `确定对[id=${ids.join(",")}]进行[${id ? "删除" : "批量删除"}]操作?`,
        "提示",
        {
          confirmButtonText: "确定",
          cancelButtonText: "取消",
          type: "warning"
        }
      ).then(() => {
        this.$http({
          url: this.$http.adornUrl("/product/attrgroup/delete"),
          method: "post",
          data: this.$http.adornData(ids, false)
        }).then(({ data }) => {
          if (data && data.code === 0) {
            this.$message({
              message: "操作成功",
              type: "success",
              duration: 1500,
              onClose: () => {
                this.getDataList();
              }
            });
          } else {
            this.$message.error(data.msg);
          }
        });
      });
    }
  }
};
</script>
4、效果,但是希望点击某个三级分类时,自动向数据库中查询更新表格。
父子组件交互
三级分类在 category.vue 中,属性分组表格在 attrgroup.vue 中,点击 三级分类 时,attrgroup.vue 就需要感知到点击了哪个三级分类。需要使用Vue中的父子组件交互。
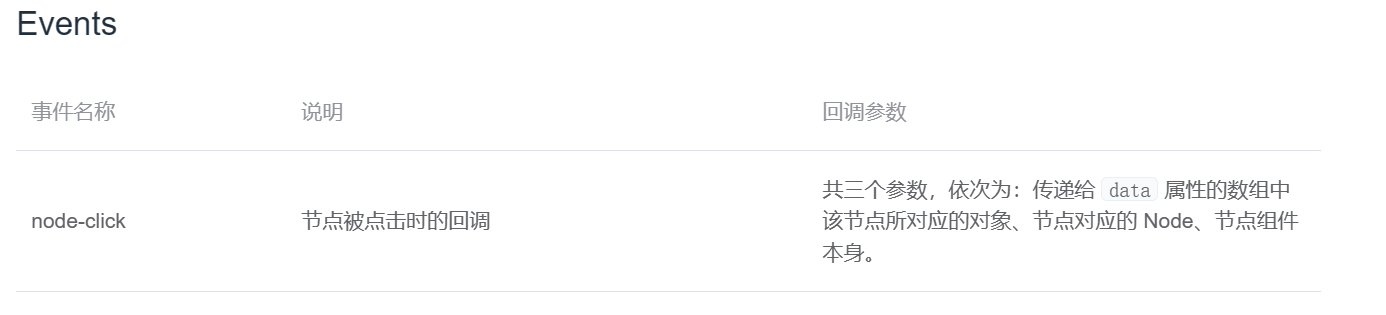
1、为三级分类的 el-tree 增加点击事件。当节点被点击时会触发 nodeClick 回调函数。并且可以传递三个参数:
- 第一个参数 : 保存了点击的菜单对象
- 第二个参数 : 保存了对象所对应的节点信息
- 第三个参数 : 保存了整个组件的信息

2、nodeClick 回调函数。通过 this.$emit 向父组件 attrgroup 传递事件
    // 节点被点击回调
    nodeClick(data,node,component) {
        console.log("category感知到节点被点击: " ,data,node,component)
        // 子组件向父组件传递信息
        // 第一个参数: 传递的事件名称
        // 第二个参数: 传递的数据
        this.$emit("tree-node-click",data,node,component)
    },
3、在父组件attrgroup 使用子组件时,设置传递的事件。

4、当子组件 触发事件后,会像父组件传递 事件,父组件接收到后会调用 nodeClick 函数
    // 感知节点被点击
    nodeClick(data,node,component){
        console.log("category父组件感知节点被点击: " , data,node,component)
        console.log("点击节点ID:", data.catId)
    },
5、控制台输出效果

获取分类属性分组
后端实现

思路分析:
- 如果传递catelogId, 就根据catelogId 查询对应的分组属性
- 并且如果key不为空,不仅要根据catelogId查询,还要加上搜索关键字key。
- 如果 key 为空,只根据 catelogId 查询即可
- 如果没有传递 catelogId,就查询所有的分组属性
代码实现:
1、AttrGroupController
    /**
     * 列表
     * 查询三级分类所对应的分组属性
     */
    @RequestMapping("/list/{catelogId}")
    //@RequiresPermissions("com.atguigu.gulimall.product:attrgroup:list")
    public R list(@RequestParam Map<String, Object> params,@PathVariable(required = false) Long catelogId){
        // PageUtils page = attrGroupService.queryPage(params);

        PageUtils page = attrGroupService.queryPage(params,catelogId);
        return R.ok().put("page", page);
    }
2、AttrGroupService
PageUtils queryPage(Map<String, Object> params, Long catelogId);
3、AttrGroupServiceImpl
  /*
     * 根据分类ID查询所对应的分组属性
     * SELECT xx FROM pms_attr_group WHERE (catelog_id = ? AND (attr_group_id = ? OR attr_group_name LIKE ?))
     * */
    @Override
    public PageUtils queryPage(Map<String, Object> params, Long catelogId) {

        String key = (String) params.get("key");
        QueryWrapper<AttrGroupEntity> wrapper = new QueryWrapper<AttrGroupEntity>();
        IPage<AttrGroupEntity> page;


        if (!StringUtils.isEmpty(key)) {
            // 如果搜索关键字不为空,带上关键字搜索分组
            wrapper.and(queryWrapper -> {
                queryWrapper.eq("attr_group_id", key).or().like("attr_group_name", key);
            });
        }
        if (catelogId != 0) {
            // 分类ID不等于0,根据分类Id查询分组属性
            wrapper.eq("catelog_id", catelogId);
        }

        // 如果分类ID==0,查询所有的分组属性
        page = this.page(
                new Query<AttrGroupEntity>().getPage(params),
                wrapper
        );
        return new PageUtils(page);
    }
前端实现
修改请求发送路径,携带 catId 参数。并且在点击的时候将 catId 获取到。

分组新增&级联选择器
在新增时选择 所属分类 应该有一个下拉框,选择现有的分类。
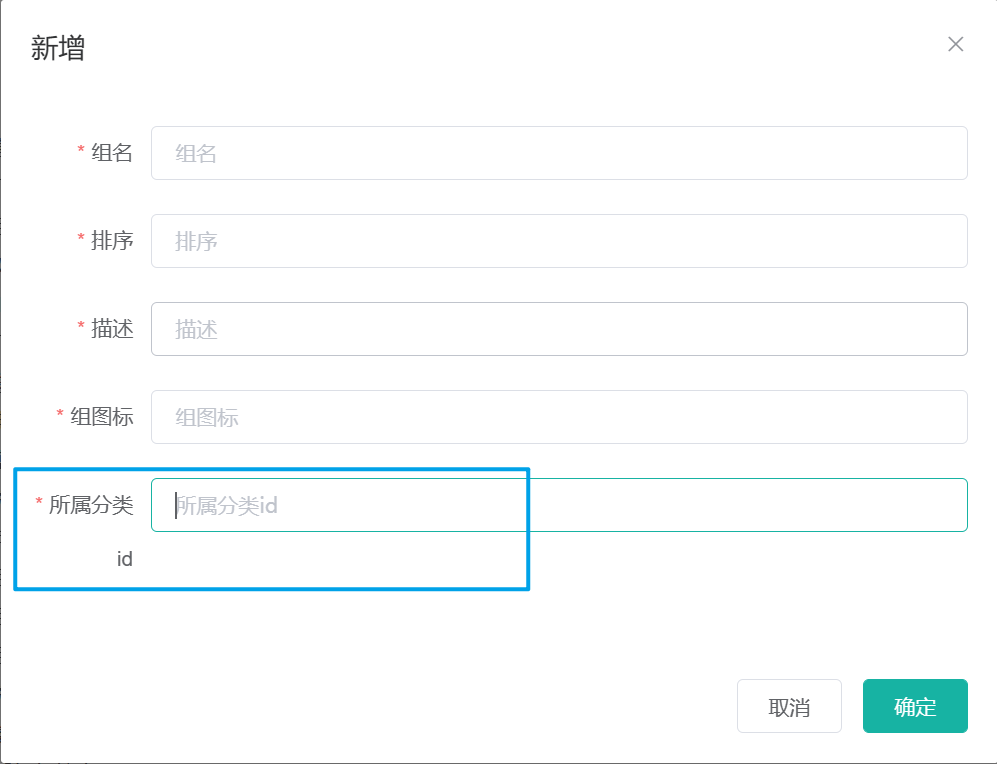
1、修改 attgroup-add-or-update.vue 页面,将所属分类id 输入框改为使用级联选择器
- :options 可选项数据源,键名可通过
Props属性配置 - :props 配置选项
- filterable:提供搜索
- placeholder 选择框默认显示的内容
        <el-cascader
          v-model="dataForm.catelogPath"
          :options="categorys"
          :props="props"
          filterable
          placeholder="试试搜索:手机"
        ></el-cascader>

2、data 中定义数据。
      props: {
        value: 'catId',
        label: 'name',
        children: 'childrenLevel'
      },
      // 展示的菜单
      categorys: [],
| value | 指定选项的值为选项对象的某个属性值 | string | — | ‘value’ |
|---|---|---|---|---|
| label | 指定选项标签为选项对象的某个属性值 | string | — | ‘label’ |
| children | 指定选项的子选项为选项对象的某个属性值 | string | — | ‘children’ |
3、发送请求,获取展示的菜单
    // 获取所有菜单
    getCategorys() {
      this.$http({
        url: this.$http.adornUrl("/product/category/list/tree"),
        method: "get"
      }).then(({ data }) => {
        console.log("成功获取菜单数据:", data.data);
        this.categorys = data.data;
      });
    },
并且 页面渲染之前调用:
  created() {
    this.getCategorys()
  },
JsonInclude
4、效果出来了,但是三级菜单之后,是一片空白。
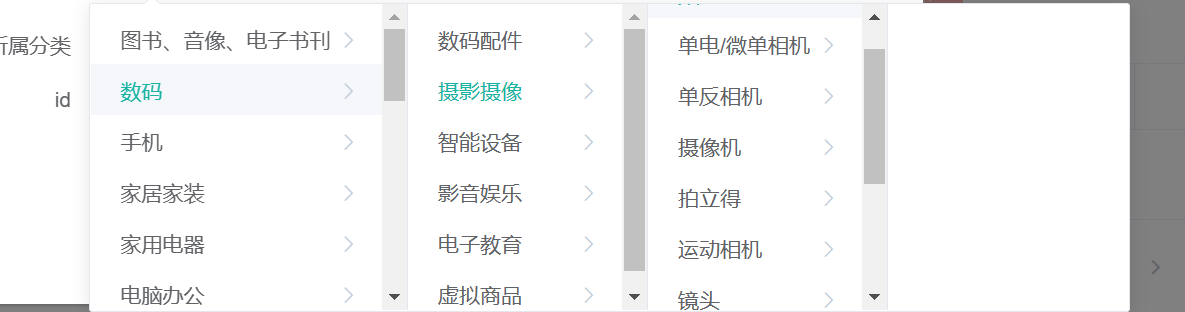
这是因为在后端给我们返回来的数据,三级分类就没有子级菜单了,但是有一个空的子级菜单数组。Element-UI默认这也是一个菜单选项。因此就是空白的。

需要在没有子级菜单的时候,就不要带上 childrenLevel 的数组了。在 childrenLevel 的属性上增加 @JsonInclude 注解

该注解有几个属性:
JsonJsonInclude.Include.ALWAYS 	//表示总是序列化所有属性
JsonJsonInclude.Include.NON_NULL //表示序列化非null属性
JsonJsonInclude.Include.NON_ABSENT //表示序列化非null或者引用类型缺省值,例如java8的Optional类,这个选中通常与Optional一起使用
JsonJsonInclude.Include.NON_EMPTY  // 表示序列化非Empty的属性,例如空的集合不会被序列化
JsonJsonInclude.Include.NON_DEFAULT //仅包含与POJO属性默认值不同的值
JsonJsonInclude.Include.CUSTOM //由{@link JsonInclude#valueFilter}指定值本身,或由{@link JsonInclude#contentFilter}指定结构化类型的内容,由过滤器对象的equals方法进行序列化,返回true则会被排除,返回false会被序列化
JsonJsonInclude.Include.USE_DEFAULTS //使用默认值
这样就正常了

5、控制台仍然报错

这是因为当我们选择所属分类时,默认 catelogId 是一个数组,而我们定义的 catelogId 是一个字符串

(1)在 dataform 中增加一个 catelogIds 数组,并修改级联选择器中绑定的值

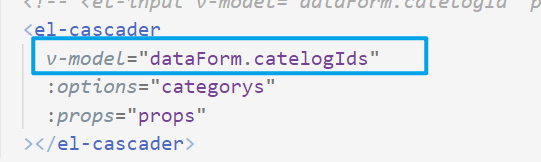
(2)提交表单时,就不能在从表单中获取 catelogId 了,因为我们已经修改为数组了。数组中最后的一个元素就是我们所需要的三级分类的ID

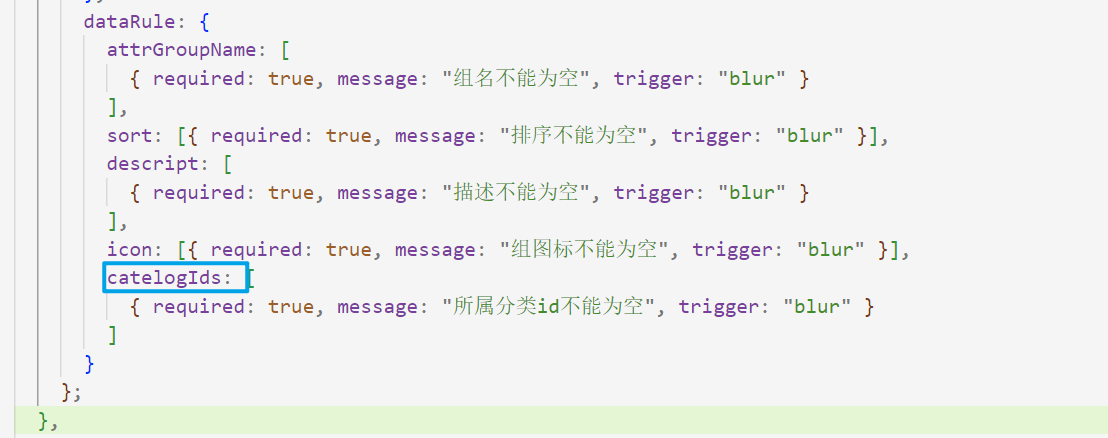
(3)还需要修改 校验规则的属性名,否则会一直校验不通过
分组修改&级联选择器显示
点击 分组属性 修改时。所属分类的路径并没有显示出来。
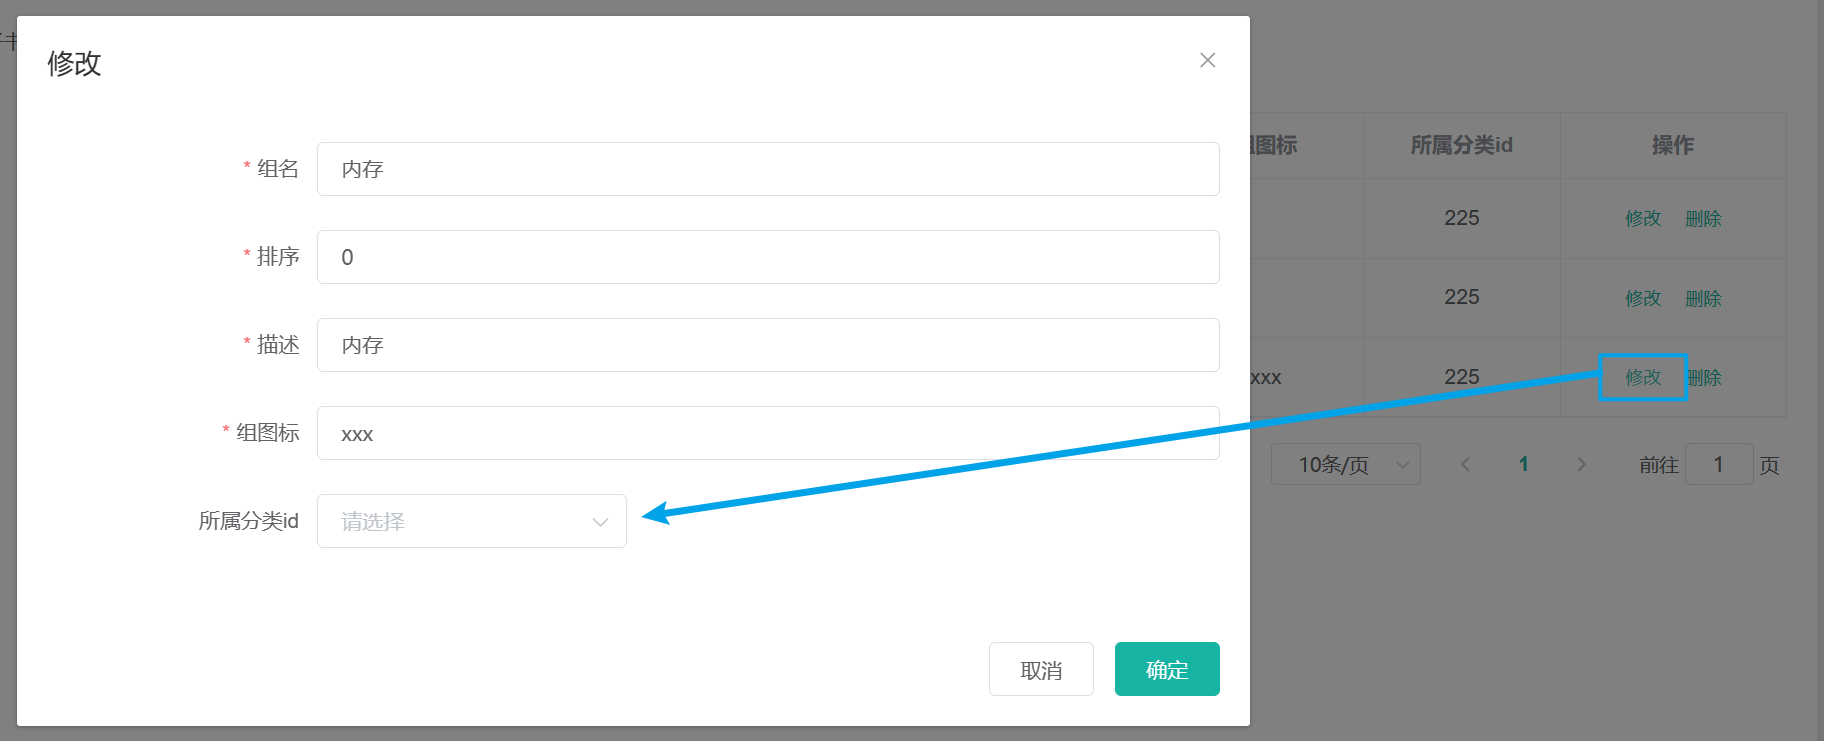
展示分类id是一个数组,而点击修改时,后端返回来的 三级分类ID并不是一个数组类型的。
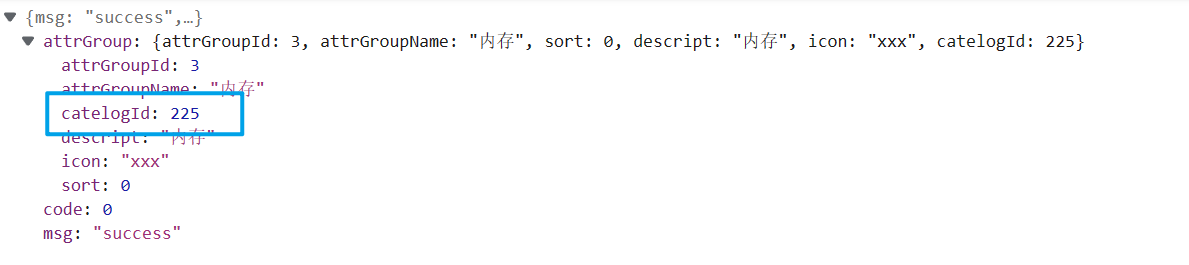
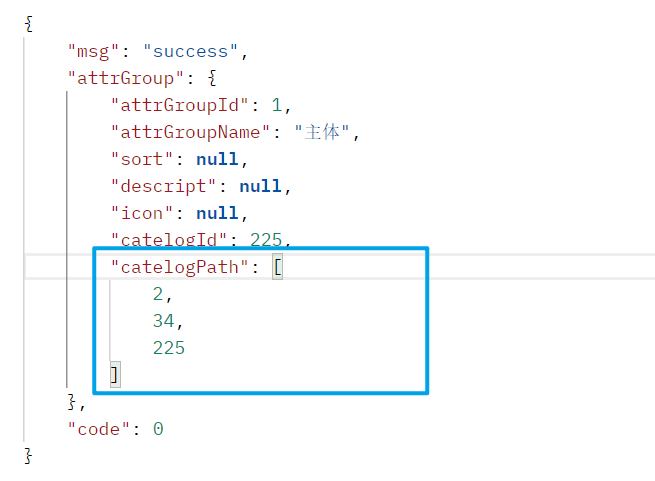
因此我们希望在后端 返回分组信息时,也将三级分类的ID路径返回,格式是:[父id,儿子id,孙子id]
我将 catelogIds 都改成了 catelogPath

1、在 AttrGroupEntity 实体类中增加 分类路径
	/**
	 * 所属分类id的路径
	 */
	@TableField(exist = false)
	Long[] catelogPath;
2、AttrGroupController
    /**
     * 信息
     */
    @RequestMapping("/info/{attrGroupId}")
   // @RequiresPermissions("com.atguigu.gulimall.product:attrgroup:info")
    public R info(@PathVariable("attrGroupId") Long attrGroupId){
		AttrGroupEntity attrGroup = attrGroupService.getById(attrGroupId);
        // 获取三级分类ID
        Long catelogId = attrGroup.getCatelogId();
        // 在返回分组信息时,希望找出分类id的路径
        Long[] catelogPath =  categoryService.findCatelogPath(catelogId);
        attrGroup.setCatelogPath(catelogPath);

        return R.ok().put("attrGroup", attrGroup);
    }
3、CategoryService
Long[] findCatelogPath(Long catelogId);
4、CategoryServiceImpl
 /**
     * @description 找到所属分类id的路径 [父级分类id,儿子分类id,孙子分类id] -> [2,34,225]
     * @date 2022/12/31 16:22
     * @param catelogId
     * @return java.lang.Long[]
     */
    @Override
    public Long[] findCatelogPath(Long catelogId) {

        ArrayList<Long> catelogPath = new ArrayList<Long>();
        // 找到所属分类id的路径,是一个递归操作
        findParentPath(catelogId,catelogPath);

        // 最后封装好的集合是: {225,34,2}
        // 将它反转一下: {2,34,225}
        Collections.reverse(catelogPath);

        // Object数组转换为Long数组会出现CastClassException,新创建一个数组。
        return catelogPath.toArray(new Long[catelogPath.size()]);

    }

    /*
    * 找到所属分类id的路径
    * */
    private void findParentPath(Long catelogId,List<Long> catelogPath) {
        catelogPath.add(catelogId);
        CategoryEntity categoryEntity = this.getById(catelogId);
        if (categoryEntity.getParentCid() != 0) {
            // 如果所属分类的父id不等于0,继续递归查找
            findParentPath(categoryEntity.getParentCid(),catelogPath);
        }

    }
5、测试结果
功能完善
关闭对话框时,清空选择框中的内容

dialogClose方法
    // 关闭对话框时,将所属分类清空
    dialogClose() {
      this.dataForm.catelogPath = []
    },
二、品牌分类关联与级联更新
增加MyBatis-Plus分页插件
如果增加到 common 模块里,记得在主启动类里增加 @SpringBootApplication(scanBasePackages = "com.atguigu")
@Configuration
public class MyConfig {
    /**
     * 新的分页插件,一缓和二缓遵循mybatis的规则,需要设置 MybatisConfiguration#useDeprecatedExecutor = false 避免缓存出现问题(该属性会在旧插件移除后一同移除)
     */
    @Bean
    public MybatisPlusInterceptor mybatisPlusInterceptor() {
        MybatisPlusInterceptor interceptor = new MybatisPlusInterceptor();
        interceptor.addInnerInterceptor(new PaginationInnerInterceptor(DbType.H2));
        return interceptor;
    }
}
品牌管理模糊查询
BrandServiceImpl: 增加对关键字 key 的判断即可。
    @Override
    public PageUtils queryPage(Map<String, Object> params) {
        QueryWrapper<BrandEntity> wrapper = new QueryWrapper<>();
        //模糊查询
        String key = (String) params.get("key");
        if (!StringUtils.isEmpty(key)) {
            wrapper.eq("brand_id",key).or().like("name",key);
        }
        IPage<BrandEntity> page = this.page(
                new Query<BrandEntity>().getPage(params),
                wrapper
        );

        return new PageUtils(page);
    }
前端模块复制
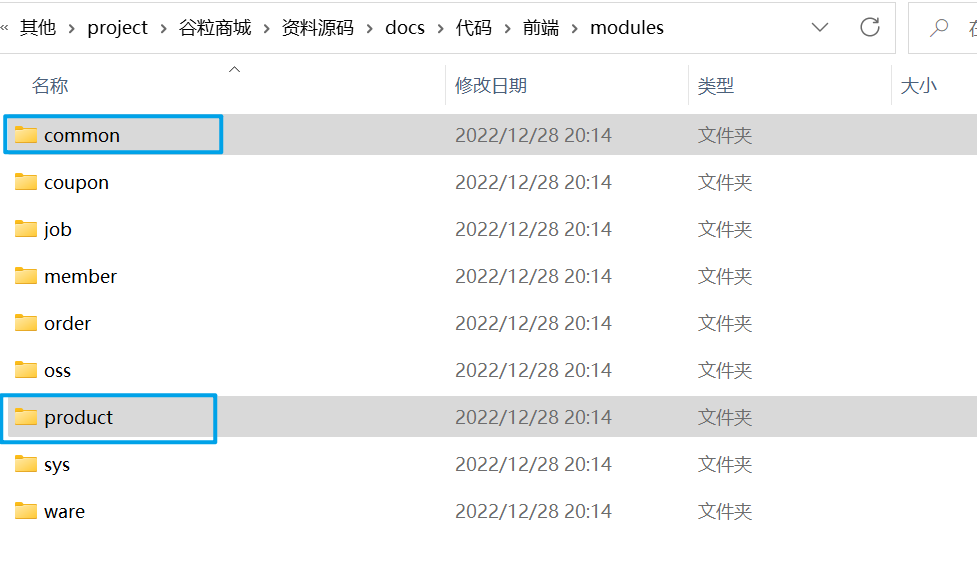
将资料提供好的 common、product 模块,替换掉自己项目中的模块。
将项目的 CategoryEntity 里的子级分类字段 ChildrenLevel 修改成 children
其他名字尽量和老师尽量一样吧,否则太悲催了…
品牌管理&关联分类
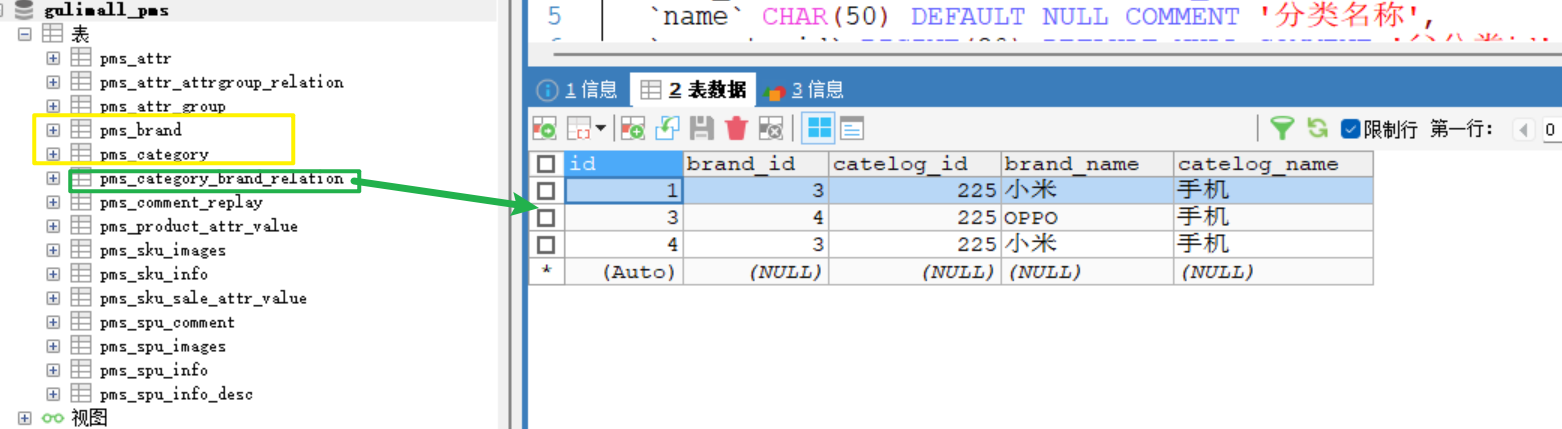
一个品牌对应多个分类,而一个分类又可以对应多个品牌。
在 pms_category_brand_relation 表中保存了品牌与分类的关联关系。

1、接口访问路径

2、前端请求参数

3、后端响应数据
{
	"msg": "success",
	"code": 0,
	"data": [{
		"catelogId": 0,
		"catelogName": "string",
	}]
}
4、CategoryBrandRelationController
    /**
     * 列表
     * 查询品牌关联分类
     */
    @GetMapping("catelog/list")
    //@RequiresPermissions("com.atguigu.gulimall.product:categorybrandrelation:list")
    public R catelogList(@RequestParam Long brandId){
        // PageUtils page = categoryBrandRelationService.queryPage(params);

        List<CategoryBrandRelationEntity> data =
                categoryBrandRelationService.list(new QueryWrapper<CategoryBrandRelationEntity>().eq("brand_id",brandId));
        return R.ok().put("data", data);

    }
新增品牌关联分类
1、接口路径

2、请求参数
{"brandId":1,"catelogId":2}
3、响应数据
{
	"msg": "success",
	"code": 0
}
4、 CategoryBrandRelationController
    /**
     * 保存
     * 新增品牌关联分类
     */
    @PostMapping("/save")
   // @RequiresPermissions("com.atguigu.gulimall.product:categorybrandrelation:save")
    public R save(@RequestBody CategoryBrandRelationEntity categoryBrandRelation){
		// categoryBrandRelationService.save(categoryBrandRelation);
        categoryBrandRelationService.saveDetail(categoryBrandRelation);
        return R.ok();
    }
5、CategoryBrandRelationServiceImpl
- 根据 brandId、catelogId 查询出品牌名,分类名。在设置关联
    @Autowired
    private BrandDao brandDao;
    @Autowired
    private CategoryDao categoryDao;

      // 新增品牌关联分类
    @Override
    public void saveDetail(CategoryBrandRelationEntity categoryBrandRelation) {
        Long brandId = categoryBrandRelation.getBrandId();
        Long catelogId = categoryBrandRelation.getCatelogId();
        // 查询品牌名
        BrandEntity brandEntity = brandDao.selectById(brandId);
        // 查询分类名
        CategoryEntity categoryEntity = categoryDao.selectById(catelogId);

        // 设置关联
        categoryBrandRelation.setBrandName(brandEntity.getName());
        categoryBrandRelation.setCatelogName(categoryEntity.getName());

        this.save(categoryBrandRelation);

    }
级联更新
由于品牌与分类关联的表,单独维护了一张表,因此在修改 品牌名称 以及 分类名称 的时候,还需要更新关联表中的 品牌名与分类名。
1、修改品牌信息时,同时更新关联表中的品牌名称
BrandController
   	/**
     * 修改
     */
    @RequestMapping("/update")
    // @RequiresPermissions("com.atguigu.gulimall.product:brand:update")
    public R update(@RequestBody @Validated(value = UpdateGroup.class) BrandEntity brand) {
        // brandService.updateById(brand);
        // 级联更新
        brandService.updateCascade(brand);
        return R.ok();
    }


BrandServiceImpl

    @Autowired
    private CategoryBrandRelationService brandRelationService;
    /*
     * 修改品牌表的同时,级联更新其他与品牌相关连的表
     * */
    @Transactional // 事务注解
    @Override
    public void updateCascade(BrandEntity brand) {
        // 更新自己
        this.updateById(brand);
        if (!StringUtils.isEmpty(brand.getName())) {

            // 修改 品牌分类 关联表
            CategoryBrandRelationEntity categoryBrandRelationEntity = new CategoryBrandRelationEntity();
            categoryBrandRelationEntity.setBrandName(brand.getName());
            // 更新关联表的 品牌名称
            brandRelationService.update(categoryBrandRelationEntity,
                    new QueryWrapper<CategoryBrandRelationEntity>().eq("brand_id", brand.getBrandId()));
            // TODO:更新其他表
        }

    }
2、修改分类信息时,同时更新关联表中的分类名称
CategoryController
	/**
     * 修改
     */
    @RequestMapping("/update")
   // @RequiresPermissions("com.atguigu.gulimall.product:category:update")
    public R update(@RequestBody CategoryEntity category){
		// categoryService.updateById(category);
        // 级联更新
        categoryService.updateCascade(category);

        return R.ok();
    }

CategoryServiceImpl

    /*
    * 更新分类表的同时更新其他关联表
    * */
    @Transactional // 事务注解
    @Override
    public void updateCascade(CategoryEntity category) {
         this.updateById(category);
        // 更新 关联表的 分类名
        if (!StringUtils.isEmpty(category.getName())) {
            CategoryBrandRelationEntity categoryBrandRelationEntity = new CategoryBrandRelationEntity();
            categoryBrandRelationEntity.setCatelogName(category.getName());
            categoryBrandRelationService.update(categoryBrandRelationEntity,
        new QueryWrapper<CategoryBrandRelationEntity>().eq("catelog_id",category.getCatId()));
        }
        // TODO 更新其他表的数据
    }
三、规格参数
Object对象划分
- PO(persistant object) 持久对象
PO 就是对应数据库中某个表中的一条记录,多个记录可以用 PO 的集合。 PO 中应该不包 含任何对数据库的操作。
- DO(Domain Object)领域对象
就是从现实世界中抽象出来的有形或无形的业务实体。
- TO(Transfer Object) ,数据传输对象
不同的应用程序之间传输的对象
- DTO(Data Transfer Object)数据传输对象
这个概念来源于 J2EE 的设计模式,原来的目的是为了 EJB 的分布式应用提供粗粒度的 数据实体,以减少分布式调用的次数,从而提高分布式调用的性能和降低网络负载,但在这 里,泛指用于展示层与服务层之间的数据传输对象。
- VO(value object) 值对象
通常用于业务层之间的数据传递,和 PO 一样也是仅仅包含数据而已。但应是抽象出 的业务对象 , 可以和表对应 , 也可以不 , 这根据业务的需要 。用 new 关键字创建,由 GC 回收的。 View object:视图对象; 接受页面传递来的数据,封装对象 将业务处理完成的对象,封装成页面要用的数据
- BO(business object) 业务对象
从业务模型的角度看 , 见 UML 元件领域模型中的领域对象。封装业务逻辑的 java 对 象 , 通过调用 DAO 方法 , 结合 PO,VO 进行业务操作。business object: 业务对象 主要作 用是把业务逻辑封装为一个对象。这个对象可以包括一个或多个其它的对象。 比如一个简 历,有教育经历、工作经历、社会关系等等。 我们可以把教育经历对应一个 PO ,工作经 历对应一个 PO ,社会关系对应一个 PO 。 建立一个对应简历的 BO 对象处理简历,每 个 BO 包含这些 PO 。 这样处理业务逻辑时,我们就可以针对 BO 去处理。
- POJO(plain ordinary java object) 简单无规则 java 对象
传统意义的 java 对象。就是说在一些 Object/Relation Mapping 工具中,能够做到维护 数据库表记录的 persisent object 完全是一个符合 Java Bean 规范的纯 Java 对象,没有增 加别的属性和方法。我的理解就是最基本的 java Bean ,只有属性字段及 setter 和 getter 方法!。 POJO 是 DO/DTO/BO/VO 的统称。
- DAO(data access object) 数据访问对象
是一个 sun 的一个标准 j2ee 设计模式, 这个模式中有个接口就是 DAO ,它负持久 层的操作。为业务层提供接口。此对象用于访问数据库。通常和 PO 结合使用, DAO 中包 含了各种数据库的操作方法。通过它的方法 , 结合 PO 对数据库进行相关的操作。夹在业 务逻辑与数据库资源中间。配合 VO, 提供数据库的 CRUD 操作
规格参数新增
新增规格参数时,需要将增加的属性与属性分组相关联。

就好比京东来说,一个属性分组下有好多个属性。就需要在新增属性时,它是属于哪个分组的。就得给他关联上。

属性与分组的关系保存在 pms_attr_attrgroup_relation 表

而在新增 规格参数 时,前端发送的请求参数多了一个 分组ID。在 AttrEntity 规格参数实体类中并没有 分组ID 属性,以前我们是在实体类中增加字段,而更多的方式是新建一个 vo对象,用于接受页面传输过来的数据。
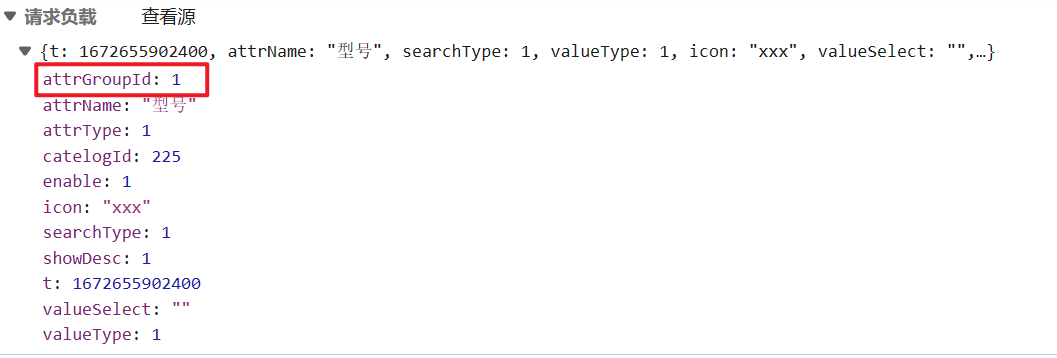
1、新建一个 VO对象
@Data
public class AttrVo {
    /**
     * 属性id
     */
    private Long attrId;
    /**
     * 属性名
     */
    private String attrName;
    /**
     * 是否需要检索[0-不需要,1-需要]
     */
    private Integer searchType;
    /**
     * 属性图标
     */
    private String icon;
    /**
     * 可选值列表[用逗号分隔]
     */
    private String valueSelect;
    /**
     * 属性类型[0-销售属性,1-基本属性,2-既是销售属性又是基本属性]
     */
    private Integer attrType;
    /**
     * 启用状态[0 - 禁用,1 - 启用]
     */
    private Long enable;
    /**
     * 所属分类
     */
    private Long catelogId;
    /**
     * 快速展示【是否展示在介绍上;0-否 1-是】,在sku中仍然可以调整
     */
    private Integer showDesc;

    /**
    * 分组ID
    * */
    private Long attrGroupId;
}
2、AttrController
  /**
   * 保存
   * 新增规格参数并关联分组
   */
  @RequestMapping("/save")
 // @RequiresPermissions("com.atguigu.gulimall.product:attr:save")
  public R save(@RequestBody AttrVo attrVo){
// attrService.save(attr);
      attrService.saveAttr(attrVo);
      return R.ok();
  }
3、 AttrServiceImpl
 /*
    * 新增规格参数并关联分组 attrAttrgroupRelationService
    * */
    @Override
    public void saveAttr(AttrVo attrVo) {
        // 1、保存属性基本信息
        AttrEntity attrEntity = new AttrEntity();
        // 拷贝对象
        BeanUtils.copyProperties(attrVo,attrEntity);
        this.save(attrEntity);
        // 2、保存关联关系
        AttrAttrgroupRelationEntity attrAttrgroupRelationEntity = new AttrAttrgroupRelationEntity();
        attrAttrgroupRelationEntity.setAttrId(attrEntity.getAttrId());
        attrAttrgroupRelationEntity.setAttrGroupId(attrVo.getAttrGroupId());
        attrAttrgroupRelationDao.insert(attrAttrgroupRelationEntity);
    }
规格参数列表
1、请求路径

2、请求参数
{
   page: 1,//当前页码
   limit: 10,//每页记录数
   sidx: 'id',//排序字段
   order: 'asc/desc',//排序方式
   key: '华为'//检索关键字
}
3、响应数据
除了要响应 Attr 中的数据,还有 catelogName(分类名)、groupName(分组名) ,这俩个字段是 Attr 实体类中没有的,因此我们需要额外创建一个 Vo 对象。
{
	"msg": "success",
	"code": 0,
	"page": {
		"totalCount": 0,
		"pageSize": 10,
		"totalPage": 0,
		"currPage": 1,
		"list": [{
			"attrId": 0, //属性id
			"attrName": "string", //属性名
			"attrType": 0, //属性类型,0-销售属性,1-基本属性
			"catelogName": "手机/数码/手机", //所属分类名字
			"groupName": "主体", //所属分组名字
			"enable": 0, //是否启用
			"icon": "string", //图标
			"searchType": 0,//是否需要检索[0-不需要,1-需要]
			"showDesc": 0,//是否展示在介绍上;0-否 1-是
			"valueSelect": "string",//可选值列表[用逗号分隔]
			"valueType": 0//值类型[0-为单个值,1-可以选择多个值]
		}]
	}
}
4、创建 Vo 对象
@Data
public class AttrRespVo extends  AttrVo{
    // catelogName/groupName
    private String catelogName;
    private String groupName;
}
思路分析:
- 查询属性信息,并且都是分页查询
- 根据分类ID查询
- 根据 key 查询
- 查询所有
- 查询属性分组名称
- 根据属性信息中的
attrId(属性ID)在pms_attr_attrgroup_relation表中查询出attr_group_id(属性分组ID) - 根据
attr_group_id(属性分组ID)在pms_attr_group查询出attr_group_name(分组名)
- 根据属性信息中的
- 查询所属分类名称
- 根据属性信息中的 catelog_id(所属分类ID) 在
pms_category表中查询出name(分类名称)
- 根据属性信息中的 catelog_id(所属分类ID) 在
5、AttrController
	/**
     *  属性规格参数查询——关联分组名称、分类名称
     * @param params 封装前端请求参数
     * @param catelogId 分类ID
     * @return
     */
    //  /product/attr/base/list/{catelogId}
    @GetMapping("/base/list/{catelogId}")
    public R baseList(@RequestParam Map<String, Object> params,@PathVariable("catelogId")Long catelogId) {
        PageUtils page = attrService.queryBaseListPage(params,catelogId);

        return R.ok().put("page", page);
    }
6、AttrServiceImpl
    @Autowired
    AttrAttrgroupRelationDao attrAttrgroupRelationDao;

    @Autowired
    private CategoryDao categoryDao;

    @Autowired
    private AttrGroupDao attrGroupDao;

	/*
    - 查询属性信息,并且都是分页查询
      - 根据 key 查询
      - 根据分类ID查询
      - 查询所有
    - 查询属性分组名称
      - 根据属性信息中的 `attrId(属性ID)` 在 `pms_attr_attrgroup_relation` 表中查询出 `attr_group_id(属性分组ID)`
      - 根据 `attr_group_id(属性分组ID)` 在` pms_attr_group` 查询出 `attr_group_name(分组名)`
    - 查询所属分类名称
      - 根据属性信息中的 catelog_id(所属分类ID) 在 `pms_category`表中查询出 `name(分类名称)`
    * */
    @Override
    public PageUtils queryBaseListPage(Map<String, Object> params, Long catelogId) {
        // 1、查询属性信息,并且都是分页查询
        QueryWrapper<AttrEntity> wrapper = new QueryWrapper<>();
        // 1.1 根据分类ID查询
        if (catelogId != 0) {
            // 根据所属分类查询
            wrapper.eq("catelog_id", catelogId);
        }

        // 1.2 根据 key 查询
        // attr_id/attr_name
        String key = (String) params.get("key");
        if (!StringUtils.isEmpty(key)) {
            wrapper.and(queryWrapper -> {
                queryWrapper.eq("attr_id", key).or().like("attr_name", key);
            });
        }
        // 1.3 查询所有
        IPage<AttrEntity> page = this.page(
                new Query<AttrEntity>().getPage(params),
                wrapper
        );

        // 属性信息集合
        List<AttrEntity> records = page.getRecords();

        List<AttrRespVo> list = records.stream().map(attrEntity -> {
            // 响应给浏览器的数据
            AttrRespVo attrRespVo = new AttrRespVo();
            // 先将属性的基本信息拷贝给vo对象
            BeanUtils.copyProperties(attrEntity, attrRespVo);
            // 2、查询属性分组名称
            // 2.1 在 `pms_attr_attrgroup_relation` 表中查询出 `attr_group_id(属性分组ID)`
            AttrAttrgroupRelationEntity attrgroupRelationEntity =
                    attrAttrgroupRelationDao.selectOne(new QueryWrapper<AttrAttrgroupRelationEntity>().eq("attr_id", attrEntity.getAttrId()));
            if (attrgroupRelationEntity != null) {
                // 2.2 根据 `attr_group_id(属性分组ID)` 在` pms_attr_group` 查询出 `attr_group_name(分组名)`
                AttrGroupEntity attrGroupEntity =
                        attrGroupDao.selectById(attrgroupRelationEntity.getAttrGroupId());
                attrRespVo.setGroupName(attrGroupEntity.getAttrGroupName());
            }

            // 3、查询所属分类名称
            // 根据属性信息中的 catelog_id(所属分类ID) 在 `pms_category`表中查询出 `name(分类名称)`
            CategoryEntity categoryEntity = categoryDao.selectById(attrEntity.getCatelogId());
            if (categoryEntity != null) {
                attrRespVo.setCatelogName(categoryEntity.getName());
            }

            return attrRespVo;
        }).collect(Collectors.toList());
        PageUtils pageUtils = new PageUtils(page);
        pageUtils.setList(list);
        return pageUtils;
    }
规格参数修改
规格参数回显
点击 修改 回显数据
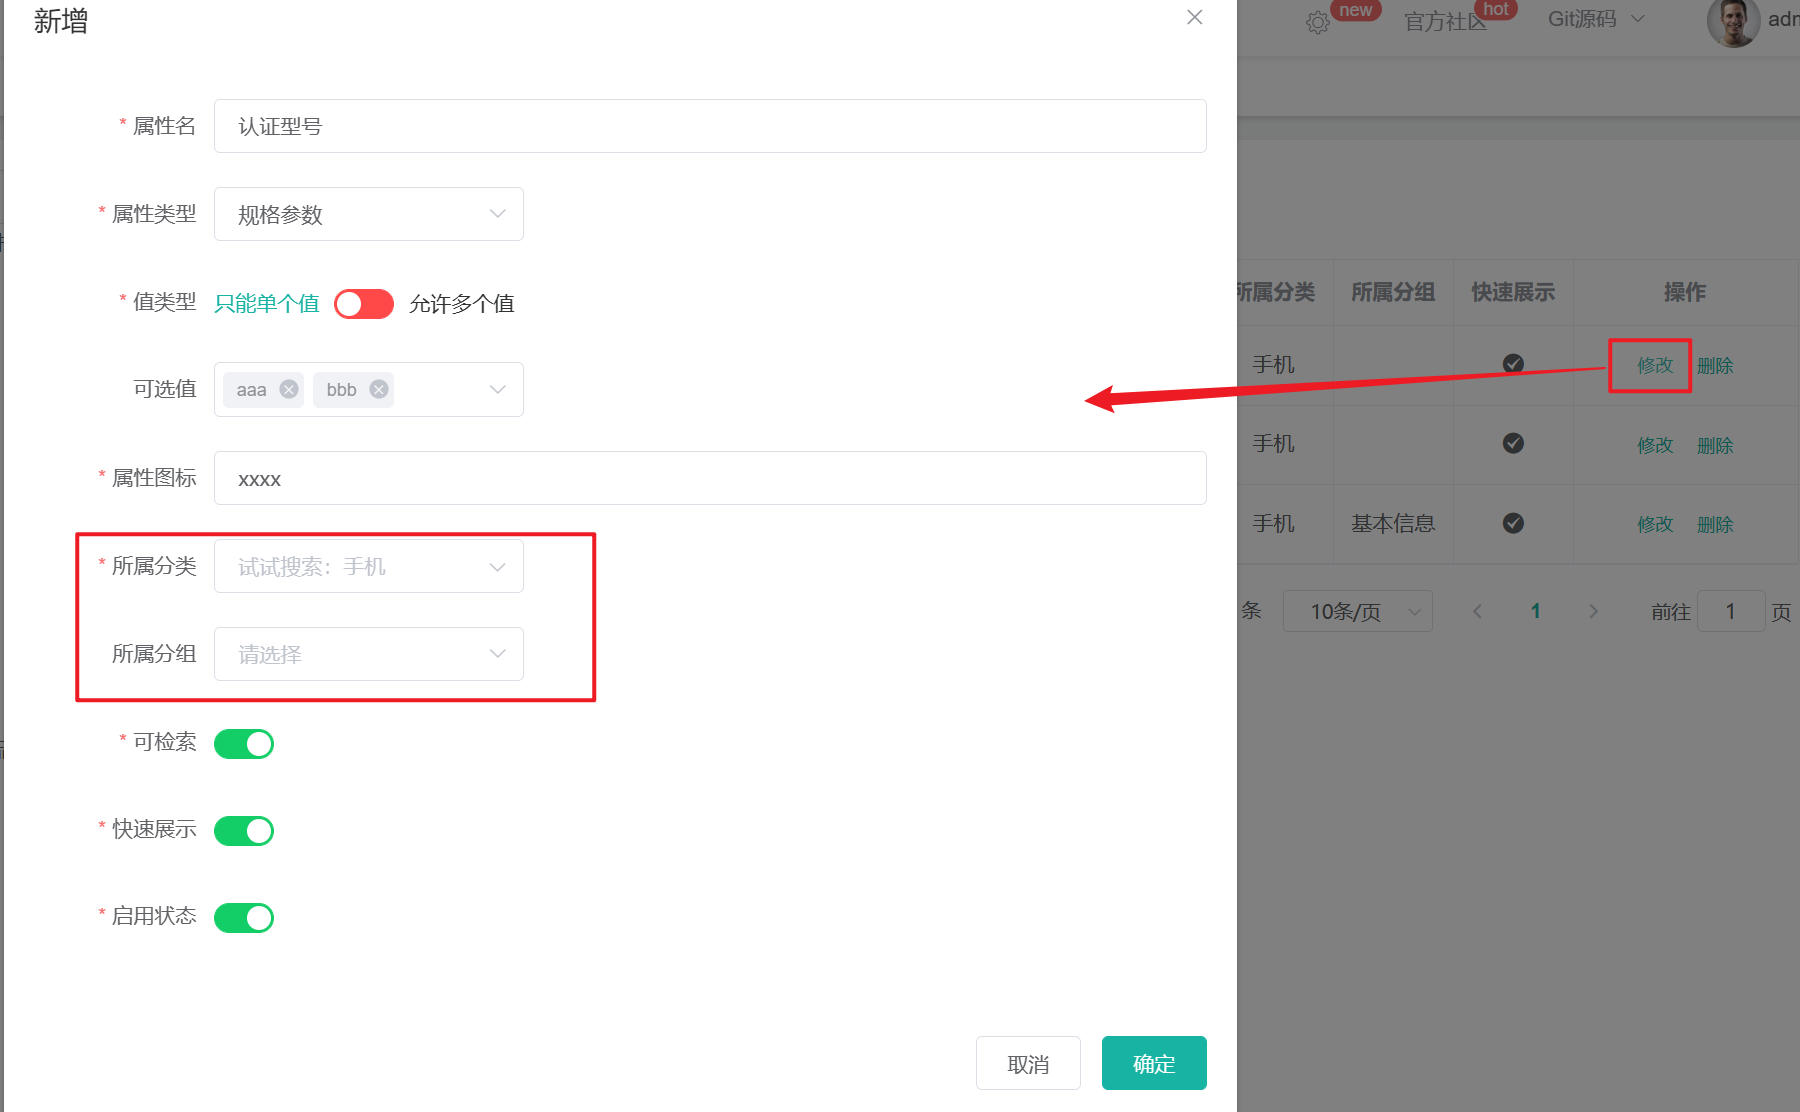
1、 接口访问路径

2、响应数据
需要在 AttrRespVo 中 额外再增加 catelogPath 字段
{
	"msg": "success",
	"code": 0,
	"attr": {
		"attrId": 4,
		"attrName": "aad",
		"searchType": 1,
		"valueType": 1,
		"icon": "qq",
		"valueSelect": "v;q;w",
		"attrType": 1,
		"enable": 1,
		"showDesc": 1,
		"attrGroupId": 1, //分组id
		"catelogId": 225, //分类id
		"catelogPath": [2, 34, 225] //分类完整路径
	}
}

思路分析:
- 根据 attrId 查询 属性基本信息
- 根据 catelogId 查询分类完整路径
- 根据
attrId(属性ID)在pms_attr_attrgroup_relation表中查询出attr_group_id(属性分组ID) - 根据
attr_group_id(属性分组ID)在pms_attr_group查询出attr_group_name(分组名)
3、AttrController
    /**
     * 信息
     */
    @RequestMapping("/info/{attrId}")
   // @RequiresPermissions("com.atguigu.gulimall.product:attr:info")
    public R info(@PathVariable("attrId") Long attrId){
		// AttrEntity attr = attrService.getById(attrId);
        AttrRespVo vo = attrService.getAttrInfo(attrId);
        return R.ok().put("attr", vo);
    }
4、AttrServiceImpl
 /*
    * 回显修改的规格参数数据
         - 根据 attrId 查询 属性基本信息
        - 根据 catelogId 查询分类完整路径
        - 根据 `attrId(属性ID)` 在 `pms_attr_attrgroup_relation` 表中查询出 `attr_group_id(属性分组ID)`
        - 根据 `attr_group_id(属性分组ID)` 在` pms_attr_group` 查询出 `attr_group_name(分组名)`
    * */
    @Override
    public AttrRespVo getAttrInfo(Long attrId) {
        AttrRespVo attrRespVo = new AttrRespVo();
        //  根据 attrId 查询 属性基本信息
        AttrEntity attrEntity = this.getById(attrId);
        BeanUtils.copyProperties(attrEntity, attrRespVo);
        // 根据 catelogId 查询分类完整路径
        Long[] catelogPath = categoryService.findCatelogPath(attrEntity.getCatelogId());
        attrRespVo.setCatelogPath(catelogPath);

        // 根据 `attrId(属性ID)` 在 `pms_attr_attrgroup_relation` 表中查询出 `attr_group_id(属性分组ID)`
        AttrAttrgroupRelationEntity attrAttrgroupRelationEntity =
                attrAttrgroupRelationDao.selectOne(new QueryWrapper<AttrAttrgroupRelationEntity>().eq("attr_id", attrEntity.getAttrId()));
        if (attrAttrgroupRelationEntity != null) {
            attrRespVo.setAttrGroupId(attrAttrgroupRelationEntity.getAttrGroupId());
            // 根据 `attr_group_id(属性分组ID)` 在` pms_attr_group` 查询出 `attr_group_name(分组名)`
            AttrGroupEntity attrGroupEntity = attrGroupDao.selectById(attrAttrgroupRelationEntity.getAttrGroupId());
            if (attrGroupEntity != null) {
                attrRespVo.setGroupName(attrGroupEntity.getAttrGroupName());

            }
        }
        return attrRespVo;
    }
规格参数修改
1、访问路径

2、请求参数
{
  "attrId": 0, //属性id
  "attrGroupId": 0, //属性分组id
  "attrName": "string",//属性名
  "attrType": 0, //属性类型
  "catelogId": 0, //分类id
  "enable": 0, //是否可用
  "icon": "string", //图标
  "searchType": 0, //是否检索
  "showDesc": 0, //快速展示
  "valueSelect": "string", //可选值列表
  "valueType": 0 //可选值模式
}
思路分析:
- 不仅要修改规格参数,还要修改 关联关系 中的分组ID,而修改所属分组有俩种情况:
- 当我们没有指定所属分组时,点击 修改时指定分组,那么它其实是一个新增所属分组的操作
- 如果指定了所属分组,修改时是一个修改所属分组操作

3、AttrController
    /**
     * 修改
     */
    @RequestMapping("/update")
   // @RequiresPermissions("com.atguigu.gulimall.product:attr:update")
    public R update(@RequestBody AttrVo attrVo){

		attrService.updateAttr(attrVo);
        return R.ok();
    }
4、AttrServiceImpl
 /*
    * 修改规格参数
    * 1、修改规格参数
    * 2、修改关联分组ID
    * 3、判断是新增所属分组还是修改所属分组
    * */
    @Override
    public void updateAttr(AttrVo attrVo) {
        // 1、修改规格参数
        AttrEntity attrEntity = new AttrEntity();
        BeanUtils.copyProperties(attrVo,attrEntity);
        this.updateById(attrEntity);

        // 2、修改关联分组ID
        AttrAttrgroupRelationEntity attrAttrgroupRelationEntity = new AttrAttrgroupRelationEntity();
        attrAttrgroupRelationEntity.setAttrId(attrVo.getAttrId());
        attrAttrgroupRelationEntity.setAttrGroupId(attrVo.getAttrGroupId());

        UpdateWrapper<AttrAttrgroupRelationEntity> updateWrapper = new UpdateWrapper<>();
        updateWrapper.eq("attr_id",attrEntity.getAttrId());

        // 3、判断是新增所属分组还是修改所属分组
        // 从关系表中查出属性对应的分组,如果能查出来就说明是修改,查不出来就是新增
        if (attrAttrgroupRelationDao.selectCount(new QueryWrapper<AttrAttrgroupRelationEntity>().eq("attr_id",attrVo.getAttrId())) == 0) {
            // 说明是新增所属分组
            attrAttrgroupRelationDao.insert(attrAttrgroupRelationEntity);
        }else {
            // 说明是修改所属分组
            attrAttrgroupRelationDao.update(attrAttrgroupRelationEntity,updateWrapper);
        }
    }
四、销售属性
1、接口路径
销售属性与规格参数唯一的区别就是,路径中带有 base 还是带有 sale。因此我们在获取列表时,只需要判断路径中带有的是哪个值即可,无需在额外创建一个方法。
销售属性:/product/attr/sale/list/{catelogId}
规格参数:/product/attr/base/list/{catelogId}

2、请求参数
{
   page: 1,//当前页码
   limit: 10,//每页记录数
   sidx: 'id',//排序字段
   order: 'asc/desc',//排序方式
   key: '华为'//检索关键字
}
3、响应数据
销售属性 无需与 所属分组进行关联,因此无论是新增还是修改,如果是销售属性就不用在设置 所属分组了。
{
	"msg": "success",
	"code": 0,
	"page": {
		"totalCount": 0,
		"pageSize": 10,
		"totalPage": 0,
		"currPage": 1,
		"list": [{
			"attrId": 0, //属性id
			"attrName": "string", //属性名
			"attrType": 0, //属性类型,0-销售属性,1-基本属性
			"catelogName": "手机/数码/手机", //所属分类名字
			"groupName": "主体", //所属分组名字
			"enable": 0, //是否启用
			"icon": "string", //图标
			"searchType": 0,//是否需要检索[0-不需要,1-需要]
			"showDesc": 0,//是否展示在介绍上;0-否 1-是
			"valueSelect": "string",//可选值列表[用逗号分隔]
			"valueType": 0//值类型[0-为单个值,1-可以选择多个值]
		}]
	}
}
思路分析:
销售属性和基本属性都保存 pms_attr 表中,使用 attr_type 字段区分是哪种属性。
因此在查询时,需要增加对 attr_type 的判断
在新增、修改时,由于销售属性不用与所属分组进行相关联。因此在进行关联分组时,也需要判断是否是基本属性。只有在 新增、修改 基本属性时才会 关联分组
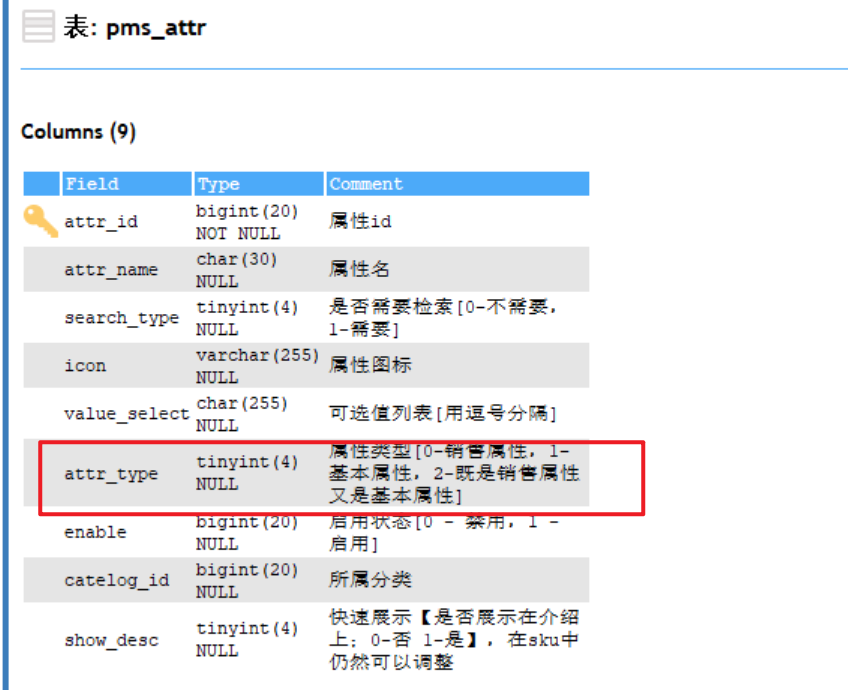
4、在 common 模块中创建 常量类。区分是销售属性,还是基本属性
package com.atguigu.common.constant;

/**
 *
 * Author: YZG
 * Date: 2023/1/3 15:53
 * Description:
 */
public class ProductConstant {

    public enum ProductEnum{
        ATTR_TYPE_BASE(1,"基础属性"),
        ATTR_TYPE_SALE(0,"销售属性");

        private int code ;
        private String msg ;

        ProductEnum(int code, String msg) {
            this.code = code;
            this.msg = msg;
        }

        public int getCode() {
            return code;
        }

        public String getMsg() {
            return msg;
        }
    }
}
5、获取销售属性列表
(1) 在controller层,获取 属性类型。base/sale

(2)在查询时,增加 属性判断 。

(3)查询属性时,只有基本属性才能关联分组

6、新增销售属性
AttrServiceImpl 中 saveAttr 方法
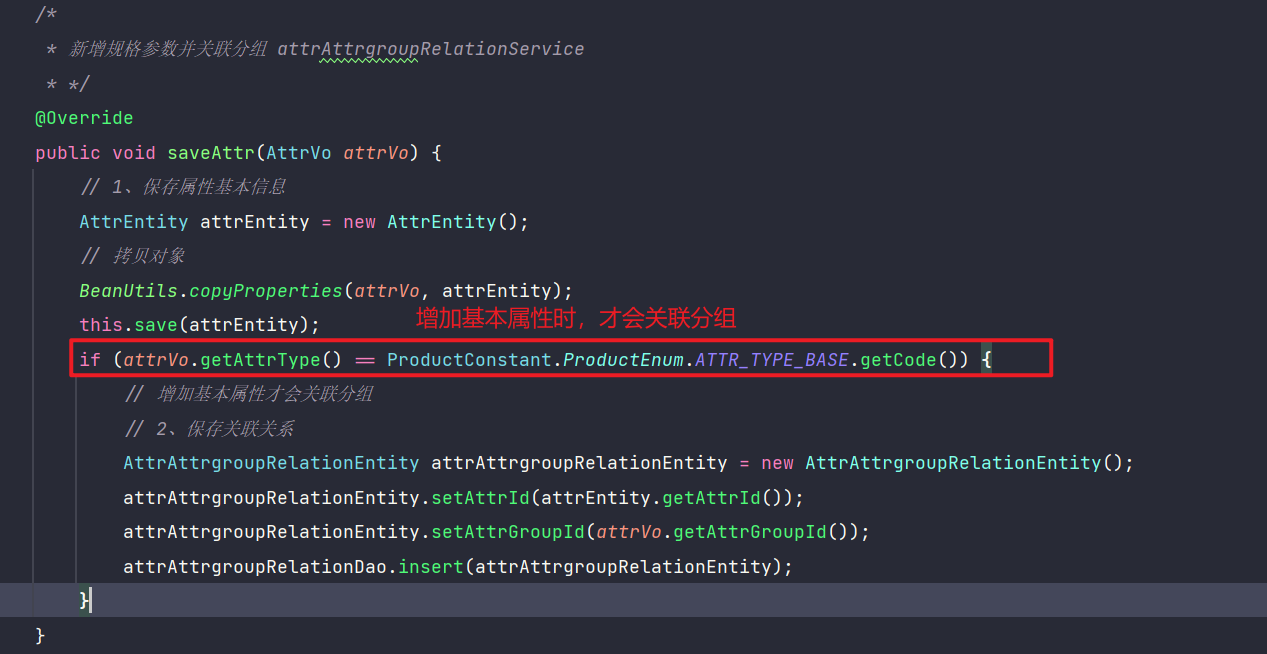
7、修改销售属性
AttrServiceImpl 中 updateAttr 方法
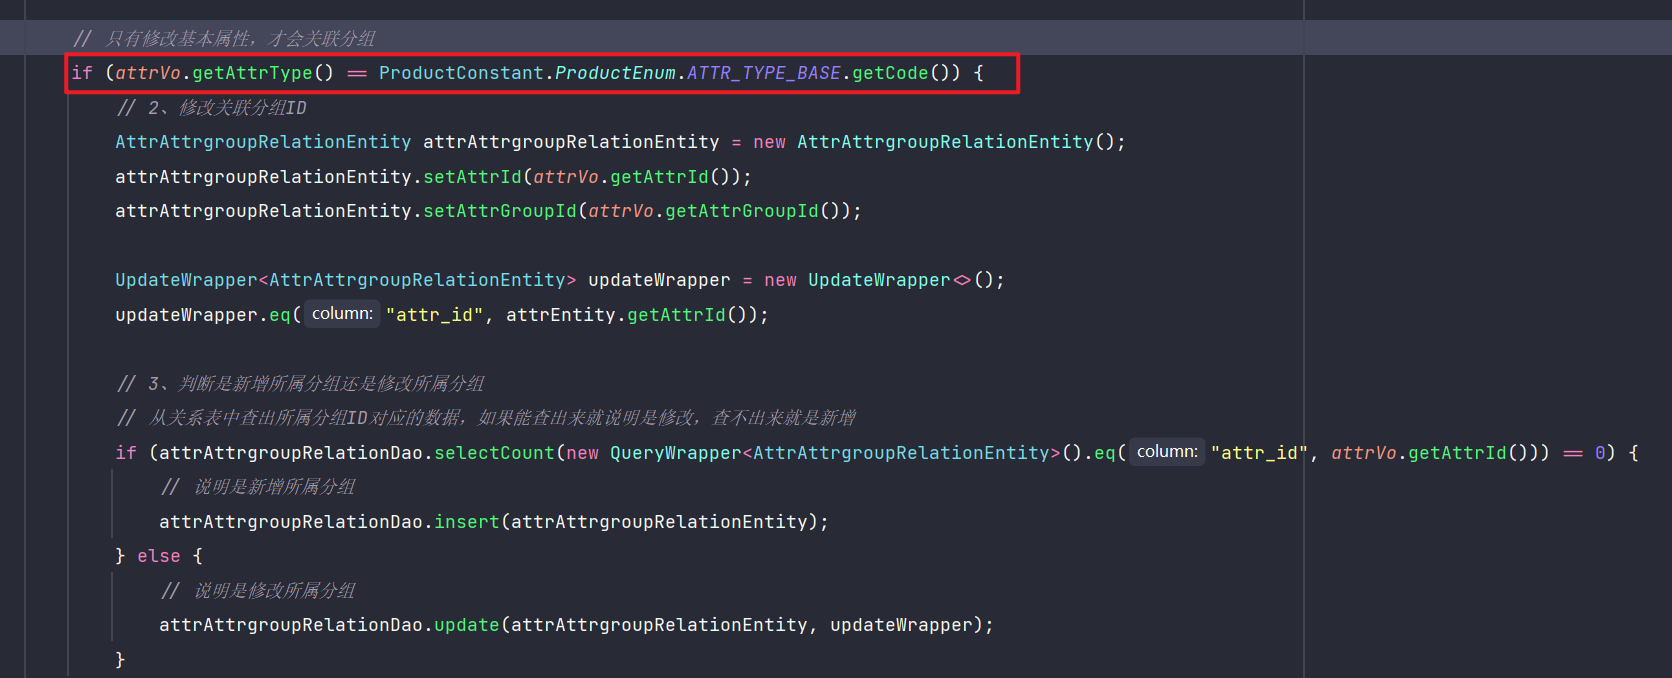
五、分组关联属性&删除关联
分组关联属性
在属性分组中,点击关联,会显示所有与分组关联的属性。
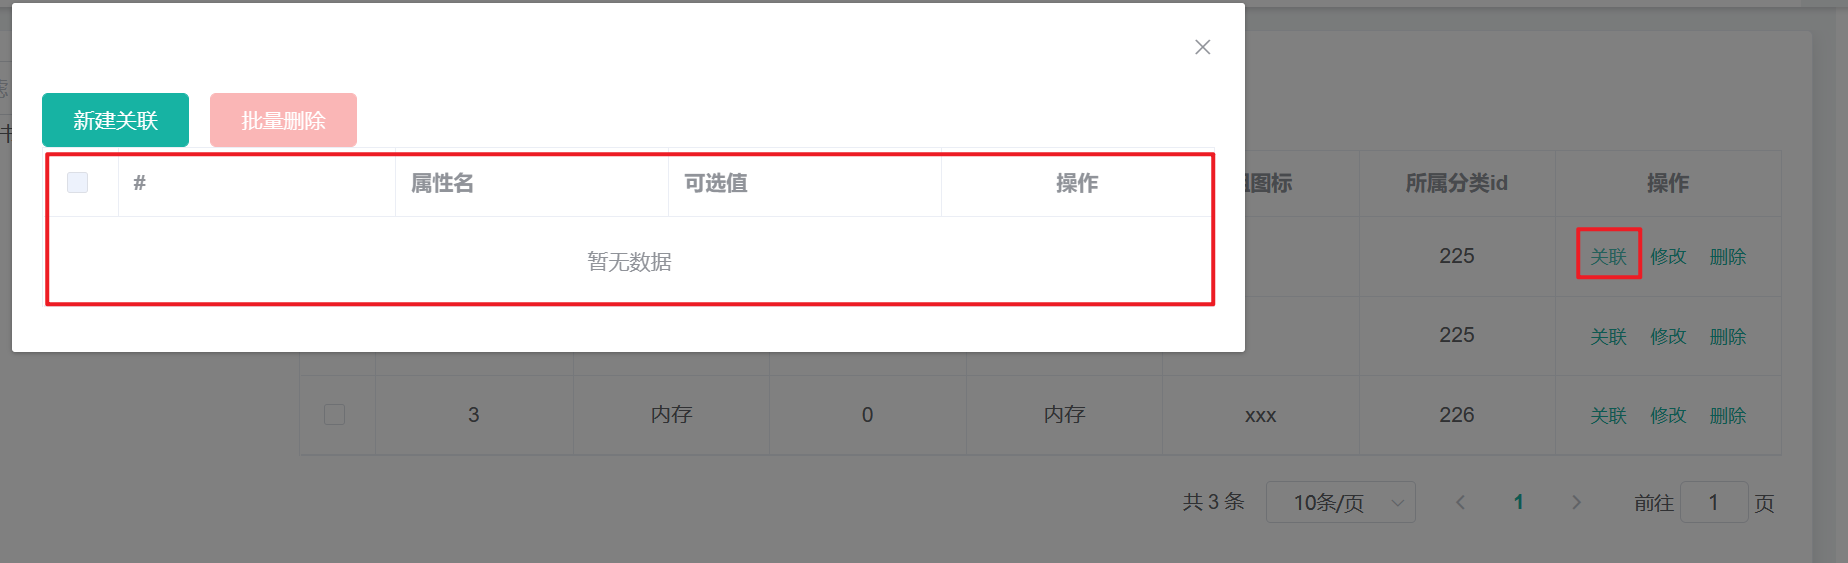
1、访问接口路径

2、响应数据
{
  "msg": "success",
  "code": 0,
  "data": [
    {
      "attrId": 4,
      "attrName": "aad",
      "searchType": 1,
      "valueType": 1,
      "icon": "qq",
      "valueSelect": "v;q;w",
      "attrType": 1,
      "enable": 1,
      "catelogId": 225,
      "showDesc": 1
    }
  ]
}
3、AttrGroupController
       @Autowired
    private AttrServiceImpl attrService;
	/**
     * 查询与分组关联的所有属性
     * */
    // /product/attrgroup/{attrgroupId}/attr/relation
    @GetMapping("/{attrgroupId}/attr/relation")
    public R listAttrRelation(@PathVariable("attrgroupId") Long attrgroupId){

        // 查询出与分组关联的所有属性
        List<AttrEntity> list = attrService.getAttrsWithGroup(attrgroupId);
        return R.ok().put("data", list);
    }
4、AttrGroupServiceImpl
   /**
     * 根据分组id查询出与分组关联的所有属性
     * 1、根据 attrgroupId 在关联表 pms_attr_attrgroup_relation 中查询出所对应的所有 attr_id
     *  一个分组可能对应多个属性
     * 2、根据 attr_id 在 pms_attr 表中查询出所有属性
     * */
    @Override
    public List<AttrEntity> getAttrsWithGroup(Long attrgroupId) {
        QueryWrapper<AttrAttrgroupRelationEntity> queryWrapper = new QueryWrapper<AttrAttrgroupRelationEntity>().eq("attr_group_id", attrgroupId);
        // 查询出分组对应的所有属性
        List<AttrAttrgroupRelationEntity> list = attrAttrgroupRelationDao.selectList(queryWrapper);
        // 根据查attr_id询出所有属性信息
        List<AttrEntity> allAttrEntity = list.stream()
                .map(attrAttrgroupRelationEntity -> this.getById(attrAttrgroupRelationEntity.getAttrId()))
                .collect(Collectors.toList());
        return allAttrEntity;
    }
删除关联
1、访问接口路径

2、 请求参数
[{"attrId":1,"attrGroupId":2}]
3、响应数据
{
	"msg": "success",
	"code": 0
}
4、创建一个 VO 对象接口参数
@Data
public class AttrRelaVo {
    //     [{"attrId":1,"attrGroupId":2}]
    private Long attrId;
    private Long attrGroupId;
}
5、AttrGroupController
   // /product/attrgroup/attr/relation/delete
    @PostMapping("/attr/relation/delete")
    public R deleteRela(@RequestBody AttrRelaVo[] relaVo) {
        // 删除与分组关联的属性
        attrService.deleteBatch(relaVo);
        return  R.ok();
    }
6、AttrServiceImpl
 /**
     * 删除与分组关联的属性
     * DELETE  FROM `pms_attr_attrgroup_relation` WHERE (attr_group_id=? AND attr_id=?) OR (attr_group_id=? AND attr_id=?)
     * */
    @Override
    public void deleteBatch(AttrRelaVo[] relaVo) {
        // attrId,attrGroupId
        List<AttrRelaVo> attrRelaVos = Arrays.asList(relaVo);

        // 将 relaVo 映射成一个个的 AttrAttrgroupRelationEntity
        List<AttrAttrgroupRelationEntity> entities = attrRelaVos.stream().map(item -> {
            AttrAttrgroupRelationEntity relationEntity = new AttrAttrgroupRelationEntity();
            BeanUtils.copyProperties(item, relationEntity);
            return relationEntity;
        }).collect(Collectors.toList());
        // 删除关联关系
        attrAttrgroupRelationDao.deleteBatchRela(entities);

    }
7、AttrAttrgroupRelationDao
void deleteBatchRela(@Param("entities") List<AttrAttrgroupRelationEntity> entities);
8、AttrGroupRelationDao.xml
    <!--
    DELETE  FROM `pms_attr_attrgroup_relation` WHERE (attr_group_id=? AND attr_id=?) OR (attr_group_id=? AND attr_id=?)
    separator 分隔符
    -->
    <delete id="deleteBatchRela">
        DELETE  FROM `pms_attr_attrgroup_relation` WHERE
        <foreach collection="entities" item="item" separator=" OR ">
            ( attr_id=#{item.attrId}  AND attr_group_id=#{item.attrGroupId})
        </foreach>

    </delete>
查询分组未关联的属性
点击 新建关联 时,显示所有本类下所有未与分组进行关联的属性
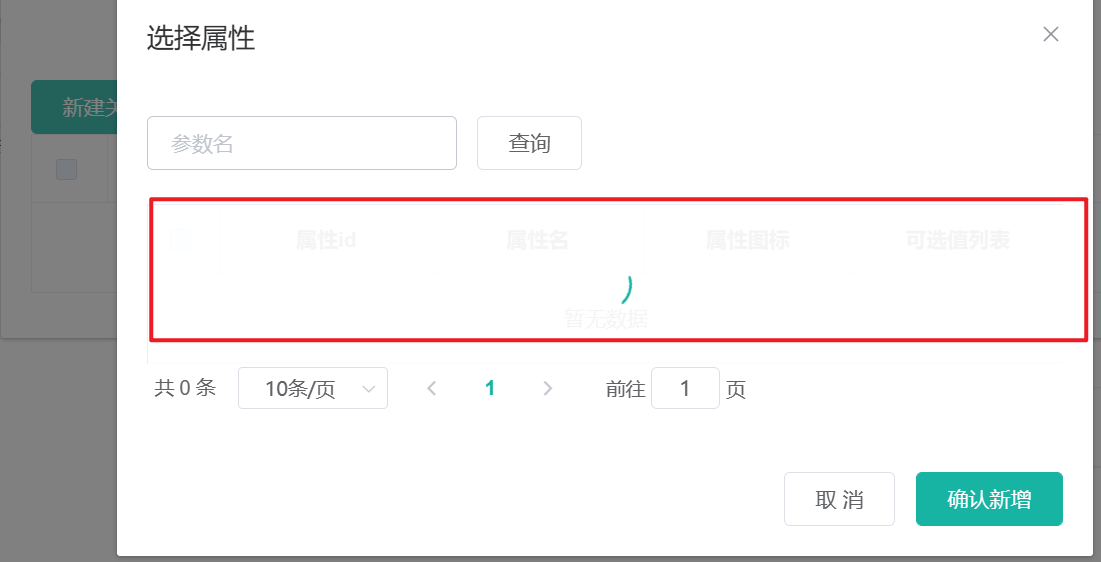
1、接口访问地址

2、请求参数
{
   page: 1,//当前页码
   limit: 10,//每页记录数
   sidx: 'id',//排序字段
   order: 'asc/desc',//排序方式
   key: '华为'//检索关键字
}
3、响应数据
{
	"msg": "success",
	"code": 0,
	"page": {
		"totalCount": 3,
		"pageSize": 10,
		"totalPage": 1,
		"currPage": 1,
		"list": [{
			"attrId": 1,
			"attrName": "aaa",
			"searchType": 1,
			"valueType": 1,
			"icon": "aa",
			"valueSelect": "aa;ddd;sss;aaa2",
			"attrType": 1,
			"enable": 1,
			"catelogId": 225,
			"showDesc": 1
		}]
	}
}
思路分析:
查询出未关联的属性有俩个条件
- 必须是本分类下的所有属性
- 属性没有与其他分组相关联
逻辑步骤:
-
在
pms_attr_group表中,根据 分组ID 查询出所属的 分类ID -
在
pms_attr_group表中, 根据分类ID查询出所有的分组 -
将分组的的 分组id 映射成一个集合
-
在
pms_attr_attrgroup_relation表中找出所有与 分组 相关联的属性 -
将所有相关联的 属性id 映射成一个集合
-
在
pms_attr表中,查询本类下的所有属性,并排除相关联的属性id集合。
总体来说,就是找出所有相关联的属性,将这些属性排除即可。
4、AttrGroupController
/**
 * 查询所有没有与分组相关联的属性
 * /product/attrgroup/{attrgroupId}/noattr/relation
 * */
@GetMapping("/{attrgroupId}/noattr/relation")
public R listAttrNoRelation(@RequestParam Map<String, Object> params,@PathVariable("attrgroupId") Long attrgroupId){

   PageUtils page = attrService.getAttrsNoRelation(params,attrgroupId);
    return R.ok().put("page", page);
}
5、AttrServiceImpl
/**
 * 1. 在 `pms_attr_group` 表中,根据 分组ID 查询出所属的 分类ID
 * 2. 在 `pms_attr_group` 表中, 根据分类ID查询出所有的分组
 * 3. 将分组的的 分组id 映射成一个集合
 * 4. 在 `pms_attr_attrgroup_relation` 表中找出所有与 分组 相关联的属性
 * 5. 将所有相关联的 属性id 映射成一个集合
 * 6. 在 `pms_attr`表中,查询本类下的所有属性,并排除相关联的属性id集合。
 * */
@Override
public PageUtils getAttrsNoRelation(Map<String, Object> params, Long attrgroupId) {
    // 1. 在 `pms_attr_group` 表中,根据 分组ID 查询出所属的 分类ID
    AttrGroupEntity attrGroupEntity = attrGroupDao.selectById(attrgroupId);
    Long catelogId = attrGroupEntity.getCatelogId();
    // 2. 在 `pms_attr_group` 表中, 根据分类ID查询出所有的分组
    List<AttrGroupEntity> otherGroups =
            attrGroupDao.selectList(new QueryWrapper<AttrGroupEntity>().eq("catelog_id", catelogId));
    // 3. 将分组的的 分组id 映射成一个集合
    List<Long> otherGroupsIds = otherGroups.stream().map(AttrGroupEntity::getAttrGroupId).collect(Collectors.toList());
    // 4. 在 `pms_attr_attrgroup_relation` 表中找出所有与 分组 相关联的属性
    List<AttrAttrgroupRelationEntity> attrAttrgroupRelationEntities
            = attrAttrgroupRelationDao.selectList(new QueryWrapper<AttrAttrgroupRelationEntity>().in("attr_group_id",otherGroupsIds));
    // 5. 将所有分组相关联的 属性id 映射成一个集合
    List<Long> relationAttrIds = attrAttrgroupRelationEntities.stream().map(AttrAttrgroupRelationEntity::getAttrId).collect(Collectors.toList());

    // 6. 在 `pms_attr`表中,查询本类下的所有属性,并排除相关联的属性id集合。
    QueryWrapper<AttrEntity> queryWrapper = new QueryWrapper<AttrEntity>().eq("catelog_id", catelogId);
    if (relationAttrIds!= null && !relationAttrIds.isEmpty()) {
        // 有可能出现所有分组都没有关联属性的情况。
        queryWrapper.and((w -> {
            w.notIn("attr_id", relationAttrIds);
        }));
    }
    String key = (String) params.get("key");
    // 关键字搜索
    if (!StringUtils.isEmpty(key)) {
        queryWrapper.and(queryWrapper1 -> {
            queryWrapper.eq("attr_id",key).or().like("attr_name",key);
        });
    }

    // 分页查询
    IPage<AttrEntity> page = this.page(
            new Query<AttrEntity>().getPage(params),
            queryWrapper
    );
    // 将查询的数据封装pageUtils
    PageUtils pageUtils = new PageUtils(page);

    return pageUtils;
}
新增分组属性关联
1、访问接口路径

2、请求参数
[{
  "attrGroupId": 0, //分组id
  "attrId": 0, //属性id
}]
3、响应数据
{
	"msg": "success",
	"code": 0
}
4、AttrGroupController
    /**
     * 保存分组与属性关联关系
     * /product/attrgroup/attr/relation
     */
    @PostMapping("/attr/relation")
    public R saveAttrRelation(@RequestBody List<AttrRelaVo> attrVo){
        attrAttrgroupRelationService.saveAttrRelation(attrVo);

        return R.ok();
    }
5、AttrAttrgroupRelationServiceImpl
    /**
     * 保存分组与属性关联关系
     * 批量增加
     * */
    @Override
    public void saveAttrRelation(List<AttrRelaVo> attrVo) {
        List<AttrAttrgroupRelationEntity> attrAttrgroupRelationEntities = attrVo.stream().map(item -> {
            AttrAttrgroupRelationEntity attrAttrgroupRelationEntity = new AttrAttrgroupRelationEntity();
            BeanUtils.copyProperties(item, attrAttrgroupRelationEntity);
            return attrAttrgroupRelationEntity;
        }).collect(Collectors.toList());

        // 批量新增
        this.saveBatch(attrAttrgroupRelationEntities);
    }
新增属性小bug
当我们新增基本属性但是没有指定分组时,就会出现空指针异常


看关系表中,没有指定分组,分组ID为NULL,因此在查询所有基本属性时,并没有对 分组ID 的判断就进行了关联分组。
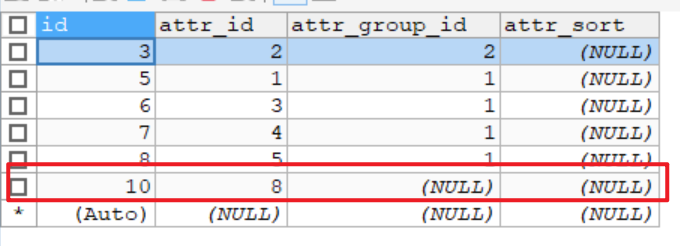
AttrServiceImpl 中 queryBaseListPage: 在关联分组属性时,对 分组ID 进行不为空判断
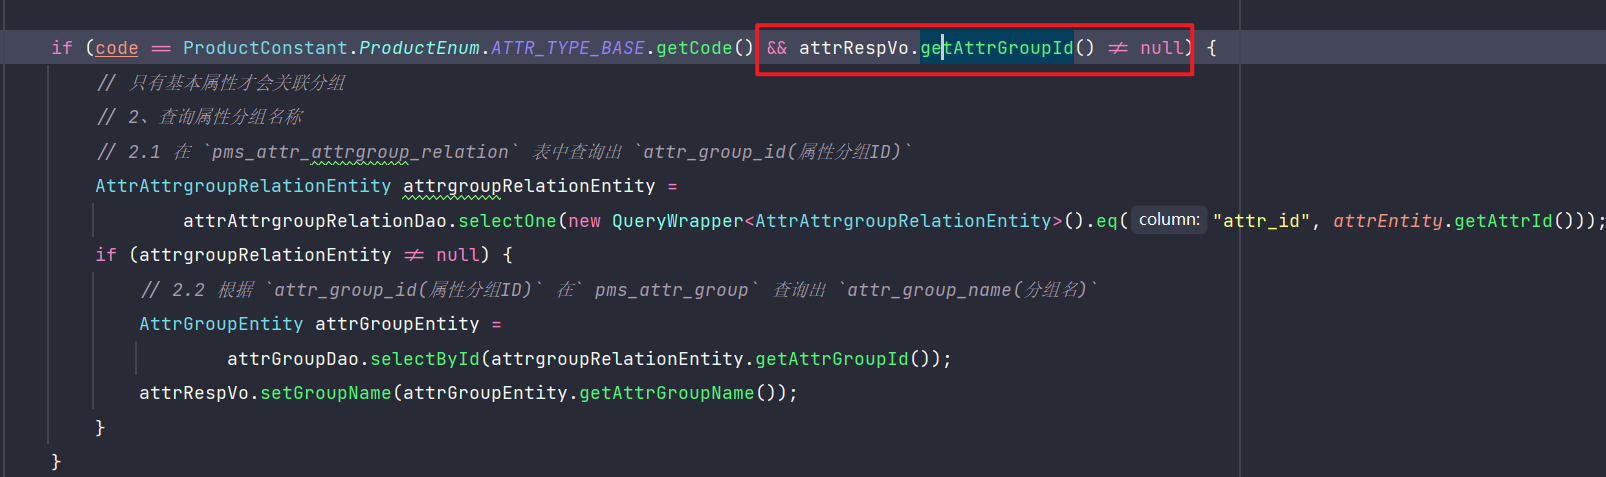
AttrServiceImpl 中 saveAttr方法: 增加 基本属性时,增加判断:只有分组ID不为空时,在进行分组关联
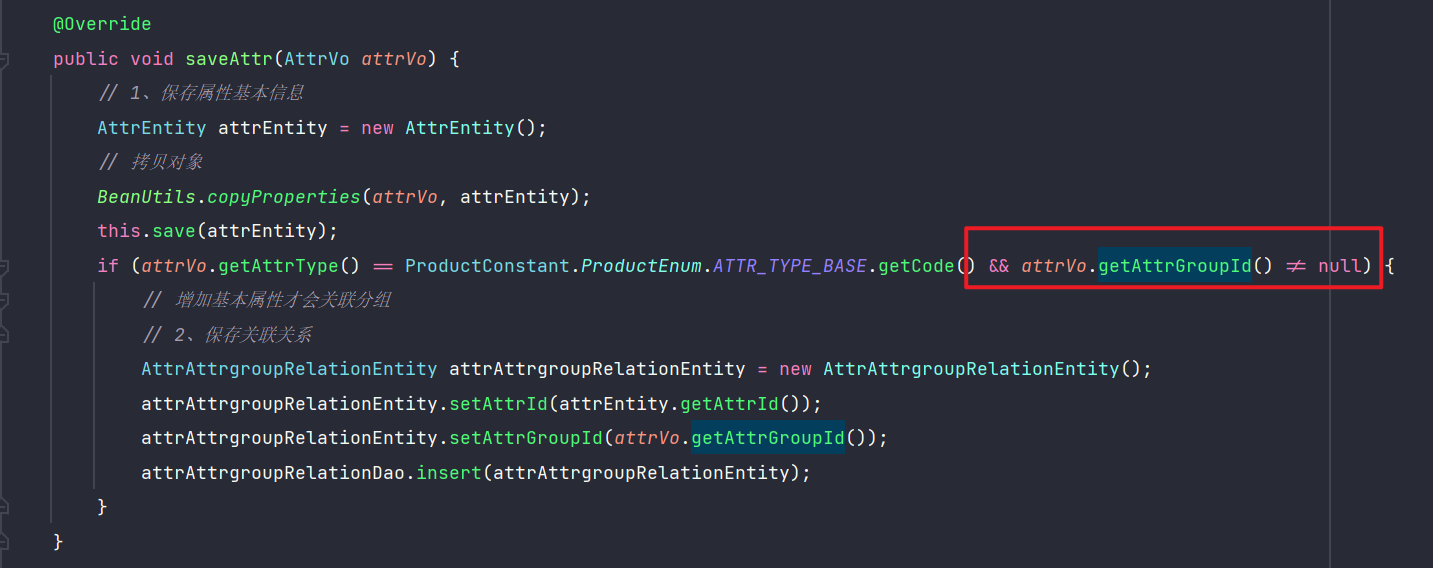
商品维护
一、发布商品
环境准备与测试
1、将提供的 modules 模块替换掉自己项目中的模块
这里老师提供的前端代码中,有的分类Id是 catelogId,有的是 catalogId,我将前端所有的 catalogId 和数据库中的 catalogId 都换成了 catelogId
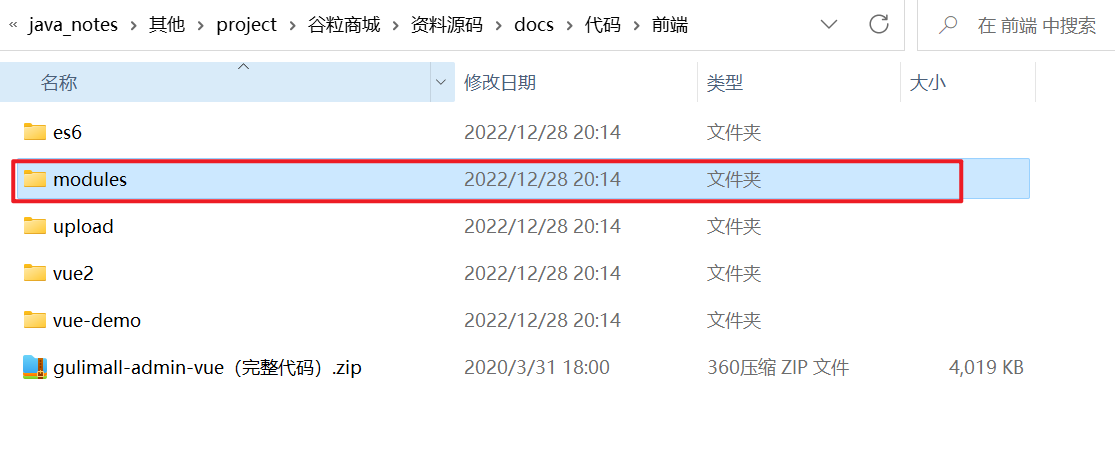
2、调试 gulimall-member 模块。
(1) 配置文件
# 数据库配置
spring:
    datasource:
        url: jdbc:mysql://192.168.56.111:3306/gulimall_ums
        username: root
        password: root
        driver-class-name: com.mysql.jdbc.Driver
    cloud:
        nacos:
            config:
                server-addr: localhost:8848
            discovery:
                server-addr: localhost:8848
    application:
        name: gulimall-member
# MyBatis-Plus配置
mybatis-plus:
    mapper-locations: classpath:/mapper/**/*.xml # mapper映射文件的位置
    global-config:
        db-config:
            id-type: auto # 主键自增策略
server:
    port: 8000
(2) 主启动类
@SpringBootApplication
@EnableDiscoveryClient
public class GulimallMemberApplication {
    public static void main(String[] args) {
        SpringApplication.run(GulimallMemberApplication.class);
    }
}
3、 配置网关
                - id: member_route
                  uri: lb://gulimall-member # 负载均衡
                  predicates:
                      - Path=/api/member/**
                  filters:
                      - RewritePath=/api/?(?<segment>.*), /$\{segment}  #路径重写
获取分类关联的所有品牌
1、访问接口路径

2、请求参数

3、响应数据
{
	"msg": "success",
	"code": 0,
	"data": [{
		"brandId": 0,
		"brandName": "string",
	}]
}
4、创建一个 VO 对象,返回页面
@Data
public class BrandVo {

    private Long brandId;
    private String brandName;
}
5、CategoryBrandRelationController
  /**
     *  /product/categorybrandrelation/brands/list
      *  获取分类关联的品牌
     * */
     @GetMapping("/brands/list")
     public R categoryBrandRelationList(Long catId) {
         // 业务处理
         List<BrandEntity> brandEntities = categoryBrandRelationService.getBrandsByCatId(catId);

         // 封装页面所需要的数据
         List<BrandVo> brandVos =  brandEntities.stream().map(item -> {
             BrandVo brandVo = new BrandVo();
             brandVo.setBrandId(item.getBrandId());
             brandVo.setBrandName(item.getName());
             return brandVo;
         }).collect(Collectors.toList());

         return  R.ok().put("data",brandVos);
     }
6、CategoryBrandRelationServiceImpl
/**
 * 获取分类下所有关联的品牌
* */
@Override
public List<BrandEntity> getBrandsByCatId(Long catId) {
    // 1、在 pms_category_brand_relation 表中查询出分类下所有的品牌id
    List<CategoryBrandRelationEntity> categoryBrandRelationEntities = this.list(new QueryWrapper<CategoryBrandRelationEntity>().eq("catelog_id", catId));
    List<Long> brandIds = categoryBrandRelationEntities.stream().map(CategoryBrandRelationEntity::getBrandId).collect(Collectors.toList());

    // 2、在品牌表中查询出所有品牌
    if (brandIds != null && !brandIds.isEmpty()){
        return brandService.listByIds(brandIds);
    }
    return  null ;
}
获取分类下的所有分组&关联属性
1、访问接口路径

2、响应数据
{
	"msg": "success",
	"code": 0,
	"data": [{
		"attrGroupId": 1,
		"attrGroupName": "主体",
		"sort": 0,
		"descript": "主体",
		"icon": "dd",
		"catelogId": 225,
		"attrs": [{
			"attrId": 7,
			"attrName": "入网型号",
			"searchType": 1,
			"valueType": 0,
			"icon": "xxx",
			"valueSelect": "aaa;bb",
			"attrType": 1,
			"enable": 1,
			"catelogId": 225,
			"showDesc": 1,
			"attrGroupId": null
			}, {
			"attrId": 8,
			"attrName": "上市年份",
			"searchType": 0,
			"valueType": 0,
			"icon": "xxx",
			"valueSelect": "2018;2019",
			"attrType": 1,
			"enable": 1,
			"catelogId": 225,
			"showDesc": 0,
			"attrGroupId": null
			}]
		},
		{
		"attrGroupId": 2,
		"attrGroupName": "基本信息",
		"sort": 0,
		"descript": "基本信息",
		"icon": "xx",
		"catelogId": 225,
		"attrs": [{
			"attrId": 11,
			"attrName": "机身颜色",
			"searchType": 0,
			"valueType": 0,
			"icon": "xxx",
			"valueSelect": "黑色;白色",
			"attrType": 1,
			"enable": 1,
			"catelogId": 225,
			"showDesc": 1,
			"attrGroupId": null
		}]
	}]
}
3、创建 VO 对象,返回前端
@Data
public class AttrGroupWithAttrsVo {
    /**
     * 分组id
     */
    private Long attrGroupId;
    /**
     * 组名
     */
    private String attrGroupName;
    /**
     * 排序
     */
    private Integer sort;
    /**
     * 描述
     */
    private String descript;
    /**
     * 组图标
     */
    private String icon;
    /**
     * 所属分类id
     */
    private Long catelogId;

    /**
     * 分组下的所有属性
     * */
    private List<AttrEntity> attrs;
}
4、AttrGroupController
    /**
     * 获取分类下的所有分组,以及每个分组的所有属性
     * /product/attrgroup/{catelogId}/withattr
     * */
    @GetMapping("{catelogId}/withattr")
    public R attrgroupWithAttrs(@PathVariable("catelogId") Long catelogId){
       List<AttrGroupWithAttrsVo> attrGroupWithAttrsVos =  attrGroupService.getAttrGroupWithAttrsWithCatelogId(catelogId);
        return R.ok().put("data",attrGroupWithAttrsVos);
    }
5、AttrGroupServiceImpl
   /**
     * 获取分类下的所有分组
     * 获取每个分组下的所有属性
     * */
    @Override
    public List<AttrGroupWithAttrsVo> getAttrGroupWithAttrsWithCatelogId(Long catelogId) {
        // 1、获取分类下的所有分组
        List<AttrGroupEntity> attrGroupEntities = this.list(new QueryWrapper<AttrGroupEntity>().eq("catelog_id", catelogId));

        if (attrGroupEntities != null && !attrGroupEntities.isEmpty()) {
            List<AttrGroupWithAttrsVo> attrGroupWithAttrsVoList = attrGroupEntities.stream().map(item -> {
                AttrGroupWithAttrsVo attrGroupWithAttrsVo = new AttrGroupWithAttrsVo();
                BeanUtils.copyProperties(item, attrGroupWithAttrsVo);
                // 2、获取每个分组下的所有属性
                List<AttrEntity> attrs = attrService.getAttrsRelation(attrGroupWithAttrsVo.getAttrGroupId());
                attrGroupWithAttrsVo.setAttrs(attrs);

                return attrGroupWithAttrsVo;
            }).collect(Collectors.toList());

            return attrGroupWithAttrsVoList;
        }
        return null;
    }
BUG: 规格参数无法单选多选
做到这里,突然发现规格参数的值类型无法选择单选还是多选。

这是因为在 pms_attr表中少了一个 value_type字段。

在 AttrEntity和AttrVo 中也增加上字段。
	/**
	 * 1:表示可选多个值
	 * 0:表示可选单个值
	* */
	private Integer valueType;
新增商品
在线JSON格式转换,以及在线生成实体类:
在线JSON校验格式化工具(Be JSON)
1、在线生成JavaBean实体类,将代码下载并拷贝到 vo 包下
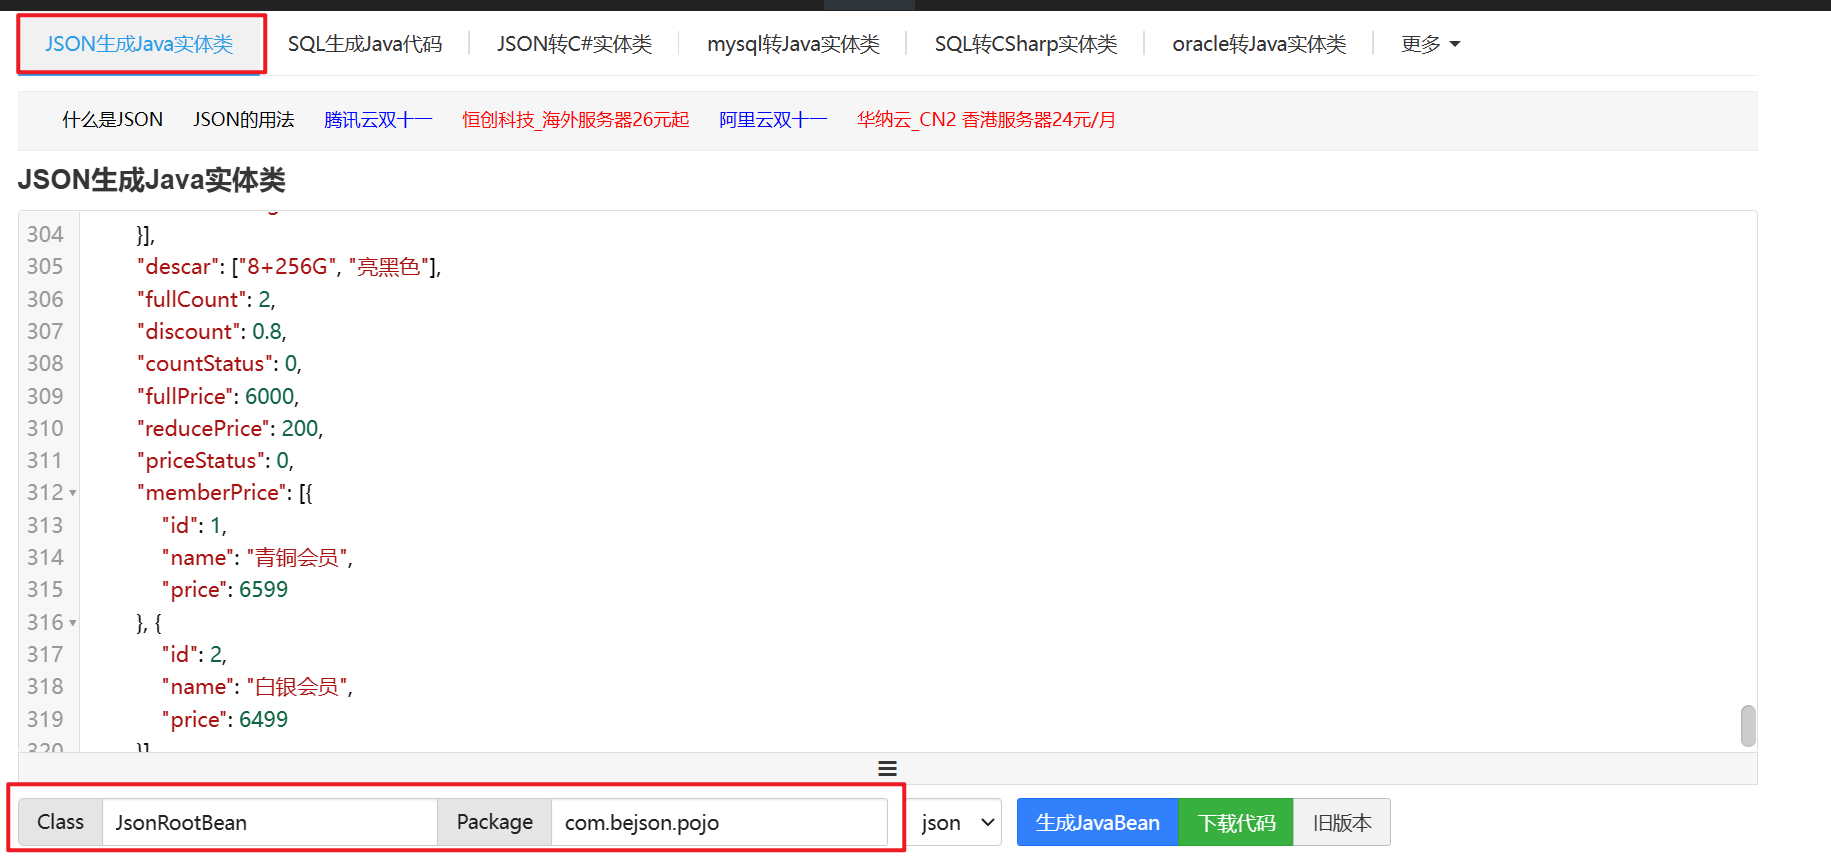
生成的 Vo
AttrVo
@Data
public class Attr {
    private Long attrId;
    private String attrName;
    private String attrValue;
}

BaseAttrs
@Data
public class BaseAttrs {

    private Long attrId;
    private String attrValues;
    private int showDesc;

}
Bounds
@Data
public class Bounds {

    private BigDecimal buyBounds;
    private BigDecimal growBounds;

}
Images
@Data
public class Images {

    private String imgUrl;
    private int defaultImg;


}

MemberPrice
@Data
public class MemberPrice {

    private Long id;
    private String name;
    private BigDecimal price;

}

Skus
@Data
public class Skus {

    private List<Attr> attr;
    private String skuName;
    private BigDecimal price;
    private String skuTitle;
    private String skuSubtitle;
    private List<Images> images;
    private List<String> descar;
    private Integer fullCount;
    private BigDecimal discount;
    private int countStatus;
    private BigDecimal fullPrice;
    private BigDecimal reducePrice;
    private int priceStatus;
    private List<MemberPrice> memberPrice;


}
SpuSaveVo
@Data
public class SpuSaveVo {

    /**
     * 商品名称
     * */
    private String spuName;
    /**
     * 商品描述
     * */
    private String spuDescription;
    /**
     * 分类ID
     * */
    private Long catelogId;
    /**
     * 品牌ID
     * */
    private Long brandId;
    /**
     * 手机重量
     * */
    private BigDecimal weight;
    /**
     * 上架状态[0 - 下架,1 - 上架]
     * */
    private int publishStatus;
    /**
     * 商品介绍
     * */
    private List<String> decript;
    /**
     * 商品图集
     * */
    private List<String> images;
    /**
     * 商品积分
     * */
    private Bounds bounds;
    /**
     * 基本属性
     * */
    private List<BaseAttrs> baseAttrs;
    /**
     * 销售属性
     * */
    private List<Skus> skus;


}
新增商品业务流程分析
1、保存商品的基本信息: gulimall_pms 数据库中的 pms_spu_info 表

2、保存商品的介绍信息: gulimall_pms 数据库中的 pms_spu_info_desc 表

3、保存商品的图片集: gulimall_pms 数据库中的 pms_spu_images 表

4、保存商品的基本属性: gulimall_pms 数据库中的 pms_product_attr_value 表

5、保存商品的积分: gulimall_sms 数据库中的 sms_spu_bounds 表

6、保存当前 spu 对应的所有 sku 信息:
(1)sku 的基本信息: gulimall_pms 数据库中的 pms_sku_info 表

(2) sku 的图片信息: gulimall_pms 数据库中的 pms_sku_images 表

(3) sku 的销售属性信息: gulimall_pms 数据库中的 pms_sku_sale_attr_value表
(4) 保存商品的优惠、满减等信息。gulimall_sms 数据库中的 sms_sku_ladder、sms_sku_full_reduction、sms_member_price 表

业务代码
一、 product 服务需要调用 coupon 服务,之间传输的数据称为 to 对象。
需要在 common 模块额外创建一个专门保存 to 对象的包。
保存商品积分的TO:
@Data
public class SpuBoundsTo {

    private Long spuId;
    private BigDecimal buyBounds;
    private BigDecimal growBounds;
}
保存商品优惠信息的TO:
@Data
public class SkuReductionTo {
    private Long skuId;
    private Integer fullCount;
    private BigDecimal discount;


    private int countStatus;

    private BigDecimal fullPrice;
    private BigDecimal reducePrice;

    private int priceStatus;

    // 依赖于 MemberPrice 类,也拷贝到 to包下
    private List<MemberPrice> memberPrice;
}
二、由于商品保存功能需要跨数据库完成,需要使用 OpenFeign 远程调用 gulimall-coupon 模块:
- 确保调用者与被调用者都注册到了Nacos服务中心。(省略)
- 在
gulimall-product中的主启动类增加 @EnableFeignClients 注解 (省略) - 在
gulimall-product创建 接口,声明gulimall-coupon中的方法
@FeignClient("gulimall-coupon")
public interface CouponFeignService {


    /**
     * OpenFeign远程调用流程:
     * 1、 调用 CouponFeignService.saveSpuBounds(spuBoundsTo) 方法
     *      (1)  @RequestBody 将 spuBoundsTo 这个对象转换 json
     *      (2) 在 Nacos服务中心找到gulimall-coupon服务,并向 coupon/spubounds/save 发送请求,
     *          并把 json 保存在请求体中
     *      (3) 对方接受到请求,(@RequestBody SpuBoundsEntity spuBounds)
     *          @RequestBody 会将 json 数据转换为 SpuBoundsEntity
     * 只要 json 中的字段名与 SpuBoundsEntity中的字段名保持一致,可以自动封装的。
     * */

    /*
    *  保存商品积分信息
    * */
    @PostMapping("coupon/spubounds/save")
    R saveSpuBounds(@RequestBody SpuBoundsTo spuBoundsTo);

    /*
    * 保存商品优惠信息
    * */
    @PostMapping("coupon/skufullreduction/saveinfo")
    R saveSkuReduction(@RequestBody SkuReductionTo skuReductionTo);
}
三、具体实现的代码
1、SpuInfoServiceImpl
      @Autowired
    private SpuInfoDescServiceImpl spuInfoDescService;
    @Autowired
    private SpuImagesService spuImagesService;
    @Autowired
    private AttrService attrService;
    @Autowired
    private ProductAttrValueService productAttrValueService;
    @Autowired
    private SkuInfoService skuInfoService;
    @Autowired
    private SkuImagesService skuImagesService;
    @Autowired
    private SkuSaleAttrValueService skuSaleAttrValueService;
    @Autowired
    private CouponFeignService couponFeignService;

	/**
     * 新增商品
     * TODO: 需要完善功能
     * */
    @Override
    @Transactional
    public void saveSpuInfo(SpuSaveVo spuSaveVo) {
        // 1、保存商品的基本信息: gulimall_pms 数据库中的 pms_spu_info 表
        SpuInfoEntity spuInfoEntity = new SpuInfoEntity();
        BeanUtils.copyProperties(spuSaveVo,spuInfoEntity);
        spuInfoEntity.setCreateTime(new Date());
        spuInfoEntity.setUpdateTime(new Date());
        this.saveSpuInfoBase(spuInfoEntity);

        // 2、保存商品的介绍信息: gulimall_pms 数据库中的 pms_spu_info_desc 表
        List<String> decript = spuSaveVo.getDecript();
        SpuInfoDescEntity spuInfoDescEntity = new SpuInfoDescEntity();
        spuInfoDescEntity.setSpuId(spuInfoEntity.getId());
        // join方法: 拼接集合中的每一个属性,最终返回一个字符串
        spuInfoDescEntity.setDecript(String.join(",",decript));
        spuInfoDescService.saveSpuInfoDesc(spuInfoDescEntity);

        // 3、保存商品的图片集: gulimall_pms 数据库中的 pms_spu_images 表
        List<String> images = spuSaveVo.getImages();
        spuImagesService.saveSpuInfoImages(spuInfoEntity.getId(),images);

        // 4、保存商品的基本属性: gulimall_pms 数据库中的 pms_product_attr_value 表
        List<BaseAttrs> baseAttrs = spuSaveVo.getBaseAttrs();

        List<ProductAttrValueEntity> productAttrValueEntities = baseAttrs.stream().map(attr -> {
            ProductAttrValueEntity valueEntity = new ProductAttrValueEntity();
            valueEntity.setSpuId(spuInfoEntity.getId());
            valueEntity.setAttrId(attr.getAttrId());
            // 查询属性名字
            AttrEntity attrEntity = attrService.getById(attr.getAttrId());
            valueEntity.setAttrName(attrEntity.getAttrName());
            valueEntity.setAttrValue(attr.getAttrValues());
            valueEntity.setQuickShow(attr.getShowDesc());
            return valueEntity;
        }).collect(Collectors.toList());
        productAttrValueService.saveProductAttr(productAttrValueEntities);

        // 5、保存商品的积分: gulimall_sms 数据库中的 sms_spu_bounds 表 【远程调用gulimall-coupon】
        Bounds bounds = spuSaveVo.getBounds();
        SpuBoundsTo spuBoundsTo = new SpuBoundsTo();
        BeanUtils.copyProperties(bounds,spuBoundsTo);
        spuBoundsTo.setSpuId(spuInfoEntity.getId());
        R r1 = couponFeignService.saveSpuBounds(spuBoundsTo);
        if (r1.getCode() != 0) {
            log.error("远程保存商品积分信息失败!!");
        }

        // 6、保存当前 spu 对应的所有 sku 信息:
        List<Skus> skus = spuSaveVo.getSkus();
        if (skus != null && skus.size() > 0) {
            skus.forEach(sku -> {
                // 找到sku的默认图片
                List<Images> skuImages = sku.getImages();
                String defaultImage = "";
                for (Images skuImage : skuImages) {
                    if (skuImage.getDefaultImg() == 1 ) {
                        defaultImage = skuImage.getImgUrl();
                    }
                }

                // (1)sku 的基本信息: gulimall_pms 数据库中的 pms_sku_info 表
                //    private String skuName;
                //     private BigDecimal price;
                //     private String skuTitle;
                //     private String skuSubtitle;
                SkuInfoEntity skuInfoEntity = new SkuInfoEntity();
                BeanUtils.copyProperties(sku,skuInfoEntity);
                skuInfoEntity.setSpuId(spuInfoEntity.getId());
                skuInfoEntity.setBrandId(spuInfoEntity.getBrandId());
                skuInfoEntity.setCatelogId(spuInfoEntity.getCatelogId());
                skuInfoEntity.setSaleCount(0L);
                skuInfoEntity.setSkuDefaultImg(defaultImage);
                skuInfoService.save(skuInfoEntity);

                // (2) sku 的图片信息: gulimall_pms 数据库中的 pms_sku_images 表
                List<SkuImagesEntity> imagesEntities = skuImages.stream().map(img -> {
                    SkuImagesEntity skuImagesEntity = new SkuImagesEntity();
                    skuImagesEntity.setSkuId(skuInfoEntity.getSkuId());
                    skuImagesEntity.setImgUrl(img.getImgUrl());
                    skuImagesEntity.setDefaultImg(img.getDefaultImg());
                    return skuImagesEntity;
                //    图片地址可能会null,过滤以下
                }).filter(item -> !StringUtils.isEmpty(item.getImgUrl())).collect(Collectors.toList());
                skuImagesService.saveBatch(imagesEntities);

                // (3) sku 的销售属性信息: gulimall_pms 数据库中的 pms_sku_sale_attr_value表 skuSaleAttrValueService
                List<Attr> skuAttrs = sku.getAttr();
                List<SkuSaleAttrValueEntity> attrValueEntities = skuAttrs.stream().map(skuAttr -> {
                    SkuSaleAttrValueEntity skuSaleAttrValueEntity = new SkuSaleAttrValueEntity();
                    skuSaleAttrValueEntity.setSkuId(skuInfoEntity.getSkuId());
                    BeanUtils.copyProperties(skuAttr, skuSaleAttrValueEntity);
                    return skuSaleAttrValueEntity;
                }).collect(Collectors.toList());
                skuSaleAttrValueService.saveBatch(attrValueEntities);

                // (4) 保存商品的优惠、满减等信息。gulimall_sms 数据库中的 sms_sku_ladder、sms_sku_full_reduction、sms_member_price 表
                SkuReductionTo skuReductionTo = new SkuReductionTo();
                BeanUtils.copyProperties(sku,skuReductionTo);
                skuReductionTo.setSkuId(skuInfoEntity.getSkuId());
                R r = couponFeignService.saveSkuReduction(skuReductionTo);
                // 在 R 返回类中增加 getCode方法
                if (r.getCode() != 0) {
                    log.error("远程保存商品优惠信息失败!!");
                }
            });
        }
    }
2、gulimall-coupon模块下的: SkuFullReductionServiceImpl,用来保存优惠信息
 /**
     * 保存商品优惠信息
     * */
    @Override
    @Transactional
    public void saveSkuReduction(SkuReductionTo reductionTo) {
        // (4) 保存商品的优惠、满减等信息。gulimall_sms 数据库中的 sms_sku_ladder、sms_sku_full_reduction、sms_member_price 表

        // sms_sku_ladder
        SkuLadderEntity skuLadderEntity = new SkuLadderEntity();
        skuLadderEntity.setFullCount(reductionTo.getFullCount());
        skuLadderEntity.setDiscount(reductionTo.getDiscount());
        skuLadderEntity.setSkuId(reductionTo.getSkuId());
        skuLadderEntity.setAddOther(reductionTo.getCountStatus());
        // 如果有打折活动再去保存
        if (skuLadderEntity.getFullCount() > 0) {
            skuLadderService.save(skuLadderEntity);
        }

        //sms_sku_full_reduction
        SkuFullReductionEntity skuFullReductionEntity = new SkuFullReductionEntity();
        BeanUtils.copyProperties(reductionTo,skuFullReductionEntity);
        skuFullReductionEntity.setAddOther(reductionTo.getCountStatus());
        // 如果有满减活动再去保存
        if (skuFullReductionEntity.getFullPrice().compareTo(new BigDecimal("0")) == 1) {
            this.save(skuFullReductionEntity);
        }


        // sms_member_price
        List<MemberPrice> memberPrice = reductionTo.getMemberPrice();
        List<MemberPriceEntity> collect = memberPrice.stream().map(item -> {
            MemberPriceEntity memberPriceEntity = new MemberPriceEntity();
            memberPriceEntity.setMemberPrice(item.getPrice());
            memberPriceEntity.setMemberLevelId(item.getId());
            memberPriceEntity.setMemberLevelName(item.getName());
            memberPriceEntity.setSkuId(reductionTo.getSkuId());
            memberPriceEntity.setAddOther(reductionTo.getCountStatus());

            return memberPriceEntity;
        }).filter(item -> item.getMemberPrice().compareTo(new BigDecimal("0")) == 1).collect(Collectors.toList());
        memberPriceService.saveBatch(collect);


    }
二、Spu管理
Spu检索
1、接口访问路径

2、请求参数
{
   page: 1,//当前页码
   limit: 10,//每页记录数
   sidx: 'id',//排序字段
   order: 'asc/desc',//排序方式
   key: '华为',//检索关键字
   catelogId: 6,//三级分类id
   brandId: 1,//品牌id
   status: 0,//商品状态
}
3、响应数据
{
	"msg": "success",
	"code": 0,
	"page": {
		"totalCount": 0,
		"pageSize": 10,
		"totalPage": 0,
		"currPage": 1,
		"list": [{

			"brandId": 0, //品牌id
			"brandName": "品牌名字",
			"catelogId": 0, //分类id
			"catalogName": "分类名字",
			"createTime": "2019-11-13T16:07:32.877Z", //创建时间
			"id": 0, //商品id
			"publishStatus": 0, //发布状态
			"spuDescription": "string", //商品描述
			"spuName": "string", //商品名字
			"updateTime": "2019-11-13T16:07:32.877Z", //更新时间
			"weight": 0 //重量

		}]
	}
}
4、SpuInfoController
    /**
     * 列表
     * SPU检索 : /product/spuinfo/list
     */
    @RequestMapping("/list")
    //@RequiresPermissions("com.atguigu.gulimall.product:spuinfo:list")
    public R list(@RequestParam Map<String, Object> params){
        PageUtils page = spuInfoService.queryPageByCondition(params);

        return R.ok().put("page", page);
    }
5、SpuInfoServiceImpl
    /**
     * Spu检索查询
     * */
    @Override
    public PageUtils queryPageByCondition(Map<String, Object> params) {
        //   key: '华为',//检索关键字
        //    catelogId: 6,//三级分类id
        //    brandId: 1,//品牌id
        //    status: 0,//商品状态
        QueryWrapper<SpuInfoEntity> wrapper = new QueryWrapper<>();
        String key = (String) params.get("key");
        String catelogId = (String) params.get("catelogId");
        String brandId = (String) params.get("brandId");
        String status = (String) params.get("status");

        wrapper.eq( !StringUtils.isEmpty(key),"id", key).or().like(!StringUtils.isEmpty(key), "spu_name", key)
                .eq(!StringUtils.isEmpty(catelogId) && !"0".equals(catelogId),"catelog_id", catelogId)
                .eq(!StringUtils.isEmpty(brandId) && !"0".equals(brandId),"brand_id", brandId)
                .eq(!StringUtils.isEmpty(status),"publish_status", status);


        IPage<SpuInfoEntity> page = this.page(
                new Query<SpuInfoEntity>().getPage(params),
                wrapper
        );

        return new PageUtils(page);
    }
规格维护
小BUG
点击 Spu 管理中的 规格 ,很多兄弟显示 404,找不到页面。
解决方法:
1、在 gulimall_admin 数据库中执行以下sql语句
INSERT INTO sys_menu (menu_id, parent_id, NAME, url, perms, TYPE, icon, order_num) VALUES (76, 37, '规格维护', 'product/attrupdate', '', 2, 'log', 0);
2、在前端 /src/router/index.js 里找到 mainRoutes 。在 children 中增加路由
{ path: '/product-attrupdate', component: _import('modules/product/attrupdate'), name: 'attr-update', meta: { title: '规格维护', isTab: true } }
获取 spu 规格
1、接口路径
GET /product/attr/base/listforspu/{spuId}
2、响应数据
{
	"msg": "success",
	"code": 0,
	"data": [{
		"id": 43,
		"spuId": 11,
		"attrId": 7,
		"attrName": "入网型号",
		"attrValue": "LIO-AL00",
		"attrSort": null,
		"quickShow": 1
	}]
}
3、AttrController
    /**
     * spu规格参数维护——获取spu规格
     * GET /product/attr/base/listforspu/{spuId}
     */
    @GetMapping("/base/listforspu/{spuId}")
    //@RequiresPermissions("com.atguigu.gulimall.product:attr:list")
    public R listForSpu(@PathVariable("spuId") Long  spuId) {
       List<ProductAttrValueEntity> productAttrValueEntity = productAttrValueService.listBaseAttrForSpu(spuId);
        return R.ok().put("data", productAttrValueEntity);
    }
4、ProductAttrValueServiceImpl
    /**
     * 获取Spu规格参数
     * */
    @Override
    public List<ProductAttrValueEntity> listBaseAttrForSpu(Long spuId) {
        return this.list(new QueryWrapper<ProductAttrValueEntity>().eq("spu_id",spuId));
    }
修改 spu 规格
1、访问接口路径
POST
/product/attr/update/{spuId}
2、请求参数
[{
	"attrId": 7,
	"attrName": "入网型号",
	"attrValue": "LIO-AL00",
	"quickShow": 1
}, {
	"attrId": 14,
	"attrName": "机身材质工艺",
	"attrValue": "玻璃",
	"quickShow": 0
}, {
	"attrId": 16,
	"attrName": "CPU型号",
	"attrValue": "HUAWEI Kirin 980",
	"quickShow": 1
}]
3、AttrController
    /**
     * spu规格参数维护——修改spu规格
     * /product/attr/update/{spuId}
     */
    @PostMapping("/update/{spuId}")
    // @RequiresPermissions("com.atguigu.gulimall.product:attr:update")
    public R update(@PathVariable("spuId") Long spuId, @RequestBody List<ProductAttrValueEntity> spuAttrList) {

        productAttrValueService.updateBaseAttrForSpu(spuId,spuAttrList);
        return R.ok();
    }
4、ProductAttrValueServiceImpl: 修改 spu 规格参数时,前端会将我们修改的所有属性值都返回过来,无论是空值还是修改的值。因此在修改spu规格时。只需要删除所有的 spu 规格参数,然后再批量保存即可。
    /**
     * 修改 spu 规格参数
     * */
    @Override
    public void updateBaseAttrForSpu(Long spuId, List<ProductAttrValueEntity> spuAttrList) {
        // 批量删除
        this.baseMapper.delete(new QueryWrapper<ProductAttrValueEntity>().eq("spu_id",spuId));

        List<ProductAttrValueEntity> collect = spuAttrList.stream().map(item -> {
            item.setSpuId(spuId);
            return item;
        }).collect(Collectors.toList());

        // 批量修改
        this.saveBatch(collect);
    }
三、商品管理
sku 检索
1、接口访问路径

2、请求参数
{
page: 1,//当前页码
limit: 10,//每页记录数
sidx: 'id',//排序字段
order: 'asc/desc',//排序方式
key: '华为',//检索关键字
catelogId: 0,
brandId: 0,
min: 0,
max: 0
}
3、响应数据
{
	"msg": "success",
	"code": 0,
	"page": {
		"totalCount": 26,
		"pageSize": 10,
		"totalPage": 3,
		"currPage": 1,
		"list": [{
			"skuId": 1,
			"spuId": 11,
			"skuName": "华为 HUAWEI Mate 30 Pro 星河银 8GB+256GB",
			"skuDesc": null,
			"catalogId": 225,
			"brandId": 9,
			"skuDefaultImg": "https://gulimall-hello.oss-cn-beijing.aliyuncs.com/2019-11-26/60e65a44-f943-4ed5-87c8-8cf90f403018_d511faab82abb34b.jpg",
			"skuTitle": "华为 HUAWEI Mate 30 Pro 星河银 8GB+256GB麒麟990旗舰芯片OLED环幕屏双4000万徕卡电影四摄4G全网通手机",
			"skuSubtitle": "【现货抢购!享白条12期免息!】麒麟990,OLED环幕屏双4000万徕卡电影四摄;Mate30系列享12期免息》",
			"price": 6299.0000,
			"saleCount": 0
		}]
	}
}
4、SkuInfoController
    /**
     * sku 检索
     * /product/skuinfo/list
     */
    @RequestMapping("/list")
    //@RequiresPermissions("com.atguigu.gulimall.product:skuinfo:list")
    public R list(@RequestParam Map<String, Object> params){
        PageUtils page = skuInfoService.queryPageByCondition(params);

        return R.ok().put("page", page);
    }
5、SkuInfoServiceImpl
 /**
     * sku检索
     * */
    @Override
    public PageUtils queryPageByCondition(Map<String, Object> params) {
        //key: '华为',//检索关键字
        // catelogId: 0,
        // brandId: 0,
        // min: 0,
        // max: 0
        QueryWrapper<SkuInfoEntity> queryWrapper = new QueryWrapper<>();

        String key = (String) params.get("key");
        String catelogId = (String) params.get("catelogId");
        String brandId = (String) params.get("brandId");
        String min = (String) params.get("min");
        String max = (String) params.get("max");


        queryWrapper.eq(!StringUtils.isEmpty(key), "sku_id", key).or().like(!StringUtils.isEmpty(key), "sku_name", key)
                .eq(!StringUtils.isEmpty(catelogId) && !"0".equals(catelogId),"catelog_id", catelogId)
                .eq(!StringUtils.isEmpty(brandId) && !"0".equals(brandId),"brand_id", brandId)
                .ge(!StringUtils.isEmpty(min),"price", min)
                .le(!StringUtils.isEmpty(max) && new BigDecimal(max).compareTo(new BigDecimal("0")) == 1,"price", max);


        IPage<SkuInfoEntity> page = this.page(
                new Query<SkuInfoEntity>().getPage(params),
                queryWrapper
        );

        return new PageUtils(page);
    }
库存系统
一、整合ware服务&获取库存列表
1、配置文件中配置nacos注册中心地址。以及服务名
2、主启动类增加 @EnableDiscoveryClient 注解
3、Gateway网关配置路由
                - id: ware_route
                  uri: lb://gulimall-ware # 负载均衡
                  predicates:
                      - Path=/api/ware/**
                  filters:
                      - RewritePath=/api/?(?<segment>.*), /$\{segment}  #路径重写
4、模糊查询
访问路径: /ware/wareinfo/list
    @Override
    public PageUtils queryPage(Map<String, Object> params) {

        QueryWrapper<WareInfoEntity> queryWrapper = new QueryWrapper<>();
        String key = (String) params.get("key");
        if (!StringUtils.isEmpty(key)) {
            queryWrapper.eq("id",key).or().like("name",key).or().like("address",key).like("areacode",key);
        }

        IPage<WareInfoEntity> page = this.page(
                new Query<WareInfoEntity>().getPage(params),
                queryWrapper
        );

        return new PageUtils(page);
    }
二、查询商品库存&创建采购需求
模糊查询商品库存
1、访问接口路径
GET /ware/waresku/list
2、请求参数
{
   page: 1,//当前页码
   limit: 10,//每页记录数
   sidx: 'id',//排序字段
   order: 'asc/desc',//排序方式
   wareId: 123,//仓库id
   skuId: 123//商品id
}
3、模糊查询: WareSkuServiceImpl
  @Override
    public PageUtils queryPage(Map<String, Object> params) {
        QueryWrapper<WareSkuEntity> queryWrapper = new QueryWrapper<>();
        //   wareId: 123,//仓库id
        //    skuId: 123//商品id
        String wareId = (String) params.get("wareId");
        String skuId = (String) params.get("skuId");

        queryWrapper.eq(!StringUtils.isEmpty(wareId),"ware_id",wareId).eq(!StringUtils.isEmpty(skuId),"sku_id",skuId);
        IPage<WareSkuEntity> page = this.page(
                new Query<WareSkuEntity>().getPage(params),
                queryWrapper
        );

        return new PageUtils(page);
    }
模糊查询采购需求
1、接口访问路径
GET /ware/purchasedetail/list
2、请求参数
{
   page: 1,//当前页码
   limit: 10,//每页记录数
   sidx: 'id',//排序字段
   order: 'asc/desc',//排序方式
   key: '华为',//检索关键字
   status: 0,//状态
   wareId: 1,//仓库id
}
3、模糊查询: PurchaseDetailServiceImpl
 @Override
    public PageUtils queryPage(Map<String, Object> params) {
        QueryWrapper<PurchaseDetailEntity> queryWrapper = new QueryWrapper<>();

        //   key: '华为',//检索关键字
        //    status: 0,//状态
        //    wareId: 1,//仓库id
        String key = (String) params.get("key");
        String status = (String) params.get("status");
        String wareId = (String) params.get("wareId");

        // purchase_id sku_id status ware_id
        queryWrapper.eq(!StringUtils.isEmpty(key),"purchase_id",key)
                .or().eq(!StringUtils.isEmpty(key),"sku_id",key)
                .eq(!StringUtils.isEmpty(status),"status",status)
                .eq(!StringUtils.isEmpty(wareId),"ware_id",wareId);

        IPage<PurchaseDetailEntity> page = this.page(
                new Query<PurchaseDetailEntity>().getPage(params),
                queryWrapper
        );

        return new PageUtils(page);
    }
合并采购需求
合并采购单流程
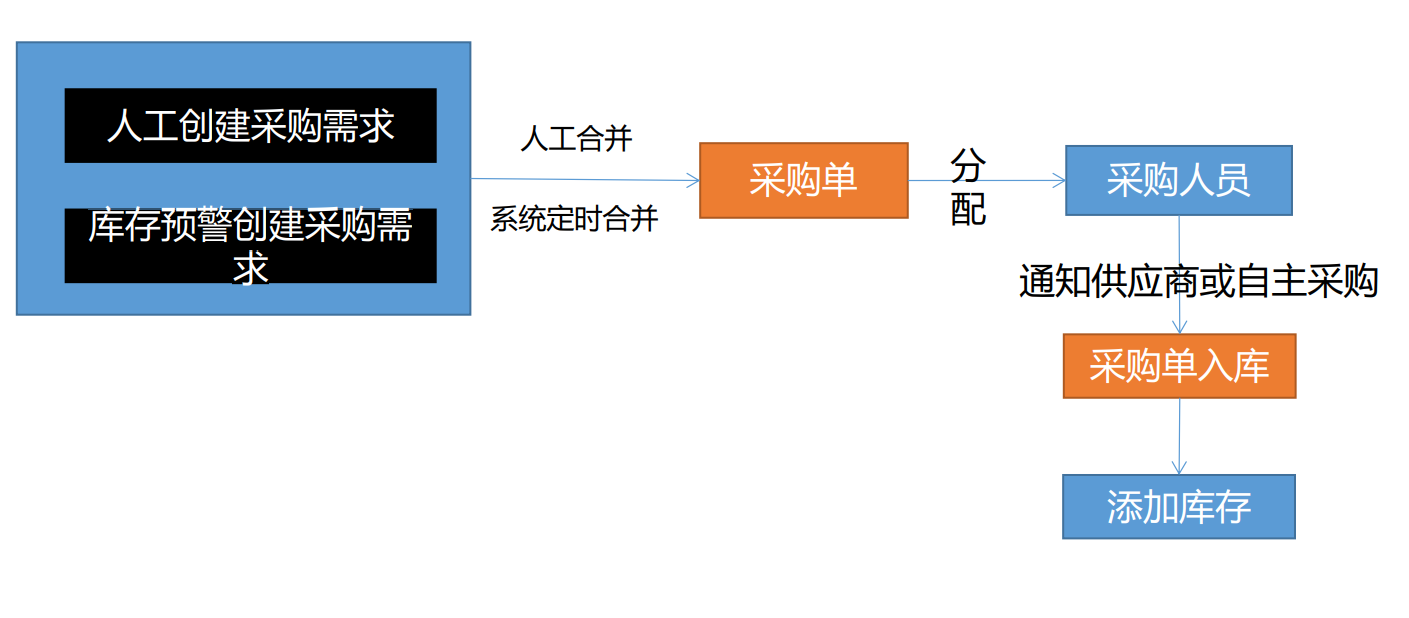
获取未领取的采购单

采购单有五种状态,只有未领取的采购单才能合并。下面就查询未被领取的采购单,在页面中显示。

1、PurchaseController
/**
 * 查询未领取的采购单
 *   /ware/purchase/unreceive/list
 */
@RequestMapping("/unreceive/list")
//@RequiresPermissions("ware:purchase:list")
public R unreceiveList(@RequestParam Map<String, Object> params){
    PageUtils page = purchaseService.queryPageByunreceive(params);

    return R.ok().put("page", page);
}
2、PurchaseServiceImpl
   /**
     * 查询未领取的采购单
     * */
    @Override
    public PageUtils queryPageByunreceive(Map<String, Object> params) {
        IPage<PurchaseEntity> page = this.page(
                new Query<PurchaseEntity>().getPage(params),
                new QueryWrapper<PurchaseEntity>().eq("status",0).or().eq("status",1)
        );

        return new PageUtils(page);
    }
合并采购单
当我们选择合并到的采购单 会携带采购单的 id,将采购的商品增加到原有的采购单即可

当没选择采购单时,就需要新创建一个采购单进行合并。

1、访问接口路径
POST /ware/purchase/merge
2、 请求参数
{
  purchaseId: 1, //整单id
  items:[1,2,3,4] //合并项集合
}
3、合并采购单只需要修改 wms_purchase_detail 表中的 采购单id 以及 status 状态

4、创建枚举类,表示采购单、采购需求的几种状态
public class WareConstant {
    // 采购单状态

    public enum PurchaseStatusEnum{
        CREATED(0,"新建"),
        ASSIGNEE(1,"已分配"),
        RECEIVE(2,"已领取"),
        FINISHED(3,"已完成"),
        HASERROR(4,"有异常");


        private int code ;
        private String msg ;

        PurchaseStatusEnum(int code, String msg) {
            this.code = code;
            this.msg = msg;
        }

        public int getCode() {
            return code;
        }

        public String getMsg() {
            return msg;
        }
    }

    // 采购需求状态
    public enum PurchaseDetailStatusEnum{
        CREATED(0,"新建"),
        ASSIGNEE(1,"已分配"),
        BUYING(2,"正在采购"),
        FINISHED(3,"已完成"),
        HASERROR(4,"采购失败");


        private int code ;
        private String msg ;

        PurchaseDetailStatusEnum(int code, String msg) {
            this.code = code;
            this.msg = msg;
        }

        public int getCode() {
            return code;
        }

        public String getMsg() {
            return msg;
        }
    }
}
5、PurchaseController
    /**
     * 合并采购单
     * /ware/purchase/merge
     */
    @PostMapping("merge")
    public R merge(@RequestBody MergeVo mergeVo) {
         purchaseService.mergePurchase(mergeVo);

        return R.ok();
    }
6、PurchaseServiceImpl
/**
     * 合并采购单
     * */
    @Override
    @Transactional
    public void mergePurchase(MergeVo mergeVo) {
        Long purchaseId = mergeVo.getPurchaseId();
        // 新建采购单
        if (purchaseId == null) {
            PurchaseEntity purchaseEntity = new PurchaseEntity();
            purchaseEntity.setCreateTime(new Date());
            purchaseEntity.setUpdateTime(new Date());
            purchaseEntity.setStatus(WareConstant.PurchaseStatusEnum.CREATED.getCode());
            this.save(purchaseEntity);
            // 获取新的采购单id
            purchaseId = purchaseEntity.getId();
        }

        // 确认采购单状态,只有0或者1才能合并
        PurchaseEntity purchase = this.getById(purchaseId);
        Integer status = purchase.getStatus();

        if (status == WareConstant.PurchaseStatusEnum.CREATED.getCode() ||
                status == WareConstant.PurchaseStatusEnum.ASSIGNEE.getCode()) {
            // 合并采购单
            List<Long> items = mergeVo.getItems();
            Long finalPurchaseId = purchaseId;
            List<PurchaseDetailEntity> collect = items.stream().map(item -> {
                PurchaseDetailEntity purchaseDetailEntity = new PurchaseDetailEntity();
                // 1、设置采购需求的采购单
                purchaseDetailEntity.setPurchaseId(finalPurchaseId);
                // 2、设置采购需求的状态为 已分配
                purchaseDetailEntity.setStatus(WareConstant.PurchaseDetailStatusEnum.ASSIGNEE.getCode());
                purchaseDetailEntity.setId(item);

                return purchaseDetailEntity;
            }).collect(Collectors.toList());

            // 批量修改
            purchaseDetailService.updateBatchById(collect);

            // 同时更新采购单的修改时间
            PurchaseEntity purchaseEntity = new PurchaseEntity();
            purchaseEntity.setUpdateTime(new Date());
            purchaseEntity.setId(purchaseId);
            this.updateById(purchaseEntity);
        }
    }
领取采购单
该接口功能对接员工系统,在员工系统中会展示可领取的采购单。因此使用 postMan 模拟员工系统发送请求领取采购单。
员工领取采购单的要求:
- 只有采购单为新建、已分配状态才能领取
- 修改采购单状态为已领取
- 修改采购需求的状态为正在采购
1、访问接口路径
POST /ware/purchase/received
2、请求参数
[1,2,3,4]//采购单id
3、PurchaseController
    /**
     * 领取采购单
     * /ware/purchase/merge
     */
    @PostMapping("received")
    public R received(@RequestBody List<Long> purchaseIds) {
        purchaseService.receivedPurchase(purchaseIds);

        return R.ok();
    }
4、PurchaseServiceImpl
  /**
     * 领取采购单
     * */
    @Override
    @Transactional
    public void receivedPurchase(List<Long> purchaseIds) {
        // - 判断采购单状态
        // (1) 根据 purchaseId 查询出所有的采购单
        // (2) 过滤掉采购单状态不为 0 或者 1 ,剩下的就是可领取的采购单
        List<PurchaseEntity> unReceivePurchases = purchaseIds.stream()
                .map(this::getById)
                .filter(entity -> entity.getStatus() == WareConstant.PurchaseStatusEnum.CREATED.getCode() ||
                        entity.getStatus() == WareConstant.PurchaseStatusEnum.ASSIGNEE.getCode())
                .collect(Collectors.toList());

        // - 修改采购单状态为已领取
        List<PurchaseEntity> purchaseEntityList = unReceivePurchases.stream().map(item -> {
            PurchaseEntity purchaseEntity = new PurchaseEntity();
            purchaseEntity.setId(item.getId());
            // 设置采购单状态为已领取
            purchaseEntity.setStatus(WareConstant.PurchaseStatusEnum.RECEIVE.getCode());
            return purchaseEntity;
        }).collect(Collectors.toList());
        this.updateBatchById(purchaseEntityList);


        // - 修改采购需求的状态为正在采购
        unReceivePurchases.forEach(item -> {
            // 查询出采购单中所有的采购需求
            List<PurchaseDetailEntity> purchaseDetailEntityList =
                    purchaseDetailService.list(new QueryWrapper<PurchaseDetailEntity>().eq("purchase_id", item.getId()));

            // 修改每一个采购需求中的status
            List<PurchaseDetailEntity> collect = purchaseDetailEntityList.stream().map(entity -> {
                PurchaseDetailEntity purchaseDetailEntity = new PurchaseDetailEntity();
                BeanUtils.copyProperties(entity, purchaseDetailEntity);
                // 修改采购需求的状态为正在采购
                purchaseDetailEntity.setStatus(WareConstant.PurchaseDetailStatusEnum.BUYING.getCode());
                return purchaseDetailEntity;
            }).collect(Collectors.toList());

            purchaseDetailService.updateBatchById(collect);
        });
    }
完成采购
1、接口访问路径
POST /ware/purchase/done
2、请求参数
{
   id: 123,//采购单id
   items: [{itemId:1,status:4,reason:""}] //完成/失败的需求详情
}
思路分析:
-
设置采购项的状态
- 采购项的状态根据请求参数中的 status 决定的。status=3:完成采购,status=4:采购失败
-
设置采购单的状态,采购单的状态是根据采购项的状态决定的
- 如果所有的采购项都采购成功,那么采购单的状态是 FINISHED
- 如果有一个采购项没有采购成功,那么采购单的状态是 HASERROR
-
设置库存
-
将采购成功的采购项增加到库存当中
- 如果库存中没有这个采购项,就新建一个采购项的库存
- 如果库存中有这个采购项,就修改库存中采购项的数量
-
3、根据请求参数创建Vo对象
@Data
public class PurchaseDoneVo {
    //    id: 123,//采购单id
    //    items: [{itemId:1,status:4,reason:""}] //完成/失败的需求详情
    private Long id ;
    private List<PurchaseDoneItemVo> items ;
}


@Data
public class PurchaseDoneItemVo {
    //    itemId:1,status:4,reason:""
    private Long itemId;
    private Integer status;
    private String reason;
}
4、PurchaseController
    /**
     * 完成采购
     *  POST /ware/purchase/done
     * */
    @PostMapping("done")
    public R done(@RequestBody PurchaseDoneVo purchaseDoneVo) {

        purchaseService.donePurchase(purchaseDoneVo);

        return R.ok();
    }
5、PurchaseServiceImpl
 /**
     * 完成采购
     * */
    @Override
    @Transactional
    public void donePurchase(PurchaseDoneVo purchaseDoneVo) {
        Long purchaseId = purchaseDoneVo.getId();

        // 采购项集合
        List<PurchaseDoneItemVo> items = purchaseDoneVo.getItems();
        // 保存采购项
        ArrayList<PurchaseDetailEntity> purchaseDetailEntities = new ArrayList<>();

        boolean isError = true;

        for (PurchaseDoneItemVo item : items) {
            PurchaseDetailEntity purchaseDetailEntity = new PurchaseDetailEntity();
            purchaseDetailEntity.setId(item.getItemId());
            // 设置采购项状态
            purchaseDetailEntity.setStatus(item.getStatus());

            purchaseDetailEntities.add(purchaseDetailEntity);
            if (item.getStatus() == WareConstant.PurchaseDetailStatusEnum.HASERROR.getCode()) {
                // 如果有采购项失败
                isError = false;
            }else{
                // 3、采购成功的采购项,设置库存
                PurchaseDetailEntity detailEntity = purchaseDetailService.getById(item.getItemId());
                wareSkuService.addStock(detailEntity.getSkuId(),detailEntity.getWareId(),detailEntity.getSkuNum());
            }
        }

        PurchaseEntity purchaseEntity = new PurchaseEntity();
        purchaseEntity.setId(purchaseId);
        purchaseEntity.setStatus(isError ? WareConstant.PurchaseStatusEnum.FINISHED.getCode() : WareConstant.PurchaseStatusEnum.HASERROR.getCode());
        purchaseEntity.setUpdateTime(new Date());
        // 2、更新采购单状态
        this.updateById(purchaseEntity);
        // 1、批量更新采购项的状态
        purchaseDetailService.updateBatchById(purchaseDetailEntities);
    }
6、WareSkuServiceImpl
 /*
    * 设置库存
    * */
    @Override
    public void addStock(Long skuId, Long wareId, Integer skuNum) {
        QueryWrapper<WareSkuEntity> queryWrapper = new QueryWrapper<WareSkuEntity>().eq("sku_id",skuId).eq("ware_id",wareId);
        WareSkuEntity entity = this.baseMapper.selectOne(queryWrapper);
        if (entity == null) {
            // 没有对应的采购项库存,就新增
            WareSkuEntity wareSkuEntity = new WareSkuEntity();
            wareSkuEntity.setSkuId(skuId);
            wareSkuEntity.setWareId(wareId);
            wareSkuEntity.setStock(skuNum);
            // TODO:设置skuName,需要远程调用
            wareSkuEntity.setSkuName("");
            this.baseMapper.insert(wareSkuEntity);
        }else {
            // 说明有与之对应的采购项库存,新增库存
            // 没有对应的采购项库存,就新增
            WareSkuEntity wareSkuEntity = new WareSkuEntity();
            wareSkuEntity.setStock(entity.getStock() + skuNum);
            wareSkuEntity.setId(entity.getId());
            this.baseMapper.updateById(wareSkuEntity);
        }
    }
分布式基础篇总结
1、分布式基础概念
• 微服务、注册中心、配置中心、远程调用、Feign、网关
2、基础开发
• SpringBoot2.0、SpringCloud、Mybatis-Plus、Vue组件化、阿里云对象存储
3、环境
• Vagrant、Linux、Docker、MySQL、Redis、逆向工程&人人开源
4、开发规范
• 数据校验JSR303、全局异常处理、全局统一返回、全局跨域处理
• 枚举状态、业务状态码、VO与TO与PO划分、逻辑删除
• Lombok:@Data、@Slf4j