前言:
深圳市启明智显科技有限公司专注于HMI(人机交互)和AIoT(人工智能物联网)产品和解决方案的研发、设计和生产。公司产品覆覆盖了多种操作系统,包括Linux、RTOS和OneOs等。无论您的项目使用哪种系统,我们都能提供相应的产品和解决方案。目前公司产品广泛应用于各个领域,包括但不限于智能家居、工业自动化、智慧医疗、智能家电和智慧出行等领域。
今天给大家分享的是启明智显M4核心板适配RGB/LVDS屏幕的教程
M4核心板-ZXM4R64CT
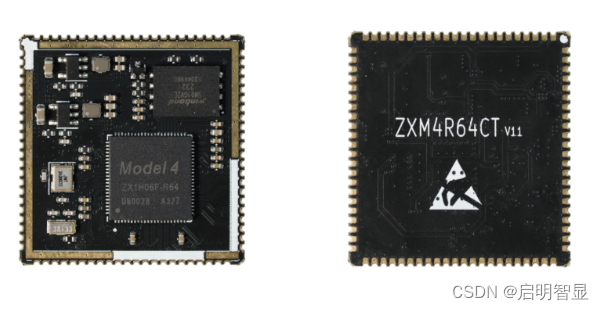
适配M4开发板
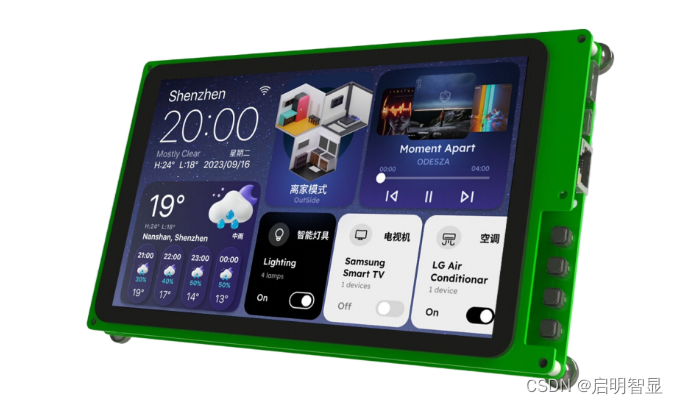
M4核心板主要功能特点:
M4核心板是启明智显基于M4芯片设计的一款高性能的全高清显示和智能控制模组,采用国产自主 64 位高算力 RISC-V 内核,内置 16 位 DDR 控制器并提供丰富的互联外设接口,配备了 2D 图像加速引擎和 H.264 解码引擎,主频600MHz,支持工业宽温。
-
默认配置 64MB DDR2,128MB Nand Flash(up to 2GB)
-
超小尺寸(27.3mm*27.3mm)。
-
单面布件,正面可选装屏蔽罩支持 Linux 系统,1s超快速启动
-
严格的信号完整性与电源完整性设计与测试
-
88Pin 1.1mm 引脚间距
-
支持Linux,Openwrt,RT-Thread,OneOS,FreeRtos
-
UI支持LVGL,8MS
-
支持1920*1080分辨率,支持H.264解码 1080P@30fps、MJPEG/PNG/JPEG解码,2D图像加速
-
1EMAC/8UART/2USB/3SPI/2CAN//8PWM/1CIR/2SDMC/DVP YUV/1*LVDS/RGB/MIPI DSI
**
显示接口
**
RGB接口
-
支持 PRGB 24/18/16 bit 模式,最高 120MHz PIXELCLK
-
支持 SRGB 8/6bit 模式,最高 480x320@60fps
-
支持 8 位色深,R/G/B 三组信号可任意交叉
-
支持 R/G/B 组内数据输出顺序切换
-
PRGB/SRGB 时钟提供4个相位选择
LVDS接口
- 支持 Single Link,最高速率 700Mbps
- 支持 VESA 和 JEIDA 模式
- 支持 18bit 和 24bit 数据传输
- 支持 LVDS 信号极性选择模式
- 支持 LVDS 五组差分对信号任意互换
MIPI-DSI接口
- 最大支持 1080P60 及衍生分辨率,支持 Video 和 Command 模式
- Video 模式支持 Non-burst 和 Burst 两种方式
- 可配置为 1/2/3/4 对数据通道,每通道最大支持 1Gbps 速率
- 支持 RGB888,RGB666,RGB666 packed,RGB565
MIPI-DBI接口
- 支持 B 类接口,Intel 8080 总线
- 支持 C 类接口,SPI 总线
- I8080 支持 24/18/16/9/8bit 模式,最高 960x540@60fps
- SPI 支持 3/4-wire 以及 4-sda 模式,最高 480x320@60fps
M4核心板适配RGB/LVDS屏幕的教程:
一、LCD 外设在 ZX-RTT 上的适配方法
方式一:通过 menuconfig 修改屏参数
在 ZX-RTT 根目录下执行 scons --menuconfig,进入 menuconfig 的功能配置界面,按如下选择:
> Board options  --->    Graphics Support  --->        Graphics support
> [*] Display Support                select Display interface (Display
> LVDS interface)  --->                LVDS interface options  --->
> Display Panels  --->                    ZX Panel Drivers (ZX simple
> panel)  --->                    display timing of simple panel  --->
此方法支持修改 simple panel 的时序参数和 RGB/LVDS 的部分参数
方式二:将屏参数写入 panel 驱动源码中
时序参数

屏接口参数

提示:如果方式一和方式二都配置了屏幕参数,最终生效的是方式二的参数。
如果适配一款 RGB/LVDS 屏幕,通过 menuconfig 选择 ZX simple panel , 修改显示参数即可。这类屏幕往往不需要初始化,使用通用的屏驱动即可。
menuconfig配置
1、使能显示模块驱动
在 ZX-RTT 根目录下执行 scons --menuconfig,进入 menuconfig 的功能配置界面,按如下选择:
Board options —>
[*] Using Display Engine (DE)
Display Parameter —>
2、选择显示接口
使能显示模块的驱动后,需要选择相应的显示接口。
Board options  --->
    [*] Using Display Engine (DE)
        Display Parameter  --->
            select Display interface (Display LVDS interface)  --->
ZX 平台支持多种显示接口标准,但在系统运行时只能生效一个。
3、屏幕配置
ZX-RTT sdk 不仅为 RGB/LVDS 接口提供通用的 panel 驱动 (ZX simple panel),
也为部分屏驱 IC 提供专用的 panel 驱动。
提示:只有使能了 panel 对应的显示接口后,panel 才能在 menuconfig 中可见。
Board options  --->
    [*] Using Display Engine (DE)
        Display Parameter  --->
            Display Panels  --->
如果选择了 ZX simple panel,可以通过 menuconfig 来修改屏时序参数
Display Panels  --->
    ZX Panel Drivers (ZX simple panel)  --->
    display timing of simple panel  --->
二、背光配置
1、GPIO
在 menuconfig 中,选择 GPIO 方式控制背光,以字符串的形式指定 gpio 引脚。
enable-gpio 默认高电平有效。
Board options  --->
    [*] Using Display Engine (DE)
        Display Parameter  --->
            panel backlight control (gpio)  --->
        (PE.19) panel backlight enable pin
        [ ] panel backlight enable pin low active
2、PWM
在 menuconfig 中,选择 PWM 方式控制背光,配置 pwm 的通道和默认占空比 [0, 100]
使能 pwm
Board options  --->
    [*] Using PWM3
配置 pwm-backlight
Board options  --->
    [*] Using Display Engine (DE)
        Display Parameter  --->
            panel backlight control (pwm)  --->
        (3) pwm backlight channel
        (80) default brightness level
三、显示引擎配置
Board options  --->
    [*] Using Display Engine (DE)
        Display Parameter  --->
            select framebuffer format (argb8888)  --->
            [*] Support double framebuffer
            [*] Enable Display Dither
framebuffer 默认使用 32 位 ARGB8888 格式。
使能双 buffer 可以避免屏幕撕裂,获得更好的显示效果。
当显示引擎 blend 32 位 RGB 数据,但显示接口只输出 18/16 位 RGB 数据时,使能 dither 能让图像色彩渐变更平滑
四、显示接口配置
1、RGB 接口
选择 RGB 显示接口
Board options  --->
    [*] Using Display Engine (DE)
        Display Parameter  --->
            select Display interface (Display RGB interface)  --->
            RGB interface options  --->
RGB 显示接口参数配置
RGB interface options  --->
    rgb mode (PRGB)  --->
    interface format (PRGB 16 BIT LD)  --->
    data order (RGB)  --->
    clock phase select (0 degree)  --->
rgb mode
支持并行 RRGB 和串行 SRGB 两种模式
interface format
接口的输出格式

data order
R/G/B 分量输出顺序

clock phase select
支持 0/90/180/270 度,四种时钟相位选择
data mirror
RGB数据组内大小端输出。默认输出低位到高位 0 - 7。如果设置则输出变为 7 - 0
2、LVDS接口
选择 LVDS 显示接口
Board options  --->
    [*] Using Display Engine (DE)
        Display Parameter  --->
            select Display interface (Display LVDS interface)  --->
            LVDS interface options  --->
LVDS 显示接口参数配置
LVDS interface options  --->
    lvds mode (vesa-24)  --->
    lvds link mode (single link 1)  --->
lvds mode
lvds 模式设置,默认输出为 vesa-24 模式
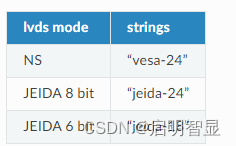
lvds link mode
lvds link 设置,默认配置 single link1 ,单link输出,link1通道。
3、调试指南
调试开关
在 ZX-RTT 根目录下执行 scons --menuconfig,进入 menuconfig 的功能配置界面,按如下选择:
Drivers options  --->
    Drivers debug  --->
        [*] Enable Display driver debug
此 DEBUG 选项打开的影响:
显示驱动的 pr_debug() 调试信息会被打印输出
显示 color block
在 ZX-RTT 根目录下执行 scons --menuconfig,进入 menuconfig 的功能配置界面,按如下选择:
Board options  --->
   Graphics Support  --->
       [*] Display color block
此选项开启后,系统上电时 LCD 屏幕会显示红,绿,蓝,黑,白五种颜色的矩形色块,矩形色块通过 CPU 进行绘制。
使能 color bar
在 RT-Thread 系统启动后,可在命令行执行以下命令:
m 0x18a00004 1
m 0x18a00008 1
此命令会使能显示引擎的 colorbar 模式。此时,显示引擎不再从内存中读取数据,而是直接生成 colorbar 数据并传送给显示接口。colorbar 模式仅供调试使用。
禁用 colorbar 模式的命令为:
m 0x18a00004 0
m 0x18a00008 1
4、测试指南
LVDS屏幕,7寸TFT屏幕,驱动芯片EK79001+EK73215
软件配置 LVDS屏幕
测试中需要用到LVDS屏幕,以驱动芯片EK79001+EK73215为例,在 ZX-RTT 的根目录下执行 scons --menuconfig ,按如下选择
[*] Display Support
        select Display interface (Display LVDS interface)  --->
    LVDS interface options  --->
video_layer 测试
video_layer 的主要功能是测试显示引擎 UI 图层和 Video 图层 blend,在 Video 图层播放一个视频帧文件
测试需要依赖 SD Card,将 YUV 数据保存在 SD Card 中,在系统启动后进行挂载:
mount sd0p0 / elm
播放一个 yuv420 格式的文件
aic /> video_layer -u
Usage: video_layer [options]:
     -w, --width        need an integer argument, default is 176
     -h, --height       need an integer argument, default is 144
     -s, --stride       video stride, just tile format need
     -f, --format       video format, yuv420p etc
     -i, --input        need a file name
     -l, --list     list the supported formats
     -u, --usage

Example: video_layer -w 176 -h 144 -f yuv420p -i my.yuv

aic /> video_layer -w 176 -h 144 -f yuv420p -i my.yuv
disp_prop测试
disp_prop 的主要功能是测试显示引擎 Video 图层的 csc 色彩转换模块,通过设置亮度,对比度,饱和度,色调等参数,改变 video 图层的显示效果。
aic /> disp_prop -u
Usage: disp_prop [Options], built on May 24 2023 17:41:29
    -b, --bright
    -c, --contrast
    -s, --saturation
    -h, --hue
    -u, --usage

All parameter range in [0, 100], 50 means no effect, default is 50

Example: disp_prop -b 35 -c 40 -s 45 -h 44
设置参数后再次在 video 图层播放一个 YUV 视频帧文件,可以看到两者显示效果不同:
aic /> video_layer -w 176 -h 144 -f yuv420p -i my.yuv
如果想重置显示效果,可将所有参数设置为 50,或者直接执行 disp_prop 命令
aic /> disp_prop -b 50 -c 50 -s 50 -h 50

aic /> disp_prop


