🍺基于Python的Web服务器系列相关文章编写如下🍺:
- 🎈【Web开发】Python实现Web服务器(Flask快速入门)🎈
- 🎈【Web开发】Python实现Web服务器(Flask案例测试)🎈
- 🎈【Web开发】Python实现Web服务器(Flask部署上线)🎈
- 🎈【Web开发】Python实现Web服务器(Flask+Tornado+nginx)🎈
- 🎈【Web开发】Python实现Web服务器(Ubuntu下安装Flask)🎈
- 🎈【Web开发】Python实现Web服务器(Ubuntu下打包Flask)🎈
- 🎈【Web开发】Python实现Web服务器(Ubuntu下调试Flask)🎈
- 🎈【Web开发】Python实现Web服务器(Ubuntu下Flask使用MySQL)🎈
- 🎈【Web开发】Python实现Web服务器(Docker下部署Flask)🎈
文章目录
- 1、简介
- 2、准备工作
- 2.1 创建虚拟环境
- 2.2 创建flask项目
- 2.3 运行flask项目
- 2.4 修改wsgi server
- 2.5 安装docker
- 3、制作docker镜像
- 3.1 创建requirements.txt文件
- 3.2 创建dockerfile文件
- 3.3 配置国内docker镜像加速地址
- 3.4 构建docker镜像
- 3.5 查看docker镜像
- 3.6 临时运行docker镜像
- 3.7 停止运行docker镜像
- 3.8 其他docker命令
- 4、发布docker镜像
- 4.1 注册docker hub账号
- 4.2 给docker镜像打标签
- 4.3 登陆docker hub
- 4.3 push上docker hub
- 4.4 pull下载到自己服务器
- 结语
1、简介
官网地址:
https://hub.docker.com/
https://docs.docker.com/get-started/
Docker 是一个开源的应用容器引擎,基于 Go 语言 并遵从 Apache2.0 协议开源。
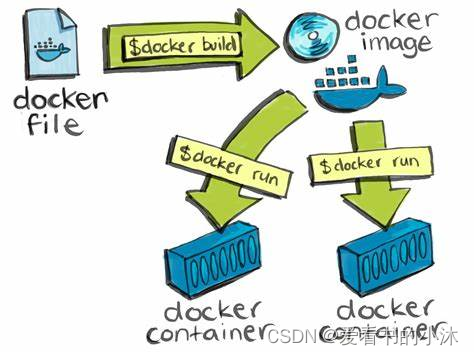
Docker 可以让开发者打包他们的应用以及依赖包到一个轻量级、可移植的容器中,然后发布到任何流行的 Linux 机器上,也可以实现虚拟化。
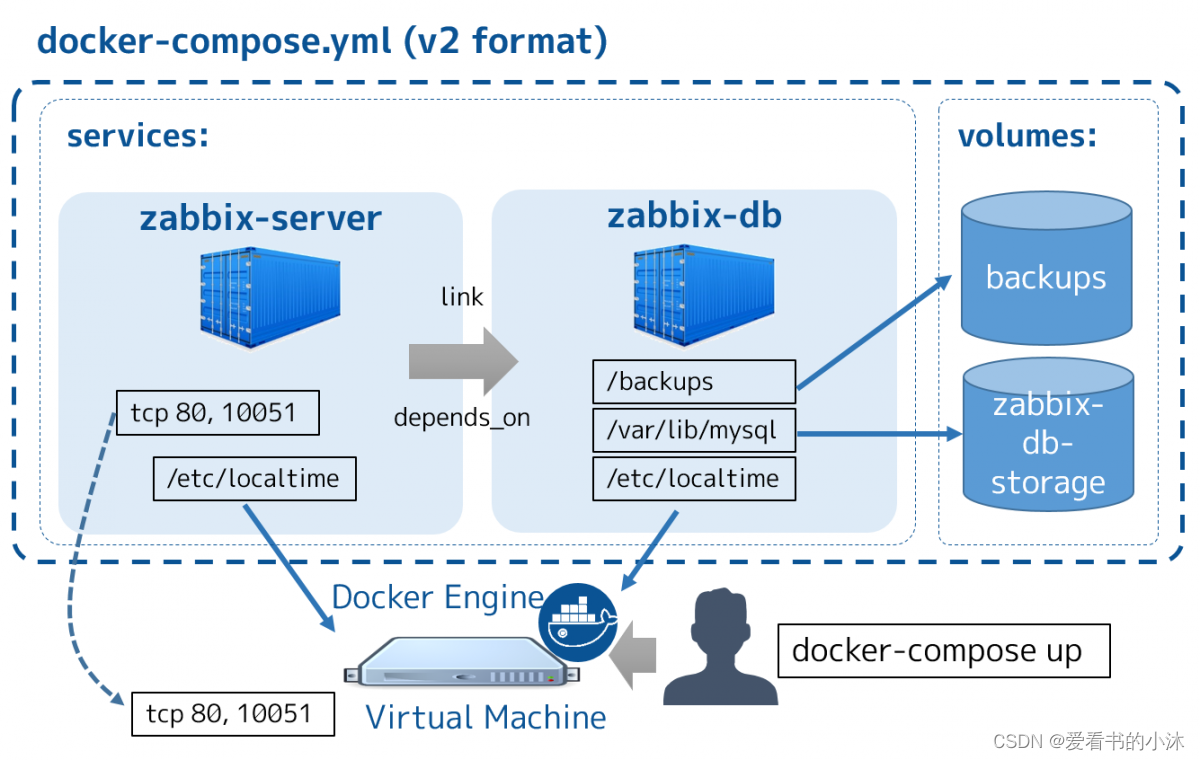
容器是完全使用沙箱机制,相互之间不会有任何接口(类似 iPhone 的 app),更重要的是容器性能开销极低。
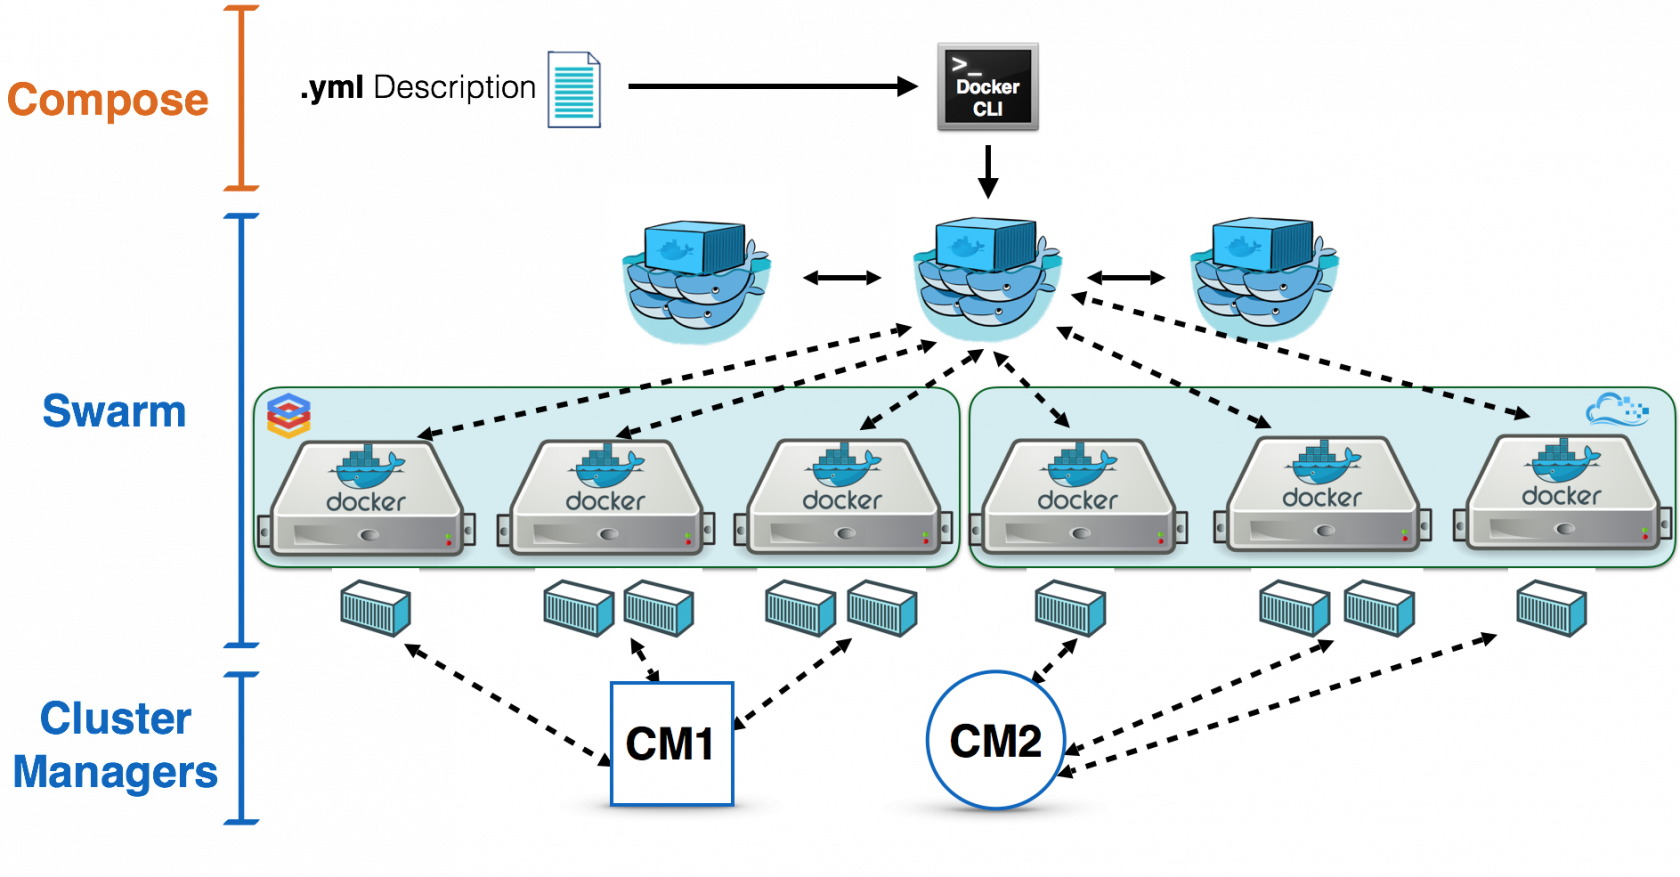
- Docker 的版本
Docker 从 17.03 版本之后分为 CE(Community Edition: 社区版) 和 EE(Enterprise Edition: 企业版),我们用社区版就可以了。
- Docker 的应用场景
Web 应用的自动化打包和发布。
自动化测试和持续集成、发布。
在服务型环境中部署和调整数据库或其他的后台应用。
从头编译或者扩展现有的 OpenShift 或 Cloud Foundry 平台来搭建自己的 PaaS 环境。
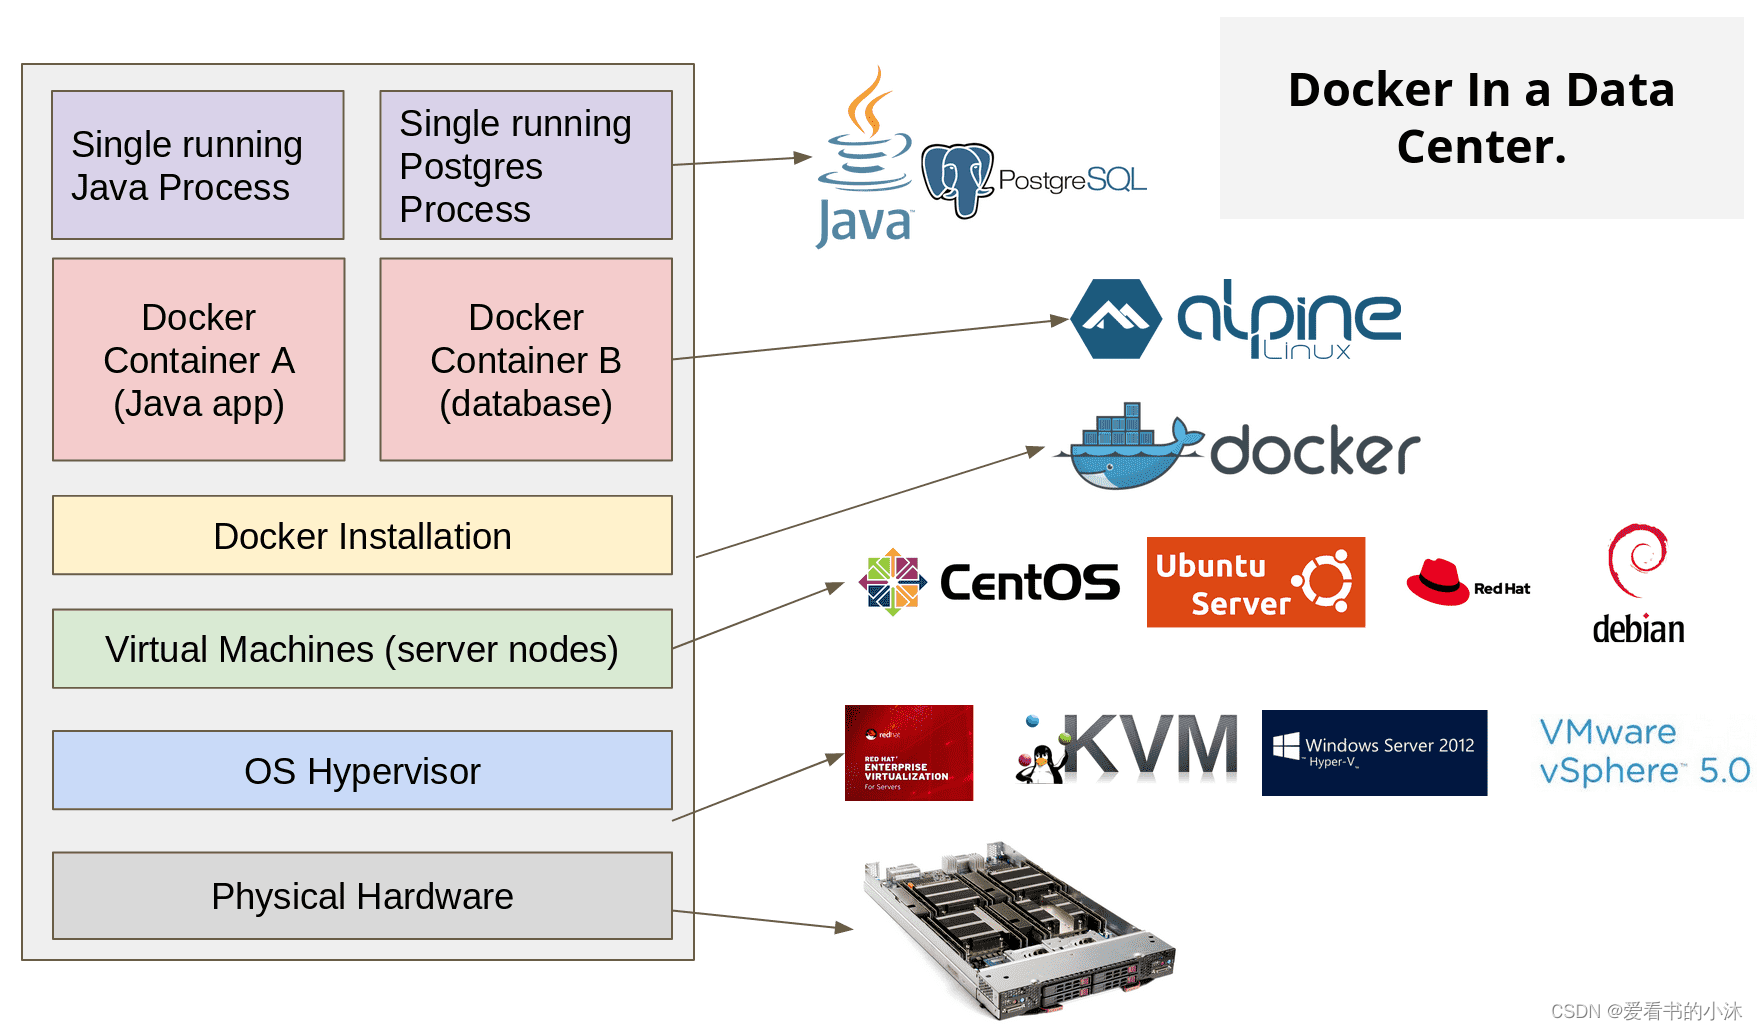
Docker 是一个用于开发,交付和运行应用程序的开放平台。Docker 使您能够将应用程序与基础架构分开,从而可以快速交付软件。借助 Docker,您可以与管理应用程序相同的方式来管理基础架构。通过利用 Docker 的方法来快速交付,测试和部署代码,您可以大大减少编写代码和在生产环境中运行代码之间的延迟。

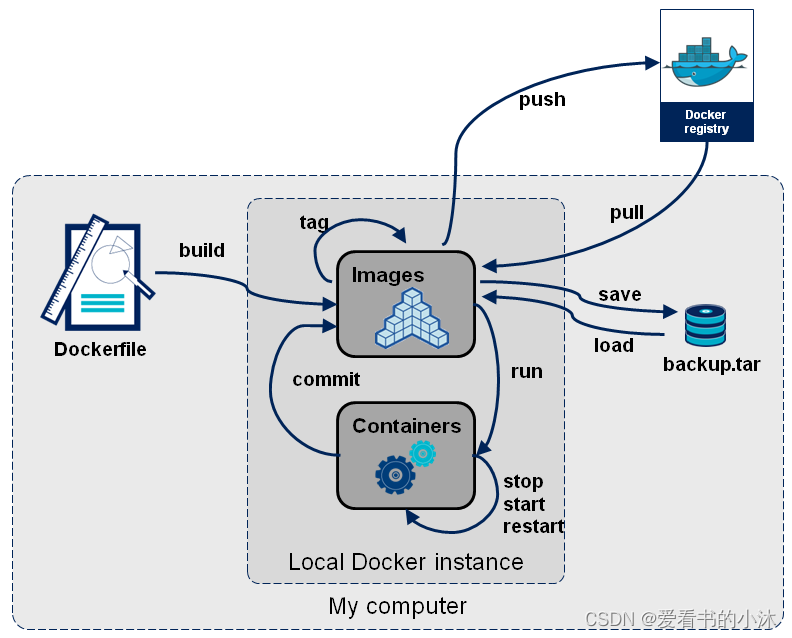
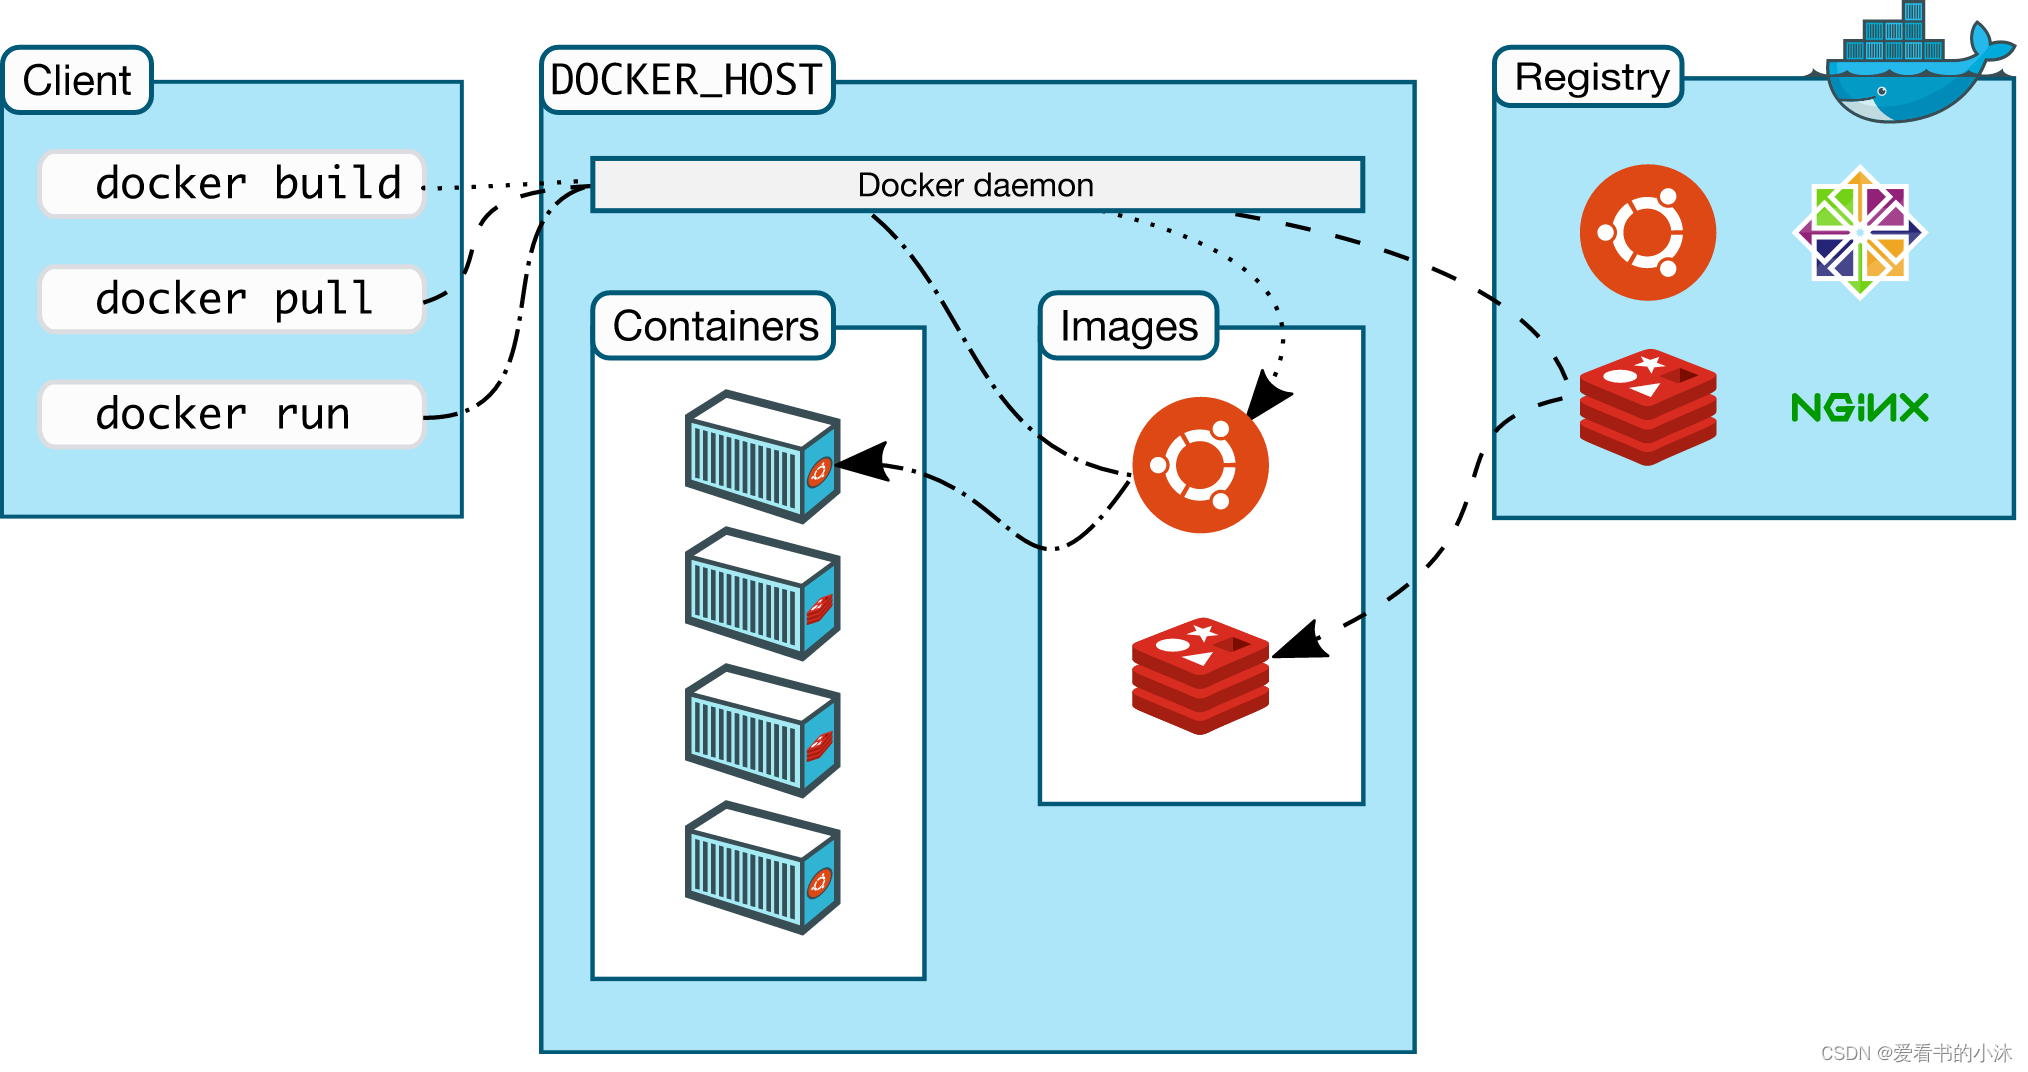
Docker 包括三个基本概念:
- 镜像(Image):Docker 镜像(Image),就相当于是一个 root 文件系统。比如官方镜像 ubuntu:16.04 就包含了完整的一套 Ubuntu16.04 最小系统的 root 文件系统。
- 容器(Container):镜像(Image)和容器(Container)的关系,就像是面向对象程序设计中的类和实例一样,镜像是静态的定义,容器是镜像运行时的实体。容器可以被创建、启动、停止、删除、暂停等。
- 仓库(Repository):仓库可看成一个代码控制中心,用来保存镜像。
Docker 使用客户端-服务器 (C/S) 架构模式,使用远程API来管理和创建Docker容器。
Docker容器(container) 和 Docker镜像(Images) 以及 Docker仓库 并称为 Docker 的三大核心概念。
Docker 容器通过 Docker 镜像来创建。
2、准备工作
2.1 创建虚拟环境
新建测试文件夹:
mkdir mytest
cd mytest

创建虚拟环境:
python3 -m venv myvenv

激活虚拟环境:
source myvenv/bin/activate

2.2 创建flask项目
在文件夹mytest下,创建一个demo.py启动文件,代码如下:
- demo.py
from flask import Flask

app = Flask(__name__)

@app.route('/')
def hello():
    return 'hello docker & flask & 爱看书的小沐.'

if __name__ == '__main__':
    app.run(host="0.0.0.0", debug=True)

另一个测试脚本文件如下:
from flask import Flask, render_template
import os

app = Flask(__name__)

@app.route('/')
def home():
    return render_template('index.html')

if __name__ == "__main__":
    port = int(os.environ.get('PORT', 5000))
    app.run(debug=True, host='0.0.0.0', port=port)
2.3 运行flask项目
输入下面命令可以测试一下是否能正常跑起来:
python demo.py

执行报错了,需要安装flask库。
pip install flask
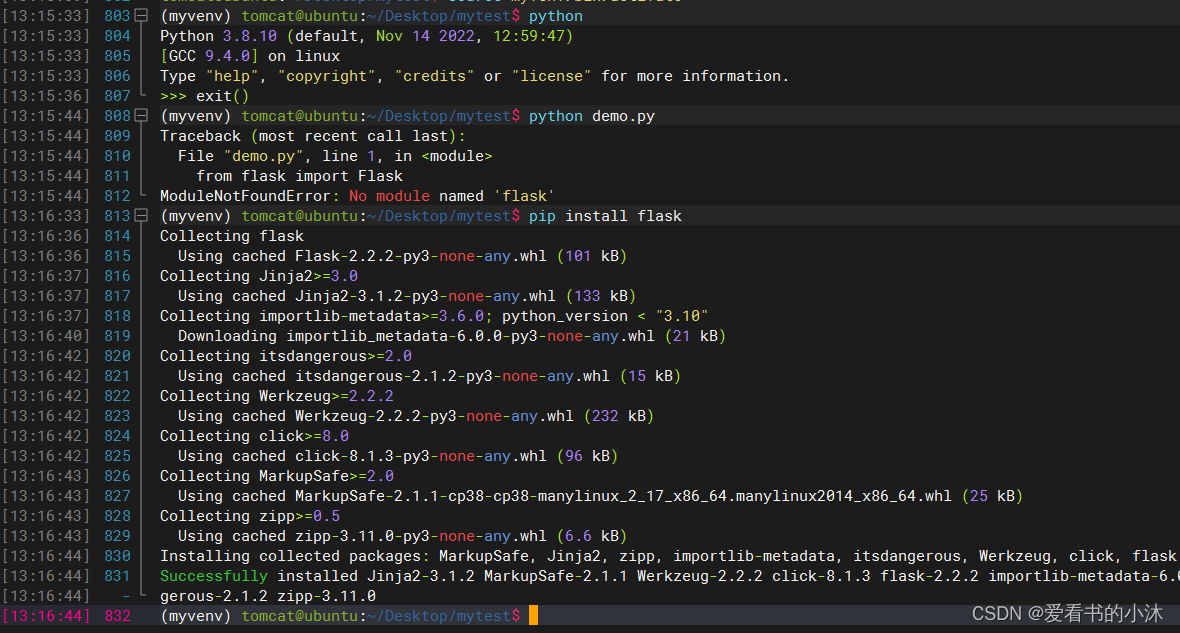
再执行python demo.py命令,如下:

flask服务器启动成功,浏览器访问如下:

2.4 修改wsgi server
guincorn是支持wsgi协议的http server,gevent只是它支持的模式之一 ,是为了解决django、flask这些web框架自带wsgi server性能低下的问题。
安装相关库如下:
pip install gunicorn gevent flask
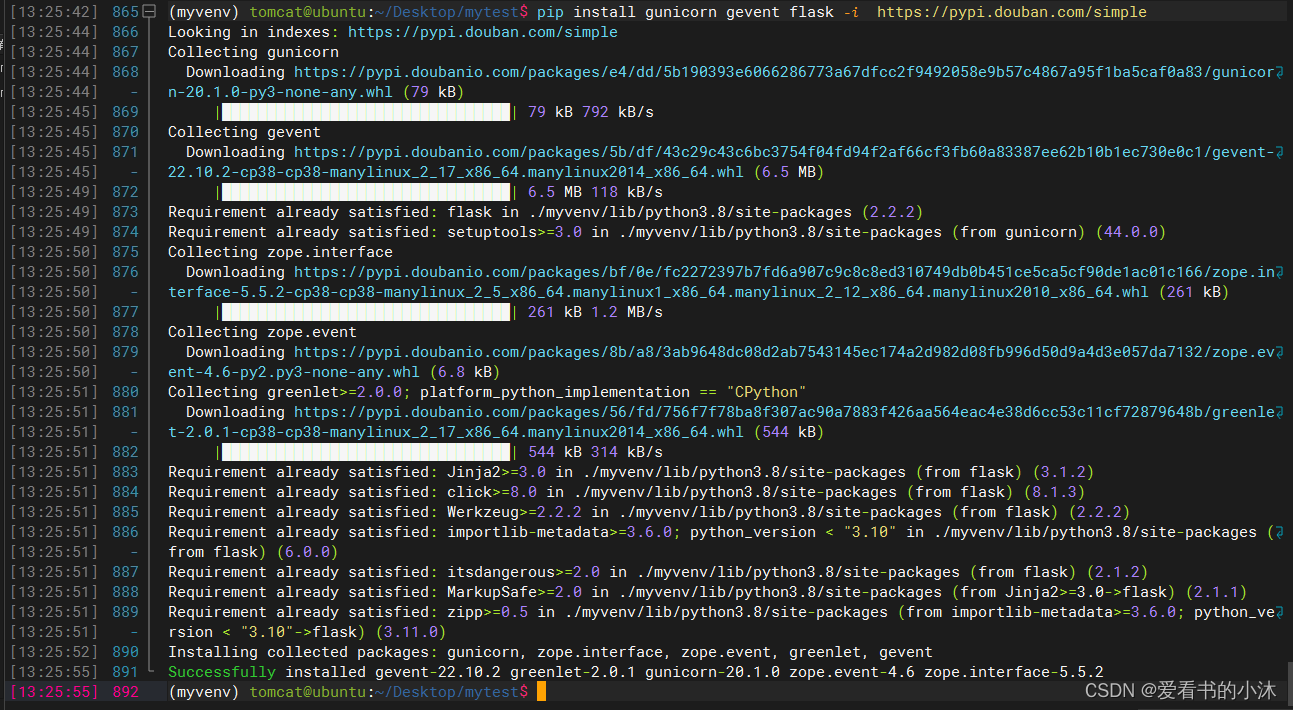
同时在mytest目录下新建配置文件gunicorn.conf.py
- gunicorn.conf.py
workers = 5    # 定义同时开启的处理请求的进程数量,根据网站流量适当调整
worker_class = "gevent"   # 采用gevent库,支持异步处理请求,提高吞吐量
bind = "0.0.0.0:5000"   #端口随便写,但是注意是否已经被占用。netstap -lntp

启动gunicorn,测试如下:
gunicorn demo:app -c gunicorn.conf.py

运行成功如上。
2.5 安装docker

- (1)使用官方安装脚本自动安装
curl -fsSL https://get.docker.com | bash -s docker --mirror Aliyun
# or
curl -sSL https://get.daocloud.io/docker | sh

- (2)手动安装
卸载旧版本。Docker 的旧版本被称为 docker,docker.io 或 docker-engine 。如果已安装,请卸载它们:
sudo apt-get remove docker docker-engine docker.io containerd runc
当前称为 Docker Engine-Community 软件包 docker-ce 。
安装 Docker Engine-Community,以下介绍两种方式。
在新主机上首次安装 Docker Engine-Community 之前,需要设置 Docker 仓库。之后,您可以从仓库安装和更新 Docker 。
# 更新 apt 包索引
sudo apt-get update
# 添加 Docker 的官方 GPG 密钥
curl -fsSL https://mirrors.ustc.edu.cn/docker-ce/linux/ubuntu/gpg | sudo apt-key add -
# 验证您现在是否拥有带有指纹的密钥
sudo apt-key fingerprint 0EBFCD88
# 使用以下指令设置稳定版仓库
sudo add-apt-repository \
   "deb [arch=amd64] https://mirrors.ustc.edu.cn/docker-ce/linux/ubuntu/ \
  $(lsb_release -cs) \
  stable"

sudo apt-get install docker-ce docker-ce-cli containerd.io
apt-cache madison docker-ce
- (3)使用 Shell 脚本进行安装
Docker 在 get.docker.com 和 test.docker.com 上提供了方便脚本,用于将快速安装 Docker Engine-Community 的边缘版本和测试版本。
$ curl -fsSL https://get.docker.com -o get-docker.sh
$ sudo sh get-docker.sh
卸载 docker:
# 删除安装包:
sudo apt-get purge docker-ce
# 删除镜像、容器、配置文件等内容:
sudo rm -rf /var/lib/docker
# 查看Docker服务状态
sudo systemctl status docker

# 停止Docker服务
sudo systemctl stop docker

# 启动Docker服务
sudo systemctl start docker

# 重启Docker服务
sudo systemctl restart docker

# 搜索Docker镜像hello-world
sudo docker search hello-world

# 拉取Docker镜像(Images)
sudo docker image pull docker.io/hello-world

# 查看Docker镜像(Images)
sudo docker image ls

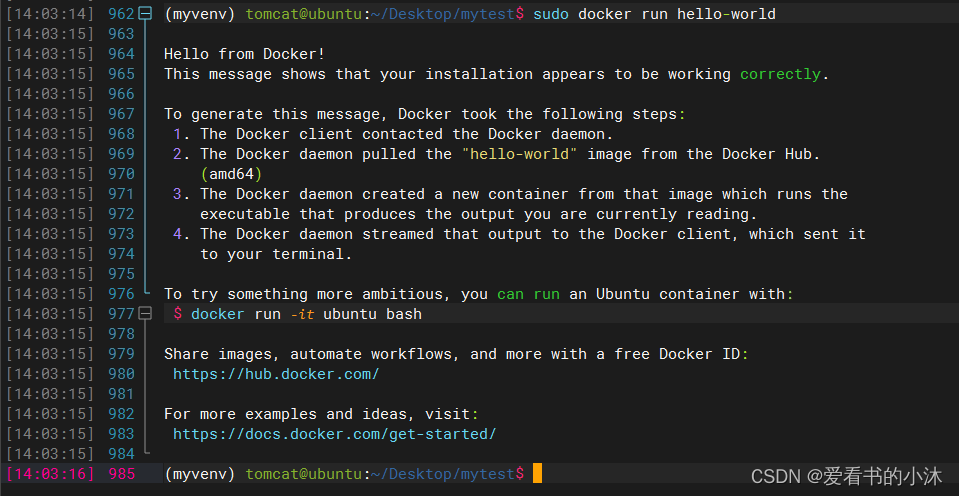
# 启动Docker镜像(Images)
sudo docker run hello-world
3、制作docker镜像
3.1 创建requirements.txt文件
用来构建项目所需要的运行环境依赖:
通过命令pip freeze生成依赖文件:
pip freeze > requirements.txt
- requirements.txt
gunicorn
gevent
flask

3.2 创建dockerfile文件
新建一个文件dockerfile。
- dockerfile
FROM python:3.8

WORKDIR /xiaomu/project/

COPY requirements.txt ./
RUN pip install -r requirements.txt -i https://pypi.tuna.tsinghua.edu.cn/simple

COPY . .

CMD ["gunicorn", "demo:app", "-c", "./gunicorn.conf.py"]  #用于指定默认的容器主进程的启动命令

另一个dockerfile文件例子如下:
# start by pulling the python image
FROM python:3.8-alpine

# copy the requirements file into the image
COPY ./requirements.txt /app/requirements.txt

# switch working directory
WORKDIR /app

# install the dependencies and packages in the requirements file
RUN pip install -r requirements.txt

# copy every content from the local file to the image
COPY . /app

# configure the container to run in an executed manner
ENTRYPOINT [ "python" ]

CMD ["demo.py" ]
参数解释如下:
FROM python:3.8-alpine: Since Docker allows us to inherit existing images, we install a Python image and install it in our Docker image. Alpine is a lightweight Linux distro that will serve as the OS on which we install our image
COPY ./requirements.txt /app/requirements.txt: Here, we copy the requirements file and its content (the generated packages and dependencies) into the app folder of the image
WORKDIR /app: We proceed to set the working directory as /app, which will be the root directory of our application in the container
RUN pip install -r requirements.txt: This command installs all the dependencies defined in the requirements.txt file into our application within the container
COPY . /app: This copies every other file and its respective contents into the app folder that is the root directory of our application within the container
ENTRYPOINT [ "python" ]: This is the command that runs the application in the container
CMD [ "demo.py" ]: Finally, this appends the list of parameters to the EntryPoint parameter to perform the command that runs the application. This is similar to how you would run the Python app on your terminal using the python view.py command
3.3 配置国内docker镜像加速地址
docker拉取镜像过慢,Docker国内镜像加速地址,docker下载镜像太慢。
可以通过修改 daemon 配置文件 /etc/docker/daemon.json 来使用加速器。
sudo mkdir -p /etc/docker
sudo tee /etc/docker/daemon.json <<-'EOF'
{
  "registry-mirrors": ["https://o6ul5754.mirror.aliyuncs.com"]
}
EOF
sudo systemctl daemon-reload
sudo systemctl restart docker
创建或修改/etc/docker/daemon.json文件
默认没有daemon文件,先创建。
sudo cd /etc
sudo mkdir docker
sudo cd docker
sudo vim /etc/docker/daemon.json
- daemon.json
{
"registry-mirrors": [
"https://ung2thfc.mirror.aliyuncs.com",
"https://registry.docker-cn.com",
"http://hub-mirror.c.163.com",
"https://docker.mirrors.ustc.edu.cn"
]
}
另外vim的相关操作命令如下:
:w 保存文件但不退出vi
:w file 将修改另外保存到file中,不退出vi
:w! 强制保存,不推出vi
:wq 保存文件并退出vi
:wq! 强制保存文件,并退出vi
:q 不保存文件,退出vi
:q! 不保存文件,强制退出vi
:e! 放弃所有修改,从上次保存文件开始再编辑命令历史
加载重启docker:
systemctl daemon-reload
systemctl restart docker
验证是否成功:
docker info
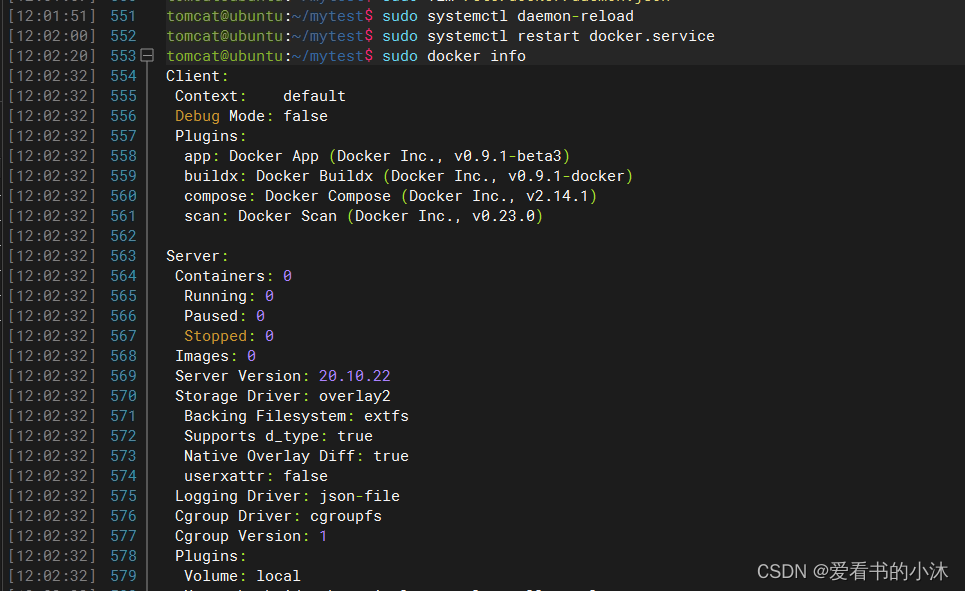

测试发现拉取镜像,速度极快。
3.4 构建docker镜像
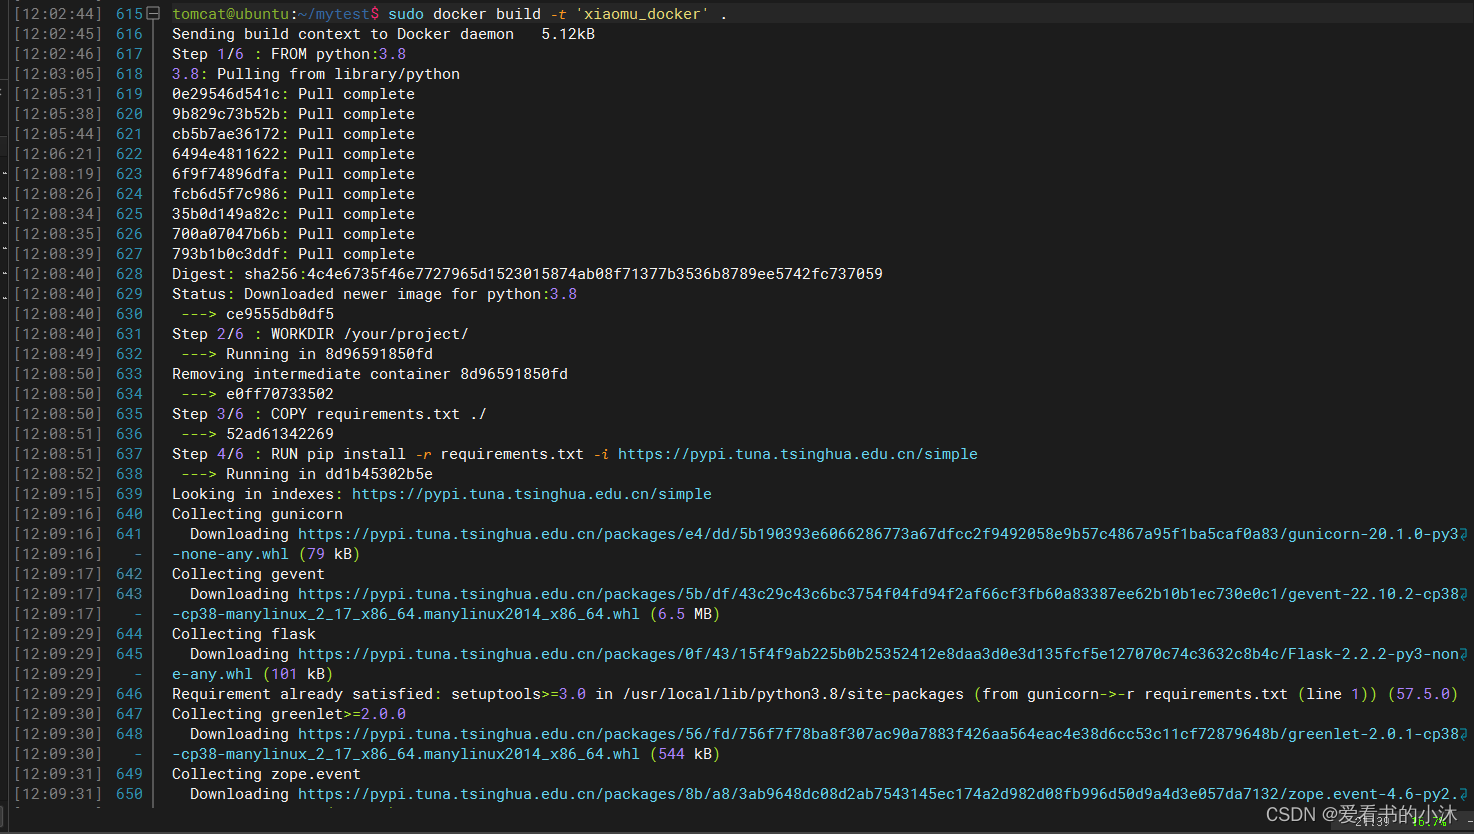
构建docker镜像(镜像它的名字随意取)。
sudo docker build -t 'xiaomu_docker' .

3.5 查看docker镜像
sudo docker images

3.6 临时运行docker镜像
Docker容器运行方式总结:
# Docker单次运行的语法为:
docker run IMAGE [COMMAND] [ARG]

# Docker交互式运行的语法为:
docker run -i -t IMAGE [COMMAND] [ARG]

# Docker后台运行的语法为:
docker run -d IMAGE [COMMAND] [ARG]
执行如下命令,启动一个容器。
# docker run --name flask_container -p 80:80 flask_image
# docker run -p 5000:5000 -d flask_docker
sudo docker run -it --rm -p 5000:5000 xiaomu_docker
--name gives the container a name that can be found in docker ps output
-p instructs to publish port 80. Second 80 after semicolons tells what port nginx inside the container listens on
-d runs container detached from terminal. Logs then can be viewed by issuing docker logs command
docker run 加上–rm退出容器以后,这个容器就被删除了,方便在临时测试使用。
不加–rm 退出容器后,容器只是停止运行,数据任然被保留。 不过容器内数据卷的内容不会被删除。
-a stdin: 指定标准输入输出内容类型,可选 STDIN/STDOUT/STDERR 三项;
-d: 后台运行容器,并返回容器ID;
-i: 以交互模式运行容器,通常与 -t 同时使用;
-P: 随机端口映射,容器内部端口随机映射到主机的端口
-p: 指定端口映射,格式为:主机(宿主)端口:容器端口
-t: 为容器重新分配一个伪输入终端,通常与 -i 同时使用;
--name="nginx-lb": 为容器指定一个名称;
--dns 8.8.8.8: 指定容器使用的DNS服务器,默认和宿主一致;
--dns-search example.com: 指定容器DNS搜索域名,默认和宿主一致;
-h "mars": 指定容器的hostname;
-e username="ritchie": 设置环境变量;
--env-file=[]: 从指定文件读入环境变量;
--cpuset="0-2" or --cpuset="0,1,2": 绑定容器到指定CPU运行;
-m :设置容器使用内存最大值;
--net="bridge": 指定容器的网络连接类型,支持 bridge/host/none/container: 四种类型;
--link=[]: 添加链接到另一个容器;
--expose=[]: 开放一个端口或一组端口;
--volume , -v: 绑定一个卷

可以看到Docker镜像成功地运行起来了,并处于阻塞状态。Flask 项目已经成功部署。

3.7 停止运行docker镜像
sudo docker stop 830f852308af

3.8 其他docker命令
列出本地实例:   					docker images
删除镜像 :  					docker image rm 镜像名:标签名
查看容器:   					docker container ls -a
查看当前运行容器:   				docker ps
显示出所有容器,包括没有启动的:   docker ps -a
停止容器:   					docker stop $CONTAINER_ID
启动容器:   					docker start $CONTAINER_ID
用于查看 docker 容器的版本信息:  docker version
用于查看 docker 容器的基本信息:   docker info
删除本地一个或多个 Docker镜像:    docker rmi
用于删除本地一个或多个Docker容器: docker rm
杀掉一个或者多个正在运行的 Docker容器: docker kill
用来重新启动一个或者多个 Docker容器:   docker restart
暂停 Docker容器 中所有的进程:			docker pause
用来恢复 Docker容器 中所有的进程:		docker unpause
运行的 Docker容器 中执行命令:         docker exec
创建一个新的 Docker容器,类似 docker run -d: docker create
docker run 只在第一次运行时使用,将镜像放到容器中,以后再次启动这个容器时,只需要使用命令docker start 即可。
4、发布docker镜像
Publish your image on Docker Hub。
4.1 注册docker hub账号
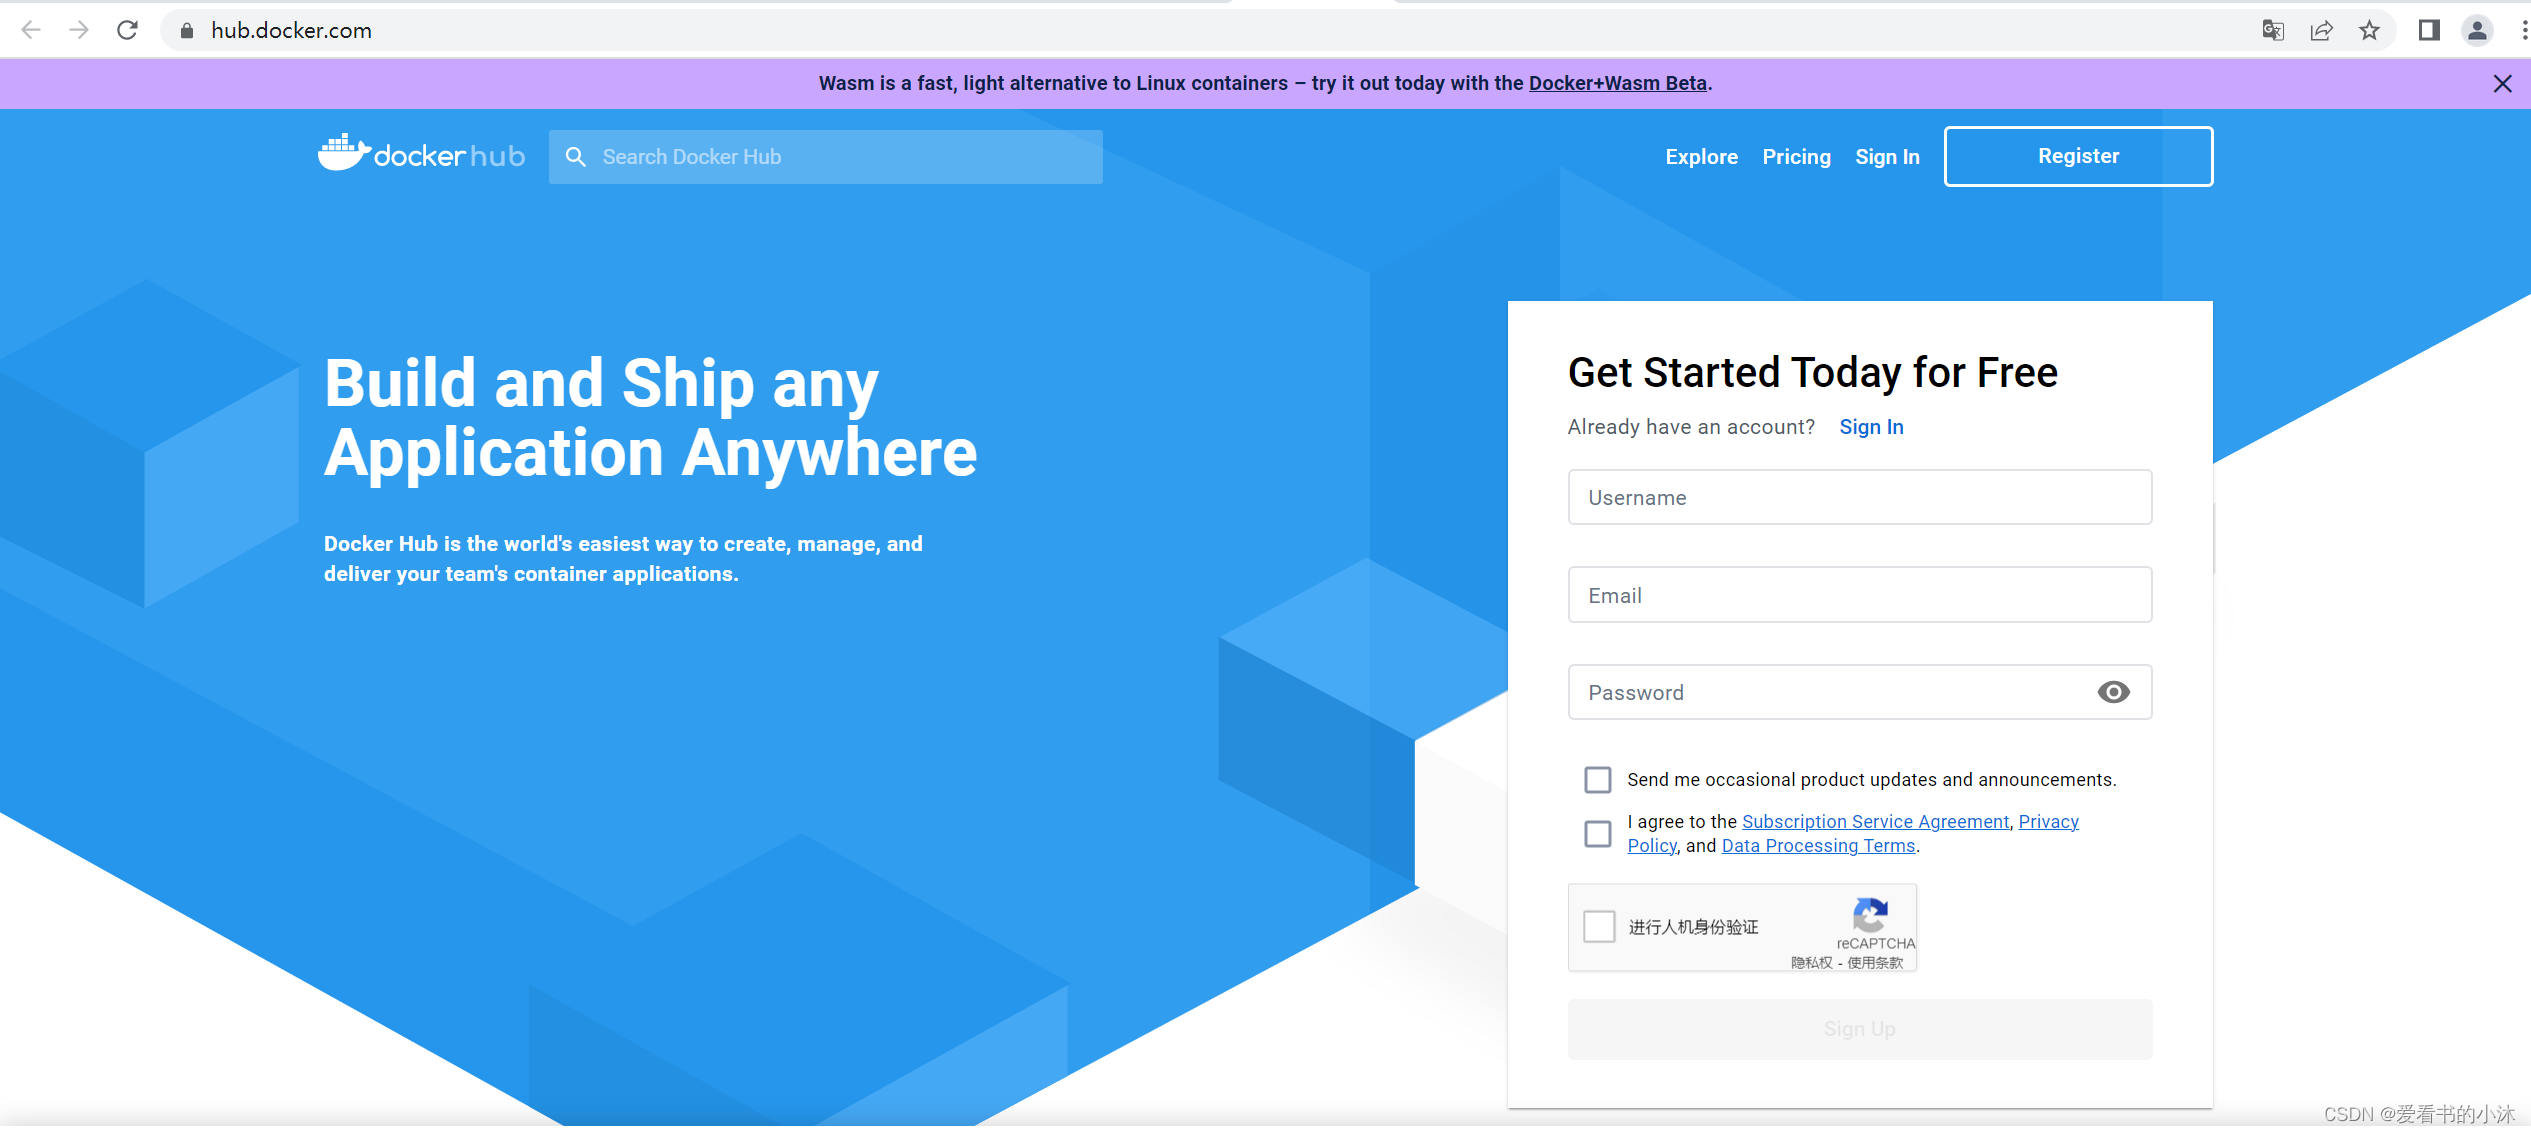
https://hub.docker.com/
Docker Hub is the world’s largest library and community for container images。
Docker Hub is the world’s easiest way to create, manage, and deliver your team’s container applications.

4.2 给docker镜像打标签
在docker中,tag是一个用于给镜像打标签的命令;tag命令可以标记本地镜像,并且将其归入某一仓库,语法为“docker tag [OPTIONS] IMAGE [:TAG] [REGISTRYHOST/] [USERNAME/]NAME [:TAG]”
sudo docker tag xiaomu_docker:latest hifisher/xiaomu_docker:latest
4.3 登陆docker hub
登录docker,输入账号密码:
sudo docker login


在docker hub网站上新建一个仓库xiaomu_docker。要创建存储库,请执行以下操作:
- 登录Docker Hub。
- 单击Docker Hub欢迎页面上的创建存储库:
- 把它命名为/my private repo。
- 将可见性设置为Private。
- 单击“创建”。
您已经创建了第一个存储库。您应该看到:

4.3 push上docker hub
push上docker hub,成功之后可以登录docker网站查看是否已经存在。
将镜像推送到docker
# docker push hifisher/xiaomu_docker:tagname
sudo docker push hifisher/xiaomu_docker:latest

4.4 pull下载到自己服务器
docker pull 账号名/线上名称:latest
结语
如果您觉得该方法或代码有一点点用处,可以给作者点个赞,或打赏杯咖啡;╮( ̄▽ ̄)╭
如果您感觉方法或代码不咋地//(ㄒoㄒ)//,就在评论处留言,作者继续改进;o_O???
如果您需要相关功能的代码定制化开发,可以留言私信作者;(✿◡‿◡)
感谢各位大佬童鞋们的支持!( ´ ▽´ )ノ ( ´ ▽´)っ!!!
