官网配置手册
官网:https://spring.io/
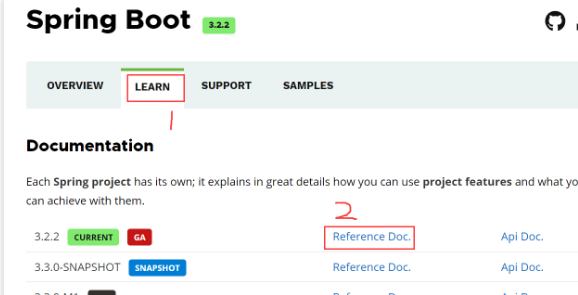
选择SpringBoot

选择LEARN
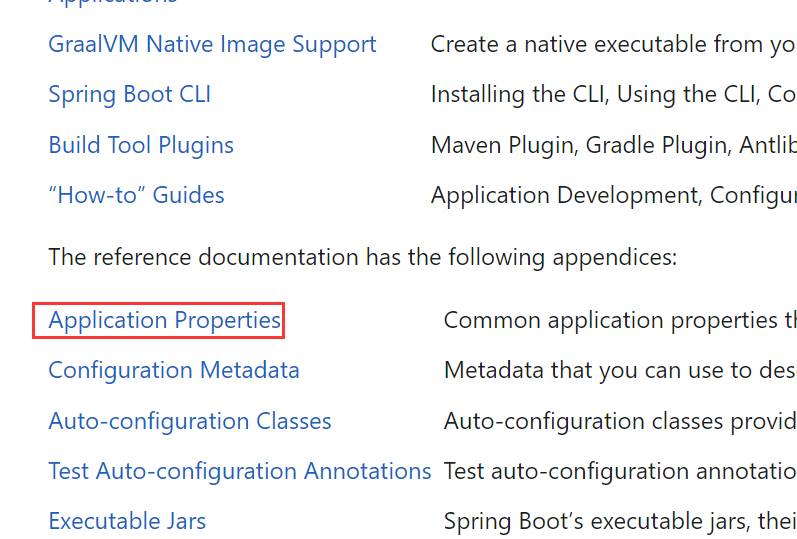
选择 Application Properties
配置MySQL数据库连接
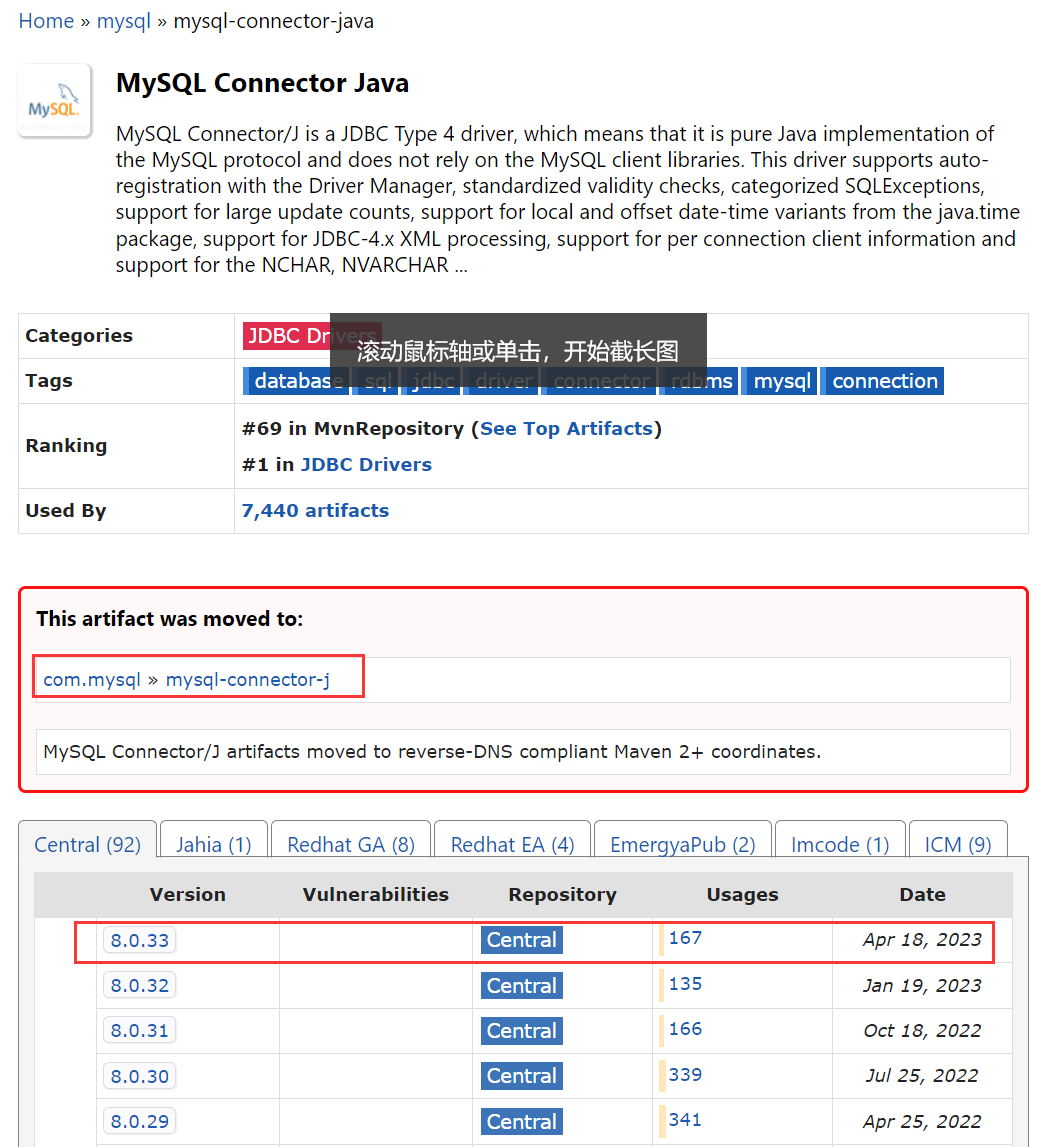
针对Maven而言,会搜索出两个MySQL的连接驱动。
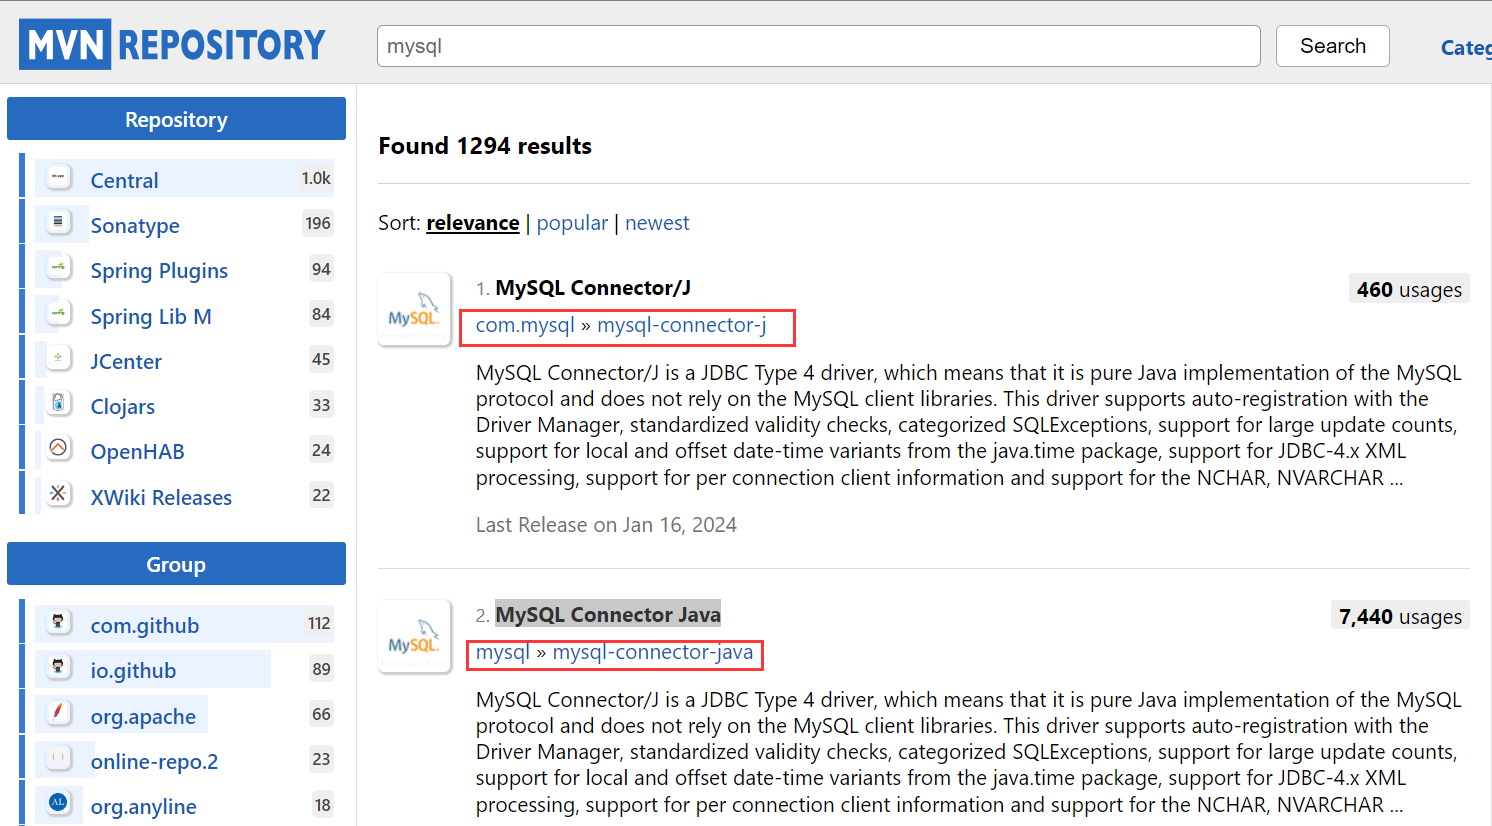
com.mysql » mysql-connector-j
比较新,是在mysql » mysql-connector-java基础上进行二次开发和维护
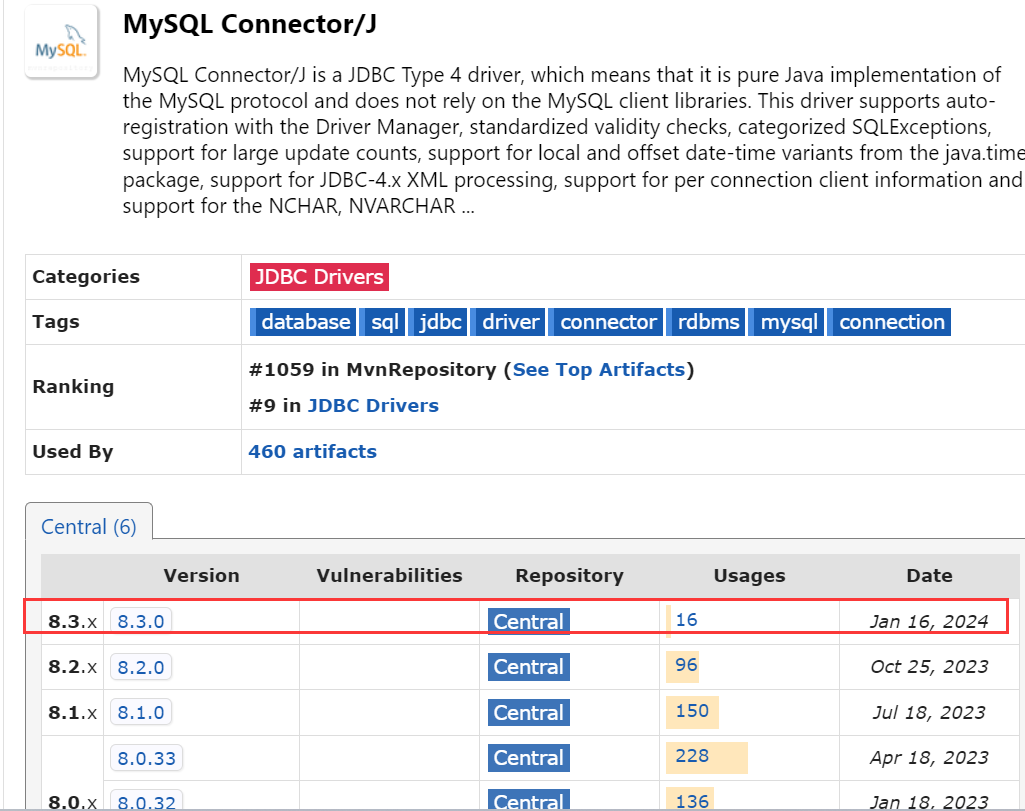
mysql » mysql-connector-java也说明了转移到了com.mysql » mysql-connector-j,推荐使用com.mysql » mysql-connector-j【如果是老项目,则应该选择mysql » mysql-connector-java】
spring:
  datasource:
    #    MySQL8.x要加上cj
    driver-class-name: com.mysql.cj.jdbc.Driver
    name: root
    password: flzxsqc
    url: jdbc:mysql://127.0.0.1:3306/my_db?useUnicode=true&characterEncoding=UTF-8&useSSL=true&serverTimezone=GMT%2B8
SpringBoot这里配置的是UTF-8,但是会被默认的数据库连接池HikariCP解析时映射到MySQL的utf8mb4字符集上。
HikariCP使用mysql-connector-j作为数据库连接驱动,而mysql-connector-j对于字符集utf-8的解释会映射为utf8mb4格式,进而更好的支持Unicode特殊字符比如 Emoji 表情等
读取配置文件信息
properties格式
properties配置文件
- 同样的代码需要多次写,会不方便
格式:key.value
# 应用服务 WEB 访问端口
server.port=8080
# MySQL数据库连接
spring.datasource.url=jdbc:mysql://127.0.0.1:3306/my_db&?useUnicode=true&characterEncoding=UTF-8&userSSL=true&serverTimezone=GMT%2B8
spring.datasource.name=root
spring.datasource.password=flzxsqc
# MySQL8.x加cj
spring.datasource.driver-class-name=com.mysql.cj.jdbc.Driver

# 用户自定义配置
config.customer.str1=hello
yaml格式
yaml格式配置文件
- 类似于JSON格式,可读性高,写法简单易理解
- 支持的数据类型众多【数组、散列表】
- 支持的编程语言更多【PHP、Python、JavaScript】
格式:key: value
注意: key 和 value 之间使用英文冒号加空格形式组成,其中空格不能省略
# 应用服务 WEB 访问端口
server:
  port: 8080

# MySQL数据库连接

# 用户自定义配置
spring:
  datasource:
    #    MySQL8.x要加上cj
    driver-class-name: com.mysql.cj.jdbc.Driver
    name: root
    password: flzxsqc
    url: jdbc:mysql://127.0.0.1:3306/my_db?useUnicode=true&characterEncoding=UTF-8&useSSL=true&serverTimezone=GMT%2B8

# 用户自定义配置
config:
  customer:
    # 字符串【只有双引号才会被解析】
    str1: hello world
    str2: hello \n world
    str3: 'hello \n world'
    str4: "hello \n world"
    # 整数
    num1: 3
    # 浮点数
    float1: 3.1415926
    # Null【~代表null】
    null1: ~

# 对象
student:
  id: 1
  name: "张三"
  age: 23

student2: { id: 2, name: "李四", age: 24 }

# 集合
mylist:
  dbtypes:
    - mysql
    - oracle
    - sqlserver

mylist2: { dbtypes: [ mysql2, oracle2, sqlserver2 ] }
yml配置文件中如果使用双引号修饰了字符,那么其中的特殊字符就会生成对应的效果比如 \n 换行符
读取基础数据
把properties文件注释掉,只读取yaml文件数据
采用@Value注解读取配置文件中基础数据类型
前端页面效果【被转为了JSON字符串】
Java代码如下
package app.controller;

import app.model.MyList;
import app.model.Student;
import org.springframework.beans.factory.annotation.Autowired;
import org.springframework.boot.context.properties.ConfigurationProperties;
import org.springframework.web.bind.annotation.RestController;
import org.springframework.web.bind.annotation.GetMapping;
import org.springframework.beans.factory.annotation.Value;

import java.util.ArrayList;
import java.util.List;

@RestController
public class TestController {
    // 读取用户自定义配置信息
    @Value("${config.customer.str1}")
    private String config_customer_str1;
    @Value("${config.customer.str2}")
    private String config_customer_str2;
    @Value("${config.customer.str3}")
    private String config_customer_str3;
    @Value("${config.customer.str4}")
    private String config_customer_str4;
    @Value("${config.customer.num1}")
    private Integer config_customer_num1;
    @Value("${config.customer.float1}")
    private float config_customer_float1;
    @Value("${config.customer.null1}")
    private Object config_customer_null1;
    // 读取系统的配置项
    @Value("${server.port}")
    private String server_port;

    @GetMapping("/config")
    public List<Object> readConfig() {
        List<Object> config = new ArrayList<>();
        config.add(config_customer_str1);
        config.add(config_customer_str2);
        config.add(config_customer_str3);
        config.add(config_customer_str4);
        config.add(config_customer_num1);
        config.add(config_customer_float1);
        config.add(config_customer_null1);
        config.add(server_port);
        System.out.println(config);
        return config;
    }
}
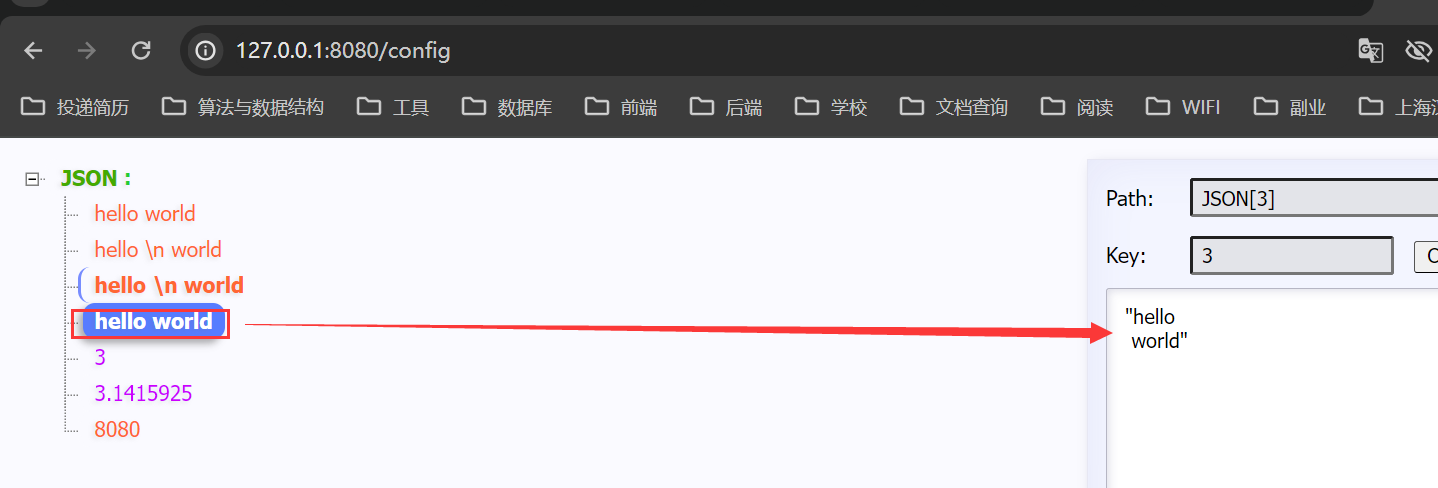
控制台输出效果

读取对象
@ConfigurationProperties 对于配置文件中的赋值依赖 getter 和 setter 方法,缺少之后就会无法启动项目
# 对象
student:
  id: 1
  name: "张三"
  age: 23
# 类似于js的行内写法也可以读取到
student2: {id: 2, name: "李四", age: 24}
Java代码如下
构造对象
package app.model;

import lombok.AllArgsConstructor;
import lombok.Data;
import lombok.NoArgsConstructor;
import org.springframework.boot.context.properties.ConfigurationProperties;
import org.springframework.stereotype.Component;

@Data
@AllArgsConstructor
@NoArgsConstructor
@Component
@ConfigurationProperties(prefix = "student") // 将配置文件中 student 配置赋值给当前对象
public class Student {
    private Integer id;
    private String name;
    private Integer age;
}
读取对象
package app.controller;

import app.model.Student;
import org.springframework.beans.factory.annotation.Autowired;
import org.springframework.web.bind.annotation.RestController;
import org.springframework.web.bind.annotation.GetMapping;

import java.util.ArrayList;
import java.util.List;

@RestController
public class TestController {
    // 读取对象
    private final Student student;

    @Autowired
    public TestController(Student student) {
        this.student = student;
    }

    @GetMapping("/config")
    public List<Object> readConfig() {
        List<Object> config = new ArrayList<>();
        config.add(student);
        System.out.println(config);
        return config;
    }
}
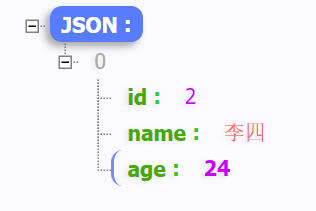
读取集合
构造集合
package app.model;

import lombok.Data;
import org.springframework.boot.context.properties.ConfigurationProperties;
import org.springframework.stereotype.Component;

import java.util.List;

@Data
@Component
@ConfigurationProperties(prefix = "mylist2")
public class MyList {
    private List<String> dbtypes;
}
读取集合
package app.controller;

import app.model.MyList;
import org.springframework.beans.factory.annotation.Autowired;
import org.springframework.web.bind.annotation.RestController;
import org.springframework.web.bind.annotation.GetMapping;

import java.util.ArrayList;
import java.util.List;

@RestController
public class TestController {
    // 读取集合
    private MyList myList;

    @Autowired
    public TestController(MyList myList) {
        this.myList = myList;
    }

    @GetMapping("/config")
    public List<Object> readConfig() {
        List<Object> config = new ArrayList<>();
        config.add(myList);
        System.out.println(config);
        return config;
    }
}
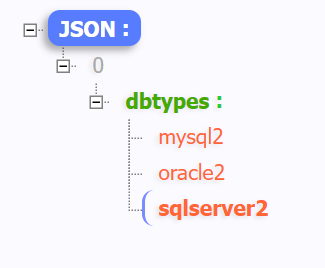
多环境配置
多平台的配置文件明明也有格式要求,其中 application-xxx.yml是固定的,xxx 是可以随意修改的。一般来说:dev是开发环境;prod是生产环境;test是测试环境
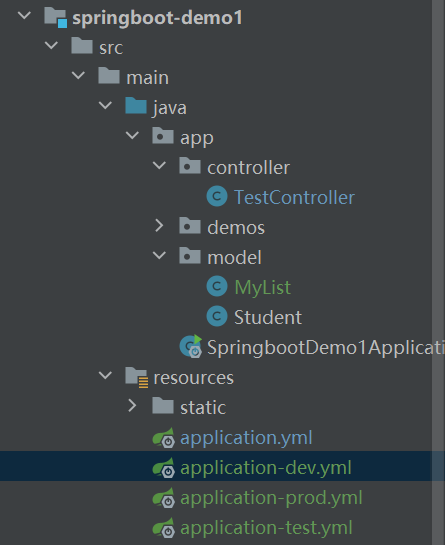
在 application.yml 中管理配置文件
这样就会在项目启动时读取dev中配置
#配置文件管理
spring:
  profiles:
    active: dev





![[机器学习]K-means——聚类算法](https://img-blog.csdnimg.cn/direct/cfe264aecec147118f4418f5794bff14.png)
