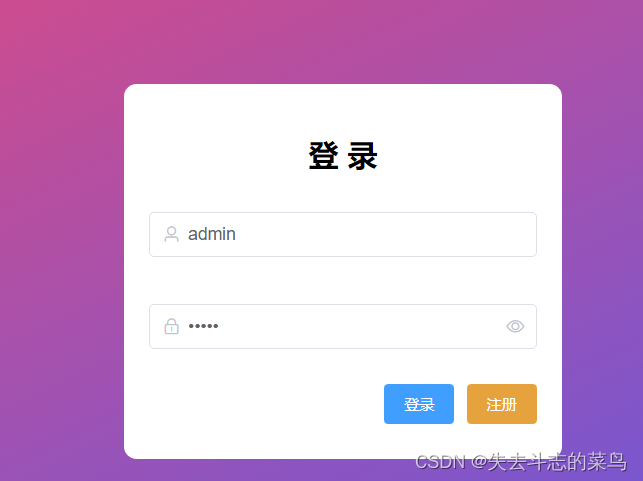
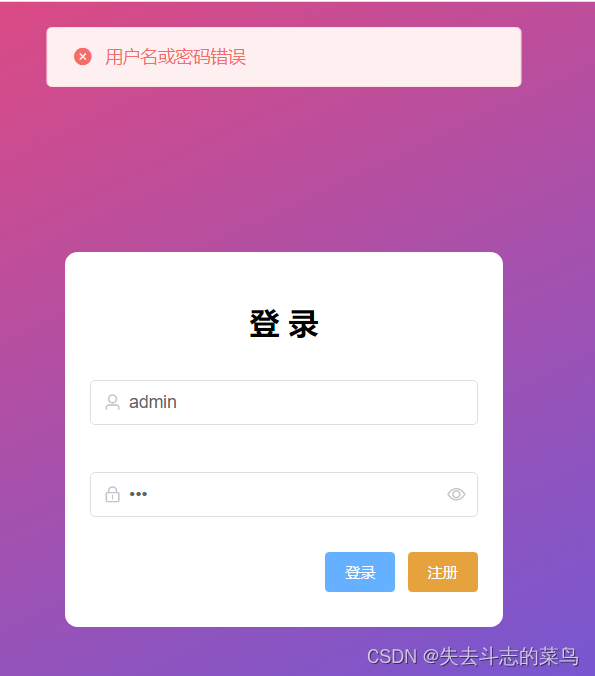
前端代码
Login.vue
注意:el-form必须写 :model 否则无法使用表单校验功能
<el-form-item>不能少
<template>
  <div class="wrapper">
    <div style="margin: 200px auto; background-color: #fff; width: 350px; height: 300px; padding: 20px; border-radius: 10px">
      <div style="margin: 20px 0; text-align: center; font-size: 24px"><b>登 录</b></div>
      <el-form :model="user" :rules="rules" ref="userForm">
        <el-form-item prop="username">
          <el-input size="medium" style="margin: 10px 0" prefix-icon="el-icon-user" v-model="user.username"></el-input>
        </el-form-item>
        <el-form-item prop="password">
          <el-input size="medium" style="margin: 10px 0" prefix-icon="el-icon-lock" show-password v-model="user.password"></el-input>
        </el-form-item>
        <el-form-item style="margin: 10px 0; text-align: right">
          <el-button type="primary" size="small"  autocomplete="off" @click="login">登录</el-button>
          <el-button type="warning" size="small"  autocomplete="off">注册</el-button>
        </el-form-item>
      </el-form>
    </div>
  </div>
</template>

<script>
export default {
  name: "Login",
  data() {
    return {
      user: {},
      rules: {
        username: [
          { required: true, message: '请输入用户名', trigger: 'blur' },
          { min: 3, max: 10, message: '长度在 3 到 5 个字符', trigger: 'blur' }
        ],
        password: [
          { required: true, message: '请输入密码', trigger: 'blur' },
          { min: 1, max: 20, message: '长度在 1 到 20 个字符', trigger: 'blur' }
        ],
      }
    }
  },
  methods: {
    login() {
      this.$refs['userForm'].validate((valid) => {
        if (valid) {  // 表单校验合法
          this.request.post("/user/login", this.user).then(res => {
            if(!res) {
              this.$message.error("用户名或密码错误")
            } else {
              this.$router.push("/")
            }
          })
        } else {
          return false;
        }
      });
    }
  }
}
</script>

<style>
  .wrapper {
    height: 100vh;
    background-image: linear-gradient(to bottom right, #FC466B , #3F5EFB);
    overflow: hidden;
  }
</style>
Header.vue
<template>
  <div style="line-height: 60px; display: flex">
    <div style="flex: 1;">
      <span :class="collapseBtnClass" style="cursor: pointer; font-size: 18px" @click="collapse"></span>

      <el-breadcrumb separator="/" style="display: inline-block; margin-left: 10px">
        <el-breadcrumb-item :to="'/'">首页</el-breadcrumb-item>
        <el-breadcrumb-item>{{ currentPathName }}</el-breadcrumb-item>
      </el-breadcrumb>
    </div>
    <el-dropdown style="width: 150px; cursor: pointer; text-align: right">
      <div style="display: inline-block">
        <img :src="user.avatarUrl" alt=""
             style="width: 30px; border-radius: 50%; position: relative; top: 10px; right: 5px">
        <span>{{ user.nickname }}</span><i class="el-icon-arrow-down" style="margin-left: 5px"></i>
      </div>
      <el-dropdown-menu slot="dropdown" style="width: 100px; text-align: center">
        <el-dropdown-item style="font-size: 14px; padding: 5px 0">
          <router-link to="/person">个人信息</router-link>
        </el-dropdown-item>
        <el-dropdown-item style="font-size: 14px; padding: 5px 0">
          <router-link to="/login" style="text-decoration: none">退出</router-link>
        </el-dropdown-item>
      </el-dropdown-menu>
    </el-dropdown>
  </div>
</template>

<script>
export default {
  name: "Header",
  props: {
    collapseBtnClass: String,
    user: Object
  },
  computed: {
    currentPathName () {
      return this.$store.state.currentPathName;  //需要监听的数据
    }
  },
  data() {
    return {

    }
  },
  methods: {
    collapse() {
      // this.$parent.$parent.$parent.$parent.collapse()  // 通过4个 $parent 找到父组件,从而调用其折叠方法
      this.$emit("asideCollapse")
    },
    logout() {
      this.$store.commit("logout")
      this.$message.success("退出成功")
    }
  }
}
</script>

<style scoped>
</style>
后台代码
在controller包下新建UserDTO保存传输来的登录用户信息
为了区分被管理的实体类以及输入的用户类
UserDTO.java
package com.qingge.springboot.controller.dto;

import lombok.Data;

/**
 * 接受前端登录请求的参数
 */
@Data
public class UserDTO {
    private String username;
    private String password;
}
UserController.java
在Controller里创建登录接口,并且调用该实体类,以及登录方法,
    /**
     * 登录界面
     */
    @PostMapping("/login")
    public boolean login(@RequestBody UserDTO userDTO)
    {
        String username = userDTO.getUsername();
        String password = userDTO.getPassword();
        //判断用户名和密码是否为空[HUTOOL工具包]
        //一般这一步前端也会加校验
        if(StrUtil.isBlank(username) || StrUtil.isBlank(password))
        {
            return false;
        }
        return userService.login(userDTO);
    }
按ALT+ENTER去Service创建login服务

IUserService.java
public interface IUserService extends IService<User> {

    boolean login(UserDTO userDTO);
}

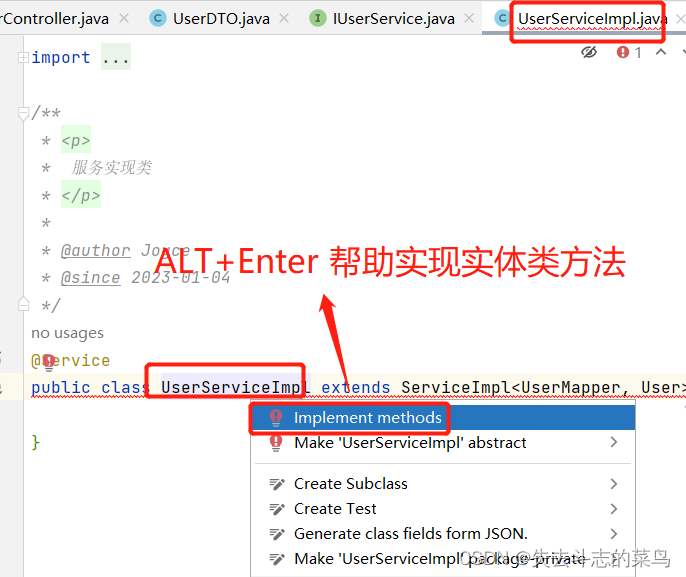
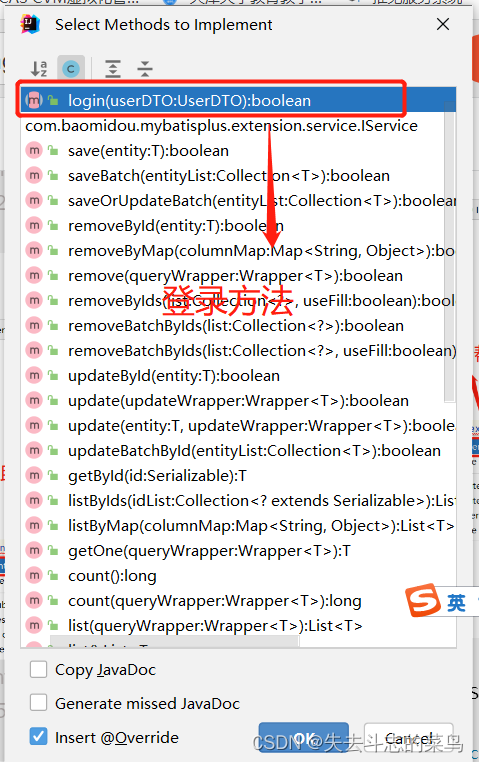
生成的代码如下:
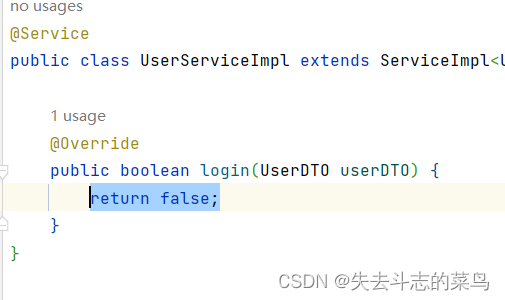
UserServiceImpl.java
具体服务编写:采用Mybatis-plus里的QueryWrapper
@Service
public class UserServiceImpl extends ServiceImpl<UserMapper, User> implements IUserService {

    private static final Log LOG = Log.get();

    @Override
    public boolean login(UserDTO userDTO) {
        QueryWrapper<User> queryWrapper = new QueryWrapper<>();
        queryWrapper.eq("username", userDTO.getUsername());
        queryWrapper.eq("password", userDTO.getPassword());
        // 处理异常情况
        try {
            User one = getOne(queryWrapper);
            return one != null;
        } catch (Exception e) {
            LOG.error(e);
            return false;
        }
    }

}
测试
