学习aloam框架中前端对于点云部分的预处理和点面特征提取。
这些功能在scanRegistration.cpp部分实现,所以也是对于这个源码的学习。
一、main函数
从main函数开始分析。
首先整个完整的main函数内容:
int main(int argc, char **argv)
{
    ros::init(argc, argv, "scanRegistration");
    ros::NodeHandle nh;

    nh.param<int>("scan_line", N_SCANS, 16);

    nh.param<double>("minimum_range", MINIMUM_RANGE, 0.1);

    printf("scan line number %d \n", N_SCANS);

    if(N_SCANS != 16 && N_SCANS != 32 && N_SCANS != 64)
    {
        printf("only support velodyne with 16, 32 or 64 scan line!");
        return 0;
    }

    ros::Subscriber subLaserCloud = nh.subscribe<sensor_msgs::PointCloud2>("/velodyne_points", 100, laserCloudHandler);

    pubLaserCloud = nh.advertise<sensor_msgs::PointCloud2>("/velodyne_cloud_2", 100);

    pubCornerPointsSharp = nh.advertise<sensor_msgs::PointCloud2>("/laser_cloud_sharp", 100);

    pubCornerPointsLessSharp = nh.advertise<sensor_msgs::PointCloud2>("/laser_cloud_less_sharp", 100);

    pubSurfPointsFlat = nh.advertise<sensor_msgs::PointCloud2>("/laser_cloud_flat", 100);

    pubSurfPointsLessFlat = nh.advertise<sensor_msgs::PointCloud2>("/laser_cloud_less_flat", 100);

    pubRemovePoints = nh.advertise<sensor_msgs::PointCloud2>("/laser_remove_points", 100);

    if(PUB_EACH_LINE)
    {
        for(int i = 0; i < N_SCANS; i++)
        {
            ros::Publisher tmp = nh.advertise<sensor_msgs::PointCloud2>("/laser_scanid_" + std::to_string(i), 100);
            pubEachScan.push_back(tmp);
        }
    }
    ros::spin();

    return 0;
}
ros节点初始化和句柄初始化跳过,接下来是两个参数服务器的设置:
    nh.param<int>("scan_line", N_SCANS, 16);

    nh.param<double>("minimum_range", MINIMUM_RANGE, 0.1);
这里是根据launch文件里面设置的"scan_line"和"minimum_range"两个参数的设置,分别设置为16线和0.1m。
然后是对于lidar只能是16、32、64线,否则不会继续执行。
ros::Subscriber subLaserCloud = nh.subscribe<sensor_msgs::PointCloud2>("/velodyne_points", 100, laserCloudHandler);这里是订阅到了topic名为"/velodyne_points",然后进入回调函数laserCloudHandler进行处理。
    pubLaserCloud = nh.advertise<sensor_msgs::PointCloud2>("/velodyne_cloud_2", 100);

    pubCornerPointsSharp = nh.advertise<sensor_msgs::PointCloud2>("/laser_cloud_sharp", 100);

    pubCornerPointsLessSharp = nh.advertise<sensor_msgs::PointCloud2>("/laser_cloud_less_sharp", 100);

    pubSurfPointsFlat = nh.advertise<sensor_msgs::PointCloud2>("/laser_cloud_flat", 100);

    pubSurfPointsLessFlat = nh.advertise<sensor_msgs::PointCloud2>("/laser_cloud_less_flat", 100);

    pubRemovePoints = nh.advertise<sensor_msgs::PointCloud2>("/laser_remove_points", 100);
接下来是发布部分,
pubLaserCloud是发布原始点云;
pubCornerPointsSharp是发布曲率大的角点点云;
pubCornerPointsLessSharp是发布曲率小一些的角点点云;
pubSurfPointsFlat是发布面点点云;
pubSurfPointsLessFlat是发布曲率更小面点点云;
pubRemovePoints是发布移除的点云。
    if(PUB_EACH_LINE)
    {
        for(int i = 0; i < N_SCANS; i++)
        {
            ros::Publisher tmp = nh.advertise<sensor_msgs::PointCloud2>("/laser_scanid_" + std::to_string(i), 100);
            pubEachScan.push_back(tmp);
        }
    }
这里是根据laser_scanid发布不同id的点云,不过PUB_EACH_LINE默认设置的是false,所以这一段并不会执行。
main函数写的比较简单,接下来分析核心部分laserCloudHandler回调函数。
二、点云预处理部分
首先看函数removeClosedPointCloud:
template <typename PointT>
void removeClosedPointCloud(const pcl::PointCloud<PointT> &cloud_in,
                              pcl::PointCloud<PointT> &cloud_out, float thres)
{
    if (&cloud_in != &cloud_out)
    {
        cloud_out.header = cloud_in.header;
        cloud_out.points.resize(cloud_in.points.size());
    }

    size_t j = 0;

    for (size_t i = 0; i < cloud_in.points.size(); ++i)
    {
        if (cloud_in.points[i].x * cloud_in.points[i].x + cloud_in.points[i].y * cloud_in.points[i].y +
           cloud_in.points[i].z * cloud_in.points[i].z < thres * thres)
            continue;
        cloud_out.points[j] = cloud_in.points[i];
        j++;
    }
    if (j != cloud_in.points.size())
    {
        cloud_out.points.resize(j);
    }

    cloud_out.height = 1;
    cloud_out.width = static_cast<uint32_t>(j);
    cloud_out.is_dense = true;
}
它的主要作用是根据设置的参数thres,实际执行中是MINIMUM_RANGE来剔除小于这个距离内过于靠近的点云,起到一个简单的降采样的作用。
    if (&cloud_in != &cloud_out)
    {
        cloud_out.header = cloud_in.header;
        cloud_out.points.resize(cloud_in.points.size());
    }
这是在很多pcl库函数里面都会有的操作,在对于点云进行处理的时候,会设定一个cloud_in,一个cloud_out分别代表原始点云和经过函数处理后的点云。这一步的作用是将原始点云的head信息赋值给新点云,并根据原始点云的点云数量给新点云设定相同的数量,方便下面的处理。
    size_t j = 0;

    for (size_t i = 0; i < cloud_in.points.size(); ++i)
    {
        if (cloud_in.points[i].x * cloud_in.points[i].x + cloud_in.points[i].y * cloud_in.points[i].y +
            cloud_in.points[i].z * cloud_in.points[i].z < thres * thres)
            continue;
        cloud_out.points[j] = cloud_in.points[i];
        j++;
    }
    if (j != cloud_in.points.size())
    {
        cloud_out.points.resize(j);
    }
这里是函数功能的实现部分,设定一个计数器j,它的作用是记录符合降采样条件的点云的数量。然后使用for-if-continue来实现筛选功能,并将符合条件的点云赋值给新设定的点云并且j++。最后的if是为了确定新的点云的数量。
    cloud_out.height = 1;
    cloud_out.width = static_cast<uint32_t>(j);
    cloud_out.is_dense = true;
这里最开始是让我很迷惑的部分,后来查询pcl中关于height和width的定义就明白了。
- width (int)
用点云数据集中的点数初始化width,width其实有两个含义:
(1)对于无组织或者说无结构的点云来说,width就是指点云中点的个数。
(2) 对于有结构的点云来说,width是指点云数据集一行上点的个数。有结构的点云可以理解成这个点云像image(或者说是一个矩阵)一样进行组织,数据被分为行和列,如立体相机或者TOF相机获得的点云数据就属于这一类。对于有结构点云的一大好处就是能知道点云中点的相邻关系,最近邻操作效率就非常高,可以大大提高PCL中相应算法的效率。
例:cloud.width = 640; // there are 640 points per line- height (int)
用点云数据集中点的高度(就是行数)初始化height,height同样有两个函数:
(1)对于有结构点云来说,height代表点云的总行数
(2)对于无结构的点云来说,height值为1,因此这也经常用来判断点云是或者不是一个有结构的点云。
它原来设定height是指的是lidar的线数信息,现在统一设置成1,然后width设置成了点云的个数,是将点云原来的结构拆散了,为后面从新划分scan做准备。
然后是核心的laserCloudHandler部分分析(太长了,放个缩写版):
void laserCloudHandler(const sensor_msgs::PointCloud2ConstPtr &laserCloudMsg)
{
    ......
}
if (!systemInited)
{
systemInitCount++;
if (systemInitCount >= systemDelay)
{
systemInited = true;
}
else
return;
}这里是设置的等待时间,在最开始默认设置了systemInited为false,等待回调函数进行处理,但好像只等待了一个数?可能是根跑的包有关系。
    TicToc t_whole;
    TicToc t_prepare;
    std::vector<int> scanStartInd(N_SCANS, 0);
    std::vector<int> scanEndInd(N_SCANS, 0);
两个时间对象不做分析然后是定义了两个vector容器,分别记录了每一个scan的开始的点云的index和结束的index,根据N_SCANS来确定size大小。
    pcl::PointCloud<pcl::PointXYZ> laserCloudIn;
    pcl::fromROSMsg(*laserCloudMsg, laserCloudIn);
    std::vector<int> indices;

    pcl::removeNaNFromPointCloud(laserCloudIn, laserCloudIn, indices);
    removeClosedPointCloud(laserCloudIn, laserCloudIn, MINIMUM_RANGE);
这里是创建了一个pcl格式的点云laserCloudIn,然后将ros格式的点云转化为pcl格式的点云通过pcl库函数pcl::fromROSMsg。之后也是通过pcl库函数pcl::removeNaNFromPointCloud来移除点云中的NaN点,最后就是通过前面定义的removeClosedPointCloud函数来筛选掉十分接近的点。
接下来就开始了计算每个点的角度,有两个角度,一个是在每个scan中的角度用来确定时间,还有一个是包含z周的夹角用来确定scan。
    int cloudSize = laserCloudIn.points.size();
    float startOri = -atan2(laserCloudIn.points[0].y, laserCloudIn.points[0].x);
    float endOri = -atan2(laserCloudIn.points[cloudSize - 1].y,
                          laserCloudIn.points[cloudSize - 1].x) +
                   2 * M_PI;

    if (endOri - startOri > 3 * M_PI)
    {
        endOri -= 2 * M_PI;
    }
    else if (endOri - startOri < M_PI)
    {
        endOri += 2 * M_PI;
    }
首先是用cloudSize来记录所有点云的数量。之后就是关于点云开始角度和结束角度的计算,在这里卡了很久,之前一直不能理解为什么这样写。在查找了atan2函数,机械式lidar旋转方式后才有点点理解了。首先明确的是aloam源码判定lidar是顺时针旋转的(右手坐标系),然后atan2值域是(-pi,pi]的,有了这两个前提就好理解一些。
关于atan2函数,它算出来的是弧度值,如果是正数,表示的是它在x正方向周上方或者左边离x轴正方向的弧度值,如果是负数,表示的是它在x轴下方或者是右边离x轴正方向的弧度值。然后参数是y在前,x在后。
如下图所示(不太会用ubuntu绘图):
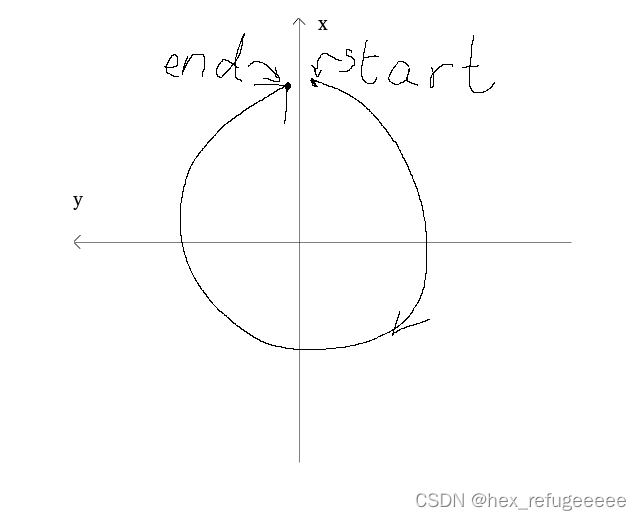
一般设定x轴向上从x轴右边开始顺时针转到x轴左边。所以按角度来描述这个旋转的过程是这样的(以x轴为界):
x轴的右边[-0,-180];
x轴的左边[180, 0];
这样子很不好计算,并且加大了他人阅读源码的难度。所以做了上面的处理,首先是都添加了负号,是它们变成了:
x轴的右边[0, +180];
x轴的左边[-180, -0];
然后又在end那边加了360度,然后就变成了
x轴的右边[0, +180];
x轴的左边[+180, +360];
这样就好理解多了,之后的计算也变容易了一些。
后面的判断是为了将角度限制在0-360之间,属于对于特殊情况的处理,一个是针对开始角度和结束角度过于接近,一个是开始角度和结束角度过于远离。知道有这么个情况就好了。
    bool halfPassed = false;
    int count = cloudSize;
    PointType point;
    std::vector<pcl::PointCloud<PointType>> laserCloudScans(N_SCANS);
这里是对于后面的for循环处理点云进行的准备工作,确定了一个point的对象,一个vector容器它按照线数初始化size,根据不同的scan来存储点云。
    for (int i = 0; i < cloudSize; i++)
    {
        point.x = laserCloudIn.points[i].x;
        point.y = laserCloudIn.points[i].y;
        point.z = laserCloudIn.points[i].z;

        float angle = atan(point.z / sqrt(point.x * point.x + point.y * point.y)) * 180 / M_PI;
        int scanID = 0;
首先将每一个点云赋值给point对象,然后计算它的俯仰角度,之后会根据这个俯仰角划分scan。
        if (N_SCANS == 16)
        {
            scanID = int((angle + 15) / 2 + 0.5);
            if (scanID > (N_SCANS - 1) || scanID < 0)
            {
                count--;
                continue;
            }
        }
        else if (N_SCANS == 32)
        {
            scanID = int((angle + 92.0/3.0) * 3.0 / 4.0);
            if (scanID > (N_SCANS - 1) || scanID < 0)
            {
                count--;
                continue;
            }
        }
        else if (N_SCANS == 64)
        {
            if (angle >= -8.83)
                scanID = int((2 - angle) * 3.0 + 0.5);
            else
                scanID = N_SCANS / 2 + int((-8.83 - angle) * 2.0 + 0.5);

            // use [0 50]  > 50 remove outlies
            if (angle > 2 || angle < -24.33 || scanID > 50 || scanID < 0)
            {
                count--;
                continue;
            }
        }
        else
        {
            printf("wrong scan number\n");
            ROS_BREAK();
        }
这里是根据不同的线数来划分,因为使用的是16线的所以只用16这个来分析。
16线激光lidar中俯仰角是-15到15度?记不太清了。所以先加15度让它变成正的,再除以2并+0.5来使它变成正整数。如果算出来的scan小于0或者大于15就跳过,并且count--。
 float ori = -atan2(point.y, point.x);
        if (!halfPassed)
        {
            if (ori < startOri - M_PI / 2)
            {
                ori += 2 * M_PI;
            }
            else if (ori > startOri + M_PI * 3 / 2)
            {
                ori -= 2 * M_PI;
            }

            if (ori - startOri > M_PI)
            {
                halfPassed = true;
            }
        }
        else
        {
            ori += 2 * M_PI;
            if (ori < endOri - M_PI * 3 / 2)
            {
                ori += 2 * M_PI;
            }
            else if (ori > endOri + M_PI / 2)
            {
                ori -= 2 * M_PI;
            }
}这一部分是计算每个点的水平角度,halfPassed的作用是判断是否旋转过半?这里设置是为了确定-pi/2 < ori - startOri < 3*pi/2,但我现在还不知道为什么这样设置,网上也没有找到解释。然后过了一半后就用end角来进行计算,不知道是在哪里确定的这个范围。。。
        float relTime = (ori - startOri) / (endOri - startOri);
        point.intensity = scanID + scanPeriod * relTime;
        laserCloudScans[scanID].push_back(point);
计算每个点的时间系数,利用点的角度和整个角度对比求解占比。scanPeriod是默认值,算的是lidar旋转一周的时间是0.1s。然后整数部分就是scanID,小数部分是点关于时间的系数。最后将它们按照不同的scanID存储进来了。
    cloudSize = count;
    printf("points size %d \n", cloudSize);
根据上面计算得到的count来更新cloudSize,并输出。
    pcl::PointCloud<PointType>::Ptr laserCloud(new pcl::PointCloud<PointType>());
    for (int i = 0; i < N_SCANS; i++)
    {
        scanStartInd[i] = laserCloud->size() + 5;
        *laserCloud += laserCloudScans[i];
        scanEndInd[i] = laserCloud->size() - 6;
    }

    printf("prepare time %f \n", t_prepare.toc());
新创建了一个点云laserCloud用来存储之后的去除前面5个点和后面6个点的点云。这里可以将i从0开始一直计算到15就明白了。
这个就是点云预处理部分的内容,主要完成了过滤点云,按不同的scan区分点云,并且收集点云的时间占比。
三、点面特征提取
这部分主要内容是对于点线面特征的提取。
    cloudSize = count;
    printf("points size %d \n", cloudSize);

    pcl::PointCloud<PointType>::Ptr laserCloud(new pcl::PointCloud<PointType>());
    for (int i = 0; i < N_SCANS; i++)
    {
        scanStartInd[i] = laserCloud->size() + 5;
        *laserCloud += laserCloudScans[i];
        scanEndInd[i] = laserCloud->size() - 6;
    }
因为论文中对于曲率的计算是前五个点和后五个点取平均值,所以去除最开始的五个点和最末尾的五个点,方便计算。具体实现也比较好理解,通过一个新的laserCloud对象累加每个不同的scan的点云。然后使用两个存储index的vector来记录每个scan开始和结束的index。
    for (int i = 5; i < cloudSize - 5; i++)
    {
        float diffX = laserCloud->points[i - 5].x + laserCloud->points[i - 4].x + laserCloud->points[i - 3].x + laserCloud->points[i - 2].x + laserCloud->points[i - 1].x - 10 * laserCloud->points[i].x + laserCloud->points[i + 1].x + laserCloud->points[i + 2].x + laserCloud->points[i + 3].x + laserCloud->points[i + 4].x + laserCloud->points[i + 5].x;
        float diffY = laserCloud->points[i - 5].y + laserCloud->points[i - 4].y + laserCloud->points[i - 3].y + laserCloud->points[i - 2].y + laserCloud->points[i - 1].y - 10 * laserCloud->points[i].y + laserCloud->points[i + 1].y + laserCloud->points[i + 2].y + laserCloud->points[i + 3].y + laserCloud->points[i + 4].y + laserCloud->points[i + 5].y;
        float diffZ = laserCloud->points[i - 5].z + laserCloud->points[i - 4].z + laserCloud->points[i - 3].z + laserCloud->points[i - 2].z + laserCloud->points[i - 1].z - 10 * laserCloud->points[i].z + laserCloud->points[i + 1].z + laserCloud->points[i + 2].z + laserCloud->points[i + 3].z + laserCloud->points[i + 4].z + laserCloud->points[i + 5].z;

        cloudCurvature[i] = diffX * diffX + diffY * diffY + diffZ * diffZ;
        cloudSortInd[i] = i;
        cloudNeighborPicked[i] = 0;
        cloudLabel[i] = 0;
    }
开始计算曲率,分别计算x,y,z的十个点的差值,然后存储到cloudCurvature里面去,同时记录cloudSortInd索引值,用于后来的排序。最后两个是标志位。
    pcl::PointCloud<PointType> cornerPointsSharp;
    pcl::PointCloud<PointType> cornerPointsLessSharp;
    pcl::PointCloud<PointType> surfPointsFlat;
    pcl::PointCloud<PointType> surfPointsLessFlat;
定义了四个对象分别是:
cornerPointsSharp表示曲率很大的角点;
cornerPointsLessSharp表示曲率小的角点;
surfPointsFlat表示平坦的面点;
surfPointsLessFlat表示不那么平坦的面点。
float t_q_sort = 0;
    for (int i = 0; i < N_SCANS; i++)
    {
        if( scanEndInd[i] - scanStartInd[i] < 6)
            continue;
        pcl::PointCloud<PointType>::Ptr surfPointsLessFlatScan(new pcl::PointCloud<PointType>);
        for (int j = 0; j < 6; j++)
        {
            int sp = scanStartInd[i] + (scanEndInd[i] - scanStartInd[i]) * j / 6;
            int ep = scanStartInd[i] + (scanEndInd[i] - scanStartInd[i]) * (j + 1) / 6 - 1;

            TicToc t_tmp;
            std::sort (cloudSortInd + sp, cloudSortInd + ep + 1, comp);

......
这部分主要作用是对每个scan进行划分,划分6个部分。首先如果一个scan中的点小于6个则直接跳过。然后就是对于怎么划分6部分进行具体的实现,使用一个for循环,创建了一个sp和一个ep。其中sp用来记录每个scan的一个部分开始的index,ep记录每个scan的一个部分结束的index。最后使用sort函数对前面存储好的点云进行排序。
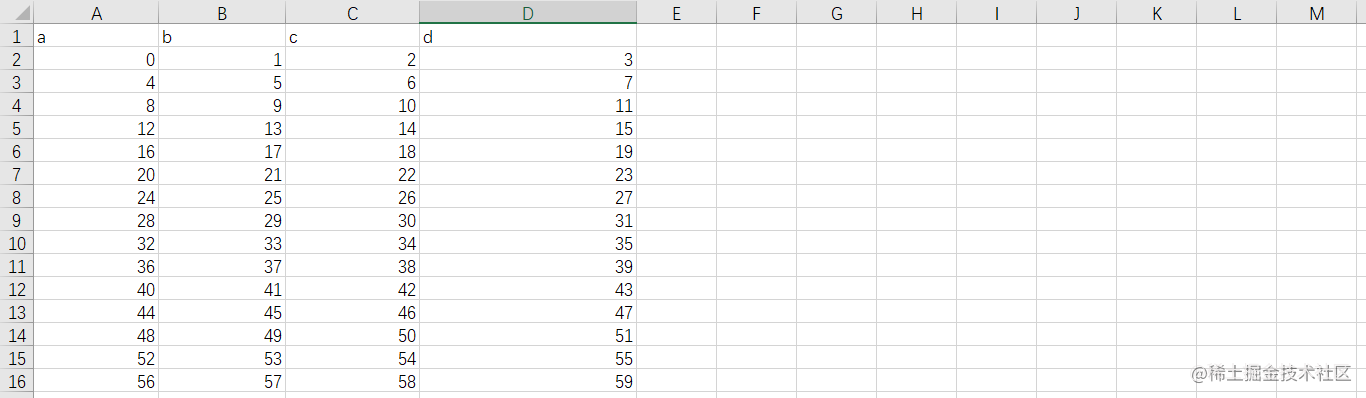
关键的来了,我之前一直理解是针对曲率的数组进行排序,越想越觉得不合逻辑。你都排序了要之前的index干什么?后来仔细阅读的代码,发现它居然是根据曲率的大小对记录那个曲率的index值进行排序。经过自己编写代码测试验证了这个想法,作者真是厉害!
自己编写的代码如下:
#include <cmath>
#include <iostream>
#include <algorithm>

using namespace std;

int a[5] = {5,3,6,4,1};
int b[5] ={1,2,3,4,5};
bool comp(int i, int j)
{
    return a[i] < a[j];
}
int main()
{
    sort(b, b + 5, comp);
    for(auto i : a)
        cout << i << "  ";
    cout << endl;
    for(auto i : b)
        cout << i << " ";
    cout << endl;
    return 0;
}
输出结果:
a[] :5 3 6 4 1
b[]:5 4 1 3 2
            for (int k = ep; k >= sp; k--)
            {
                int ind = cloudSortInd[k];

                if (cloudNeighborPicked[ind] == 0 &&
                    cloudCurvature[ind] > 0.1)
                {

                    largestPickedNum++;
                    if (largestPickedNum <= 2)
                    {
                        cloudLabel[ind] = 2;
                        cornerPointsSharp.push_back(laserCloud->points[ind]);
                        cornerPointsLessSharp.push_back(laserCloud->points[ind]);
                    }
                    else if (largestPickedNum <= 20)
                    {
                        cloudLabel[ind] = 1;
                        cornerPointsLessSharp.push_back(laserCloud->points[ind]);
                    }
                    else
                    {
                        break;
                    }
在cloudSortInd数组里面的index都是经过排序的所以当取最后面的ep的时候是对应最大曲率的index值。然后根据之前计算曲率的时候写入的标志位数组进行判断,并且去0.1作为角点和面点的划分,大于0.1的划分为角点,小于0.1的划分为面点。通过if判断后,首先将largestPickedNum自增,如果largestPickedNum小于2,将这个点云标志为曲率最大的两个点,并将它存如cornerPointsSharp和cornerPointsLessSharp这两个容器中。同理也有20这个数量进行判断,标志为1,存入cornerPointsLessSharp这个容器中。
                    cloudNeighborPicked[ind] = 1;

                    for (int l = 1; l <= 5; l++)
                    {
                        float diffX = laserCloud->points[ind + l].x - laserCloud->points[ind + l - 1].x;
                        float diffY = laserCloud->points[ind + l].y - laserCloud->points[ind + l - 1].y;
                        float diffZ = laserCloud->points[ind + l].z - laserCloud->points[ind + l - 1].z;
                        if (diffX * diffX + diffY * diffY + diffZ * diffZ > 0.05)
                        {
                            break;
                        }

                        cloudNeighborPicked[ind + l] = 1;
                    }
                    for (int l = -1; l >= -5; l--)
                    {
                        float diffX = laserCloud->points[ind + l].x - laserCloud->points[ind + l + 1].x;
                        float diffY = laserCloud->points[ind + l].y - laserCloud->points[ind + l + 1].y;
                        float diffZ = laserCloud->points[ind + l].z - laserCloud->points[ind + l + 1].z;
                        if (diffX * diffX + diffY * diffY + diffZ * diffZ > 0.05)
                        {
                            break;
                        }

                        cloudNeighborPicked[ind + l] = 1;
                    }
                }
            }
然后就将这个点标志位置1表示,已经挑选过了。后面的两个for循环是为了防止找到的特征点过于集中,就准备将被挑选中的点附近的点全部置1,这里面的if判断的作用是为了防止原本lidar数据中相邻的两个点实际上是距离特别远的点,所有设置了一个0.05的阈值,超过0.05说明是距离很远的点,就直接break跳出就行了。
            int smallestPickedNum = 0;
            for (int k = sp; k <= ep; k++)
            {
                int ind = cloudSortInd[k];

                if (cloudNeighborPicked[ind] == 0 &&
                    cloudCurvature[ind] < 0.1)
                {

                    cloudLabel[ind] = -1;
                    surfPointsFlat.push_back(laserCloud->points[ind]);

                    smallestPickedNum++;
                    if (smallestPickedNum >= 4)
                    {
                        break;
                    }

                    cloudNeighborPicked[ind] = 1;
                    for (int l = 1; l <= 5; l++)
                    {
                        float diffX = laserCloud->points[ind + l].x - laserCloud->points[ind + l - 1].x;
                        float diffY = laserCloud->points[ind + l].y - laserCloud->points[ind + l - 1].y;
                        float diffZ = laserCloud->points[ind + l].z - laserCloud->points[ind + l - 1].z;
                        if (diffX * diffX + diffY * diffY + diffZ * diffZ > 0.05)
                        {
                            break;
                        }

                        cloudNeighborPicked[ind + l] = 1;
                    }
                    for (int l = -1; l >= -5; l--)
                    {
                        float diffX = laserCloud->points[ind + l].x - laserCloud->points[ind + l + 1].x;
                        float diffY = laserCloud->points[ind + l].y - laserCloud->points[ind + l + 1].y;
                        float diffZ = laserCloud->points[ind + l].z - laserCloud->points[ind + l + 1].z;
                        if (diffX * diffX + diffY * diffY + diffZ * diffZ > 0.05)
                        {
                            break;
                        }

                        cloudNeighborPicked[ind + l] = 1;
                    }
                }
            }
这部分的代码类似,只不过是挑选曲率比较小的点,所以从sp开始。具体的实现和上一段代码的原理相同,选取的是面点。
            for (int k = sp; k <= ep; k++)
            {
                if (cloudLabel[k] <= 0)
                {
                    surfPointsLessFlatScan->push_back(laserCloud->points[k]);
                }
            }
        }
这里就是对这一部分(1/6)的所有点进行遍历,如果label值小于0直接认定为surPointsLessFlatScan容器内的点,就是说,除了角点都是面点。
        pcl::PointCloud<PointType> surfPointsLessFlatScanDS;
        pcl::VoxelGrid<PointType> downSizeFilter;
        downSizeFilter.setInputCloud(surfPointsLessFlatScan);
        downSizeFilter.setLeafSize(0.2, 0.2, 0.2);
        downSizeFilter.filter(surfPointsLessFlatScanDS);

        surfPointsLessFlat += surfPointsLessFlatScanDS;
这部分就是对于前面收集到surPointsLessFlatScan容器里面的点进行体素滤波降采样,因为平坦的点太多了。最后的结果放在了surfPointLessFlat里面。
    sensor_msgs::PointCloud2 laserCloudOutMsg;
    pcl::toROSMsg(*laserCloud, laserCloudOutMsg);
    laserCloudOutMsg.header.stamp = laserCloudMsg->header.stamp;
    laserCloudOutMsg.header.frame_id = "/camera_init";
    pubLaserCloud.publish(laserCloudOutMsg);

    sensor_msgs::PointCloud2 cornerPointsSharpMsg;
    pcl::toROSMsg(cornerPointsSharp, cornerPointsSharpMsg);
    cornerPointsSharpMsg.header.stamp = laserCloudMsg->header.stamp;
    cornerPointsSharpMsg.header.frame_id = "/camera_init";
    pubCornerPointsSharp.publish(cornerPointsSharpMsg);

    sensor_msgs::PointCloud2 cornerPointsLessSharpMsg;
    pcl::toROSMsg(cornerPointsLessSharp, cornerPointsLessSharpMsg);
    cornerPointsLessSharpMsg.header.stamp = laserCloudMsg->header.stamp;
    cornerPointsLessSharpMsg.header.frame_id = "/camera_init";
    pubCornerPointsLessSharp.publish(cornerPointsLessSharpMsg);

    sensor_msgs::PointCloud2 surfPointsFlat2;
    pcl::toROSMsg(surfPointsFlat, surfPointsFlat2);
    surfPointsFlat2.header.stamp = laserCloudMsg->header.stamp;
    surfPointsFlat2.header.frame_id = "/camera_init";
    pubSurfPointsFlat.publish(surfPointsFlat2);

    sensor_msgs::PointCloud2 surfPointsLessFlat2;
    pcl::toROSMsg(surfPointsLessFlat, surfPointsLessFlat2);
    surfPointsLessFlat2.header.stamp = laserCloudMsg->header.stamp;
    surfPointsLessFlat2.header.frame_id = "/camera_init";
    pubSurfPointsLessFlat.publish(surfPointsLessFlat2);

    // pub each scam
    if(PUB_EACH_LINE)
    {
        for(int i = 0; i< N_SCANS; i++)
        {
            sensor_msgs::PointCloud2 scanMsg;
            pcl::toROSMsg(laserCloudScans[i], scanMsg);
            scanMsg.header.stamp = laserCloudMsg->header.stamp;
            scanMsg.header.frame_id = "/camera_init";
            pubEachScan[i].publish(scanMsg);
        }
    }
最后这部分就是将分别处理好的角点和面点转化为ros格式并发布出去。那个if里面的条件默认是false所以并没有发布。
四、总结
scanRegistration.cpp主要是点云预处理包括剔除不合要求的点云以及针对不同曲率要求的点云选取并发布出去。华为天才少年名不虚传,不光逻辑思维缜密,coding能力也很强,向大佬学习。