文章目录
- 1.安装并配置Hive
- 处理hive中文乱码
- 2.Hive基本操作
- 3.将本地文件导入Hive
- 练习1
- 练习2
1.安装并配置Hive
-
下载
-
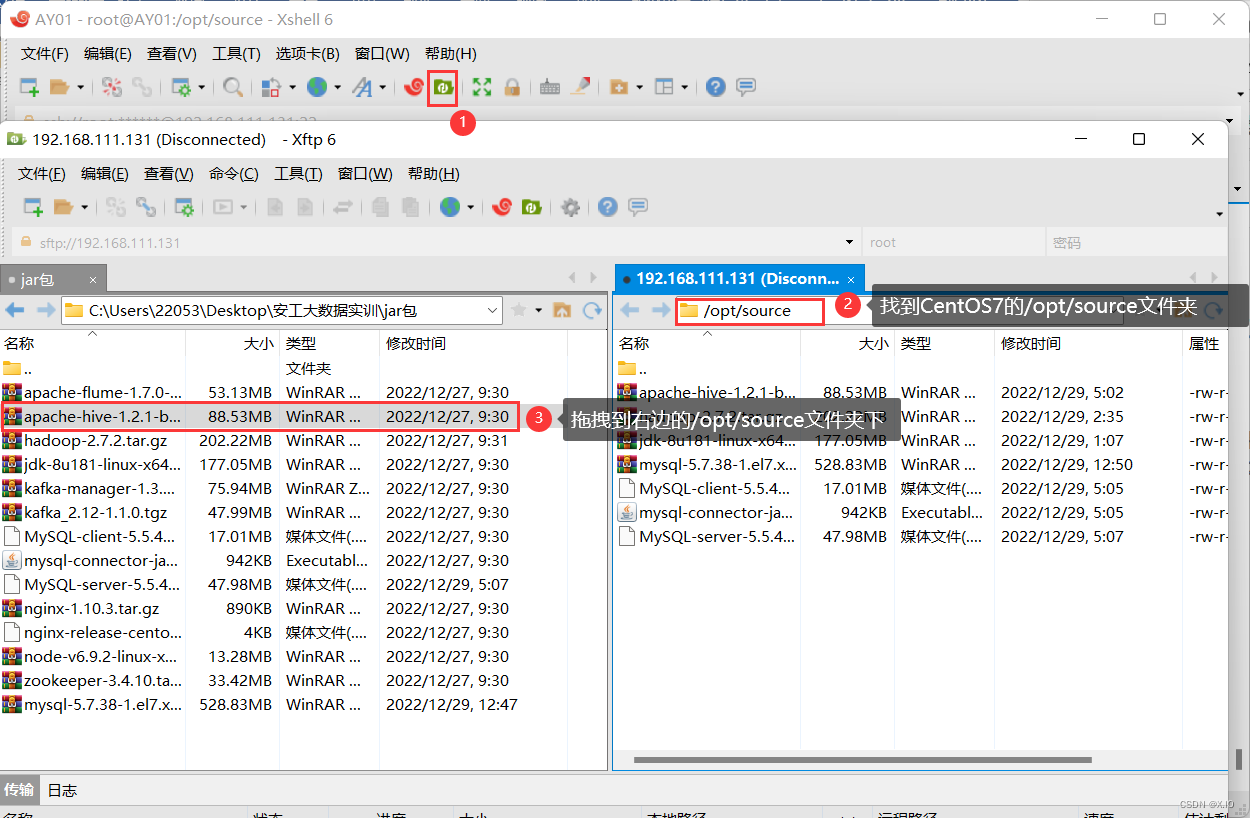
利用Xshell中的xftp,将apache-hive导入到CentOS7的/opt/source文件夹下
-
解压
·解压命令:tar -zxvf apache-hive-1.2.1-bin.tar.gz
·重命名:mv apache-hive-1.2.1-bin hive-1.2.1
·移动到/opt/module目录下:mv hive-1.2.1 ../module


-
配置hive-env.sh文件
·修改/opt/module/hive-1.2.1/conf下的hive-env.sh文件
 /opt/module/hive-1.2.1/conf下没有hive-env.sh文件,但有个hive-env.sh.template文件,把hive-env.sh.template文件复制一份,并把复制的文件命名为:hive-env.sh
  命令:cp hive-env.sh.template hive-env.sh
同理(依次进行以下操作):
	cd /hive-1.2.1/conf
	cp hive-env.sh.template hive-env.sh
	cp hive-default.xml.template hive-site.xml
	cp hive-log4j.properties.template hive-log4j.properties
	cp hive-exec-log4j.properties.template hive-exec-log4j.properties

 ·配置hive-env.sh文件
 	1)配置HADOOP_HOME路径:
 		export HADOOP_HOME=/opt/module/hadoop-2.7.2
 	2)配置HIVE_CONF_DIR路径:
 		export HIVE_CONF_DIR=/opt/module/hive-1.2.1/conf

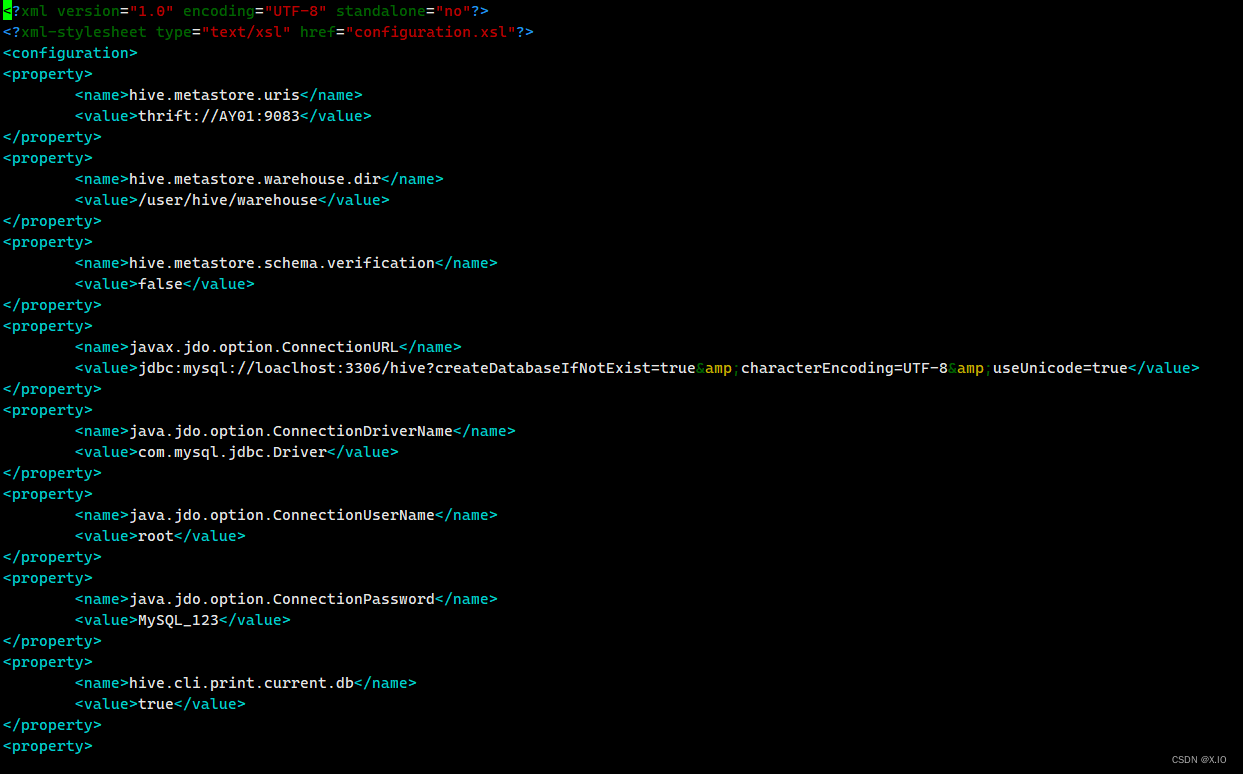
·修改hive-site.xml文件
<?xml version="1.0" encoding="UTF-8" standalone="no"?>
<?xml-stylesheet type="text/xsl" href="configuration.xsl"?>
·配置hive-env.sh文件配置前:

配置后:

·修改hive-site.xml文件
修改前(保留前两行,其他删除重写):
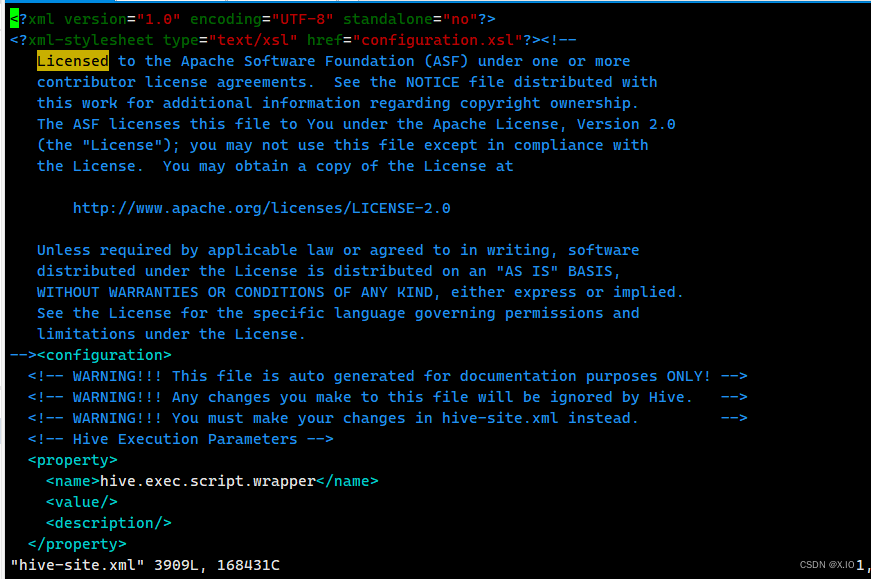
修改后:
-
添加mysql驱动包
如果本机有mysql的驱动jar包,就直接拷贝到hive的安装目下的lib目录。 -
配置hive环境变量
·vim /etc/profile 末尾添加如下内容: export HIVE_HOME=/opt/module/hive-1.2.1 export PATH=$PATH:$HIVE_HOME/bin ·使环境变量生效: source /etc/profile -
初始化元数据库
schematool -dbType mysql -initSchema

处理hive中文乱码
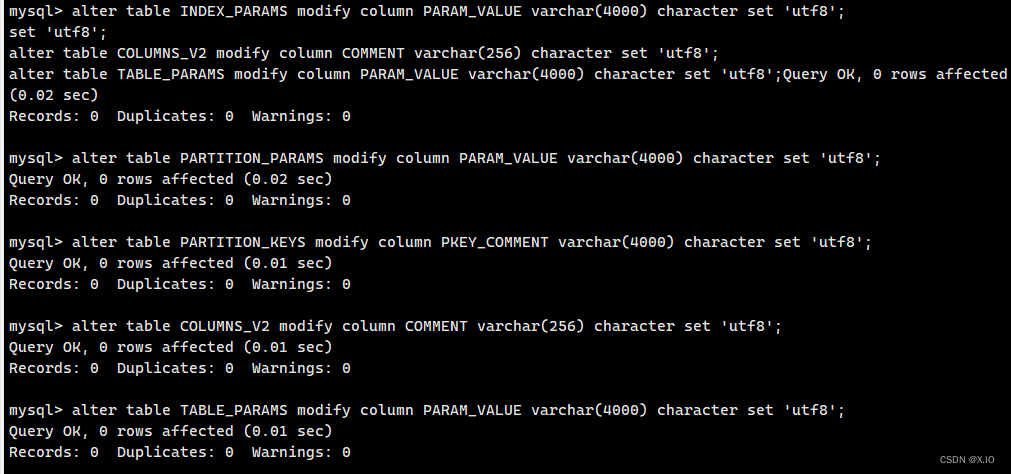
进入数据库中执行以下5条SQL语句:
alter table INDEX_PARAMS modify column PARAM_VALUE varchar(4000) character set 'utf8';
alter table PARTITION_PARAMS modify column PARAM_VALUE varchar(4000) character set 'utf8';
alter table PARTITION_KEYS modify column PKEY_COMMENT varchar(4000) character set 'utf8';
alter table COLUMNS_V2 modify column COMMENT varchar(256) character set 'utf8';
alter table TABLE_PARAMS modify column PARAM_VALUE varchar(4000) character set 'utf8';
执行完后,重启MySQL服务
2.Hive基本操作
准备工作:
	1.确保hadoop正常运行
	2.确保mysql正常运行
	3.确保jdk正常安装
-
启动hive
·hive --service metastore &
·启动命令:hive
-
查看数据库
·查看命令:show databases;
-
打开默认数据库
命令:use default; -
显示default数据库中的表
命令:show tables;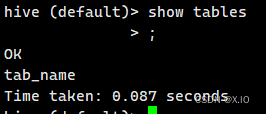
-
创建一张表
命令:create table student(id int,name string);
-
显示数据库中有几张表
命令:show tables
-
查看表的结构
命令:desc student;
-
向表中插入数据
命令:insert into student values(1000,"ss");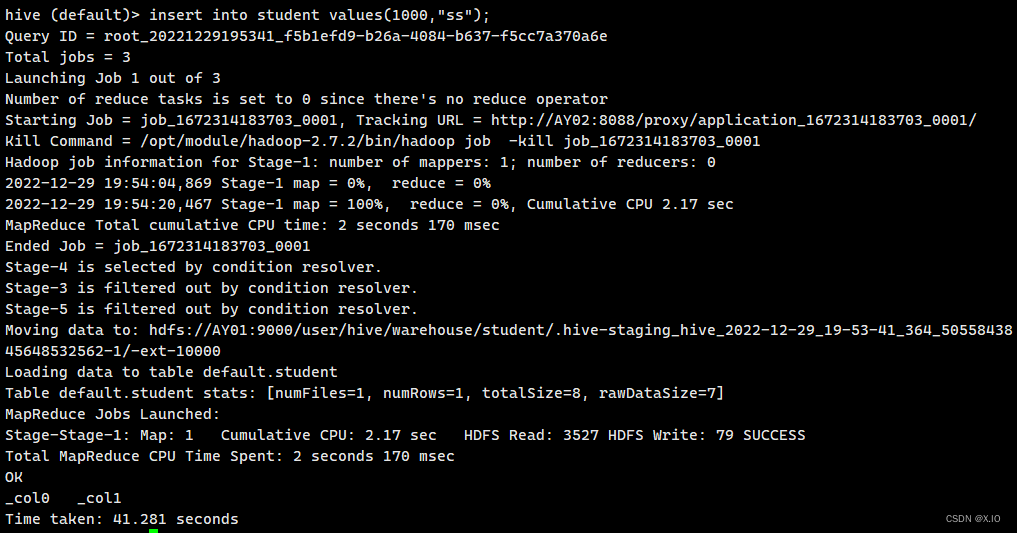
-
查询表中数据
命令:select * from student;
-
退出hive
命令:quit;
3.将本地文件导入Hive
需求:将本地/opt/module/datas/students.txt 这个目录下的数据导入到hive的student(id int,name string)表中。
-
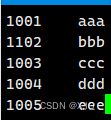
数据准备:在/opt/module/datas/student.txt 这个目录下准备数据
说明:student.txt的字段格式要与Hive数据库中student表中的字段一致。1)在/opt/module/目录下创建datas 2)在/opt/module/datas/目录下创建student.txt文件并添加数据。 依次执行如下命令: cd /opt/module mkdir datas cd datas touch student.txt vi student.txt 输入具体内容如下(注意以tab键间隔): 1001 aaa 1102 bbb 1003 ccc 1004 ddd 1005 eee
-
hive实际操作
1)启动hive:hive
2)显示数据库:showdatabases;
3)使用default数据库:use default;
4)显示default数据库中的表:show tables;
5)删除已创建的student表:drop table student;
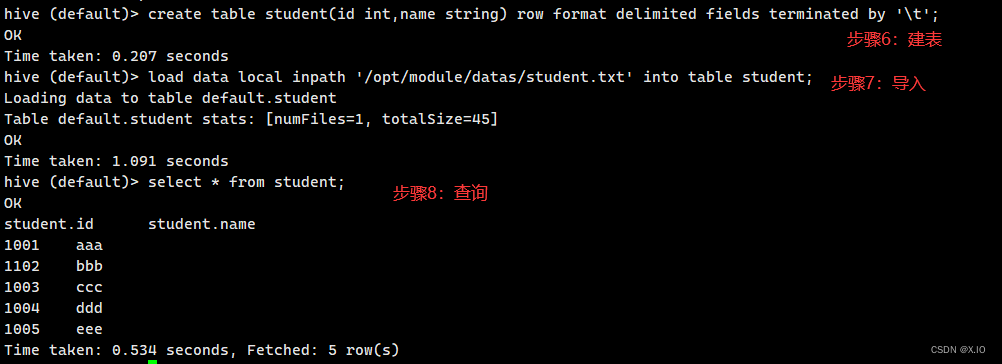
6)创建student表,并声明文件分隔符' \t':create table student(id int,name string) row format delimited fields terminated by '\t';
7)加载/opt/module/datas/student.txt文件到student数据库表中:load data local inpath '/opt/module/datas/student.txt' into table student;
8)Hive查询结果:select * from student;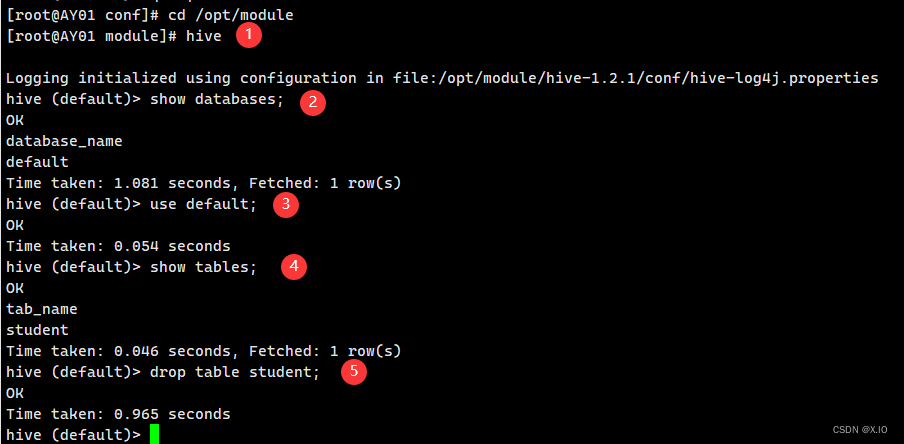
练习1
本机准备一个数据文件/opt/module/datas/data.txt,数据内容:

创建测试数据库:
create database test;
使用新的数据库:
use test;
创建hero表:
create table hero(id int,name string,work string) row format delimited fields terminated by ',';
往表中加载数据:
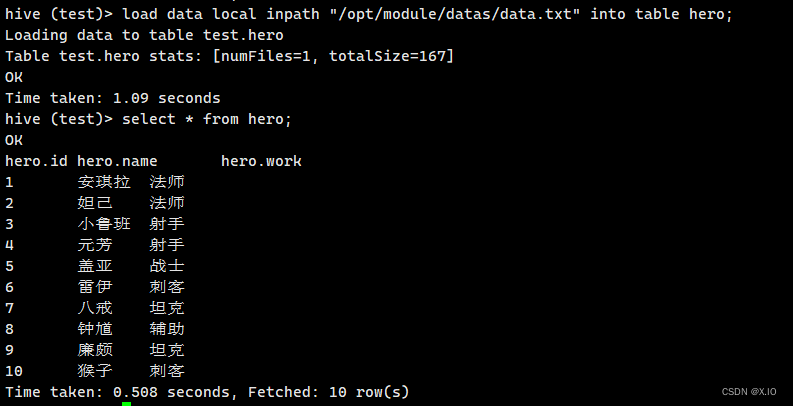
load data local inpath "/opt/module/datas/data.txt" into table hero;
查询数据:
select * from hero;
练习2
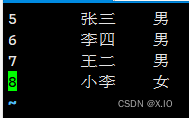
- 本机准备一个数据文件/opt/module/datas/data1.txt,数据内容:
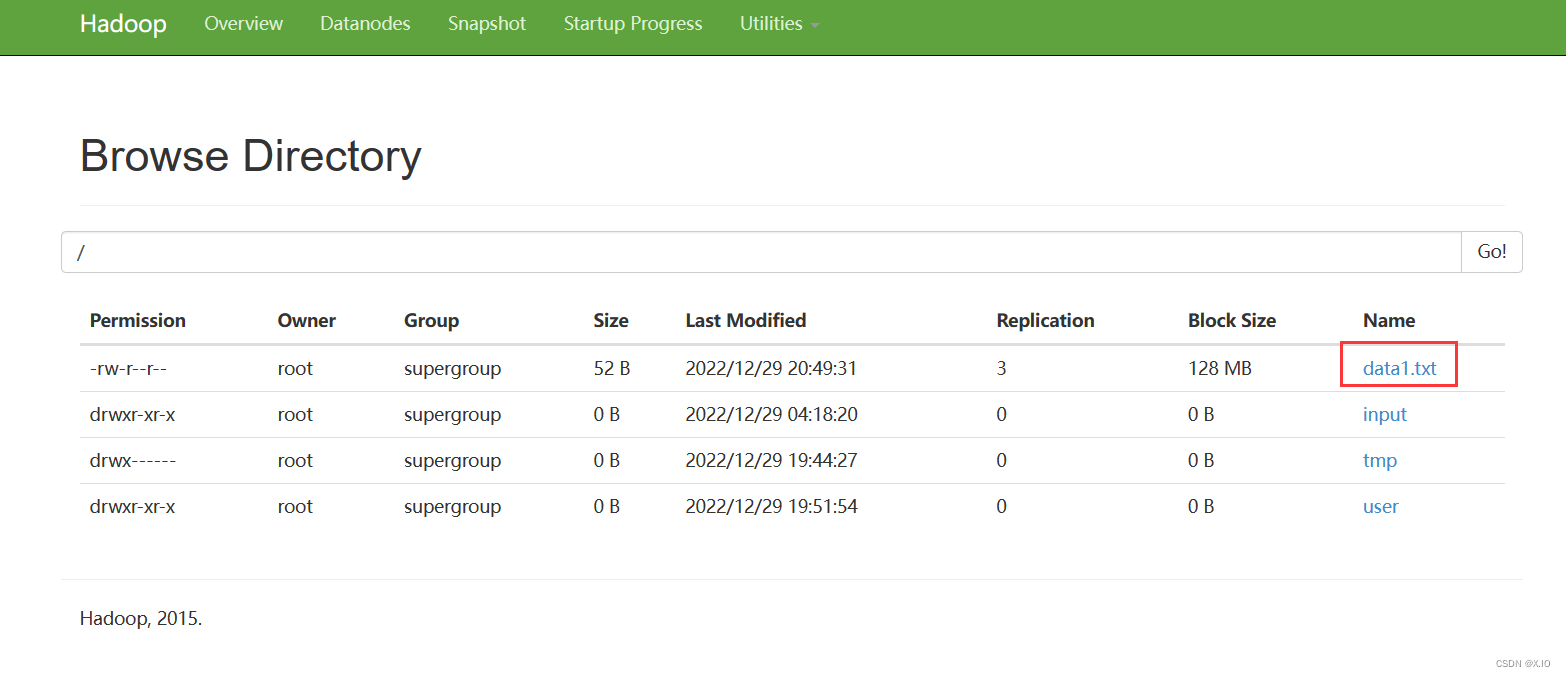
- 将data1.txt数据上传到HDFS(在hadoop-2.7.2的bin目录下执行以下命令)
· cd /opt/module/hadoop-2.7.2/bin
· hdfs dfs -put /opt/module/datas/data1.txt /
- 创建studet1表
hive
use test
create table student1(id int,name string,sex string) row format delimited fields terminated by '\t';
- 把hdfs中的data1.txt数据加载到student1表中
load data inpath '/data1.txt' into table student1;
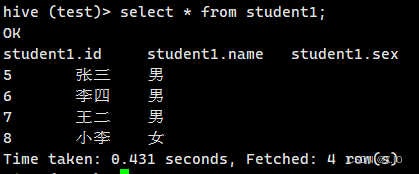
- 查询数据
select * from student1;




![[Java]泛型](https://img-blog.csdnimg.cn/5c630826be8e44ad8db884e7e485696a.png)

