工作需求要求threeJS渲染一个模型以供可视化大屏展示,抛出模型精度不谈,只说业务实现
1.Three.JS的引入
ThreeJS官网地址:Three.js – JavaScript 3D Library
查看文档
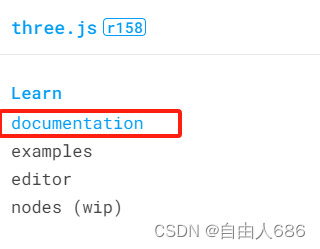
中文切换及安装创建步骤
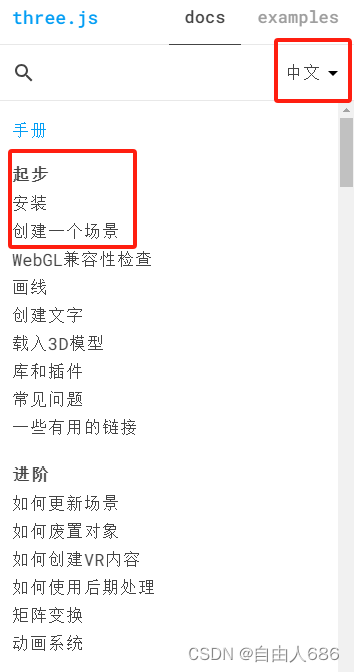
如果是自己研究学习用的,在官网安装完后,直接在-创建一个场景-里面直接copy代码玩就行了
如果是业务需求相关,希望快速构建一个简单的模型模块看下一页
2.封装模型模块
第一步先引入模块相关的threeJS模块
import * as THREE from 'three';

// gltf文件装载器

import { GLTFLoader } from 'three/addons/loaders/GLTFLoader.js';

// 视图旋转控件

import { OrbitControls } from 'three/examples/jsm/controls/OrbitControls';
第二步构建一个class类并初始化constructor内的参数
class ThreeModel {
    constructor(GLTF, Dom) {
        this.glft = GLTF; // 模型文件
        this.Dom = Dom; // dom容器
        this.scene = new THREE.Scene(); // 实例化场景
        this.camera = new THREE.PerspectiveCamera(75, window.innerWidth / window.innerHeight, 0.1, 20000); // 实例化相机
        this.renderer = new THREE.WebGLRenderer(); // 实例化渲染器
        this.loader = new GLTFLoader(); // 实例化gltf装载器
        this.CameraPosition = {
            x: 0,
            y: 2600,
            z: 0
        }
    }
}
constructor内的参数分别为GLTF(引用的gltf格式模型文件)、Dom(挂载的dom元素)
我使用的vue2框架,调用该模块时须传入以下
import { ThreeModel } from "../three.js"

...

mounted() {
    const model_one = new ThreeModel('Texture/scene.gltf', this.$refs.box);
    model_one.init()
  }
接下来是类里面的初始化函数
    init() {
        this.renderer.setSize(window.innerWidth, window.innerHeight);
        this.Dom.appendChild(this.renderer.domElement);
        this.loader.load(
            this.glft,
            (gltf) => {
                const model = gltf.scene;
                // 创建一个Object3D对象
                const modelContainer = new THREE.Object3D();
                // 将模型的网格添加到Object3D对象中
                modelContainer.add(model);
                // 添加Object3D对象到场景中
                this.scene.add(modelContainer);
            },
            undefined,
            (err) => {
                console.log('报错', err)
            }
        )
        this.initControls();
        this.initLight();
        this.initCamera();
        const animate = () => {
            requestAnimationFrame(animate);
            // 在此处更新场景的其他内容
            this.renderer.render(this.scene, this.camera);
        }
        animate();

    }
初始化控制三维场景缩放和旋转的函数
    initControls() { //使用OrbitControls控制三维场景缩放和旋转等功能
        this.controls = new OrbitControls(this.camera, this.renderer.domElement);
        //动态阻尼系数 即鼠标拖拽旋转的灵敏度
        this.controls.dampingFactor = 0.25;
        // this.controls.target.set(0, 900, 0)
        // //上下旋转范围
        this.controls.minPolarAngle = 0;
        this.controls.maxPolarAngle = 1.5;
        this.controls.autoRotate = true;
        //惯性滑动,滑动大小默认0.25
        this.controls.dampingFactor = 0.25;
        //滚轮是否可控制zoom,zoom速度默认1
        //缩放倍数
        this.controls.zoomSpeed = 1.0;
        //最大最小相机移动距离(景深相机)
        this.controls.minDistance = 1;
        this.controls.maxDistance = Infinity;
        //水平方向视角限制
        this.minAzimuthAngle = -Math.PI * 2;
        this.maxAzimuthAngle = Math.PI * 2;
        this.controls.enabledPan = true;
        this.keyPanSpeed = 7.0;
    }
初始化光照函数
    initLight() { // 初始化光照
        let ambientLight = new THREE.AmbientLight(0x404040);
        this.scene.add(ambientLight);
        //定义灯,并设置位置
        this.light = new THREE.DirectionalLight(0x333333);
        this.light.position.set(60, 30, 40);
        this.light2 = new THREE.DirectionalLight(0xdddddd);
        this.light2.position.set(-20, 20, -20);
        this.scene.add(this.light);
        this.scene.add(this.light2);
    }
初始化相机函数
initCamera() {//初始化相机
        this.scene.scale.set(0.1, 0.1, 0.1)
        this.camera.position.set(0, this.CameraPosition.y, 0); // 设置相机位置,根据需求调整坐标
        this.camera.lookAt(1, 1, 5); // 设置相机观察的目标位置
    }
以下是完整代码
import * as THREE from 'three';
import { GLTFLoader } from 'three/addons/loaders/GLTFLoader.js';
// 视图旋转控件
import { OrbitControls } from 'three/examples/jsm/controls/OrbitControls';
// 拖拽控件
// import { DragControls } from 'three/examples/jsm/controls/DragControls';
class ThreeModel {
    constructor(GLTF, Dom) {
        this.glft = GLTF; // 模型文件
        this.Dom = Dom; // dom容器
        this.scene = new THREE.Scene(); // 实例化场景
        this.camera = new THREE.PerspectiveCamera(75, window.innerWidth / window.innerHeight, 0.1, 20000); // 实例化相机
        this.renderer = new THREE.WebGLRenderer(); // 实例化渲染器
        this.loader = new GLTFLoader(); // 实例化gltf装载器
        this.CameraPosition = {
            x: 0,
            y: 2600,
            z: 0
        }
    }
    init() {
        this.renderer.setSize(window.innerWidth, window.innerHeight);
        this.Dom.appendChild(this.renderer.domElement);
        this.loader.load(
            this.glft,
            (gltf) => {
                const model = gltf.scene;
                // 创建一个Object3D对象
                const modelContainer = new THREE.Object3D();
                // 将模型的网格添加到Object3D对象中
                modelContainer.add(model);
                // 添加Object3D对象到场景中
                this.scene.add(modelContainer);
            },
            undefined,
            (err) => {
                console.log('报错', err)
            }
        )
        this.initControls();
        this.initLight();
        this.initCamera();
        const animate = () => {
            requestAnimationFrame(animate);
            // 在此处更新场景的其他内容
            this.renderer.render(this.scene, this.camera);
        }
        animate();

    }
    initControls() { //使用OrbitControls控制三维场景缩放和旋转等功能
        this.controls = new OrbitControls(this.camera, this.renderer.domElement);
        //动态阻尼系数 即鼠标拖拽旋转的灵敏度
        this.controls.dampingFactor = 0.25;
        // this.controls.target.set(0, 900, 0)
        // //上下旋转范围
        this.controls.minPolarAngle = 0;
        this.controls.maxPolarAngle = 1.5;
        this.controls.autoRotate = true;
        //惯性滑动,滑动大小默认0.25
        this.controls.dampingFactor = 0.25;
        //滚轮是否可控制zoom,zoom速度默认1
        //缩放倍数
        this.controls.zoomSpeed = 1.0;
        //最大最小相机移动距离(景深相机)
        this.controls.minDistance = 1;
        this.controls.maxDistance = Infinity;
        //水平方向视角限制
        this.minAzimuthAngle = -Math.PI * 2;
        this.maxAzimuthAngle = Math.PI * 2;
        this.controls.enabledPan = true;
        this.keyPanSpeed = 7.0;
    }
    initLight() { // 初始化光照
        let ambientLight = new THREE.AmbientLight(0x404040);
        this.scene.add(ambientLight);
        //定义灯,并设置位置
        this.light = new THREE.DirectionalLight(0x333333);
        this.light.position.set(60, 30, 40);
        this.light2 = new THREE.DirectionalLight(0xdddddd);
        this.light2.position.set(-20, 20, -20);
        this.scene.add(this.light);
        this.scene.add(this.light2);
    }
    initCamera() {//初始化相机
        this.scene.scale.set(0.1, 0.1, 0.1)
        this.camera.position.set(0, this.CameraPosition.y, 0); // 设置相机位置,根据需求调整坐标
        this.camera.lookAt(1, 1, 5); // 设置相机观察的目标位置
    }
}
export { ThreeModel }
3.注意事项和说明
说明:
1.第三方模型文件要按照threeJS支持的格式要求
如图:
2.模型市场
推荐Explore 3D Models - Sketchfab
注意事项:
我使用的是vue项目,一定要将模型文件存放在public文件夹下,否则找不到或报引用错误
本人接触threeJS不多,该模块仅限于基础功能的使用,适用性较低,如果有懂的大佬希望评论或私信交流,如有错误请指出


