文章目录
- 🌺工具—postman
- ⭐作用
- 🏳️🌈安装
- 🎈创建工作空间
- 🎄简单参数
- ⭐原始方式
- 🎈我们建立springboot项目,输入下面的代码
- 🎈运行
- ⭐SpringBoot方式
- 🎄实体参数
- 🏳️🌈简单实体参数
- ⭐代码实现
- 🏳️🌈复杂实体参数
- ⭐代码实现
- 🎄数组集合参数
- ⭐使用数组来接收
- ⭐使用集合来接收
- 🎆小结
- 🎄日期参数
- 🎄路径参数
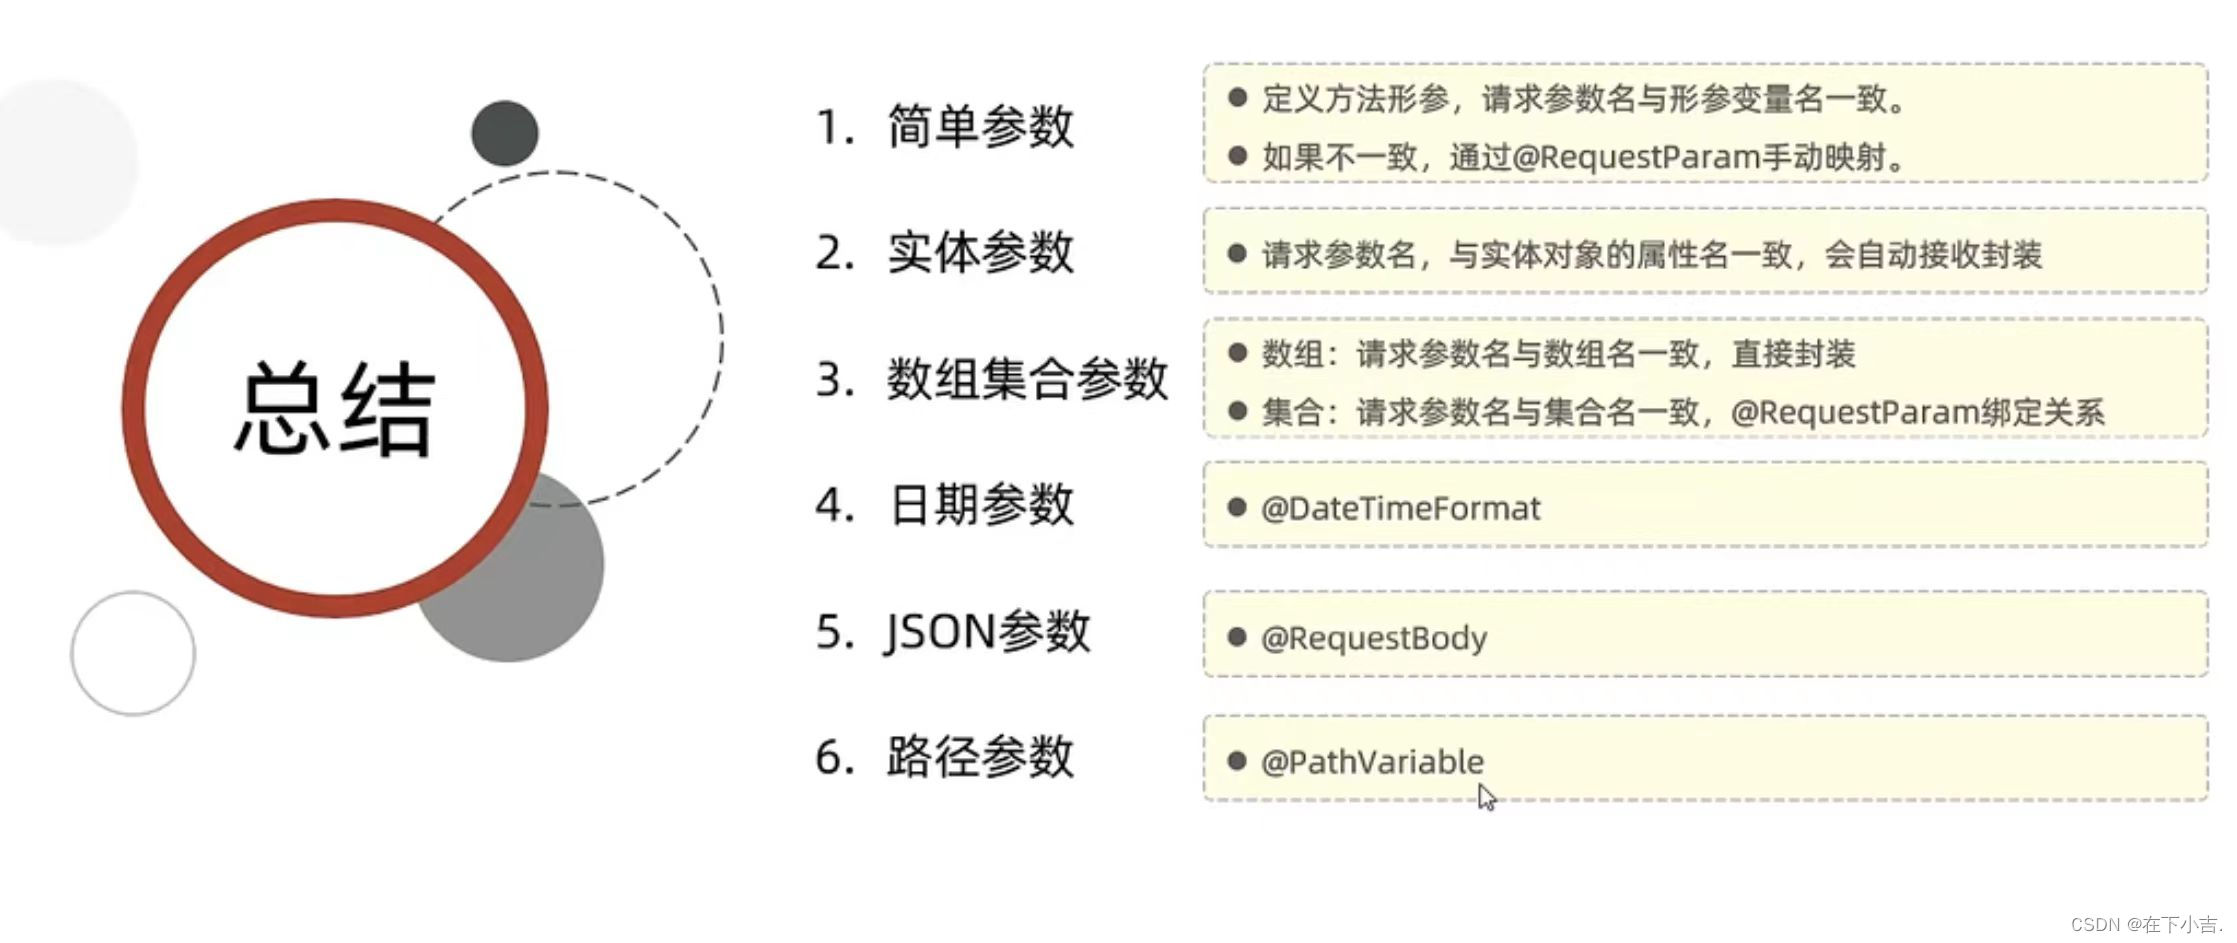
- 🥰总结
🌺工具—postman
postman是一款功能强大的网页调试与发送网页HTTP请求的Chrome插件
⭐作用
常用于进行接口测试
🏳️🌈安装
我把安装包传到网盘里面了,点击exe文件就可以下载,需要的同学请自取
链接
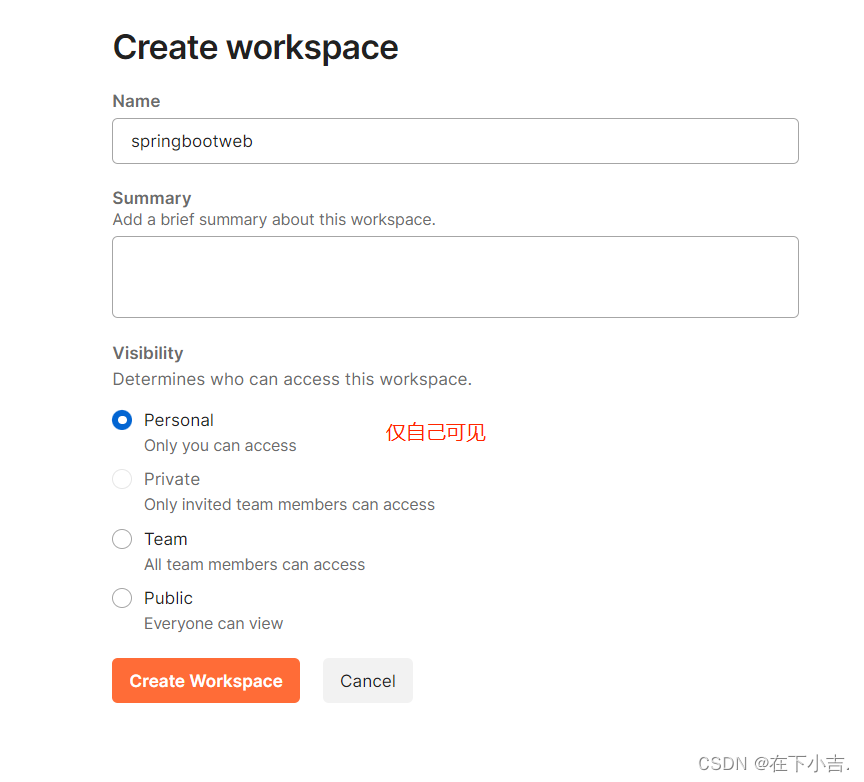
🎈创建工作空间
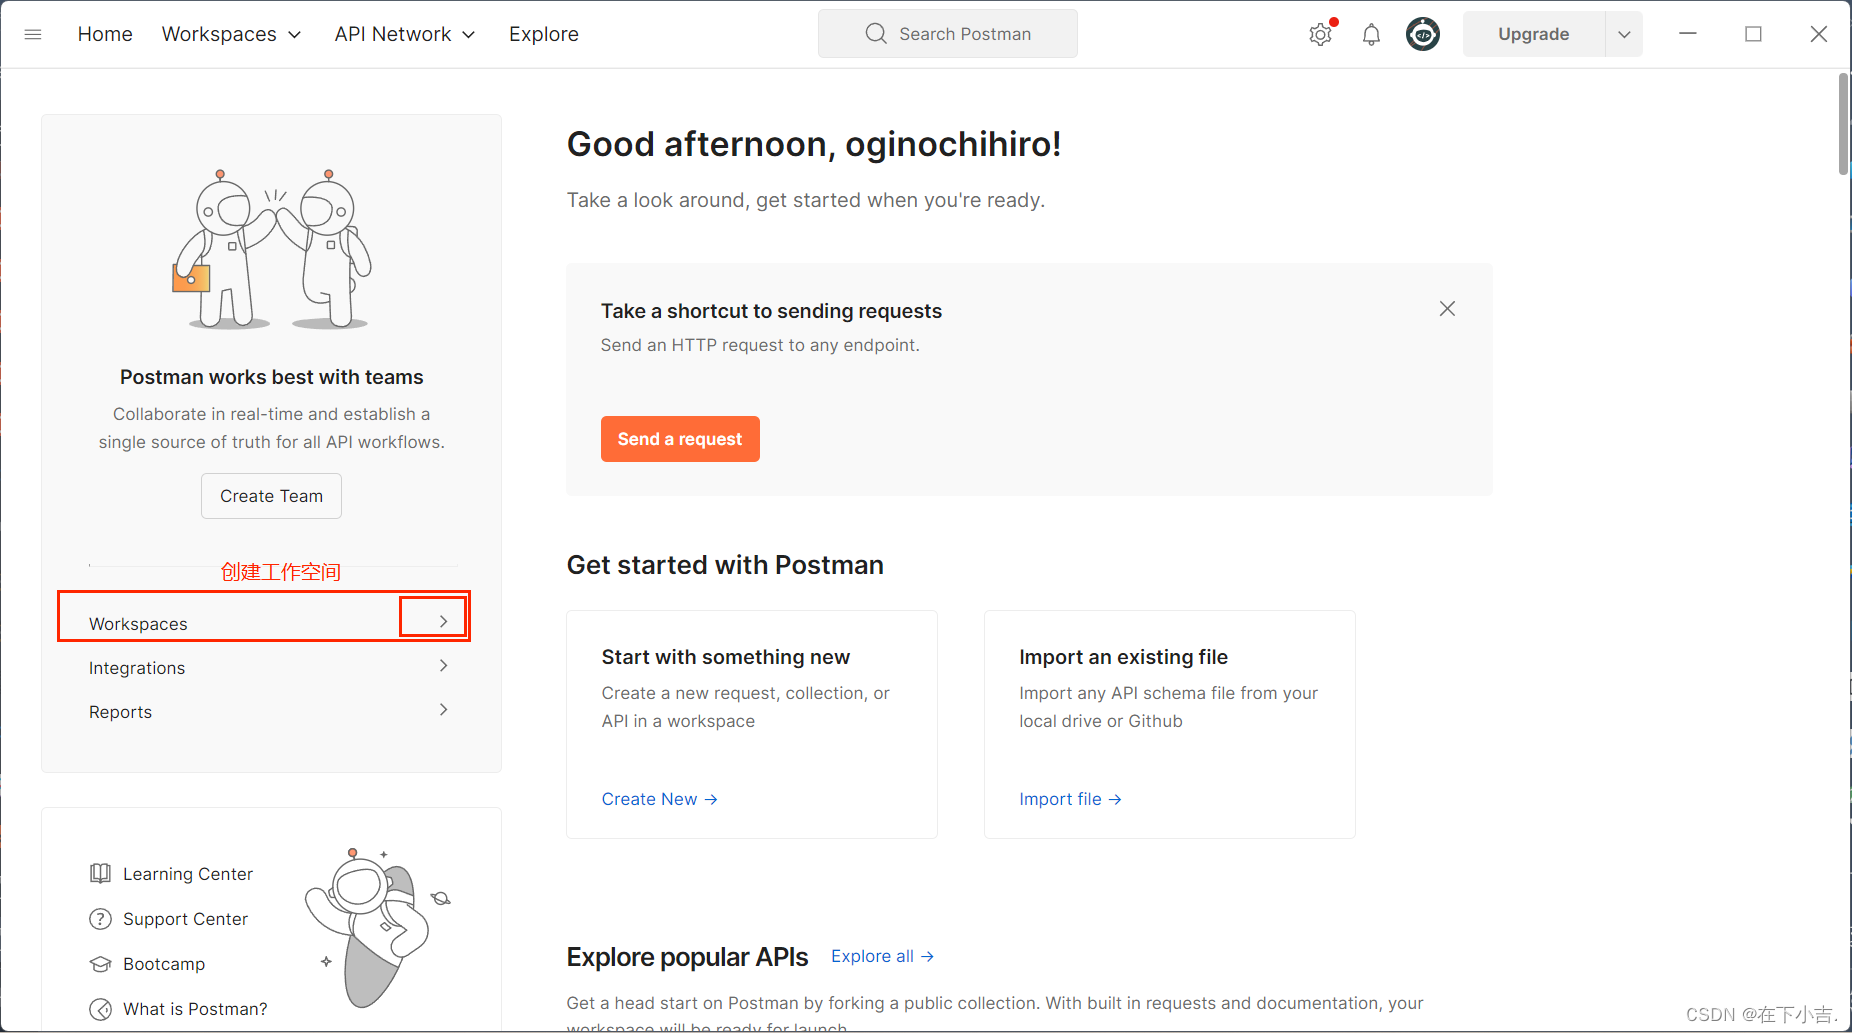
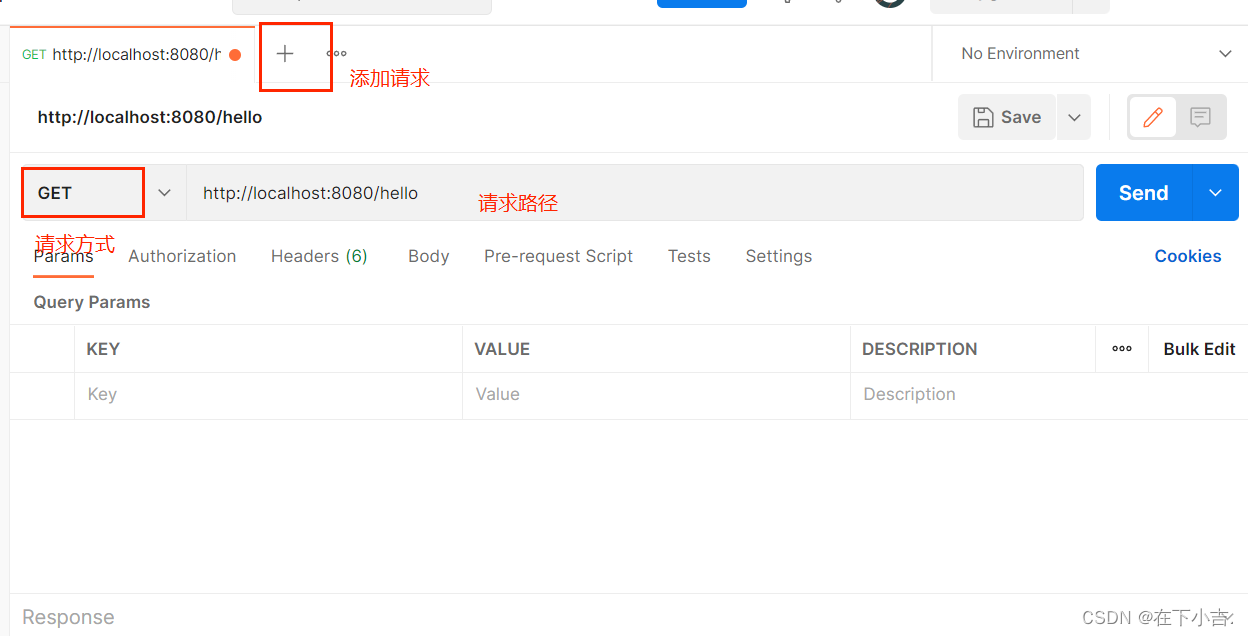
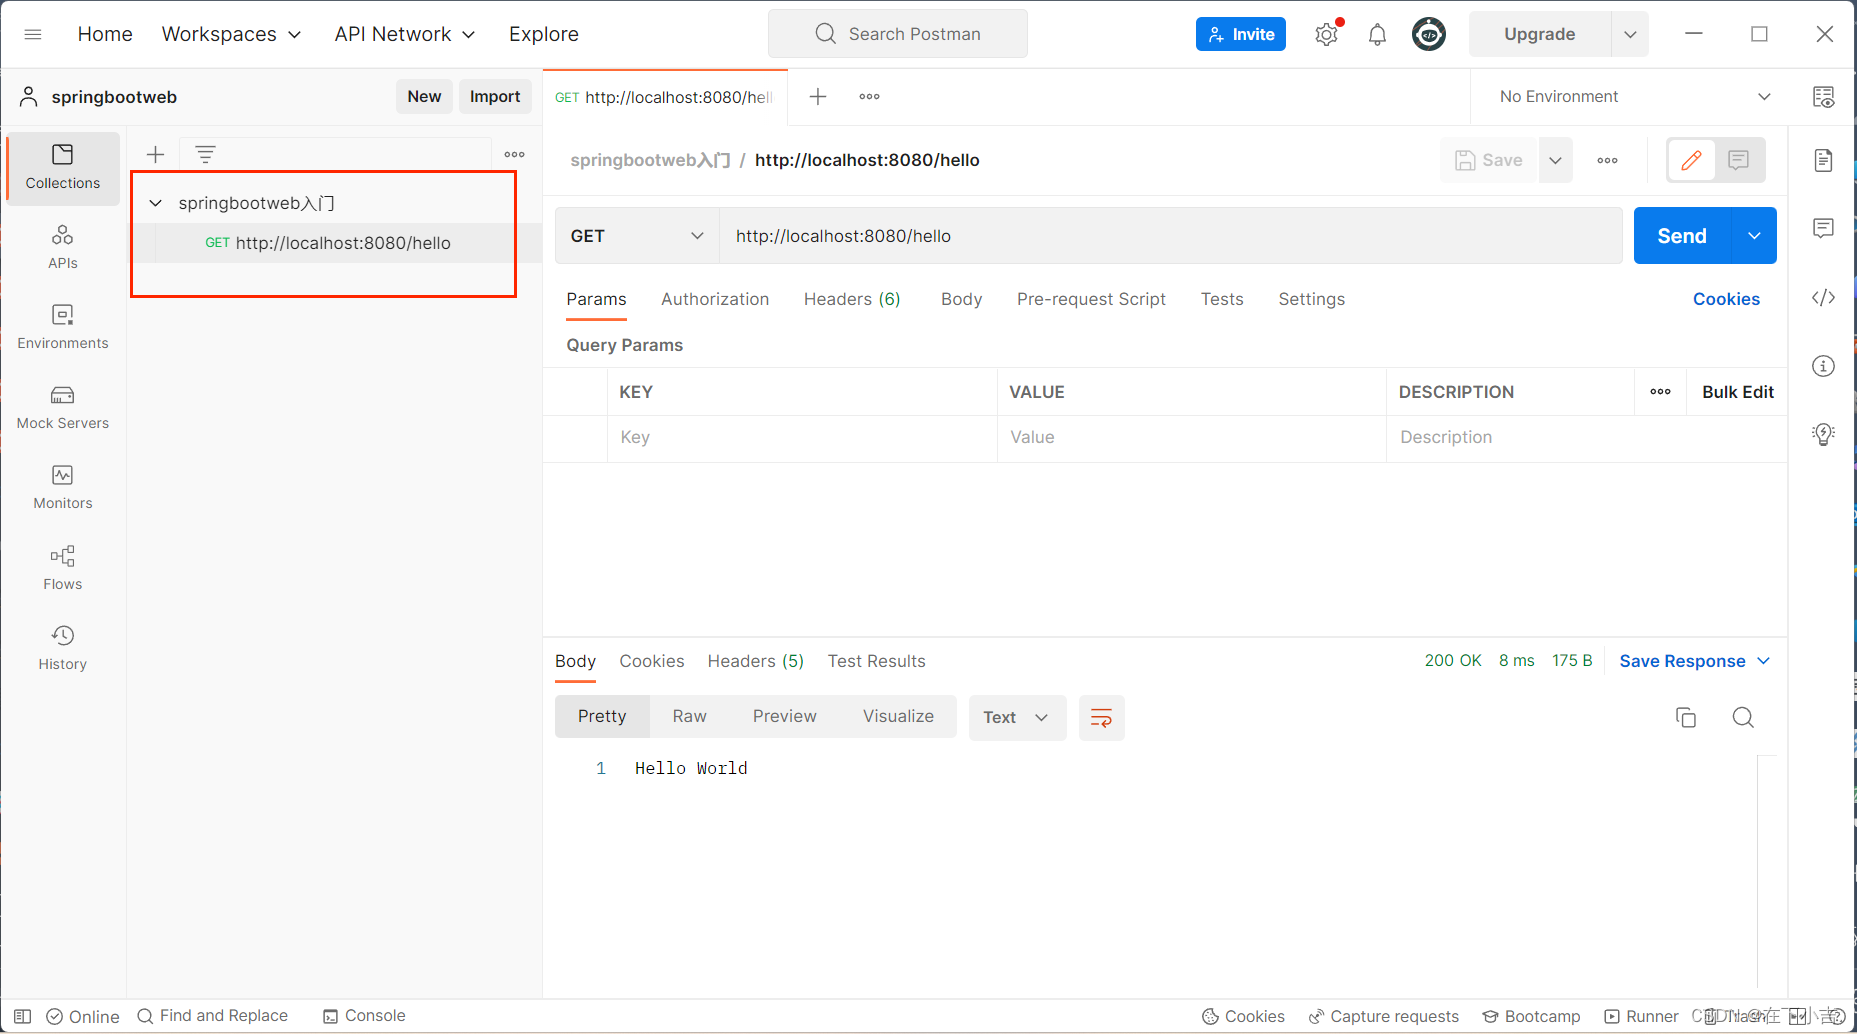
点击CTRL+S进行保存
这样子即使我们关了,也能够访问
🎄简单参数
⭐原始方式
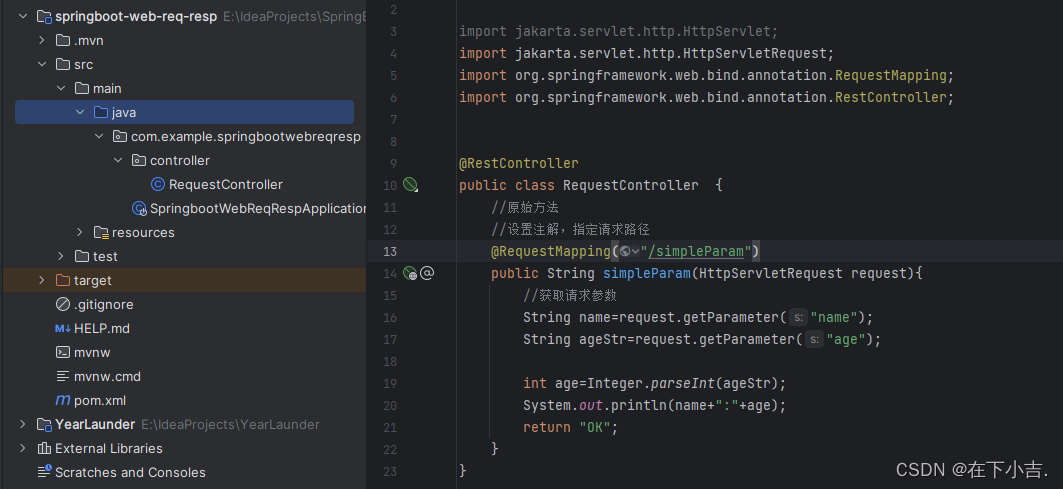
在原始的web程序中,获取请求参数,需要通过HttpServletRequest对象手动获取
🎈我们建立springboot项目,输入下面的代码
import jakarta.servlet.http.HttpServlet;
import jakarta.servlet.http.HttpServletRequest;
import org.springframework.web.bind.annotation.RequestMapping;
import org.springframework.web.bind.annotation.RestController;


@RestController
public class RequestController  {
    //原始方法
    //设置注解,指定请求路径
    @RequestMapping("/simpleParam")
    public String simpleParam(HttpServletRequest request){
        //获取请求参数
        String name=request.getParameter("name");
        String ageStr=request.getParameter("age");

        int age=Integer.parseInt(ageStr);
        System.out.println(name+":"+age);
        return "OK";
    }
}
🎈运行
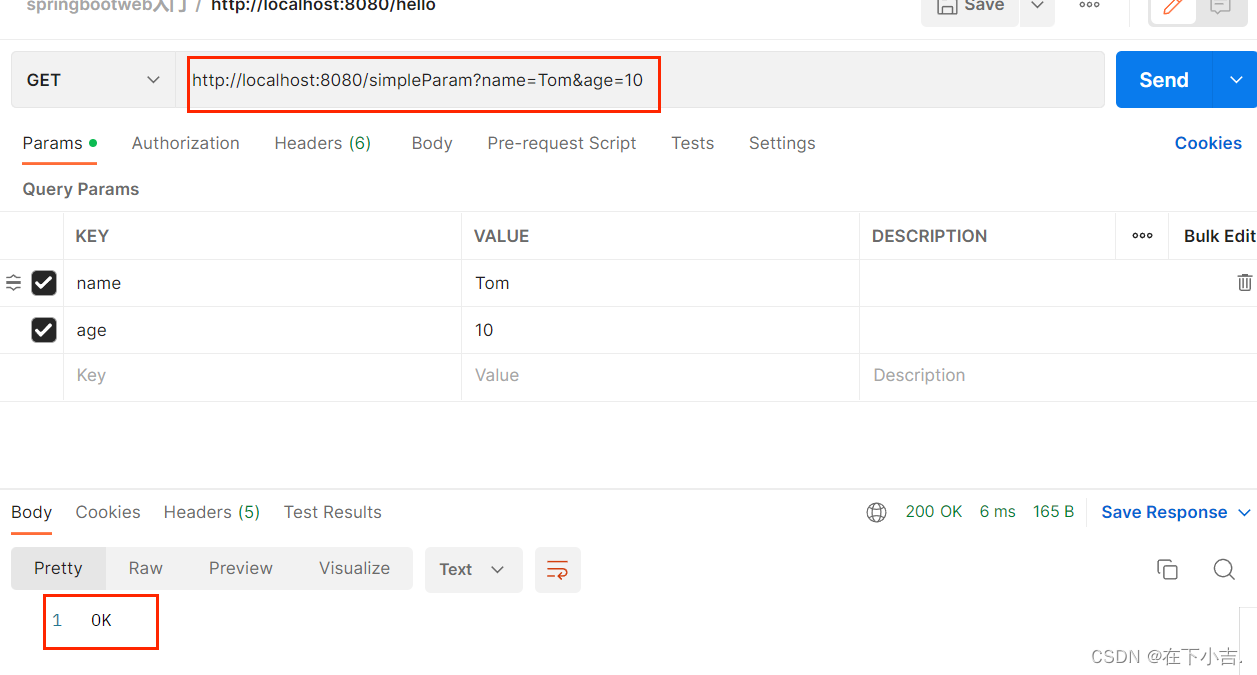
这时候我们打开postman(不要终止项目运行)
输入http://localhost:8080/simpleParam?name=Tom&age=10
然后点击send
⭐SpringBoot方式
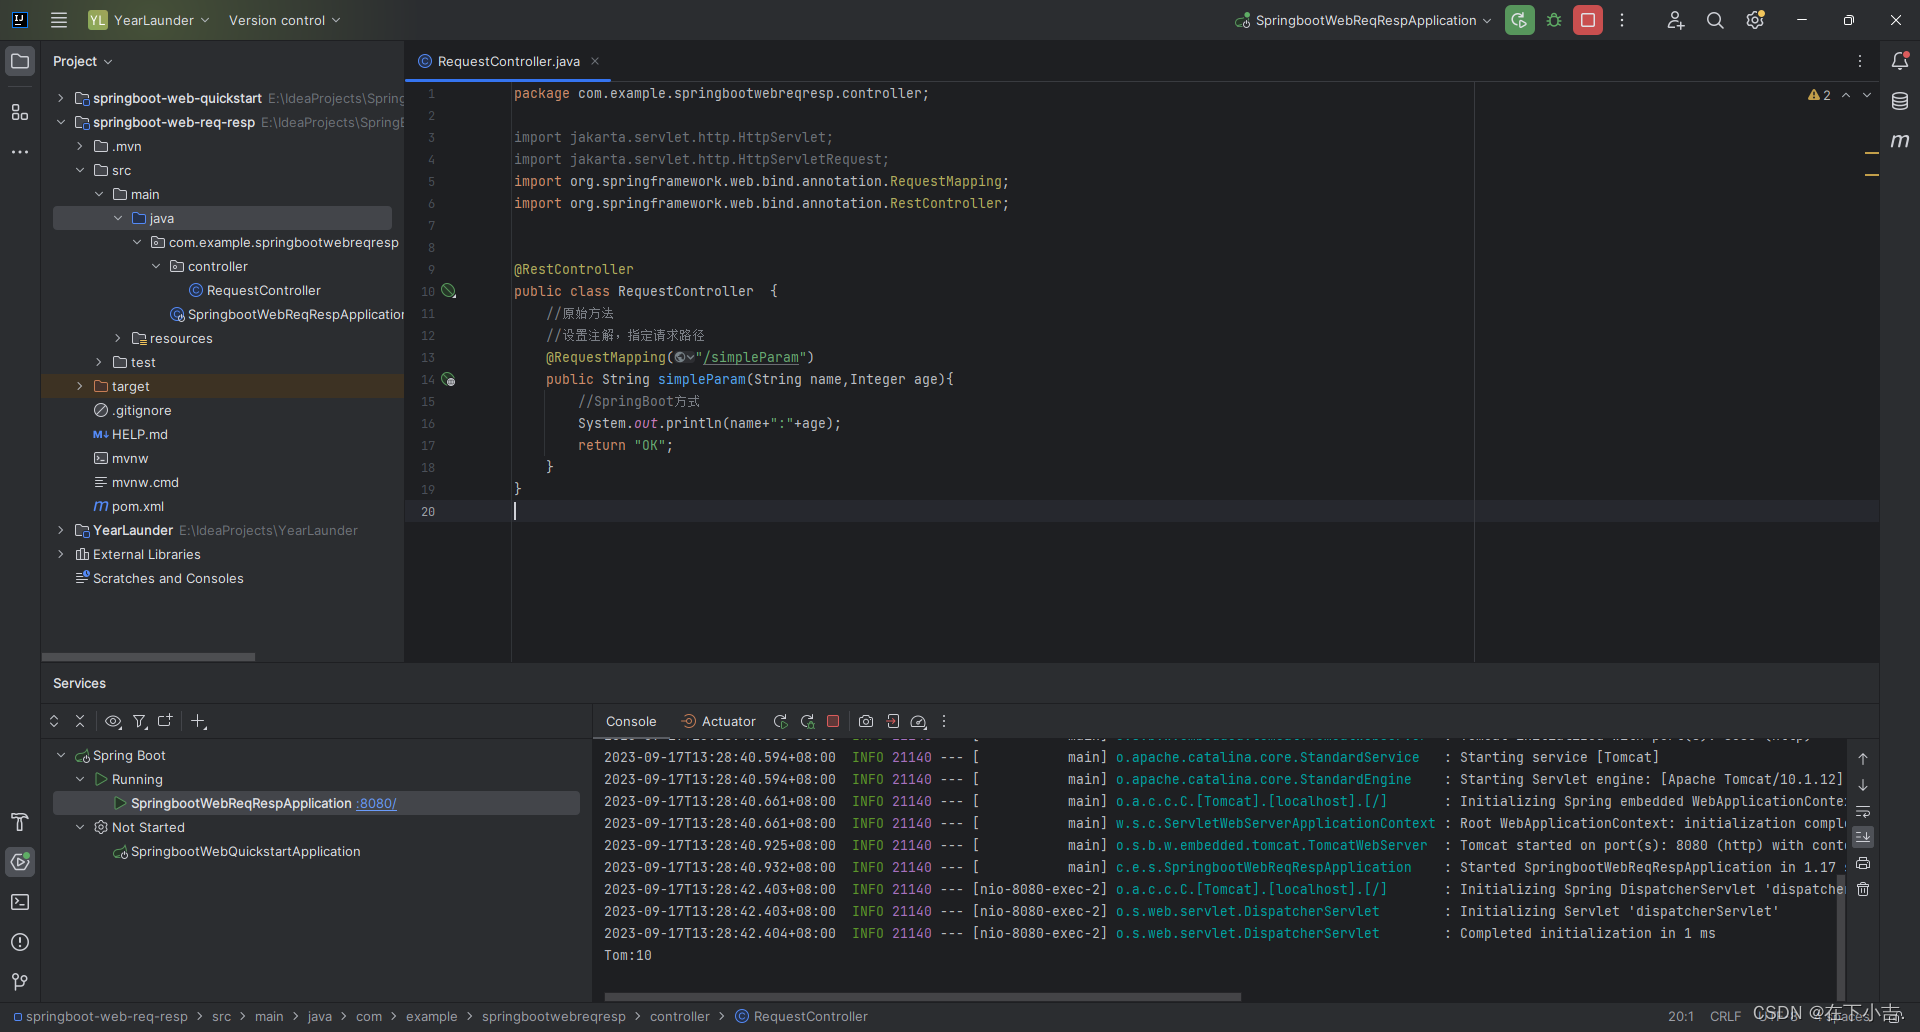
只需要保证参数名和变量名相同,定义形参即可接收参数

import jakarta.servlet.http.HttpServlet;
import jakarta.servlet.http.HttpServletRequest;
import org.springframework.web.bind.annotation.RequestMapping;
import org.springframework.web.bind.annotation.RestController;


@RestController
public class RequestController  {
    //原始方法
    //设置注解,指定请求路径
    @RequestMapping("/simpleParam")
    public String simpleParam(String name,Integer age){
        //SpringBoot方式
        System.out.println(name+":"+age);
        return "OK";
    }
}
🎄实体参数
🏳️🌈简单实体参数
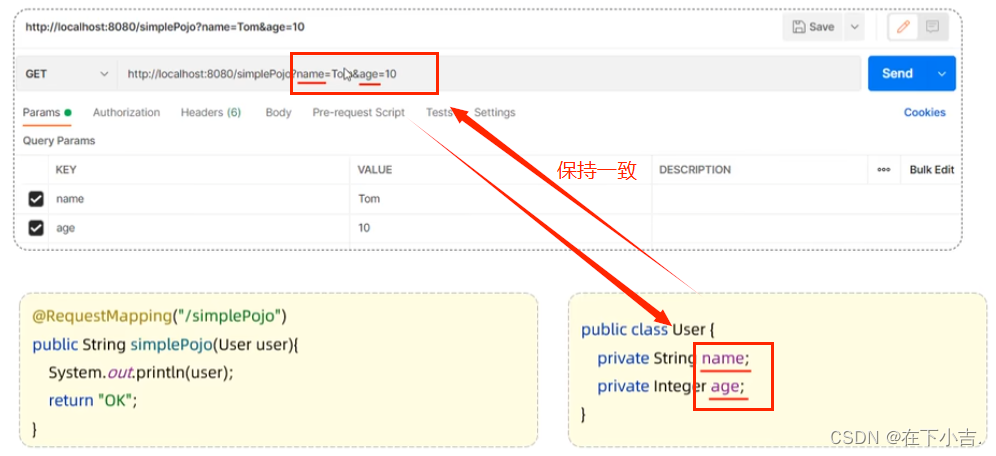
请求参数名与形参对象属性名相同,定义POJO接收即可
⭐代码实现
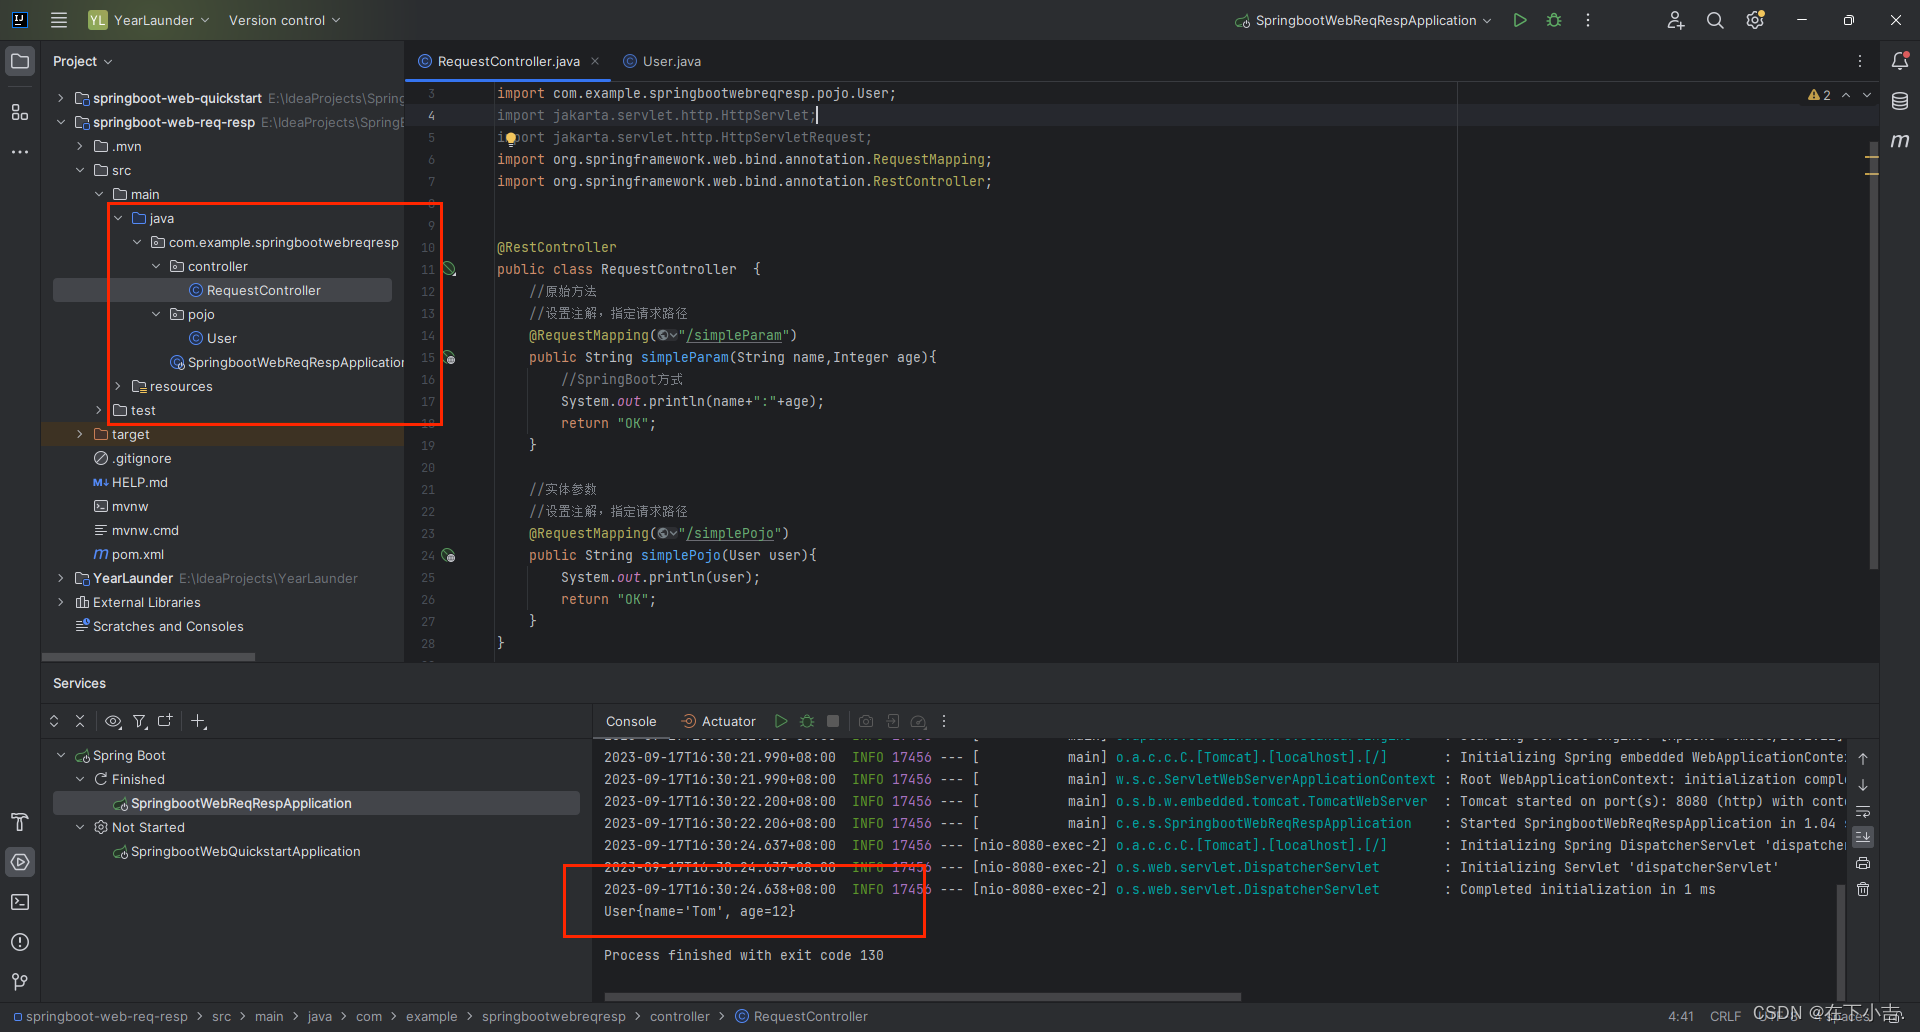
创建类User.java
public class User {
    private String name;
    private Integer age;

    public String getName() {
        return name;
    }

    public void setName(String name) {
        this.name = name;
    }

    public Integer getAge() {
        return age;
    }

    public void setAge(Integer age) {
        this.age = age;
    }

    @Override
    public String toString() {
        return "User{" +
                "name='" + name + '\'' +
                ", age=" + age +
                '}';
    }
}
创建类RequestController.Java
import com.example.springbootwebreqresp.pojo.User;
import jakarta.servlet.http.HttpServlet;
import jakarta.servlet.http.HttpServletRequest;
import org.springframework.web.bind.annotation.RequestMapping;
import org.springframework.web.bind.annotation.RestController;


@RestController
public class RequestController  {

    //实体参数
    //设置注解,指定请求路径
    @RequestMapping("/simplePojo")
    public String simplePojo(User user){
        System.out.println(user);
        return "OK";
    }
}
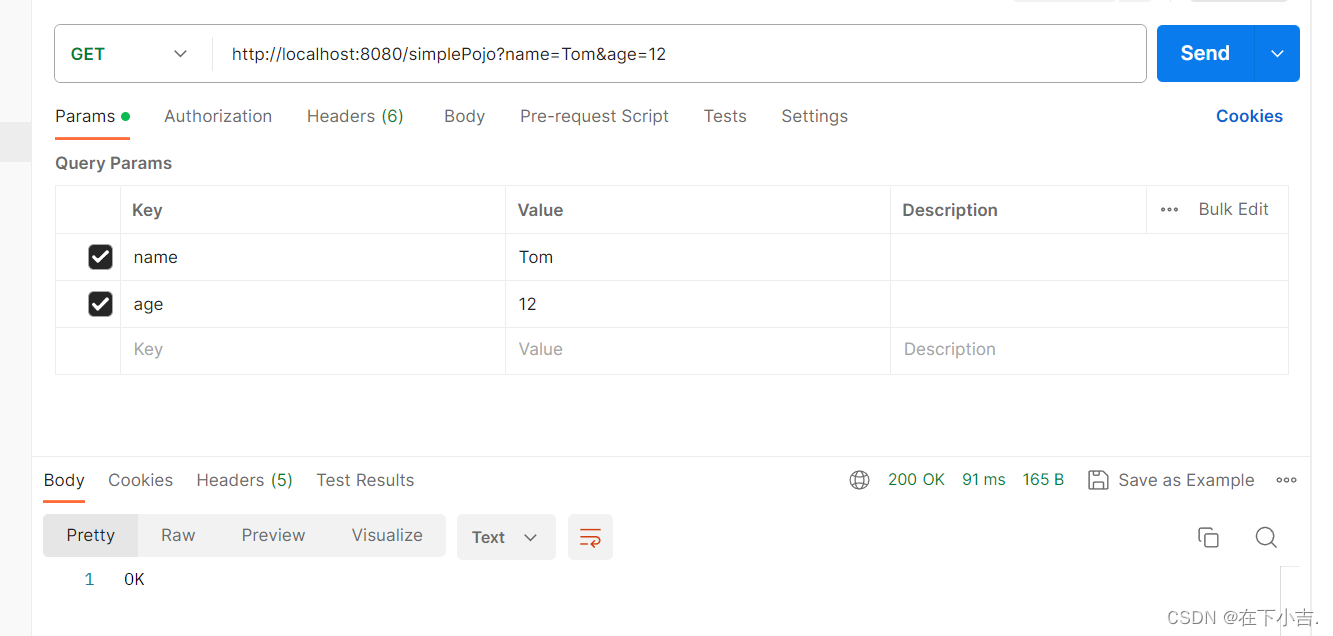
🏳️🌈复杂实体参数
请求参数名与形参对象属性名相同,安装对象层次结构关系即可接收嵌套POJO属性参数
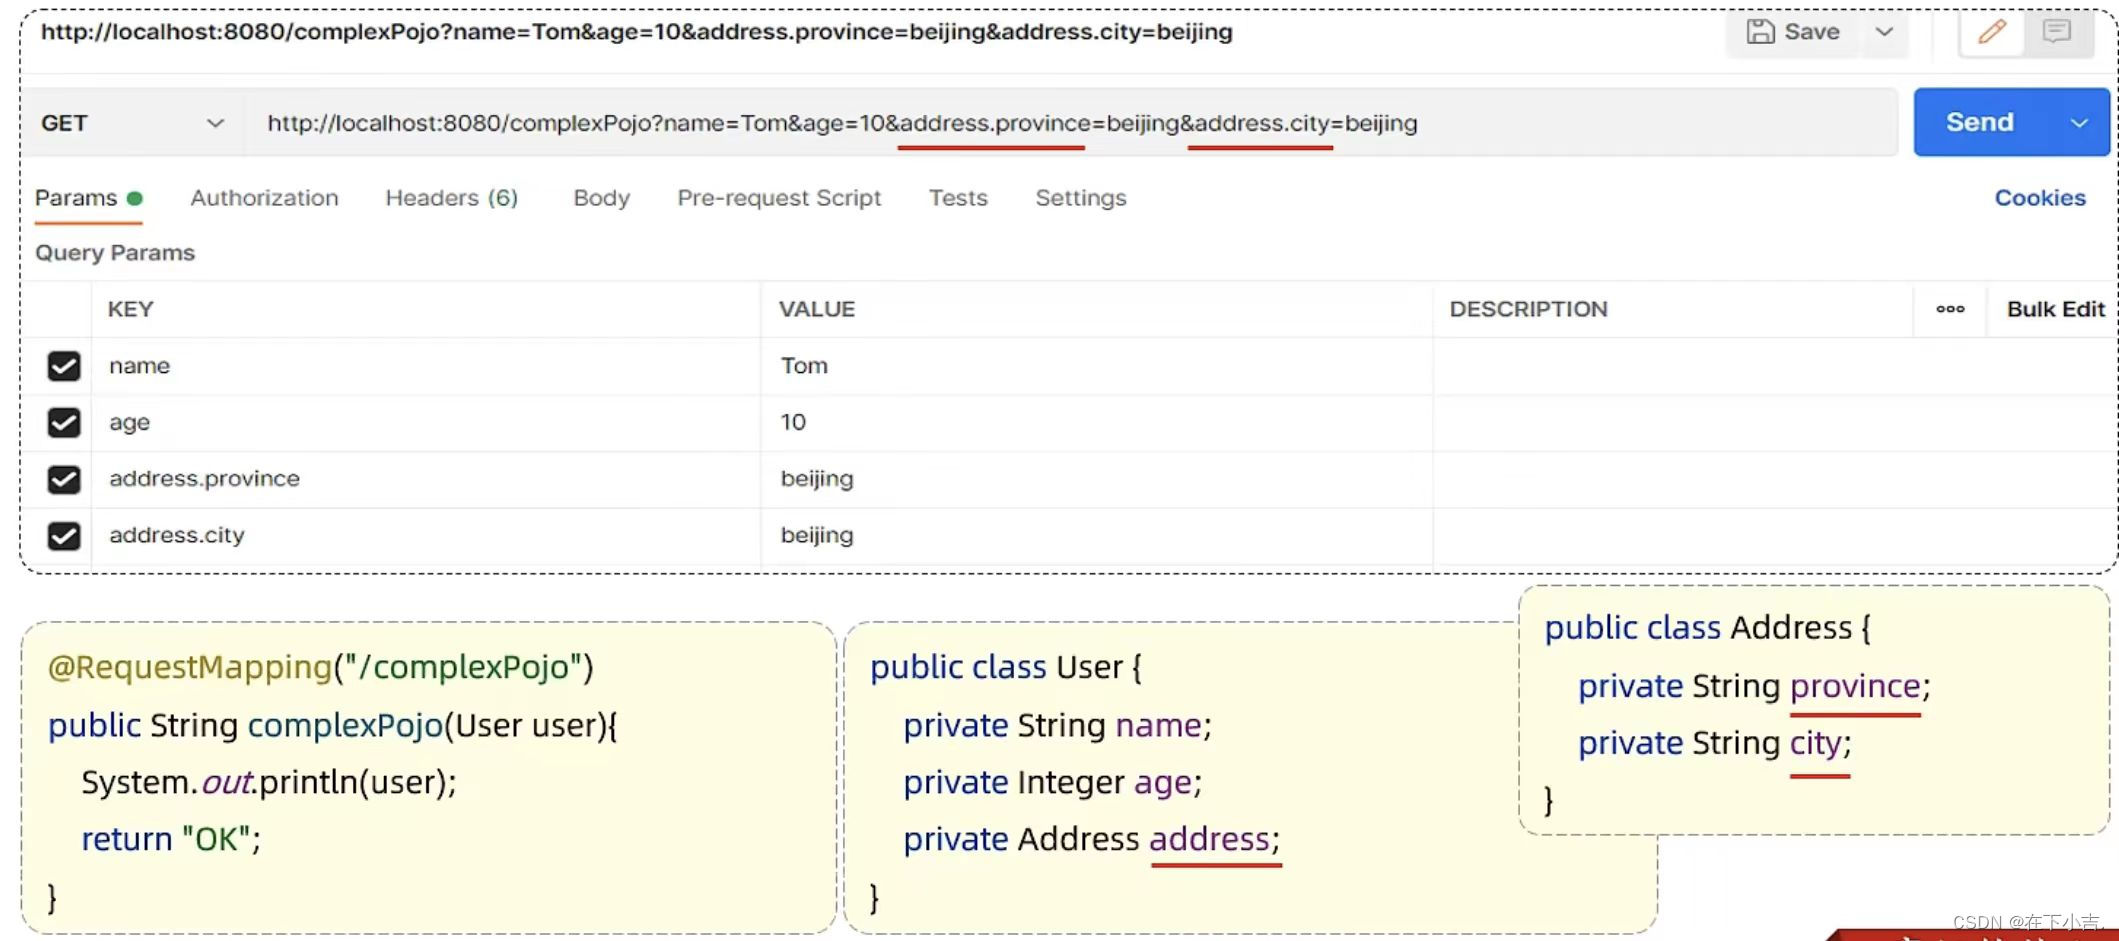
⭐代码实现
创建类User.java
package com.example.springbootwebreqresp.pojo;

public class User {
    private String name;
    private Integer age;

    private Address address;

    public String getName() {
        return name;
    }

    public void setName(String name) {
        this.name = name;
    }

    public Integer getAge() {
        return age;
    }

    public void setAge(Integer age) {
        this.age = age;
    }

    public Address getAddress() {
        return address;
    }

    public void setAddress(Address address) {
        this.address = address;
    }

    @Override
    public String toString() {
        return "User{" +
                "name='" + name + '\'' +
                ", age=" + age +
                ", address=" + address +
                '}';
    }
}
创建类Address.java
package com.example.springbootwebreqresp.pojo;

public class Address {
    private String province;
    private String city;

    public String getProvince() {
        return province;
    }

    public void setProvince(String province) {
        this.province = province;
    }

    public String getCity() {
        return city;
    }

    public void setCity(String city) {
        this.city = city;
    }

    @Override
    public String toString() {
        return "Address{" +
                "province='" + province + '\'' +
                ", city='" + city + '\'' +
                '}';
    }
}
创建类RequestController.Java
package com.example.springbootwebreqresp.controller;

import com.example.springbootwebreqresp.pojo.User;
import jakarta.servlet.http.HttpServlet;
import jakarta.servlet.http.HttpServletRequest;
import org.springframework.web.bind.annotation.RequestMapping;
import org.springframework.web.bind.annotation.RestController;


    @RequestMapping("/complexPojo")
    public String complexPojo(User user){
        System.out.println(user);
        return "OK";
    }
}
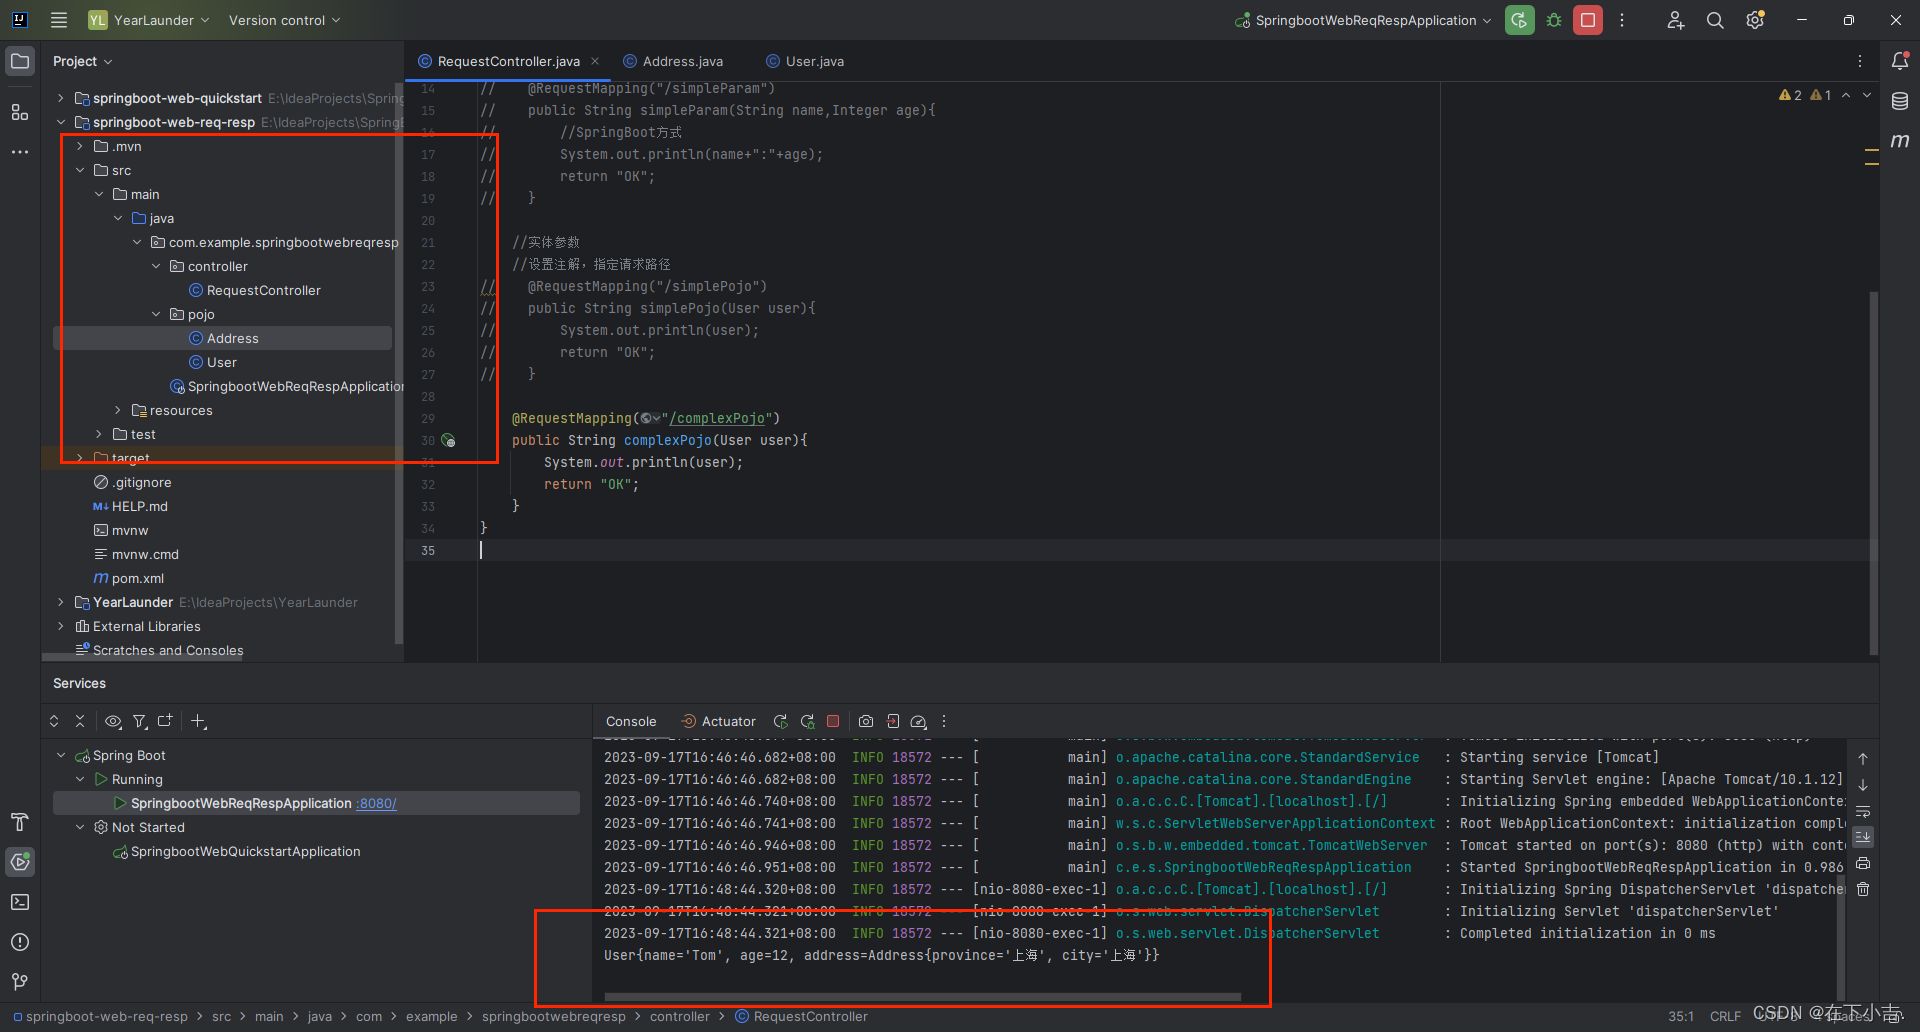
🎄数组集合参数
⭐使用数组来接收
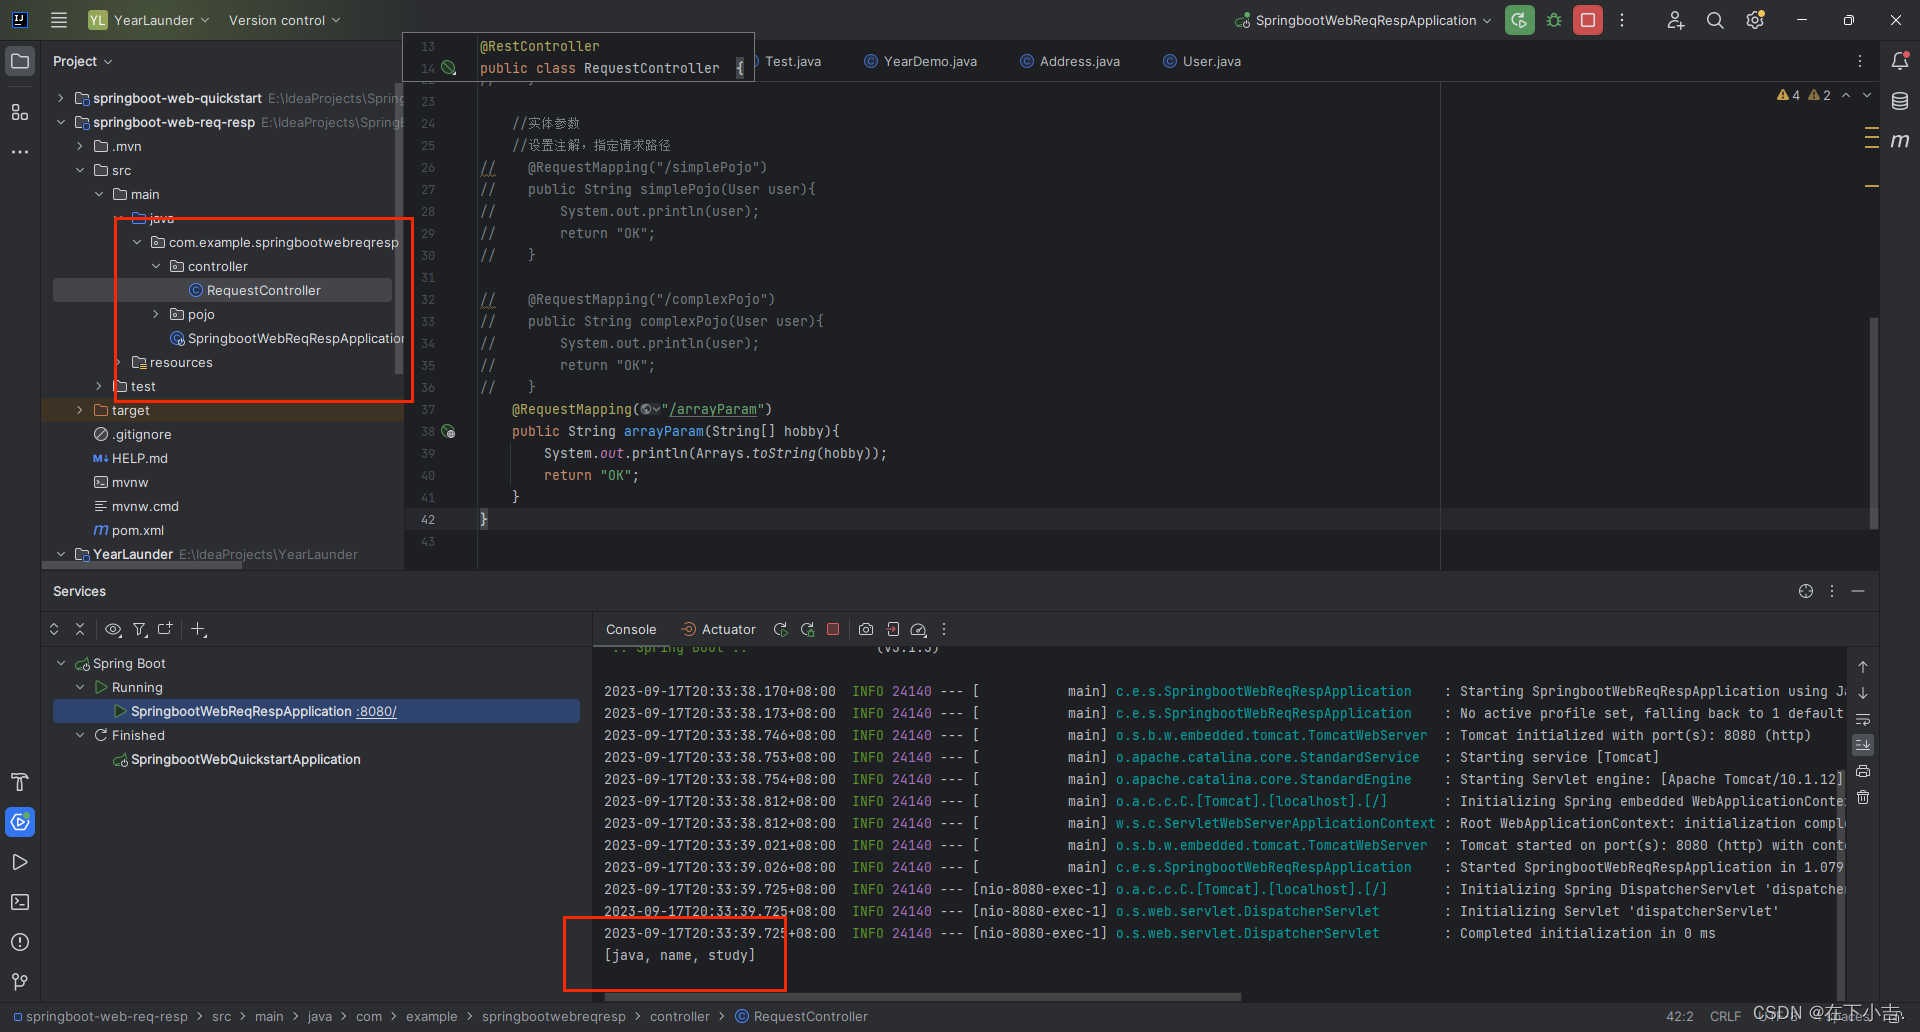
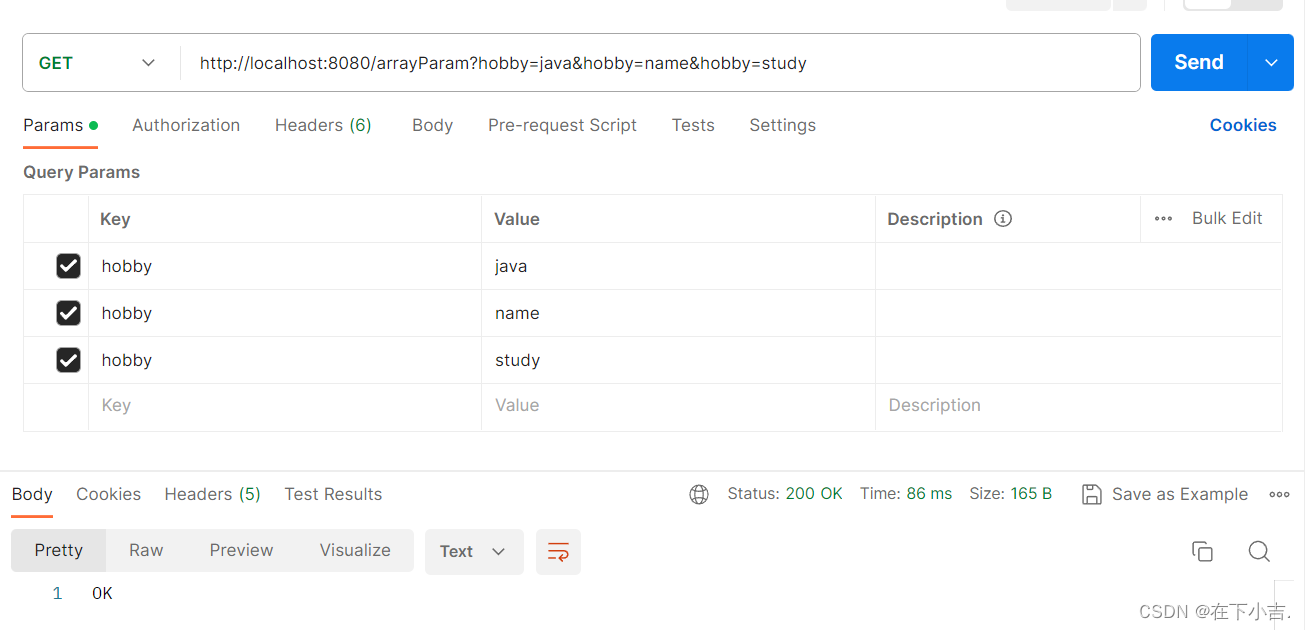
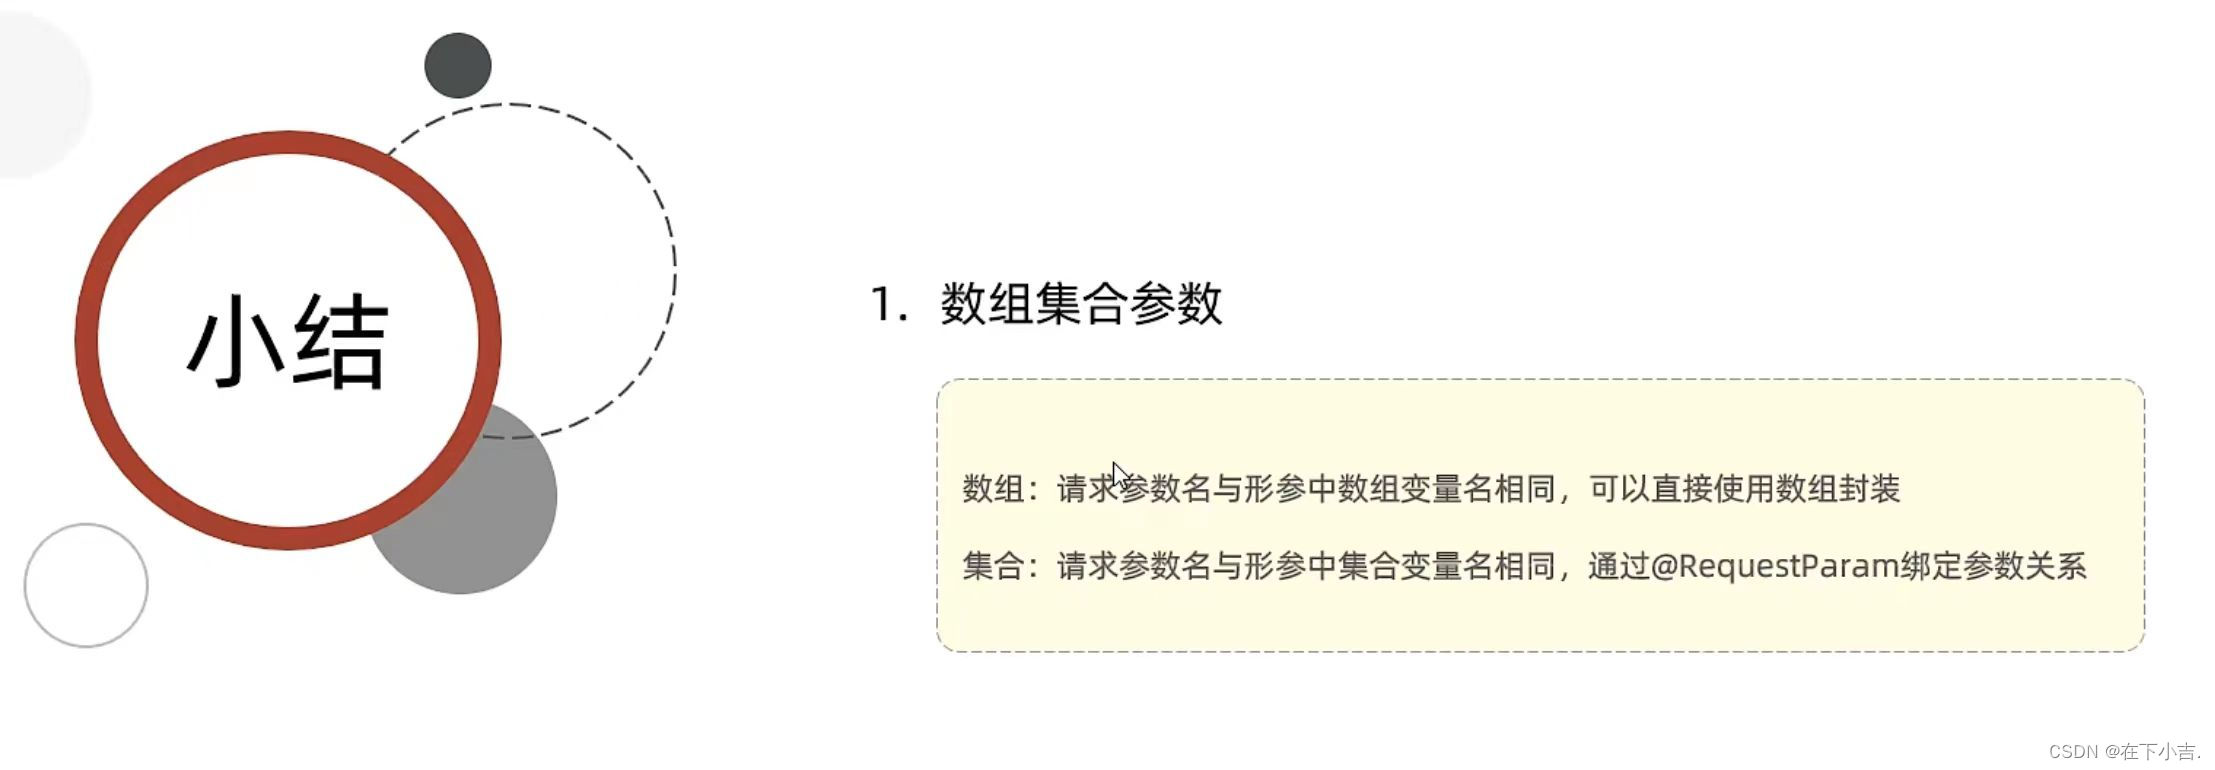
请求参数名与形参数组名相同且请求参数为多个,定义数组类型形参即可接收参数
package com.example.springbootwebreqresp.controller;

import com.example.springbootwebreqresp.pojo.User;
import jakarta.servlet.http.HttpServlet;
import jakarta.servlet.http.HttpServletRequest;
import org.springframework.web.bind.annotation.RequestMapping;
import org.springframework.web.bind.annotation.RestController;

import java.lang.reflect.Array;
import java.util.Arrays;


@RestController
public class RequestController  {
    @RequestMapping("/arrayParam")
    public String arrayParam(String[] hobby){
        System.out.println(Arrays.toString(hobby));
        return "OK";
    }
}
⭐使用集合来接收
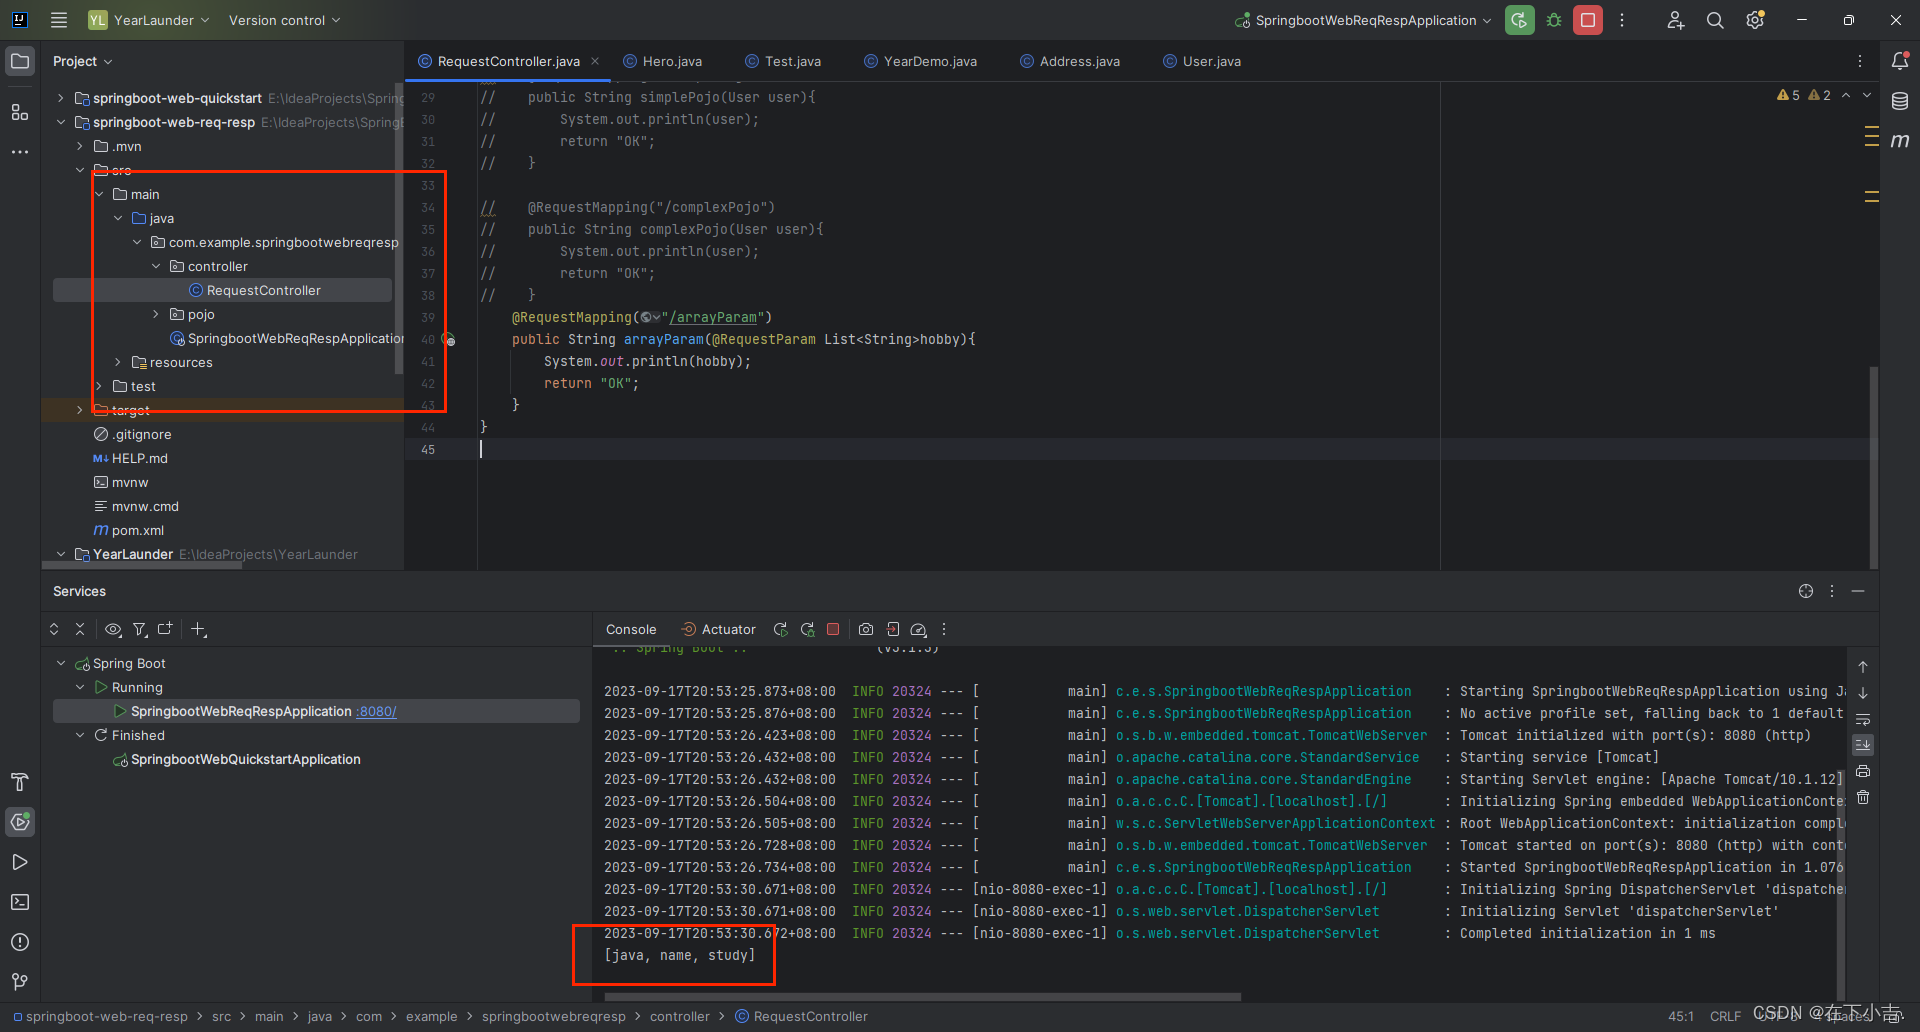
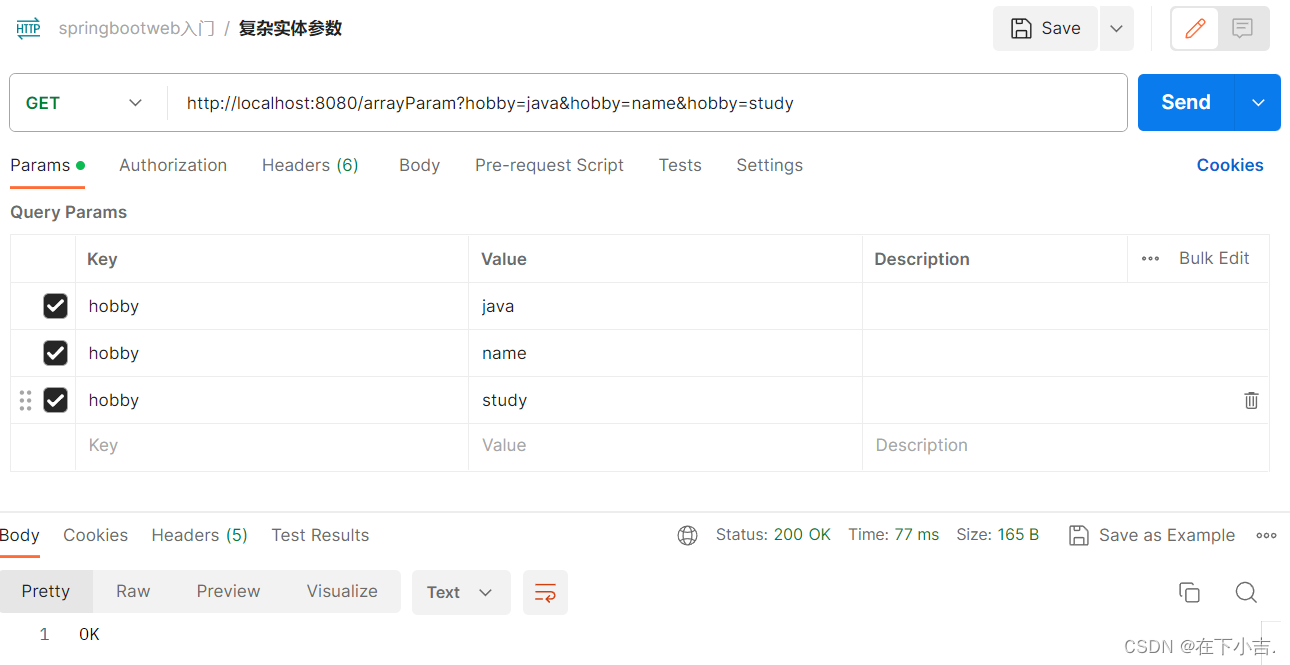
请求参数名与形参集合名称相同且请求参数为多个,@RequestParam绑定参数关系
package com.example.springbootwebreqresp.controller;

import com.example.springbootwebreqresp.pojo.User;
import jakarta.servlet.http.HttpServlet;
import jakarta.servlet.http.HttpServletRequest;
import org.springframework.web.bind.annotation.RequestMapping;
import org.springframework.web.bind.annotation.RequestParam;
import org.springframework.web.bind.annotation.RestController;

import java.lang.reflect.Array;
import java.util.Arrays;
import java.util.List;


@RestController
public class RequestController  {
    @RequestMapping("/arrayParam")
    public String arrayParam(@RequestParam List<String>hobby){
        System.out.println(hobby);
        return "OK";
    }
}
🎆小结
🎄日期参数
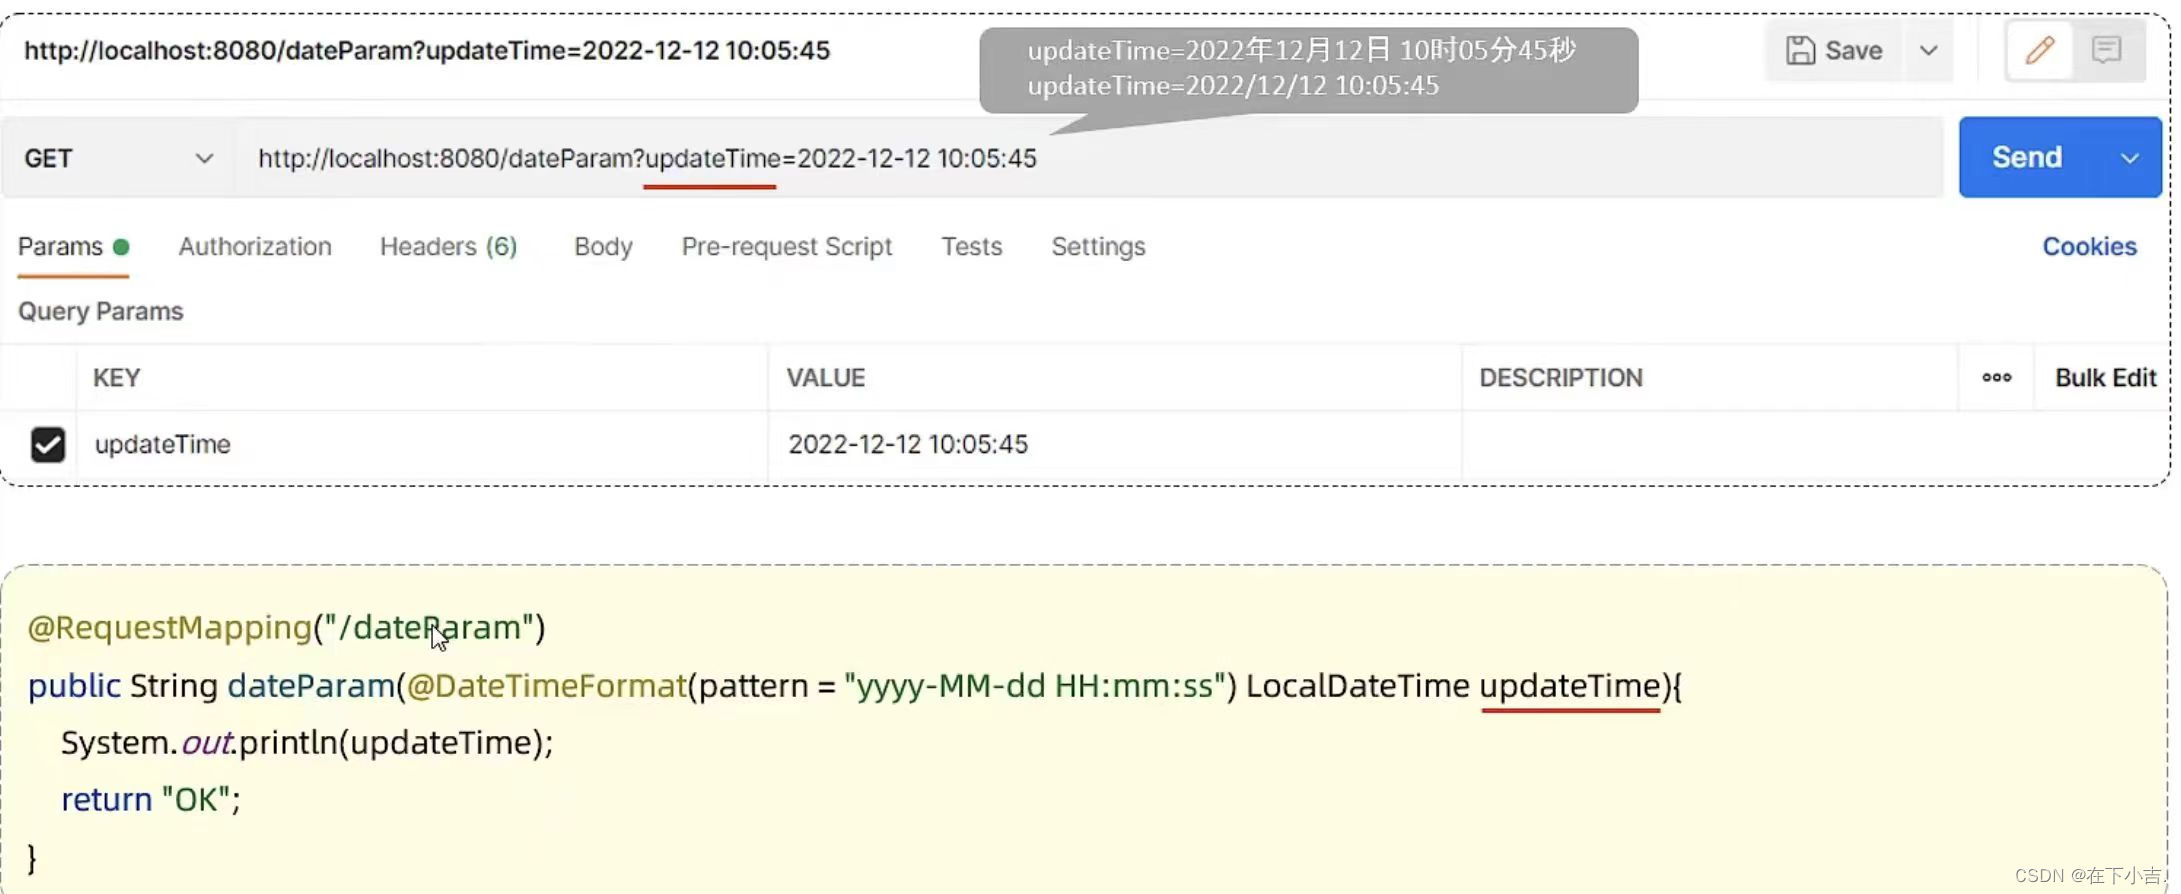
使用@DateTimeFormat注解完成日期参数格式转换
🎄路径参数
🥰总结
