Harbor镜像仓库的安装与使用
简介:Harbor是一个用于存储和分发Docker镜像的企业级Registry服务器,除了Harbor这个私有镜像仓库外,还有Docker官方提供的Registry。相对Registry,Harbor具有很多优势,本文主要介绍Harbor镜像仓库的安装与使用,以及使用Docker从Harbor中上传与下载镜像
Harbor安装步骤
安装Docker-compose
官网下载地址——慢:
sudo curl -L "https://github.com/docker/compose/releases/download/1.29.2/docker-compose-$(uname -s)-$(uname -m)" -o /usr/local/bin/docker-compose
国内镜像加速下载地址——快:
sudo curl -L "https://get.daocloud.io/docker/compose/releases/download/1.27.4/docker-compose-$(uname -s)-$(uname -m)" -o /usr/local/bin/docker-compose

赋予执行权限:
sudo chmod +x /usr/local/bin/docker-compose
使用命令 docker-compose -v 查看 compose 版本:出现版本号说明安装成功

下载Harbor
harbor安装可以使用在线安装或者离线安装。在线安装需要联网所以体积非常小,离线安装的包比较大。在这里,由于github网站不通,我选择离线安装的方式
手动下载地址 https://github.com/goharbor/harbor/releases
# 将下载好的压缩包传到linux服务器
[root@iZwz9eq1jai7e87n6vw5liZ harbor]# ls
harbor-offline-installer-v1.5.0.tgz
[root@iZwz9eq1jai7e87n6vw5liZ harbor]# tar -zxf harbor-offline-installer-v1.5.0.tgz
[root@iZwz9eq1jai7e87n6vw5liZ harbor]# ls 解压之后的文件
harbor  harbor-offline-installer-v1.5.0.tgz
修改harbor的配置文件
[root@iZwz9eq1jai7e87n6vw5liZ harbor]# vim harbor.cfg
hostname = 你主机IP  #待会barbor启动成功后能访问的页面,默认80端口
执行 ./prepare
[root@iZwz9eq1jai7e87n6vw5liZ harbor]# ./prepare
Generated and saved secret to file: /data/secretkey
Generated configuration file: ./common/config/nginx/nginx.conf
Generated configuration file: ./common/config/adminserver/env
Generated configuration file: ./common/config/ui/env
Generated configuration file: ./common/config/registry/config.yml
Generated configuration file: ./common/config/db/env
Generated configuration file: ./common/config/jobservice/env
Generated configuration file: ./common/config/jobservice/config.yml
Generated configuration file: ./common/config/log/logrotate.conf
Generated configuration file: ./common/config/jobservice/config.yml
Generated configuration file: ./common/config/ui/app.conf
Generated certificate, key file: ./common/config/ui/private_key.pem, cert file: ./common/config/regis
The configuration files are ready, please use docker-compose to start the service.
执行 ./install.sh 命令
[root@iZwz9eq1jai7e87n6vw5liZ harbor]# ./install.sh

[Step 0]: checking installation environment ...

Note: docker version: 19.03.11

Note: docker-compose version: 1.21.2

[Step 1]: loading Harbor images ...
52ef9064d2e4: Loading layer [==================================================>]  135.9MB/135.9MB
c169f7c7a5ff: Loading layer [==================================================>]  154.2MB/154.2MB
a2194b3a5434: Loading layer [==================================================>]  10.75MB/10.75MB
f3809b773329: Loading layer [==================================================>]  2.048kB/2.048kB
bdd2cd4d5394: Loading layer [==================================================>]  48.13kB/48.13kB
bce61638a813: Loading layer [==================================================>]   10.8MB/10.8MB
Loaded image: vmware/clair-photon:v2.0.1-v1.5.0
0bf5fb4e60f4: Loading layer [==================================================>]     95MB/95MB
9fc876f7ef97: Loading layer [==================================================>]  6.656kB/6.656kB
9f364ae08e7f: Loading layer [==================================================>]  2.048kB/2.048kB
d8e3574f27f2: Loading layer [==================================================>]   7.68kB/7.68kB
.
.
.
[Step 3]: checking existing instance of Harbor ...


[Step 4]: starting Harbor ...
Creating network "harbor_harbor" with the default driver
Creating harbor-log ... done
Creating redis              ... done
Creating harbor-db          ... done
Creating registry           ... done
Creating harbor-adminserver ... done
Creating harbor-ui          ... done
Creating harbor-jobservice  ... done
Creating nginx              ... done

✔ ----Harbor has been installed and started successfully.----
For more details, please visit https://github.com/vmware/harbor .

[root@iZwz9eq1jai7e87n6vw5liZ harbor]# 启动成功,接着访问配置文件中配置的页面即可
Harbor的启动与停止
docker-compose up -d  # 启动
docker-compose stop # 停止
docker-compose restart # 重新启动
harbor页面访问,使用默认的账户和密码 admin Harbor12345
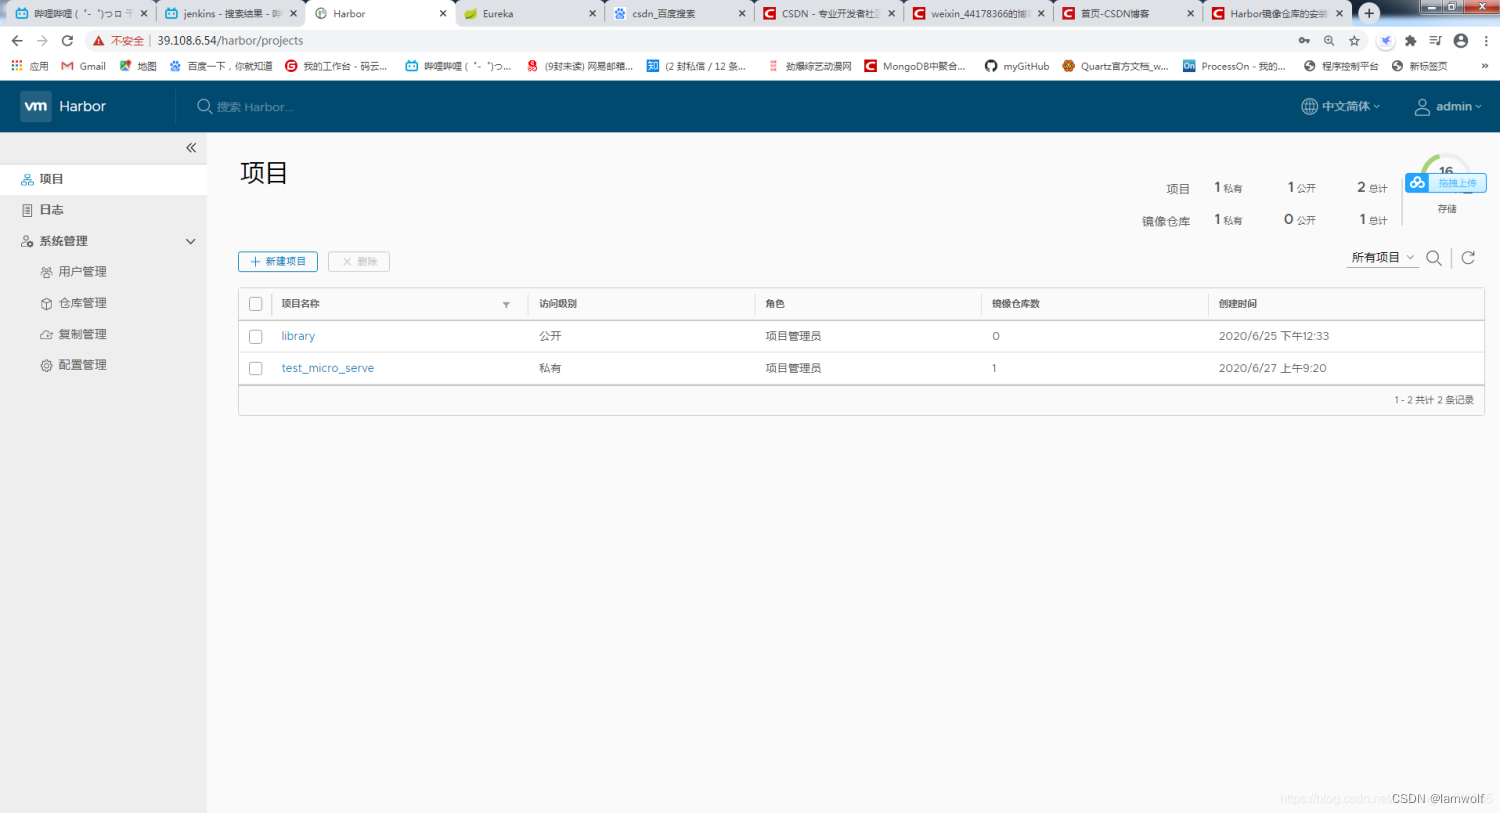
在Harbor创建用户和项目
1)创建项目
Harbor的项目分为公开和私有的:
公开项目:所有用户都快要访问,通常存放公共的镜像,默认有一个library公开项目
私有项目:只有授权用户才可以访问,通换成那个存放项目本身的镜像
然后可以创建用户,并分配项目权限,之后上传镜像可以登录创建的用户
把本地镜像上传到Harbor
把本地jar包上传到linux服务器
[root@iZwz9eq1jai7e87n6vw5liZ makeImages]# ls
micro-server-eureka-7001-1.0-SNAPSHOT.jar
[root@iZwz9eq1jai7e87n6vw5liZ makeImages]#
编写Dockerfile文件
FROM openjdk:8-jdk-alpine
ARG JAR_FILE
COPY ${JAR_FILE} app.jar
EXPOSE 7001
ENTRYPOINT ["java","-jar","/app.jar"]
构建镜像
[root@iZwz9eq1jai7e87n6vw5liZ makeImages]# ls
Dockerfile  micro-server-eureka-7001-1.0-SNAPSHOT.jar
[root@iZwz9eq1jai7e87n6vw5liZ makeImages]# docker build --build-arg JAR_FILE=micro-server-eureka-7001-1.0-SNAPSHOT.jar -t eureka:v1 .
Sending build context to Docker daemon  40.38MB
Step 1/5 : FROM openjdk:8-jdk-alpine
8-jdk-alpine: Pulling from library/openjdk
e7c96db7181b: Pull complete
f910a506b6cb: Pull complete
c2274a1a0e27: Pull complete
Digest: sha256:94792824df2df33402f201713f932b58cb9de94a0cd524164a0f2283343547b3
Status: Downloaded newer image for openjdk:8-jdk-alpine
 ---> a3562aa0b991
Step 2/5 : ARG JAR_FILE
 ---> Running in abc5865df3f5
Removing intermediate container abc5865df3f5
 ---> acf88ea40f2d
Step 3/5 : COPY ${JAR_FILE} app.jar
 ---> 21c13d245f67
Step 4/5 : EXPOSE 7001
 ---> Running in 9fcc4953b5dc
Removing intermediate container 9fcc4953b5dc
 ---> f637b2856709
Step 5/5 : ENTRYPOINT ["java","-jar","/app.jar"]
 ---> Running in 4d7fb6d0c37a
Removing intermediate container 4d7fb6d0c37a
 ---> e38cc76e668f
Successfully built e38cc76e668f
Successfully tagged eureka:v1  # 构建成功
[root@iZwz9eq1jai7e87n6vw5liZ makeImages]# docker images  查看镜像
REPOSITORY                    TAG                 IMAGE ID            CREATED
eureka                        v1                  e38cc76e668f        16 seconds ago
创建容器
[root@iZwz9eq1jai7e87n6vw5liZ makeImages]# docker run -d --name eureka -p 7001:7001 eureka:v1
422a873e68ee334b602c00cbe2d7b7c1a00f6d623acf537e85b095fd04ff99ac  # 运行成功
访问eureka地址
http://39.108.6.54:7001/
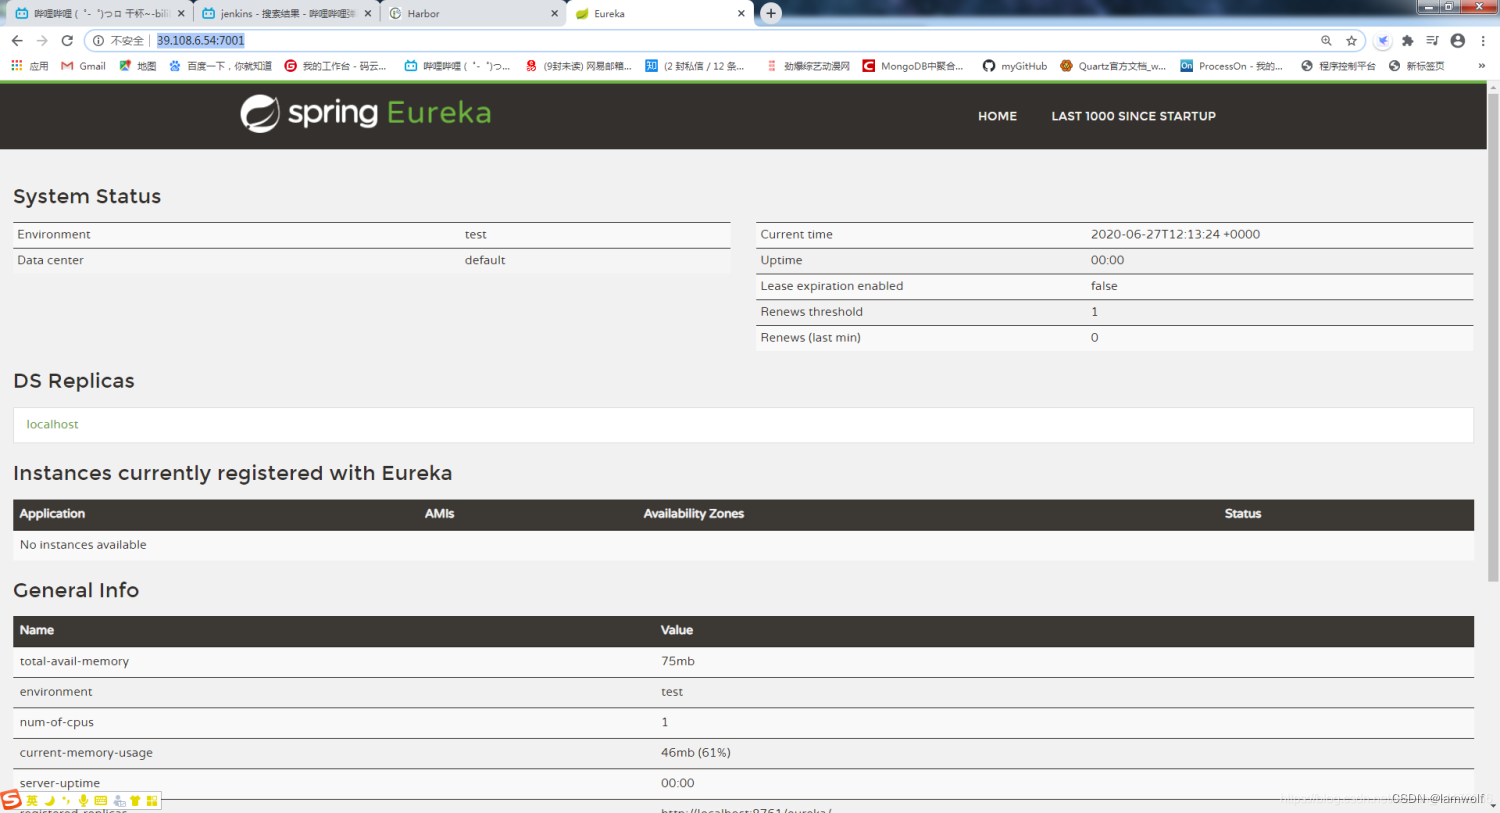
自测没问题,接下来就该测试上传这个镜像了!
把镜像上传到私有仓库Harbor
1、先给镜像打上标签
# test_micro_serve 为Harbor创建的仓库名字eureka:v1为给这个镜像取的名字
# eureka:v1为给这个镜像取的名字
[root@iZwz9eq1jai7e87n6vw5liZ makeImages]# docker tag eureka:v1 39.108.6.54/test_micro_serve/eureka:v1
[root@iZwz9eq1jai7e87n6vw5liZ makeImages]# docker images
REPOSITORY                            TAG                 IMAGE ID            CREATED             SIZE
39.108.6.54/test_micro_serve/eureka   v1                  e38cc76e668f        11 minutes ago      145MB
eureka                                v1                  e38cc76e668f        11 minutes ago      145MB
2、推送镜像
[root@iZwz9eq1jai7e87n6vw5liZ makeImages]# docker push 39.108.6.54/test_micro_serve/eureka:v1
报错: Get https://39.108.6.54/v2/: dial tcp 39.108.6.54:443: connect: connection refused
3、将Harbor仓库地址添加为Docker信任列表
# 编辑 /etc/docker 下的daemon.json文件

{
  "registry-mirrors": ["https://ggb52j62.mirror.aliyuncs.com"],
  "insecure-registries":["39.108.6.54"] # 将Harbor仓库的地址添加为Dokcer的信任列表
}
# 然后重启Docker
systemctl restart docker
4、再次执行推送命令,提示权限不足
[root@iZwz9eq1jai7e87n6vw5liZ harbor]# docker push 39.108.6.54/test_micro_serve/eureka:v1
The push refers to repository [39.108.6.54/test_micro_serve/eureka]
4d891904981c: Preparing
ceaf9e1ebef5: Preparing
9b9b7f3d56a0: Preparing
f1b5933fe4b5: Preparing
denied: requested access to the resource is denied # 提示权限不足,这是因为我们还没有登入Harbor的私有仓库,Docker并不知道要把这个镜像提交到哪里
5、登入Harborm,然后提交推送
[root@iZwz9eq1jai7e87n6vw5liZ harbor]# docker login -u pihao -p ****** 39.108.6.54
WARNING! Using --password via the CLI is insecure. Use --password-stdin.
WARNING! Your password will be stored unencrypted in /root/.docker/config.json.
Configure a credential helper to remove this warning. See
https://docs.docker.com/engine/reference/commandline/login/#credentials-store

Login Succeeded # 登入成功
# 再次推送
[root@iZwz9eq1jai7e87n6vw5liZ harbor]# docker push 39.108.6.54/test_micro_serve/eureka:v1
The push refers to repository [39.108.6.54/test_micro_serve/eureka]
4d891904981c: Pushing [====>                                              ]  3.834MB/40.38MB
ceaf9e1ebef5: Layer already exists
9b9b7f3d56a0: Layer already exists
f1b5933fe4b5: Layer already exists
^C
[root@iZwz9eq1jai7e87n6vw5liZ harbor]# docker push 39.108.6.54/test_micro_serve/eureka:v1
The push refers to repository [39.108.6.54/test_micro_serve/eureka]
4d891904981c: Pushed
ceaf9e1ebef5: Layer already exists
9b9b7f3d56a0: Layer already exists
f1b5933fe4b5: Layer already exists
v1: digest: sha256:330bab5ee774423769da0d646c17e4d8571f5eb1544b7d005f937dcc96d7f274 size: 1159
# 推送成功
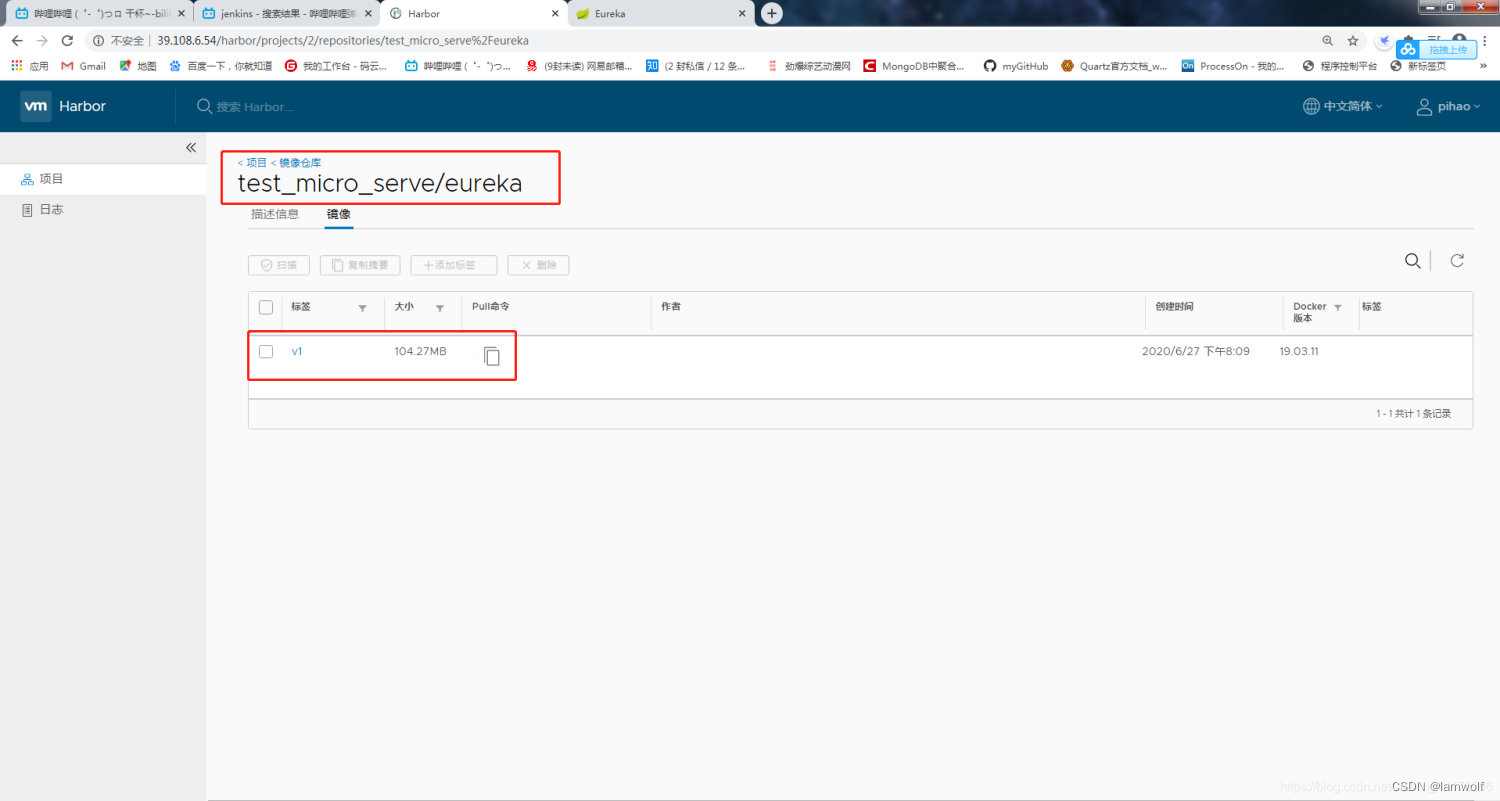
6、查看推送的镜像
