目录
阻塞队列
优先级队列(Priority Queue)
阻塞队列(Blocking Queue)
消息队列(Message Queue)
生产者消费者模型
生产者消费者模型的两个好处
标准库阻塞队列使用
实现一个简单 生产者消费者模型
自己实现阻塞队列代码
阻塞队列
- 队列最基本的原则为先进先出
优先级队列(Priority Queue)
- 该队列为一种特殊的队列数据结构
- 每个元素都有一个与之相关联的优先级
- 在优先级队列中,元素按照优先级的顺序进行插入和删除操作,优先级高的元素先被处理
- 所以通常情况下优先级队列的实现使用 堆 数据结构
阻塞队列(Blocking Queue)
- 该队列也是特殊的队列
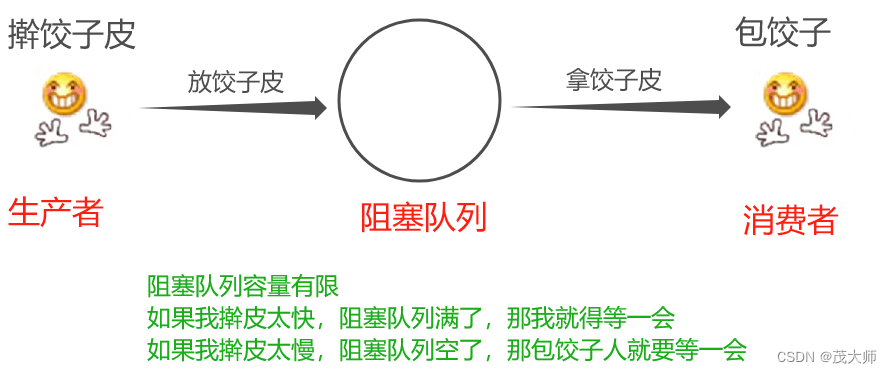
- 虽然也遵循先进先出的原则,但带有特殊的功能:阻塞
- 当一个线程试图对空队列进行取元素操作时,它会被阻塞,直到有另一个线程向队列中插入了一个元素
- 当一个线程试图向满队列中插入元素时,它会被阻塞,直到有另一个线程取走了一个元素,释放了空间
消息队列(Message Queue)
- 该队列也属于特殊的队列
- 相当于是在阻塞队列的基础上,加上了个 消息的类型 按照制定类别进行先进先出
- 因为消息队列很好用,所以就有大佬把这样的数据结构,单独实现成了一个程序
- 这个程序可以通过网络的方式和其他程序进行通信
- 有时这个消息队列,可以单独部署到一组服务器上(分布式)
- 此时其 存储能力 和 转发能力 都大大提升了
- 因此很多大型项目里,都可以看到 消息队列 的身影
- 此时 消息队列,就已经成为了一个可以和 mysql,redis 这种相提并论的一个重要组件,也就是 "中间件"
- rabbit mq 就是消息队列中的一种典型实现
生产者消费者模型
- 消息队列之所以很好用,这与阻塞队列的阻塞特性有很大的关系
- 基于这样的特性,可以实现 生产者消费者模型
生产者消费者模型的两个好处
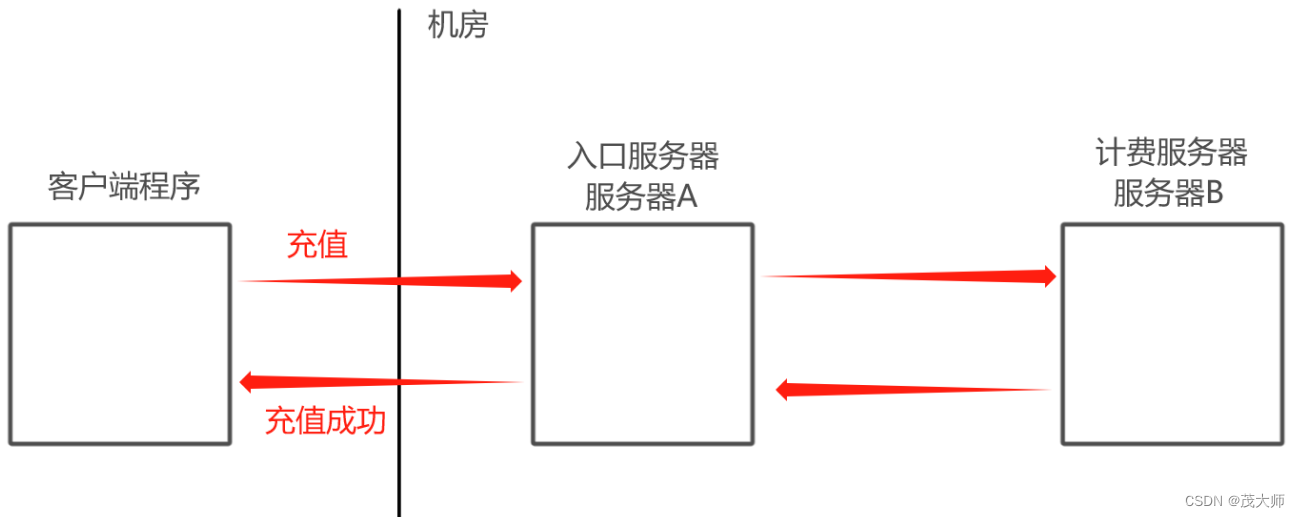
- 好处一:实现了发送方和接收方之间的 解耦
- 此时A 把请求转发个 B处理,B 处理完把结果反馈给A
- 此时可以视为 A调用了B
- 在上述场景中,A和 B之间的耦合是比较高的
- A要调用B ,A务必要知道 B的存在
- 如果 B挂了,很容易引起 A的 bug
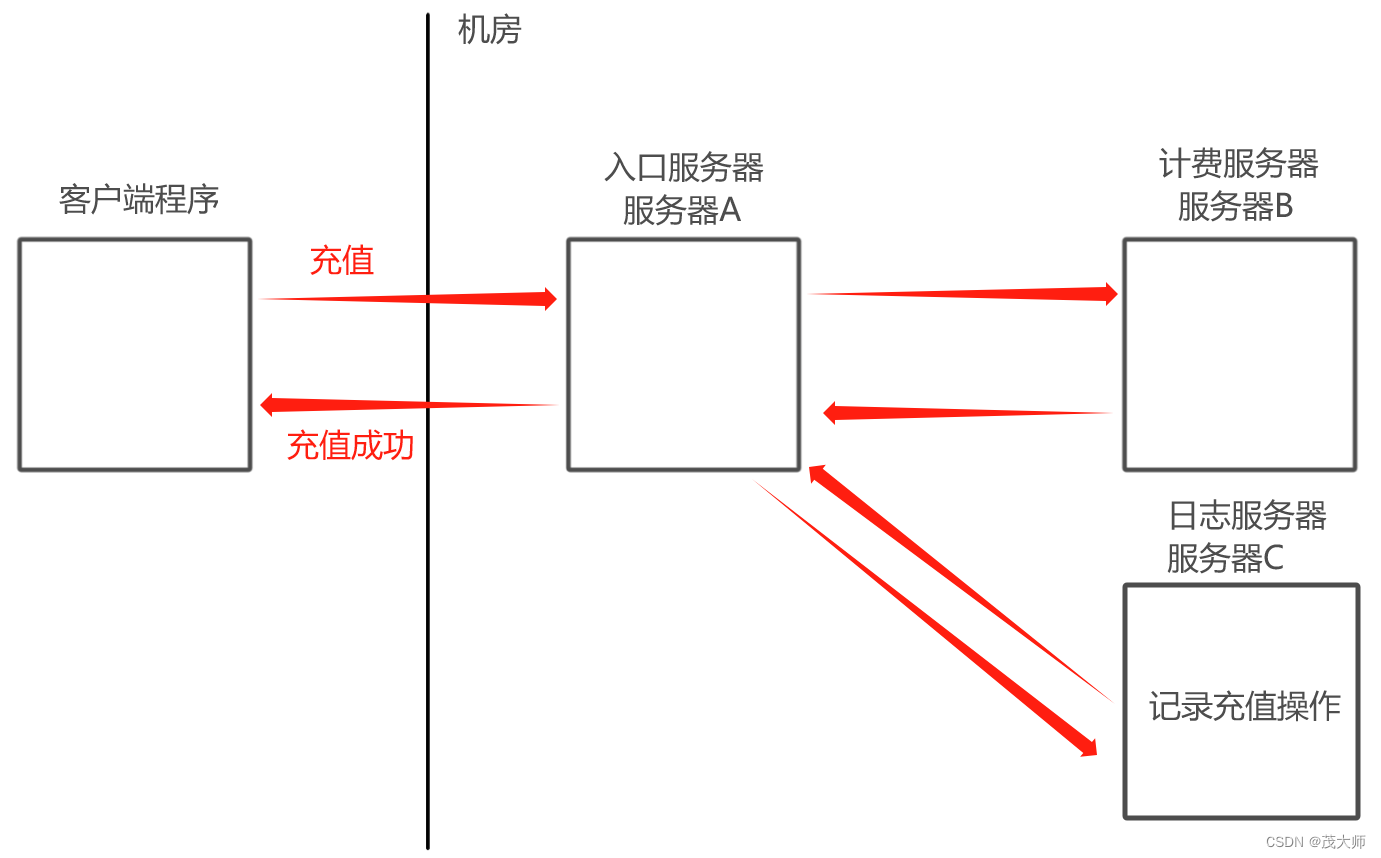
- 如果要是再加一个 C服务器,此时也需要对 A修改不少代码
- 因此就需要针对 A重新修改代码、重新测试、重新发布、重新部署 等,十分麻烦
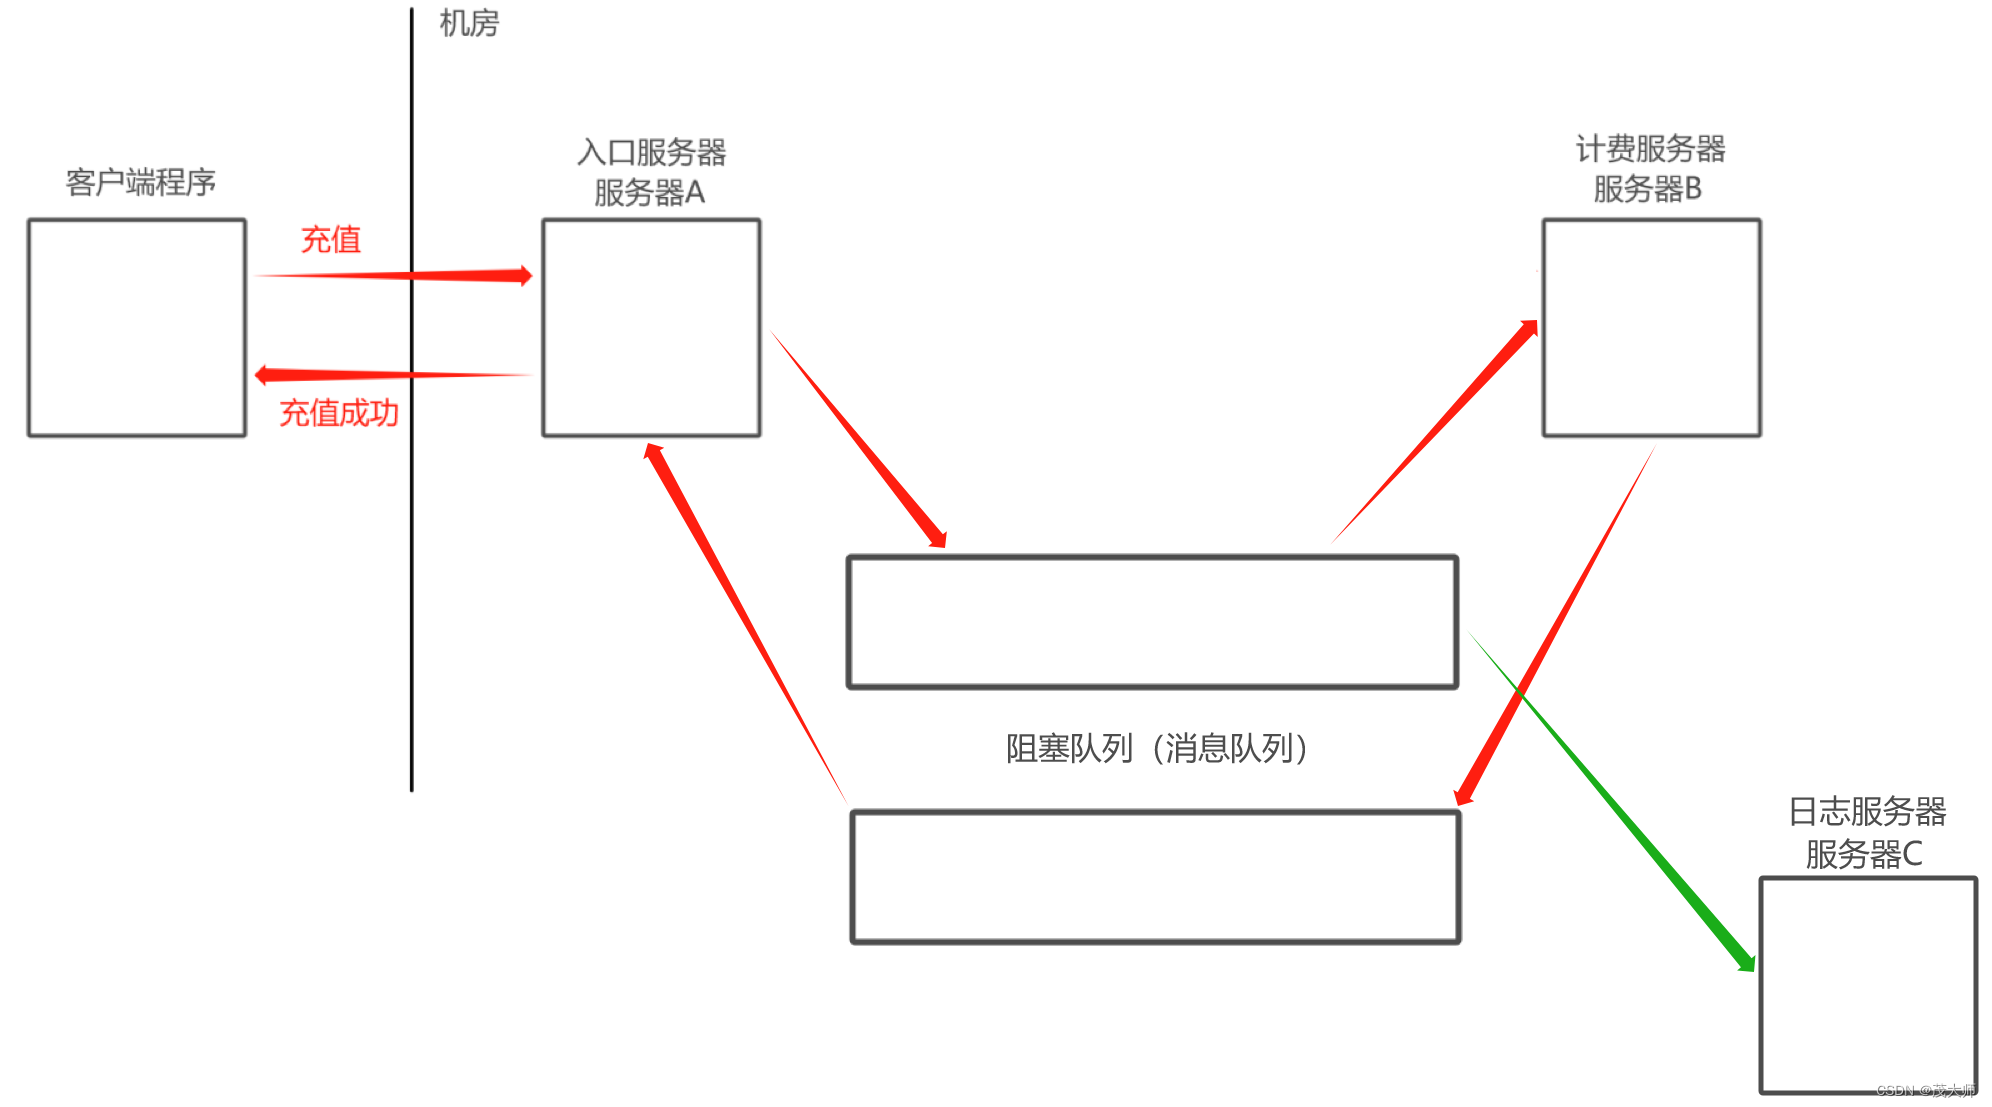
使用生产者消费者模型解耦
- 此时A 和B 之间的耦合就降低了很多
- A 并不知道B,A只知道队列(A的代码中没有任何一行与 B相关)
- B 也不知道A,B只知道队列(B的代码中没有任何一行与 A相关)
- 如果 B挂了,对 A没有任何影响,因为队列在,A 仍然可以给队列插入元素,如果队列满了,就先阻塞
- 如果 A挂了,对 B没有任何影响,因为队列在,B仍然可以从队列中取元素,如果队列空了,就先阻塞
- 新增一个服务器C 来作为消费者,对于 A来说是无感知的
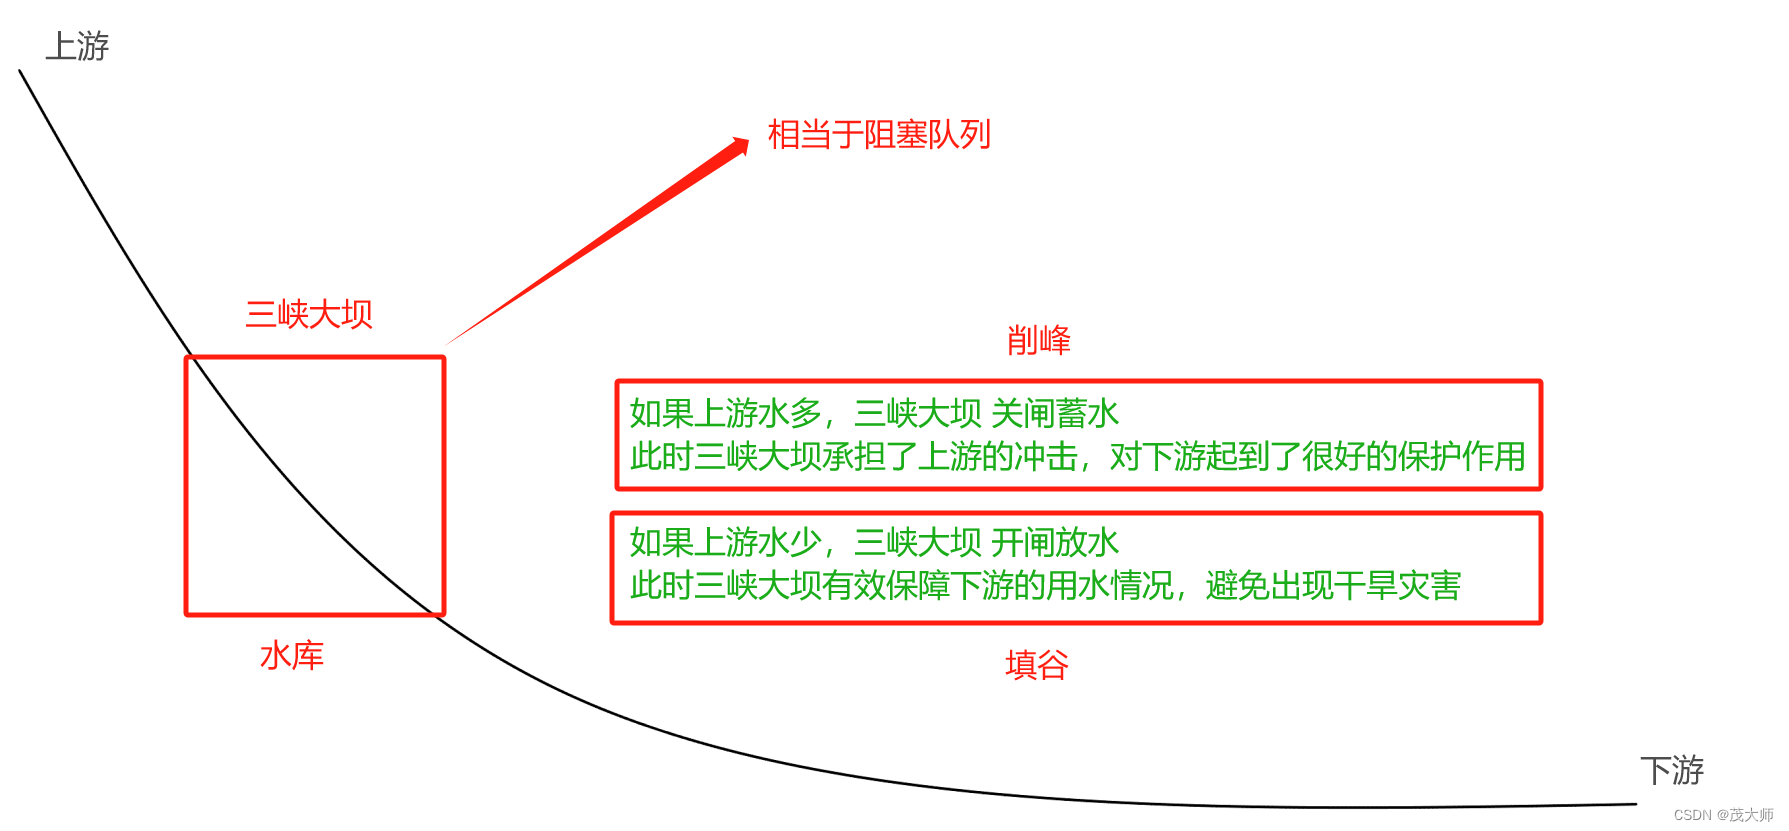
- 好处二:可以做到 削峰填谷,保证系统的稳定性
- 我们进行服务器开发,也和上述这个模型是非常相似的
- 上游就是用户发送的请求
- 下游就是一些执行具体业务的服务器
- 用户发多少请求是不可控的
标准库阻塞队列使用
import java.util.concurrent.*;

//阻塞队列的使用
public class ThreadDemo21 {
    public static void main(String[] args) throws InterruptedException {
//        基于链表实现的阻塞队列
        BlockingQueue<String> blockingQueue1 = new LinkedBlockingQueue<>();

//        基于数组实现的优先级队列
//        BlockingQueue<String> blockingQueue2 = new ArrayBlockingQueue<>();
//        基于堆实现的优先级队列
//        BlockingQueue<String> blockingQueue3 = new PriorityBlockingQueue<>();

        blockingQueue1.put("hello");
        String res = blockingQueue1.take();
        System.out.println(res);
        res = blockingQueue1.take();
        System.out.println(res);
    }
}
- 我们向阻塞队列中使用 put 方法插入了一个 "hello" 字符串
- 此时我们再连续使用两次 take 方法取出阻塞队列中元素
- 注意此时的 put 方法 和 take 方法均带有阻塞功能
运行结果:
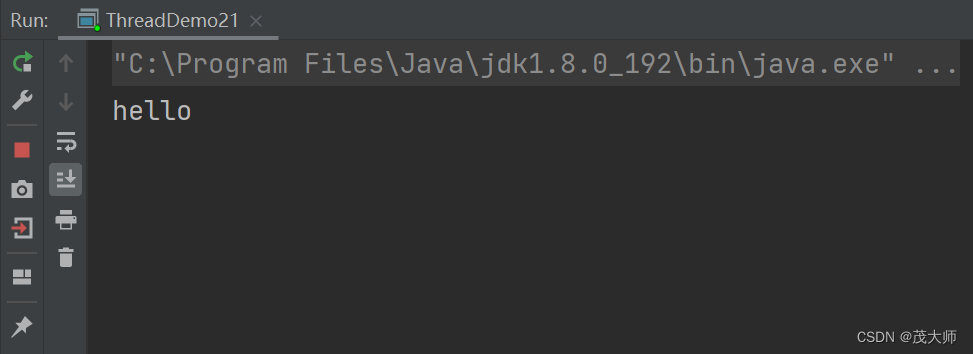
- 我们可以发现控制台打印插入的 "hello" 字符串
- 当执行第二次 take 方法时,便进行阻塞
实现一个简单 生产者消费者模型
import java.util.concurrent.BlockingQueue;
import java.util.concurrent.LinkedBlockingQueue;

public class ThreadDemo22 {
    public static void main(String[] args) {
        BlockingQueue<Integer> blockingQueue = new LinkedBlockingQueue<>();

//        创建两个线程来作为 生产者 和 消费者
        Thread customer = new Thread(() -> {
            while (true) {
                try {
                    Integer result  = blockingQueue.take();
                    System.out.println("消费元素:" + result);
                } catch (InterruptedException e) {
                    e.printStackTrace();
                }
            }
        });
        customer.start();


        Thread producer = new Thread(() -> {
            int count = 0;
            while (true) {
                try {
                    blockingQueue.put(count);
                    System.out.println("生产元素:" + count);
                    count++;
                    Thread.sleep(500);
                } catch (InterruptedException e) {
                    e.printStackTrace();
                }
            }
        });
        producer.start();
    }
}
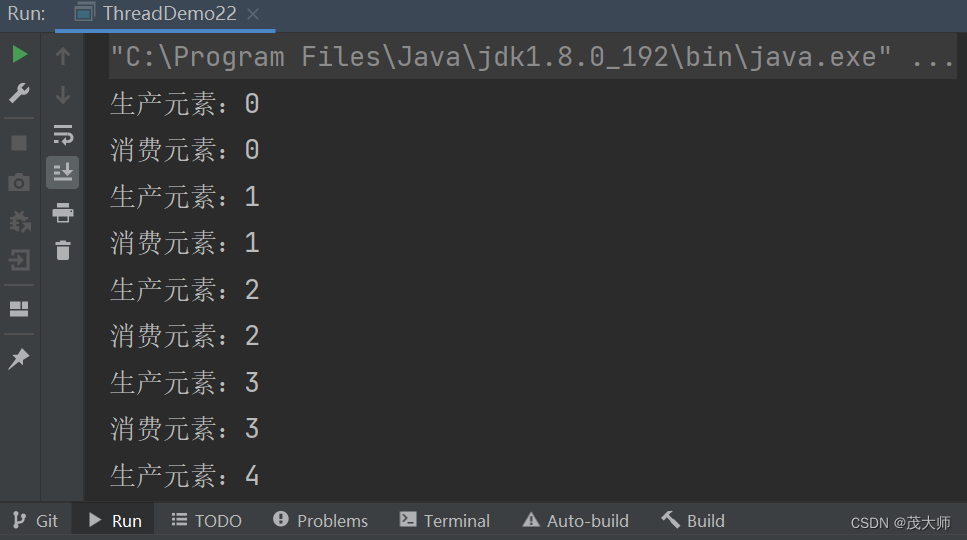
运行结果:
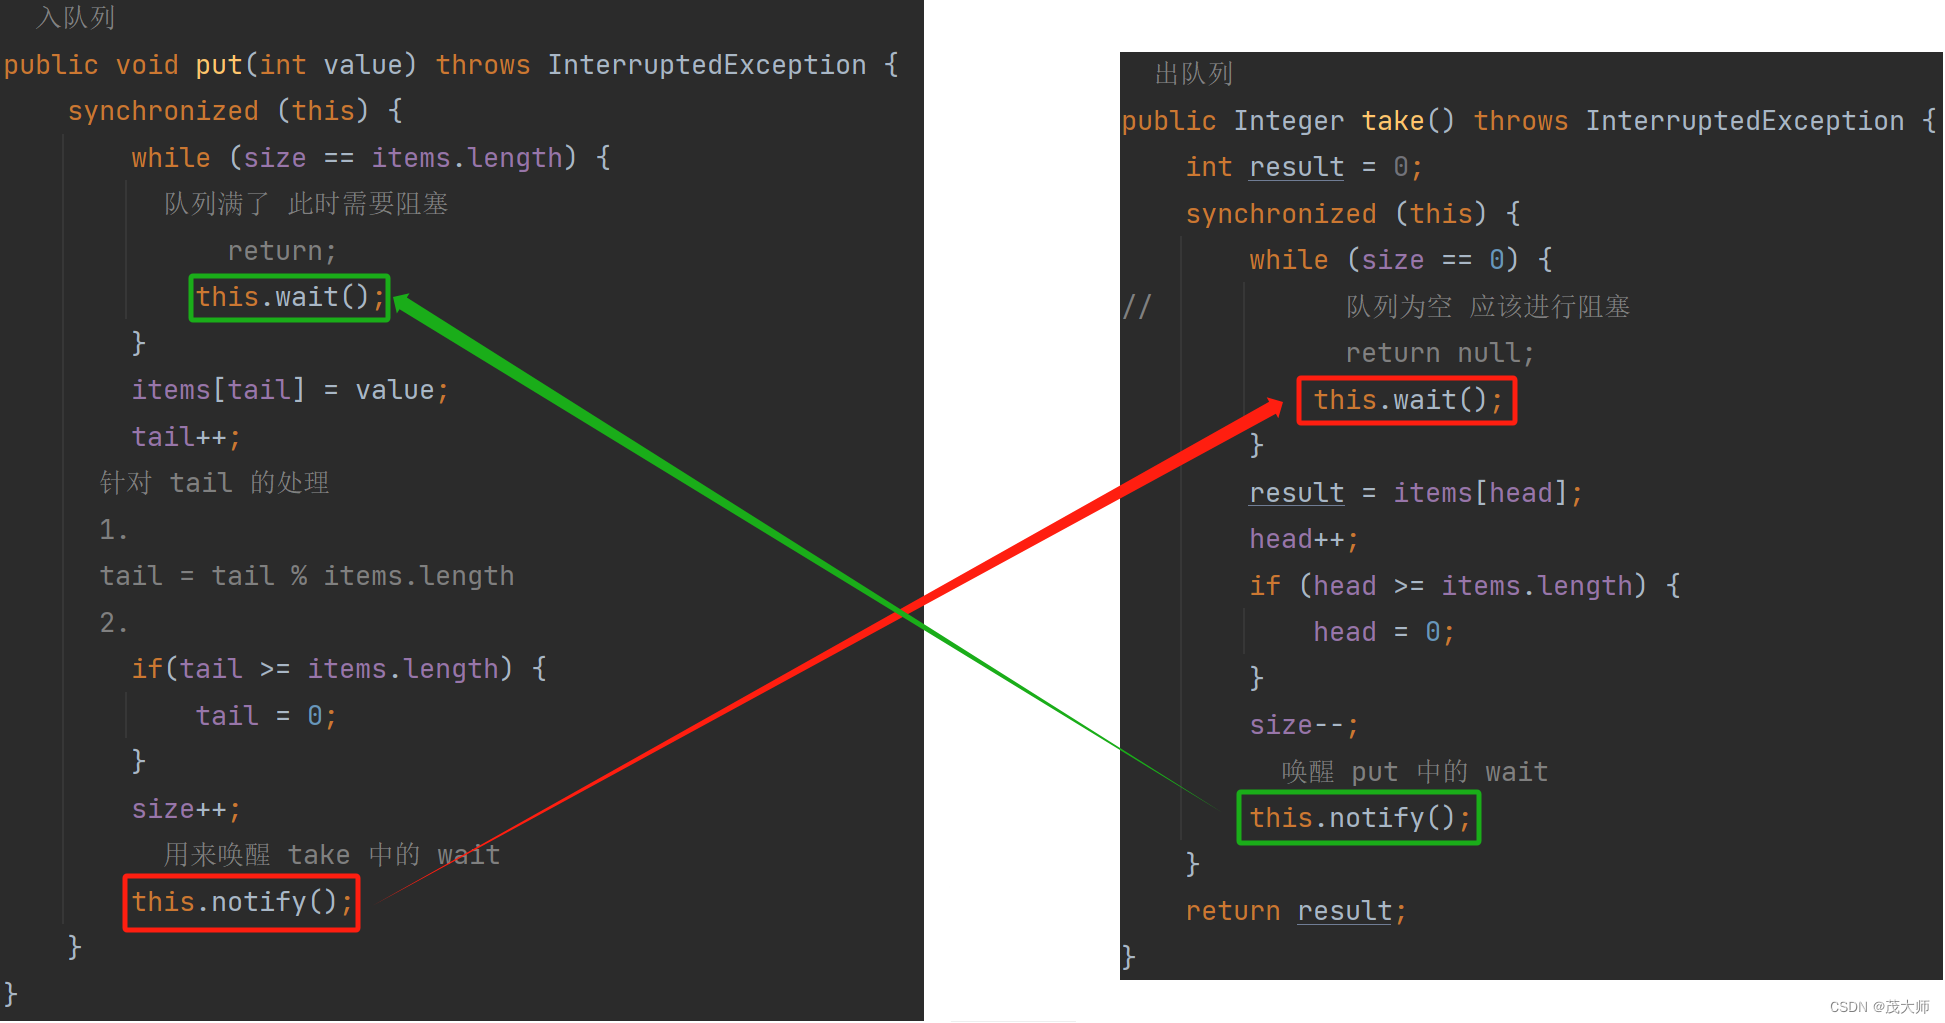
自己实现阻塞队列代码
- 以下是基于一个循环数组实现的阻塞队列
//自己写阻塞队列
//此处不考虑泛型,直接使用 int 来表示元素类型
class MyBlockingQueue {
    private int[] items = new int[10];
//    指向阻塞队列的头部
    private int head = 0;
//    指向阻塞队列的尾部
    private int tail = 0;
//    记录阻塞队列的长度
    private int size = 0;

//    入队列
    public void put(int value) throws InterruptedException {
        synchronized (this) {
            while (size == items.length) {
//            队列满了 此时需要阻塞
//                return;
                this.wait();
            }
            items[tail] = value;
            tail++;
//        针对 tail 的处理
//        1.
//        tail = tail % items.length
//        2.
            if(tail >= items.length) {
                tail = 0;
            }
            size++;
//            用来唤醒 take 中的 wait
            this.notify();
        }
    }

//    出队列
    public Integer take() throws InterruptedException {
        int result = 0;
        synchronized (this) {
            while (size == 0) {
    //            队列为空 应该进行阻塞
//                return null;
                this.wait();
            }
            result = items[head];
            head++;
            if (head >= items.length) {
                head = 0;
            }
            size--;
//            唤醒 put 中的 wait
            this.notify();
        }
        return result;
    }
}

public class ThreadDemo23 {
    public static void main(String[] args) throws InterruptedException {
        MyBlockingQueue queue = new MyBlockingQueue();

        Thread product = new Thread(() ->{
            int count = 0;
            while (true) {
                try {
                    System.out.println("生产元素 : " + count);
                    queue.put(count);
                    count++;
                } catch (InterruptedException e) {
                    e.printStackTrace();
                }
            }
        });
        product.start();

        Thread custom = new Thread(() -> {
            int result = 0;
            while (true) {
                try {
                    result = queue.take();
                    System.out.println("消费元素 : " + result);
                    Thread.sleep(500);
                } catch (InterruptedException e) {
                    e.printStackTrace();
                }
            }
        });
        custom.start();
    }
}
运行结果:
重点理解
- 正因为生产者消费者模型是边生产边消费的
- 所以上述阻塞队列我们可以基于一个循环数组
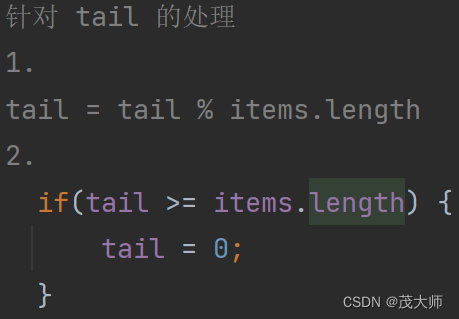
- 那么当我们的 tail 指向数组末尾时,便需要重新指向开头,此时便有两种方案
- 方案一 根据 tail 的值和 阻塞队列的长度来取模
- 方案二 直接将 tail 值 与 数组长度进行比较,如果等于或大于数组长度,直接赋值为 0,也就相当于直接从头开始
- 更推荐第二种方案
- 首先第二种方案要更加直观,可读性更好,一眼便能知道该段代码的逻辑是什么
- 其次取模运算本质上要做一系列的除法运算,计算机算乘除相对算加减是要慢的,但是方案二仅是判定和赋值,这两个高效操作,从而方案二的效率比方案一要高
- 为了实现 put 方法和 take 方法的阻塞效果,我们引入了 wait 和 notify
- 在仅创建一个阻塞队列实例的情况下,那么这个两个线程中的 wait 是否会同时触发?
- 肯定是不会的,针对同一个阻塞队列,不可能既是空又是满
- 此处当 队列满 或 队列空 时,将会直接进入 wait 阻塞状态
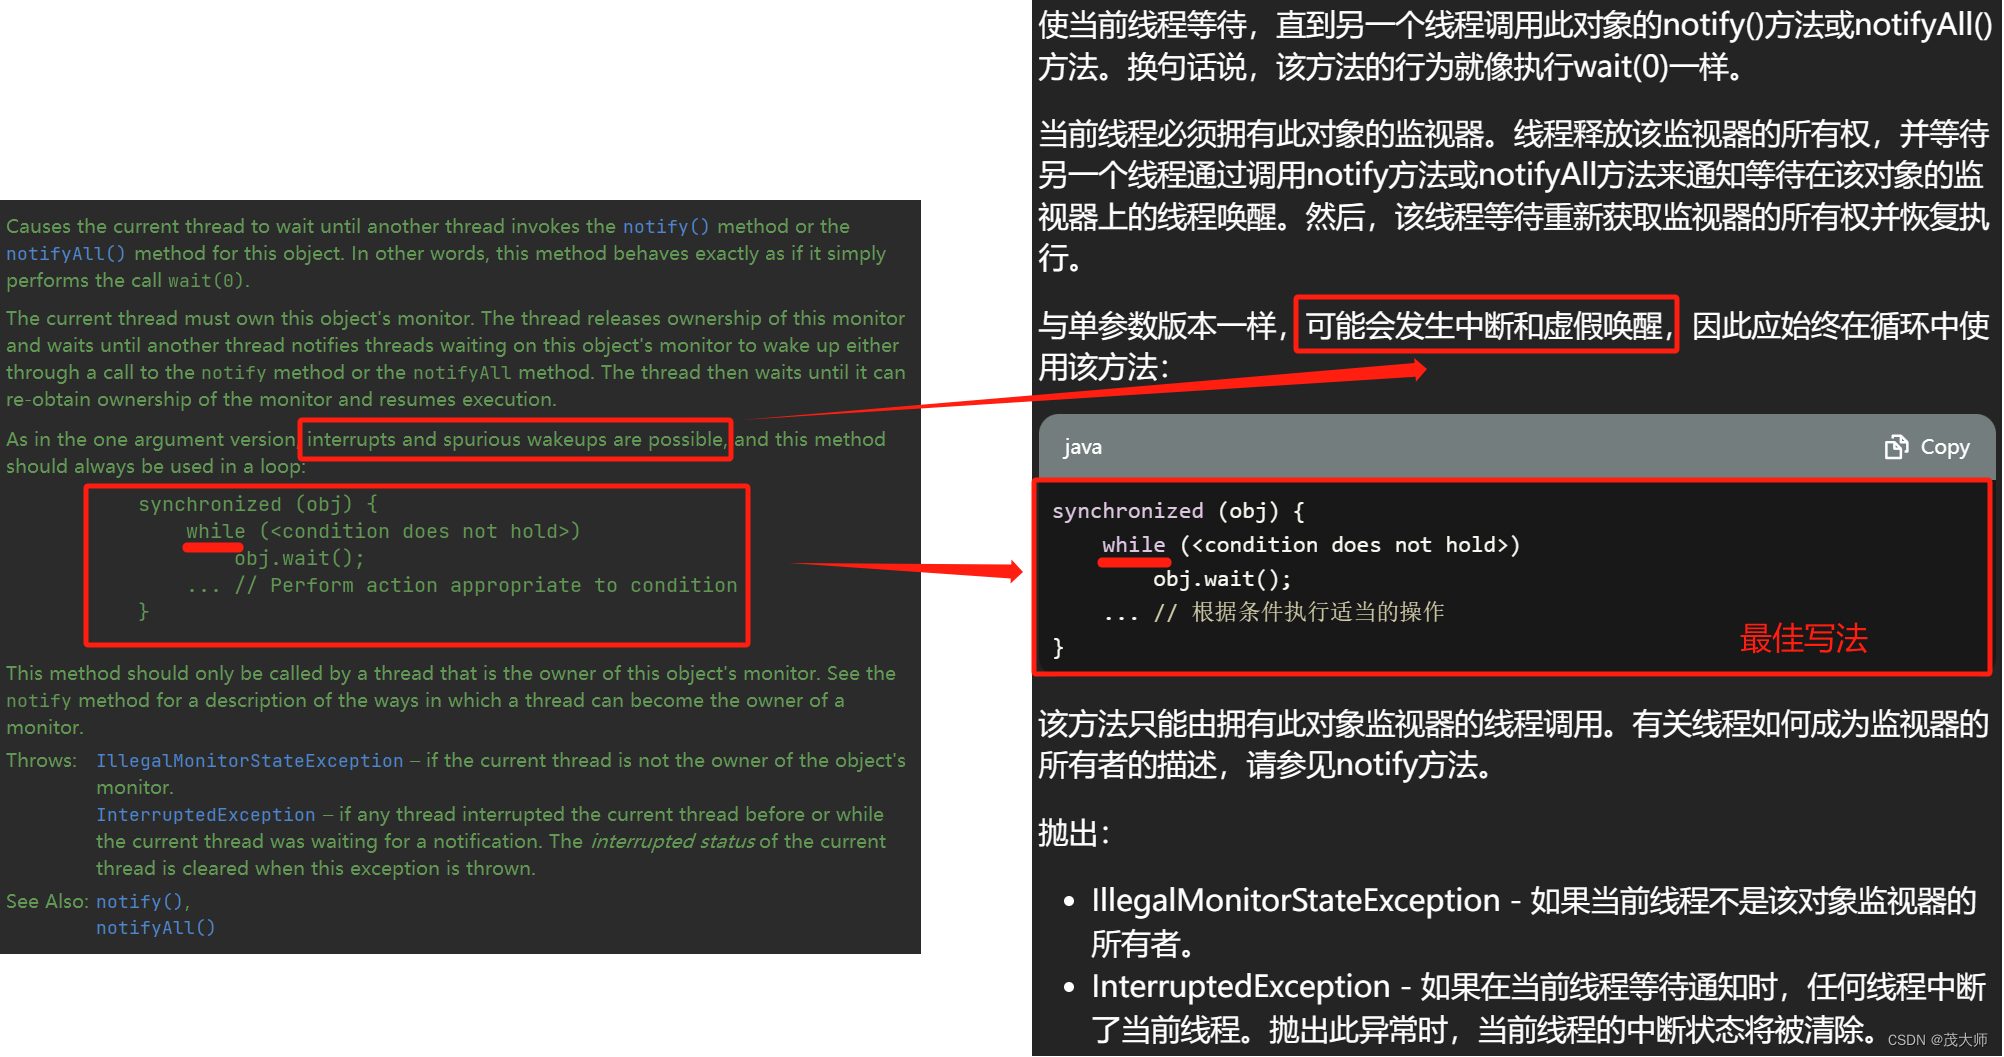
- 那为什么这里是写的循环,而不是写 if 判断语句呢?
- 具体来说就是当 wait 被 notify 唤醒后,阻塞队列一定是 非空 或 不满 吗?
- 咱们当前的代码确实不会出现这种情况
- 因为该代码一定是 插入或拿取 元素成功后才会 notify 唤醒 wait
- 并不存在第二种唤醒 wait 的方式,所以 wait 不会在非空 或 不满的时候被唤醒
- 但是为了稳妥起见,还是加上 while 循环 唤醒之后,再判定一下,看此时的条件是否具备
- 正如上述 wait 原码中建议写法一致

