强化学习环境 - robogym - 学习 - 3
文章目录
- 强化学习环境 - robogym - 学习 - 3
- 项目地址
- 为什么选择 robogym
- Observation - 观测信息
- Action - 动作信息
- Initialization - 初始状态设置
项目地址
https://github.com/openai/robogym
为什么选择 robogym
-
自己的项目需要做一些机械臂 table-top 级的多任务操作
-
robogym 基于 mujoco 搭建,构建了一个仿真机械臂桌面物体操作(pick-place、stack、rearrange)场景
-
robogym 的例程效果看,支持多个相机示教,包括眼在手上和眼在手外,可以获取多视角视觉信息
-
robogym 的物体支持 YCB 数据集格式
主要是这些原因,当然,看官方 readme.md 文档,它还有其他不错的功能。
国内主流社区对 robogym 的介绍比较少,所以选择写一些文档记录一下,作为参考。
Observation - 观测信息
robogym 的观测一般通过 obs = env.reset() 返回即可得到。爬源码可得到 obs 是一个字典。
把字典的键排序按照值的方法进行了简答的分类,可以得到:仿真环境的 obs 字典是通过:self.mujoco_simulation 、 robot_obs 、 self._goal 、 self._goal_info_dict 和 np.array 四个变量得到的。
obs = {
    		# 读取 self.mujoco_simulation 内部的方法返回作为值
            "obj_pos": self.mujoco_simulation.get_object_pos(),
            "obj_rel_pos": self.mujoco_simulation.get_object_rel_pos(),
            "obj_vel_pos": self.mujoco_simulation.get_object_vel_pos(),
            "obj_rot": self.mujoco_simulation.get_object_rot(),
            "obj_vel_rot": self.mujoco_simulation.get_object_vel_rot(),
    		"qpos": self.mujoco_simulation.qpos,
    		"obj_gripper_contact": self.mujoco_simulation.get_object_gripper_contact(),
            "obj_bbox_size": self.mujoco_simulation.get_object_bounding_box_sizes(),
            "obj_colors": self.mujoco_simulation.get_object_colors(),

    		# 在代码上面实例化了
    		# robot_obs = self.mujoco_simulation.robot.observe()
    		# 这个实例,这部分的键对应的值就是 robot_obs 的方法
            "robot_joint_pos": robot_obs.joint_positions(),
            "gripper_pos": robot_obs.tcp_xyz(),
            "gripper_velp": robot_obs.tcp_vel(),
            "gripper_controls": robot_obs.gripper_controls(),
            "gripper_qpos": robot_obs.gripper_qpos(),
            "gripper_vel": robot_obs.gripper_vel(),
    		"tcp_force": robot_obs.tcp_force(),
            "tcp_torque": robot_obs.tcp_torque(),

            # self._goal 从源码来看就是每个物体重排列的位置。

            "qpos_goal": self._goal["qpos_goal"].copy(),
            "goal_obj_pos": self._goal["obj_pos"].copy(),
            "goal_obj_rot": self._goal["obj_rot"].copy(),
            "rel_goal_obj_pos": self._goal_info_dict["rel_goal_obj_pos"].copy(),
            "rel_goal_obj_rot": self._goal_info_dict["rel_goal_obj_rot"].copy(),

    		"is_goal_achieved": np.array([self._is_goal_achieved], np.int32),
            "safety_stop": np.array([robot_obs.is_in_safety_stop()]),

        }
这里列出了每个键对应的含义。
| observation 键名 | 每个键的意义 |
|---|---|
| object_pos | Get position for all objects. |
| object_rel_pos | Get position for all objects relative to the gripper position. |
| object_vel_pos | Get position velocity for all objects relative to tooltip velocity. |
| object_rot | Get rotation in euler angles for all objects. |
| object_vel_rot | Get rotation velocity for all objects. |
| robot_joint_pos | Array of joint angles (one for each joint). |
| gripper_pos | Tooltip position in the Cartesian coordinate space. |
| gripper_velp | Tooltip velocity in the Cartesian coordinate space. |
| gripper_controls | Gripper’s linear target position. |
| gripper_qpos | Gripper joint positions. |
| gripper_vel | Gripper joint velocities. |
| qpos | Copy of full sim qpos including 3D-position and 4D-quaternion. |
| qpos_goal | Copy of full sim goal qpos including 3D-position and 4D-quaternion. |
| goal_obj_pos | Get current-goal positions for all objects. |
| goal_obj_rot | Get current-goal rotations in euler angles for all objects. |
| is_goal_achieved | Return if current goal is achieved. |
| rel_goal_obj_pos | Get current-goal positions for all objects relative to the gripper position. |
| rel_goal_obj_rot | Get current-goal rotations for all objects relative to the gripper position. |
| obj_gripper_contact | A numpy array of shape [num objects, len(other_geom_ids)], in which each value is binary, 1 meaning having contact and 0 no contact. |
| obj_bbox_size | Returns the bounding box for one objects as a tuple of (positive, half size), where both positive and half size are np.array of shape (3,). |
| obj_colors | This logic works, assuming only assign a single color to one object. |
| safety_stop | True if the arm is in a safety stop, False otherwise. |
| tcp_force | TCP force in world coordinates. |
| tcp_torque | TCP torque in world coordinates. |
根据自己的项目,选择:
object_pos、object_rot,代表了每个物体的位置和姿态;gripper_pos、gripper_controls,代表了机械臂的位置和张开闭合程度;goal_obj_pos、goal_obj_rot,代表了每个物体的目标位置和目标姿态。
需要精简一下观测的信息,有三种思路:
-
爬源码,把不必要的观测信息直接注释掉;
【注意】 一些项目中会在
observation生成后再对里面的键做处理,这样做会导致一些bug!! -
利用 Open AI Gym 的
FilterObservation()这个类过滤掉不想要的键; -
自己写一个函数,把不必要的键过滤掉;
【注意】
.reset()和.step()的返回都需要进行这样的操作!!
这里我选择自己写一个函数。
# create a small util to filter the observation
def filter_obs(raw_obs: dict, name_list: list) -> dict:
    result = {}
    for name in name_list:
        result[name] = copy.copy(raw_obs[name])
    return result
最后的代码如下。选择 pprint.pprint() 进行输出可以更加格式化。
import copy
import pprint
from robogym.envs.rearrange.ycb import make_env


# create a small util to filter the observation
def filter_obs(raw_obs: dict, name_list: list) -> dict:
    result = {}
    for name in name_list:
        result[name] = copy.copy(raw_obs[name])
    return result


# Create an environment with the default number of objects: 5
env = make_env(
    parameters={
        'simulation_params': {
            'num_objects': 3,
            'max_num_objects': 8,
        }
    }
)

# Reset to randomly generate an environment with `num_objects: 3`
obs = env.reset()
obs = filter_obs(obs, ["obj_pos", "obj_rot", "gripper_pos", "gripper_controls", "goal_obj_pos", "goal_obj_rot"])
pprint.pprint(obs)

while True:
    a = env.action_space.sample()
    next_obs, reward, done, info = env.step(a)
    next_obs = filter_obs(next_obs, ["obj_pos", "obj_rot", "gripper_pos", "gripper_controls", "goal_obj_pos", "goal_obj_rot"])
    pprint.pprint(next_obs)
    env.render()
得到结果:
{'goal_obj_pos': array([[1.39363232, 0.86174547, 0.51221652],
       [1.57460708, 0.70375038, 0.50919097],
       [1.20793525, 0.8834796 , 0.49350575],
       [0.        , 0.        , 0.        ],
       [0.        , 0.        , 0.        ],
       [0.        , 0.        , 0.        ],
       [0.        , 0.        , 0.        ],
       [0.        , 0.        , 0.        ]]),
 'goal_obj_rot': array([[ 0.        ,  0.        , -1.79725862],
       [ 0.        ,  0.        , -1.13518178],
       [ 0.        ,  0.        , -2.40479252],
       [ 0.        ,  0.        ,  0.        ],
       [ 0.        ,  0.        ,  0.        ],
       [ 0.        ,  0.        ,  0.        ],
       [ 0.        ,  0.        ,  0.        ],
       [ 0.        ,  0.        ,  0.        ]]),
 'gripper_controls': array([0.]),
 'gripper_pos': array([1.23887261, 0.43994768, 0.68622718]),
 'obj_pos': array([[1.59604171, 0.81327296, 0.51217642],
       [1.57460711, 0.41286039, 0.50922118],
       [1.40990736, 0.64130153, 0.49354594],
       [0.        , 0.        , 0.        ],
       [0.        , 0.        , 0.        ],
       [0.        , 0.        , 0.        ],
       [0.        , 0.        , 0.        ],
       [0.        , 0.        , 0.        ]]),
 'obj_rot': array([[-8.89659174e-05, -7.47313090e-05, -1.79530140e+00],
       [-3.00692282e-06,  4.73572520e-06, -1.13518163e+00],
       [-4.85122664e-02, -4.51887581e-02, -2.40575071e+00],
       [ 0.00000000e+00,  0.00000000e+00,  0.00000000e+00],
       [ 0.00000000e+00,  0.00000000e+00,  0.00000000e+00],
       [ 0.00000000e+00,  0.00000000e+00,  0.00000000e+00],
       [ 0.00000000e+00,  0.00000000e+00,  0.00000000e+00],
       [ 0.00000000e+00,  0.00000000e+00,  0.00000000e+00]])}
为什么 'goal_obj_rot' 这部分只有第三个元素有数值,前面两个没数值?
原因是这是用 rpy 格式描述姿态的。这三个元素依次表示roll 、 pitch 和 yaw 角。如下图所示。

而 table-top 级的物体都是“平躺”的,所以默认 yaw 角有姿态。
在上述打印出来的字典可以看到,当忽略很小的小数(-3.00692282e-06)时,目标姿态和当前物体姿态差别不大,这说明在当前环境中,只需要机械臂做细致的平移就行。
Action - 动作信息
robogym 的动作空间比较特殊:它通过一层 wrapper 把原本
[
−
1
,
1
]
[-1,1]
[−1,1] 数值的动作空间给离散化了:在 ~/robogym/robogym/wrappers/utils.py 里面 DiscretizeActionWrapper 把奖励值做了封装,通过离散数值索引一个列表 [-1. -0.8 -0.6 -0.4 -0.2 0. 0.2 0.4 0.6 0.8 1. ] ,获得机械臂TCP末端的偏移量,前面三维度分别是 xyz,后面两个维度是姿态角,最后一个维度是夹爪的开闭(但是测试效果是夹爪开闭似乎无效,可能是因为这是 rearrange 环境,对物体的操作更多是“push”而不是“pick-and-place”)。
【注意】在这样的默认包装下,保持机械臂末端位姿不动的动作向量是:a = np.asarray([5, 5, 5, 5, 5, 5]) 可以设置一个全局参数保存这个动作向量。
【注意】a = np.asarray([0, 0, 0, 0, 0, 0]) 不是静止的向量,相反,它是偏移最大的动作向量!
Initialization - 初始状态设置
好的初始状态既能完成更好的实验,也能在做成视频的时候更美观些。对于机械臂 rearrange 环境,设置初始状态的函数是在 ~/robogym/robogym/envs/rearrange/common/base.py 文件里面 RearrangeEnv 类的 _randomize_robot_initial_position() 函数中。函数中是通过设置末端TCP的初始位姿来进行状态初始化的。
action = self.action_space.sample()
if self.parameters.n_random_initial_steps < 1:
    return
for _ in range(self.parameters.n_random_initial_steps):
    self._set_action(action)
    self.mujoco_simulation.step()
self._set_action(action * 0.0)
for _ in range(100):
    # calling set_action each tick is necessary
    # for the robot to reach stability with relative actions
    self._set_action(action * 0.0)
    self.mujoco_simulation.step()

print(self.mujoco_simulation.get_qpos('robot0:arm_joint_angles'))
里面用到了这个类中实例过的mujoco接口 mujoco_simulation 。这里的mujoco接口保留了大量 mujoco-py 的方法,可以爬源码看到都有哪些函数方法可以调用。
class SimulationInterface:
    """
    Base class for domain-specific simulation interfaces tied to particular XML.

    Goal is to transform code interfacing with generic `MjSim` that looks like that:

    hand_angles = sim.data.qpos[hand_angle_idx]
    cube_pos = sim.data.qpos[cube_pos_idx]
    sim.model.actuator_gainprm[actuator_idx] = actuator_kps
    sim.model.actuator_biasprm[actuator_idx] = actuator_kps

    Into more high-level and domain-specific version:

    hand_angles = sim.hand.get_angles()
    cube_pos = sim.get_cube_pos()
    sim.set_actuator_kp(actuator_kps)

    Etc.

    This is a base class that just exposes a few generic utilities to help the subclasses
    implement the abovementioned functionality. By convention, the subclasses should be named
    <Something>Simulation.
    """

    __slots__ = [
        "sim",
        "qpos_idxs",
        "qvel_idxs",
        "synchronization_points",
        "_mujoco_viewer",
    ]

    def __init__(self, sim: MjSim):
        self.sim = sim

        self.qpos_idxs: Dict[str, List[int]] = {}
        self.qvel_idxs: Dict[str, List[int]] = {}

        self.synchronization_points = []  # type: ignore

        self._mujoco_viewer = None

    @property
    def mj_sim(self):
        """ MuJoCo simulation object - alias to make it clearer """
        return self.sim

    @property
    def mujoco_viewer(self):
        """
        Get a nicely-interactive version of the mujoco viewer
        """
        if self._mujoco_viewer is None:
            # Inline import since this is only relevant on platforms
            # which have GLFW support.
            from mujoco_py.mjviewer import MjViewer  # noqa

            self._mujoco_viewer = MjViewer(self.sim)

        return self._mujoco_viewer

    def enable_pid(self):
        """ Enable our custom PID controller code for the actuators with 'user' type """
        cymj.set_pid_control(self.sim.model, self.sim.data)

    ########################################################################################
    # SUBCLASS REGISTRATION
    def register_joint_group(self, group_name, prefix):
        """ Finds and collect joint ids for given joint name prefix or a list of prefixes. """
        if isinstance(prefix, str):
            self.qpos_idxs[group_name] = joint_qpos_ids_from_prefix(
                self.sim.model, prefix
            )
            self.qvel_idxs[group_name] = joint_qvel_ids_from_prefix(
                self.sim.model, prefix
            )
        elif isinstance(prefix, list):
            self.qpos_idxs[group_name] = list(
                it.chain.from_iterable(
                    joint_qpos_ids_from_prefix(self.sim.model, p) for p in prefix
                )
            )
            self.qvel_idxs[group_name] = list(
                it.chain.from_iterable(
                    joint_qvel_ids_from_prefix(self.sim.model, p) for p in prefix
                )
            )

    def register_joint_group_by_name(self, group_name, name):
        """ Finds and collect joint ids for given joint name or list of names. """
        if isinstance(name, str):
            self.qpos_idxs[group_name] = joint_qpos_ids(self.sim.model, name)
            self.qvel_idxs[group_name] = joint_qvel_ids(self.sim.model, name)
        elif isinstance(name, list):
            self.qpos_idxs[group_name] = list(
                it.chain.from_iterable(joint_qpos_ids(self.sim.model, n) for n in name)
            )
            self.qvel_idxs[group_name] = list(
                it.chain.from_iterable(joint_qvel_ids(self.sim.model, n) for n in name)
            )

    ########################################################################################
    # GET DATA OUT OF SIM
    def get_qpos(self, group_name):
        """ Gets qpos for a particular group. """
        return self.sim.data.qpos[self.qpos_idxs[group_name]]

    def get_qpos_dict(self, group_names):
        """ Gets qpos dictionary for multiple groups. """
        return {k: self.get_qpos(k) for k in group_names}

    def get_qvel(self, group_name):
        """ Gets qvel for a particular group. """
        return self.sim.data.qvel[self.qvel_idxs[group_name]]

    def get_qvel_dict(self, group_names):
        """ Gets qpos dictionary for multiple groups. """
        return {k: self.get_qvel(k) for k in group_names}

    @property
    def qpos(self):
        """ Returns. copy of full sim qpos. """
        return self.sim.data.qpos.copy()

    @property
    def qvel(self):
        """ Returns copy of full sim qvel. """
        return self.sim.data.qvel.copy()

    def get_state(self) -> MjSimState:
        return self.sim.get_state()

    ########################################################################################
    # SET DATA IN SIM
    def set_qpos(self, group_name, value):
        """ Sets qpos for a given group. """
        self.sim.data.qpos[self.qpos_idxs[group_name]] = value

    def set_qvel(self, group_name, value):
        """ Sets qpos for a given group. """
        self.sim.data.qvel[self.qvel_idxs[group_name]] = value

    def add_qpos(self, group_name, value):
        """ Sets qpos for a given group. """
        self.sim.data.qpos[self.qpos_idxs[group_name]] += value

    def set_state(self, state: MjSimState):
        self.sim.set_state(state)

    ########################################################################################
    # INTERFACE TO UNDERLYING SIM
    def step(self, with_udd=True):
        """
        Advances the simulation by calling ``mj_step``.

        If ``qpos`` or ``qvel`` have been modified directly, the user is required to call
        :meth:`.forward` before :meth:`.step` if their ``udd_callback`` requires access to MuJoCo
        state set during the forward dynamics.
        """
        self.sim.step(with_udd=with_udd)
        self.sim.forward()

        # To potentially communicate with other processes
        for point in self.synchronization_points:
            point.synchronize()

    def reset(self):
        """
        Resets the simulation data and clears buffers.
        """
        self.sim.reset()

    def set_constants(self):
        """
        Sets the derived constants of the mujoco simulation.
        """
        self.sim.set_constants()

    def forward(self):
        """
        Computes the forward kinematics. Calls ``mj_forward`` internally.
        """
        self.sim.forward()

    def render(
        self,
        width=None,
        height=None,
        *,
        camera_name=None,
        depth=False,
        mode="offscreen",
        device_id=-1
    ):
        """
        Renders view from a camera and returns image as an `numpy.ndarray`.

        Args:
        - width (int): desired image width.
        - height (int): desired image height.
        - camera_name (str): name of camera in model. If None, the free
            camera will be used.
        - depth (bool): if True, also return depth buffer
        - device (int): device to use for rendering (only for GPU-backed
            rendering).

        Returns:
        - rgb (uint8 array): image buffer from camera
        - depth (float array): depth buffer from camera (only returned
            if depth=True)
        """
        return self.sim.render(
            width=width,
            height=height,
            camera_name=camera_name,
            depth=depth,
            mode=mode,
            device_id=device_id,
        )

    ########################################################################################
    # PROPERTIES
    @property
    def n_substeps(self):
        """ Number of substeps in the mujoco sim """
        return self.sim.nsubsteps
在这里,我主要通过单步调试,实现一个关节角的初始化。具体做法是:注释掉上面初始化状态的代码,写入自己的代码:
from math import pi

print(self.mujoco_simulation.qpos_idxs.keys())
self.mujoco_simulation.set_qpos('robot0:arm_joint_angles',np.asarray([1.5 * 0.5 * pi, -0.5 * pi, 1.5 * 0.5 * pi,-1.74529567, -4.18881842, 2.35619837]))

self.mujoco_simulation.step()
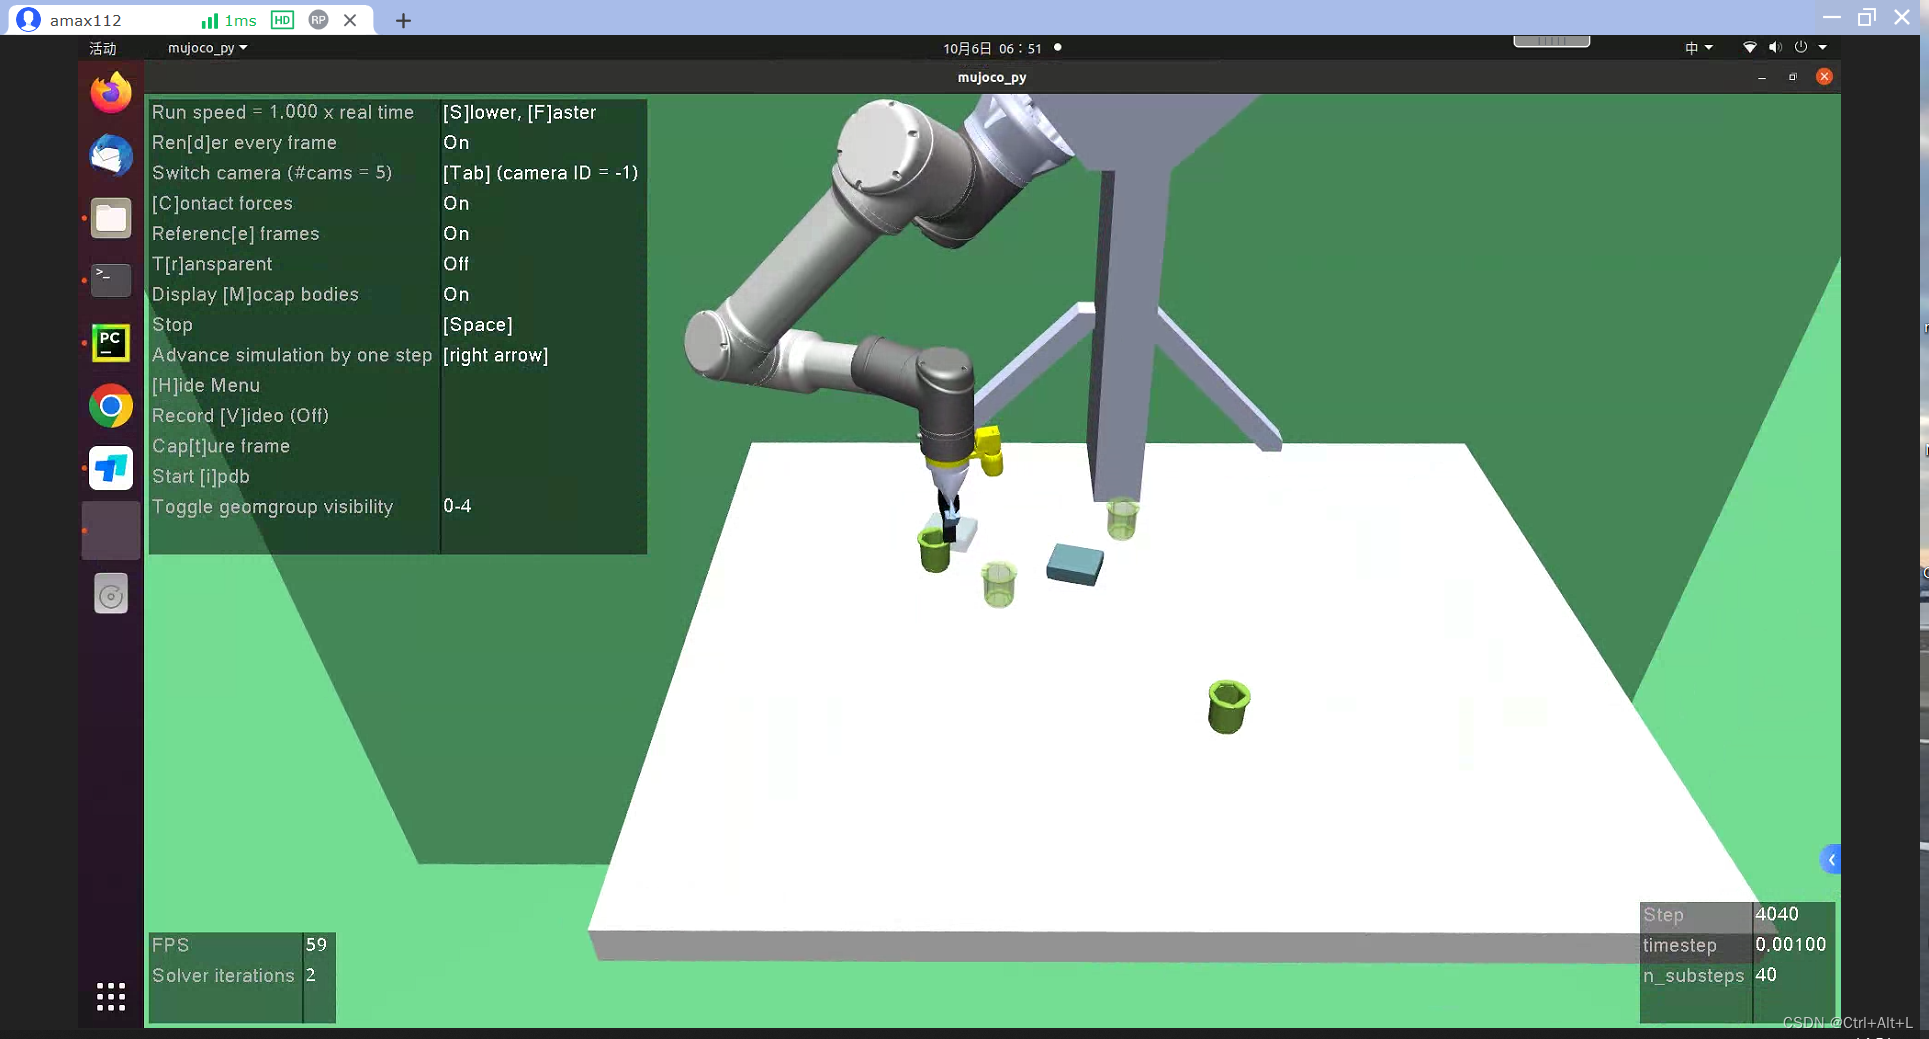
结果现实,代码可以运行。效果如下:




![[unity]保存文件的路径设置](https://img-blog.csdnimg.cn/02fc94df4ae44579b0051ad8b21e4bca.png)
