每个模型是一个Python 类,集成django.db.models.Modle类
该模型的每个属性表示一个数据库表字段
通过API 自动生成数据库访问 .../sign/modles.py 文件,通过模型完成表创建。
TypeError: ForeignKey.__init__() missing 1 required positional argument: 'on_delete'
在创建一个新模型时 ,出现错误TypeError: ForeignKey.__init__() missing 1 required positional argument: ‘on_delete‘_爱吃龙虾的小黑的博客-CSDN博客
E:\data\python\djaongo_prj\guest>  python manage.py makeigrations sign
Traceback (most recent call last):
  File "E:\data\python\djaongo_prj\guest\manage.py", line 21, in <module>
    main()
  File "E:\data\python\djaongo_prj\guest\manage.py", line 17, in main
    execute_from_command_line(sys.argv)
  File "D:\software\python3\anconda3\Lib\site-packages\django\core\management\__init__.py", line 442, in execute_from_command_line
    utility.execute()
  File "D:\software\python3\anconda3\Lib\site-packages\django\core\management\__init__.py", line 416, in execute
    django.setup()
  File "D:\software\python3\anconda3\Lib\site-packages\django\__init__.py", line 24, in setup
    apps.populate(settings.INSTALLED_APPS)
  File "D:\software\python3\anconda3\Lib\site-packages\django\apps\registry.py", line 116, in populate
    app_config.import_models()
  File "D:\software\python3\anconda3\Lib\site-packages\django\apps\config.py", line 269, in import_models
    self.models_module = import_module(models_module_name)
  File "D:\software\python3\python310\lib\importlib\__init__.py", line 126, in import_module
    return _bootstrap._gcd_import(name[level:], package, level)
  File "<frozen importlib._bootstrap>", line 1050, in _gcd_import
  File "<frozen importlib._bootstrap>", line 1027, in _find_and_load
  File "<frozen importlib._bootstrap>", line 1006, in _find_and_load_unlocked
  File "<frozen importlib._bootstrap>", line 688, in _load_unlocked
  File "<frozen importlib._bootstrap_external>", line 883, in exec_module
  File "<frozen importlib._bootstrap>", line 241, in _call_with_frames_removed
  File "E:\data\python\djaongo_prj\guest\sign\models.py", line 20, in <module>
    class Guest(models.Model):
  File "E:\data\python\djaongo_prj\guest\sign\models.py", line 21, in Guest
    event = models.ForeignKey(Event)  # 关联发布会id
TypeError: ForeignKey.__init__() missing 1 required positional argument: 'on_delete'
必须要设置级联删除,也就是当你删除一条信息时,会级联的删除所有和这一条信息对应的另一张表的多个信息,也就是指定on_delete=models.CASCADE
event = models.ForeignKey(Event,on_delete=models.CASCADE) # 关联发布会id
# 嘉宾
class Guest(models.Model):
    event = models.ForeignKey(Event,on_delete=models.CASCADE)  # 关联发布会id
    realname = models.CharField(max_length=64)  # 姓名
    phone = models.CharField(max_length=16)  # 手机号
    email = models.EmailField()  # 邮箱
    sign = models.BooleanField()  # 签到状态
    create_time = models.DateTimeField(auto_now=True)  # 创建时间(自动获取当前时间)

    class Meta:
        unique_together = ('phone', 'event')

    def __str__(self):
        return self.realname
python manage.py makemigrations sign
E:\data\python\djaongo_prj\guest>  python manage.py makemigrations sign
System check identified some issues:

WARNINGS:
sign.Event: (models.W042) Auto-created primary key used when not defining a primary key type, by default 'django.db.models.AutoField'.
        HINT: Configure the DEFAULT_AUTO_FIELD setting or the SignConfig.default_auto_field attribute to point to a subclass of AutoField, e.g. 'django.db.models.BigAutoField'.
sign.Guest: (models.W042) Auto-created primary key used when not defining a primary key type, by default 'django.db.models.AutoField'.
        HINT: Configure the DEFAULT_AUTO_FIELD setting or the SignConfig.default_auto_field attribute to point to a subclass of AutoField, e.g. 'django.db.models.BigAutoField'.
Migrations for 'sign':
  sign\migrations\0001_initial.py
    - Create model Event
    - Create model Guest
python manage.py migrate
E:\data\python\djaongo_prj\guest>  python manage.py migrate
System check identified some issues:

WARNINGS:
sign.Event: (models.W042) Auto-created primary key used when not defining a primary key type, by default 'django.db.models.AutoField'.
        HINT: Configure the DEFAULT_AUTO_FIELD setting or the SignConfig.default_auto_field attribute to point to a subclass of AutoField, e.g. 'django.db.models.BigAutoField'.
sign.Guest: (models.W042) Auto-created primary key used when not defining a primary key type, by default 'django.db.models.AutoField'.
        HINT: Configure the DEFAULT_AUTO_FIELD setting or the SignConfig.default_auto_field attribute to point to a subclass of AutoField, e.g. 'django.db.models.BigAutoField'.
Operations to perform:
  Apply all migrations: admin, auth, contenttypes, sessions, sign
Running migrations:
  Applying auth.0012_alter_user_first_name_max_length... OK
  Applying sign.0001_initial... OK

E:\data\python\djaongo_prj\guest>
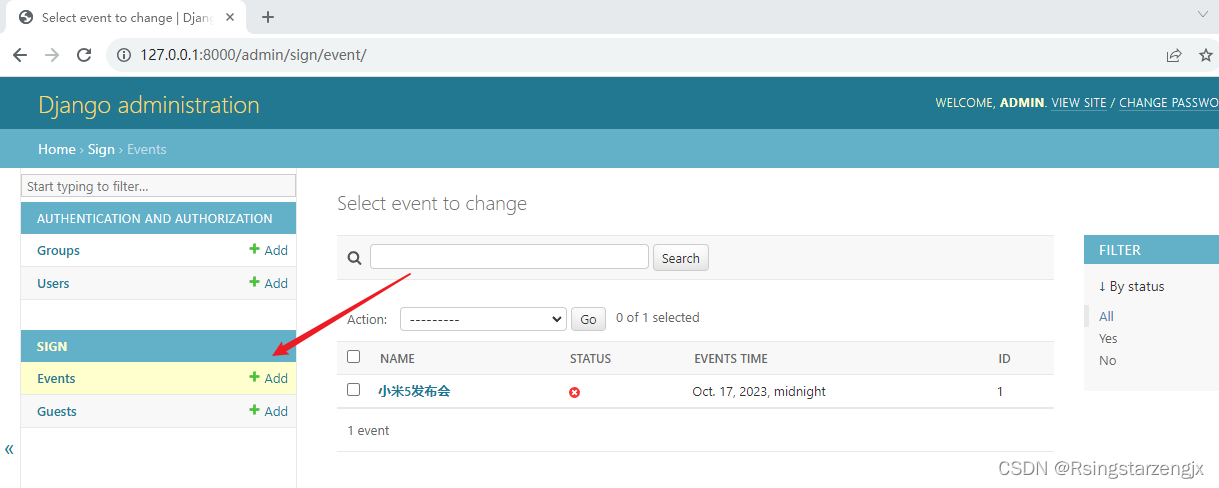
admin 后台 管理
from django.contrib import admin

# Register your models here.
#  admin 后台管理  创建的发布会和嘉宾表示同样可以通过Admin 后台管理
from  django.contrib  import  admin
from  sign.models import   Event ,Guest


# Register your models here.
class EventAdmin(admin.ModelAdmin):
    list_display = ['name', 'status', 'start_time','id']
    search_fields = ['name']    # 搜索功能
    list_filter = ['status']    # 过滤器


class GuestAdmin(admin.ModelAdmin):
    list_display = ['realname', 'phone','email','sign','create_time','event_id']
    list_display_links = ('realname', 'phone') # 显示链接
    search_fields = ['realname','phone']       # 搜索功能
    list_filter = ['sign']                 # 过滤器


admin.site.register(Event, EventAdmin)
admin.site.register(Guest, GuestAdmin)
Microsoft Windows [版本 10.0.19045.3448]
(c) Microsoft Corporation。保留所有权利。

E:\data\python\djaongo_prj\guest>python   manage.py shell
Python 3.10.0 (tags/v3.10.0:b494f59, Oct  4 2021, 19:00:18) [MSC v.1929 64 bit (AMD64)]
Type 'copyright', 'credits' or 'license' for more information
IPython 8.10.0 -- An enhanced Interactive Python. Type '?' for help.

In [1]:

In [1]:

In [1]: from sign.models import Event,Guest

In [2]: Event.objects.all()
Out[2]: <QuerySet [<Event: 小米5发布会>]>

In [3]: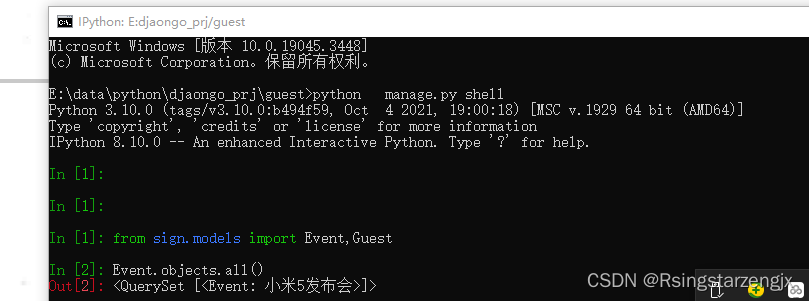
from sign.models import Event,Guest 导入模块
Event.objects.all() 所有对象
配置 MySQL
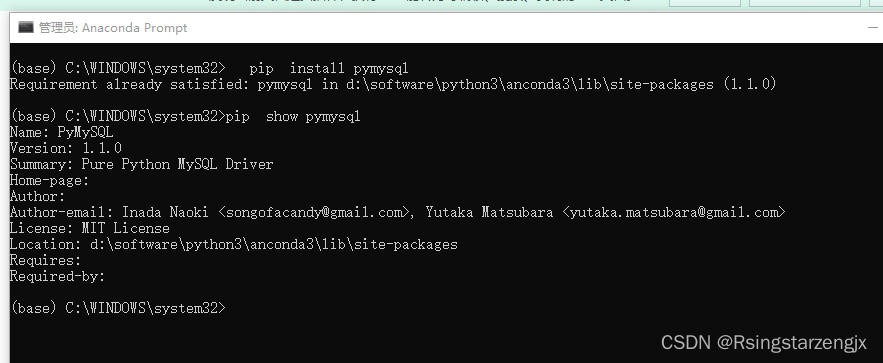
pip install pymysql
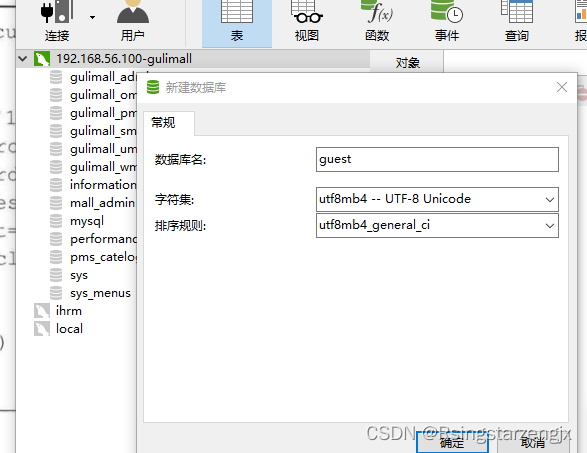
数据库创建表
报错 [Err] 1055 - Expression #1 of ORDER BY
[Err] 1055 - Expression #1 of ORDER BY clause is not in GROUP BY clause and contains nonaggregated column 'information_schema.PROFILING.SEQ' which is not functionally dependent on columns in GROUP BY clause; this is incompatible with sql_mode=only_full_group_by
[Err] 1055 - Expression #1 of ORDER BY clause is not in GROUP BY clause and contains nonaggregated_Ricardo · M · YUAN的博客-CSDN博客
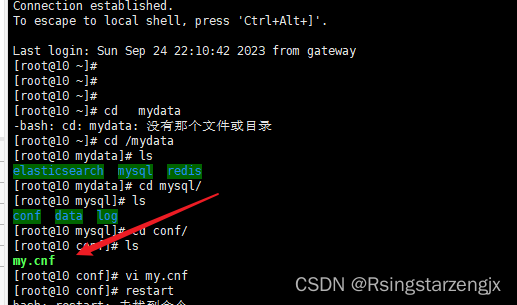
在配置文件的末尾加上这段代码:
[mysqld]
sql_mode=STRICT_TRANS_TABLES,NO_ZERO_IN_DATE,NO_ZERO_DATE,ERROR_FOR_DIVISION_BY_ZERO,NO_ENGINE_SUBSTITUTION
CREATE TABLE `sign_event` (
  `id` int NOT NULL AUTO_INCREMENT,
  `name` varchar(50) DEFAULT NULL COMMENT '名称',
  `limit` int DEFAULT NULL COMMENT 'limit',
  `status` varchar(1) DEFAULT '1' COMMENT '状态   0:隐藏   1:显示',
  `address` varchar(500) DEFAULT NULL COMMENT '地址',
   start_time DATE,
   create_time DATE,
  PRIMARY KEY (`id`)
) ENGINE=InnoDB  DEFAULT CHARSET=utf8mb4 COMMENT='系统配置信息表';
CREATE TABLE `sign_guest` (
`event_id` int NOT NULL ,
`realname` varchar(50) DEFAULT NULL COMMENT '名称',
`phone` varchar(11) COMMENT '手机号',
`email` varchar(50) ,
`sign` VARCHAR(1) DEFAULT '1' COMMENT '状态 0:隐藏 1:显示',
create_time DATE,
PRIMARY KEY (`event_id`,`phone`)
) ENGINE=InnoDB DEFAULT CHARSET=utf8mb4 COMMENT='嘉宾表';insert into sign_guest(realname,phone,email,sign,event_id,create_time)values("tom","12344444","1111@qq.com",1,123456,now())
select * from sign_guest

from pymysql import cursors, connect

# 连接数据库
conn = connect(host='192.168.56.10', user='root', password='root',
               db='guest', charset='utf8mb4', cursorclass=cursors.DictCursor)

try:
    with conn.cursor() as cursors:
        # 创建嘉宾数据
        sql = 'insert into  sign_guest(realname,phone,email,sign,event_id,create_time)values("tom2","12344444","1111@qq.com",1,123456,now())'
        cursors.execute(sql)
    conn.commit()
    with conn.cursor() as cursor:
        # 查询
        sql = "select  *  from sign_guest where phone=%s"
        cursor.execute(sql, ('12344444',))
        res = cursor.fetchone()
        print(res)
finally:
conn.close() 
Django 连接 mysql
DATABASES = {
    'default': {
        'ENGINE': 'django.db.backends.sqlite3',
        'NAME': os.path.join(BASE_DIR, 'db.sqlite3'),
    }
}
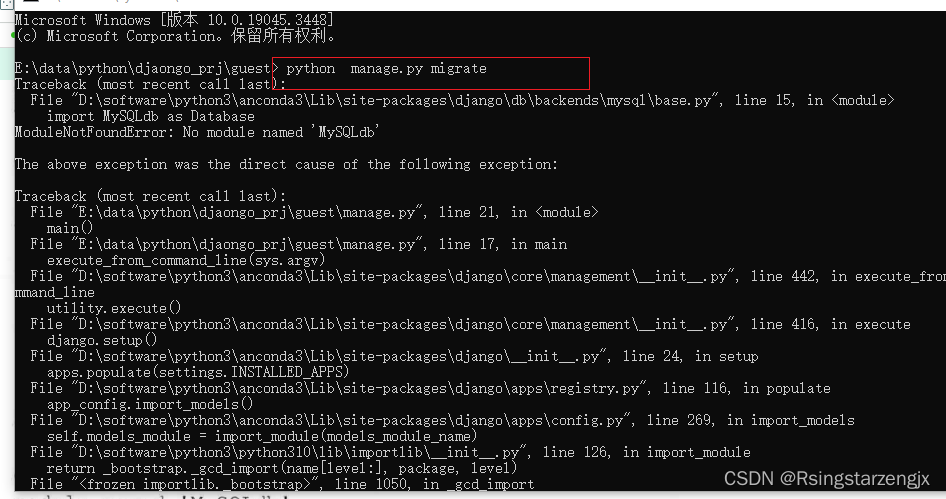

import pymysql
pymysql.install_as_MySQLdb()

"""
如果你使用pymysql驱动的话,上面两行必须添加。
"""
E:\data\python\djaongo_prj\guest> python  manage.py migrate
Traceback (most recent call last):
  File "E:\data\python\djaongo_prj\guest\manage.py", line 21, in <module>
    main()
  File "E:\data\python\djaongo_prj\guest\manage.py", line 17, in main
    execute_from_command_line(sys.argv)
  File "D:\software\python3\anconda3\Lib\site-packages\django\core\management\__init__.py", line 442, in execute_from_command_line
    utility.execute()
  File "D:\software\python3\anconda3\Lib\site-packages\django\core\management\__init__.py", line 436, in execute
    self.fetch_command(subcommand).run_from_argv(self.argv)
  File "D:\software\python3\anconda3\Lib\site-packages\django\core\management\base.py", line 412, in run_from_argv
    self.execute(*args, **cmd_options)
  File "D:\software\python3\anconda3\Lib\site-packages\django\core\management\base.py", line 458, in execute
    output = self.handle(*args, **options)
  File "D:\software\python3\anconda3\Lib\site-packages\django\core\management\base.py", line 106, in wrapper
    res = handle_func(*args, **kwargs)
  File "D:\software\python3\anconda3\Lib\site-packages\django\core\management\commands\migrate.py", line 100, in handle
    self.check(databases=[database])
  File "D:\software\python3\anconda3\Lib\site-packages\django\core\management\base.py", line 485, in check
    all_issues = checks.run_checks(
  File "D:\software\python3\anconda3\Lib\site-packages\django\core\checks\registry.py", line 88, in run_checks
    new_errors = check(app_configs=app_configs, databases=databases)
  File "D:\software\python3\anconda3\Lib\site-packages\django\core\checks\model_checks.py", line 36, in check_all_models
    errors.extend(model.check(**kwargs))
  File "D:\software\python3\anconda3\Lib\site-packages\django\db\models\base.py", line 1558, in check
    *cls._check_indexes(databases),
  File "D:\software\python3\anconda3\Lib\site-packages\django\db\models\base.py", line 2002, in _check_indexes
    connection.features.supports_expression_indexes
  File "D:\software\python3\anconda3\Lib\site-packages\django\utils\functional.py", line 57, in __get__
    res = instance.__dict__[self.name] = self.func(instance)
  File "D:\software\python3\anconda3\Lib\site-packages\django\db\backends\mysql\features.py", line 317, in supports_expression_indexes
    not self.connection.mysql_is_mariadb
  File "D:\software\python3\anconda3\Lib\site-packages\django\utils\functional.py", line 57, in __get__
    res = instance.__dict__[self.name] = self.func(instance)
  File "D:\software\python3\anconda3\Lib\site-packages\django\db\backends\mysql\base.py", line 439, in mysql_is_mariadb
    return "mariadb" in self.mysql_server_info.lower()
  File "D:\software\python3\anconda3\Lib\site-packages\django\utils\functional.py", line 57, in __get__
    res = instance.__dict__[self.name] = self.func(instance)
  File "D:\software\python3\anconda3\Lib\site-packages\django\db\backends\mysql\base.py", line 425, in mysql_server_info
    return self.mysql_server_data["version"]
  File "D:\software\python3\anconda3\Lib\site-packages\django\utils\functional.py", line 57, in __get__
    res = instance.__dict__[self.name] = self.func(instance)
  File "D:\software\python3\anconda3\Lib\site-packages\django\db\backends\mysql\base.py", line 399, in mysql_server_data
    with self.temporary_connection() as cursor:
  File "D:\software\python3\python310\lib\contextlib.py", line 135, in __enter__
    return next(self.gen)
  File "D:\software\python3\anconda3\Lib\site-packages\django\db\backends\base\base.py", line 705, in temporary_connection
    with self.cursor() as cursor:
  File "D:\software\python3\anconda3\Lib\site-packages\django\utils\asyncio.py", line 26, in inner
    return func(*args, **kwargs)
  File "D:\software\python3\anconda3\Lib\site-packages\django\db\backends\base\base.py", line 330, in cursor
    return self._cursor()
  File "D:\software\python3\anconda3\Lib\site-packages\django\db\backends\base\base.py", line 306, in _cursor
    self.ensure_connection()
  File "D:\software\python3\anconda3\Lib\site-packages\django\utils\asyncio.py", line 26, in inner
    return func(*args, **kwargs)
  File "D:\software\python3\anconda3\Lib\site-packages\django\db\backends\base\base.py", line 289, in ensure_connection
    self.connect()
  File "D:\software\python3\anconda3\Lib\site-packages\django\utils\asyncio.py", line 26, in inner
    return func(*args, **kwargs)
  File "D:\software\python3\anconda3\Lib\site-packages\django\db\backends\base\base.py", line 272, in connect
    self.init_connection_state()
  File "D:\software\python3\anconda3\Lib\site-packages\django\db\backends\mysql\base.py", line 257, in init_connection_state
    super().init_connection_state()
  File "D:\software\python3\anconda3\Lib\site-packages\django\db\backends\base\base.py", line 239, in init_connection_state
    self.check_database_version_supported()
  File "D:\software\python3\anconda3\Lib\site-packages\django\db\backends\base\base.py", line 214, in check_database_version_supported
    raise NotSupportedError(
django.db.utils.NotSupportedError: MySQL 8 or later is required (found 5.7.36).

E:\data\python\djaongo_prj\guest>
django.db.utils.NotSupportedError: MySQL 8 or later is required (found 5.7.36).
django.db.utils.NotSupportedError: MySQL 8 or later is required (found 5.7.2)简单快速的解决办法_疯狂的小强呀的博客-CSDN博客
这个问题是说我们的Django框架版本比较新,已经不支持MySQL老版本5.7.2了,MySQL8或者更新的版本才是我们需要的或者说匹配的。
解决方案
从问题出发的解决方案有两个,①卸载老版本的MySQL,安装项目支持的新版本 ②降低Django框架的版本
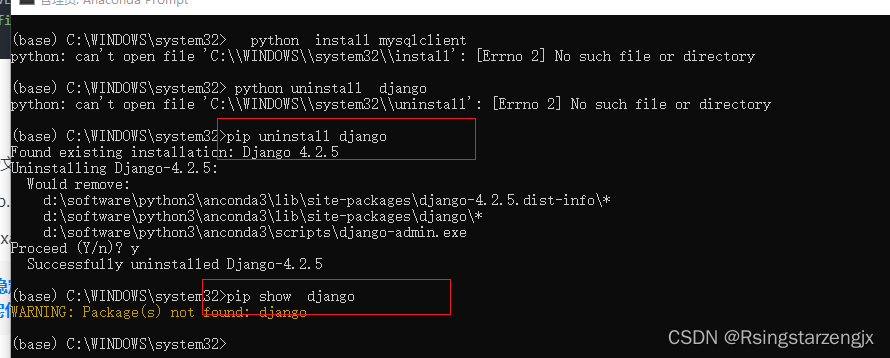
pip uninstall django
pip install django==2.1.13
要重启pycharm
Error: [WinError 10013] 以一种访问权限不允许的方式做了一个访问套接字的尝试。

Django-解决报错Error: [WinError 10013] 以一种访问权限不允许的方式做了一个访问套接字的尝试。_Python454的博客-CSDN博客
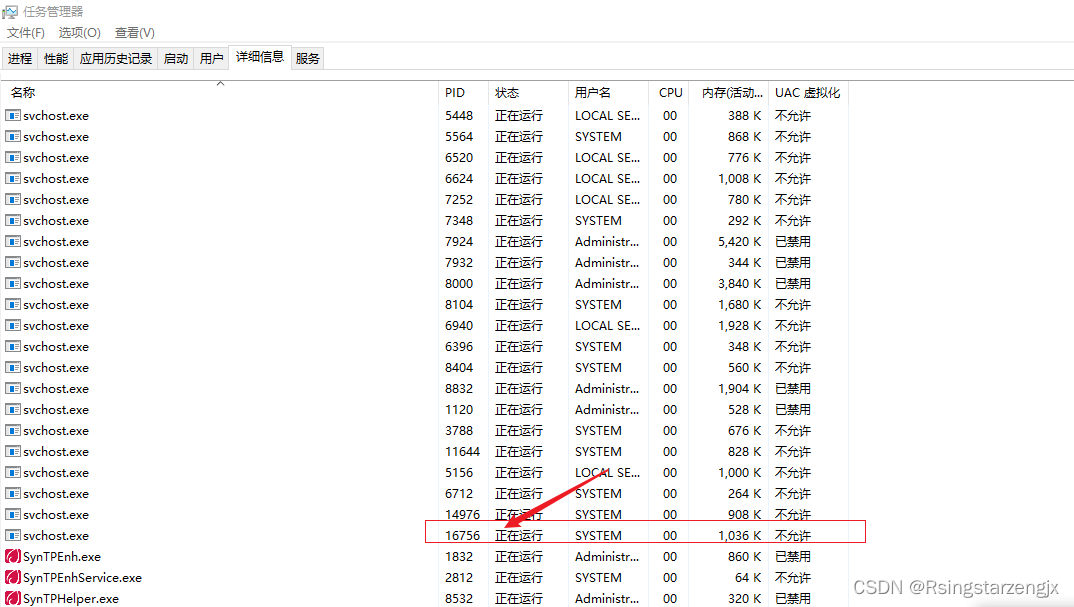
E:\data\python\djaongo_prj\guest>netstat -aon|findstr "8000"
TCP 0.0.0.0:8000 0.0.0.0:0 LISTENING 14756
UDP 0.0.0.0:8000 *:*
PID =14756
任务管理器 详细信息
D:\software\python3\python310\python.exe E:/data/python/djaongo_prj/guest/manage.py runserver 127.0.0.1:8001
D:\software\python3\anconda3\Lib\site-packages\numpy\__init__.py:138: UserWarning: mkl-service package failed to import, therefore Intel(R) MKL initialization ensuring its correct out-of-the box operation under condition when Gnu OpenMP had already been loaded by Python process is not assured. Please install mkl-service package, see http://github.com/IntelPython/mkl-service
from . import _distributor_init
Performing system checks...
System check identified no issues (0 silenced).
You have 16 unapplied migration(s). Your project may not work properly until you apply the migrations for app(s): admin, auth, contenttypes, sessions, sign.
Run 'python manage.py migrate' to apply them.
October 02, 2023 - 21:57:38
Django version 2.1.13, using settings 'guest.settings'
Starting development server at http://127.0.0.1:8001/
Quit the server with CTRL-BREAK.
设置 runserver 127.0.0.1:8001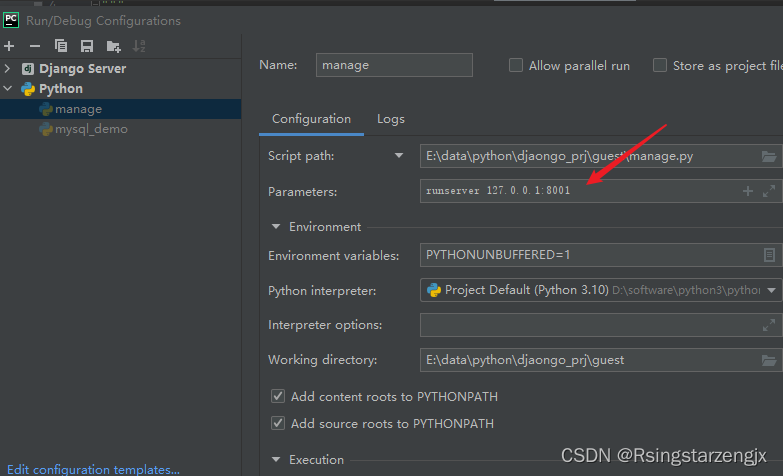
启动成功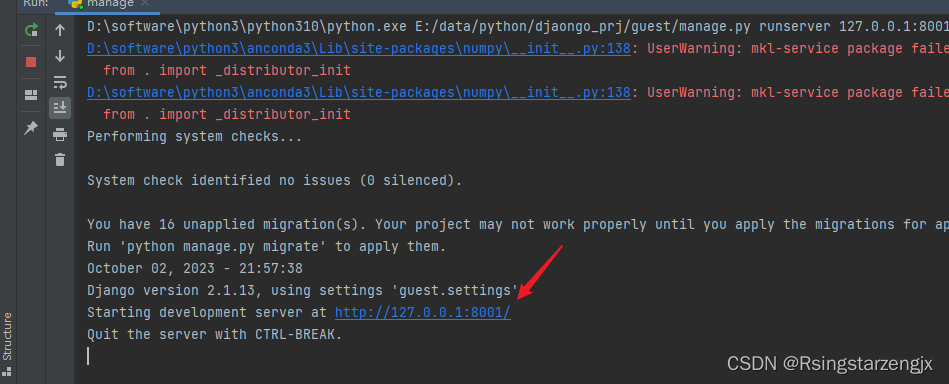
删除 数据库中 sign_event 表
python manage.py migrate
  File "D:\software\python3\anconda3\Lib\site-packages\pymysql\protocol.py", line 221, in raise_for_error
    err.raise_mysql_exception(self._data)
  File "D:\software\python3\anconda3\Lib\site-packages\pymysql\err.py", line 143, in raise_mysql_exception
    raise errorclass(errno, errval)
django.db.utils.OperationalError: (1050, "Table 'sign_event' already exists")

E:\data\python\djaongo_prj\guest>python  manage.py migrate
Operations to perform:
  Apply all migrations: admin, auth, contenttypes, sessions, sign
Running migrations:
  Applying sign.0001_initial... OK

E:\data\python\djaongo_prj\guest>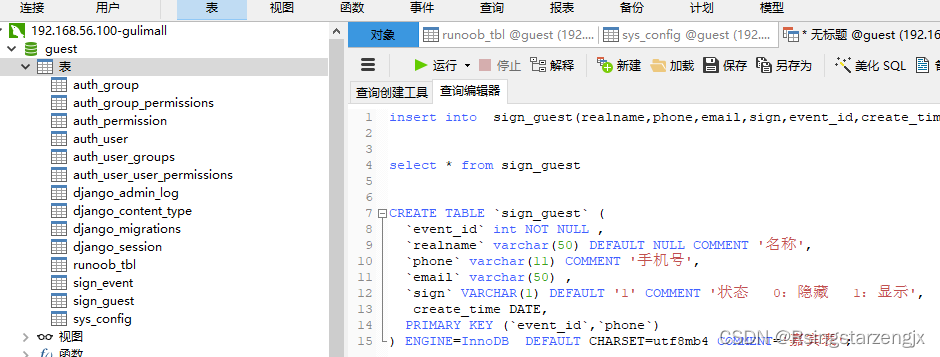
重新生成后台管理admin
python manage.py createsuperuser
E:\data\python\djaongo_prj\guest>python manage.py createsuperuser
Username (leave blank to use 'administrator'): admin
Email address: 11111@qq.com
Password:
Password (again):
Superuser created successfully.
http://127.0.0.1:8001/admin/


