1. pip 安装

2. django 指令
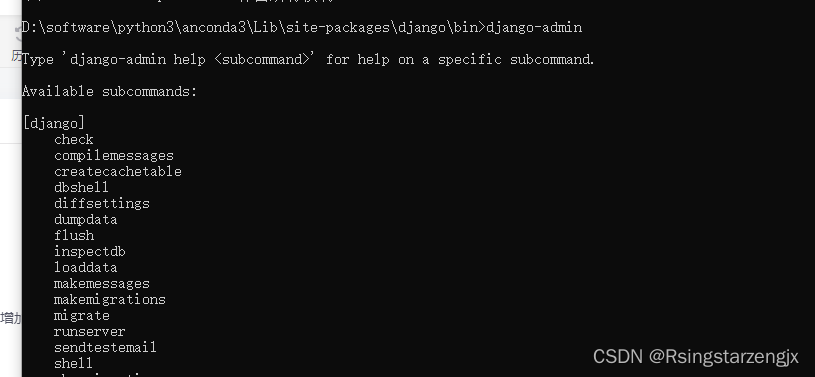
D:\software\python3\anconda3\Lib\site-packages\django\bin>django-admin

Type 'django-admin help <subcommand>' for help on a specific subcommand.

Available subcommands:

[django]
    check
    compilemessages
    createcachetable
    dbshell
    diffsettings
    dumpdata
    flush
    inspectdb
    loaddata
    makemessages
    makemigrations
    migrate
    runserver
    sendtestemail
    shell
    showmigrations
    sqlflush
    sqlmigrate
    sqlsequencereset
    squashmigrations
    startapp
    startproject
    test
    testserver
Note that only Django core commands are listed as settings are not properly configured (error: Requested setting INSTALLED_APPS, but settings are not configured. You must either define the environment variable DJANGO_SETTINGS_MODULE or call settings.configure() before accessing settings.).
3.创建项目
D:\software\python3\anconda3\Lib\site-packages\django\bin>django-admin  startproject guest
CommandError: [WinError 5] 拒绝访问。: 'D:\\software\\python3\\anconda3\\Lib\\site-packages\\django\\bin\\guest
python - Django creating new project - access is denied - Stack Overflow
问题解决 ;
选择其他路径创建,不要再 'D:\\software\\python3\\anconda3\\Lib\\site-packages\\django\\bin下执行命令

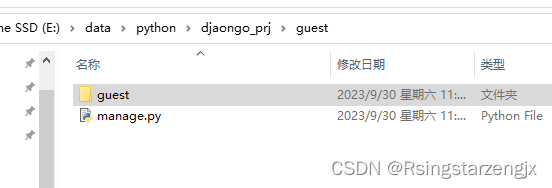

4 目录结构 :
 查看 manange 提供的命令
E:\data\python\djaongo_prj>cd  guest

E:\data\python\djaongo_prj\guest>  python manage.py

Type 'manage.py help <subcommand>' for help on a specific subcommand.

Available subcommands:

[auth]
    changepassword
    createsuperuser

[contenttypes]
    remove_stale_contenttypes

[django]
    check
    compilemessages
    createcachetable
    dbshell
    diffsettings
    dumpdata
    flush
    inspectdb
    loaddata
    makemessages
    makemigrations
    migrate
    sendtestemail
    shell
    showmigrations
    sqlflush
    sqlmigrate
    sqlsequencereset
    squashmigrations
    startapp
    startproject
    test
    testserver

[sessions]
    clearsessions

[staticfiles]
    collectstatic
    findstatic
    runserver

E:\data\python\djaongo_prj\guest>
官方命令文档 : django-admin and manage.py | Django documentation | Django
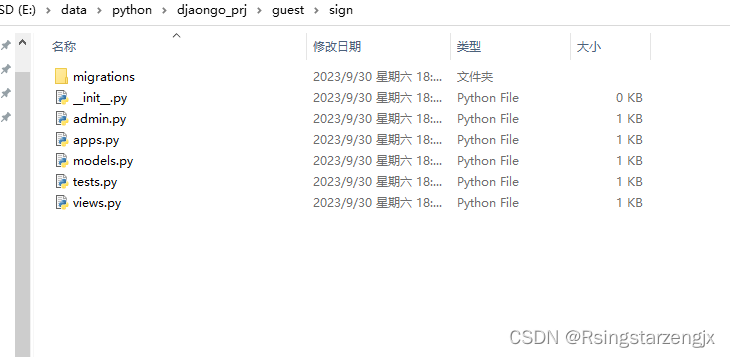
5.创建应用 sign
E:\data\python\djaongo_prj\guest>python manage.py startapp sign

运行 :
python manager.py runserver
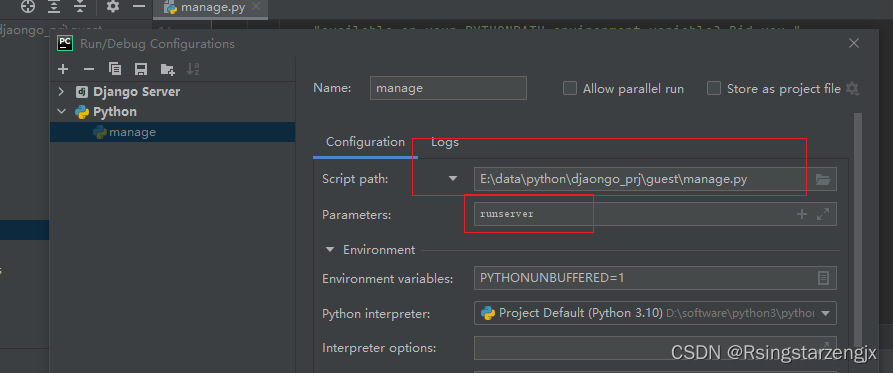

http://127.0.0.1:8000/
如果运行失败可能出现端口占用 : python manager.py runserver 127.0.0.1:8001 运行
127.0.0.1 表示本机的IP地址 8001: 是端口
guest/settings.py 添加项目 sign
INSTALLED_APPS = [
    'django.contrib.admin',
    'django.contrib.auth',
    'django.contrib.contenttypes',
    'django.contrib.sessions',
    'django.contrib.messages',
    'django.contrib.staticfiles',
    'sign'
]
6显示 Hello Django!
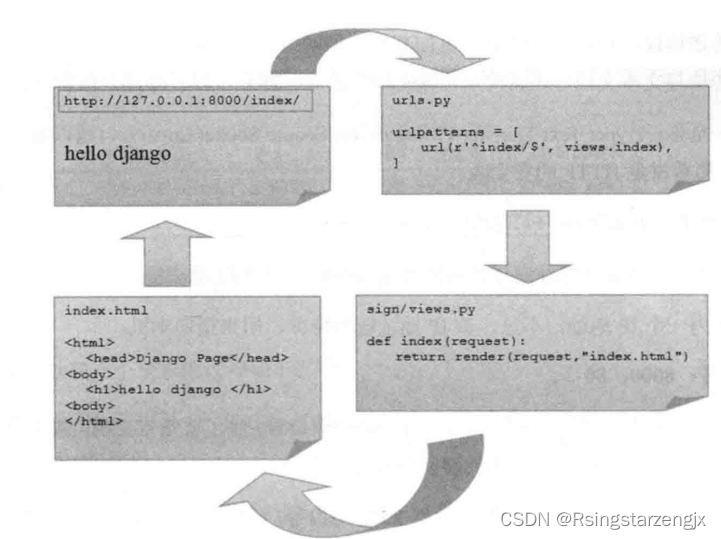
guest/urls.py
url(r'^index/$', views.index), # 添加 index 、路径配置
"""guest URL Configuration

The `urlpatterns` list routes URLs to views. For more information please see:
    https://docs.djangoproject.com/en/2.2/topics/http/urls/
Examples:
Function views
    1. Add an import:  from my_app import views
    2. Add a URL to urlpatterns:  path('', views.home, name='home')
Class-based views
    1. Add an import:  from other_app.views import Home
    2. Add a URL to urlpatterns:  path('', Home.as_view(), name='home')
Including another URLconf
    1. Import the include() function: from django.urls import include, path
    2. Add a URL to urlpatterns:  path('blog/', include('blog.urls'))
"""
from django.conf.urls import url
from django.contrib import admin
from django.urls import path
from sign import views

urlpatterns = [
    url(r'^admin/', admin.site.urls),
    url(r'^index/$', views.index),  # 添加 index 、路径配置
]
sign/views.py
from django.shortcuts import render

# Create your views here.
from django.http  import  HttpResponse

# 定义inex 函数,通过HttpResponse 类向客户端返回字符创
def index(request):
    return HttpResponse("Hello Django!")
7.使用模版
创建 templates (文件名称不要随便改django 默认从这个路径下找html)
sign/templates/index.html
<!DOCTYPE html>
<html lang="en">
<head>
    <meta charset="UTF-8">
    <title>Title</title>

    <h1> Hello Django!<h1>
</head>
<body>

</body>
</html>
8.修改 sign/views.py
return render(request,"index.html") 使用 render函数
from django.shortcuts import render

# Create your views here.
from django.http  import  HttpResponse

# 定义inex 函数,通过HttpResponse 类向客户端返回字符创
def index(request):
    #return HttpResponse("Hello Django!")  # 使用Django 的render函数
    return  render(request,"index.html")
Django 工作流

