文章目录
- 1、整合
- 2、简单示例
- 3、一点补充
- 4、增删改查索引与文档
1、整合
整合思路都一样,先起步依赖或普通依赖,再配置,再封装的操作对象。先引入依赖:
<dependency>
	<groupId>org.springframework.boot</groupId>
	<artifactId>spring-boot-starter-data-elasticsearch</artifactId>
</dependency>
application.yaml配置:
spring:
  elasticsearch:
    rest:
      uris: http://localhost:9200
在需要的地方注入客户端操作对象:
@Autowired
ElasticsearchRestTemplate template;
注意,与以往不同的是,SpringBoot平台并没有跟随ES的更新速度进行同步更新,ES提供了High Level Client操作ES,导入坐标:
<dependency>
	<groupId>org.elasticsearch.client</groupId>
	<artifactId>elasticsearch-rest-high-level-client</artifactId>
</dependency>
不用加配置,上面的starter搭配的那个配置也可以注释掉了,使用es-high-level-client,ES的信息写在代码中,不写在配置文件中,因为没和SpringBoot整合还。
2、简单示例
既然es-high-level-client还没和Spring做整合,那自然不能使用@Autowired自动注入一个客户端操作对象了。RestHighLevelClient对象需要我们自己来手动创建,并初始化。且之前对象做为Bean交给Spring管理时,我们只管用,现在手搓的RestHighLevelClient用完需要关闭资源连接。在UT中看下效果,以创建索引为例:
@Test
void test() throws IOException {

    HttpHost host = HttpHost.create("http://localhost:9200");

    RestClientBuilder builder = RestClient.builder(host);

    RestHighLevelClient client = new RestHighLevelClient(builder);

    //客户端操作
    CreateIndexRequest request = new CreateIndexRequest("books");

    //获取操作索引的客户端对象,调用创建索引操作
    client.indices().create(request, RequestOptions.DEFAULT);

    //关闭客户端
    client.close();
}
创建客户端连接对象和关闭连接是重复操作,使用SetUp和TearDown方法来改进下:
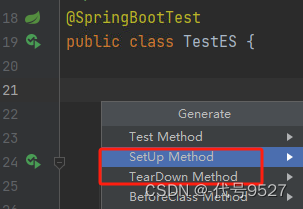
SetUp和TearDown分别代表每个测试用例@Test执行前和执行后进行的操作。
@SpringBootTest
class Springboot18EsApplicationTests {

	private RestHighLevelClient client;

	@BeforeEach
	void setUp() {
		this.client = new RestHighLevelClient(RestClient.builder(HttpHost.create("http://localhost:9200")));
	}

	@AfterEach
	void tearDown() throws IOException {
		this.client.close();
	}

}
此时,直接写CRUD代码就行。
@Test
void test() throws IOException {
	//客户端操作
	CreateIndexRequest request = new CreateIndexRequest("books");
	//获取操作索引的客户端对象,调用创建索引操作
	client.indices().create(request, RequestOptions.DEFAULT);
}
3、一点补充
高版本的SpringBoot好像已经完成了整合,可以直接注入RestHighLevelClient这个对象(测试版本SpringBoot 2.6.13)
@Autowired
private RestHighLevelClient restHighLevelClient;
在Ioc容器中获取一下,是可以拿到这个Bean的,且其加载了application.yaml中的es配置:
spring:
  elasticsearch:
    rest:
      uris: http://localhost:9200 # 默认就是这个uri,写不写都行


不确定,没查文档,实际开发时自己看吧,注入不成功就@Bean自己创建一个。
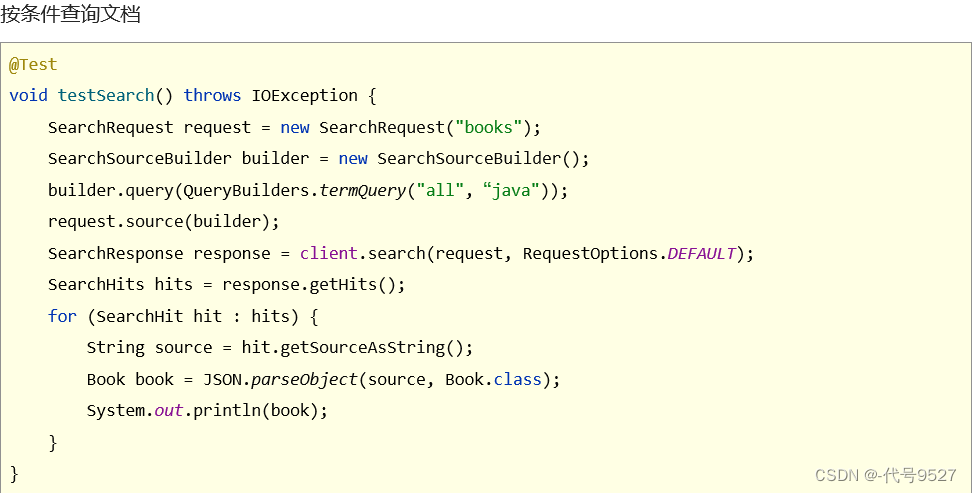
4、增删改查索引与文档
之前专栏已经整理完了,跳转【ES专栏】


