网络编程
1.概述
-
Java提供跨平台的网络类库,可以实现无痛的网络连接,程序员面对的是一个统一的网络编程环境
-
网络编程的目的:直接或间接地通过网络协议与其他计算机进行通信
-
网络编程的两个主要问题:
-
1.如何准确定位网络上一台或多台计算机
-
通信双方地址
-
一定的规则
TCP/IP参考模型(现实中运用)
OSI参考模型(太过理想化,未广泛推广)
-
-
2.找到主机后如何可靠高效地进行数据传输
- TCP 可靠性高,每次传输数据多
- UDP 速度快,可靠性低
-
2.要素
-
IP和端口号
-
IP: 唯一标识Internet上的计算机(回环:
127.0.0.1;主机:localhost) -
端口号: 标识正在计算机上运行的进程(程序);不同的进程有不同的端口号;端口号为
0~2^16-1,0~1023被预先定义,1024~65535支持用户定义(默认数据库MySQL:3306,http:80) -
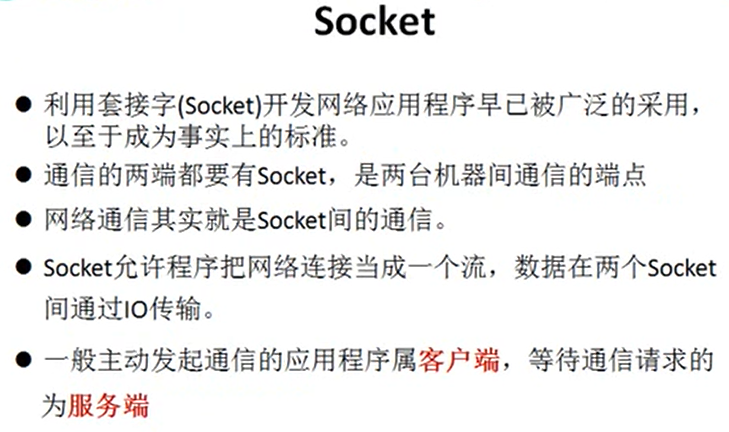
端口号与IP地址的组合得出一个网络套接字
-
-
网络通信协议
-
计算机网络中实现通信必须有的一些约定,及网络通信协议
-
计算机各层之间互不影响
-
TCP/IP协议簇:包含多个具有不同功能且相互关联的一组协议(以传输控制协议(TCP)和网络互联协议(IP)为主)
-
3.InetAddress类
InetAddress:位于java.net下
- InetAddress用来代表IP地址,一个
InetAddress的对象就代表一个IP地址 - 创建InetAddress类对象:
getByName(String host) - 获取IP地址
:getHostAddress()获取IP地址对应的域名:getHostName()
例:
import java.net.InetAddress;
import java.net.UnknownHostException;

public class Test1 {
	public static void main(String[] args) throws Exception {
		//创建InetAddress对象
		InetAddress inet = InetAddress.getByName("www.bilibili.com");
		//inet = InetAddress.getByName("61.240.206.10");//也可以用IP地址
		System.out.println(inet);//www.bilibili.com/112.83.140.13

		System.out.println(inet.getHostAddress());
		System.out.println(inet.getHostName());

		System.out.println();
		//获取本机的用户名与IP
		InetAddress inet1 = InetAddress.getLocalHost();
		System.out.println(inet1);
		System.out.println(inet1.getHostAddress());
		System.out.println(inet1.getHostName());
	}

}
4.TCP网络通信
传输控制协议要点
- 使用TCP协议前,须先建立TCP连接,形成传输数据通道
- 传输前,采用“三次握手”方式,可靠
- TCP协议进行通信的两个应用进程:客户端,服务端
- 在连接中可进行大数据量的传输
- 传输完成,需释放已建立的连接,效率低
例1
package com.end.java;

import java.io.IOException;
import java.io.InputStream;
import java.io.OutputStream;
import java.net.InetAddress;
import java.net.ServerSocket;
import java.net.Socket;
import java.net.UnknownHostException;

import org.junit.Test;

//客户端给服务器发送信息,服务端输送此信息到控制台
public class TestTCP1 {
	@Test
	//客户端
	public void client() {
		Socket socket = null;
		OutputStream os = null;
		try {
			//1.创建一个Socket的对象,通过构造器指明服务器的IP地址及接收端口
			socket = new Socket(InetAddress.getByName("127.0.0.1"),9090);
			//2.getOutputStream(),发送数据,方法返回OutputStream的对象
			os = socket.getOutputStream();
			//3.具体的输出过程
			os.write("我是客户端,请多多关照!".getBytes());
		} catch (IOException e) {
			e.printStackTrace();
		}finally {
			//4.关闭相应的流与Socket
			if(os != null) {
				try {
					os.close();
				} catch (IOException e) {
					e.printStackTrace();
				}
			}
			if(socket != null) {
				try {
					socket.close();
				} catch (IOException e) {
					e.printStackTrace();
				}
			}
		}
	}

	@Test
	//服务端
	public void server() {
		ServerSocket ss = null;
		Socket s = null;
		InputStream is = null;
		try {
			//1.创建ServerSocket的对象,通过构造器指明自身的接收端口
			ss = new ServerSocket(9090);
			//2.调用accept()方法,返回Socket的对象()
			s = ss.accept();
			//3.调用Socket的getInputStream(): 接收从客户端发送过来的数据输入流
			is = s.getInputStream();
			//4.对获取的输入流进行操作
			byte[] b = new byte[20];
			int len;
			while((len = is.read(b)) != -1) {
				String str = new String(b,0,len);
				System.out.print(str);
			}
			System.out.println("收到来自" + s.getInetAddress().getHostName() + "的消息");
		} catch (IOException e) {
			e.printStackTrace();
		}finally {
			//5.关闭相应的流与Socket
			if(is != null) {
				try {
					is.close();
				} catch (IOException e) {
					e.printStackTrace();
				}
			}
			if(s != null) {
				try {
					s.close();
				} catch (IOException e) {
					e.printStackTrace();
				}
			}
			if(ss != null) {
				try {
					ss.close();
				} catch (IOException e) {
					e.printStackTrace();
				}
			}
		}
	}
}
例2
package com.end.java;

import java.io.IOException;
import java.io.InputStream;
import java.io.OutputStream;
import java.net.InetAddress;
import java.net.ServerSocket;
import java.net.Socket;
import java.net.UnknownHostException;

import org.junit.Test;

//客户端给服务器发送信息,服务端输送此信息到控制台,同向客户端发送“收到信息”
public class TestTCP2 {
	@Test
	//客户端
	public void client() {
		Socket socket = null;
		OutputStream os = null;
		InputStream is = null;
		try {
			socket = new Socket(InetAddress.getByName("127.0.0.1"),8081);
			os = socket.getOutputStream();
			os.write("我是客户端".getBytes());
			//shutdownOutput():告诉服务端消息已发送完毕
			socket.shutdownOutput();

			is = socket.getInputStream();
			byte[] b = new byte[20];
			int len;
			while((len = is.read(b)) != -1) {
				String str = new String(b,0,len);
				System.out.print(str);
			}
		} catch (Exception e) {
			e.printStackTrace();
		}finally {
			if(is != null) {
				try {
					is.close();
				} catch (IOException e) {
					e.printStackTrace();
				}
			}
			if(os != null) {
				try {
					os.close();
				} catch (IOException e) {
					e.printStackTrace();
				}
			}
			if(socket != null) {
				try {
					socket.close();
				} catch (IOException e) {
					e.printStackTrace();
				}
			}
		}
	}
	@Test
	//服务端
	public void server() {
		ServerSocket ss = null;
		Socket s = null;
		InputStream is = null;
		OutputStream os = null;
		try {
			ss = new ServerSocket(8081);
			s = ss.accept();
			is = s.getInputStream();
			byte[] b = new byte[20];
			int len;
			while((len = is.read(b)) != -1) {
				String str = new String(b,0,len);
				System.out.print(str);
			}
			os = s.getOutputStream();
			os.write("我已收到".getBytes());
		} catch (IOException e) {
			e.printStackTrace();
		}finally {
			if(os != null) {
				try {
					os.close();
				} catch (Exception e) {
					e.printStackTrace();
				}
			}
			if(is != null) {
				try {
					is.close();
				} catch (IOException e) {
					e.printStackTrace();
				}
			}
			if(s != null) {
				try {
					s.close();
				} catch (IOException e) {
					e.printStackTrace();
				}
			}
			if(ss != null) {
				try {
					ss.close();
				} catch (IOException e) {
					e.printStackTrace();
				}
			}
		}
	}
}
例3
package com.end.java;

import java.io.File;
import java.io.FileInputStream;
import java.io.FileOutputStream;
import java.io.InputStream;
import java.io.OutputStream;
import java.net.InetAddress;
import java.net.ServerSocket;
import java.net.Socket;

import org.junit.Test;

//从客户端发送给服务器,服务端保存到本地,并返回“发送成功”给客户端,并关闭相应的连接
//处理异常时,必须使用try-catch-finally!本例仅为书写方便
public class TestTCP3 {
	@Test
	public void client() throws Exception{
	//客户端
	//1.创建对象
	Socket socket = new Socket(InetAddress.getByName("127.0.0.1"),9898);
	//2.本地获取文件发送给服务端
	OutputStream os = socket.getOutputStream();
	FileInputStream fis = new FileInputStream(new File("1.webp"));
	byte[] b = new byte[20];
	int len;
	while((len = fis.read(b)) != -1) {
		os.write(b,0,len);
	}
	socket.shutdownOutput();
	//3.读取服务端发送的数据
	InputStream is = socket.getInputStream();
	byte[] b1 = new byte[1024];
	int len1;
	while((len1 = is.read(b1)) != -1) {
		String str = new String(b1,0,len1);
		System.out.print(str);
	}
	//4.关闭相应的流
	os.close();
	is.close();
	fis.close();
	socket.close();
	}
	@Test
	//服务器
	public void server() throws Exception{
		//1.创建对象
		ServerSocket ss = new ServerSocket(9898);
		//2.接受/读取客户端请求或数据,保存到本地
		Socket s = ss.accept();

		InputStream is = s.getInputStream();
		FileOutputStream fos = new FileOutputStream(new File("2.webp"));
		byte[] b = new byte[1024];
		int len;
		while((len = is.read(b)) != -1) {
			fos.write(b,0,len);
		}
		System.out.println("收到来自" + s.getInetAddress().getHostName() + "的文件");
		//3.向客户端发送信息
		OutputStream os = s.getOutputStream();
		os.write("你发送的图片已接收成功".getBytes());
		//4.关闭相应的流
		os.close();
		is.close();
		fos.close();
		ss.close();
		s.close();
	}
}
5.UDP网络通信
用户数据报协议要点
- 将数据,源,目的地址封装成数据包,不需要建立连接
- 每个数据报的大小限制在64K内
- 因无需连接,故不可靠
- 发送数据结束时无需释放资源,速度快
例
package com.end.java;

import java.io.IOException;
import java.net.DatagramPacket;
import java.net.DatagramSocket;
import java.net.InetAddress;
import java.net.SocketException;
import java.net.UnknownHostException;

import org.junit.Test;

//发送端给服务器发送信息,服务端输送此信息到控制台
//DatagramSocket(数据报的发送和接收) 和 DatagramPacket(对象封装UDP数据报中数据)实现基于UDP协议网络程序
public class TestUDP {
	@Test
	//发送端
	public void send() {
		DatagramSocket ds= null;
		try {
			ds = new DatagramSocket();
			byte[] b = "hello,world!".getBytes();
			//创建数据报,每个数据报不能大于64K,都记录着数据,发送端IP,端口,及接收端IP,端口
			DatagramPacket pack = new DatagramPacket(b,0,b.length,InetAddress.getByName("127.0.0.1"),9090);
			ds.send(pack);
		} catch (SocketException e) {
			// TODO Auto-generated catch block
			e.printStackTrace();
		} catch (UnknownHostException e) {
			// TODO Auto-generated catch block
			e.printStackTrace();
		} catch (IOException e) {
			// TODO Auto-generated catch block
			e.printStackTrace();
		}finally {
			if(ds != null) {
				ds.close();
			}

		}

	}

	@Test
	//接收端
	public void rceive() {
		 DatagramSocket ds = null;
		try {
			ds = new DatagramSocket(9090);
			 byte[] b = new byte[1024];
			 DatagramPacket pack = new DatagramPacket(b,0,b.length);
			 ds.receive(pack);

			 String str = new String(pack.getData(),0,pack.getLength());
			 System.out.println(str);
		} catch (IOException e) {
			e.printStackTrace();
		}finally {
			if(ds != null) {
				 ds.close();
			}
		}
	}
}
练习
package com.end.java;

import java.io.IOException;
import java.io.InputStream;
import java.io.OutputStream;
import java.net.InetAddress;
import java.net.ServerSocket;
import java.net.Socket;
import java.net.UnknownHostException;
import java.util.Scanner;

import org.junit.Test;

//TCP编程练习:客户端给服务端发送文本,服务端将文本转成大写返回给客户端
public class TCPTest {
	@Test
	public void client() {
		Socket socket = null;
		OutputStream os = null;
		Scanner scanner = null;
		//4.接收来自服务端的数据
		InputStream is = null;
		try {
			socket = new Socket(InetAddress.getByName("127.0.0.1"),9090);

			os = socket.getOutputStream();

			System.out.println("请输入多个字符: ");
			scanner = new Scanner(System.in);
			String str = scanner.next();
			os.write(str.getBytes());
			socket.shutdownOutput();
			is = socket.getInputStream();
			byte[] b = new byte[1024];
			int len;
			while((len = is.read(b)) != -1) {
				String str1 = new String(b,0,len);
				System.out.println(str1);
			}
		} catch (UnknownHostException e) {
			// TODO Auto-generated catch block
			e.printStackTrace();
		} catch (IOException e) {
			// TODO Auto-generated catch block
			e.printStackTrace();
		}finally {
			//5.关闭流
			if(is != null) {
				try {
					is.close();
				} catch (IOException e) {
					// TODO Auto-generated catch block
					e.printStackTrace();
				}
			}

			if(scanner != null) {
				scanner.close();
			}

			if(os != null) {
				try {
					os.close();
				} catch (IOException e) {
					// TODO Auto-generated catch block
					e.printStackTrace();
				}
			}

			if(socket != null) {
				try {
					socket.close();
				} catch (IOException e) {
					// TODO Auto-generated catch block
					e.printStackTrace();
				}
			}

		}
	}
	@Test
	public void server() {

		ServerSocket ss = null;
		Socket s = null;

		InputStream is = null;

		OutputStream os = null;
		try {
			ss = new ServerSocket(9090);
			s = ss.accept();
			//3.接收客户端信息
			is = s.getInputStream();
			byte[] b = new byte[10];
			int len;
			String str = new String();
			while((len = is.read(b)) != -1) {
				String str1 = new String(b,0,len);
				str += str1;
			}
			String strUpperCase = str.toUpperCase();
			//返回客户端信息
			os = s.getOutputStream();
			os.write(strUpperCase.getBytes());
		} catch (IOException e) {
			// TODO Auto-generated catch block
			e.printStackTrace();
		}finally {
			//关闭流
			if(os != null) {
				try {
					os.close();
				} catch (IOException e) {
					// TODO Auto-generated catch block
					e.printStackTrace();
				}
			}
			if(is != null) {
				try {
					is.close();
				} catch (IOException e) {
					// TODO Auto-generated catch block
					e.printStackTrace();
				}
			}
			if(s != null) {
				try {
					s.close();
				} catch (IOException e) {
					// TODO Auto-generated catch block
					e.printStackTrace();
				}
			}
			if(ss != null) {
				try {
					ss.close();
				} catch (IOException e) {
					// TODO Auto-generated catch block
					e.printStackTrace();
				}
			}

		}

	}
}
6.URL编程
- 统一资源定位符,一个URL的对象,就对应着互联网上的一个资源
- 可以通过URL的对象调用相应的方法,将此资源读取(“下载”)
- 组成:
<传输协议>://<主机号>:<端口号>/<文件名>如:http://127.0.0.1:8080/index.html
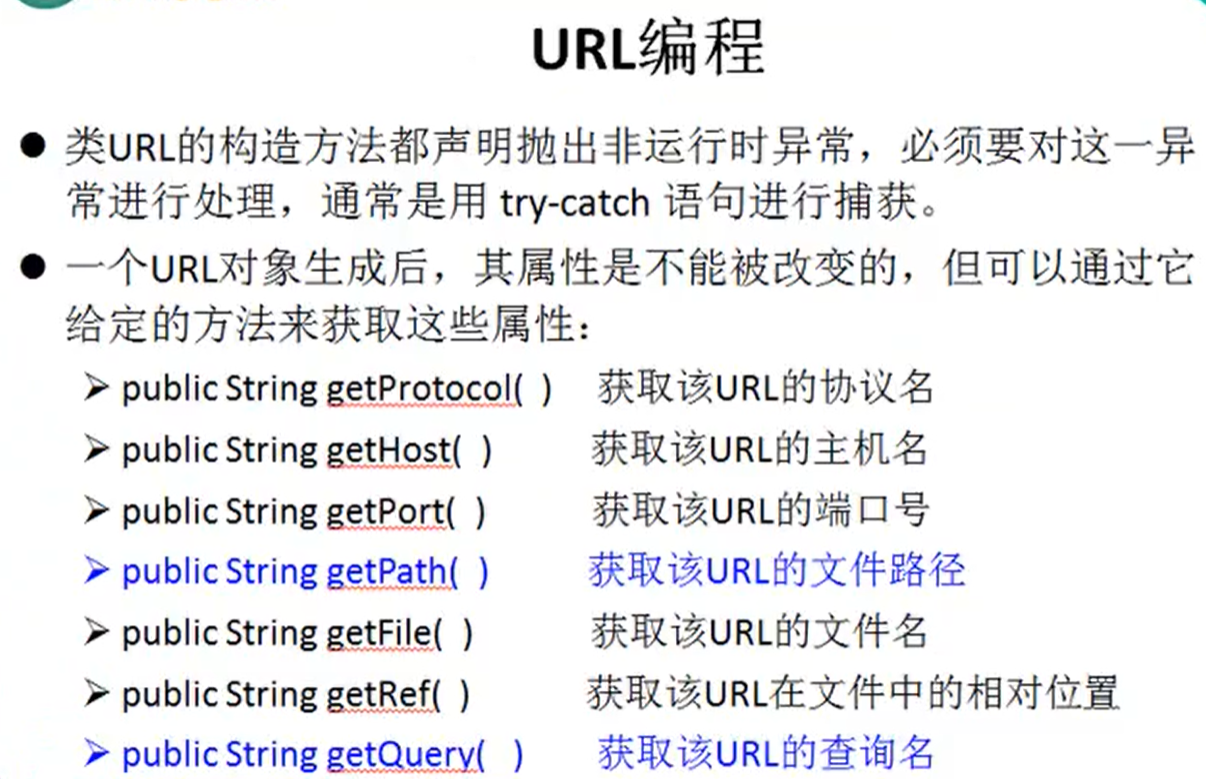
openStream()是将服务端的资源读取进来,如果希望输出数据,那就需要使用URLConnection
当需要与URL建立连接时,首先需要对象URL通过调用openConnection()生成的URLConnection对象,连接失败,将产生IOException异常
例
package com.end.java;

import java.io.File;
import java.io.FileOutputStream;
import java.io.IOException;
import java.io.InputStream;
import java.net.MalformedURLException;
import java.net.URL;
import java.net.URLConnection;

//URL编程
public class TestURL {
	public static void main(String[] args) throws Exception {
		//1.创建URL对象
		URL url = new URL("http://127.0.0.1:8080//examples/index.html?about");

//		//获取URL的协议名
//		System.out.println("协议名:" + url.getProtocol());
//		//获取URL的主机名
//		System.out.println("主机名:" + url.getHost());
//		//获取URL的端口号
//		System.out.println("端口号:" + url.getPort());
//		//获取URL的文件路径
//		System.out.println("文件路径:" + url.getPath());
//		//获取URL的文件名
//		System.out.println("文件名:" + url.getFile());
//		//获取URL的相对路径
//		System.out.println("文件相对路径:" + url.getRef());
//		//获取URL的查询名
//		System.out.println("查询名:" + url.getQuery());

		//将服务端的资源读取进来
		InputStream is = url.openStream();
		byte[] b = new byte[20];
		int len;
		while((len = is.read(b)) != -1) {
			String str = new String(b,0,len);
			System.out.println(str);
		}
		is.close();

		//既有数据的输入,又有数据的输出,考虑使用URLConnection
		URLConnection urlConn = url.openConnection();
		InputStream is1 = urlConn.getInputStream();
		FileOutputStream fos = new FileOutputStream(new File("abc.txt"));
		byte[] b1 = new byte[20];
		int len1;
		while((len1 = is1.read(b1)) != -1) {
			fos.write(b1,0,len1);
		}
		fos.close();
		is.close();
	}
}
感谢大家的支持,关注,评论,点赞!
参考资料:
尚硅谷宋红康20天搞定Java基础下部

