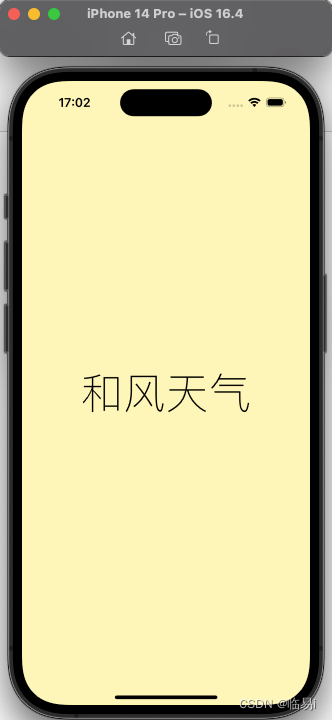
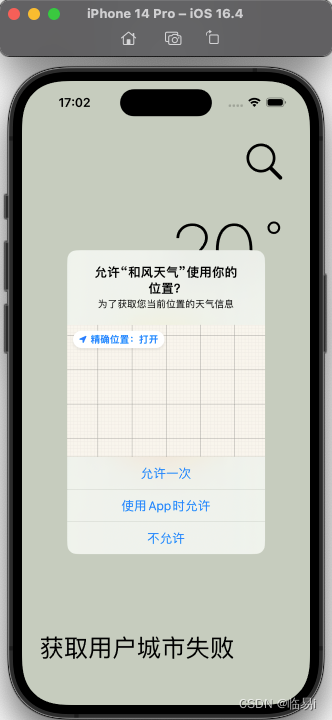
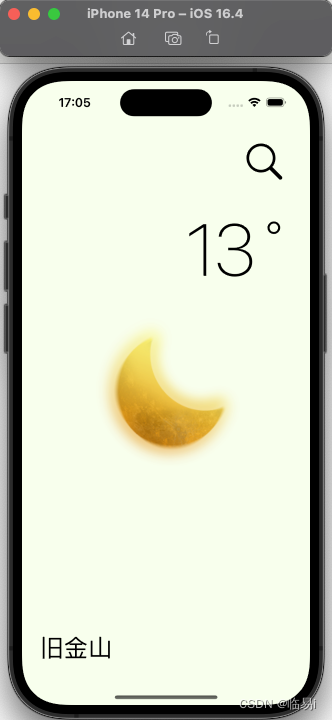
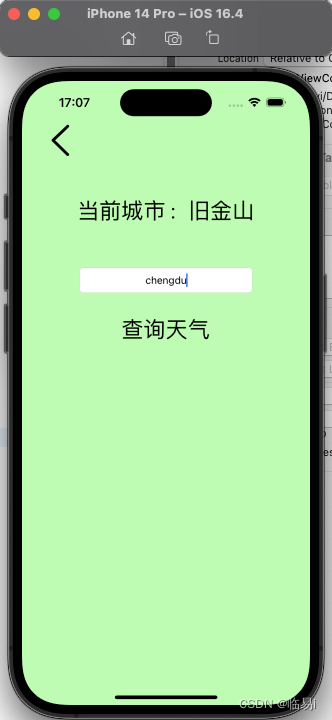
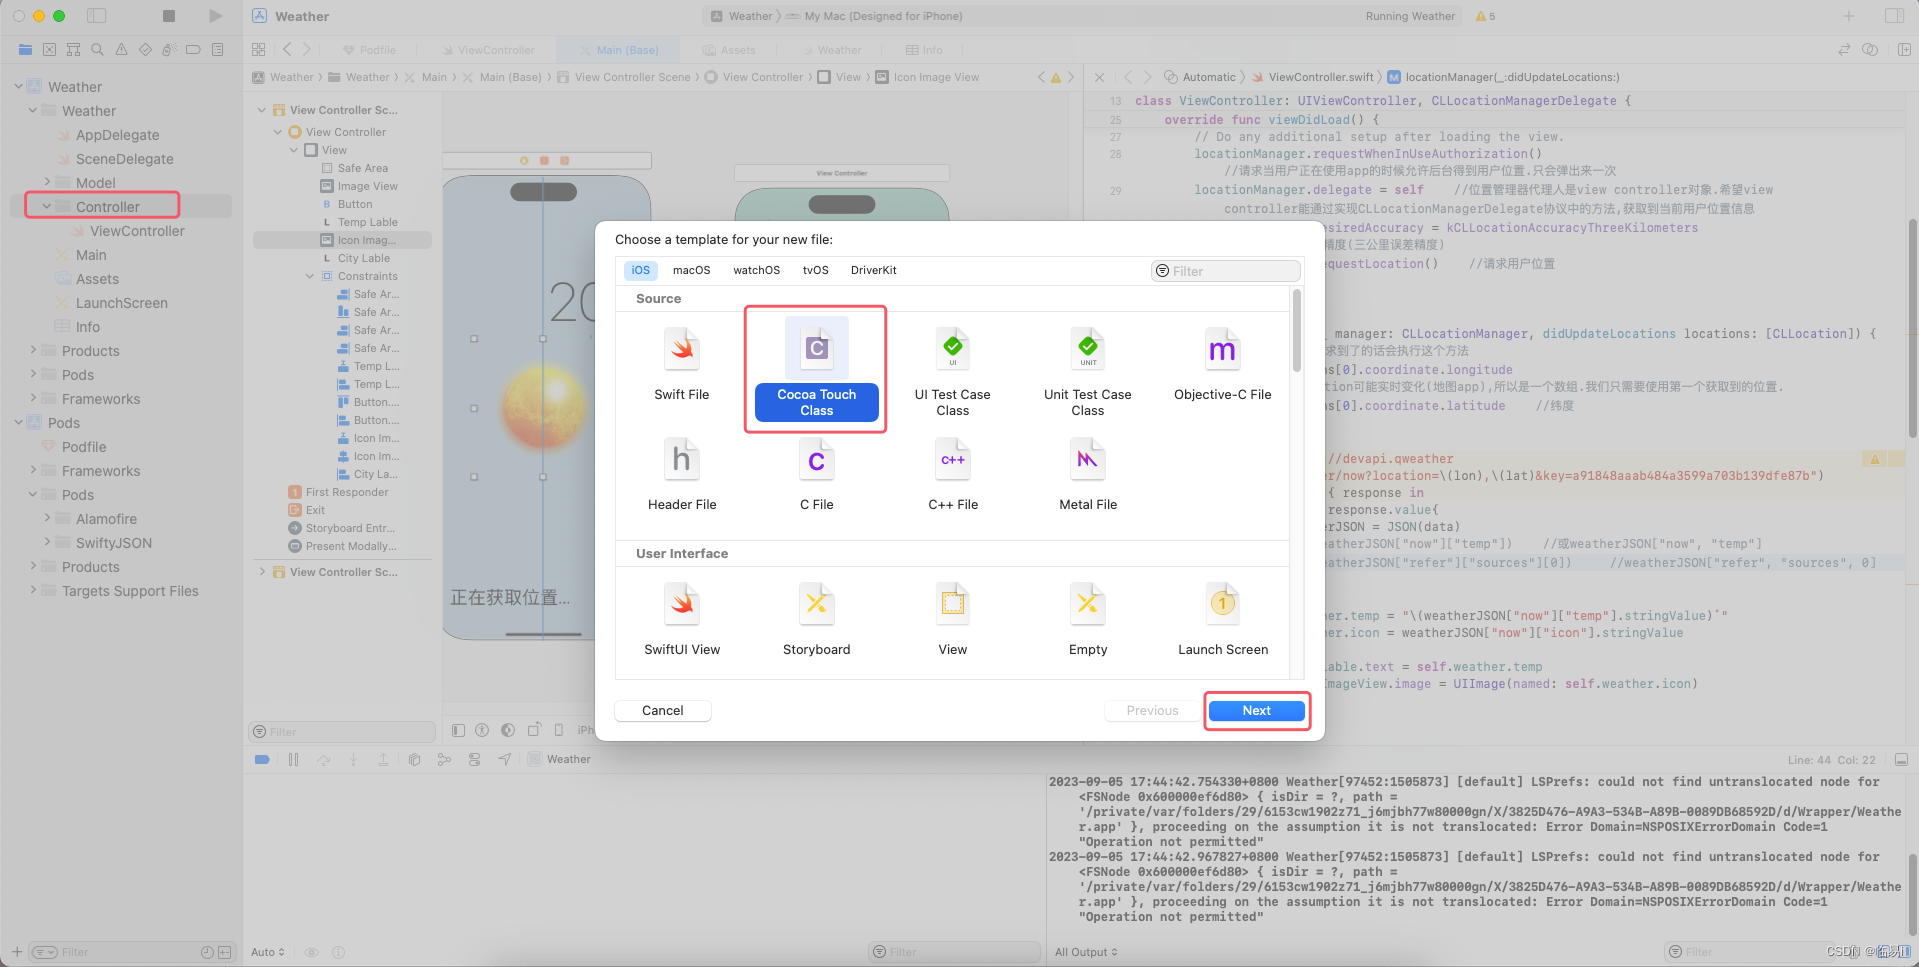
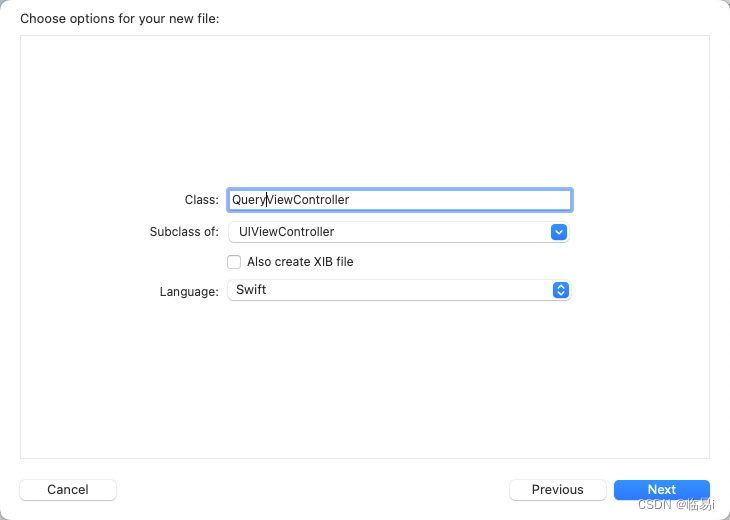
1.创建次页的controller class
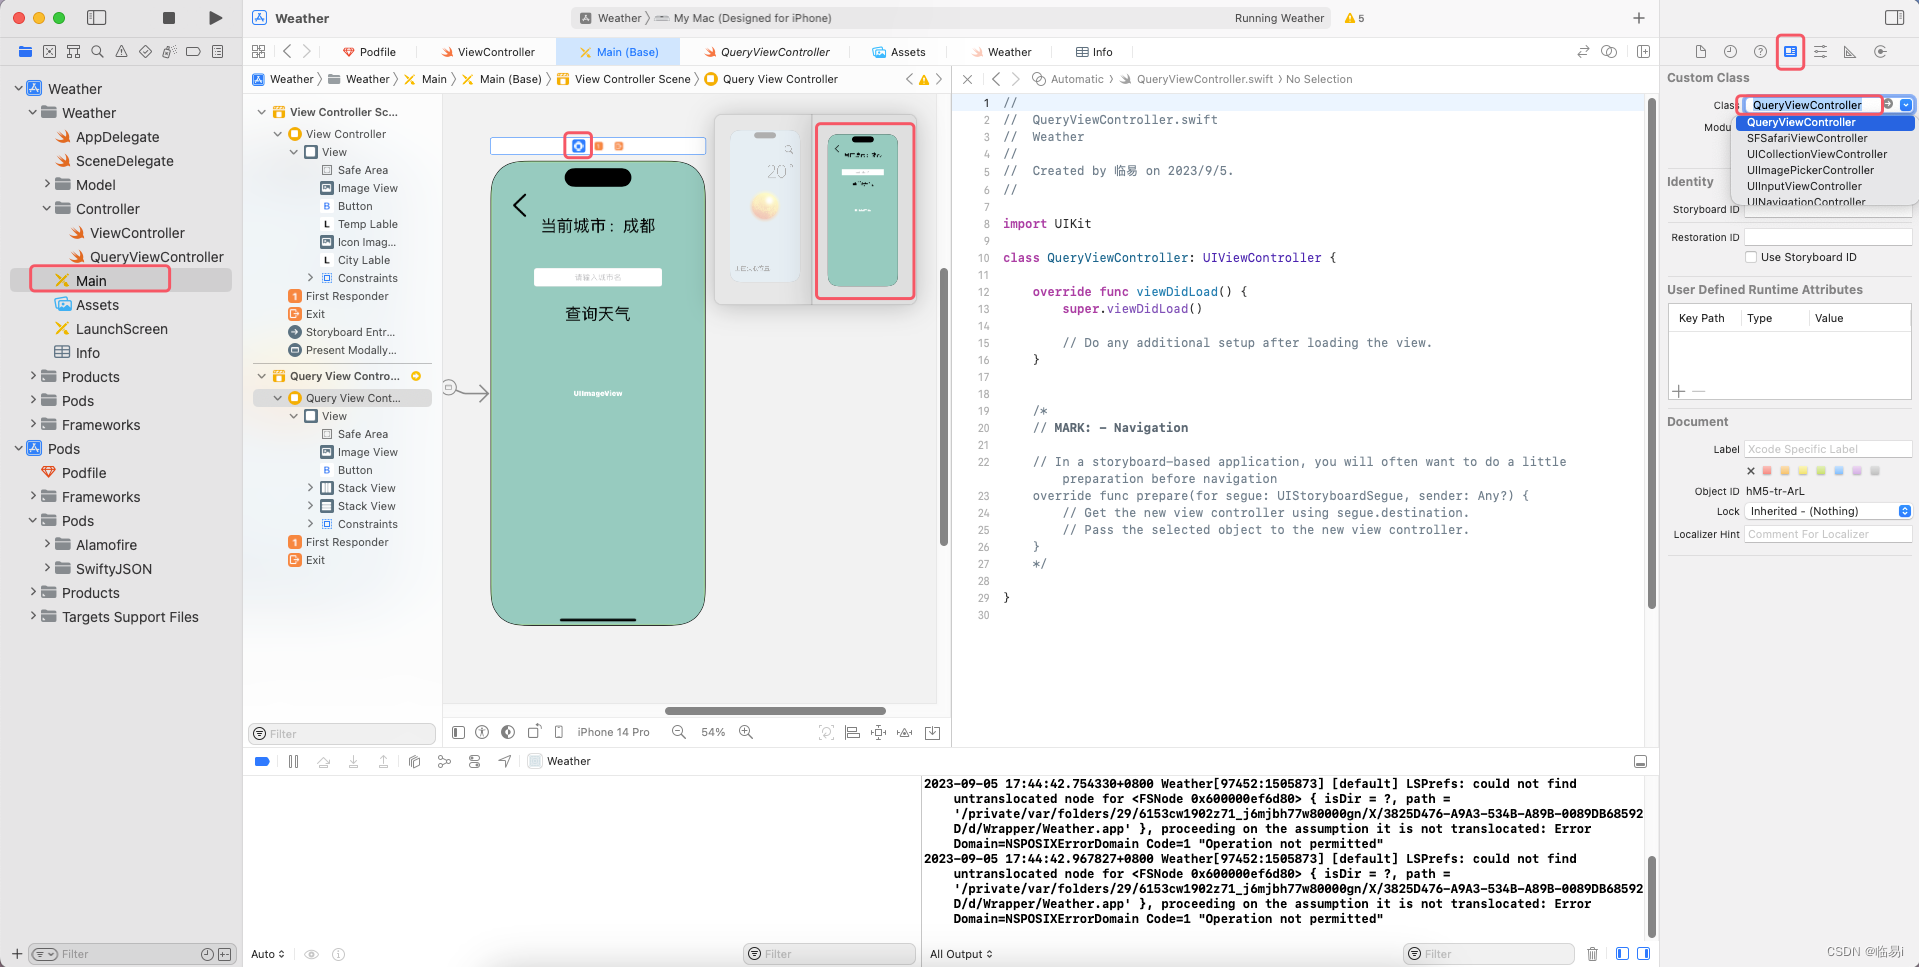
在Main中选择次界面,点击左上方黄色的圈圈,将它的Custom Class中的class修改为QueryViewController.
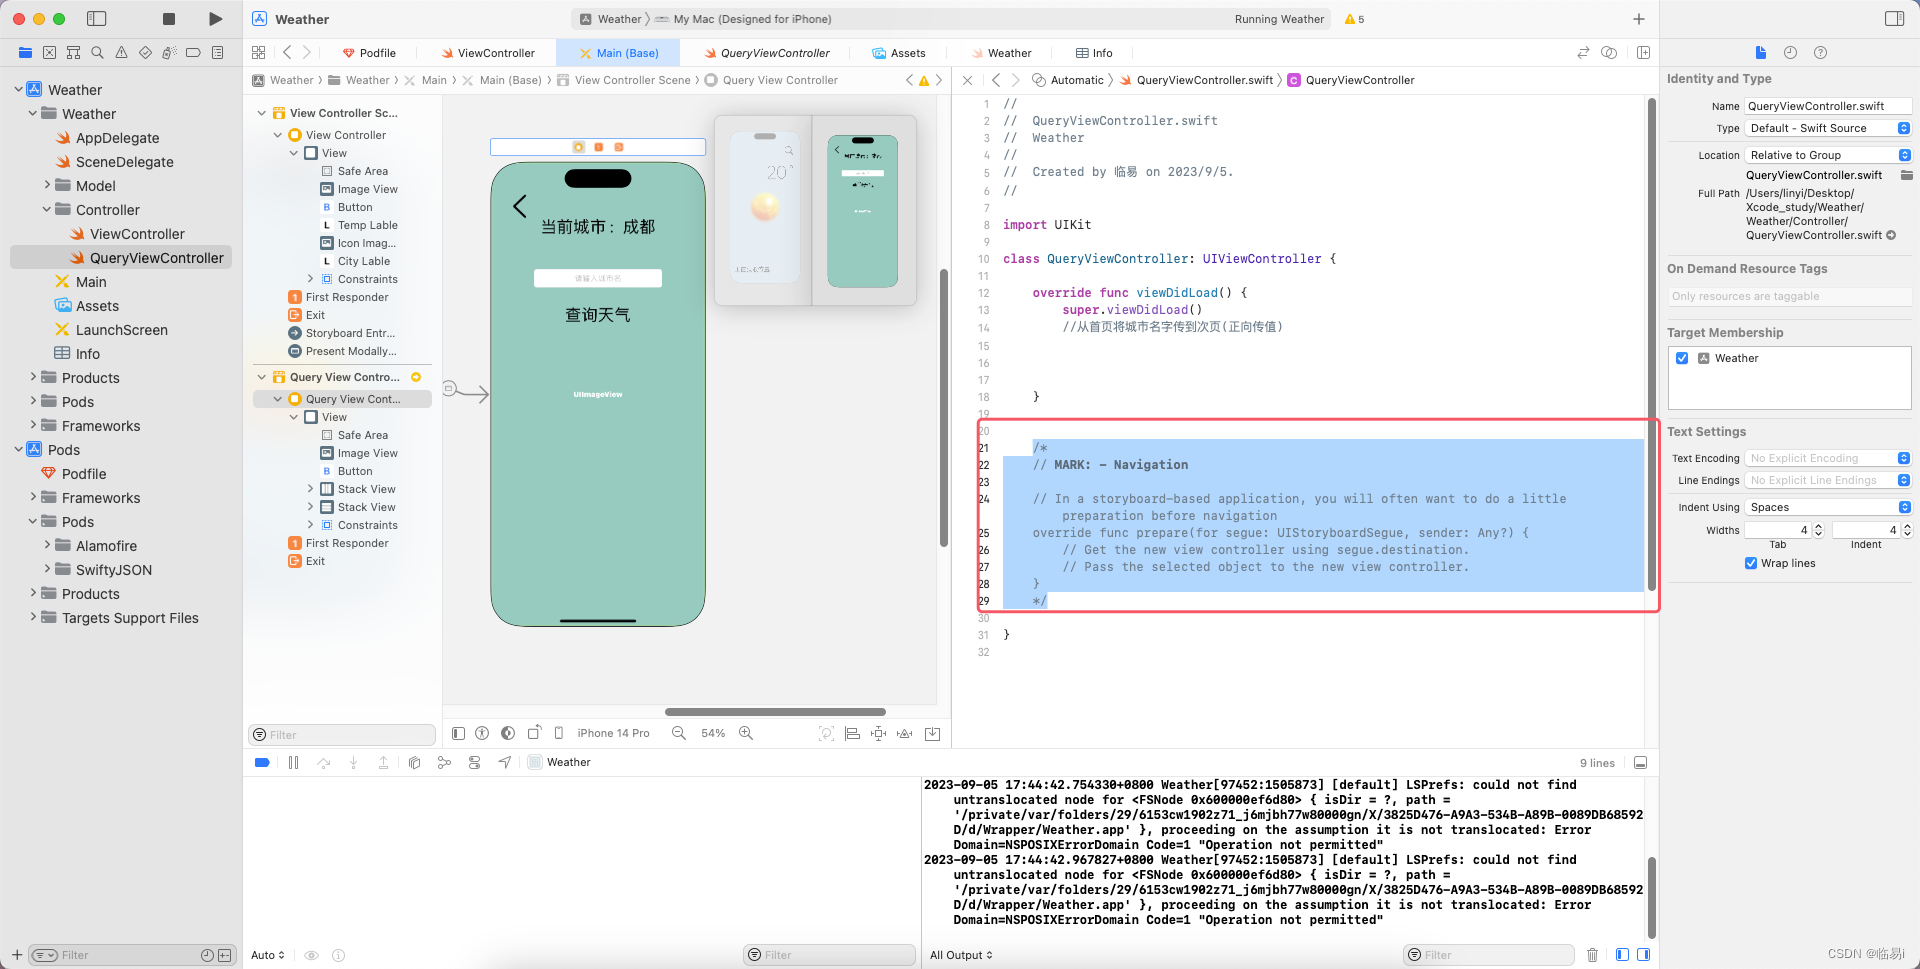
将QueryViewController中自动生成的首页传值方法复制到ViewController中去.去掉注释符号.
2.在Main中给1页向2页传值的箭头命名为QueryViewControllerSegue.
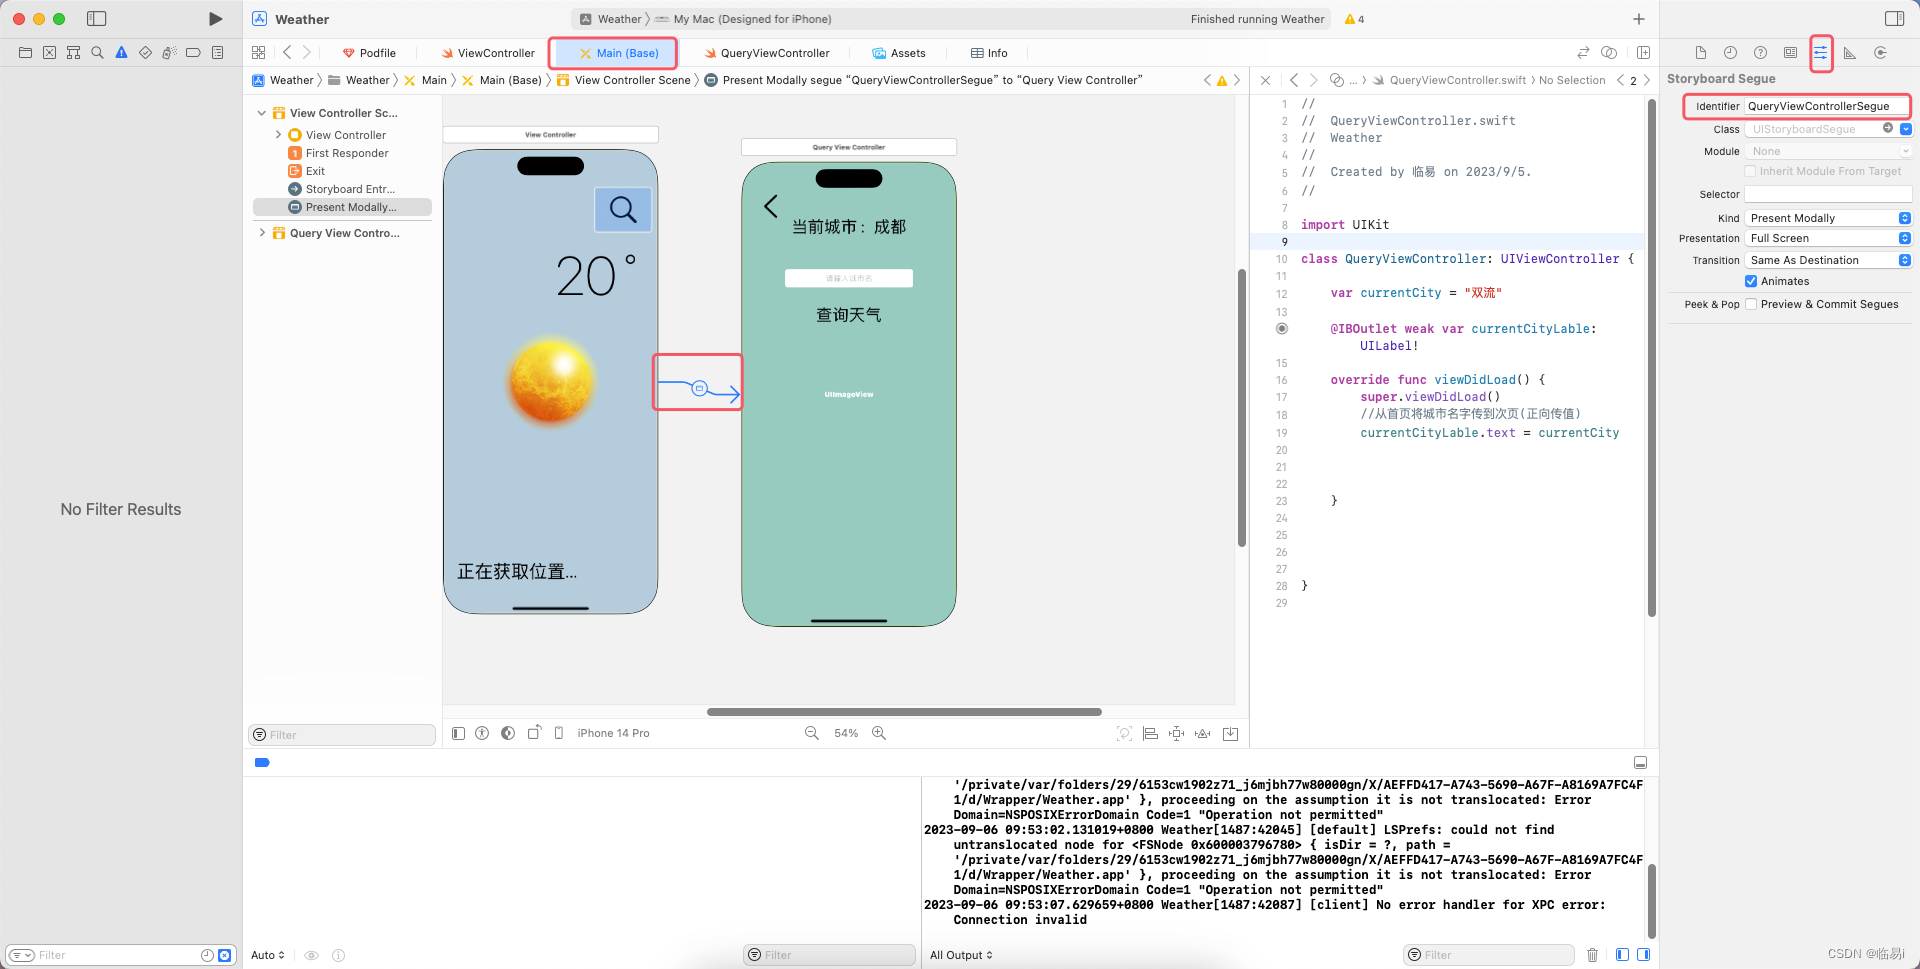
3.编码进行从首页到次页的城市正向传值.
ViewController:
import UIKit
import CoreLocation
import Alamofire   //引入和风API包
import SwiftyJSON   //引入解析JSON数据的包

class ViewController: UIViewController, CLLocationManagerDelegate {    //遵循CLLocationManagerDelegate协议
    @IBOutlet weak var tempLable: UILabel!

    @IBOutlet weak var iconImageView: UIImageView!

    @IBOutlet weak var cityLable: UILabel!

    //位置管理器
    let locationManager = CLLocationManager()
    //Weather.swift实例化
    let weather = Weather()

    override func viewDidLoad() {
        super.viewDidLoad()
        // Do any additional setup after loading the view.
        locationManager.requestWhenInUseAuthorization()    //请求当用户正在使用app的时候允许后台得到用户位置.只会弹出来一次
        locationManager.delegate = self    //位置管理器代理人是view controller对象.希望view controller能通过实现CLLocationManagerDelegate协议中的方法,获取到当前用户位置信息
        locationManager.desiredAccuracy = kCLLocationAccuracyThreeKilometers    //设置需要的位置精度(三公里误差精度)
        locationManager.requestLocation()    //请求用户位置
    }
    func locationManager(_ manager: CLLocationManager, didUpdateLocations locations: [CLLocation]) {  //requesLocation请求到了的话会执行这个方法
        let lon = locations[0].coordinate.longitude   //精度.因为location可能实时变化(地图app),所以是一个数组.我们只需要使用第一个获取到的位置.
        let lat = locations[0].coordinate.latitude    //纬度
        //print(lon)
        //print(lat)
        AF.request("https://devapi.qweather.com/v7/weather/now?location=\(lon),\(lat)&key=a91848aaab484a3599a703b139dfe87b").responseJSON { response in
            if let data = response.value{
                let weatherJSON = JSON(data)
                //print(weatherJSON["now"]["temp"])    //或weatherJSON["now", "temp"]
                //print(weatherJSON["refer"]["sources"][0])     //weatherJSON["refer", "sources", 0]

                //MVC结构
                self.weather.temp = "\(weatherJSON["now"]["temp"].stringValue)˚"
                self.weather.icon = weatherJSON["now"]["icon"].stringValue

                self.tempLable.text = self.weather.temp
                self.iconImageView.image = UIImage(named: self.weather.icon)
            }
        }      //请求和风API的网址,得到当前位置的天气

        AF.request("https://geoapi.qweather.com/v2/city/lookup?location=\(lon),\(lat)&key=a91848aaab484a3599a703b139dfe87b").responseJSON { response in
            if let data = response.value{
                let cityJSON = JSON(data)
                //处理数据
                self.weather.city = cityJSON["location", 0, "name"].stringValue
                //处理AI
                self.cityLable.text = self.weather.city
            }
        }
    }
    func locationManager(_ manager: CLLocationManager, didFailWithError error: Error) {    //requesLocation请求失败的话会执行这个方法
        cityLable.text = "获取用户城市失败"
    }

    // Navigation跳转
    // 跳转前到准备工作,从当前页面经过的所有跳转都会经过这个方法
    override func prepare(for segue: UIStoryboardSegue, sender: Any?) {
// 方法1.
        //if segue.identifier == "QueryViewControllerSegue"{
        //    let viewController = segue.destination as! QueryViewController
        //    viewController.currentCity = weather.city
        //}
// 方法2.

        if let viewController = segue.destination as? QueryViewController{

            ViewController.currentCity = weather.city

    }

}
QueryViewController:
import UIKit

class QueryViewController: UIViewController {

    var currentCity = "双流"

    @IBOutlet weak var currentCityLable: UILabel!

    override func viewDidLoad() {
        super.viewDidLoad()
        //从首页将城市名字传到次页(正向传值)
        currentCityLable.text = currentCity
    }

}
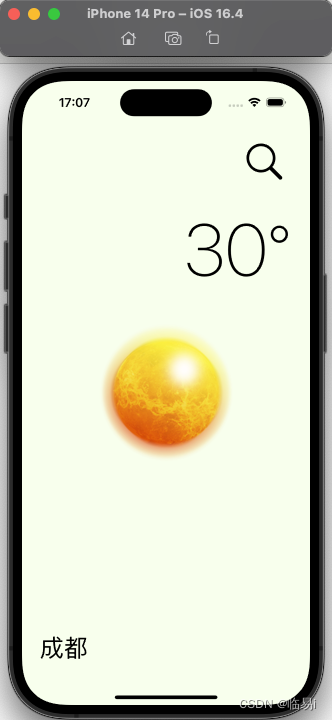
4.启动测试,正向传值成功.
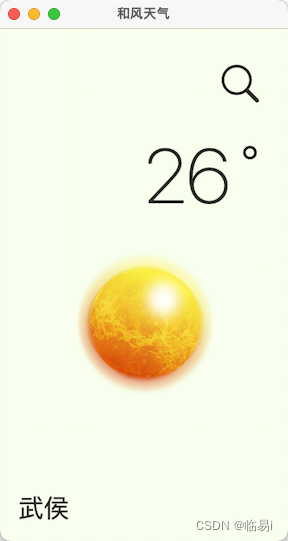
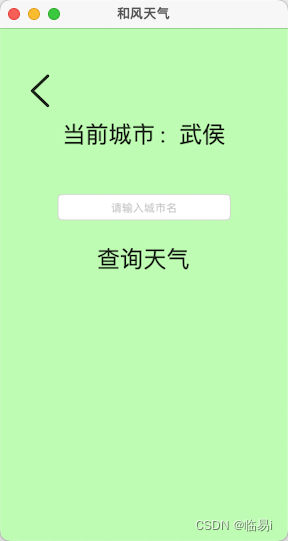
5.反向传值,将次页输入框中拿到的值传给首页的天气.制作返回按钮与搜索按钮.
QueryViewController:
import UIKit

protocol QueryViewControllerDelegate {
    func didChangeCity(city: String)
}

class QueryViewController: UIViewController {

    var currentCity = ""
    var delegate: QueryViewControllerDelegate?

    @IBOutlet weak var currentCityLable: UILabel!
    @IBOutlet weak var cityTextfield: UITextField!

    override func viewDidLoad() {
        super.viewDidLoad()
        //从首页将城市名字传到次页(正向传值)
        currentCityLable.text = currentCity
    }
    //返回按钮
    @IBAction func back(_ sender: Any) {
        dismiss(animated: true)
    }
    //查询按钮
    @IBAction func query(_ sender: Any) {
        dismiss(animated: true)

        delegate?.didChangeCity(city: cityTextfield.text!)
    }
}
ViewController:
import UIKit
import CoreLocation
import Alamofire   //引入和风API包
import SwiftyJSON   //引入解析JSON数据的包

class ViewController: UIViewController, CLLocationManagerDelegate, QueryViewControllerDelegate {    //遵循CLLocationManagerDelegate协议
    @IBOutlet weak var tempLable: UILabel!

    @IBOutlet weak var iconImageView: UIImageView!

    @IBOutlet weak var cityLable: UILabel!

    //位置管理器
    let locationManager = CLLocationManager()
    //Weather.swift实例化
    let weather = Weather()

    override func viewDidLoad() {
        super.viewDidLoad()
        // Do any additional setup after loading the view.
        locationManager.requestWhenInUseAuthorization()    //请求当用户正在使用app的时候允许后台得到用户位置.只会弹出来一次
        locationManager.delegate = self    //位置管理器代理人是view controller对象.希望view controller能通过实现CLLocationManagerDelegate协议中的方法,获取到当前用户位置信息
        locationManager.desiredAccuracy = kCLLocationAccuracyThreeKilometers    //设置需要的位置精度(三公里误差精度)
        locationManager.requestLocation()    //请求用户位置


    }
    func locationManager(_ manager: CLLocationManager, didUpdateLocations locations: [CLLocation]) {  //requesLocation请求到了的话会执行这个方法
        let lon = locations[0].coordinate.longitude   //精度.因为location可能实时变化(地图app),所以是一个数组.我们只需要使用第一个获取到的位置.
        let lat = locations[0].coordinate.latitude    //纬度
        //print(lon)
        //print(lat)
        AF.request("https://devapi.qweather.com/v7/weather/now?location=\(lon),\(lat)&key=a91848aaab484a3599a703b139dfe87b").responseJSON { response in
            if let data = response.value{
                let weatherJSON = JSON(data)
                //print(weatherJSON["now"]["temp"])    //或weatherJSON["now", "temp"]
                //print(weatherJSON["refer"]["sources"][0])     //weatherJSON["refer", "sources", 0]

                //MVC结构
                self.weather.temp = "\(weatherJSON["now"]["temp"].stringValue)˚"
                self.weather.icon = weatherJSON["now"]["icon"].stringValue

                self.tempLable.text = self.weather.temp
                self.iconImageView.image = UIImage(named: self.weather.icon)


            }
        }      //请求和风API的网址,得到当前位置的天气

        AF.request("https://geoapi.qweather.com/v2/city/lookup?location=\(lon),\(lat)&key=a91848aaab484a3599a703b139dfe87b").responseJSON { response in
            if let data = response.value{
                let cityJSON = JSON(data)
                //处理数据
                self.weather.city = cityJSON["location", 0, "name"].stringValue
                //处理AI
                self.cityLable.text = self.weather.city
            }
        }
    }
    func locationManager(_ manager: CLLocationManager, didFailWithError error: Error) {    //requesLocation请求失败的话会执行这个方法
        cityLable.text = "获取用户城市失败"
    }

    // Navigation跳转

    // 跳转前到准备工作,从当前页面经过的所有跳转都会经过这个方法
    override func prepare(for segue: UIStoryboardSegue, sender: Any?) {

        //        if segue.identifier == "QueryViewControllerSegue"{
        //            let viewController = segue.destination as! QueryViewController
        //            viewController.currentCity = weather.city
        //        }

        if let viewController = segue.destination as? QueryViewController{
            viewController.currentCity = weather.city
            viewController.delegate = self
        }


    }
    func didChangeCity(city: String) {
        print(city)
    }
}
6.通过搜索获取用户想查询的城市名
ViewController:
import UIKit
import CoreLocation
import Alamofire   //引入和风API包
import SwiftyJSON   //引入解析JSON数据的包

class ViewController: UIViewController, CLLocationManagerDelegate, QueryViewControllerDelegate {    //遵循CLLocationManagerDelegate协议
    @IBOutlet weak var tempLable: UILabel!

    @IBOutlet weak var iconImageView: UIImageView!

    @IBOutlet weak var cityLable: UILabel!

    //位置管理器
    let locationManager = CLLocationManager()
    //Weather.swift实例化
    let weather = Weather()

    override func viewDidLoad() {
        super.viewDidLoad()
        // Do any additional setup after loading the view.
        locationManager.requestWhenInUseAuthorization()    //请求当用户正在使用app的时候允许后台得到用户位置.只会弹出来一次
        locationManager.delegate = self    //位置管理器代理人是view controller对象.希望view controller能通过实现CLLocationManagerDelegate协议中的方法,获取到当前用户位置信息
        locationManager.desiredAccuracy = kCLLocationAccuracyThreeKilometers    //设置需要的位置精度(三公里误差精度)
        locationManager.requestLocation()    //请求用户位置


    }
    func locationManager(_ manager: CLLocationManager, didUpdateLocations locations: [CLLocation]) {  //requesLocation请求到了的话会执行这个方法
        let lon = locations[0].coordinate.longitude   //精度.因为location可能实时变化(地图app),所以是一个数组.我们只需要使用第一个获取到的位置.
        let lat = locations[0].coordinate.latitude    //纬度
        //print(lon)
        //print(lat)
        AF.request("https://devapi.qweather.com/v7/weather/now?location=\(lon),\(lat)&key=a91848aaab484a3599a703b139dfe87b").responseJSON { response in
            if let data = response.value{
                let weatherJSON = JSON(data)
                //print(weatherJSON["now"]["temp"])    //或weatherJSON["now", "temp"]
                //print(weatherJSON["refer"]["sources"][0])     //weatherJSON["refer", "sources", 0]

                //MVC结构
                self.weather.temp = "\(weatherJSON["now"]["temp"].stringValue)˚"
                self.weather.icon = weatherJSON["now"]["icon"].stringValue

                self.tempLable.text = self.weather.temp
                self.iconImageView.image = UIImage(named: self.weather.icon)


            }
        }      //请求和风API的网址,得到当前位置的天气

        AF.request("https://geoapi.qweather.com/v2/city/lookup?location=\(lon),\(lat)&key=a91848aaab484a3599a703b139dfe87b").responseJSON { response in
            if let data = response.value{
                let cityJSON = JSON(data)
                //处理数据
                self.weather.city = cityJSON["location", 0, "name"].stringValue
                //处理AI
                self.cityLable.text = self.weather.city
            }
        }
    }
    func locationManager(_ manager: CLLocationManager, didFailWithError error: Error) {    //requesLocation请求失败的话会执行这个方法
        cityLable.text = "获取用户城市失败"
    }

    // Navigation跳转

    // 跳转前到准备工作,从当前页面经过的所有跳转都会经过这个方法
    override func prepare(for segue: UIStoryboardSegue, sender: Any?) {

        //        if segue.identifier == "QueryViewControllerSegue"{
        //            let viewController = segue.destination as! QueryViewController
        //            viewController.currentCity = weather.city
        //        }

        if let viewController = segue.destination as? QueryViewController{
            viewController.currentCity = weather.city
            viewController.delegate = self
        }


    }
    func didChangeCity(city: String) {
        //print(city)
        let parameters = ["location": city, "key": "a91848aaab484a3599a703b139dfe87b"]
        AF.request("https://geoapi.qweather.com/v2/city/lookup", parameters: parameters).responseJSON { response in
            if let data = response.value{
                let cityJSON = JSON(data)
                //处理数据
                self.weather.city = cityJSON["location", 0, "name"].stringValue
                //处理AI
                self.cityLable.text = self.weather.city
            }
        }

    }
}
7.优化,直接通过城市id获取当时天气,避免受到重名城市困扰.
ViewController:
import UIKit
import CoreLocation
import Alamofire   //引入和风API包
import SwiftyJSON   //引入解析JSON数据的包

class ViewController: UIViewController, CLLocationManagerDelegate, QueryViewControllerDelegate {    //遵循CLLocationManagerDelegate协议
    @IBOutlet weak var tempLable: UILabel!

    @IBOutlet weak var iconImageView: UIImageView!

    @IBOutlet weak var cityLable: UILabel!

    //位置管理器
    let locationManager = CLLocationManager()
    //Weather.swift实例化
    let weather = Weather()

    override func viewDidLoad() {
        super.viewDidLoad()
        // Do any additional setup after loading the view.
        locationManager.requestWhenInUseAuthorization()    //请求当用户正在使用app的时候允许后台得到用户位置.只会弹出来一次
        locationManager.delegate = self    //位置管理器代理人是view controller对象.希望view controller能通过实现CLLocationManagerDelegate协议中的方法,获取到当前用户位置信息
        locationManager.desiredAccuracy = kCLLocationAccuracyThreeKilometers    //设置需要的位置精度(三公里误差精度)
        locationManager.requestLocation()    //请求用户位置


    }
    func locationManager(_ manager: CLLocationManager, didUpdateLocations locations: [CLLocation]) {  //requesLocation请求到了的话会执行这个方法
        let lon = locations[0].coordinate.longitude   //精度.因为location可能实时变化(地图app),所以是一个数组.我们只需要使用第一个获取到的位置.
        let lat = locations[0].coordinate.latitude    //纬度
        //print(lon)
        //print(lat)
        AF.request("https://devapi.qweather.com/v7/weather/now?location=\(lon),\(lat)&key=a91848aaab484a3599a703b139dfe87b").responseJSON { response in
            if let data = response.value{
                let weatherJSON = JSON(data)
                //print(weatherJSON["now"]["temp"])    //或weatherJSON["now", "temp"]
                //print(weatherJSON["refer"]["sources"][0])     //weatherJSON["refer", "sources", 0]

                //MVC结构
                self.weather.temp = "\(weatherJSON["now"]["temp"].stringValue)˚"
                self.weather.icon = weatherJSON["now"]["icon"].stringValue

                self.tempLable.text = self.weather.temp
                self.iconImageView.image = UIImage(named: self.weather.icon)


            }
        }      //请求和风API的网址,得到当前位置的天气

        AF.request("https://geoapi.qweather.com/v2/city/lookup?location=\(lon),\(lat)&key=a91848aaab484a3599a703b139dfe87b").responseJSON { response in
            if let data = response.value{
                let cityJSON = JSON(data)
                //处理数据
                self.weather.city = cityJSON["location", 0, "name"].stringValue
                //处理AI
                self.cityLable.text = self.weather.city
            }
        }
    }
    func locationManager(_ manager: CLLocationManager, didFailWithError error: Error) {    //requesLocation请求失败的话会执行这个方法
        cityLable.text = "获取用户城市失败"
    }

    // Navigation跳转

    // 跳转前到准备工作,从当前页面经过的所有跳转都会经过这个方法
    override func prepare(for segue: UIStoryboardSegue, sender: Any?) {

        //        if segue.identifier == "QueryViewControllerSegue"{
        //            let viewController = segue.destination as! QueryViewController
        //            viewController.currentCity = weather.city
        //        }

        if let viewController = segue.destination as? QueryViewController{
            viewController.currentCity = weather.city
            viewController.delegate = self
        }


    }
    func didChangeCity(city: String) {
        //print(city)
        let parameters = ["location": city, "key": "a91848aaab484a3599a703b139dfe87b"]
        AF.request("https://geoapi.qweather.com/v2/city/lookup", parameters: parameters).responseJSON { response in
            if let data = response.value{
                let cityJSON = JSON(data)
                //处理数据
                self.weather.city = cityJSON["location", 0, "name"].stringValue
                //处理AI
                self.cityLable.text = self.weather.city

                //通过城市id查询当前城市天气

                let parameters = ["location": cityJSON["location", 0, "id"].stringValue, "key": "a91848aaab484a3599a703b139dfe87b"]

                AF.request("https://devapi.qweather.com/v7/weather/now", parameters: parameters).responseJSON { response in

                    if let data = response.value{

                        let weatherJSON = JSON(data)

                        //处理数据

                        self.weather.temp = "\(weatherJSON["now","temp"].stringValue)°"

                        self.weather.icon = weatherJSON["now","icon"].stringValue

                        //处理UI

                        self.tempLable.text = self.weather.temp

                        self.iconImageView.image = UIImage(named: self.weather.icon)

                    }

                }

           }

        }

    }
}
8.优化,在次页直接将光标聚焦到搜索栏处,减少用户的点击操作.
QueryViewController:
import UIKit

protocol QueryViewControllerDelegate {
    func didChangeCity(city: String)
}

class QueryViewController: UIViewController {

    var currentCity = ""
    var delegate: QueryViewControllerDelegate?

    @IBOutlet weak var currentCityLable: UILabel!
    @IBOutlet weak var cityTextfield: UITextField!

    override func viewDidLoad() {
        super.viewDidLoad()

        //将光标聚焦到搜索栏处
        cityTextfield.becomeFirstResponder()  //收起键盘:cityTextfield.resignFirstResponder()

        //从首页将城市名字传到次页(正向传值)
        currentCityLable.text = currentCity
    }
    //返回按钮
    @IBAction func back(_ sender: Any) {
        dismiss(animated: true)
    }
    //查询按钮
    @IBAction func query(_ sender: Any) {
        dismiss(animated: true)

        delegate?.didChangeCity(city: cityTextfield.text!)
    }

}
9.拦截用户的空白搜索,减少资源消耗.
QueryViewController:
import UIKit

protocol QueryViewControllerDelegate {
    func didChangeCity(city: String)
}

class QueryViewController: UIViewController {

    var currentCity = ""
    var delegate: QueryViewControllerDelegate?

    @IBOutlet weak var currentCityLable: UILabel!
    @IBOutlet weak var cityTextfield: UITextField!

    override func viewDidLoad() {
        super.viewDidLoad()

        //将光标聚焦到搜索栏处
        cityTextfield.becomeFirstResponder()  //收起键盘:cityTextfield.resignFirstResponder()

        //从首页将城市名字传到次页(正向传值)
        currentCityLable.text = currentCity
    }
    //返回按钮
    @IBAction func back(_ sender: Any) {
        dismiss(animated: true)
    }
    //查询按钮
    @IBAction func query(_ sender: Any) {
        dismiss(animated: true)
        if !cityTextfield.text!.trimmingCharacters(in: .whitespacesAndNewlines).isEmpty{//修剪掉用户输入的空格和回车,如果修剪掉之后字符串 不(!) 为空,则进行搜索
            delegate?.didChangeCity(city: cityTextfield.text!)
        }
    }

}
10.启动测试:
