简介
首先了解一个概念AST(abstract syntax tree)抽象语法树,按照大多数教程中的描述,这是一种源代码的抽象语法结构树,树上的每个节点都表示源代码中的一种结构,将源码中的各种嵌套括号等形式,隐含在树的结构中,不依赖于源语言的语法。这个概念不但名称AST很抽象, 描述得也很抽象,理解起来很难。个人习惯,将所有抽象的东西抽象的理解,(下文中都将简称为AST或语法树),粗暴的代入到各个场景中,抓住几个主要的过程描述:
-
对于常见编译型语言(例如:Java)来说,编译步骤分为:词法分析->语法分析->语义检查->代码优化和字节码生成
-
对于解释型语言(例如 JavaScript)来说,通过词法分析 -> 语法分析 -> 语法树,就可以开始解释执行了
抓住以上两点,语言分为编译型语言,解释型语言。在解释型语言中,前端常用的javascript就有话说了,AST原来在javascript引擎执行中起到了作用。
思考
基于以上先向下延申到JavaScript的执行过程,这就到了js引擎编译部分——V8引擎以及其工作的原理了,太深奥了,先到此为止(@~@),再往下就暴露自己了,毕竟看破不说破;只能再横向拓展,js引擎的执行过程以及编译解析深入不了,就看看其执行环境node、浏览器、智能编辑器以及编译器。在以上各个不同环境中,很多经验丰富的一线的开发者,很容易就想到兼容的问题,例如es6 语法在低版本的浏览器中,需要转换为es5, 这个兼容经常在开发框架中经常被提到。脑洞打开,将复杂的东西简单化。在现阶段经典的开发框架中Angular、React、Vue中抓住共同点,开发工具脚手架都有一个编译打包的配置。这里面是不是都有这个过程,毕竟各种不同的语法文件后缀.ts、.jsx、.vue,最终都要在同一个环境中js引擎中运行,肯定是有AST的编译过程。
梳理知识
梳理下知识点,就个人能力而言A/V/R三大框架都精通?咳咳~目前而言,还差亿丢丢(~@^@~)。只能以当前使用最熟练的vue来做栗子了。 扒一扒vue框架源码中compiler的插件——vue-loader、compiler、render等插件。这里就比较夹杂了vue2与vue3的兼容。以下简单说一下2.x与3.x版本的更新点,vue2.x是vue-template-compiler,在vue3在@vue/compiler-sfc。尽管两个版本的插件不同,代码实现的设计底层原理不同,但步骤都相差不大,模板文件的解析步骤如下:

先通过装载器加载模板文件,再通过编译插件将转为可以被渲染的代码,最后通过render函数进行页面渲染。按照理解进一步画了如下几个步骤,其中template中的标签、指令、修饰符等需要传入到编译器中,通过几个编译中的几个api 转换为可以渲染的代码,进入到render函数中进行页面渲染。
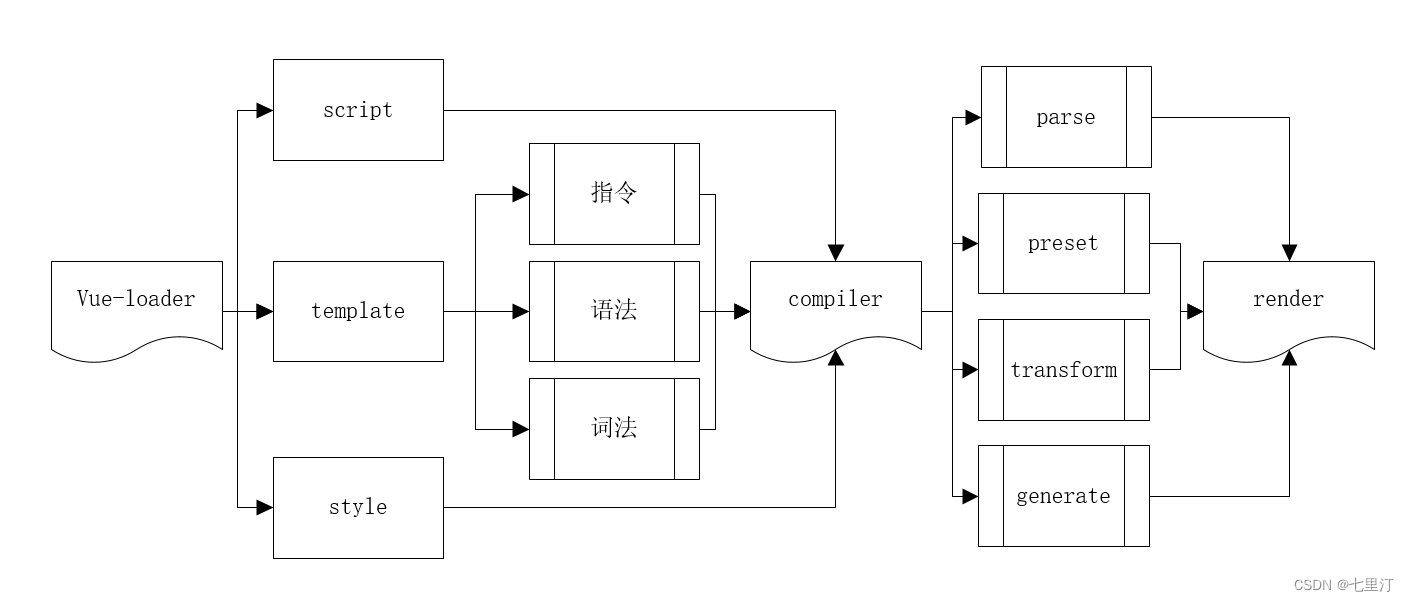
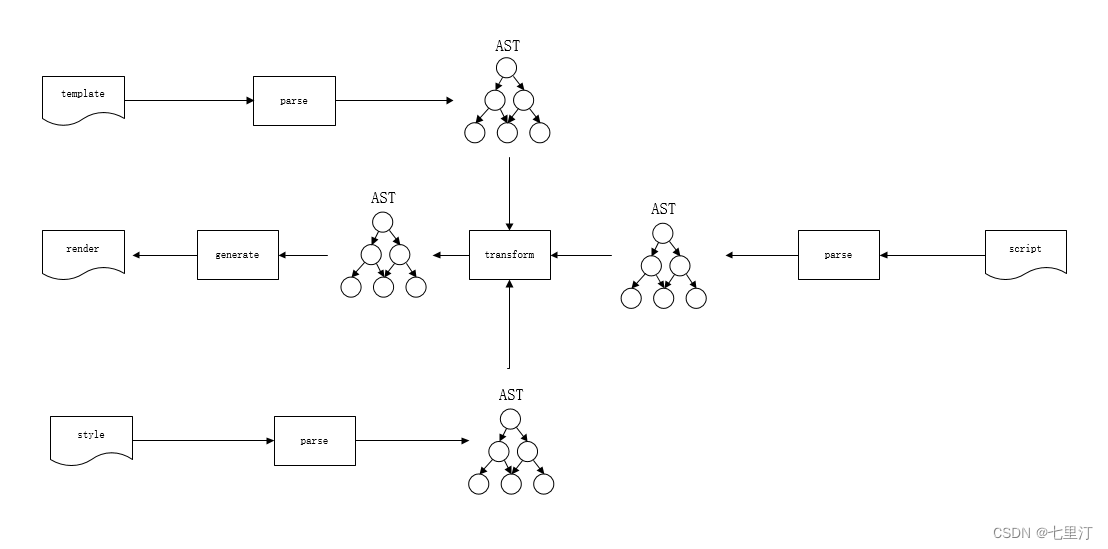
其中的compiler编译中分为了三个部分进行拆分为 dom 、script、style中分别进行AST转换,通过generate函数将AST转换为可执行代码。传入到render函数执行页面渲染的dom
示例源码
以vue-template-compiler插件为例,将字符串代码转换AST的函数工具
const vueCompiler = require('vue-template-compiler');
function templateCompile(code) {
const {ast} = vueCompiler.compile(code);
const dfs = (node, path) => {
for (let index in node.children) {
let child = node.children[index];
if ('img' === child.tag) {
child.attrsList.forEach(attr => {
if (attr.name === ':src' || attr.name === 'src') {
console.log('这是一个img', attr.value, ` path= ${ path }`);
}
})
}
dfs(child, path.concat(child.tag))
}
}
dfs(ast, []);
return ast
}函数执行测试如下:
const templateCode = `
  <div id="app">
    <div class="header_box" :style="\`height: \${headerHeight}px\`"></div>
    <transition :name="transitionName">
        <div :style="\`height: calc(100% - \${headerHeight + footerHeight}px)\`">
            <navigator title="编辑资料"  @goback="handleGoback" btn_name="完成" @reset="handleSave">
            <span slot="left" class="left-text">取消</span>
            </navigator>
            <div class="detail">
                <div class="img" @click="updateAvatar">
                    <img v-if="info.userIcon" :src="info.userIcon" alt="">
                    <i v-else></i>
                    <!-- <img v-else src="@/asset/images/bg_my_avatar@3x.png" alt=""> -->
                    <span>更换头像</span>
                </div>
                <div class="form-item">
                    <span>昵称</span>
                    <hm-input :clearable="true" type="text" placeholder="请输入昵称" :maxlength="32" v-model="nickName" />
                </div>
            </div>
        </div>
    </transition>
    <div class="footer_box" :style="\`height: \${footerHeight}px\`"></div>
  </div>
`;
const templateResult = templateCompile(templateCode);
console.log('------------------------------');
console.log(templateResult.ast);
执行结果如下:

babel工具类
使用@babel/parse、@babel/traverse进行转换js、css的示例
const parser = require("@babel/parser");
const traverse = require("@babel/traverse").default;
function scriptCompile(code) {
const ast = parser.parse(code, { sourceType: 'module' });
const visitor = {
ImportDeclaration(path) {
const {specifiers, source} = path.node;
console.log('这是一个import', specifiers[0].local.name, source.value);
}
}
traverse(ast, visitor);
return ast;
}测试用例如下:
const scriptCode = `
import navigator from '@/components/navigator/navigator';
import { setTimeout } from 'timers';
export default {
    name: 'app',
    data () {
        return {
            info: {},
            transitionName: '',
            nickName: '',
            headerHeight: 10,
            footerHeight: 10
        };
    },
    // 添加一个注释
    created () {
        this.headerHeight = this.GLOBAL.isMobile ? (this.GLOBAL.statusBarHeight / window.devicePixelRatio) : 10;
        this.footerHeight = this.GLOBAL.isMobile ? (this.GLOBAL.bottomSafeAreaHeight / window.devicePixelRatio) : 10;
    },
    mounted () {
        this.listenBackbutton();
        // 这是一个注释
        this.getInfo();
    },
    methods: {
        listenBackbutton () {
            hatom.setBridge(
                'onBackPressed',
                (res) => {
                    hatom.page.exit();
                }
            );
        },
        getInfo () {
            this.$http({
                method: 'post',
                url: this.$api.USER_INFO
            }).then((res) => {
                console.log(res.data);
                this.nickName = res.data.nickName;
                this.info.userIcon = res.data.userIcon;
                this.info = res.data;
            });
        },
        exitWebApp () {
            hatom.page.exit((res) => {
                this.$toast('exit成功');
            });
        },
        updateAvatar () { },
        handleGoback () {
            if (this.GLOBAL.isMobile) {
                hatom.page.exit();
            } else {
                window.location.hash = '';
                window.location.pathname = 'index';
            }
        },
        handleSave () {    }
    },
    watch: {
        '$route' (to, from) {
            if (to.meta.index < from.meta.index) {
                this.transitionName = 'right';
            }
            if (to.meta.index > from.meta.index) {
                this.transitionName = 'left';
            }
        }
    },
    components: {
        navigator
    }
};
`;
const scriptResult = scriptCompile(scriptCode);
console.log(scriptResult);
console.log('------------------------------');
测试结果如下:
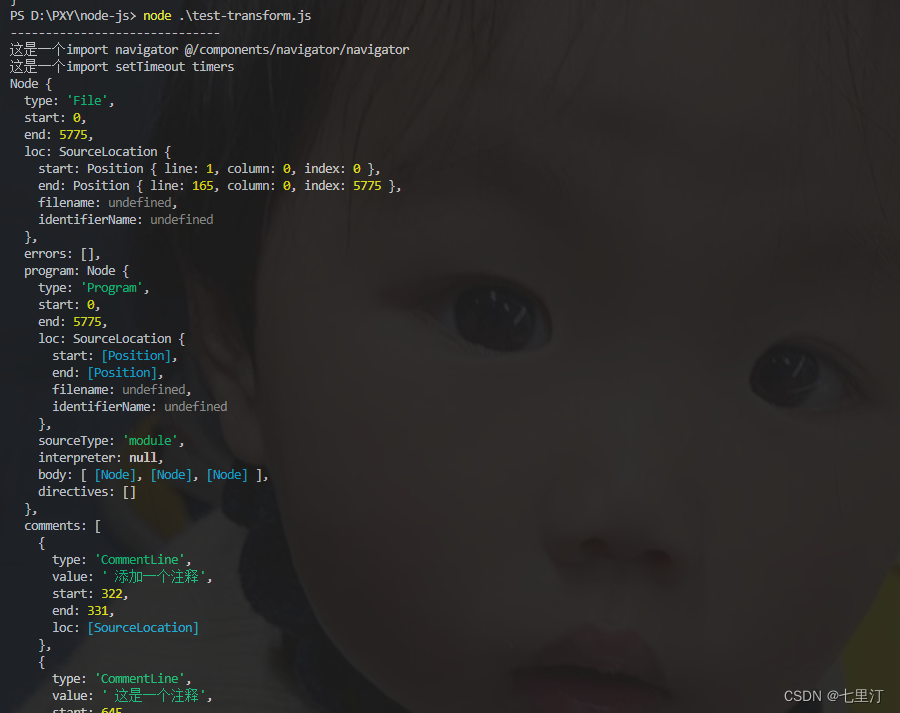
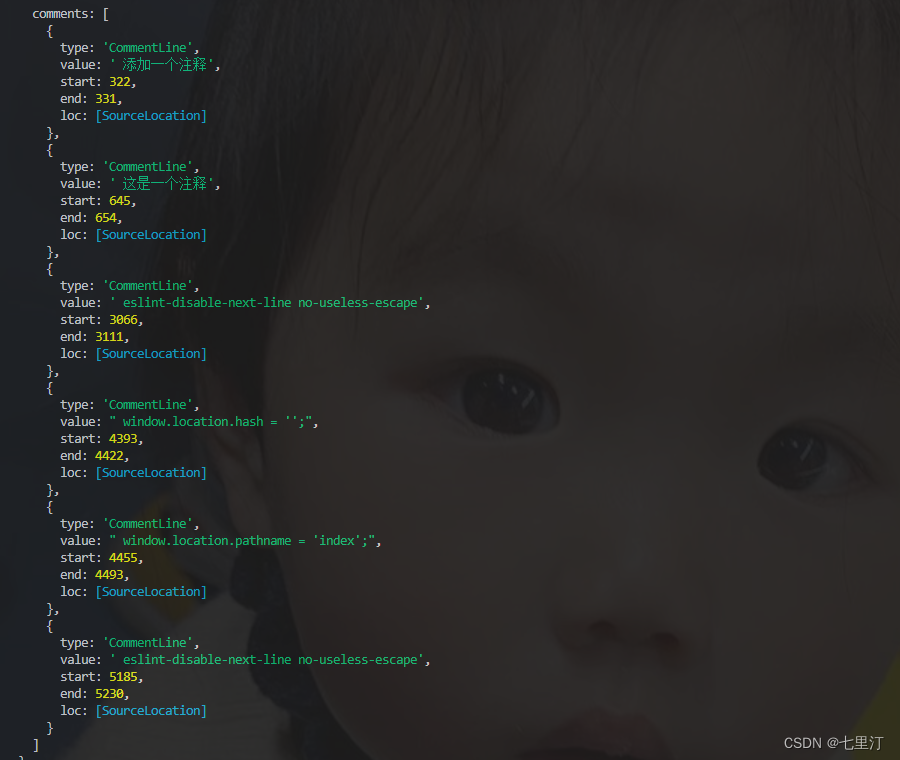
以上是使用@babel/parse、@babel/traverse用例,查找babel官网上,其中babel全家桶中,@babel/core、@babel/generator、@babel/types等,
css的转换AST
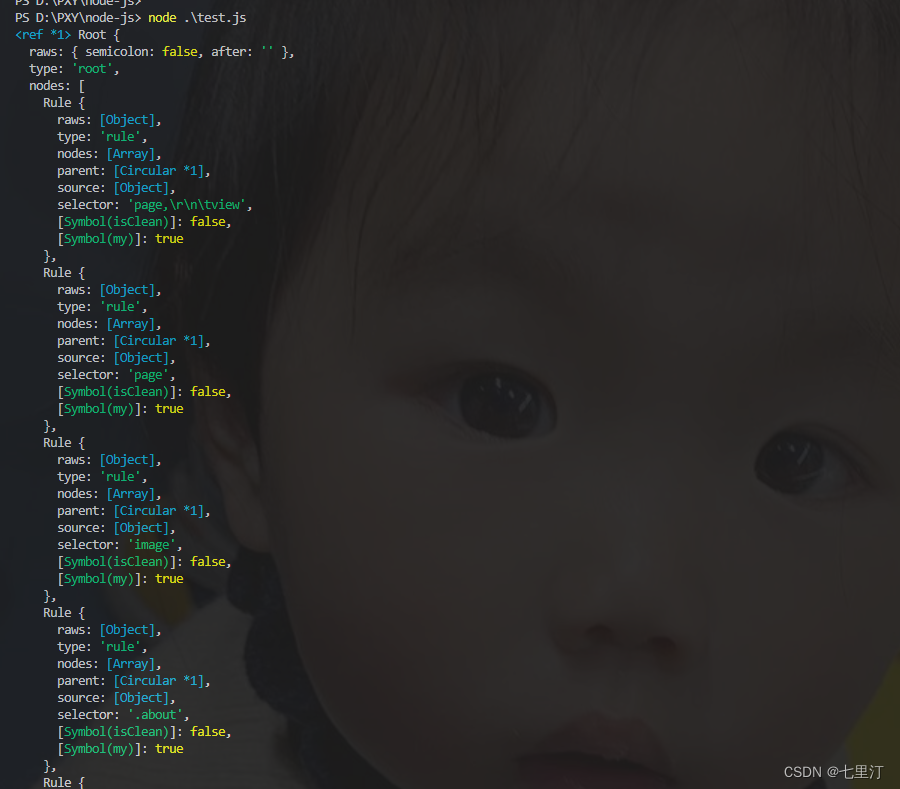
其中css转换的工具类有cssom、postcss,以postcss为例,建立一个test.js脚本文件
const postcssNested = require('postcss-nested')
const autoprefixer = require('autoprefixer')
const postcss = require('postcss')
const fs = require('fs')
fs.readFile('src/app.css', (err, css) => {
postcss([postcssNested, autoprefixer])
.process(css, { from: 'src/app.css', to: 'dest/app.css' })
.then(result => {
console.log(result.root);
})
const ast = postcss.parse(css, {
})
console.log(ast)
})执行bash node test.js,结果如下:

总结
以上就是本人对vue文件解析的简单理解,从AST概念简单描述,进一步联想到在vue编译的使用场景,通过vue的编译原理,了解到AST转换工具类;目前探究到的就这么多。其中关于AST的进一步使用场景,仍在探究,有兴趣的,大家可以在线上astexplorer 训练场进行尝试。

