文章目录
- 一、快速开始
- 1.1 SOFARPC
- 1.2 基于SOFABoot
- 二、注册中心
- 三、通讯协议
- 2.1 Bolt
- 基本发布
- 调用方式
- 超时控制
- 协议泛化调用
- 序列化协议
- 自定义线程池
- 2.2 RESTful
- 基本使用
- 2.3 其他协议
- 四、架构
- 附录
官方样例下载地址-sofa-boot-guides
可查看 SOFARPC 方式快速入门
一、快速开始
1.1 SOFARPC
导入如下依赖
<dependency>
    <groupId>com.alipay.sofa</groupId>
    <artifactId>sofa-rpc-all</artifactId>
    <version>最新版本</version>
</dependency>
版本查看
创建一个接口
public interface HelloService {
    String sayHello(String string);
}
实现它
public class HelloServiceImpl implements HelloService {
    @Override
    public String sayHello(String string) {
        System.out.println("Server receive: " + string);
        return "hello " + string + " !";
    }
}
服务器代码
import com.alipay.sofa.rpc.config.ProviderConfig;
import com.alipay.sofa.rpc.config.ServerConfig;

public class QuickStartServer {
    public static void main(String[] args) {
        ServerConfig serverConfig = new ServerConfig()
                .setProtocol("bolt") // 设置一个协议,默认bolt
                .setPort(12200) // 设置一个端口,默认12200
                .setDaemon(false); // 非守护线程

        ProviderConfig<HelloService> providerConfig = new ProviderConfig<HelloService>()
                .setInterfaceId(HelloService.class.getName()) // 指定接口
                .setRef(new HelloServiceImpl()) // 指定实现
                .setServer(serverConfig); // 指定服务端

        providerConfig.export(); // 发布服务
    }
}
客户端代码
import com.alipay.sofa.rpc.config.ConsumerConfig;

public class QuickStartClient {
    public static void main(String[] args) {
        ConsumerConfig<HelloService> consumerConfig = new ConsumerConfig<HelloService>()
            .setInterfaceId(HelloService.class.getName()) // 指定接口
            .setProtocol("bolt") // 指定协议
            .setDirectUrl("bolt://127.0.0.1:12200"); // 指定直连地址
        // 生成代理类
        HelloService helloService = consumerConfig.refer();
        while (true) {
            System.out.println(helloService.sayHello("world"));
            try {
                Thread.sleep(2000);
            } catch (Exception e) {
            }
        }
    }
}

1.2 基于SOFABoot
引入如下依赖
	<parent>
        <groupId>com.alipay.sofa</groupId>
        <artifactId>sofaboot-dependencies</artifactId>
        <version>3.2.0</version>
    </parent>


    <dependencies>
        <dependency>
            <groupId>org.springframework.boot</groupId>
            <artifactId>spring-boot-starter-web</artifactId>
        </dependency>
        <dependency>
            <groupId>com.alipay.sofa</groupId>
            <artifactId>rpc-sofa-boot-starter</artifactId>
        </dependency>
    </dependencies>
以及基本的SpringBoot配置
spring.application.name=rpcApp
logging.path=./logs
server.port=8080
服务接口
package com.SOFABootRPCTest.service;

public interface AnnotationService {
    String sayAnnotation(String string);
}
服务实现接口
在前文中,我们用@Configuration、@Bean+@SofaService来完成的发布与引用,我们这里就直接用@Service+@SofaService的方式完成
package com.SOFABootRPCTest.serviceImpl;

import com.SOFABootRPCTest.service.AnnotationService;
import com.alipay.sofa.runtime.api.annotation.SofaService;
import com.alipay.sofa.runtime.api.annotation.SofaServiceBinding;
import org.springframework.stereotype.Service;

@SofaService(interfaceType = AnnotationService.class, uniqueId = "annotationServiceImpl", bindings = { @SofaServiceBinding(bindingType = "bolt")})
@Service
public class AnnotationServiceImpl implements AnnotationService {
    @Override
    public String sayAnnotation(String string) {
        return string;
    }
}
bolt这里是协议,我们在前文中这个地方是jvm。不同协议用法不同。可以看到,默认是jvm协议。

上面代表我们的接口就正式发布了。可以通过互联网进行访问。
我们现在要调用我们发布的接口,基本和jvm一样。jvmFirst默认为True,也就是优先使用jvm协议。
package com.client;

import com.alipay.sofa.runtime.api.annotation.SofaReference;
import com.alipay.sofa.runtime.api.annotation.SofaReferenceBinding;
import com.service.AnnotationService;
import org.springframework.stereotype.Component;

@Component
public class AnnotationClientImpl {

    @SofaReference(interfaceType = AnnotationService.class, jvmFirst = false,uniqueId = "annotationServiceImpl",
            binding = @SofaReferenceBinding(bindingType = "bolt")
    )
    private AnnotationService annotationService;

    public String sayClientAnnotation(String str) {
        return annotationService.sayAnnotation(str);
    }
}
使用起来很像Fegin直接调用方法即可。
文档给的代码如下。也可以用 阿里官方给的 SOFARPC快速入门里面的代码。
将下列main中代码放入当前MainApplication中,即可。
package com.SOFABootRPCTest.client;

import com.SOFABootRPCTest.Contoller.AnnotationClientImpl;
import org.springframework.boot.SpringApplication;
import org.springframework.context.ApplicationContext;

public class AnotationClientApplication {

    public static void main(String[] args) {
    	// 临时切换地址,避免端口重复
        System.setProperty("server.port", "8081");
        SpringApplication springApplication = new SpringApplication(
            AnotationClientApplication.class);
        ApplicationContext applicationContext = springApplication.run(args);

        AnnotationClientImpl annotationService = applicationContext
            .getBean(AnnotationClientImpl.class);
        String result = annotationService.sayClientAnnotation("annotation");
        System.out.println("invoke result:" + result);
    }
}

二、注册中心
笔者使用Nacos作为注册中心,其他注册中心可参考注册中心
使用时注意版本要求
图方便可以用本地文件作为注册中心
三、通讯协议
我们此处仅尝试注解方式的发布引用。
可以自行参考协议基本使用
可以创建如下结构项目

2.1 Bolt
基本发布
api中创建
package com.serviceApi;

public interface SampleService {
    String HelloWorld();
}
producer中创建
package com.producer.serviceImpl;


import com.alipay.sofa.runtime.api.annotation.SofaService;
import com.alipay.sofa.runtime.api.annotation.SofaServiceBinding;
import com.serviceApi.SampleService;
import org.springframework.stereotype.Service;

@Service
@SofaService(uniqueId = "sampleService",bindings = {@SofaServiceBinding(bindingType = "bolt")})
public class SampleServiceImpl implements SampleService {
    @Override
    public String HelloWorld() {
        System.out.println("==========================\nhello world!\n==========================\n");
        return "hello world";
    }
}
consumer中使用
package com.consumer;


import com.alipay.sofa.runtime.api.annotation.SofaReference;
import com.alipay.sofa.runtime.api.annotation.SofaReferenceBinding;
import com.serviceApi.SampleService;
import org.junit.Test;
import org.junit.runner.RunWith;
import org.springframework.boot.test.context.SpringBootTest;
import org.springframework.test.context.junit4.SpringRunner;

@RunWith(SpringRunner.class)
@SpringBootTest(classes = ConsumerApplication.class, webEnvironment = SpringBootTest.WebEnvironment.DEFINED_PORT)
public class test {

    @SofaReference(uniqueId = "sampleService",binding = @SofaReferenceBinding(bindingType = "bolt"))
    private SampleService sampleService;
    @Test
    public void testRPC(){
        sampleService.HelloWorld();
    }
}
我们启动服务producer服务,然后consumer使用Test(上述代码)

可以看到成功调用
使用端口可通过如下配置进行修改
com.alipay.sofa.rpc.bolt.port=端口号
调用方式
- 同步
见前文
- 异步
异步调用的方式下,客户端发起调用后不会等到服务端的结果,继续执行后面的业务逻辑。服务端返回的结果会被 SOFARPC 缓存,当客户端需要结果的时候,再主动调用 API 获取。
异步方式如下:
	package com.consumer;


import com.alipay.sofa.rpc.api.future.SofaResponseFuture;
import com.alipay.sofa.runtime.api.annotation.SofaReference;
import com.alipay.sofa.runtime.api.annotation.SofaReferenceBinding;
import com.serviceApi.SampleService;
import org.junit.Test;
import org.junit.runner.RunWith;
import org.springframework.boot.test.context.SpringBootTest;
import org.springframework.test.context.junit4.SpringRunner;

@RunWith(SpringRunner.class)
@SpringBootTest(classes = ConsumerApplication.class, webEnvironment = SpringBootTest.WebEnvironment.DEFINED_PORT)
public class test {

    @SofaReference(uniqueId = "sampleService",binding = @SofaReferenceBinding(bindingType = "bolt",invokeType = "future"))
    private SampleService sampleService;
    @Test
    public void testRPC(){
        try {
            sampleService.HelloWorld();
             // true表示清除
            String result = (String) SofaResponseFuture.getResponse(10000, true);
            System.out.println(result);
        }catch (InterruptedException e) {
            throw new RuntimeException(e);
        }
    }
}
注意,观察源码会发现内部是用ThreadLocalMap,如果一个线程发布了两个异步请求,但其间没有获取结果,其结果后到的一项会覆盖前一项。
我们进行如下测试。
为SampleService再添一个实例
package com.producer.serviceImpl;

import com.alipay.sofa.runtime.api.annotation.SofaService;
import com.alipay.sofa.runtime.api.annotation.SofaServiceBinding;
import com.serviceApi.SampleService;
import org.springframework.stereotype.Service;

@Service
@SofaService(uniqueId = "sampleService2",bindings = @SofaServiceBinding(bindingType = "bolt"))
public class SampleServiceImpl2 implements SampleService {
    @Override
    public String HelloWorld() {
        System.out.println("==========================\nhello Java!\n==========================\n");
        return "hello Java!";
    }
}
我们将测试部分改成这样的代码(睡眠了一秒为了保证前一项执行完毕)
package com.consumer;


import com.alipay.sofa.rpc.api.future.SofaResponseFuture;
import com.alipay.sofa.runtime.api.annotation.SofaReference;
import com.alipay.sofa.runtime.api.annotation.SofaReferenceBinding;
import com.serviceApi.SampleService;
import org.junit.Test;
import org.junit.runner.RunWith;
import org.springframework.boot.test.context.SpringBootTest;
import org.springframework.test.context.junit4.SpringRunner;

@RunWith(SpringRunner.class)
@SpringBootTest(classes = ConsumerApplication.class, webEnvironment = SpringBootTest.WebEnvironment.DEFINED_PORT)
public class test {

    @SofaReference(uniqueId = "sampleService",binding = @SofaReferenceBinding(bindingType = "bolt",invokeType = "future"))
    private SampleService sampleService;

    @SofaReference(uniqueId = "sampleService2",binding = @SofaReferenceBinding(bindingType = "bolt",invokeType = "future"))
    private SampleService sampleService2;
    @Test
    public void testRPC(){
        try {
            sampleService.HelloWorld();
            Thread.sleep(1000);
            sampleService2.HelloWorld();
            String result = (String) SofaResponseFuture.getResponse(10000, true);
            System.out.println(result);
        }catch (InterruptedException e) {
            throw new RuntimeException(e);
        }
    }
}
服务器端没有问题

结果却输出了hello Java

如果我们去两次会报错,说明确实覆盖了。(当然如果是false就不会被清除)
 public void testRPC(){
        try {
            sampleService.HelloWorld();
            Thread.sleep(1000);
            sampleService2.HelloWorld();
            String result = (String) SofaResponseFuture.getResponse(10000, true);

            String result2 = (String) SofaResponseFuture.getResponse(10000, true);
            System.out.println(result);
            System.out.println(result2);
        }catch (InterruptedException e) {
            throw new RuntimeException(e);
        }
    }

我们可以发布后交给Java原来的异步调用来管理。
			 Future future = SofaResponseFuture.getFuture(true);
             future.get(10000, TimeUnit.MILLISECONDS);
- 回调
需要实现SofaResponseCallback类
package com.consumer.callback;

import com.alipay.sofa.rpc.core.exception.SofaRpcException;
import com.alipay.sofa.rpc.core.invoke.SofaResponseCallback;
import com.alipay.sofa.rpc.core.request.RequestBase;
import org.slf4j.Logger;
import org.slf4j.LoggerFactory;
import org.springframework.context.annotation.Bean;
import org.springframework.context.annotation.Configuration;;


@Configuration
public class CallbackConfiguration  {

    Logger log = LoggerFactory.getLogger(CallbackConfiguration.class);

    @Bean("sampleCallback")
    public  SofaResponseCallback getSampleCallback(){
        return new SofaResponseCallback() {
            @Override
            public void onAppResponse(Object o, String s, RequestBase requestBase) {
                log.info("调用回调");
                log.info("{}",o.toString());
            }

            @Override
            public void onAppException(Throwable throwable, String s, RequestBase requestBase) {
                System.out.println("APP错误");
            }

            @Override
            public void onSofaException(SofaRpcException e, String s, RequestBase requestBase) {
                System.out.println("SOFA错误");
            }
        };
    }
}
SOFARPC 为设置回调接口提供了两种方式,
- Callback Class:Callback Class 的方式直接设置回调的类名,SOFARPC 会通过调用回调类的默认构造函数的方式生成回调类的实例。
- Callback Ref:Callback Ref 的方式则为用户直接提供回调类的实例。callbackRef 属性的值需要是回调类的 Bean 名称。
- 单向
当客户端发送请求后不关心服务端返回的结果时,可以使用单向的调用方式,这种方式会在发起调用后立即返回 null,并且忽略服务端的返回结果。
使用单向的方式只需要将调用方式设置为 oneway 即可,设置方式和将调用方式设置为 future 或者 callback 一样,这里不再重复讲述,可以参考上面的文档中提供的设置方式。
需要特别注意的是,由于单向的调用方式会立即返回,所以所有的超时设置在单向的情况下都是无效的。
超时控制
使用 Bolt 协议进行通信的时候,SOFARPC 的超时时间默认为 3 秒,用户可以在引用服务的时候去设置超时时间,又分别可以在服务以及方法的维度设置超时时间,SOFARPC 的超时时间的设置的单位都为毫秒。
可自行查看-Bolt 协议超时控制
- 服务维度
如果需要在发布服务的时候在服务维度设置超时时间,设置对应的 timeout 参数到对应的值即可。
@SofaReference(binding = @SofaReferenceBinding(bindingType = "bolt", timeout = 2000))
private SampleService sampleService;
- 方法维度
注解模式暂无
协议泛化调用
发布可以不变
xml无法读入时,可以尝试如下方式(*代表查找所有,无*代表使用找到的第一个)
@ImportResource({ "classpath*:rpc-starter-example.xml" })
在引用时需要配置XML
<beans xmlns="http://www.springframework.org/schema/beans"
       xmlns:xsi="http://www.w3.org/2001/XMLSchema-instance"
       xmlns:sofa="http://sofastack.io/schema/sofaboot"
       xsi:schemaLocation="http://www.springframework.org/schema/beans http://www.springframework.org/schema/beans/spring-beans.xsd
http://sofastack.io/schema/sofaboot http://sofastack.io/schema/sofaboot.xsd"
       default-autowire="byName">

<sofa:reference jvm-first="false" id="sampleGenericServiceReference" interface="com.serviceApi.SampleService">
    <sofa:binding.bolt>
        <sofa:global-attrs generic-interface="com.serviceApi.SampleService"/>
    </sofa:binding.bolt>
</sofa:reference>

</beans>
	@Test
    public void testRPC() {
        GenericService sampleGenericServiceReference = (GenericService) SpringUtil.getBean("sampleGenericServiceReference");
        // 需要传入方法名,方法类型,方法参数
        String result = sampleGenericServiceReference.$genericInvoke("HelloWorld",new String[]{},new Object[]{},String.class);
        System.out.println(result);
    }
其他规则可参考官方给出的例子
/**
* Java Bean
*/
public class People {
    private String name;
    private int    age;

    // getters and setters
}


/**
 * 服务方提供的接口
 */
interface SampleService {
   String hello(String arg);
   People hello(People people);
   String[] hello(String[] args);
}

/**
 * 客户端
 */
public class ConsumerClass {
   GenericService genericService;

   public void do() {
      // 1. $invoke仅支持方法参数类型在当前应用的 ClassLoader 中存在的情况

      genericService.$invoke("hello", new String[]{ String.class.getName() }, new Object[]{"I'm an arg"});


      // 2. $genericInvoke支持方法参数类型在当前应用的 ClassLoader 中不存在的情况。
      // 2.1 构造参数
      GenericObject genericObject = new GenericObject("com.alipay.sofa.rpc.test.generic.bean.People"); // 构造函数中指定全路径类名
      genericObject.putField("name", "Lilei"); // 调用putField,指定field值
      genericObject.putField("age", 15);

      // 2.2 进行调用,不指定返回类型,返回结果类型为GenericObject
      Object obj = genericService.$genericInvoke("hello", new String[]{"com.alipay.sofa.rpc.test.generic.bean.People"}, new Object[] { genericObject });
      Assert.assertTrue(obj.getClass == GenericObject.class);

				  // 如果返回的是泛化的自定义对象,可以如下方式取出。
				  String name = result.getField("name");

      // 2.3 进行调用,指定返回类型
      People people = genericService.$genericInvoke("hello", new String[]{"com.alipay.sofa.rpc.test.generic.bean.People"}, new Object[] { genericObject }, People.class);

      // 2.4 进行调用,参数类型是数组类型
      String[] result = (String[]) proxy.$genericInvoke("hello", new String[]{new String[0].getClass().getName()}, new Object[]{ new String[]{"args"} });
   }
}
序列化协议
SOFARPC 可以在使用 Bolt 通信协议的情况下,可以选择不同的序列化协议,
- hessian2
- protobuf
默认的情况下,SOFARPC 使用 hessian2 作为序列化协议
配置
@SofaService(bindings = @SofaServiceBinding(bindingType = "bolt",serializeType = "protobuf"))
public class SampleServiceImpl implements SampleService {
}


@SofaReference(binding = @SofaReferenceBinding(bindingType = "bolt", serializeType = "protobuf"))
private SampleService sampleService;
自定义线程池
SOFARPC 支持自定义业务线程池。可以为指定服务设置一个独立的业务线程池,和 SOFARPC 自身的业务线程池是隔离的。多个服务可以共用一个独立的线程池。
SOFARPC 要求自定义线程池的类型必须是 com.alipay.sofa.rpc.server.UserThreadPool。
配置
@SofaService(bindings = {@SofaServiceBinding(bindingType = "bolt", userThreadPool = "customThreadPool")})
public class SampleServiceImpl implements SampleService {
}
2.2 RESTful
基本使用
import javax.ws.rs.GET;
import javax.ws.rs.Path;

@Path("/sample")
public interface SampleService {
    @GET
    @Path("/hello")
    String HelloWorld();
}
@Service
@SofaService(uniqueId = "sampleService",bindings = @SofaServiceBinding(bindingType = "rest"))
public class SampleServiceImpl implements SampleService {
    @Override
    public String HelloWorld() {
        System.out.println("==========================\nhello world!\n==========================\n");
        return "hello world";
    }
}
上述代码需放在同一项目中。
可以使用浏览器访问
http://localhost:8341/sample/hello
SOFARPC 的 RESTful 服务的默认端口为 8341。
可配置进行修改
com.alipay.sofa.rpc.rest.port=端口号
也可以用如下方式调用
@RunWith(SpringRunner.class)
@SpringBootTest(classes = ConsumerApplication.class, webEnvironment = SpringBootTest.WebEnvironment.DEFINED_PORT)
public class test {

    @SofaReference(uniqueId = "sampleService",binding = @SofaReferenceBinding(bindingType = "rest"))
    private SampleService sampleService;

    @Test
    public void testRPC(){
        System.out.println(sampleService.HelloWorld());
    }

}
2.3 其他协议
除Http外,用法与Bolt类似。可参看协议基本使用
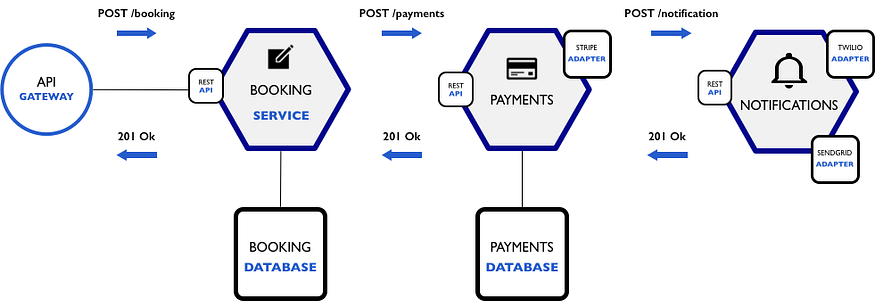
四、架构

附录
SOFARPC 方式快速入门
阿里云官方文档
