最近工程中需要集成高质量阴影(效率、效果),介于项目非循环渲染所以CSM无法使用,但动态建模中还需要快速增删改场景,阴影还必须重新生成,奈何之前简单SM+PCF无法满足效率、效果要求,于是调研RVT等软件,发现其采用的为单帧EVSM算法,遂集成实现。
想要了解Exponential Variance Shadow Maps(EVSM),就需要先了解Variance Shadow Map(VSM)算法,想要了解VSM,就需要知道常规的Shadow Map(SM算法),本文便不再赘述SM了,期间也不再赘述中间优化算法Layered Variance Shadow Maps(LVSM)。
首先我们来看一下EVSM算法的优点吧,毕竟算法有优势我们才会优先选择集成到项目嘛。
先来看一张EVSM原文里的效果对比(1080卡),详见下参考文章链接:https://www.martincap.io/project_detail.php?project_id=9

首先VSM相对于SM的优缺点如下:
- 优点: 在处理软阴影时效率更快;没有shadow acne现象
- 缺点: 需要额外通道来记录深度平方;高方差区域会产生漏光
其次EVSM相对于VSM的优缺点如下:
- 优点: 最大程度上减缓漏光问题
- 缺点: 极端情况下,仍然会有artifacts;会占用较多带宽(EVSM4)
首先我们来看一下VSM。多说一句Demo主要参照http://mynameismjp.wordpress.com/大神介绍,某些汪汪不想看的可以出门右拐,求别再喷粪嗷嗷,感谢合作。
一、VSM
1.1 算法原理
根据SM原理我们知道,在处理软阴影的时候,我们通常需要使用PCF来处理一个区域内的多个深度比较结果来确定一个合适的软硬程度值。
简单说一下PCF的原理:把当前屏幕空间像素范围投射为阴影贴图,并对得到的区域采样,这个过程和标准的纹理过滤很相似。然后把每一个样本和一个参考的深度进行对比,产 生一个二元结果。接着,结合所有的深度对比来计算过滤区域中比参考深度更加靠近(closer)的纹理像素的百分比。这个百分比就被用来减弱光线。一般提高过滤区域的大小可以软化阴影的边缘程序。
虽然PCF的品质挺不错,但是需要大量的采样。对于标准的纹理过滤来说,阴影角部的表面还需要求大量的各向异性过滤区域。在最坏的情况下,我们必须对阴影贴图中的每一个纹理像素进行采样和对比,以计算每一个帧缓冲像素的光衰减。这样过程会很慢,而且存在shadow acne现象。
针对上边的问题于是便有了VSM算法,其主要思路是:按照一种可以线性过滤的方法来表示深度数据,这样我们就可以使用适用于颜色和其他线性数据的算法和硬件。本算法和标准的阴影贴图算法很相似,只不过我们把深度和深度平方写到一个二分量R32G32_FLOAT的差值阴影贴图中,而不是简单地把深度写入到阴影贴图中。通过对某些区域进行过滤,我们恢复了该区域在M1时刻和M2时刻的深度分布,其中M1/M2代表的是该区域的均值数据,即:
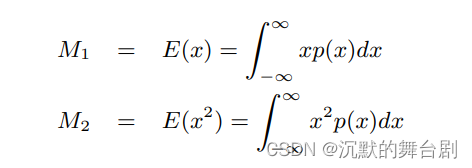
本质上就是对深度和深度平方贴图做一个滤波(如盒型滤波或高斯滤波等)。

抑或是直接采用MSAA处理一下之后采用线型采样器直接取值即可,之后算出均值(平均准)和方差(统计学经典公式)。

紧接着我们就可以使用这个差值,应用(Chebyshev)切比雪夫不等式来计算当前待求阴影的表面(深度为1)被遮挡的概率的上界:
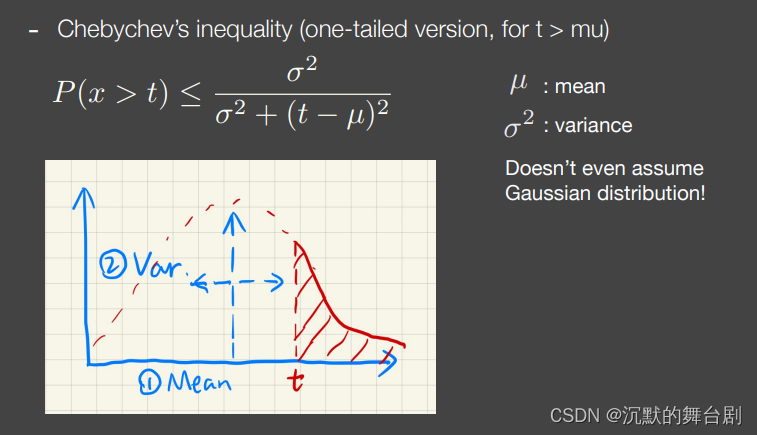

Chebyshev不等式的“积差相关系数”版本只在t>μ时有效。如果t≤μ,那么Pmax=1,代表的就是这个表面被完全照亮了,虽然不准,但是就这么用就行。
以上就是全部理论,就这么简单。但是在实现中还有几点小坑,直接看代码吧。
1.2 算法实现
1.2.1 阴影生成
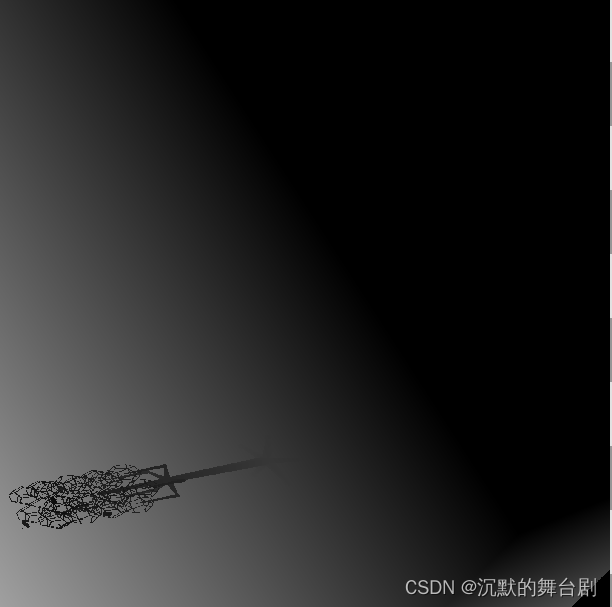
常规阴影算法,不再赘述,生成如下图所示:
1.2.2 深度与深度平方期望计算
一个DrawCall三角形将上述深度图转换存储,HLSL中PS代码如下:
struct VSOutput
{
    float4 Position : SV_Position;
    float2 TexCoord : TEXCOORD;
};
VSOutput FullScreenVS(in uint VertexID : SV_VertexID)
{
    VSOutput output;

    if(VertexID == 0)
    {
        output.Position = float4(-1.0f, 1.0f, 1.0f, 1.0f);
        output.TexCoord = float2(0.0f, 0.0f);
    }
    else if(VertexID == 1)
    {
        output.Position = float4(3.0f, 1.0f, 1.0f, 1.0f);
        output.TexCoord = float2(2.0f, 0.0f);
    }
    else
    {
        output.Position = float4(-1.0f, -3.0f, 1.0f, 1.0f);
        output.TexCoord = float2(0.0f, 2.0f);
    }

    return output;
}

float4 ConvertToVSM(in VSOutput input) : SV_Target0
{
    float sampleWeight = 1.0f / float(MSAASamples_);
    uint2 coords = uint2(input.Position.xy);


    float4 average = float4(0.0f, 0.0f, 0.0f, 0.0f);

    // Sample indices to Load() must be literal, so force unroll
    [unroll]
    for(uint i = 0; i < MSAASamples_; ++i)
    {
        // Convert to EVSM representation
        #if MSAASamples_ > 1
            float depth = ShadowMap.Load(coords, i);
        #else
            float depth = ShadowMap[coords];
        #endif
         average += sampleWeight * float4(vsmDepth.xy, vsmDepth.xy * vsmDepth.xy);
    }
    return average.xzxz;
}
转换后贴图如下所示:
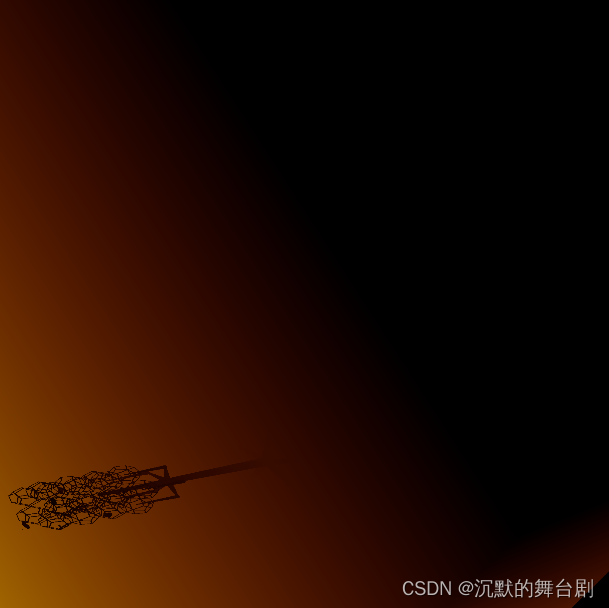
除了上述说的,直接采用MSAA和线型采样器来处理得到深度与深度平方的均值,即(M1与M2),还可以采用滤波的方式。
可参照这篇文章介绍https://graphics.stanford.edu/~mdfisher/Shadows.html,流程效果图如下:
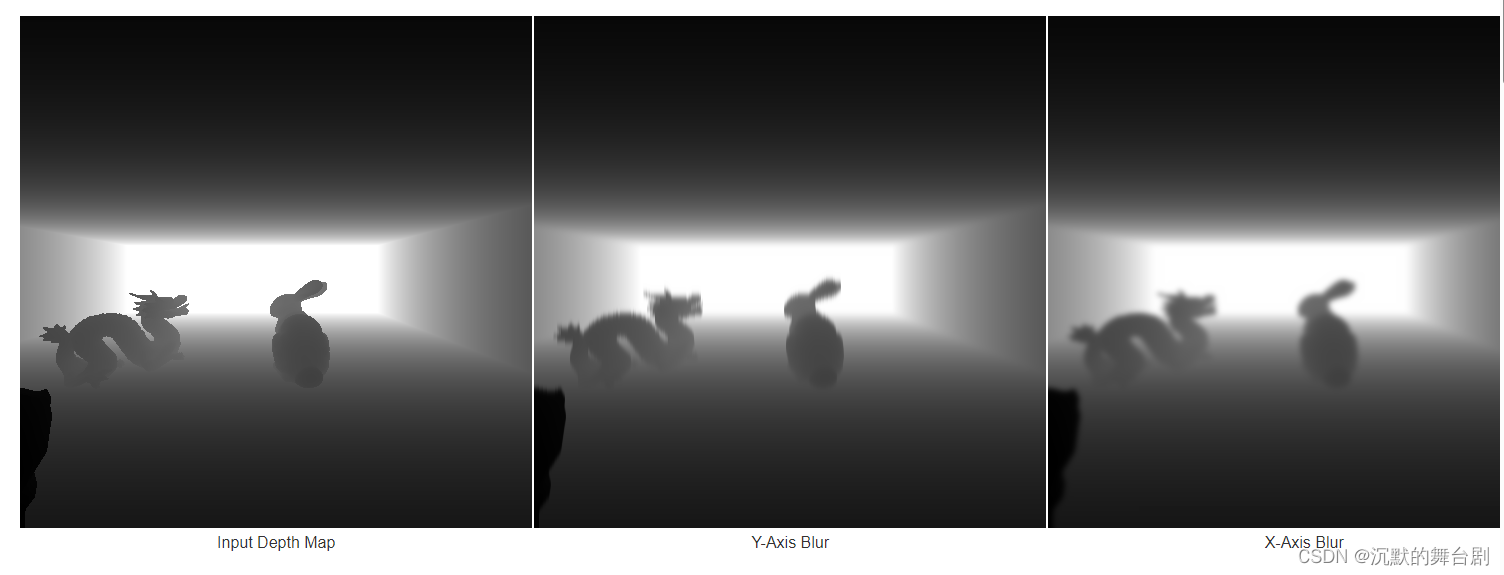
滤波处理代码可参照:
struct VSOutput
{
    float4 Position : SV_Position;
    float2 TexCoord : TEXCOORD;
};
VSOutput FullScreenVS(in uint VertexID : SV_VertexID)
{
    VSOutput output;

    if(VertexID == 0)
    {
        output.Position = float4(-1.0f, 1.0f, 1.0f, 1.0f);
        output.TexCoord = float2(0.0f, 0.0f);
    }
    else if(VertexID == 1)
    {
        output.Position = float4(3.0f, 1.0f, 1.0f, 1.0f);
        output.TexCoord = float2(2.0f, 0.0f);
    }
    else
    {
        output.Position = float4(-1.0f, -3.0f, 1.0f, 1.0f);
        output.TexCoord = float2(0.0f, 2.0f);
    }

    return output;
}

float4 BlurSample(in float2 screenPos, in float offset, in float2 mapSize)
{
    #if Vertical_
        float2 samplePos = screenPos;
        samplePos.y = clamp(screenPos.y + offset, 0, mapSize.y);
        return VSMMap[uint2(samplePos)];
    #else
        float2 samplePos = screenPos;
        samplePos.x = clamp(screenPos.x + offset, 0, mapSize.x);
        return VSMMap[uint3(samplePos, 0)];
    #endif
}

float4 BlurVSM(in VSOutput input) : SV_Target0
{
    #if Vertical_
        float scale = abs(CascadeScale.y);
        float maxFilterSize = MaxKernelSize / abs(Cascade0Scale.y);
    #else
        float scale = abs(CascadeScale.x);
        float maxFilterSize = MaxKernelSize / abs(Cascade0Scale.x);
    #endif

    const float KernelSize = clamp(min(FilterSize, maxFilterSize) * scale, 1.0f, MaxKernelSize);
    const float Radius = KernelSize / 2.0f;

    #if GPUSceneSubmission_
        [branch]
        if(KernelSize > 1.0f)
        {
            const int SampleRadius = int(round(Radius));

            float4 sum = 0.0f;

            [loop]
            for(int i = -SampleRadius; i <= SampleRadius; ++i)
            {
                float4 sample = BlurSample(input.Position.xy, i, ShadowMapDimensions);

                sample *= saturate((Radius + 0.5f) - abs(i));

                sum += sample;
            }

            return sum / KernelSize;
        }
        else
        {
            return BlurSample(input.Position.xy, 0, ShadowMapDimensions);
        }
    #else
        float4 sum = 0.0f;

        [unroll]
        for(int i = -SampleRadius_; i <= SampleRadius_; ++i)
        {
            float4 sample = BlurSample(input.Position.xy, i, ShadowMapDimensions);

            sample *= saturate((Radius + 0.5f) - abs(i));

            sum += sample;
        }

        return sum / KernelSize;
    #endif
}
总结一下:由于阴影贴图是线性可过滤的,那么我们就可以使用很多技术和算法。最明显的是,我们可以简单地使用纹理细化、三线过滤和各向异性过滤,甚至是多样本反锯齿(同时要渲染阴影贴图)。相比于使用标准的阴影贴图以及常量过滤percentage-closer过滤而言,它自己就可以极大地提高阴影贴图的质量。当然还有盒型滤波或高斯滤波等、还有就是区域求和表(SAT)算法也可以。有兴趣的可以自行尝试。
当然,为了更精确的算法深度平方的均值,还可以给其加一个偏离:

此处主要是把阴影贴图纹理像素当成一个局部平面分布考虑来优化(GPU Gems 3中相关优化技术),有兴趣的自行深入探索吧。
1.2.3 计算阴影
经过上边的处理我们就很容易得到深度与深度平方的期望值了,接下来就是在阴影计算的时候使用切比雪夫不等式了:
//  http://mynameismjp.wordpress.com/


// 减少漏光
float Linstep(float a, float b, float v)
{
    return saturate((v - a) / (b - a));
}

float ReduceLightBleeding(float pMax, float amount)
{
  // 溢出[0, amount] 的尾部并线型地缩放到[amount, 1].
   return Linstep(amount, 1.0f, pMax);
}

float ChebyshevUpperBound(float2 moments, float mean, float minVariance,
                          float lightBleedingReduction)
{
    // 计算方差
    float variance = moments.y - (moments.x * moments.x);
    variance = max(variance, minVariance);//防除0

    // 计算概率上界(切比雪夫不等式)
    float d = mean - moments.x;
    float pMax = variance / (variance + (d * d));

	//减轻漏光
    pMax = ReduceLightBleeding(pMax, lightBleedingReduction);

    // 单侧切比雪夫处理
    return (mean <= moments.x ? 1.0f : pMax);
}

float SampleShadowMapVSM(in float3 shadowPos, in float3 shadowPosDX,
                         in float3 shadowPosDY, uint cascadeIdx)
{
    float depth = shadowPos.z;

    float2 occluder = ShadowMap.SampleGrad(VSMSampler, float3(shadowPos.xy, cascadeIdx),
                                           shadowPosDX.xy, shadowPosDY.xy).xy;

    return ChebyshevUpperBound(occluder, depth, VSMBias * 0.01, LightBleedingReduction);
}

float3 ShadowVisibility(in float3 positionWS, in float depthVS, in float nDotL, in float3 normal,
                        in uint2 screenPos)
{
	float3 shadowVisibility = 1.0f;
	uint cascadeIdx = NumCascades - 1;
    float3 projectionPos = mul(float4(positionWS, 1.0f), ShadowMatrix).xyz;

    // Apply offset
    float3 offset = GetShadowPosOffset(nDotL, normal) / abs(CascadeScales[cascadeIdx].z);

    // Project into shadow space
    float3 samplePos = positionWS + offset;
	float3 shadowPosition = mul(float4(samplePos, 1.0f), ShadowMatrix).xyz;
    float3 shadowPosDX = ddx_fine(shadowPosition);
    float3 shadowPosDY = ddy_fine(shadowPosition);

	shadowVisibility = SampleShadowCascade(shadowPosition, shadowPosDX, shadowPosDY,
                                           cascadeIdx, screenPos);

	return shadowVisibility;
}
得到的结果如下所示:
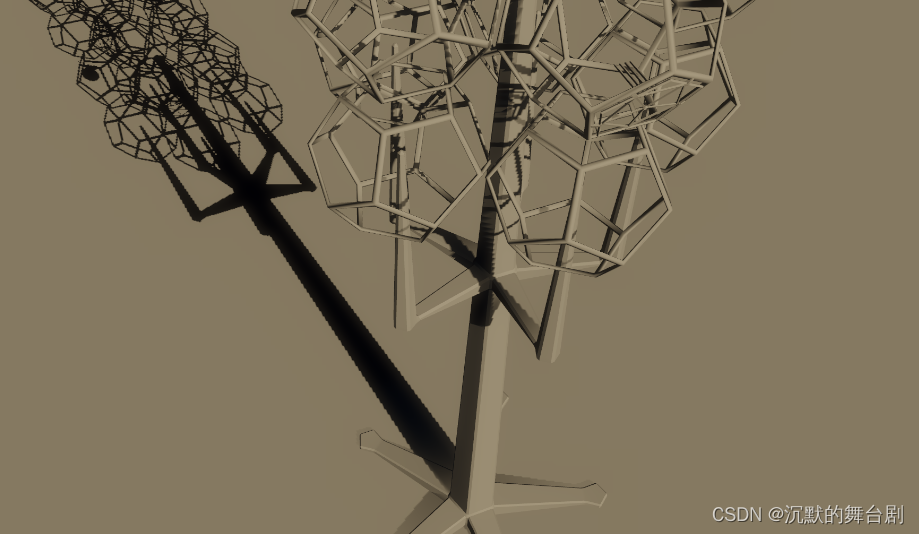
看着上边代码不多,除了切比雪夫近似应用外,其实在一定程度上还解决了漏光问题(VSM最大的问题在于漏光现象),那么算法为什么会产生漏光呢?我们具体看一下(其实就是切比雪夫不等式的近似导致的,我们从数学公式的角度上分析更容易看出原因)。
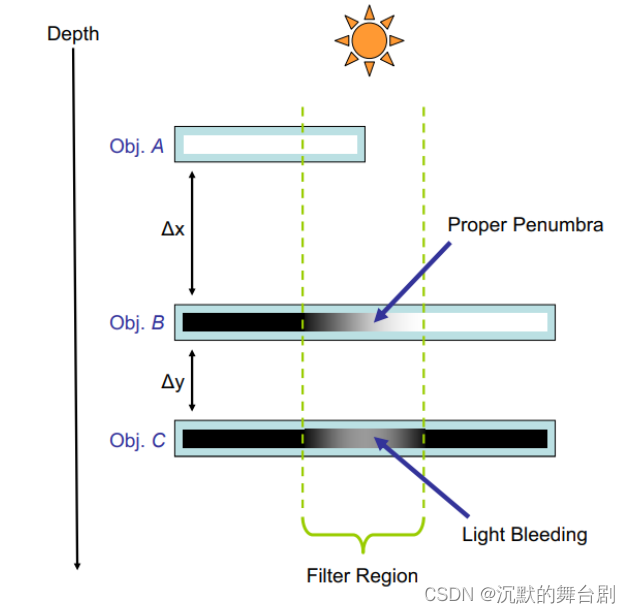
假设三个物体从上到下标记为A、B、C,对应的深度值为a、b、c。只有物体A和B处于滤波区域,C则作为receiver被两个物体挡住本应是看不到光源的。我们假定当前着色点位于C中滤波区域的中心我们可以得到下面两个矩:
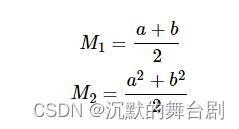
然后我们可以算出均值和方差:

上图中有Δx=b−a和Δy=c−b,因此运用切比雪夫不等式计算中间区域的可见性函数为:
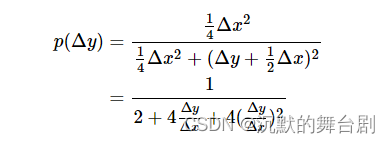
以Δy/Δx作为变量,可以得到函数曲线为:
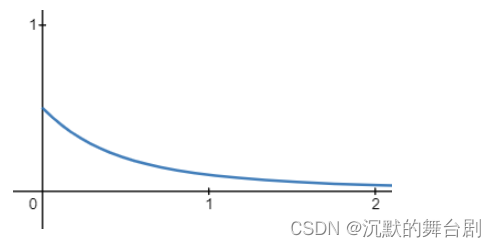
因此Δy/Δx越小,整体可见性越是接近于0.5,所以导致了漏光现象的出现。
因此解决漏光问题的算法便是上述代码中的:
// 减少漏光
float Linstep(float a, float b, float v)
{
    return saturate((v - a) / (b - a));
}

float ReduceLightBleeding(float pMax, float amount)
{
  // 溢出[0, amount] 的尾部并线型地缩放到[amount, 1].
   return Linstep(amount, 1.0f, pMax);
}
其原理很简单:一些重要的数据观察结果是如果深度t的一个表面完全遮挡了某些平均深度为μ的过滤区域,那么t>μ。因此(t-μ)²>0,根据Chebyshev不等式,Pmax<1。简单地说就是,完全遮挡的表面上错误的半影绝对不会达到完全的亮度。因此我们可以通过修改Pmax来移除这些区域,这样所有小于某些最小亮度的值都会映射为0,然后重新调节其他的值,这样它们就映射到(0,1)区间。 也就是上边代码中的实现。
为了进一步提升精度更大程度上解决漏光问题,便衍生了LVSM、EVSM等方法,接下来我们就直接以效果最好的EVSM来看吧。
二、EVSM
2.1 算法原理
正如前面所说的,漏光现象在Δy和Δx的比值非常小的时候会特别明显。我们可以考虑使用一些对x和y的wrap来尝试提升Δy和Δx的比值。
例如我们可以使用上面e(cx)的wrapper,这里c是一个正数。然后对ecx求均值和方差,然后使用切比雪夫不等式求Pmax。
这样原来Δy/Δx就变成了e(Δy−Δx)。
经过e(cx)的wrapper后,可以有效抑制漏光情况,但是随着c增大,远处场景也会出现问题,因此需要一个反向抑制,即-e(-cx)。

这两个wrapper一起使用时,叫做EVSM4,即需要使用四通道纹理,只使用正向的叫EVSM2。由于e(cx)和-e(-cx)都是单调递增函数,这两个wrapper都可以使用切比雪夫不等式,最后取两个上限概率之中的最小值即可。这时候artifacts就会随着c值的增加而极大限度的减缓漏光问题。
2.2 算法实现
2.2.1 EVSM4阴影转换
代码如下:
static const uint SMFormat16Bit = 0;
static const uint SMFormat32Bit = 1;

float2 GetEVSMExponents(in float positiveExponent, in float negativeExponent, in uint vsmFormat)
{
    const float maxExponent = vsmFormat == SMFormat16Bit ? 5.54f : 42.0f;

    float2 lightSpaceExponents = float2(positiveExponent, negativeExponent);

    // 逼近至fp32/fp16的最大范围,以防止溢出
    return min(lightSpaceExponents, maxExponent);
}

// 对阴影贴图深度应用指数扭曲,输入深度应为[0,1]
float2 WarpDepth(float depth, float2 exponents)
{
    // Rescale depth into [-1, 1]
    depth = 2.0f * depth - 1.0f;
    float pos =  exp( exponents.x * depth);
    float neg = -exp(-exponents.y * depth);
    return float2(pos, neg);
}

float4 ConvertToVSM(in VSOutput input) : SV_Target0
{
    float sampleWeight = 1.0f / float(MSAASamples_);
    uint2 coords = uint2(input.Position.xy);
	//40.0f,5.0f
    float2 exponents = GetEVSMExponents(PositiveExponent, NegativeExponent, SMFormat);


    float4 average = float4(0.0f, 0.0f, 0.0f, 0.0f);

    [unroll]
    for(uint i = 0; i < MSAASamples_; ++i)
    {
        // Convert to EVSM representation
        float depth = ShadowMap[coords];
        float2 vsmDepth = WarpDepth(depth, exponents);
        average += sampleWeight * float4(vsmDepth.xy, vsmDepth.xy * vsmDepth.xy);
    }
    return average;
}
原始阴影贴图:
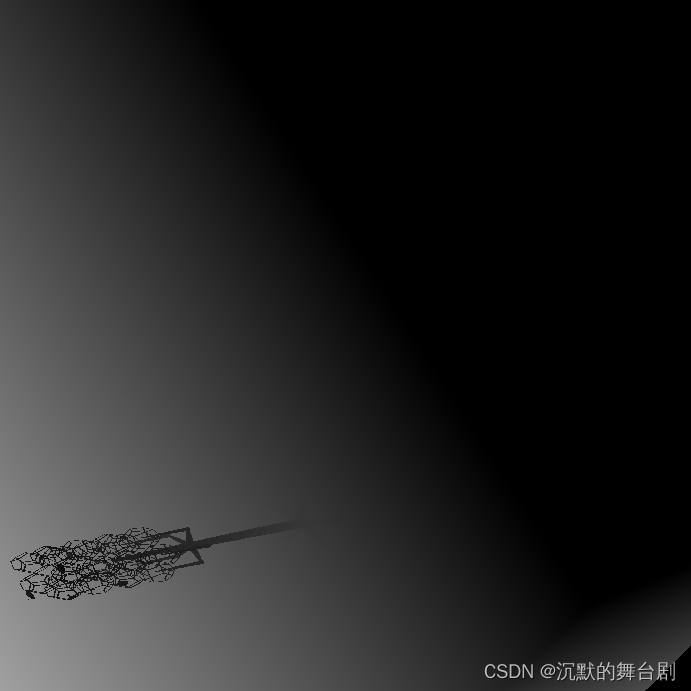
转换后的EVSM4阴影贴图:
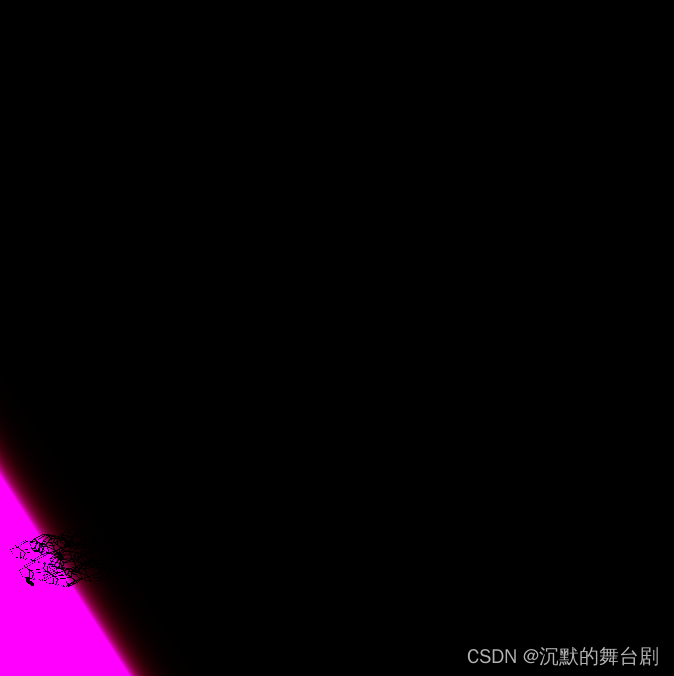
2.2.2 阴影计算
static const uint SMFormat16Bit = 0;
static const uint SMFormat32Bit = 1;

float2 GetEVSMExponents(in float positiveExponent, in float negativeExponent, in uint vsmFormat)
{
    const float maxExponent = vsmFormat == SMFormat16Bit ? 5.54f : 42.0f;

    float2 lightSpaceExponents = float2(positiveExponent, negativeExponent);

    // 逼近至fp32/fp16的最大范围,以防止溢出
    return min(lightSpaceExponents, maxExponent);
}

// 对阴影贴图深度应用指数扭曲,输入深度应为[0,1]
float2 WarpDepth(float depth, float2 exponents)
{
    // Rescale depth into [-1, 1]
    depth = 2.0f * depth - 1.0f;
    float pos =  exp( exponents.x * depth);
    float neg = -exp(-exponents.y * depth);
    return float2(pos, neg);
}

float SampleShadowMapEVSM(in float3 shadowPos, in float3 shadowPosDX,
                          in float3 shadowPosDY)
{
    float2 exponents = GetEVSMExponents(PositiveExponent, NegativeExponent, SMFormat);
    float2 warpedDepth = WarpDepth(shadowPos.z, exponents);

    float4 occluder = ShadowMap.SampleGrad(VSMSampler, float3(shadowPos.xy, 0.),
                                            shadowPosDX.xy, shadowPosDY.xy);

    // 采样深度翘曲
    float2 depthScale = VSMBias * 0.01f * exponents * warpedDepth;
    float2 minVariance = depthScale * depthScale;

    #if ShadowMode_ == ShadowModeEVSM4_
        float posContrib = ChebyshevUpperBound(occluder.xz, warpedDepth.x, minVariance.x, LightBleedingReduction);
        float negContrib = ChebyshevUpperBound(occluder.yw, warpedDepth.y, minVariance.y, LightBleedingReduction);
        return min(posContrib, negContrib);
    #else
        // Positive only
        return ChebyshevUpperBound(occluder.xy, warpedDepth.x, minVariance.x, LightBleedingReduction);
    #endif
}


float ShadowVisibility(in float3 positionWS, in float depthVS, in float nDotL, in float3 normal,
                        in uint2 screenPos)
{
	float shadowVisibility = 1.0f;
    // Project into shadow space
    float3 samplePos = positionWS;
	float3 shadowPosition = mul(float4(samplePos, 1.0f), ShadowMatrix).xyz;
    float3 shadowPosDX = ddx_fine(shadowPosition);
    float3 shadowPosDY = ddy_fine(shadowPosition);

	shadowVisibility = SampleShadowMapEVSM(shadowPosition, shadowPosDX, shadowPosDY, screenPos);

	return shadowVisibility;
}
生成及如果如下:

2.2.3 高斯滤波(软阴影生成)
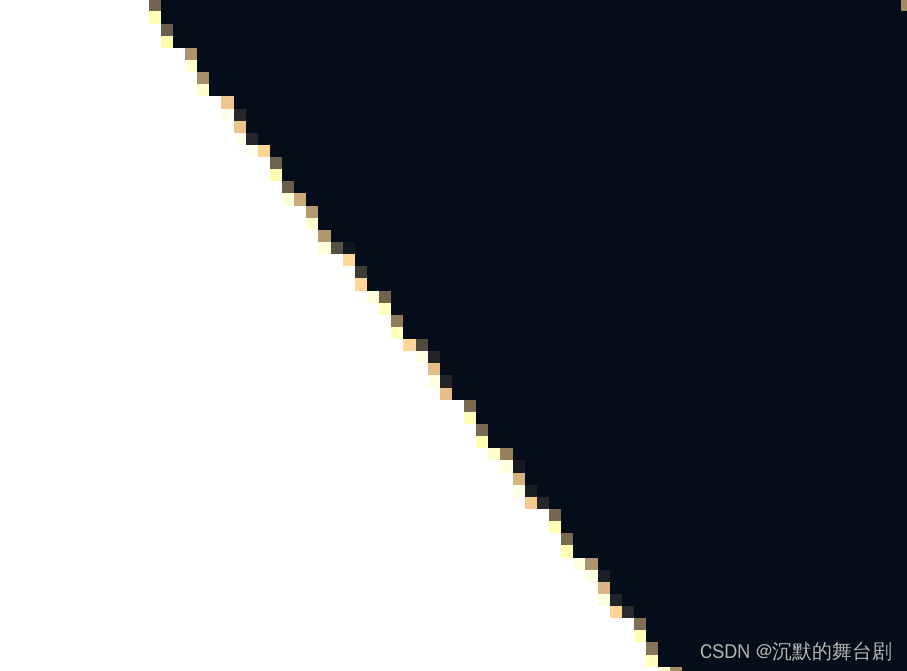
最后说一下无论是VSM、LVSM、ESM还是EVSM都是没办法直接产生软阴影的,但是它相对于SM单点采样直接非0即1的结果来说已经很好了,对比如下图:
单次SampleCmpLevelZero采样阴影边缘:
EVSM单次采样阴影边缘:
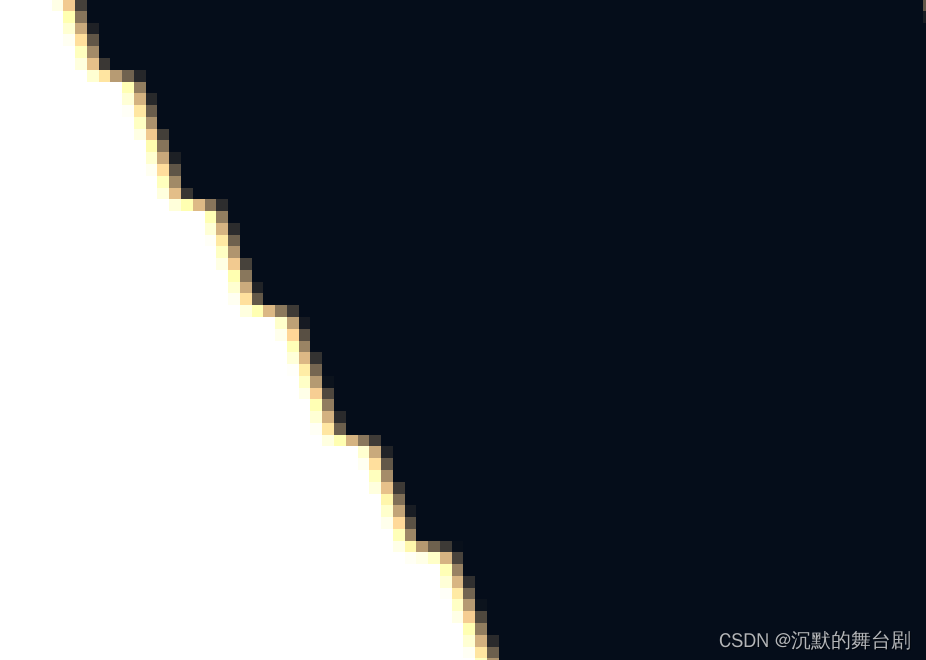
所以一般还需要一个高斯滤波使其能够模糊边缘区域,实现软阴影。
简单放一个5*5高斯算法示意如下:
// Kernel from: https://computergraphics.stackexchange.com/questions/39/how-is-gaussian-blur-implemented
// I presume it is approximate using the Pascal pyramid
//const float blurKernel[25] = float[](
//    1.0 / 256.0,  4.0 / 256.0,  6.0 / 256.0,  4.0 / 256.0, 1.0 / 256.0,
//	4.0 / 256.0, 16.0 / 256.0, 24.0 / 256.0, 16.0 / 256.0, 4.0 / 256.0,
//	6.0 / 256.0, 24.0 / 256.0, 36.0 / 256.0, 24.0 / 256.0, 6.0 / 256.0,
//	4.0 / 256.0, 16.0 / 256.0, 24.0 / 256.0, 16.0 / 256.0, 4.0 / 256.0,
//    1.0 / 256.0,  4.0 / 256.0,  6.0 / 256.0,  4.0 / 256.0, 1.0 / 256.0
//);

// Kernel generated at: http://dev.theomader.com/gaussian-kernel-calculator/
const float blurKernel[25] = float[](
0.023528,	0.033969,	0.038393,	0.033969,	0.023528,
0.033969,	0.049045,	0.055432,	0.049045,	0.033969,
0.038393,	0.055432,	0.062651,	0.055432,	0.038393,
0.033969,	0.049045,	0.055432,	0.049045,	0.033969,
0.023528,	0.033969,	0.038393,	0.033969,	0.023528
);


float4 main(in VSOutput input) : SV_Target0
{
	float3 finalColor = float3 (0.0);
	float2 u_TexelSize=input.texelSize;
	for (int x = -2; x <= 2; x++) {
		for (int y = -2; y <= 2; y++) {
			finalColor += InputTexture.Sample(sampler, float2(v_TexCoords.x + u_TexelSize.x * x, v_TexCoords.y + u_TexelSize.y * y)).rgb * blurKernel[x + 2 + (y + 2) * 5];
		}
	}
	FragColor = float4 (finalColor, 1.0);
}
至此结束,至于如何运用到CSM(一般我们叫级联阴影,也有一个阴影算法叫Convolution Shadow Maps,也俗称CSM,仁者见仁吧)上,很简单,每级阴影皆执行EVSM即可。
参考文章:
http://developer.download.nvidia.com/presentations/2008/GDC/GDC08_SoftShadowMapping.pdf
https://learn.microsoft.com/zh-cn/windows/win32/dxtecharts/cascaded-shadow-maps?redirectedfrom=MSDN
https://graphics.stanford.edu/~mdfisher/Shadows.html
https://www.martincap.io/project_detail.php?project_id=9
https://graphics.stanford.edu/~mdfisher/Shadows.html


