手把手教你使用SpringBoot做一个员工管理系统【代码篇·下】
- 1.增加员工实现
- 2.修改员工信息
- 3.删除员工
- 4.404页面配置
- 5.注销
1.增加员工实现
新增添加员工的按钮:
<h2><a class="btn btn-sm btn-success" th:href="@{/addemp}">添加员工</a></h2>
编写添加员工的controller:
/**
 * 跳转添加员工页面
 * @return
 */
@GetMapping("/addemp")
public String toAddPage(){
    return "emp/add";
}
添加前端页面,复制list页面,修改即可:
这里提供一个表单美化代码:
<form th:action="@{/addemp}" method="post">
     <div class="form-group"><label>LastName</label>
         <input class="form-control" placeholder="dahezhiquan" type="text" name="lastName">
     </div>
     <div class="form-group"><label>Email</label>
         <input class="form-control" placeholder="3390205563@qq.com" type="email" name="email">
     </div>
     <div class="form-group"><label>Gender</label><br/>
         <div class="form-check form-check-inline">
             <input class="form-check-input" name="gender" type="radio" value="1">
             <label class="form-check-label">男</label>
         </div>
         <div class="form-check form-check-inline">
             <input class="form-check-input" name="gender" type="radio" value="0">
             <label class="form-check-label">女</label>
         </div>
     </div>
     <div class="form-group"><label>department</label>
         <select class="form-control" name="department.id">
             <option th:each="dept:${departments}" th:text="${dept.getDepartmentName()}"
                     th:value="${dept.getId()}"></option>
         </select>
     </div>
     <div class="form-group">
         <label>Birth</label>
         <input class="form-control" placeholder="klza" type="text" name="birth">
     </div>
     <button class="btn btn-primary" type="submit">添加</button>
 </form>
来测试看一下效果吧:
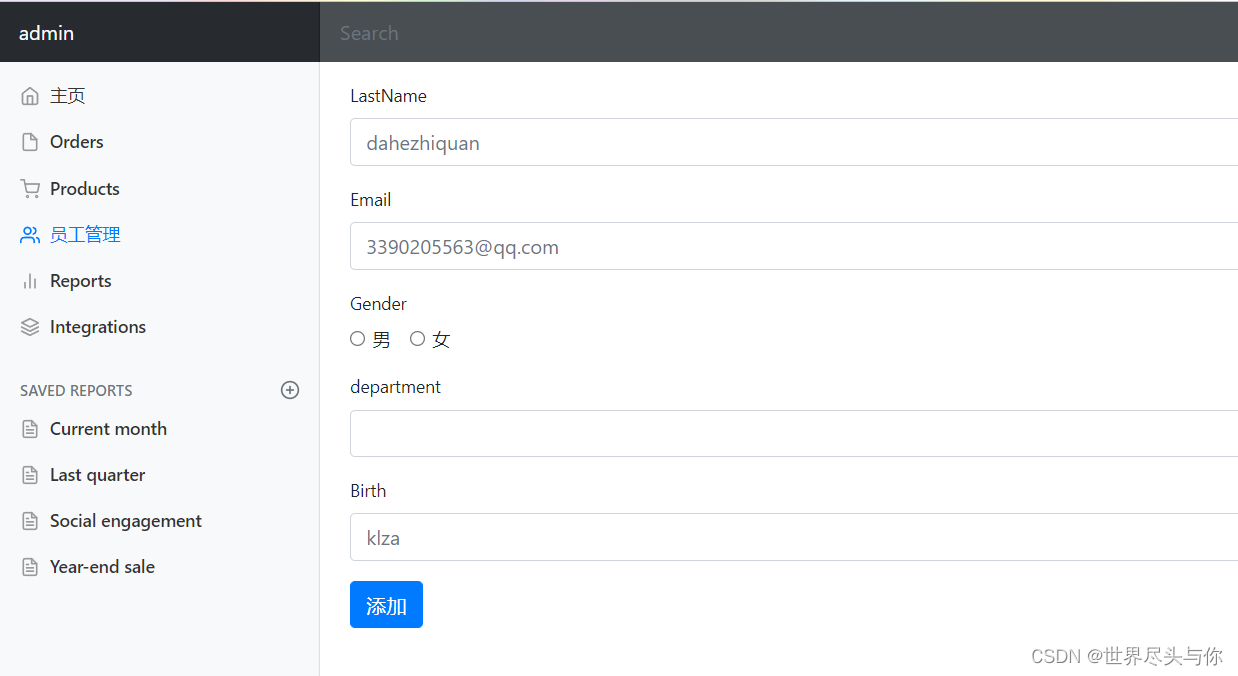
现在来获取一下所有的department信息,传到前端展示:
引入DepartmentDao:
@Autowired
DepartmentDao departmentDao;
完善添加员工controller:
/**
 * 跳转添加员工页面
 *
 * @return
 */
@GetMapping("/addemp")
public String toAddPage(Model model) {
    // 查询所有的部门信息
    Collection<Department> departments = departmentDao.getDepartments();
    model.addAttribute("departments", departments);
    return "emp/add";
}
现在可以正常显示所有部门了!
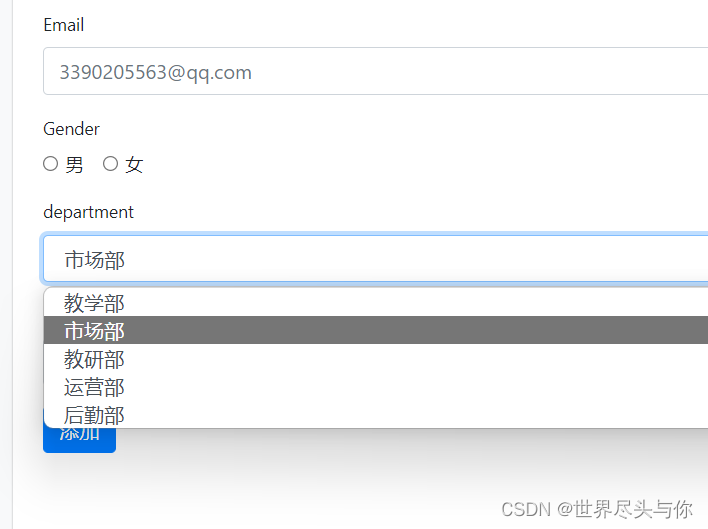
开始开发具体的添加员工的控制器:
/**
 * 添加员工
 * 接收前端传递的参数,自动封装成为对象[要求前端传递的参数名,和属性名一致]
 *
 * @param employee 员工对象
 * @return
 */
@PostMapping("/addemp")
public String addEmp(Employee employee) {
    employeeDao.save(employee);
    // 回到员工列表页面,可以使用redirect或者forward,就不会被视图解析器解析
    return "redirect:/emps";
}
测试一下吧:
添加成功:

2.修改员工信息
我们要实现员工修改功能,需要实现两步;
-
点击修改按钮,去到编辑页面,我们可以直接使用添加员工的页面实现
-
显示原数据,修改完毕后跳回列表页面!
首先修改跳转链接的位置:
<a class="btn btn-sm btn-primary" th:href="@{/emp/}+${emp.getId()}">编辑</a>
编写对应的controller:
/**
 * 员工修改
 *
 * @param id    员工ID号
 * @param model
 * @return
 */
@GetMapping("/emp/{id}")
public String toUpdatePage(@PathVariable("id") Integer id, Model model) {
    Employee employee = employeeDao.getEmployeeById(id);
    model.addAttribute("emp", employee);

    // 查询所有的部门信息
    Collection<Department> departments = departmentDao.getDepartments();
    model.addAttribute("departments", departments);
    return "emp/update";
}
添加修改的模板页面,将add.html复制,表单修改为如下即可:
<form th:action="@{/updateemp}" method="post" >
    <input type="hidden" name="id" th:value="${emp.getId()}">
    <div class="form-group" ><label>LastName</label>
        <input th:value="${emp.getLastName()}" class="form-control" placeholder="kuangshen" type="text" name="lastName">
    </div>
    <div class="form-group" ><label>Email</label>
        <input th:value="${emp.getEmail()}" class="form-control" placeholder="24736743@qq.com" type="email" name="email">
    </div>
    <div class="form-group"><label>Gender</label><br/>
        <div class="form-check form-check-inline">
            <input th:checked="${emp.getGender()==1}" class="form-check-input" name="gender" type="radio" value="1">
            <label class="form-check-label">男</label>
        </div>
        <div class="form-check form-check-inline">
            <input th:checked="${emp.getGender()==0}" class="form-check-input" name="gender" type="radio" value="0">
            <label class="form-check-label">女</label>
        </div>
    </div>
    <div class="form-group" ><label>department</label>
        <select class="form-control" name="department.id">
            <option th:selected="${dept.id==emp.getDepartment().getId()}" th:each="dept:${departments}" th:text="${dept.getDepartmentName()}" th:value="${dept.getId()}"></option>
        </select>
    </div>
    <div class="form-group" >
        <label >Birth</label>
        <input th:value="${#dates.format(emp.birth,'yyyy/MM/dd')}" class="form-control" placeholder="2021-02-02" type="text" name="birth">
    </div>
    <button class="btn btn-primary" type="submit">修改</button>
</form>
现在先来测试一下修改页面的回显数据是否正常展示了:
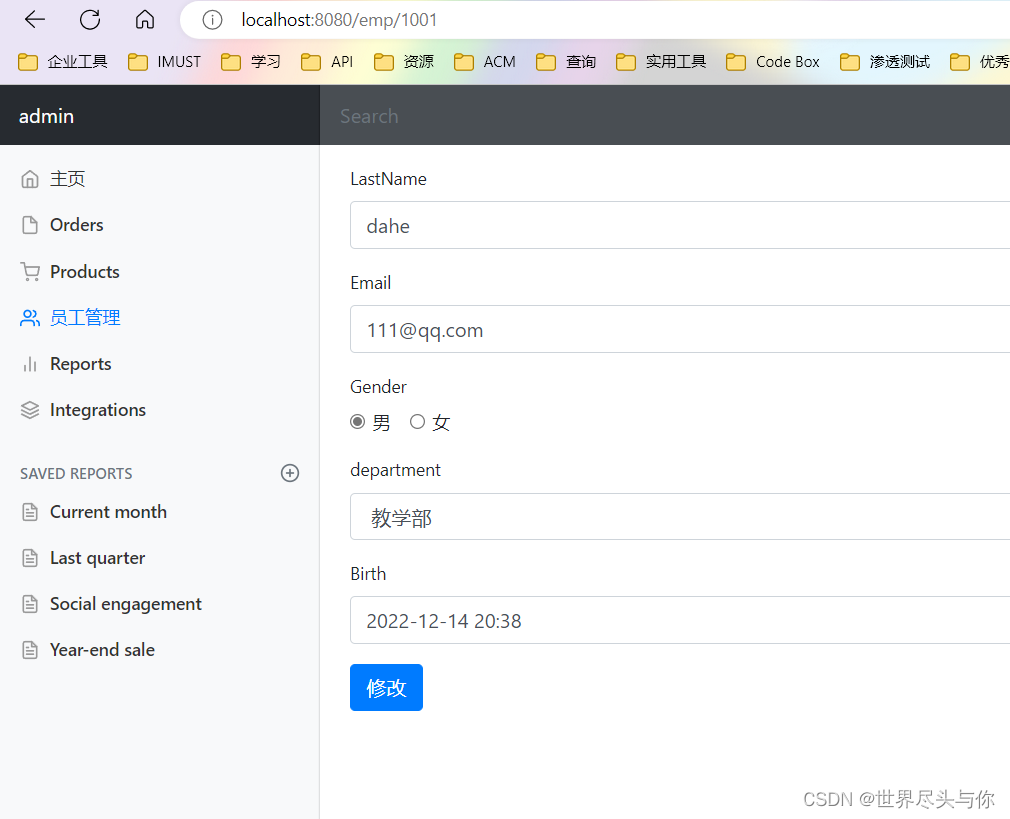
现在来实现一下修改员工的控制器吧:
/**
 * 修改员工
 *
 * @param employee 员工对象
 * @return
 */
@PostMapping("/updateemp")
public String updateEmp(Employee employee) {
    employeeDao.save(employee);
    return "redirect:/emps";
}
3.删除员工
list页面,编写提交地址:
<a class="btn btn-sm btn-danger" th:href="@{/delEmp/}+${emp.getId()}">删除</a>
编写删除员工的Controller:
/**
 * 删除员工
 *
 * @param id 员工ID
 * @return
 */
@GetMapping("/delEmp/{id}")
public String delEmp(@PathVariable("id") Integer id) {
    employeeDao.delete(id);
    return "redirect:/emps";
}
大功告成!👌
4.404页面配置
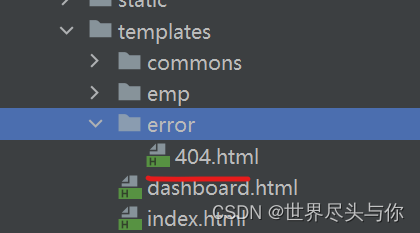
我们只需要在模板目录下添加一个error文件夹,文件夹中存放我们相应的错误页面;
比如404.html 或者 4xx.html 等等,SpringBoot就会帮我们自动使用了!
5.注销
在SpringBoot中,注销同样也很简单:
修改前端的注销代码:
<a class="nav-link" th:href="@{/user/logout}">注销</a>
编写控制器:
/**
 * 注销
 * 销毁session即可!
 * @param session
 * @return
 */
@RequestMapping("/user/logout")
public String logout(HttpSession session){
    session.invalidate();
    return "redirect:/index.html";
}





![[附源码]Python计算机毕业设计SSM基于Web的摄影爱好者交流社区(程序+LW)](https://img-blog.csdnimg.cn/c240add9de2c4ba1905460ec0345a839.png)

