前言
在日常工作中,我们需要有一款监控平台来帮助我们管理服务,监控服务是否宕机、服务运行指标(内存、虚拟机、线程、请求等)、监控日志、管理服务(服务下线)等,SpringBoot Admin作为一款开源的监控平台,开发对接方便,只需要配置好服务和监控信息,定时拉取即可。其github地址为https://github.com/topics/spring-boot-admin
SpringBoot Admin简单使用
首先,创建我们的监控服务端,注意,spring-boot-admin-starter-server的版本和spring-boot-starter的版本要一致,引入依赖
<dependency>
    <groupId>org.springframework.boot</groupId>
    <artifactId>spring-boot-starter</artifactId>
    <version>2.5.4</version>
</dependency>
<dependency>
    <groupId>de.codecentric</groupId>
    <artifactId>spring-boot-admin-starter-server</artifactId>
    <version>2.5.4</version>
</dependency>
<dependency>
    <groupId>org.springframework.boot</groupId>
    <artifactId>spring-boot-starter-web</artifactId>
    <version>2.5.4</version>
</dependency>
在启动类上添加@EnableAdminServer注解,启动,访问localhost:8080

接下来,创建一个被监控服务,这里,需要引入的就是client,引入依赖
<dependency>
    <groupId>org.springframework.boot</groupId>
    <artifactId>spring-boot-starter</artifactId>
    <version>2.5.4</version>
</dependency>
<dependency>
    <groupId>de.codecentric</groupId>
    <artifactId>spring-boot-admin-starter-client</artifactId>
    <version>2.5.4</version>
</dependency>
<dependency>
    <groupId>org.springframework.boot</groupId>
    <artifactId>spring-boot-starter-web</artifactId>
    <version>2.5.4</version>
</dependency>
接着,在配置文件配置服务端地址,表示客户端可被监控并启动客户端
spring.boot.admin.client.url=http://localhost:8080

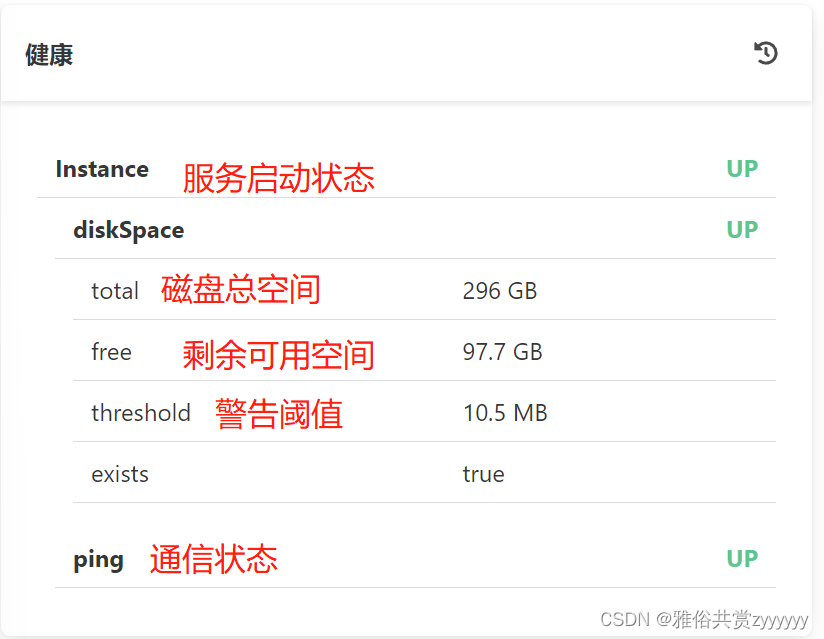
可以看到,监控平台上注册了一个客户端服务,点击可以查看详情,然后我们配置默认的health配置,因为health默认开启,所以只需要配置详细信息展示即可,添加配置management.endpoint.health.show-details=always
当然,除了健康信息外,还有其他很多指标,我们添加配置开启所有监控项
##默认health,*代表所有,开放的监控信息
management.endpoints.web.exposure.include=*
##注意,如果是yml配置文件,*值需要用单引号或双引号标记,"*"或'*'
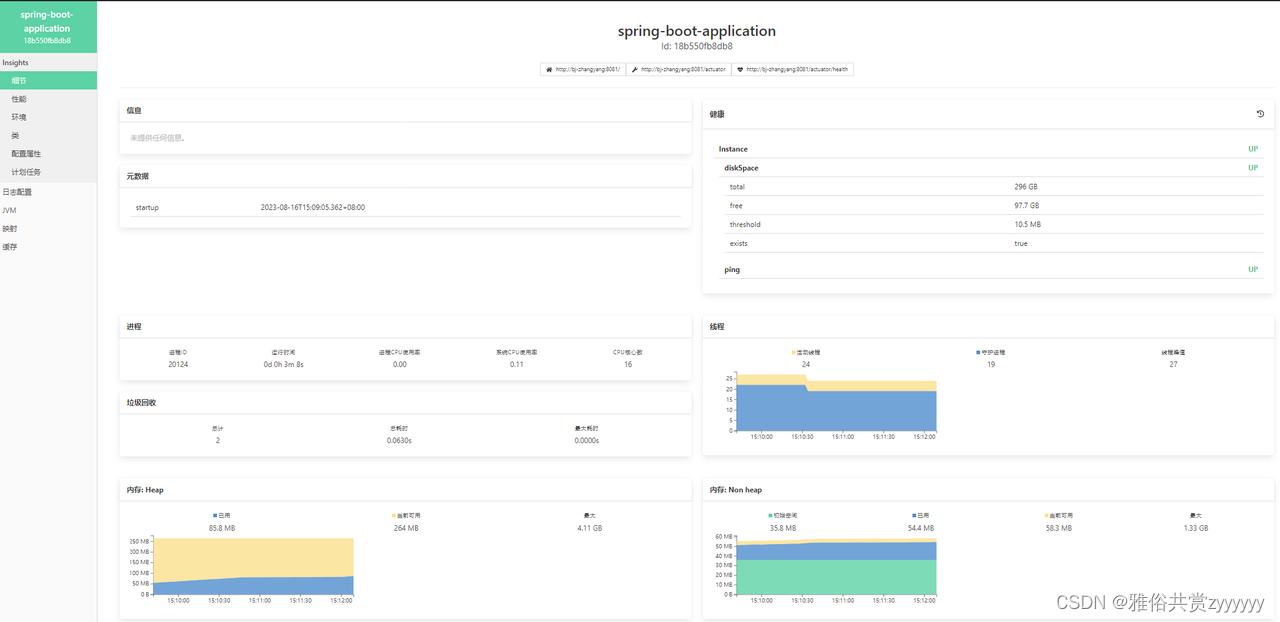
从上图可以看到,我么你可以健康服务的性能、jvm、缓存等多种信息
端点actuator
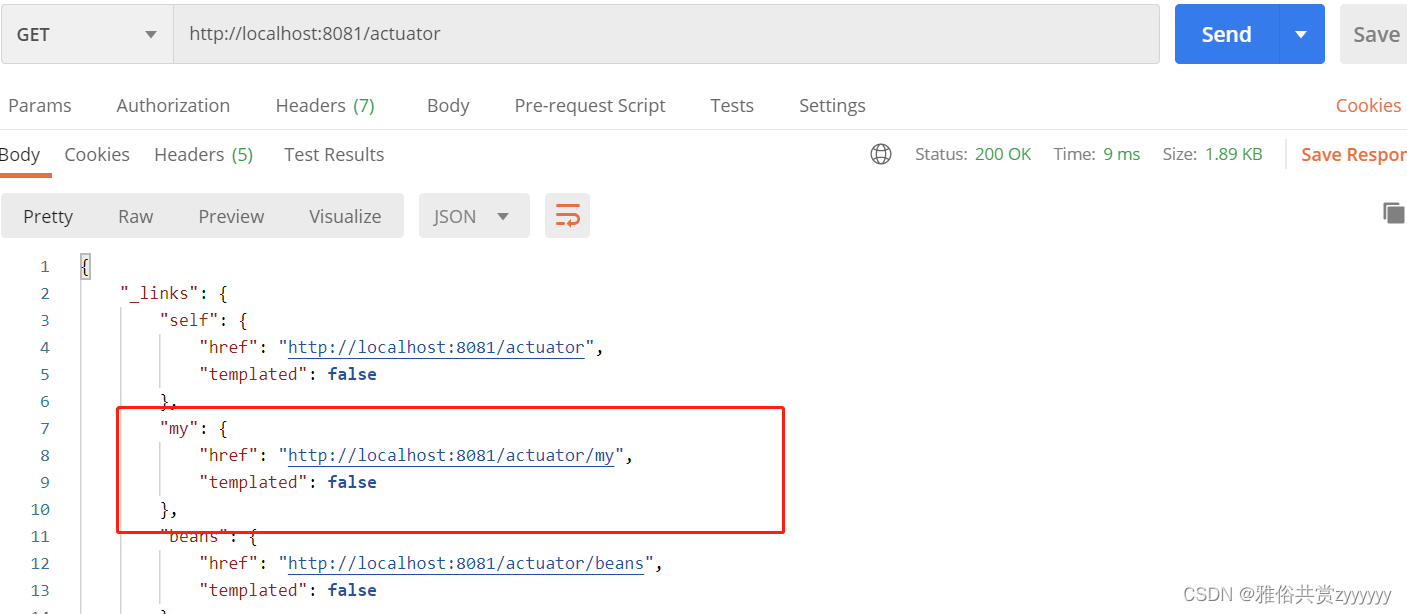
在映射中,有很多请求,大部分由/actuator开头,我们访问localhost:8081/actuator可以获取数据,注意,这里是监控的服务,不是监控本身,返回的是一系列端点路径
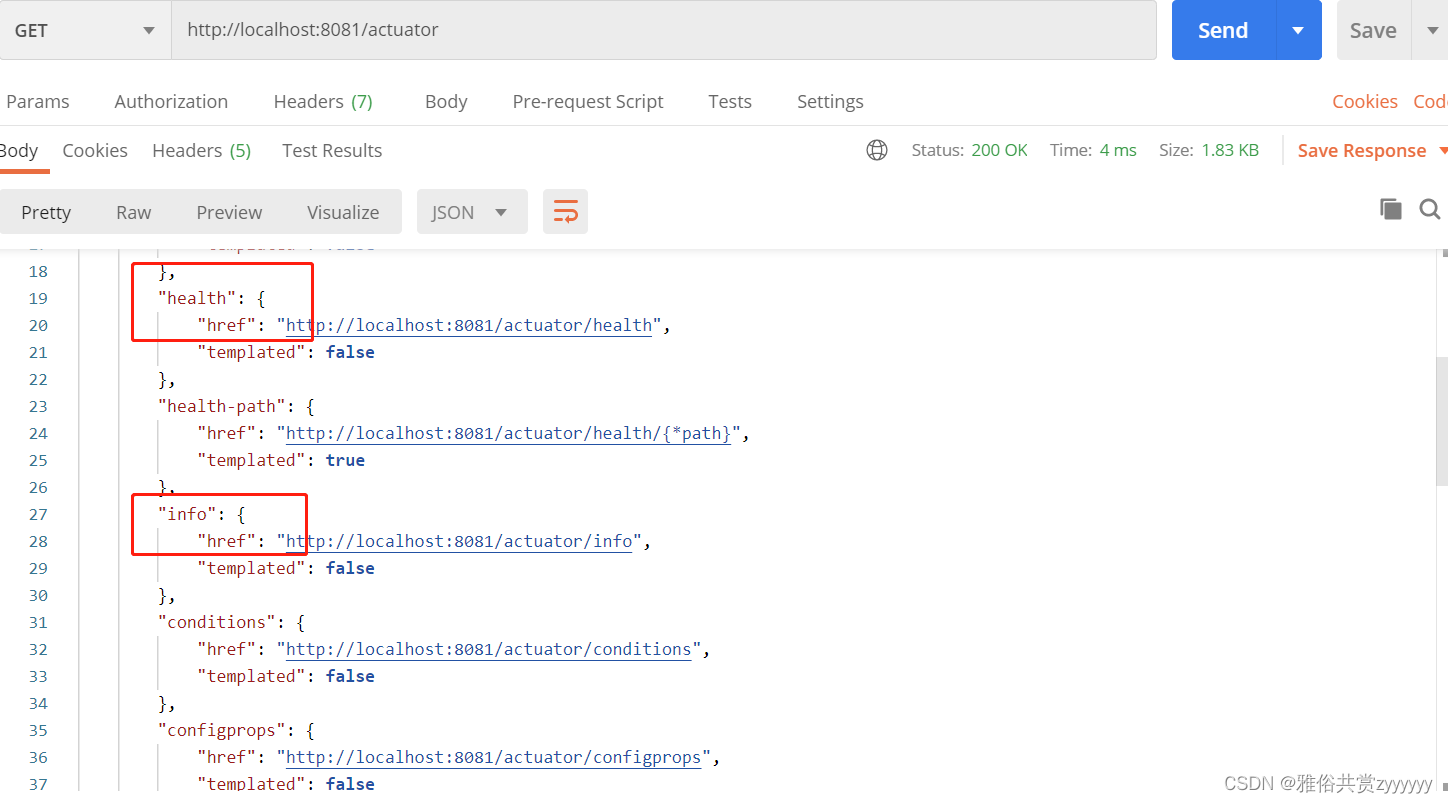
actuator提供了springboot生产就绪功能,通过端点的配置与访问,获取端点信息,端点描述了一组监控信息,SpringBoot提供了多个内置端点,也可以自定义端点(监控原理),访问当前应用所有端点信息:/actuator,访问端点详细信息:/actuator/端点名称

在应用程序启动日志可以看到,开放了13个端点,而上面我们配置中*号是web端展示的端点(对外暴露),实际端点是否开放,是由management.endpoint.xxx.enable决定的,例如
#关闭信息端点
management.endpoint.info.enabled=false
注意,对于health属性,enable必须为true,默认开放
日志
监控控制台还可以查看服务日志,我们先配置好服务端的日志配置
<?xml version="1.0" encoding="UTF-8"?>
<configuration>
    <!--<include resource="org/springframework/boot/logging/logback/defaults.xml" />-->
    <contextName>logback</contextName>
    <property name="log.path" value="./logs/my.log"/>
    <appender name="console" class="ch.qos.logback.core.ConsoleAppender">
        <encoder>
            <!--格式化输出:%d表示日期,%thread表示线程名,%-5level:级别从左显示5个字符宽度%msg:日志消息,%n是换行符-->
            <pattern>%d{yyyy-MM-dd HH:mm:ss.SSS} [%thread] %-5level %logger{36} - %msg%n</pattern>
        </encoder>
    </appender>

    <appender name="file" class="ch.qos.logback.core.rolling.RollingFileAppender">
        <file>${log.path}</file>
        <rollingPolicy class="ch.qos.logback.core.rolling.TimeBasedRollingPolicy">
            <fileNamePattern>${log.path}.%d{yyyy-MM-dd}.zip</fileNamePattern>
        </rollingPolicy>
        <encoder>
            <!--格式化输出:%d表示日期,%thread表示线程名,%-5level:级别从左显示5个字符宽度%msg:日志消息,%n是换行符-->
            <pattern>%date %level [%thread] %logger{36} [%file : %line] %msg%n
            </pattern>
        </encoder>
    </appender>
    <root level="info">
        <appender-ref ref="console"/>
        <appender-ref ref="file"/>
    </root>
</configuration>
新建一个测试方法,主要打印各种级别的日志信息
@RequestMapping("/log")
public void log(){
    logger.info("我是info级别日志===========");
    logger.warn("我是warn级别日志===========");
    logger.error("我是error级别日志=========");
}
然后,最重要的是,在配置文件开启日志,并配置好日志的路径
#日志
management.endpoint.logfile.enabled=true
management.endpoint.logfile.external-file=D:/project/springboot_service/logs/my.log
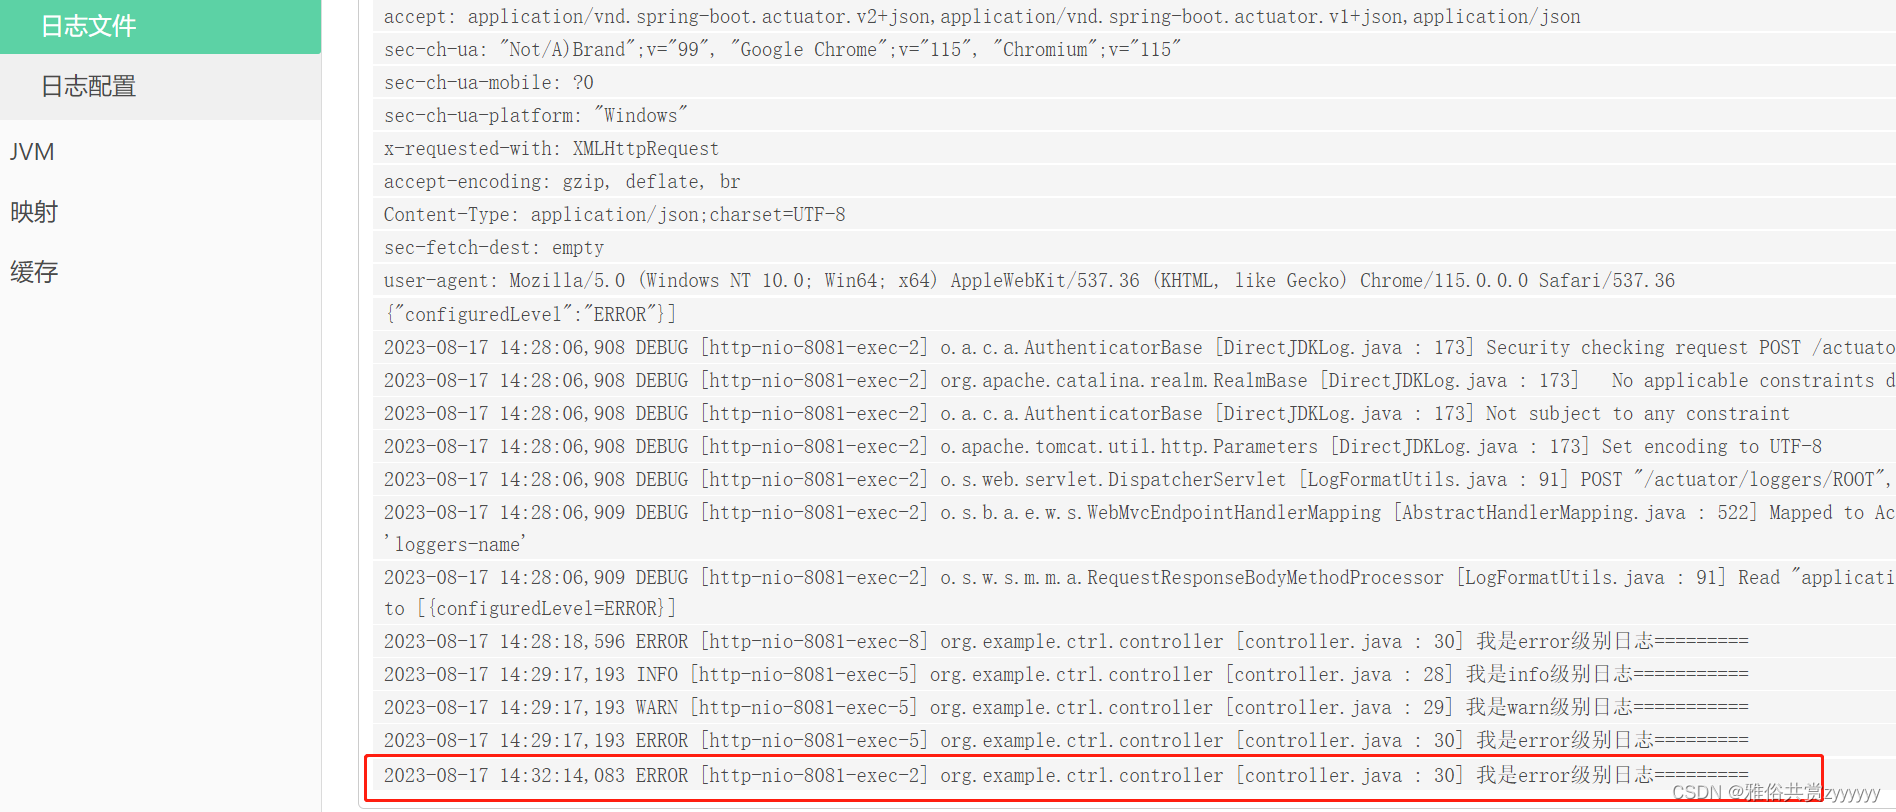
启动项目,调用接口http://localhost:8081/test/log可以在控制台的日志栏看到我们配置的日志,先看日志文件
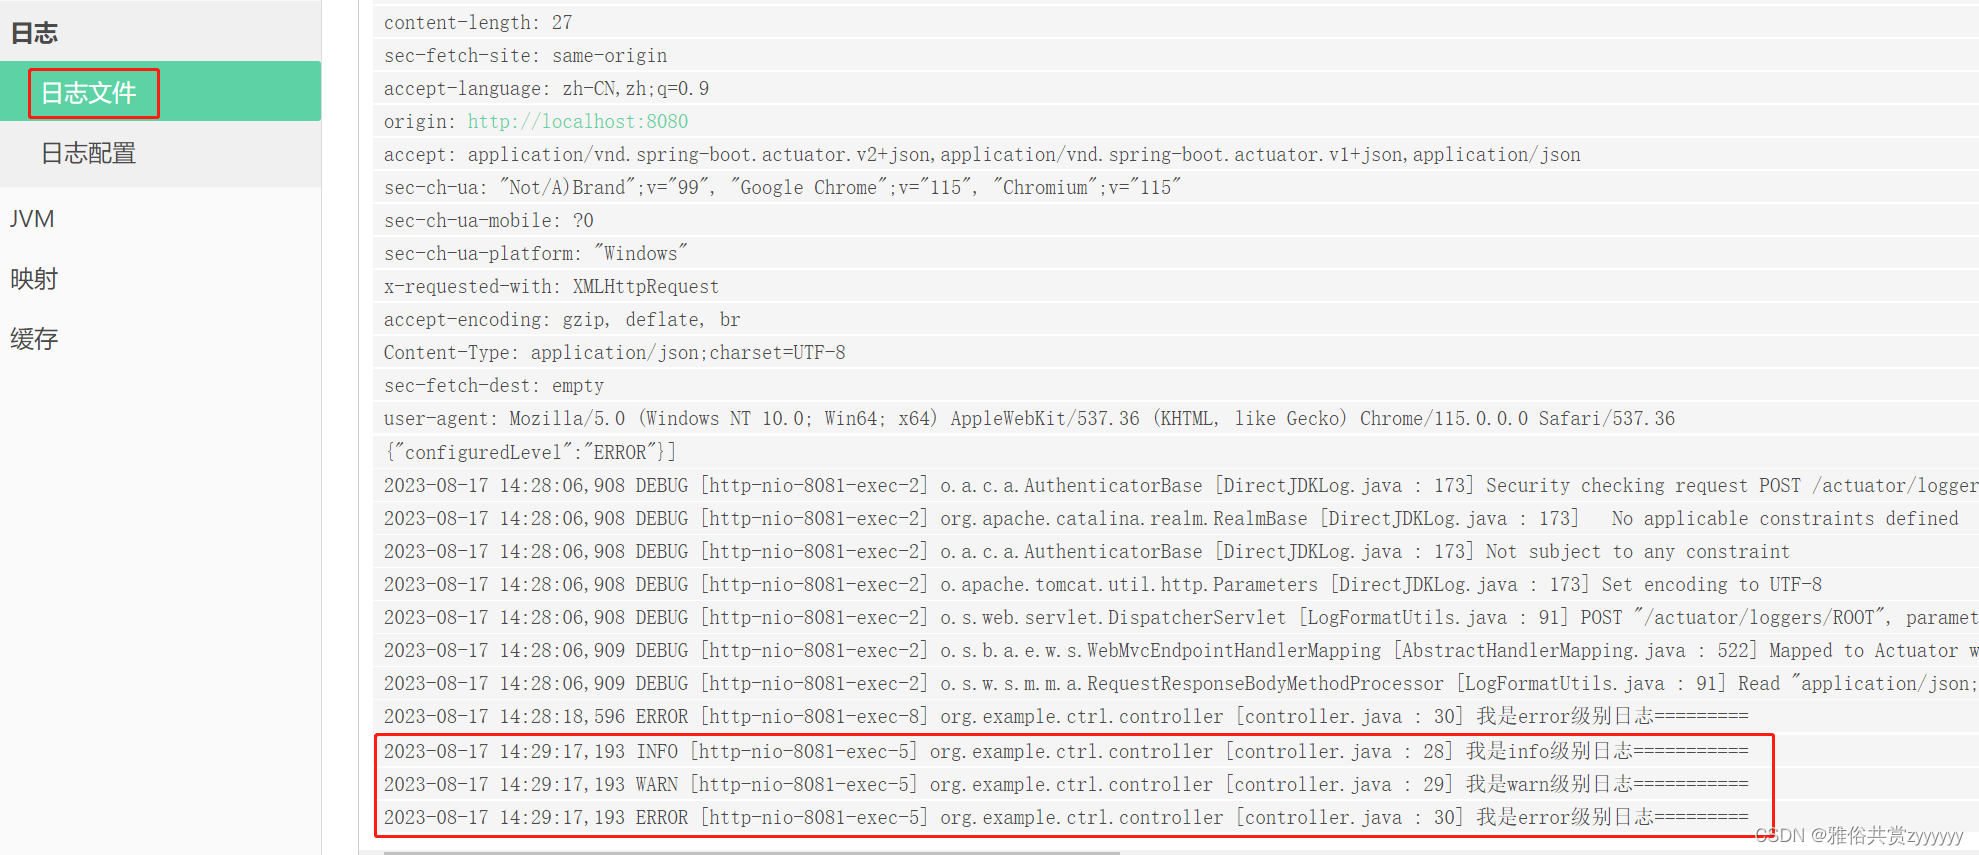
在下面还有一个日志配置,点进去可以发现,是针对日志级别和对应类的配置,最上面可以管理所有类的日志打印级别,下面也可以分别设置单独的类的级别,我们将所有日志改成error,再查看日志

再次请求接口,查看日志,发现只有error级别的日志,其他日志不显示
自定义端点
1、info端点
自定义信息,例如配置文件添加info.author=zy info.desc=spring_boot_admin_test,可以看到监控控制台如下

当然,这些只是基本的静态信息,那么如何获取动态信息呢?
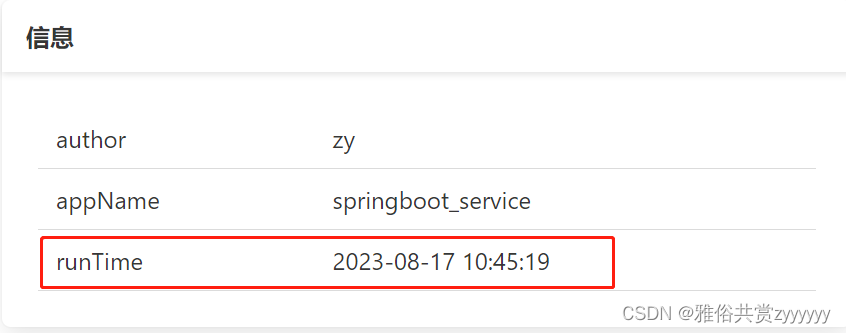
我们定义一个InfoConfig,实现InfoContributor接口,重写contribute方法,通过builder.withDetails或builder.withDetail构建想要动态获取的信息,每次刷新,信息动态变化
package org.example.actuator;

import org.springframework.boot.actuate.info.Info;
import org.springframework.boot.actuate.info.InfoContributor;
import org.springframework.stereotype.Component;

import java.text.SimpleDateFormat;
import java.util.Date;
import java.util.HashMap;
import java.util.Map;

@Component
public class InfoConfig implements InfoContributor {
    private final SimpleDateFormat sdf = new SimpleDateFormat("yyyy-MM-dd hh:mm:ss");
    @Override
    public void contribute(Info.Builder builder) {
        Map map = new HashMap();
        map.put("runTime",sdf.format(new Date()));
        builder.withDetails(map);
    }
}
2、health端点
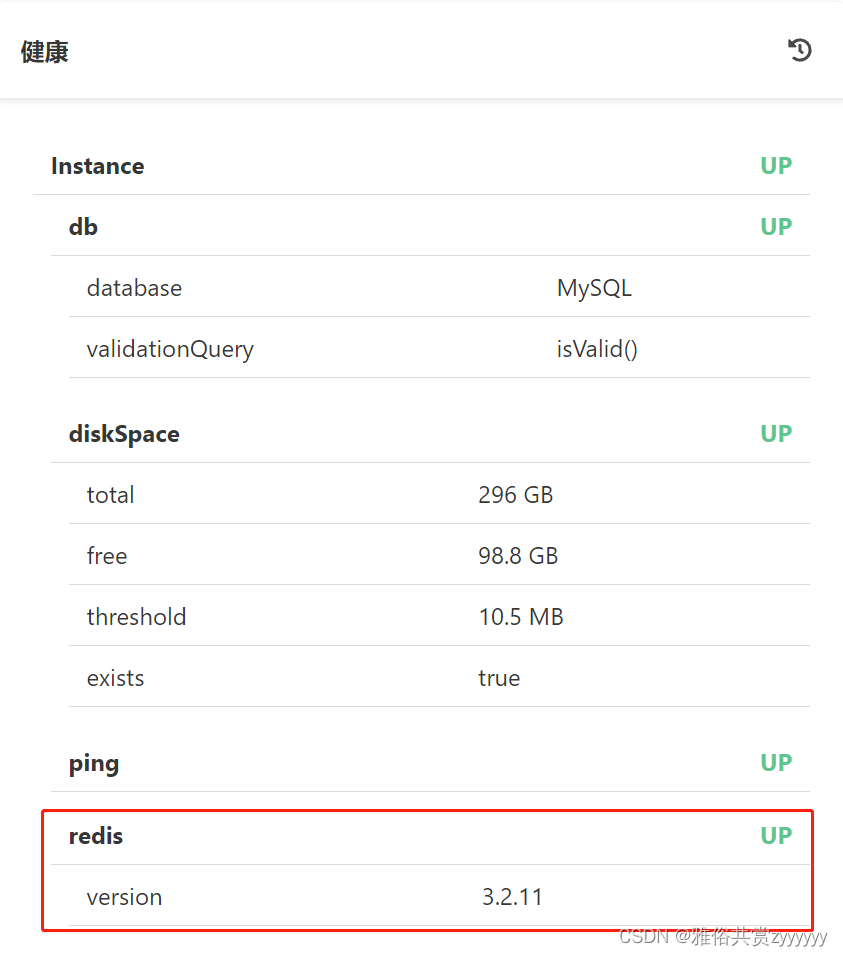
首先要说明,health端点不能同上配置文件操作,我们可以添加pom文件中中间件,例如redis,控制台
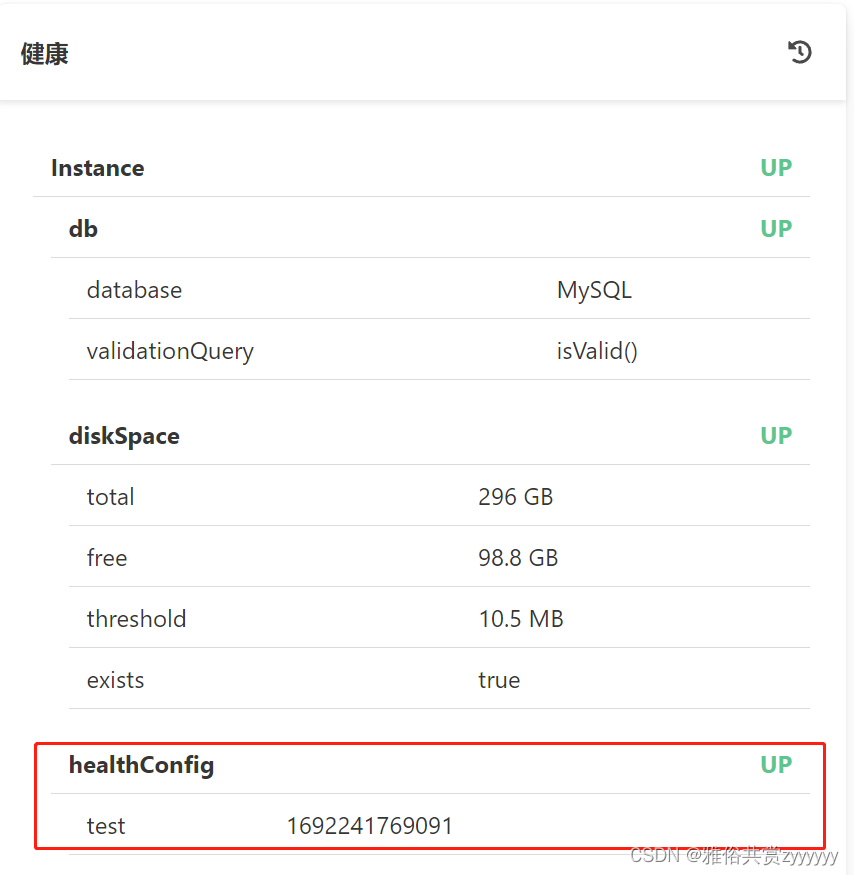
当然,也支持自定义,方式同上,继承AbstractHealthIndicator类,实现doHealthCheck方法,builder有三个方法去自定义,支持多个状态信息up、down、unknown等,也可以通过builder.status(xxx)设置,通过这个可以自定义监控组件信息

package org.example.actuator;

import org.springframework.boot.actuate.health.AbstractHealthIndicator;
import org.springframework.boot.actuate.health.Health;
import org.springframework.stereotype.Component;

@Component
public class HealthConfig extends AbstractHealthIndicator {
    @Override
    protected void doHealthCheck(Health.Builder builder) throws Exception {
        builder.withDetail("test",System.currentTimeMillis());
        builder.up();
    }
}
3、metrics端点
通过融合业务,去操作,这里主要监控性能,即接口调用信息
package org.example.ctrl;

import io.micrometer.core.instrument.Counter;
import io.micrometer.core.instrument.MeterRegistry;
import org.springframework.web.bind.annotation.RequestMapping;
import org.springframework.web.bind.annotation.RestController;

@RestController
@RequestMapping("/test")
public class controller {
    @RequestMapping("/hello")
    public String hello(){
        //每次执行,监控+1
        counter.increment();
        return "hello";
    }
    private Counter counter;
    public controller(MeterRegistry meterRegistry){
        counter = meterRegistry.counter("用户操作次数:");
    }
}

然后调用接口,http://localhost:8081/test/hello观察指标

4、自定义端点
新建自定义端点类,在类上声明@Endpoint(id = "my",enableByDefault = true)注解将其定义为端点,其中,id为端点的名称,名称不可包含特殊字符,例如"_",否则会报错;enableByDefault代表是否开启端点,也可以通过上面配置文件的方式开启,记下来,定义端点的行为,声明一个方法,用@ReadOperation注解声明,当启动项目的时候可被actuator读取管理
package org.example.actuator;

import org.springframework.boot.actuate.endpoint.annotation.Endpoint;
import org.springframework.boot.actuate.endpoint.annotation.ReadOperation;
import org.springframework.stereotype.Component;

import java.util.HashMap;
import java.util.Map;

@Component
//定义端点,后面enable可通过配置文件开启,名称不可包含特殊字符,例如_,否则会报错
@Endpoint(id = "my",enableByDefault = true)
public class MyEndpoint {
    @ReadOperation
    public Map test(){
        System.out.println("======================================");
        System.out.println("===============hello==================");
        System.out.println("======================================");
        Map map = new HashMap();
        map.put("aaa","111");
        return map;
    }
}

Admin的安全性
直到现在,我们的Admin控制台是可以直接访问的,现在考虑给它设置账号密码,首先,引入security依赖
<dependency>
    <groupId>org.springframework.boot</groupId>
    <artifactId>spring-boot-starter-security</artifactId>
    <version>2.5.4</version>
</dependency>
创建一个SecurityConfig配置类,设置好拦截路径
package org.example.config;
import de.codecentric.boot.admin.server.config.AdminServerProperties;
import org.springframework.security.config.annotation.web.builders.HttpSecurity;
import org.springframework.security.config.annotation.web.configuration.WebSecurityConfigurerAdapter;
import org.springframework.security.web.authentication.SavedRequestAwareAuthenticationSuccessHandler;
import org.springframework.stereotype.Component;

@Component
public class SecurityConfig extends WebSecurityConfigurerAdapter {
    private final String adminContextPath;
    public SecurityConfig(AdminServerProperties adminServerProperties){
        this.adminContextPath = adminServerProperties.getContextPath();
    }

    @Override
    protected void configure(HttpSecurity security) throws Exception {
        SavedRequestAwareAuthenticationSuccessHandler handler = new SavedRequestAwareAuthenticationSuccessHandler();
        handler.setTargetUrlParameter("redirectTo");
        security.authorizeRequests()
                .antMatchers( adminContextPath + "/assets/**" ).permitAll()
                .antMatchers( adminContextPath + "/login" ).permitAll()
                .anyRequest().authenticated()
                .and()
                .formLogin().loginPage( adminContextPath + "/login" ).successHandler( handler ).and()
                .logout().logoutUrl( adminContextPath + "/logout" ).and()
                .httpBasic().and()
                .csrf().disable();
    }
}
然后,在配置文件配置用户名和密码,重新启动,即可看到需要账号密码登录
spring.security.user.name=admin
spring.security.user.password=123456
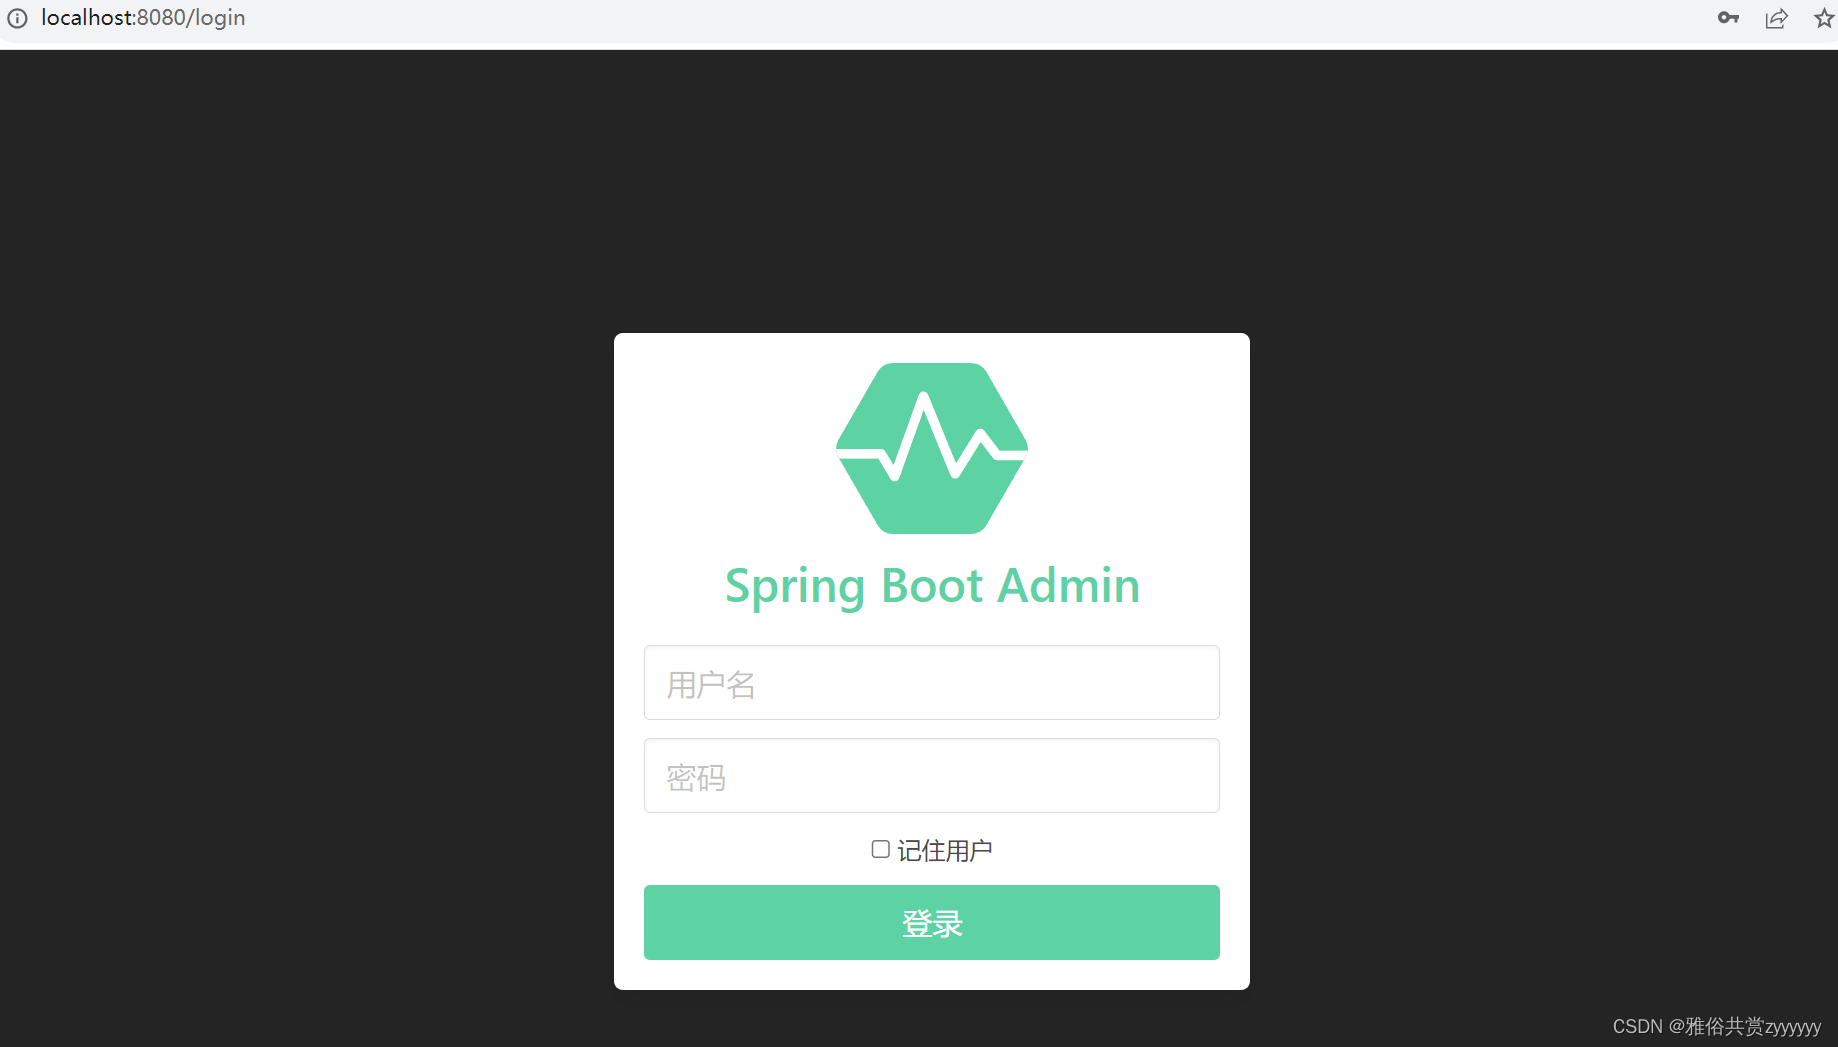
登录之后,发现我们的客户端虽然启动,但是没有服务实例,这是因为我们的客户端连不上admin了,需要在客户端的配置文件添加admin的账户信息,然后重启,注册成功
spring.boot.admin.client.username=admin
spring.boot.admin.client.password=123456
监控通知
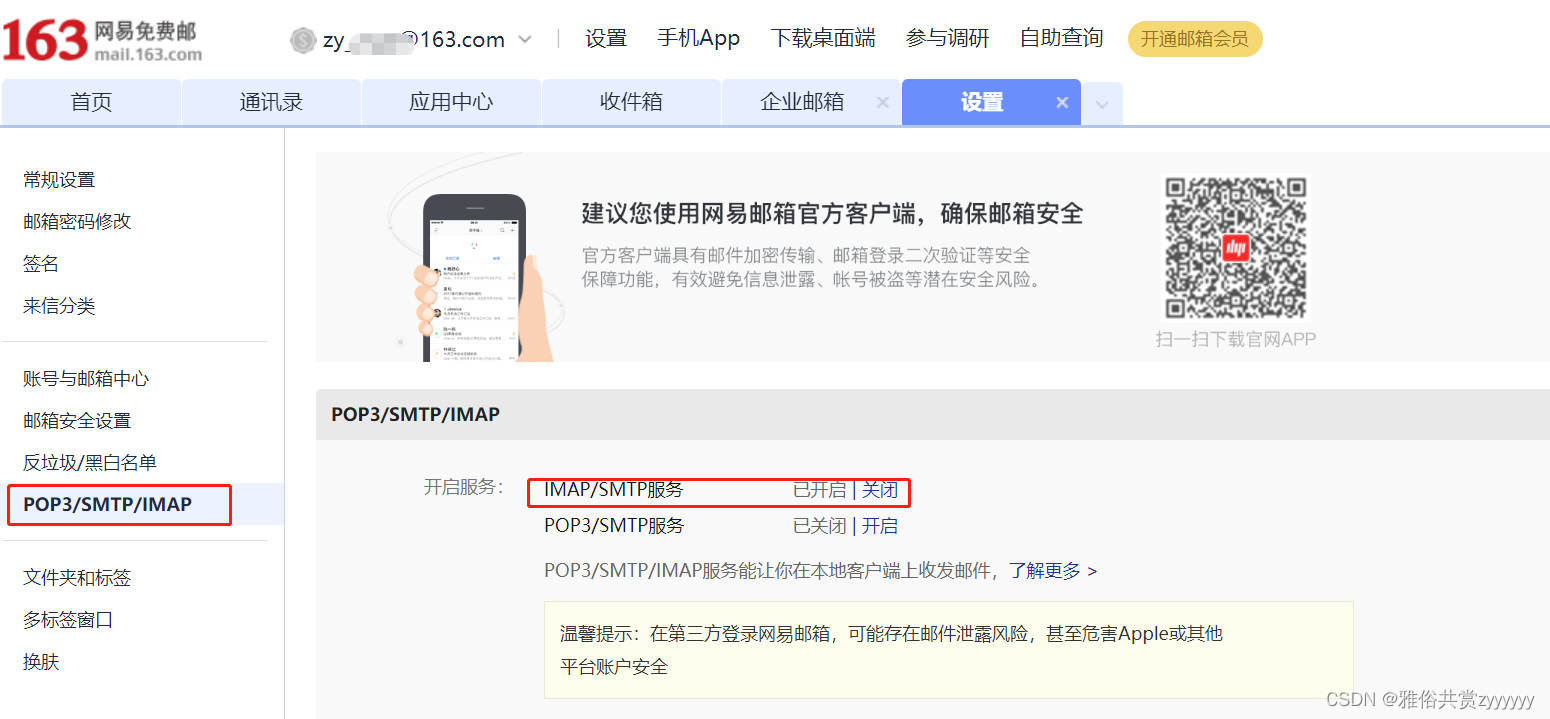
既然是服务监控,那么就要求它能够实时提醒我们服务的状态,也就是做到即时通知,这里,我们采用邮件的方式实现。首先,我们需要有一个可以对外发送邮件的邮箱,我这里使用的163邮箱,我们在设置里找到SMTP,并开启,这里会给一个授权码,一定保存好不要泄露
然后,在Admin服务添加邮箱依赖
<dependency>
    <groupId>org.springframework.boot</groupId>
    <artifactId>spring-boot-starter-mail</artifactId>
    <version>2.5.4</version>
</dependency>
在配置文件配置我们的发送邮箱,接收邮箱以及账户信息等
#163的smtp
spring.mail.host=smtp.163.com
#邮箱
spring.mail.username=开启smtp的@163.com
#开启的授权码,保存好,不要泄露
spring.mail.password=授权码
#发件人邮箱
spring.boot.admin.notify.mail.from=开启smtp的@163.com
#收件人邮箱
spring.boot.admin.notify.mail.to=接收邮箱,可以随意
然后,重启我们的Admin服务,将客户端下线,可以在接收邮箱收到邮件
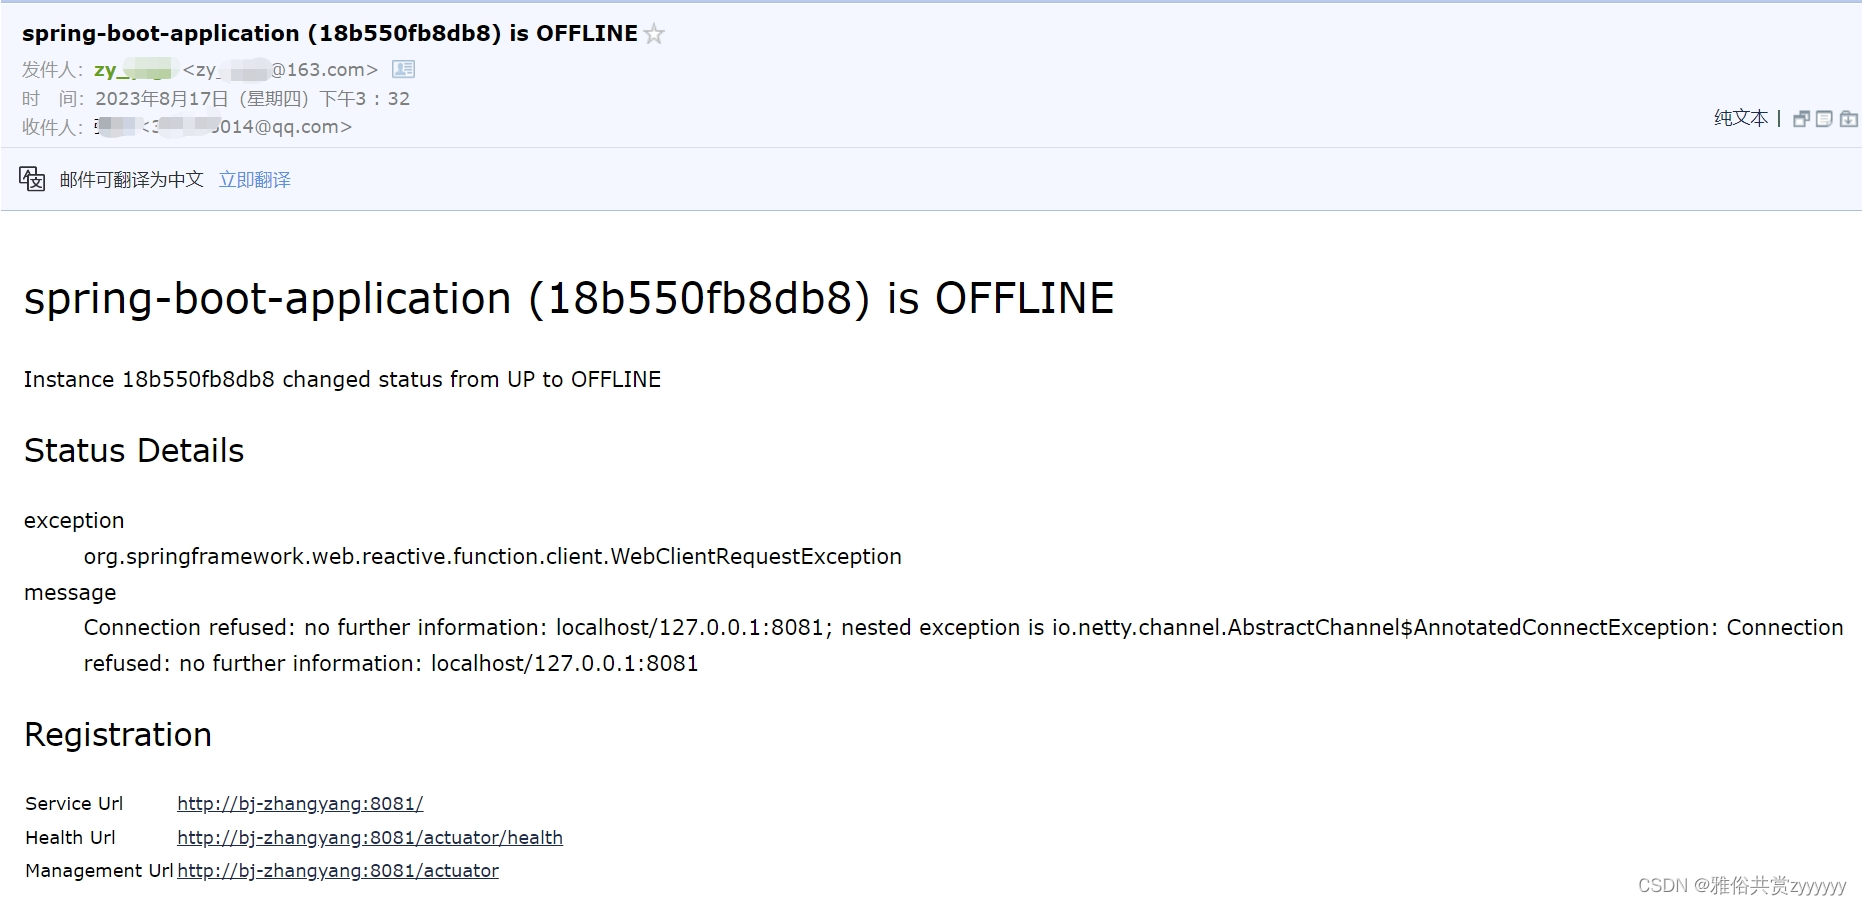
同理,再次上线客户端服务,也会收到上线邮件。
总结
至此,我们实现了监控平台的部分功能,这里只是针对示例服务去处理的,实际应用还要结合服务场景,同时,这里我们的客户端是和服务端直连的,当服务数量过多时,我们还可以将服务端和客户端注册到nacos等注册中心,进行微服务化的调用。





![[C++] string类的介绍与构造的模拟实现,进来看吧,里面有空调](https://img-blog.csdnimg.cn/a746a3bdb3db4521a78cc094207f94ed.gif#pic_center)


