编译镜像
官方百度云盘资料:https://doc.embedfire.com/linux/rk356x/quick_start/zh/latest/quick_start/baidu_cloud/baidu_cloud.html
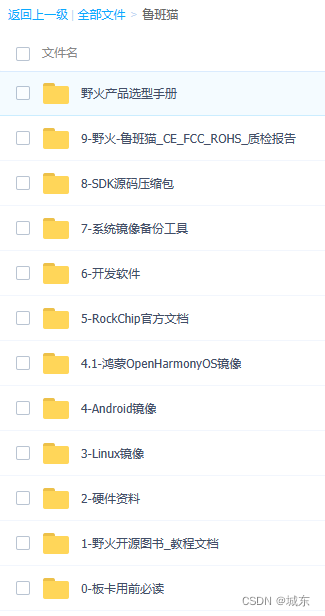
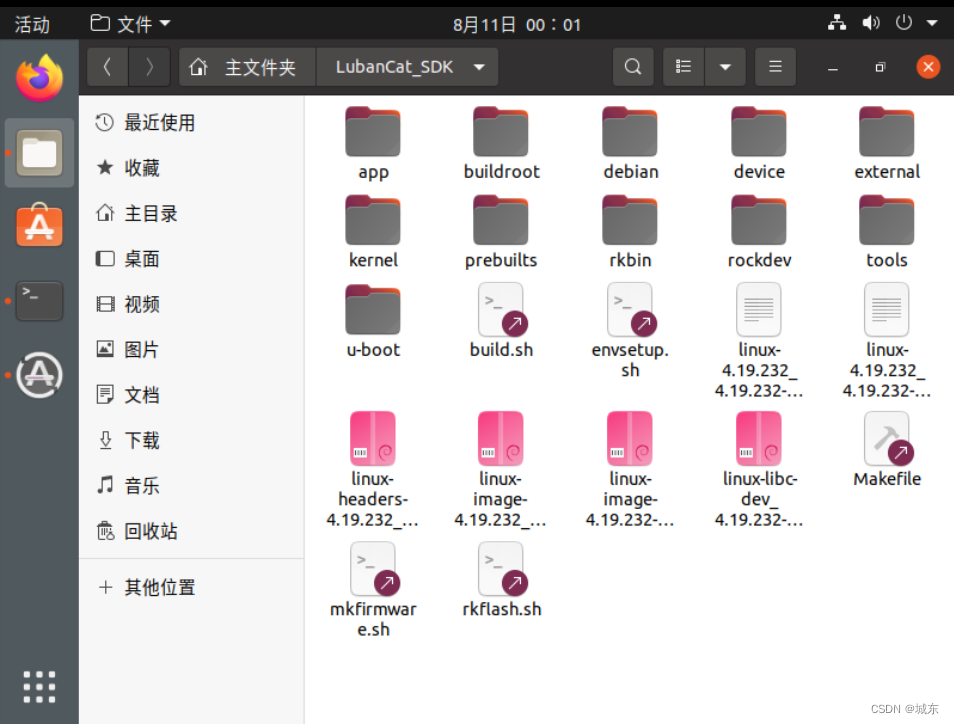
解压虚拟机压缩包:"鲁班猫\8-SDK源码压缩包\开发环境虚拟机镜像\ubuntu20.04.7z"后既可以用VMware打开,打开后可以看到已经有了现成的SDK,如下:
按照:https://doc.embedfire.com/linux/rk356x/build_and_deploy/zh/latest/building_image/debian_rootfs/debian_rootfs.html#id13
文章的说法输入如下命令一键生成镜像:
# 一键编译
./build.sh
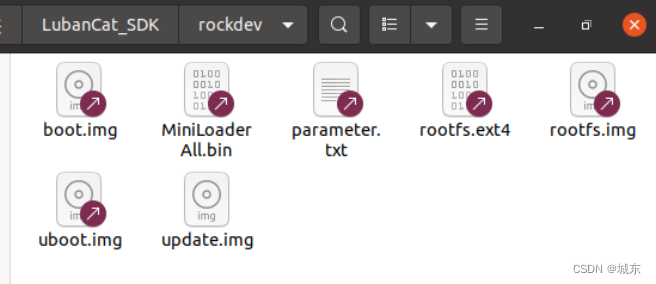
运行成功后在"rockdev"目录生成"update.img"即为镜像文件,该文件可以通过如下文章的说明下载到芯片中运行:https://chengdong.blog.csdn.net/article/details/132035193
Running build_firmware succeeded.
Make update.img
start to make update.img...
Android Firmware Package Tool v2.0
------ PACKAGE ------
Add file: ./package-file
package-file,Add file: ./package-file done,offset=0x800,size=0xa0,userspace=0x1
Add file: ./Image/MiniLoaderAll.bin
bootloader,Add file: ./Image/MiniLoaderAll.bin done,offset=0x1000,size=0x729c0,userspace=0xe6
Add file: ./Image/parameter.txt
parameter,Add file: ./Image/parameter.txt done,offset=0x74000,size=0x168,userspace=0x1
Add file: ./Image/uboot.img
uboot,Add file: ./Image/uboot.img done,offset=0x74800,size=0x400000,userspace=0x800
Add file: ./Image/boot.img
boot,Add file: ./Image/boot.img done,offset=0x474800,size=0x8000000,userspace=0x10000
Add file: ./Image/rootfs.img
rootfs,Add file: ./Image/rootfs.img done,offset=0x8474800,size=0xacb00000,userspace=0x159600
Add CRC...
Make firmware OK!
------ OK ------
********rkImageMaker ver 2.0********
Generating new image, please wait...
Writing head info...
Writing boot file...
Writing firmware...
Generating MD5 data...
MD5 data generated successfully!
New image generated successfully!
Making ./Image/update.img OK.
Running build_updateimg succeeded.
Running build_allsave succeeded.
lubancat@lubancat-vm:~/LubanCat_SDK$
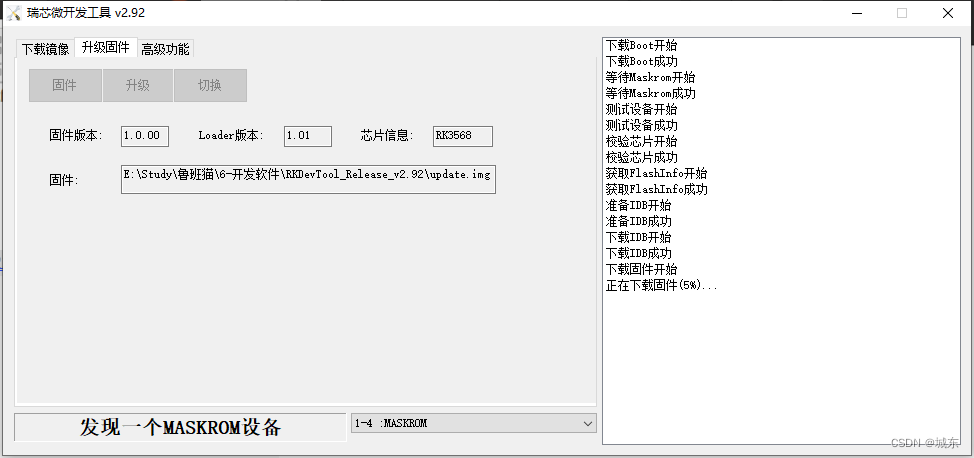
把这个文件拷贝到window中通过工具下载既可以下载运行:
修改根文件系统重编译
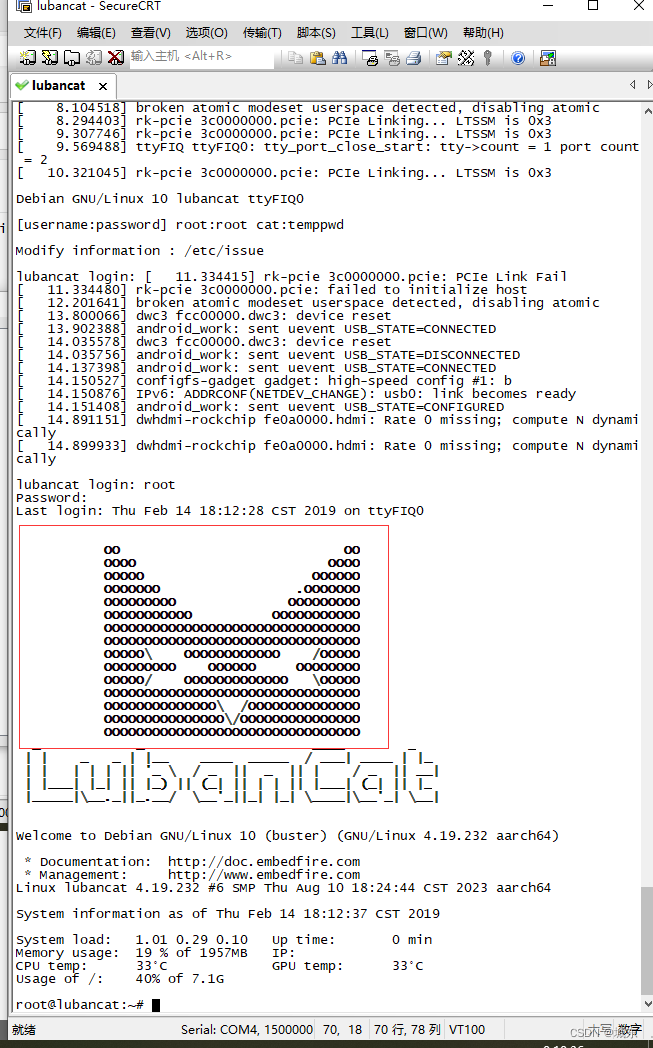
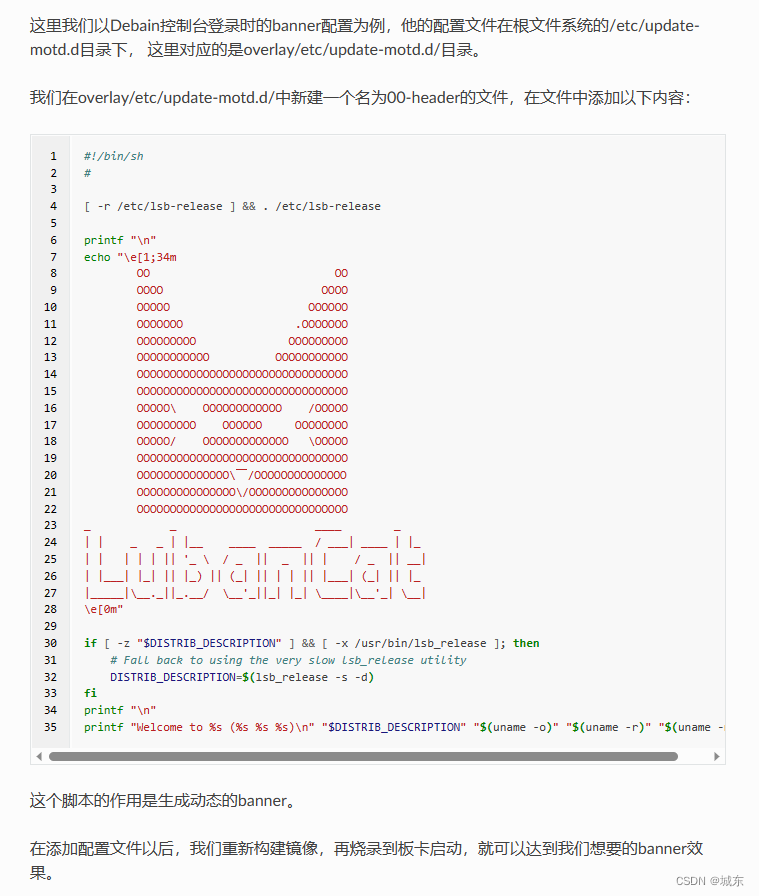
这里想去掉上图钟的图案,根据研究可知这个图案是在根文件系统里面,根据如下文章的提示修改overlay/etc/update-motd.d/00-header文件的内容:
https://doc.embedfire.com/linux/rk356x/build_and_deploy/zh/latest/building_image/debian_rootfs/debian_rootfs.html#id8
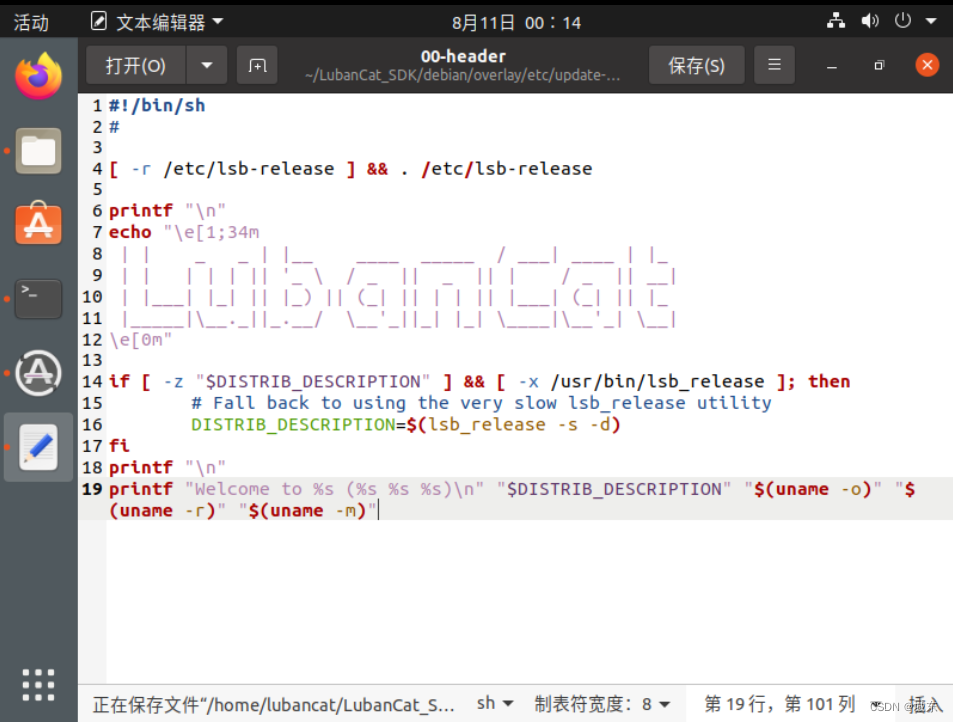
修改后文件的内容如下并保存:
按照如下提示到Debian目录下输入如下命令重新编译:
#构建完整的根文件系统镜像
./mk-buster-rootfs.sh
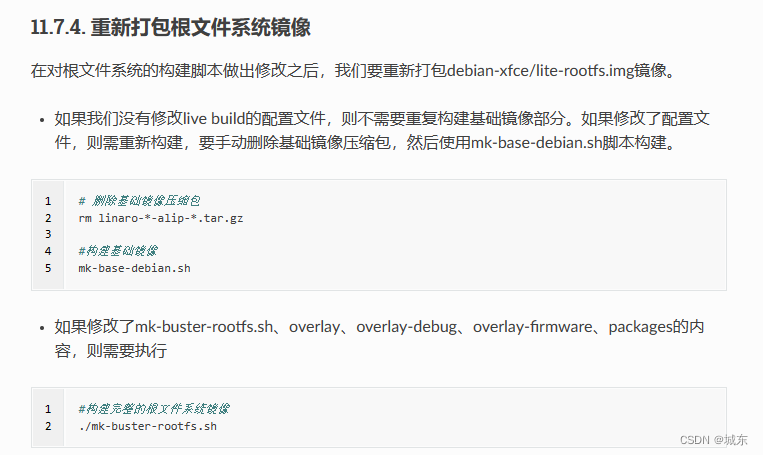
时间很久过去才能够编译成功:
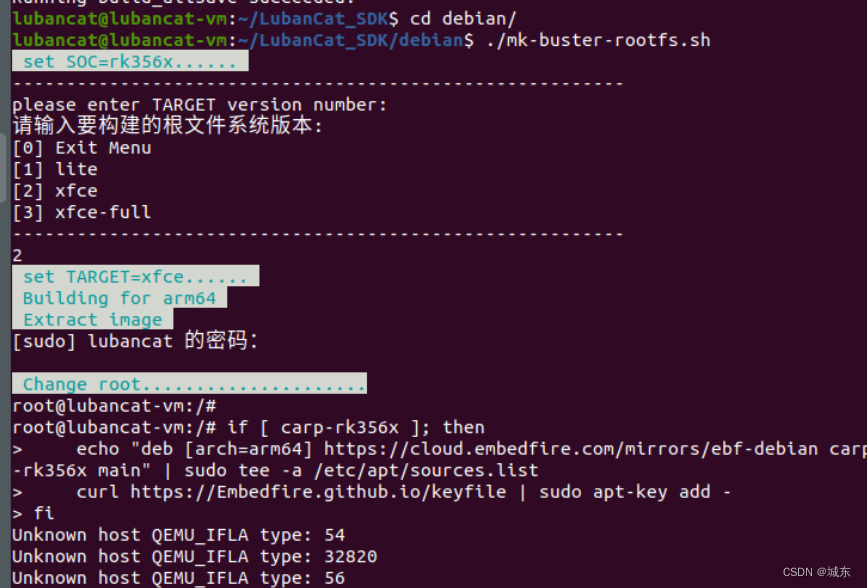
编译成功返回到上一层(SDK)按照上面的步骤输入"./build.sh"命令一键编译生成镜像:
root@lubancat-vm:/usr/lib/aarch64-linux-gnu/dri# rm -rf /home/lubancat
root@lubancat-vm:/usr/lib/aarch64-linux-gnu/dri# rm -rf /var/lib/apt/lists/*
root@lubancat-vm:/usr/lib/aarch64-linux-gnu/dri# rm -rf /var/cache/
root@lubancat-vm:/usr/lib/aarch64-linux-gnu/dri# rm -rf /packages
root@lubancat-vm:/usr/lib/aarch64-linux-gnu/dri#
root@lubancat-vm:/usr/lib/aarch64-linux-gnu/dri# exit
Making rootfs!
Executing post-build.sh...
Adding build-info to /etc/os-release...
Fixing up /etc/fstab...
Fixing up rootfs type: auto
Adding dirs and links...
记录了0+0 的读入
记录了0+0 的写出
0字节已复制,0.0309057 s,0.0 kB/s
mke2fs 1.45.5 (07-Jan-2020)
丢弃设备块: 完成
创建含有 707328 个块(每块 4k)和 177056 个 inode 的文件系统
文件系统 UUID:a1e9a681-744c-4613-97b7-70cc87a5b12e
超级块的备份存储于下列块:
	32768, 98304, 163840, 229376, 294912

正在分配组表: 完成
正在写入 inode表: 完成
创建日志(16384 个块): 完成
将文件复制到设备: 完成
写入超级块和文件系统账户统计信息: 已完成

Rootfs Image: linaro-xfce-rootfs.img
lubancat@lubancat-vm:~/LubanCat_SDK/debian$
lubancat@lubancat-vm:~/LubanCat_SDK/debian$
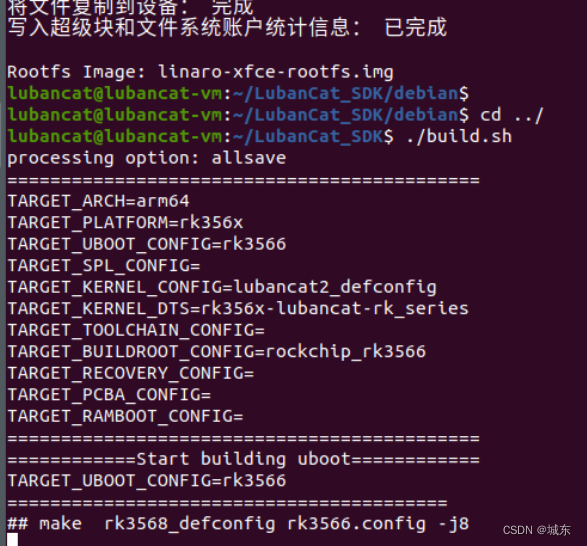
接下来又是漫长的等待后拷贝镜像到window后下载运行登录可以看到界面如下:
Running build_firmware succeeded.
Make update.img
start to make update.img...
Android Firmware Package Tool v2.0
------ PACKAGE ------
Add file: ./package-file
package-file,Add file: ./package-file done,offset=0x800,size=0xa0,userspace=0x1
Add file: ./Image/MiniLoaderAll.bin
bootloader,Add file: ./Image/MiniLoaderAll.bin done,offset=0x1000,size=0x729c0,userspace=0xe6
Add file: ./Image/parameter.txt
parameter,Add file: ./Image/parameter.txt done,offset=0x74000,size=0x168,userspace=0x1
Add file: ./Image/uboot.img
uboot,Add file: ./Image/uboot.img done,offset=0x74800,size=0x400000,userspace=0x800
Add file: ./Image/boot.img
boot,Add file: ./Image/boot.img done,offset=0x474800,size=0x8000000,userspace=0x10000
Add file: ./Image/rootfs.img
rootfs,Add file: ./Image/rootfs.img done,offset=0x8474800,size=0xacb00000,userspace=0x159600
Add CRC...
Make firmware OK!
------ OK ------
********rkImageMaker ver 2.0********
Generating new image, please wait...
Writing head info...
Writing boot file...
Writing firmware...
Generating MD5 data...
MD5 data generated successfully!
New image generated successfully!
Making ./Image/update.img OK.
Running build_updateimg succeeded.
Running build_allsave succeeded.
lubancat@lubancat-vm:~/LubanCat_SDK$
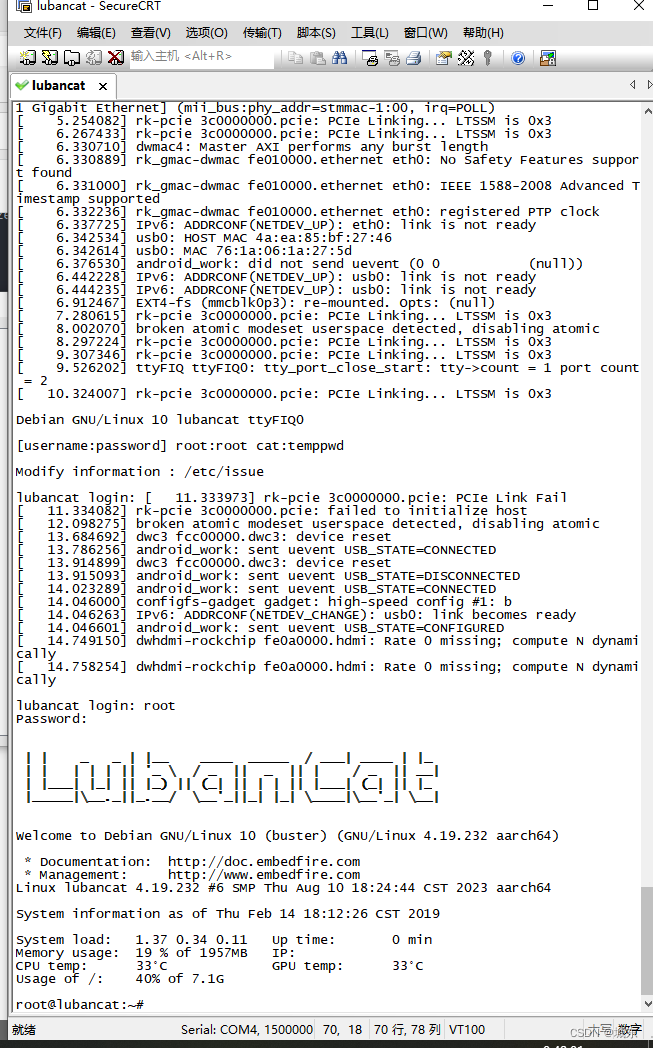
可以看到确实按照自己的想法运行了,说明整套修改和编译是正常的!
修改设备树改屏幕为MIPI
默认的代码使用的是HDMI的屏幕,但是我最终使用的是MIPI的屏幕,这里第一步就要修改屏幕,按照鲁班猫官方的提示修改如下主设备树文件,然后从新编译镜像(./build.sh命令,会同时会编译内核)烧录后屏幕确实变成了MIPI的屏幕了:
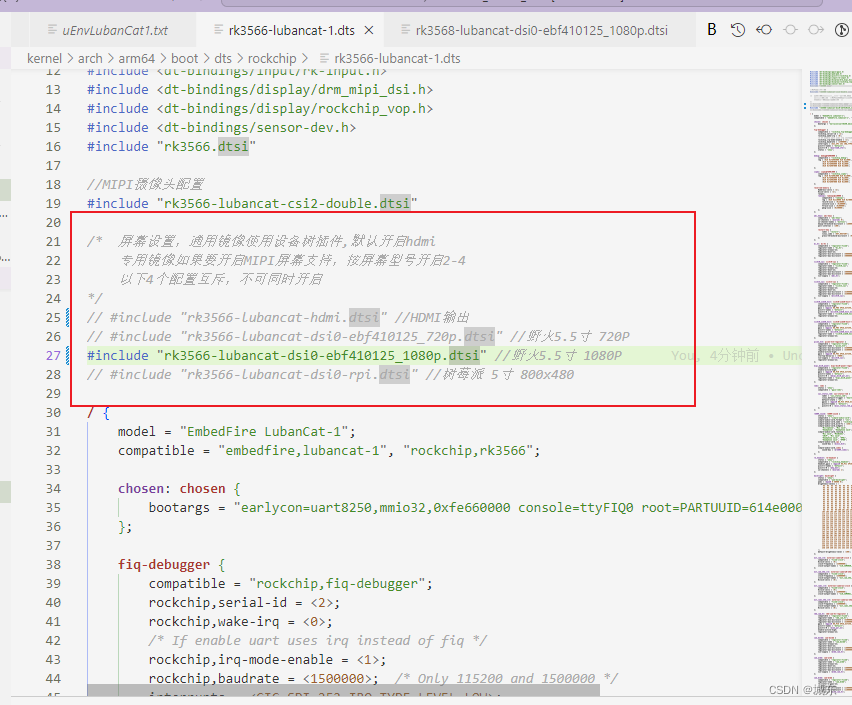
修改设备树使默认屏幕变成MIPI
其实也可以修改设备树插件让屏幕变成MIPI,修改方式是放开如下文件的MIPI的代码:
文件是:Kernel/arch/arm64/boot/dts/rockchip/uEnv/uEnvLubanCat1.txt
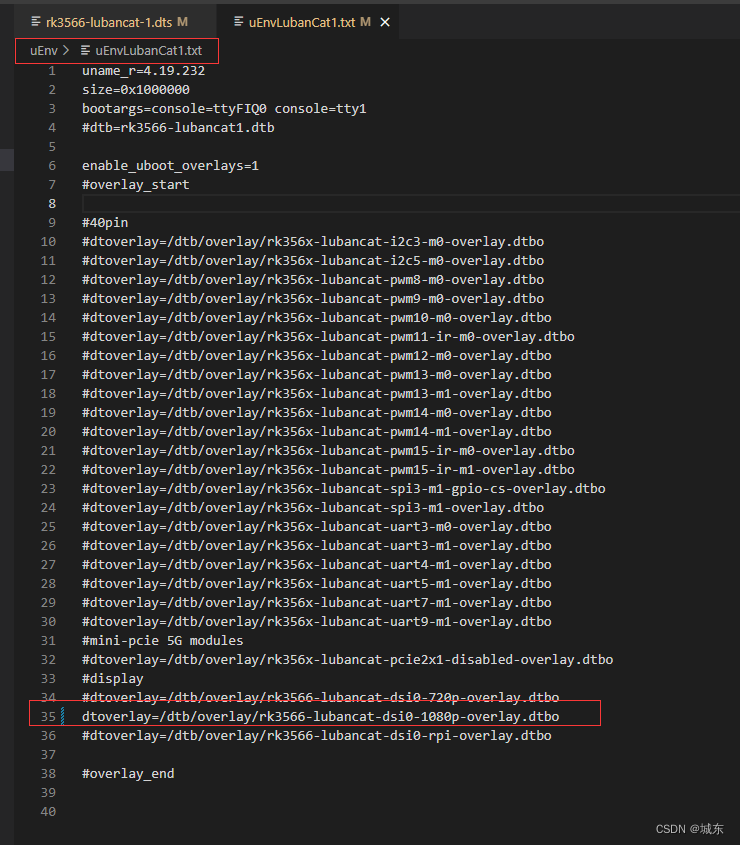
修改后从新编译下载后效果和上面的一样也切换成了MIPI
修改屏幕和TP方向
按照文章:https://chengdong.blog.csdn.net/article/details/132035193中的说法修改了"/boot/uEnv/uEnv.txt"和"/etc/X11/xorg.conf.d/20-modesetting.conf"文件来修改TP和屏幕的方向,但是上文的这种方式是直接改板卡上面的文件来实现的,并不是正常的正宗的方式,所以这里还是要通过修改代码中的文件然后编译才行,对于"20-modesetting.conf"文件这里修改的文件为"/home/lubancat/LubanCat_SDK/debian/overlay/etc/X11/xorg.conf.d/20-modesetting.conf",修改后内容如下:
Section "Device"
    Identifier  "Rockchip Graphics"
    Driver      "modesetting"

### Use Rockchip RGA 2D HW accel
#    Option      "AccelMethod"    "exa"

### Use GPU HW accel
    Option      "AccelMethod"    "glamor"

    Option      "DRI"            "2"

### Set to "always" to avoid tearing, could lead to up 50% performance loss
    Option      "FlipFB"         "none"

### Limit flip rate and drop frames for "FlipFB" to reduce performance lost
#    Option      "MaxFlipRate"    "25"

    Option      "NoEDID"         "true"
EndSection

Section	"Screen"
    Identifier	"Default Screen"
    Device	"Rockchip Graphics"
    Monitor	"Default Monitor"
EndSection

### Valid values for rotation are "normal", "left", "right"
Section	"Monitor"
    Identifier	"Default Monitor"
    Option	"Rotate" "left"
EndSection

Section "InputClass"
         Identifier "Goodix Capacitive TouchScreen"
         MatchProduct "Goodix Capacitive TouchScreen"
         Option "TransformationMatrix" " 0 -1 1 1 0 0 0 0 1
EndSection
主要修改了"Monitor"和"InputClass"这两个字段,文件"uEnv.txt"并没有具体的文件,这里修改设备树文件"/home/lubancat/LubanCat_SDK/kernel/arch/arm64/boot/dts/rockchip/uEnv/uEnvLubanCat1.txt",修改后的文件如下:
uname_r=4.19.232
size=0x1000000
bootargs=console=ttyFIQ0 console=tty1 fbcon=rotate:3
#dtb=rk3566-lubancat1.dtb

enable_uboot_overlays=1
#overlay_start

#40pin
#dtoverlay=/dtb/overlay/rk356x-lubancat-i2c3-m0-overlay.dtbo
#dtoverlay=/dtb/overlay/rk356x-lubancat-i2c5-m0-overlay.dtbo
#dtoverlay=/dtb/overlay/rk356x-lubancat-pwm8-m0-overlay.dtbo
#dtoverlay=/dtb/overlay/rk356x-lubancat-pwm9-m0-overlay.dtbo
#dtoverlay=/dtb/overlay/rk356x-lubancat-pwm10-m0-overlay.dtbo
#dtoverlay=/dtb/overlay/rk356x-lubancat-pwm11-ir-m0-overlay.dtbo
#dtoverlay=/dtb/overlay/rk356x-lubancat-pwm12-m0-overlay.dtbo
#dtoverlay=/dtb/overlay/rk356x-lubancat-pwm13-m0-overlay.dtbo
#dtoverlay=/dtb/overlay/rk356x-lubancat-pwm13-m1-overlay.dtbo
#dtoverlay=/dtb/overlay/rk356x-lubancat-pwm14-m0-overlay.dtbo
#dtoverlay=/dtb/overlay/rk356x-lubancat-pwm14-m1-overlay.dtbo
#dtoverlay=/dtb/overlay/rk356x-lubancat-pwm15-ir-m0-overlay.dtbo
#dtoverlay=/dtb/overlay/rk356x-lubancat-pwm15-ir-m1-overlay.dtbo
#dtoverlay=/dtb/overlay/rk356x-lubancat-spi3-m1-gpio-cs-overlay.dtbo
#dtoverlay=/dtb/overlay/rk356x-lubancat-spi3-m1-overlay.dtbo
#dtoverlay=/dtb/overlay/rk356x-lubancat-uart3-m0-overlay.dtbo
#dtoverlay=/dtb/overlay/rk356x-lubancat-uart3-m1-overlay.dtbo
#dtoverlay=/dtb/overlay/rk356x-lubancat-uart4-m1-overlay.dtbo
#dtoverlay=/dtb/overlay/rk356x-lubancat-uart5-m1-overlay.dtbo
#dtoverlay=/dtb/overlay/rk356x-lubancat-uart7-m1-overlay.dtbo
#dtoverlay=/dtb/overlay/rk356x-lubancat-uart9-m1-overlay.dtbo
#mini-pcie 5G modules
#dtoverlay=/dtb/overlay/rk356x-lubancat-pcie2x1-disabled-overlay.dtbo
#display
#dtoverlay=/dtb/overlay/rk3566-lubancat-dsi0-720p-overlay.dtbo
#dtoverlay=/dtb/overlay/rk3566-lubancat-dsi0-1080p-overlay.dtbo
#dtoverlay=/dtb/overlay/rk3566-lubancat-dsi0-rpi-overlay.dtbo

#overlay_end
这里就是增加了"fbcon=rotate:3"内容,然后使用如下命令编译内核和镜像:
sudo -i  //进入root账号
cd ./debian/   //进入内核目录
./mk-buster-rootfs.sh  //重新编译内核

cd ..
cd /home/lubancat/LubanCat_SDK
./build.sh  //编译镜像
烧录运行后屏幕状态如下:
VID_20230814_202326
