代码其实也很简单,我只不过加入了按键控制暂停、蜂鸣器、led和如何控制追踪的效果(调PID)。B站的那些大神早早地完成了要求,我犯了一个不好地错误,企图三连让他们分享思路,这是不对的,电赛本身的意义是让我们提高自己对问题的解决能力、时间管理等,是一项紧急情况下的应对能力,考验我们的综合能力、团队合作能力。
import sensor, image, time,pyb
from pyb import Pin
from pid import PID
from pyb import Servo			#调用库
from pyb import LED

pan_servo=Servo(1)  #p7
tilt_servo=Servo(2)	#p8

#红色色素块
#red_threshold  = (79, 99, -1, 28, 3, 12) #  (79, 99, -1, 28, 3, 12) ((78, 100, -4, 20, -13, 4)) (72, 85, 18, 100, -3, 16)
red_threshold= [(0, 98, 37, 127, -32, 89)]

#pan_pid = PID(p=0.05,i=0.03,d=0.001 imax=90) #脱机运行或者禁用图像传输,使用这个PID
#tilt_pid = PID(p=0.05,i=0.05, imax=90) #脱机运行或者禁用图像传输,使用这个PID

pan_pid = PID(p=0.06,d=0.001,i=0.02, imax=100)#在线调试使用这个PID
tilt_pid = PID(p=0.11,d=0.001,i=0.04, imax=100)#在线调试使用这个PID

#由于openmv脱机运行帧率会提高,运行性能会有所改变,所以需要设置“在线联机调试”和“脱机运行”的两个参数


sensor.reset() # Initialize the camera sensor.
sensor.set_pixformat(sensor.RGB565) # use RGB565.
sensor.set_framesize(sensor.QVGA) # use QQVGA for speed.
sensor.skip_frames(10) # Let new settings take affect.
sensor.set_auto_gain(False) # 颜色跟踪必须关闭自动增益
sensor.set_auto_whitebal(False) # turn this off.
EXPOSURE_TIME_SCALE = 2.0
#画面翻转
sensor.set_vflip(True)
#sensor.set_hmirror (True)
clock = time.clock() # Tracks FPS.	#基本参数设置

def find_max(blobs):
    max_size=0
    for blob in blobs:
        if blob[2]*blob[3] > max_size:
            max_blob=blob
            max_size = blob[2]*blob[3]
    return max_blob											#找到视野中的最大色素块

#初始角度
#pan_servo.angle(35)#openmv上P7为控制云台上舵机的输出引脚(摄像头上下移动)
#tilt_servo.angle(5)         #物理意义的90度

pan_servo.angle(0) #openmv上P7为控制云台上舵机的输出引脚(摄像头上下移动)
tilt_servo.angle(5) #物理意义的90度

#绿色激光与镜头的x,y距离误差补偿,后来发现用不上,调一下激光笔就好了
#shang_error=160-148
#xia_error=120-100

global  pan_output, tilt_output,flag

#P1蜂鸣器
buzzer_pin = pyb.Pin("P1", pyb.Pin.OUT)

#P2:led
led = pyb.LED(2)

#P3:按键
pin1 = Pin('P3', Pin.IN, Pin.PULL_UP)

flag = 1

while(True):
    clock.tick() # Track elapsed milliseconds between snapshots().
    img = sensor.snapshot() # Take a picture and return the image.
    img.draw_cross(int(img.width()/2),int(img.height()/2),color=(0,0,255),size =5, thickness = 1)
    #img.draw_cross(148,100,color=(0,255,0),size =4, thickness = 1)
    buzzer_pin.high()
    key0 = pin1.value()      ##按键控制

    blobs = img.find_blobs(red_threshold)
    if blobs:
        max_blob = find_max(blobs)

        #pan_error = img.width()/2-max_blob.cx()				#	x横轴方向上的修正参数
        #tilt_error = img.height()/2-max_blob.cy()			   	#	y纵轴方向上的修正参数
        #print("img.height()/2",img.height()/2)

        pan_error =  -(img.width()/2-max_blob.cx())    #	x横轴方向上的修正参数
        tilt_error = -(img.height()/2-max_blob.cy())   #	y纵轴方向上的修正参数

        #if(pan_error > -100)

        #pan_error =  -(74-max_blob.cx())    #x横轴方向上的修正参数
        #tilt_error = -(50-max_blob.cy())   #y纵轴方向上的修正参数

        print("x_error: ", pan_error) #在参数调试窗口打印色块中心坐标与视野中心坐标的偏离值,便于调试与修正
        print("y_error:",  tilt_error)

        img.draw_rectangle(max_blob.rect()) # rect	#在色块外围四周处画框
        img.draw_cross(max_blob.cx(), max_blob.cy()) # cx, cy     #色块中心坐标处画十字

        pan_output=pan_pid.get_pid(pan_error,1)/2
        tilt_output=tilt_pid.get_pid(tilt_error,1)/2

        #print("pan_output",pan_output)		  	     #在参数调试窗口打印坐标值,便于调试与修正
        #print("tilt_output",tilt_output)

        if key0 == 1 :
               #pid控制
               pan_servo.angle(pan_servo.angle() + pan_output)
               tilt_servo.angle(tilt_servo.angle() - tilt_output)

               if -8<pan_error <8 and -9< tilt_error < 9:
                    buzzer_pin.low()   # 发声
                    print("succes")
                    #pan_servo.angle(pan_servo.angle())
                    #tilt_servo.angle(tilt_servo.angle()
                    flag=0

                    time.sleep(0.5)
                    if key0 == 0 and flag ==0:
                                time.sleep(0.5)
                                buzzer_pin.high()  # 发出声音

                                print("按键按下")
                                       #pan_output =0
                                       #tilt_output =0

                                pan_servo.angle(pan_servo.angle())
                                tilt_servo.angle(tilt_servo.angle())

                                       #flag==0

    #没有色块,复位
   # else:
       #pan_servo.angle(10)
       #tilt_servo.angle(6)
此次电赛,我主要负责的是色块追踪部分,在官方给出的代码基础上加以修改以符合电赛的要求,经过测试其精度达不到要求,即误差大于3cm。一方面是算法的原因,没有深究其原理,做到如何精准识别;另一方面是硬件本身的问题,一个好的硬件往往可以帮助我们节约大量的工作和时间。
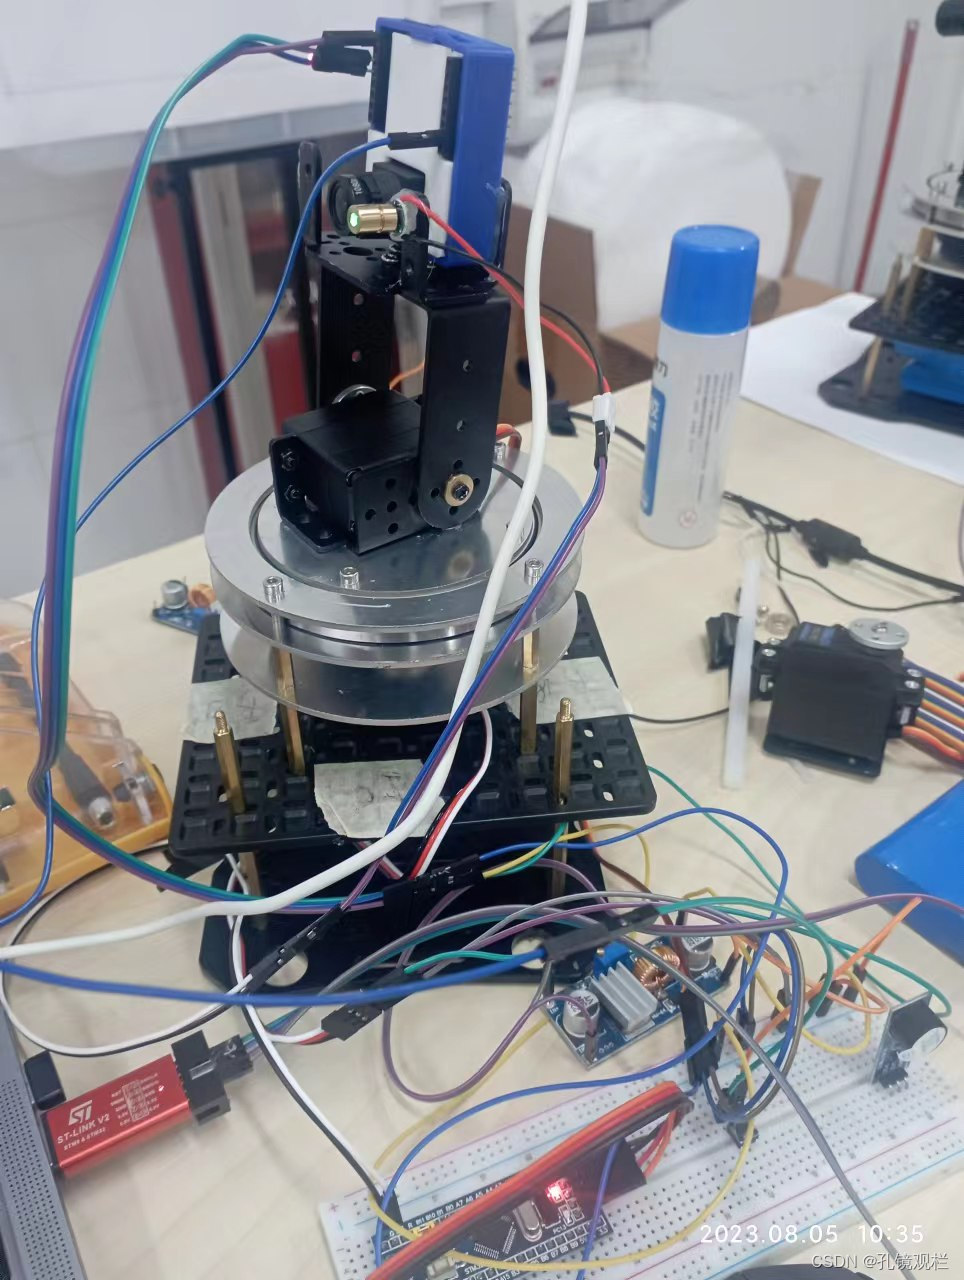 比赛时现场作品制作图
