零、前言
在 QtWebApp开发https服务器,完成客户端与服务器基于ssl的双向认证,纯代码操作 一文中已经用纯代码的形式完成了客户端和服务端的 https 协议交互。
不过,只是开放了https服务,更多情况下,http服务和https服务都是同时开启的,,
客户端根据需求去决定究竟使用哪种协议进行连接交互操作。
http服务的端口默认是80端口,https服务的端口默认是443端口。
开发环境:
客户端:win10
服务端:win10 + Qt6.4
一、思想
实际上非常简单,我们只需开启两个监听器就可以了,,分别用来处理http服务和https服务。
只需要在配置文件中分别指定http服务和https服务的配置参数,然后创建基于http服务器和基于https服务器,分别用来监听来自客户端的http请求和https请求。
注意:客户端http请求和https请求url中只是 协议和端口不同,其他都是一样的,
例如:
http://192.168.64.176:80/hello
https://192.168.64.176:443/hello
http的端口默认是80,https的端口默认是443,所以可以不写。
但是,如果http的端口设置为8888,那么请求时必须在请求url中显式指定8888端口;https同理。
用户不论以http请求,还是以https请求,当请求路径为 /hello时,在本例中它们都会跳转到 /hello对应的请求处理函数中执行相同的操作,只不过以http请求时,数据是以明文形式传输的;以https请求时,数据是以密文形式传输的。
二、代码
仍然以QtWebApp的demo1作为基点。
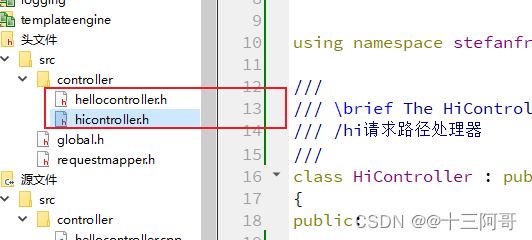
为简化,此处设置两个请求路径,分别是/hello和/hi路径,其他自带的请求路径及其处理函数全部屏蔽。
1、修改配置文件
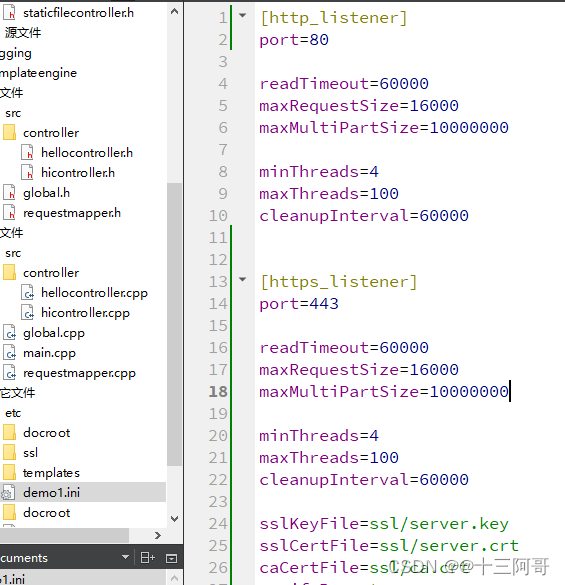
[http_listener]
port=80

readTimeout=60000
maxRequestSize=16000
maxMultiPartSize=10000000

minThreads=4
maxThreads=100
cleanupInterval=60000


[https_listener]
port=443

readTimeout=60000
maxRequestSize=16000
maxMultiPartSize=10000000

minThreads=4
maxThreads=100
cleanupInterval=60000

...
2、请求路径处理函数
void HiController::service(HttpRequest &request, HttpResponse &response)
{
    response.setHeader("Content-Type", "text/html; charset=UTF-8");

    response.write("<html><body>");
    response.write("<h1 style=\"color:red;\">");
    response.write("HI~HI~HI~HI~HI~HI~HI~HI~HI~HI~HI~HI~HI~HI~HI~HI~HI~HI~HI~HI");
    response.write("</h1>");
    response.write("</body></html>",true);
}
void HelloController::service(HttpRequest &request, HttpResponse &response)
{
        response.setHeader("Content-Type", "text/html; charset=UTF-8");

        response.write("<html><body>");
        response.write("<h1 style=\"color:green;\">");
        response.write("HELLO~HELLO~HELLO~HELLO~HELLO~HELLO~HELLO~HELLO~HELLO~HELLO");
        response.write("</h1>");
        response.write("</body></html>",true);
}
3、添加路径映射
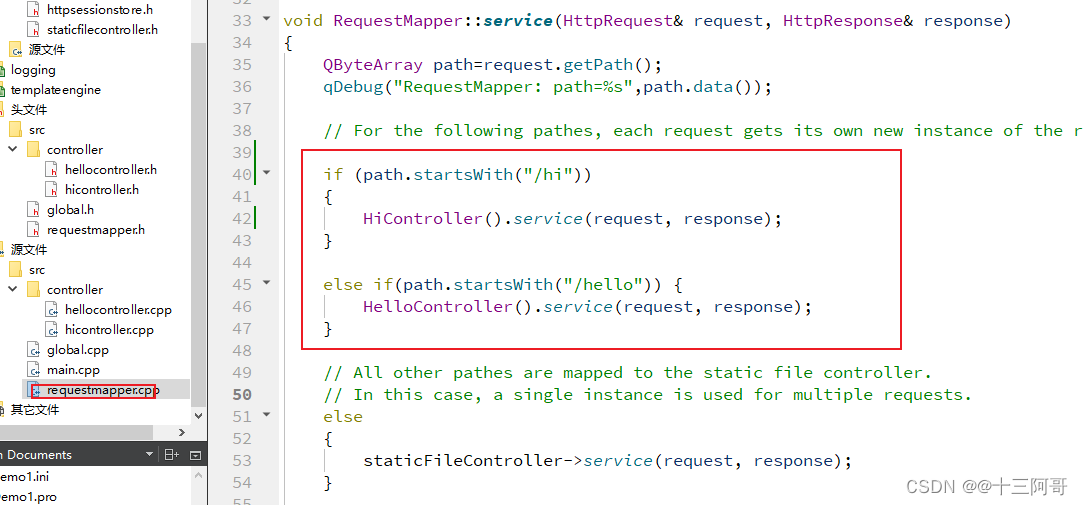
	// ...
    if (path.startsWith("/hi"))
    {
        HiController().service(request, response);
    }

    else if(path.startsWith("/hello")) {
        HelloController().service(request, response);
    }
	// ...
4、修改main函数
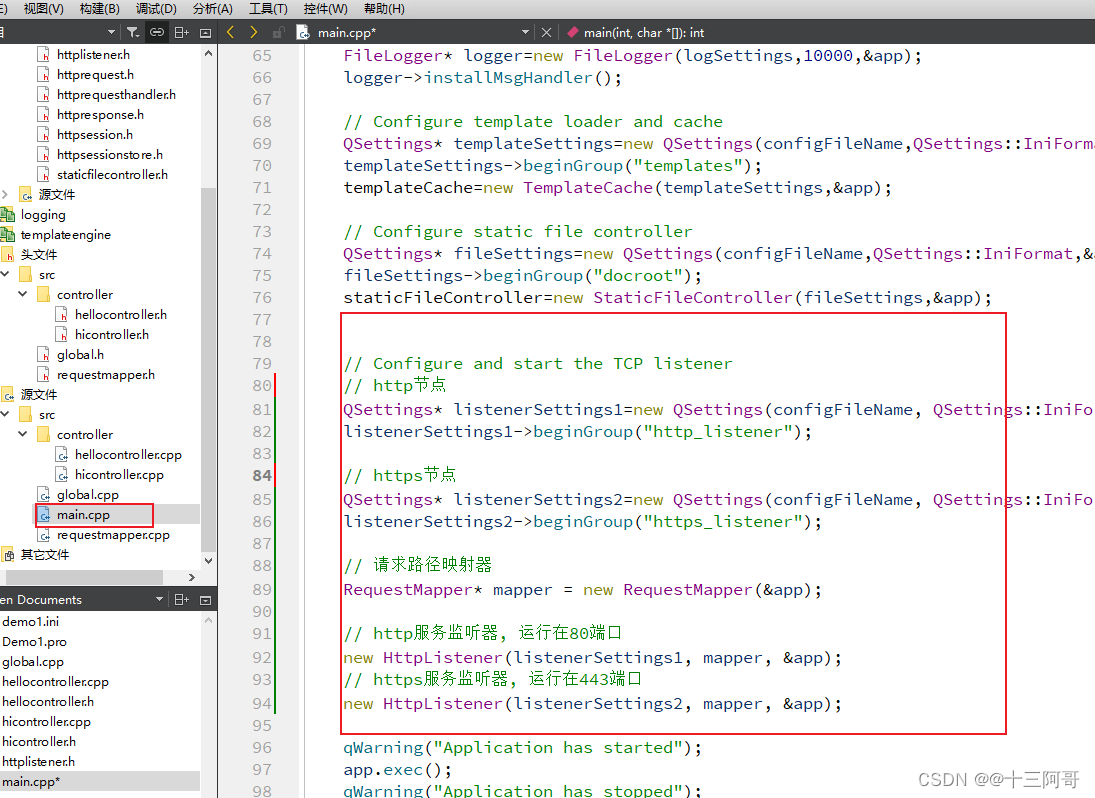
	// ...

    // Configure and start the TCP listener
    // http节点
    QSettings* listenerSettings1=new QSettings(configFileName, QSettings::IniFormat,&app);
    listenerSettings1->beginGroup("http_listener");

    // https节点
    QSettings* listenerSettings2=new QSettings(configFileName, QSettings::IniFormat,&app);
    listenerSettings2->beginGroup("https_listener");

    // 请求路径映射器: 拦截请求路径, 根据路径转入对应的后台处理函数
    // http服务和https服务共用同一个映射器
    RequestMapper* mapper = new RequestMapper(&app);

    // http服务监听器, 运行在80端口
    new HttpListener(listenerSettings1, mapper, &app);

    // https服务监听器, 运行在443端口
    new HttpListener(listenerSettings2, mapper, &app);

	// ...
QtWebApp源码通俗易懂,在实际操作时有问题直接阅读源码即可知道如何操作。。
三、测试效果
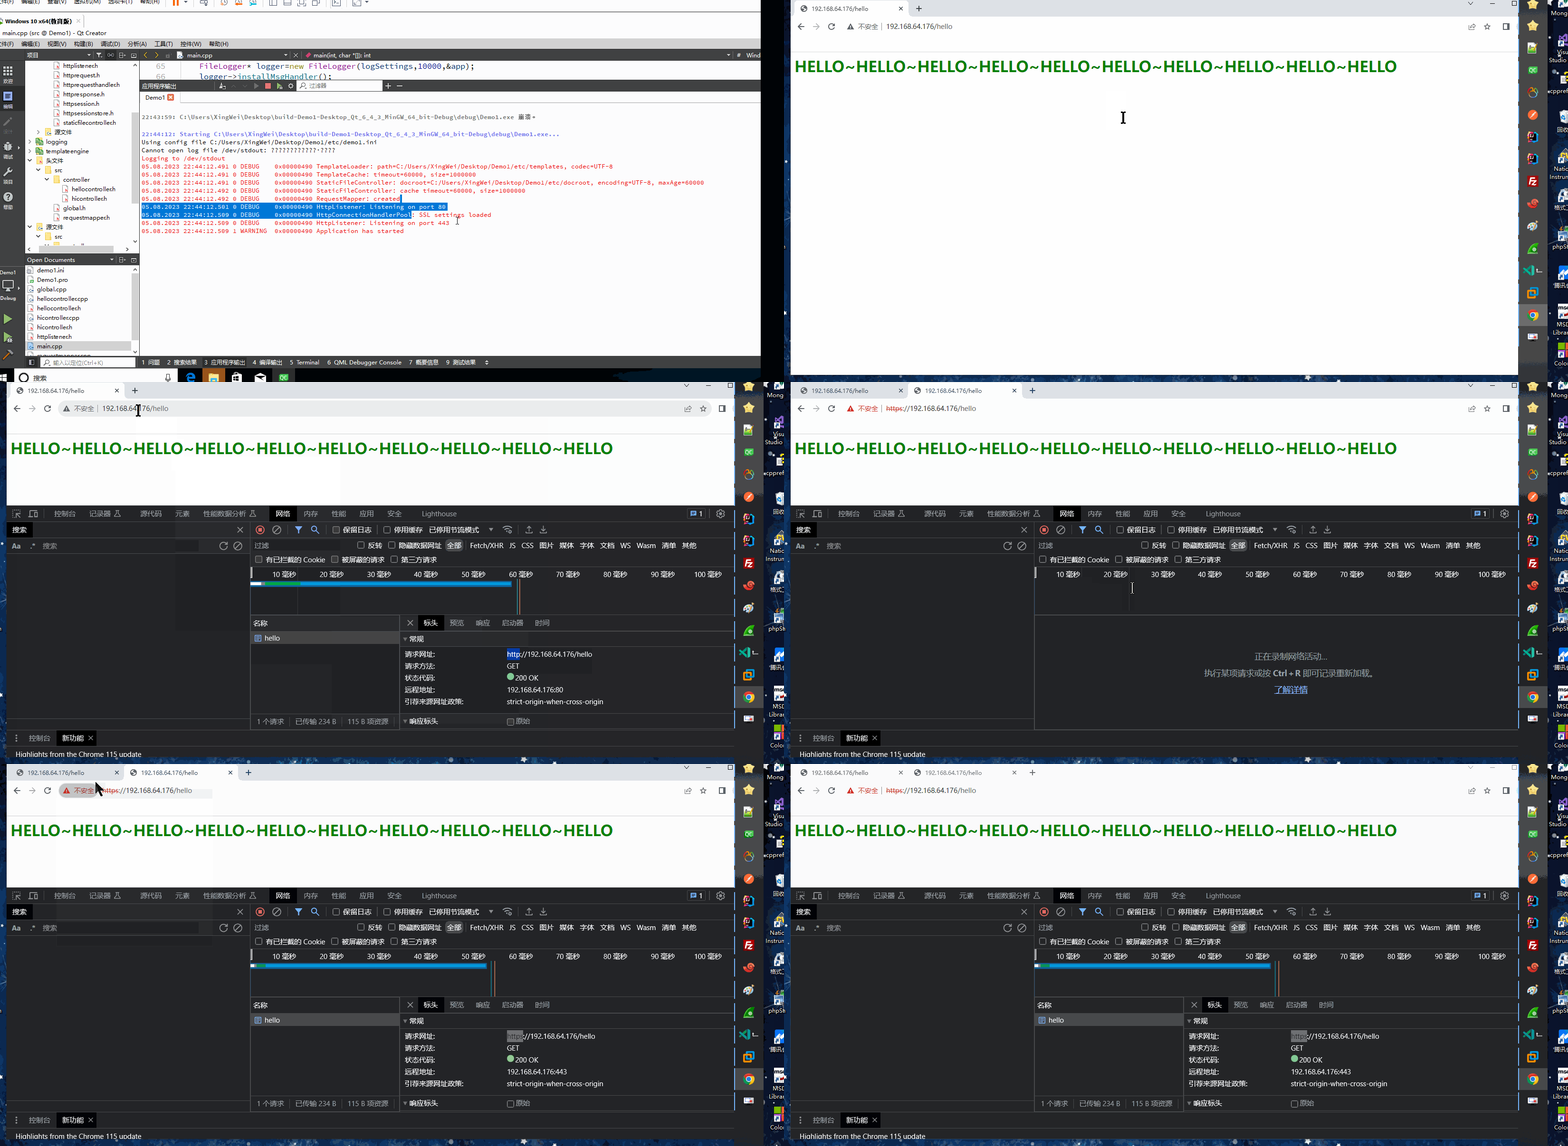
首先启动服务器,服务器分别监听80端口的http服务 和 443的端口https服务。
客户端输入 http://192.168.64.176/hello 是以http协议发出请求;
客户端输入 https://192.168.64.176/hello 是以https协议发出的请求;
好,下面通过抓包看一下,,
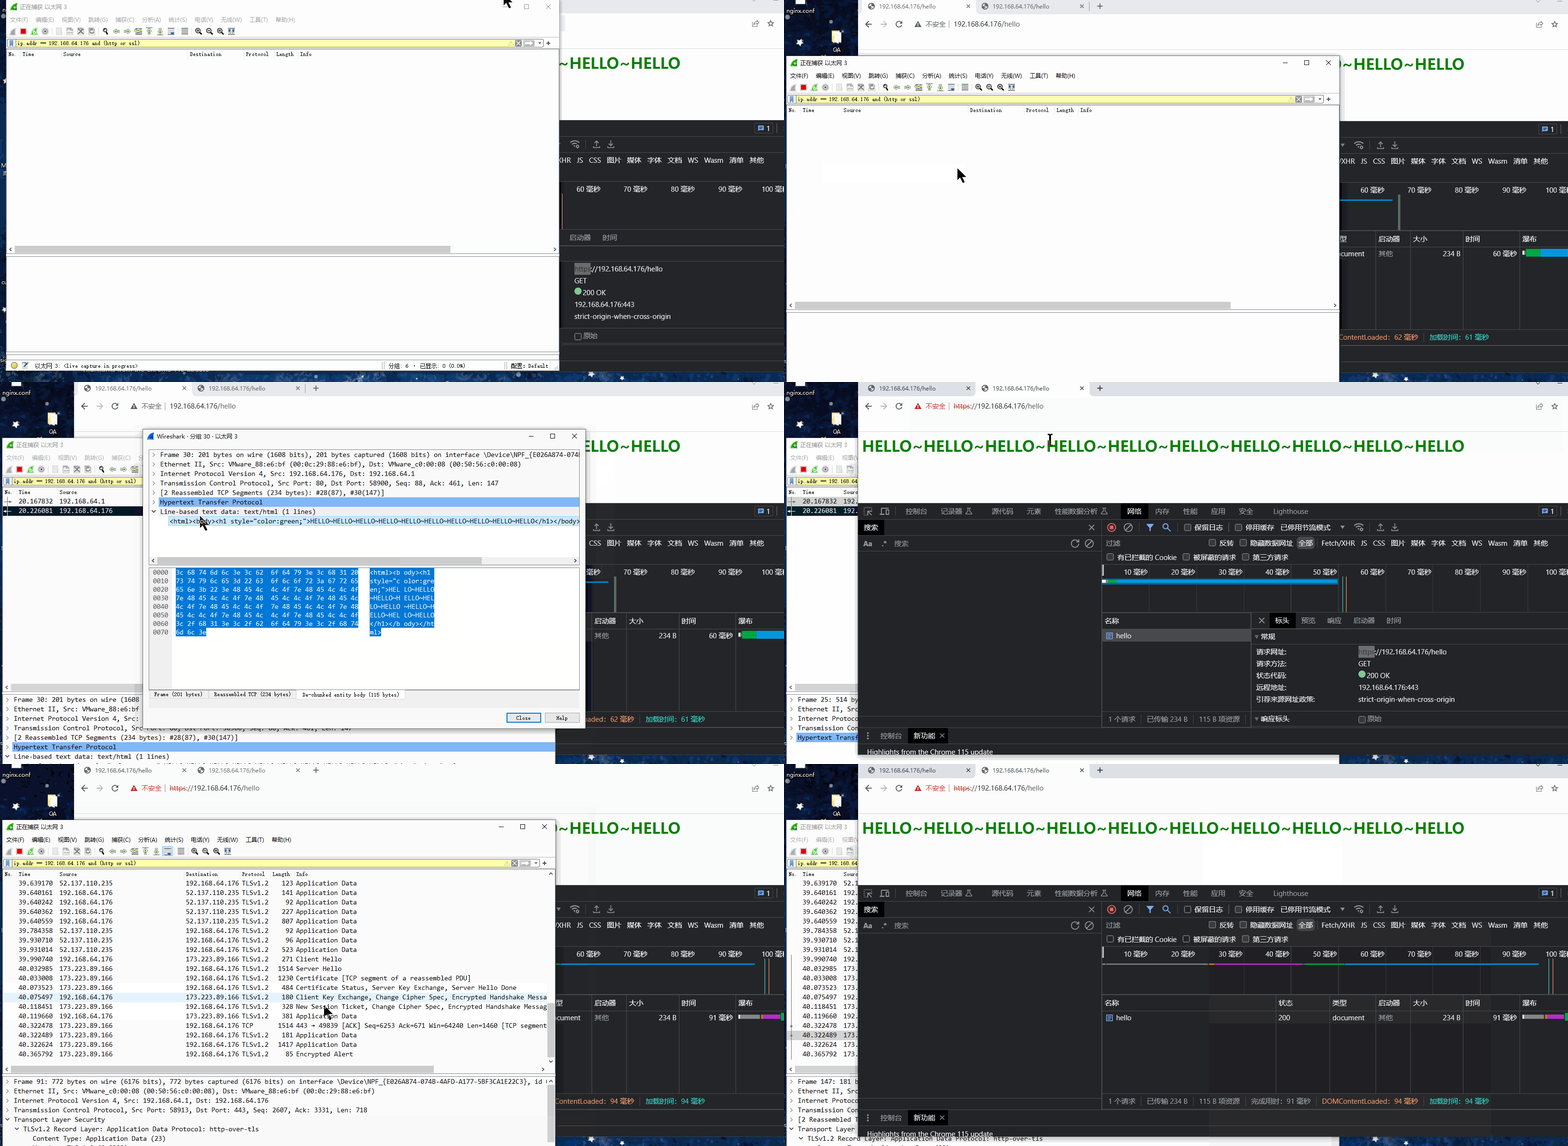
非常的明显,http协议是以明文传输 ,,我们直接通过wireshark就能拿到其传输的内容,其毫无隐私性可言。
而https协议是以密文传输的,,同样可以通过抓包拿到,不过你拿到的也是密文,,,拿到了又如何,,反正你解不开,,这就是https加密传输。整个加解密过程由ssl自动完成,用户无需手手动干预。
如果不加密传输,可以在内核层去拦截网络包,修改其内容后注入到原始网络路径中,,,这就造成极大的网络数据传输风险。。。
你们所使用的外挂其中的一个思想就是修改了网络数据包后再注入到原始路径中从而达到自己的目的,此处不再赘述。。。


