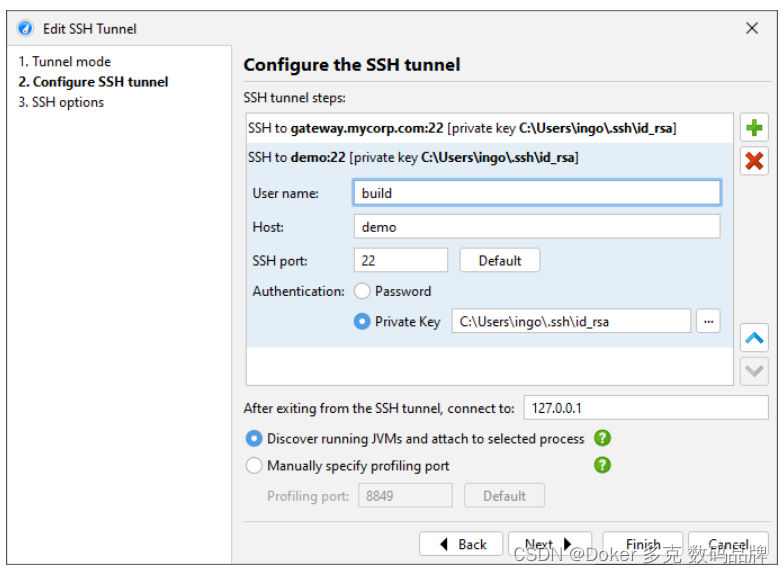
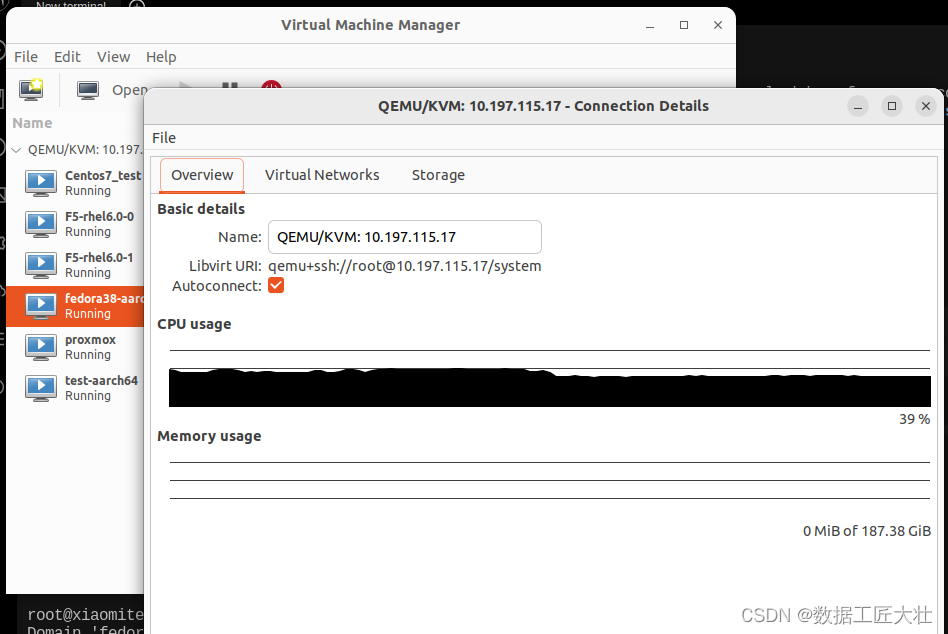
virt-manager 图形化创建虚拟机
virt-manager -c 'qemu+ssh://root@10.197.115.17:5555/system?keyfile=id_rsa' --no-fork
virt-manager -c 'qemu+ssh://root@10.197.115.17/system?keyfile=/home/ssh-key/test-key' --no-fork
virt-install 命令行创建虚拟机(安装操作系统可选择vnc连接5910端口进行安装)
virt-install --name=kvm --ram=2048 --vcpus=2 --disk path=/root/kvm/centos01.img,size=20,bus=virtio --accelerate --cdrom /root/iso/CentOS-7-x86_64-Minimal-1810.iso --vnc --vncport=5910 --vnclisten=0.0.0.0 --network bridge=br0,model=virtio --noautoconsole
--name
--ram
--vcpus
--cdrom
--disk
--size
--bus
--cache
--network bridge
--model
-n --name= 客户端虚拟机名称
-r --ram= 客户端虚拟机分配的内存
-u --uuid= 客户端UUID 默认不写时,系统会自动生成
--vcpus= 客户端的vcpu个数
-v --hvm 全虚拟化
-p --paravirt 半虚拟化
-l --location=localdir 安装源,有本地、nfs、http、ftp几种,多用于ks网络安装
--vnc 使用vnc ,另有--vnclient=监听的IP --vncport =VNC监听的端口
-c --cdrom= 光驱 安装途径
--disk= 使用不同选项作为磁盘使用安装介质
-w NETWORK, --network=NETWORK 连接客户机到主机网络
-s --file-size= 使用磁盘映像的大小 单位为GB
-f --file= 作为磁盘映像使用的文件
--cpuset=设置哪个物理CPU能够被虚拟机使用
--os-type=OS_TYPE 针对一类操作系统优化虚拟机配置(例如:‘linux’,‘windows’)
--os-variant=OS_VARIANT 针对特定操作系统变体(例如’rhel6’, ’winxp’,'win2k3')进一步优化虚拟机配置
--host-device=HOSTDEV 附加一个物理主机设备到客户机。HOSTDEV是随着libvirt使用的一个节点设备名(具体设备如’virsh nodedev-list’的显示的结果)
--accelerate KVM或KQEMU内核加速,这个选项是推荐最好加上。如果KVM和KQEMU都支持,KVM加速器优先使用。
-x EXTRA, --extra-args=EXTRA 当执行从"--location"选项指定位置的客户机安装时,附加内核命令行参数到安装程序
--nographics "virt-install" 将默认使用--vnc选项,使用nographics指定没有控制台被分配给客户机
virsh的libvirt的命令行管理工具
virsh define test.xml
virsh create test.xml
virsh edit test
virsh destroy test
virsh undefined test
virsh list --all
virsh start domain
virsh autostart domain
virsh vncdisplay domain
virsh console domain
virsh net-list
virsh net-start default
qemu相关命令
qemu-img create -f qcow2 test.qcow2 20G
qemu-img convert -c -O qcow2 image result.img
qemu-img resize test.qcow2 +10G
虚拟机xml文件
<domain type='kvm'>
<name>test</name>
<memory unit='GiB'>8</memory>
<currentMemory unit='GiB'>4</currentMemory>
<vcpu>4</vcpu>
<os>
<type arch='x86_64' machine='pc'>hvm</type>
<boot dev='hd'/>
<boot dev='cdrom'/>
</os>
<features>
<acpi/>
<apic/>
<pae/>
</features>
<clock offset='utc'/>
<on_poweroff>destroy</on_poweroff>
<on_reboot>restart</on_reboot>
<on_crash>destroy</on_crash>
<devices>
<emulator>/usr/libexec/qemu-kvm</emulator>
<disk type='file' device='disk'>
<driver name='qemu' type='qcow2'/>
<source file='/home/zhzej/test.qcow2'/>
<target dev='vda' bus='virtio'/>
</disk>
<disk type='file' device='cdrom'>
<source file='/home/iso/ubuntu-14.04.3-server-amd64.iso'/>
<target dev='hdb' bus='ide'/>
</disk>
<interface type='bridge'>
<source bridge='br0'/>
<mac address='52:54:02:2B:73:F1'/>
<model type='virtio'/>
</interface>
<input type='mouse' bus='ps2'/>
<graphics type='vnc' port='-1' autoport='yes' listen='0.0.0.0' keymap='en-us'/>
</devices>
</domain>
可以使用xml模版创建虚机,事先创建好磁盘文件,然后修改xml的磁盘文件路径和mac地址,重新创建并安装多台虚机
遇到的问题
- could not open disk ,imagePermission denied
virt-install --virt-type kvm --name centos --ram 1024 --disk /tmp/centos.qcow2,format=qcow2 --network network=default --graphics vnc,listen=0.0.0.0 --noautoconsole --os-type=linux --os-variant=centos7.0 --location=/root/CentOS-7-x86_64-DVD-1708.iso
root@test:~
530:user = "root"
534:group = "root"
systemctl restart libvirtd.service
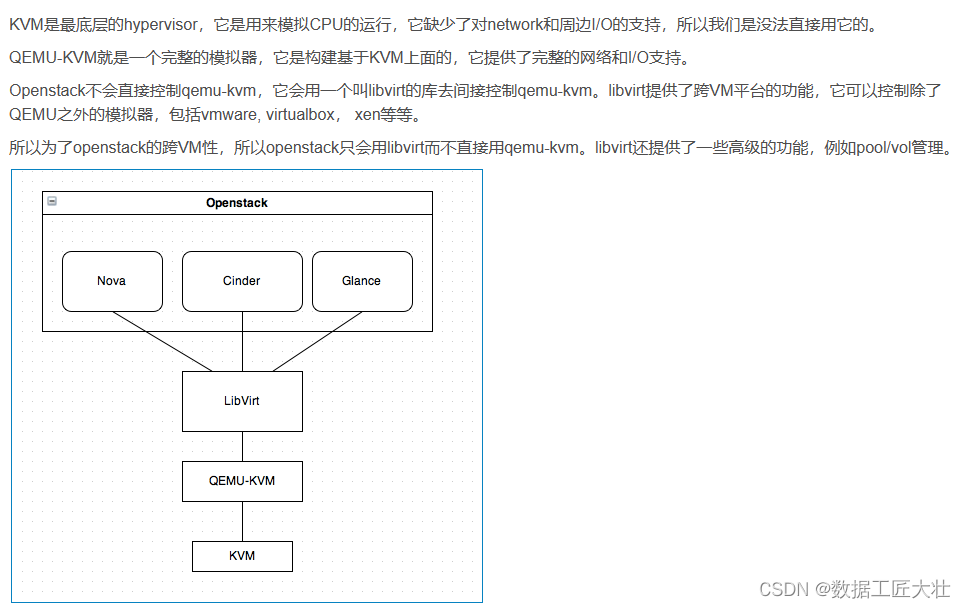
openstack、libvirt、kvm+qemu、kvm之间的关系
