1. spring security
Spring Security 是一个提供身份验证、授权和针对常见攻击保护的框架。 凭借对保护命令式和反应式应用程序的一流支持,它成为基于Spring的标准安全框架。
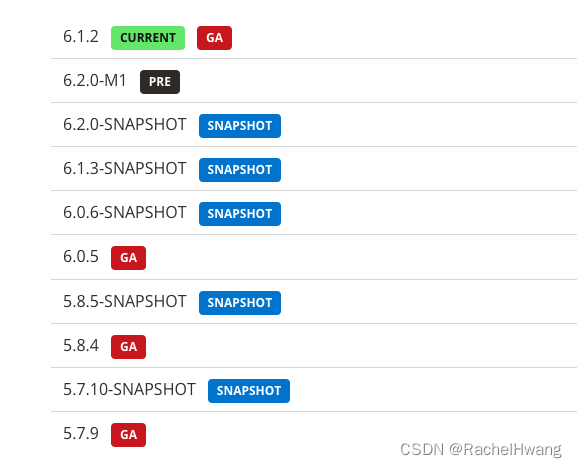
Spring Security 在最近几个版本中配置的写法都有一些变化,很多常见的方法都废弃了,并且将在未来的 Spring Security7 中移除,Spring Security5.7 开始(对应 Spring Boot2.7 开始)将重新梳理一下主要功能变化。以下是spring security的版本列表:
2. spring security 新增功能
2.1 WebSecurityConfigurerAdapter
- gh-11923 - Remove WebSecurityConfigurerAdapter. Instead, create a SecurityFilterChain bean.
这一条更新改变了我们配置SpringSecurity的方式,WebSecurityConfigurerAdapter 过期了,在目前最新的 Spring Security6.1 中,这个类已经完全被移除了,作为替代,我们需要创建类型为SecurityFilterChain的bean。

以前WebSecurityConfigurerAdapter+HttpSecurity 的方式为:
@Configuration
public class SecurityConfiguration extends WebSecurityConfigurerAdapter {

    @Override
    protected void configure(HttpSecurity http) throws Exception {
        http
            .authorizeHttpRequests((authz) -> authz
                .anyRequest().authenticated()
            )
            .httpBasic(withDefaults());
    }
}
SecurityFilterChain+HttpSecurity 新的写法为:
@Configuration
public class SecurityConfiguration {

    @Bean
    public SecurityFilterChain filterChain(HttpSecurity http) throws Exception {
        http
            .authorizeHttpRequests((authz) -> authz
                .anyRequest().authenticated()
            )
            .httpBasic(withDefaults());
        return http.build();
    }

}
以前WebSecurityConfigurerAdapter+WebSecurity 的方式为:
@Configuration
public class SecurityConfiguration extends WebSecurityConfigurerAdapter {
    @Override
    public void configure(WebSecurity web) {
        web.ignoring().antMatchers("/api1", "/api2");
    }
}
SecurityFilterChain+WebSecurity 新的写法为:
@Configuration
public class SecurityConfiguration {
    @Bean
    public WebSecurityCustomizer webSecurityCustomizer() {
        return (web) -> web.ignoring().antMatchers("/api1", "/api2");
    }
}
以前WebSecurityConfigurerAdapter配置AuthenticationManager是通过重写父类的方法来获取这个 Bean:
@Configuration
public class SecurityConfig extends WebSecurityConfigurerAdapter {
    @Override
    @Bean
    public AuthenticationManager authenticationManagerBean() throws Exception {
        return super.authenticationManagerBean();
    }
}
6.0后则需要单独创建AuthenticationManager这个bean:
@Configuration
public class SecurityConfig {

    @Autowired
    UserService userService;

    @Bean
    AuthenticationManager authenticationManager() {
        DaoAuthenticationProvider daoAuthenticationProvider = new DaoAuthenticationProvider();
        daoAuthenticationProvider.setUserDetailsService(userService);
        ProviderManager pm = new ProviderManager(daoAuthenticationProvider);
        return pm;
    }
}
也可以从 HttpSecurity 中提取出来 AuthenticationManager:
@Configuration
public class SpringSecurityConfiguration {

    AuthenticationManager authenticationManager;

    @Autowired
    UserDetailsService userDetailsService;

    @Bean
    public SecurityFilterChain filterChain(HttpSecurity http) throws Exception {

        AuthenticationManagerBuilder authenticationManagerBuilder = http.getSharedObject(AuthenticationManagerBuilder.class);
        authenticationManagerBuilder.userDetailsService(userDetailsService);
        authenticationManager = authenticationManagerBuilder.build();

        http.csrf().disable().cors().disable().authorizeHttpRequests().antMatchers("/api/v1/account/register", "/api/v1/account/auth").permitAll()
            .anyRequest().authenticated()
            .and()
            .authenticationManager(authenticationManager)
            .sessionManagement().sessionCreationPolicy(SessionCreationPolicy.STATELESS);
        return http.build();
    }
}
Spring Security 的底层实际上就是一堆过滤器,所以我们之前在 configure(HttpSecurity) 方法中的配置,实际上就是配置过滤器链。现在过滤器链的配置,我们通过提供一个 SecurityFilterChain Bean 来配置过滤器链,SecurityFilterChain 是一个接口,这个接口只有一个实现类 DefaultSecurityFilterChain,构建 DefaultSecurityFilterChain 的第一个参数是拦截规则,也就是哪些路径需要拦截,第二个参数则是过滤器链,如果给了一个空集合,不设置忽略的路径请求, Spring Security 会拦截下所有的请求,然后在一个空集合中走一圈就结束了,相当于不拦截任何请求。
2.2 使用 Lambda表达式
and() 方法将被移除:
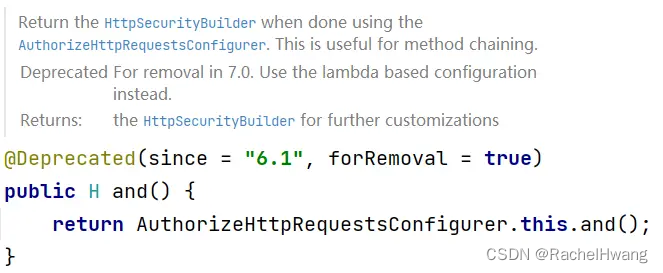
从上面 and 方法的注释中小伙伴们可以看到,官方现在是在推动基于 Lambda 的配置来代替传统的链式配置。
2.3 自定义 JSON 登录
Spring Security 默认处理登录数据的过滤器是 UsernamePasswordAuthenticationFilter,在这个过滤器中,系统会通过 request.getParameter(this.passwordParameter) 的方式将用户名和密码读取出来,很明显这就要求前端传递参数的形式是 key-value。
步骤为:
- 首先我们获取请求头,根据请求头的类型来判断请求参数的格式。
- 如果是 JSON 格式的参数,就在 if 中进行处理,否则说明是 key-value 形式的参数,那么我们就调用父类的方法进行处理即可。JSON 格式的参数的处理逻辑和 key-value 的处理逻辑是一致的,唯一不同的是参数的提取方式不同而已。
- 最后,我们还需要对这个过滤器进行配置:
@Configuration
public class SecurityConfig {

    @Autowired
    UserService userService;

    @Bean
    JsonLoginFilter jsonLoginFilter() {
        JsonLoginFilter filter = new JsonLoginFilter();
        filter.setAuthenticationSuccessHandler((req,resp,auth)->{
            resp.setContentType("application/json;charset=utf-8");
            PrintWriter out = resp.getWriter();
            //获取当前登录成功的用户对象
            User user = (User) auth.getPrincipal();
            user.setPassword(null);
            RespBean respBean = RespBean.ok("登录成功", user);
            out.write(new ObjectMapper().writeValueAsString(respBean));
        });
        filter.setAuthenticationFailureHandler((req,resp,e)->{
            resp.setContentType("application/json;charset=utf-8");
            PrintWriter out = resp.getWriter();
            RespBean respBean = RespBean.error("登录失败");
            if (e instanceof BadCredentialsException) {
                respBean.setMessage("用户名或者密码输入错误,登录失败");
            } else if (e instanceof DisabledException) {
                respBean.setMessage("账户被禁用,登录失败");
            } else if (e instanceof CredentialsExpiredException) {
                respBean.setMessage("密码过期,登录失败");
            } else if (e instanceof AccountExpiredException) {
                respBean.setMessage("账户过期,登录失败");
            } else if (e instanceof LockedException) {
                respBean.setMessage("账户被锁定,登录失败");
            }
            out.write(new ObjectMapper().writeValueAsString(respBean));
        });
        filter.setAuthenticationManager(authenticationManager());
        filter.setFilterProcessesUrl("/login");
        return filter;
    }

    @Bean
    AuthenticationManager authenticationManager() {
        DaoAuthenticationProvider daoAuthenticationProvider = new DaoAuthenticationProvider();
        daoAuthenticationProvider.setUserDetailsService(userService);
        ProviderManager pm = new ProviderManager(daoAuthenticationProvider);
        return pm;
    }

    @Bean
    SecurityFilterChain securityFilterChain(HttpSecurity http) throws Exception {
        //开启过滤器的配置
        http.authorizeHttpRequests()
                //任意请求,都要认证之后才能访问
                .anyRequest().authenticated()
                .and()
                //开启表单登录,开启之后,就会自动配置登录页面、登录接口等信息
                .formLogin()
                //和登录相关的 URL 地址都放行
                .permitAll()
                .and()
                //关闭 csrf 保护机制,本质上就是从 Spring Security 过滤器链中移除了 CsrfFilter
                .csrf().disable();
        http.addFilterBefore(jsonLoginFilter(), UsernamePasswordAuthenticationFilter.class);
        return http.build();
    }

}
这里就是配置一个 JsonLoginFilter 的 Bean,并将之添加到 Spring Security 过滤器链中即可。在 Spring Boot3 之前(Spring Security6 之前),上面这段代码就可以实现 JSON 登录了。
但是从 Spring Boot3 开始,则存在问题,具体表现就是:当你调用登录接口登录成功之后,再去访问系统中的其他页面,又会跳转回登录页面,说明访问登录之外的其他接口时,系统不知道你已经登录过了。
在 Spring Boot3 之前,Spring Security 过滤器链中有一个名为 SecurityContextPersistenceFilter 的过滤器,这个过滤器在 Spring Boot2.7.x 中废弃了,但是还在使用,在 Spring Boot3 中则被从 Spring Security 过滤器链中移除了,取而代之的是一个名为 SecurityContextHolderFilter 的过滤器。
先来看 SecurityContextPersistenceFilter 的核心逻辑:
private void doFilter(HttpServletRequest request, HttpServletResponse response, FilterChain chain)
        throws IOException, ServletException {
    HttpRequestResponseHolder holder = new HttpRequestResponseHolder(request, response);
    SecurityContext contextBeforeChainExecution = this.repo.loadContext(holder);
    try {
        SecurityContextHolder.setContext(contextBeforeChainExecution);
        chain.doFilter(holder.getRequest(), holder.getResponse());
    }
    finally {
        SecurityContext contextAfterChainExecution = SecurityContextHolder.getContext();
        SecurityContextHolder.clearContext();
        this.repo.saveContext(contextAfterChainExecution, holder.getRequest(), holder.getResponse());
    }
}
- 首先,这个过滤器位于整个 Spring Security 过滤器链的第三个,是非常靠前的。
- 当登录请求经过这个过滤器的时候,首先会尝试从 SecurityContextRepository(上文中的 this.repo)中读取到 SecurityContext 对象,这个对象中保存了当前用户的信息,第一次登录的时候,这里实际上读取不到任何用户信息。
- 将读取到的 SecurityContext 存入到 SecurityContextHolder 中,默认情况下,SecurityContextHolder 中通过 ThreadLocal 来保存 SecurityContext 对象,也就是当前请求在后续的处理流程中,只要在同一个线程里,都可以直接从 SecurityContextHolder 中提取到当前登录用户信息。
- 请求继续向后执行。
- 在 finally 代码块中,当前请求已经结束了,此时再次获取到 SecurityContext,并清空 SecurityContextHolder 防止内存泄漏
- 然后调用 this.repo.saveContext 方法保存当前登录用户对象(实际上是保存到 HttpSession 中)
- 以后其他请求到达的时候,执行前面第 2 步的时候,就读取到当前用户的信息了,在请求后续的处理过程中,Spring Security 需要知道当前用户的时候,会自动去 SecurityContextHolder 中读取当前用户信息。
这就是 Spring Security 认证的一个大致流程。
然而,到了 Spring Boot3 之后,这个过滤器被 SecurityContextHolderFilter 取代了,我们来看下 SecurityContextHolderFilter 过滤器的一个关键逻辑:
private void doFilter(HttpServletRequest request, HttpServletResponse response, FilterChain chain)
        throws ServletException, IOException {
    Supplier<SecurityContext> deferredContext = this.securityContextRepository.loadDeferredContext(request);
    try {
        this.securityContextHolderStrategy.setDeferredContext(deferredContext);
        chain.doFilter(request, response);
    }
    finally {
        this.securityContextHolderStrategy.clearContext();
        request.removeAttribute(FILTER_APPLIED);
    }
}
通过这段逻辑代码我们发现前面的逻辑基本上还是一样的,不一样的是 finally 中的代码,finally 中少了一步向 HttpSession 保存 SecurityContext 的操作。
未处理加入SecurityContextHolderFilter过滤器之前用户登录成功后,用户信息没有保存到 HttpSession,导致下一次请求到达的时候,无法从 HttpSession 中读取到 SecurityContext 存到 SecurityContextHolder 中,在后续的执行过程中,Spring Security 就会认为当前用户没有登录。这就是问题的原因!
问题解决:
Spring Security 提供了一个修改的入口,在 org.springframework.security.web.authentication.AbstractAuthenticationProcessingFilter#successfulAuthentication 方法中,源码如下:
protected void successfulAuthentication(HttpServletRequest request, HttpServletResponse response, FilterChain chain,
        Authentication authResult) throws IOException, ServletException {
    SecurityContext context = this.securityContextHolderStrategy.createEmptyContext();
    context.setAuthentication(authResult);
    this.securityContextHolderStrategy.setContext(context);
    this.securityContextRepository.saveContext(context, request, response);
    this.rememberMeServices.loginSuccess(request, response, authResult);
    if (this.eventPublisher != null) {
        this.eventPublisher.publishEvent(new InteractiveAuthenticationSuccessEvent(authResult, this.getClass()));
    }
    this.successHandler.onAuthenticationSuccess(request, response, authResult);
}
这个方法是当前用户登录成功之后的回调方法,小伙伴们看到,在这个回调方法中,有一句 this.securityContextRepository.saveContext(context, request, response);,这就表示将当前登录成功的用户信息存入到 HttpSession 中。
在当前过滤器中,securityContextRepository 的类型是 RequestAttributeSecurityContextRepository,这个表示将 SecurityContext 存入到当前请求的属性中,那很明显,在当前请求结束之后,这个数据就没了。在 Spring Security 的自动化配置类中,将 securityContextRepository 属性指向了 DelegatingSecurityContextRepository,这是一个代理的存储器,代理的对象是 RequestAttributeSecurityContextRepository 和 HttpSessionSecurityContextRepository,所以在默认的情况下,用户登录成功之后,在这里就把登录用户数据存入到 HttpSessionSecurityContextRepository 中了。
当我们自定义了登录过滤器之后,就破坏了自动化配置里的方案了,这里使用的 securityContextRepository 对象就真的是 RequestAttributeSecurityContextRepository 了,所以就导致用户后续访问时系统以为用户未登录。
那么解决方案很简单,我们只需要为自定义的过滤器指定 securityContextRepository 属性的值就可以了,如下:
@Bean
JsonLoginFilter jsonLoginFilter() {
    JsonLoginFilter filter = new JsonLoginFilter();
    filter.setAuthenticationSuccessHandler((req,resp,auth)->{
        resp.setContentType("application/json;charset=utf-8");
        PrintWriter out = resp.getWriter();
        //获取当前登录成功的用户对象
        User user = (User) auth.getPrincipal();
          user.setPassword(null);
        RespBean respBean = RespBean.ok("登录成功", user);
        out.write(new ObjectMapper().writeValueAsString(respBean));
    });
    filter.setAuthenticationFailureHandler((req,resp,e)->{
        resp.setContentType("application/json;charset=utf-8");
        PrintWriter out = resp.getWriter();
        RespBean respBean = RespBean.error("登录失败");
        if (e instanceof BadCredentialsException) {
            respBean.setMessage("用户名或者密码输入错误,登录失败");
        } else if (e instanceof DisabledException) {
            respBean.setMessage("账户被禁用,登录失败");
        } else if (e instanceof CredentialsExpiredException) {
            respBean.setMessage("密码过期,登录失败");
        } else if (e instanceof AccountExpiredException) {
            respBean.setMessage("账户过期,登录失败");
        } else if (e instanceof LockedException) {
            respBean.setMessage("账户被锁定,登录失败");
        }
        out.write(new ObjectMapper().writeValueAsString(respBean));
    });
    filter.setAuthenticationManager(authenticationManager());
    filter.setFilterProcessesUrl("/login");
    filter.setSecurityContextRepository(new HttpSessionSecurityContextRepository());
    return filter;
}
最后调用 setSecurityContextRepository 方法设置一下就行。Spring Boot3.x 之前之所以不用设置这个属性,是因为这里虽然没保存最后还是在 SecurityContextPersistenceFilter 过滤器中保存了。
在登录成功之后,开发者自己手动将数据存入到 HttpSession 中,这样就能确保下个请求到达的时候,能够从 HttpSession 中读取到有效的数据存入到 SecurityContextHolder 中。