1. $nextTick
2.过渡与动画
一. $nextTick
① 语法:this.$nextTick(回调函数)
② 作用:在下一次DOM更新结束后执行其指定的回调
nextTick所指定的回调会在DOM节点更新后执行
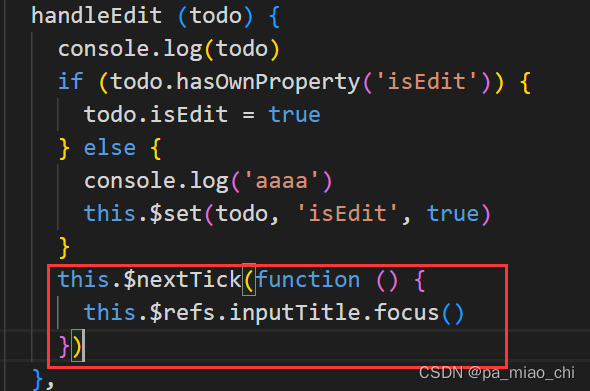
③ 使用场景:当改变数据后,要基于更新后的新 DOM 进行某些操作时,要在 nextTick 所指定的回调函数中执行
二. 过渡与动画
2.1 动画
① 使用<transition>包裹过渡的元素,并配置name属性

appear表示一上来就展示动画
② 样式写法
如果没有配置name属性:
元素进入的样式:
v-enter:进入的起点
v-enter-active: 进入过程中
v-enter-to:进入的终点
元素离开的样式:
v-leave: 离开的起点
v-leave-active 离开过程中
v-leave-to:离开的终点
如果配置了name属性,需要将上面的v换成name
③ 动画实现
<template>
  <div>
    <button @click="isShow = !isShow">显示/隐藏</button>
    <transition name="hello" appear>
      <h1 v-show="isShow">你好</h1>
    </transition>
  </div>
</template>

<script>
export default {
  name: 'Test',
  data () {
    return {
      isShow: true
    }
  }
}
</script>
<style scoped>
h1 {
  background-color: orange;
}

.hello-enter-active {
  animation: atguigu 0.5s linear;
}

.hello-leave-active {
  animation: atguigu 0.5s linear reverse;
}

@keyframes atguigu {
  from {
    transform: translateX(-100%);
  }
  to {
    transform: translateX(0px);
  }
}
</style>
2.2 过渡实现
<template>
  <div>
    <button @click="isShow = !isShow">显示/隐藏</button>
    <transition name="hello" appear>
      <h1 v-show="isShow">你好</h1>
    </transition>
  </div>
</template>

<script>
export default {
  name: 'Test2',
  data () {
    return {
      isShow: true
    }
  }
}
</script>
<style scoped>
h1 {
  background-color: lightblue;
}
/* 进入的起点 */
.hello-enter,
.hello-leave-to {
  transform: translateX(-100%);
}
/* 进入的终点 */
.hello-enter-to,
.hello-leave {
  transform: translateX(0);
}

.hello-enter-active,
.hello-leave-active {
  transition: 0.5s linear;
}
</style>
2.3 多个元素过渡
需要使用transition-group,并且每个元素都要指定key值
    <transition-group name="hello" appear>
      <h1 v-show="!isShow" key="1">你好</h1>
      <h1 v-show="isShow" key="2">尚硅谷</h1>
    </transition-group>
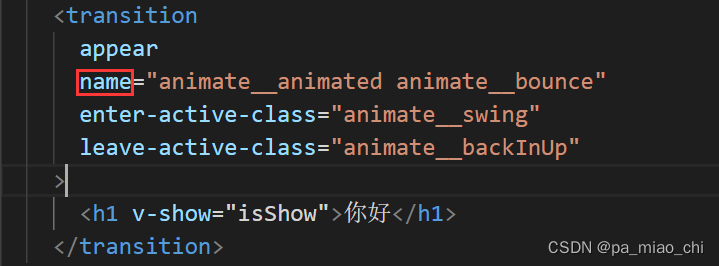
三. 第三方动画库

① 安装第三方库
npm install animate.css --save② 引入
import 'animate.css'③ 使用配置name, 选择进入和离开的动画
