QT学习笔记(上)
文章目录
- QT学习笔记(上)
- 1. 窗口和按钮
- 2. 创建一个自定义的QPushButton
- 2.1 mypushbutton.h
- 2.2 mypushbuttion.cpp
- 2.3 mainwindow.cpp引用mypushbutton
- 3. QT坐标原点
- 4. 信号与槽
- 5. 自定义信号和槽
- 6. 信号和槽的重载
- P12 信号连接信号
- P13 QT4之前的连接函数写法
- P14 lambda表达式
- 练习:使用按钮来控制窗口的开闭
- P17 菜单栏和工具栏
- P18 状态栏和浮动窗口
- P19
- P20 对话框
1. 窗口和按钮
#include "mainwindow.h"
#include "ui_mainwindow.h"
#include <qpushbutton.h>

MainWindow::MainWindow(QWidget *parent)
    : QMainWindow(parent)
    , ui(new Ui::MainWindow)
{
    ui->setupUi(this);

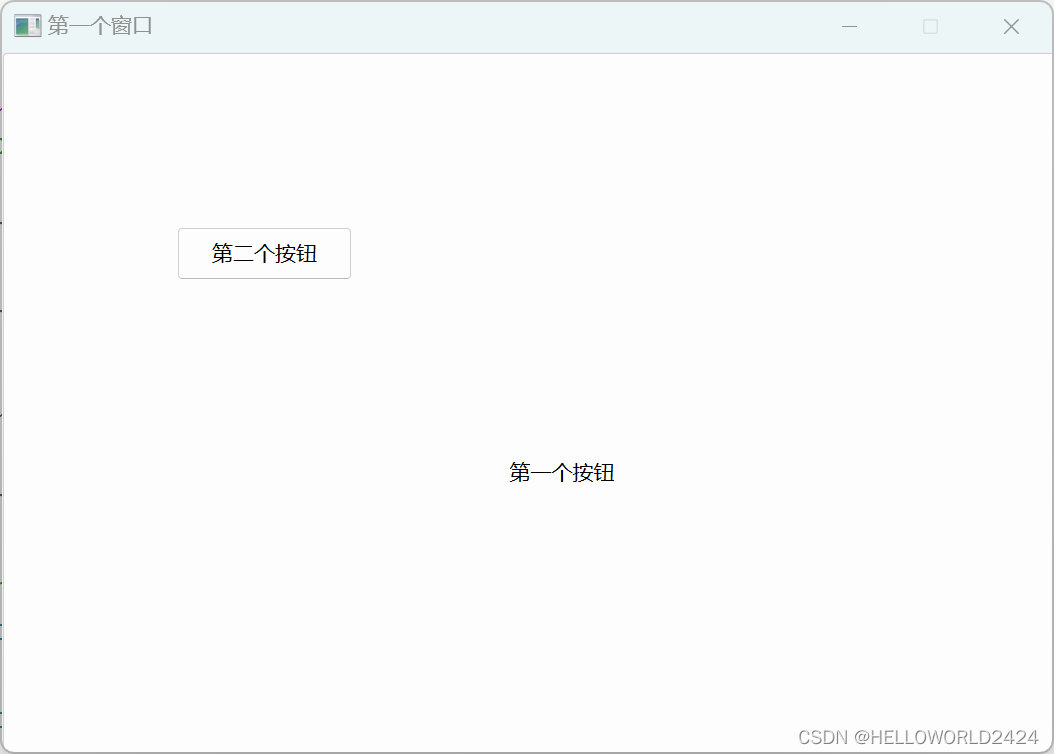
    // 创建一个按钮
    QPushButton *btn = new QPushButton;
//    btn->show();
    // depends on MainWindow
    btn->setParent(this);
    // 显示文本
    btn->setText("第一个按钮");
    // 第二个按钮
    QPushButton * btn2 = new QPushButton("第二个按钮", this);
    // 移动
    btn2->move(100, 100);
    // 重置窗口大小
//    resize(600, 400);
    setFixedSize(600, 400);
    // 设置窗口标题
    setWindowTitle("第一个窗口");
}

MainWindow::~MainWindow()
{
    delete ui;
}
2. 创建一个自定义的QPushButton
2.1 mypushbutton.h
#ifndef MYPUSHBUTTON_H
#define MYPUSHBUTTON_H

#include <QPushButton>

class mypushbutton : public QPushButton
{
    Q_OBJECT
public:
    explicit mypushbutton(QWidget *parent = nullptr);

    ~mypushbutton();

signals:

};

#endif // MYPUSHBUTTON_H
2.2 mypushbuttion.cpp
#include "mypushbutton.h"
#include <QDebug>

mypushbutton::mypushbutton(QWidget *parent)
    : QPushButton{parent}
{
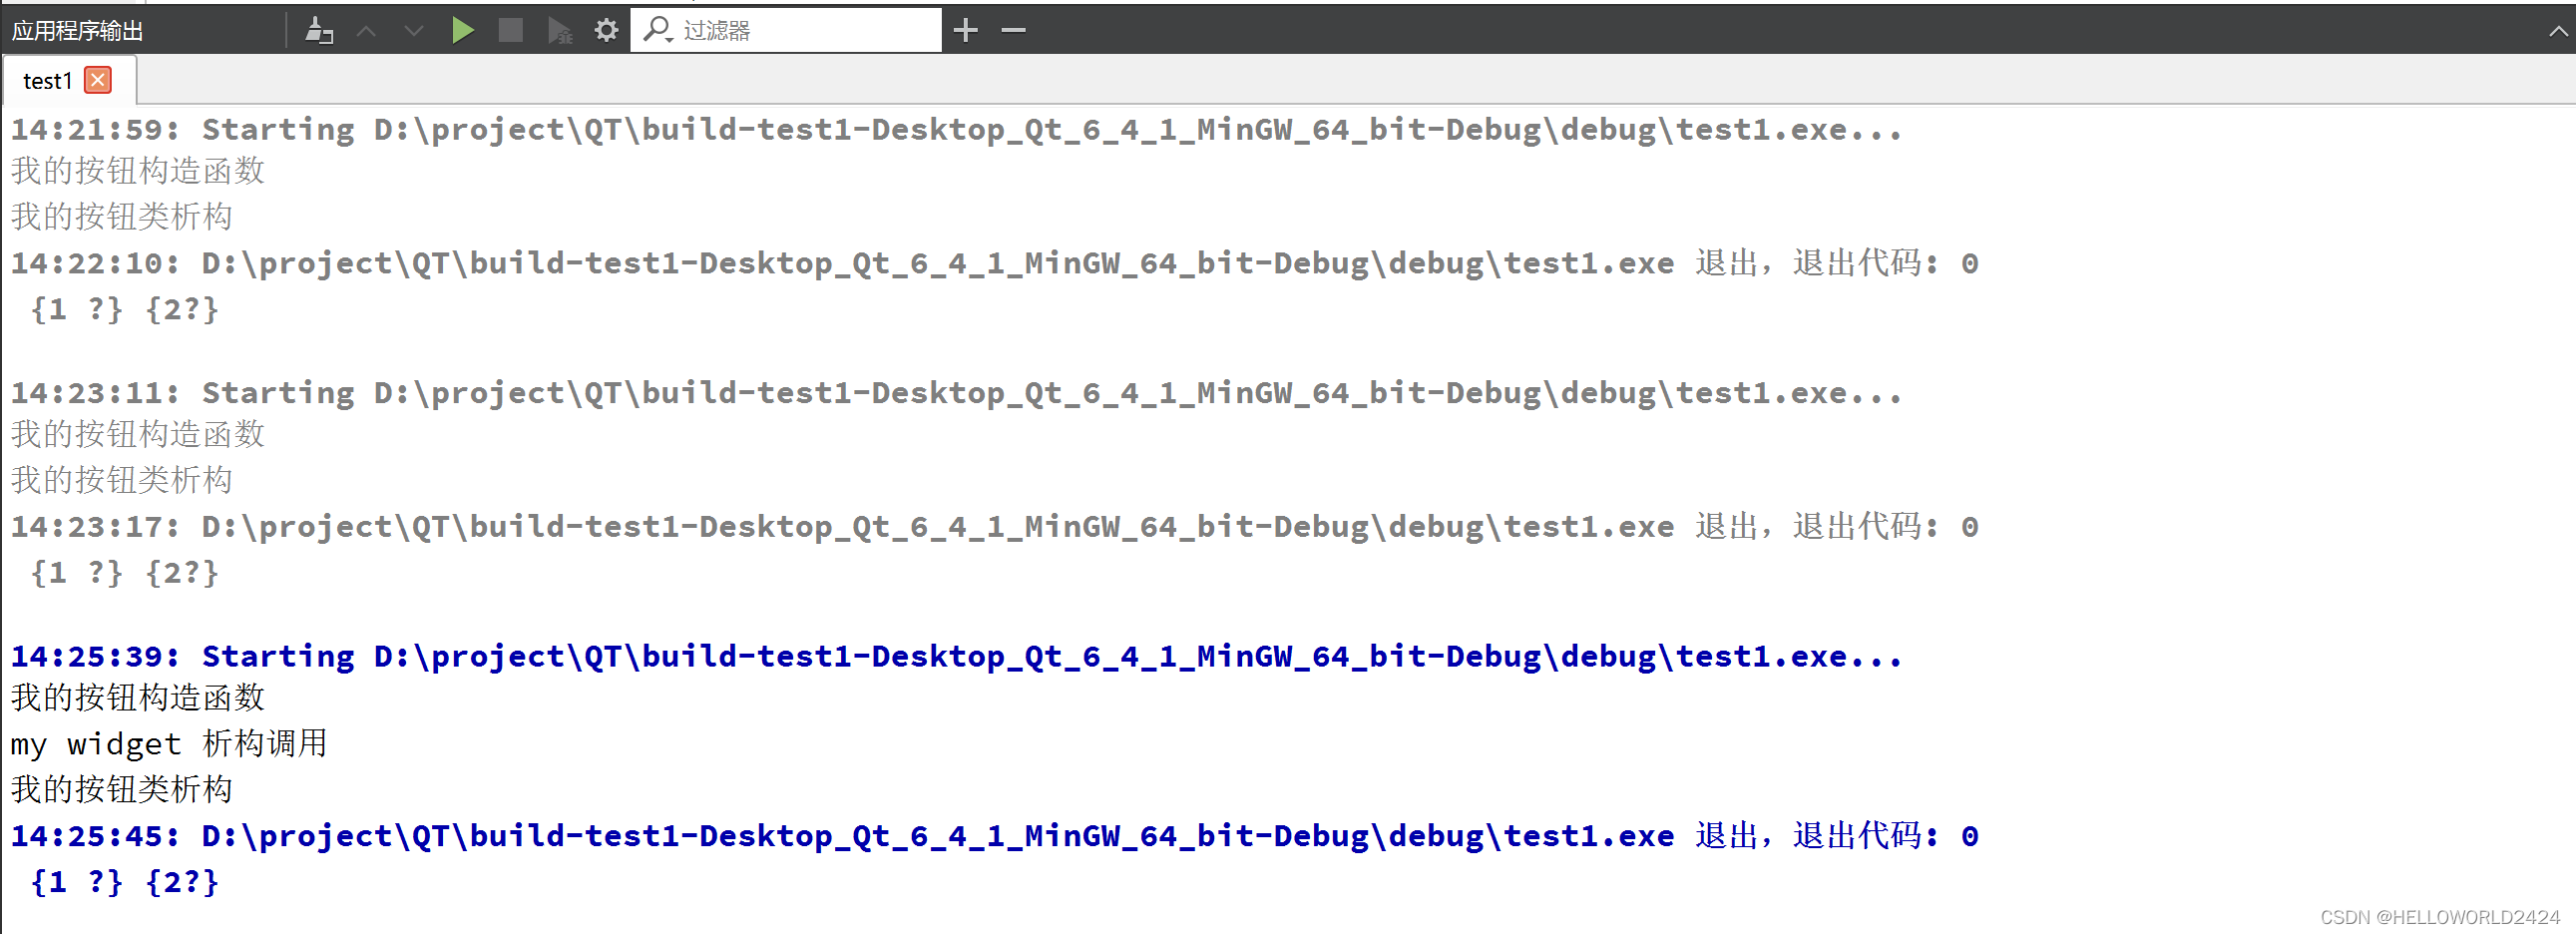
    qDebug() << "我的按钮构造函数";

}

mypushbutton::~mypushbutton(){
    qDebug() << "我的按钮类析构";
}
2.3 mainwindow.cpp引用mypushbutton
#include "mainwindow.h"
#include "ui_mainwindow.h"
#include <qpushbutton.h>
#include "mypushbutton.h"
#include <QDebug>


MainWindow::MainWindow(QWidget *parent)
    : QMainWindow(parent)
    , ui(new Ui::MainWindow)
{
    ui->setupUi(this);

    // 创建一个按钮
    QPushButton *btn = new QPushButton;
//    btn->show();
    // depends on MainWindow

    btn->setParent(this);
    // 显示文本
    btn->setText("第一个按钮");
    // 第二个按钮
    QPushButton * btn2 = new QPushButton("第二个按钮", this);
    btn2->resize(50, 50);


    // 移动
    btn2->move(100, 100);
    // 重置窗口大小
//    resize(600, 400);
    setFixedSize(600, 400);
    // 设置窗口标题
    setWindowTitle("第一个窗口");

    // 创建自己的按钮
    mypushbutton * myBtn = new mypushbutton;
    myBtn->setText("我自己的按钮");
    myBtn->move(200, 0);
    myBtn->setParent(this);

}

MainWindow::~MainWindow()
{
    qDebug() << "my widget 析构调用";
    delete ui;
}
可以看到构造函数以及析构函数的调用
3. QT坐标原点
QT的坐标原点是在左上角,向下和向右为正方向。
4. 信号与槽
核心: 使用connect函数进行连接,指定信号的发送者,信号(函数地址),信号的接收者,槽函数(函数地址形式)。
#include "mainwindow.h"
#include "ui_mainwindow.h"
#include <qpushbutton.h>
#include "mypushbutton.h"
#include <QDebug>


MainWindow::MainWindow(QWidget *parent)
    : QMainWindow(parent)
    , ui(new Ui::MainWindow)
{
    ui->setupUi(this);

    // 创建一个按钮
    QPushButton *btn = new QPushButton;
//    btn->show();
    // depends on MainWindow

    btn->setParent(this);
    // 显示文本
    btn->setText("第一个按钮");
    // 第二个按钮
    QPushButton * btn2 = new QPushButton("第二个按钮", this);
    btn2->resize(50, 50);


    // 移动
    btn2->move(100, 100);
    // 重置窗口大小
//    resize(600, 400);
    setFixedSize(600, 400);
    // 设置窗口标题
    setWindowTitle("第一个窗口");

    // 创建自己的按钮
    mypushbutton * myBtn = new mypushbutton;
    myBtn->setText("关闭窗口");
    myBtn->move(200, 0);
    myBtn->setParent(this);

    // 点击按钮,关闭窗口
    // 发送者, 信号(函数地址,+引用), 接收者, 槽函数
    connect(myBtn, &mypushbutton::clicked, this, &MainWindow::close);


}

MainWindow::~MainWindow()
{
    qDebug() << "my widget 析构调用";
    delete ui;
}
5. 自定义信号和槽
重点: 信号,写在signals下面,槽,写在public下面,连接如4小节,连接后需要触发信号。
teacher部分
teacher.h
#ifndef TEACHER_H
#define TEACHER_H

#include <QObject>

class Teacher : public QObject
{
    Q_OBJECT
public:
    explicit Teacher(QObject *parent = nullptr);

signals:
    // 自定义信号
    // 只声明,不实现
    // 可以有参数,可以重载
    void hungry();

};

#endif // TEACHER_H
teacher.cpp
#include "teacher.h"

Teacher::Teacher(QObject *parent)
    : QObject{parent}
{

}
student部分
student.h
#ifndef STUDENT_H
#define STUDENT_H

#include <QObject>

class Student : public QObject
{
    Q_OBJECT
public:
    explicit Student(QObject *parent = nullptr);
    // 槽函数。早期qt必须写在 public_slots, 后期写在public
    // 返回值是void,需要声明和实现,
    // 可以有参数,可以重载
    void treat();


signals:


};

#endif // STUDENT_H
student.cpp
#include "student.h"
#include <QDebug>

Student::Student(QObject *parent)
    : QObject{parent}
{

}


void Student::treat(){
    qDebug() << "请老师吃饭";
}
窗口部分
widget.h
#ifndef WIDGET_H
#define WIDGET_H
#include "teacher.h"
#include "student.h"


#include <QWidget>

QT_BEGIN_NAMESPACE
namespace Ui { class Widget; }
QT_END_NAMESPACE

class Widget : public QWidget
{
    Q_OBJECT

public:
    Widget(QWidget *parent = nullptr);
    ~Widget();

private:
    Ui::Widget *ui;

    Teacher* zt;
    Student* st;
    void classIsOver();


};
#endif // WIDGET_H
widget.cpp
#include "widget.h"
#include "ui_widget.h"

Widget::Widget(QWidget *parent)
    : QWidget(parent)
    , ui(new Ui::Widget)
{
    ui->setupUi(this);

    // 初始化控件
    this->zt = new Teacher(this);
    this->st = new Student(this);
    connect(zt, &Teacher::hungry, st, &Student::treat);

    // 调用函数
    classIsOver();


}

void Widget::classIsOver(){
    emit zt->hungry();
}


Widget::~Widget()
{
    delete ui;
}
6. 信号和槽的重载
核心点:信号和槽重载时候需要使用函数指针来指定类中重载的版本。
函数指针:
void (Teacher::*teacherSignal)(QString) = &Teacher::hungry;
conect(tz, teacherSignal, ...)
    void (Teacher::*teacherSignal)(QString) = &Teacher::hungry;
    void (Student::*studentSlot)(QString) = &Student::treat;


    connect(zt, teacherSignal, st, studentSlot);
P12 信号连接信号
核心:连个信号连接的方法
比较笨的方法:利用一个slot进行转发
#include "widget.h"
#include "ui_widget.h"
#include <QPushButton>

Widget::Widget(QWidget *parent)
    : QWidget(parent)
    , ui(new Ui::Widget)
{
    ui->setupUi(this);

    // 初始化控件
    this->zt = new Teacher(this);
    this->st = new Student(this);
//    connect(zt, &Teacher::hungry, st, &Student::treat);

    // 调用函数
//    classIsOver();


    void (Teacher::*teacherSignal)(QString) = &Teacher::hungry;
    void (Student::*studentSlot)(QString) = &Student::treat;
    connect(zt, teacherSignal, st, studentSlot);
    QPushButton *btn = new QPushButton("下课", this);
    this->resize(600, 400);
    connect(btn, &QPushButton::clicked, this, &Widget::classIsOver);

}

void Widget::classIsOver(){
//    zt->hungry();
    emit zt->hungry("宫保鸡丁");

}


Widget::~Widget()
{
    delete ui;
}
好的方法: 使用信号连接信号,解释和代码如下图所指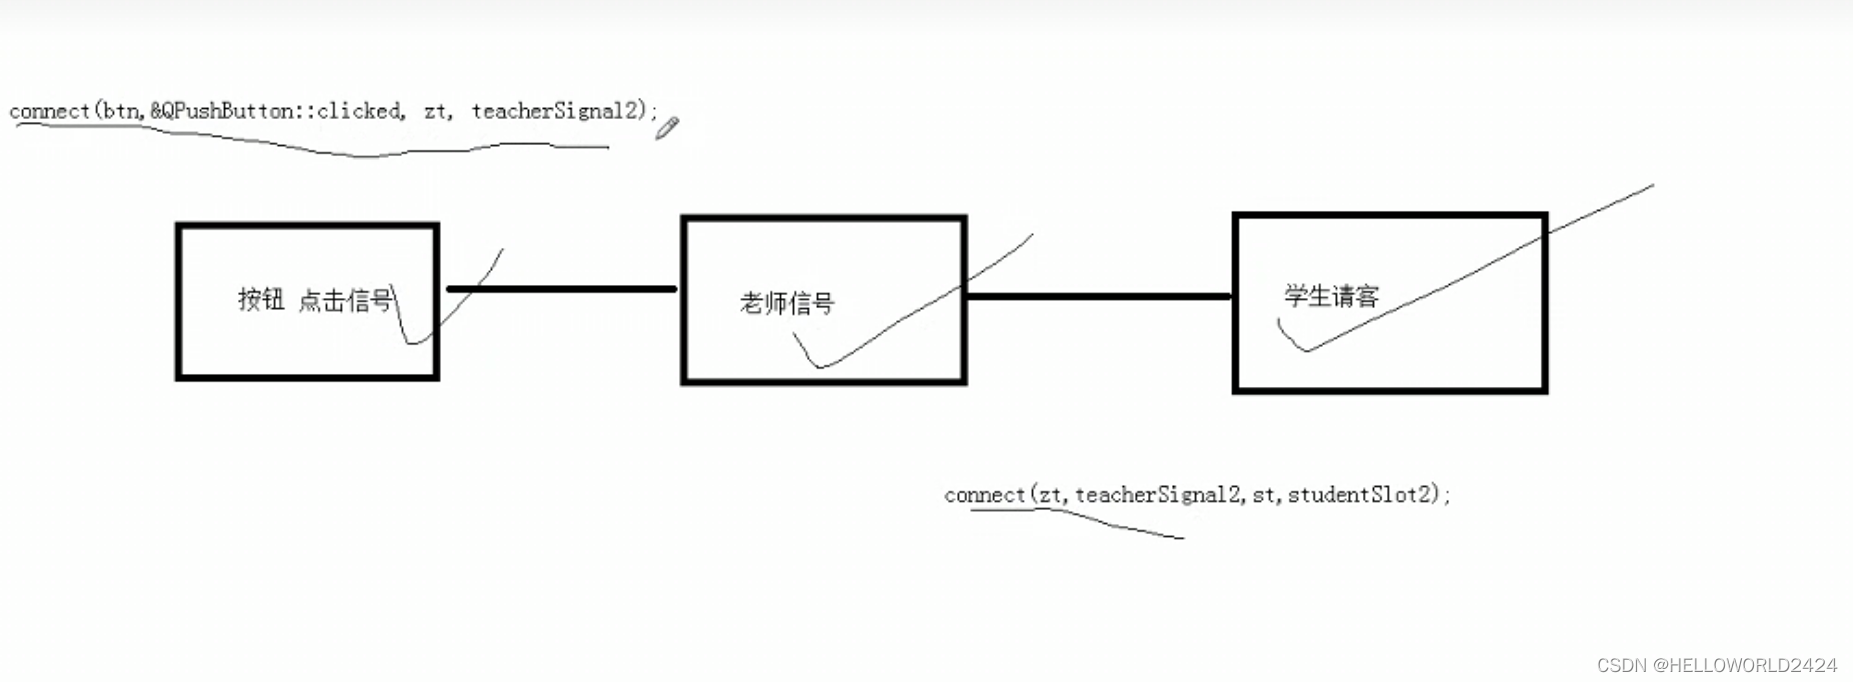
#include "widget.h"
#include "ui_widget.h"
#include <QPushButton>

Widget::Widget(QWidget *parent)
    : QWidget(parent)
    , ui(new Ui::Widget)
{
    ui->setupUi(this);

    // 初始化控件
    this->zt = new Teacher(this);
    this->st = new Student(this);
//    connect(zt, &Teacher::hungry, st, &Student::treat);

    // 调用函数
//    classIsOver();


//    void (Teacher::*teacherSignal)(QString) = &Teacher::hungry;
//    void (Student::*studentSlot)(QString) = &Student::treat;
//    connect(zt, teacherSignal, st, studentSlot);
//    QPushButton *btn = new QPushButton("下课", this);
//    this->resize(600, 400);
//    connect(btn, &QPushButton::clicked, this, &Widget::classIsOver);


    QPushButton *btn = new QPushButton("下课", this);
    void(Teacher::*ztSignal)(void) = &Teacher::hungry;
    void(Student::*stuSlot)(void) = &Student::treat;
    connect(zt, ztSignal, st, stuSlot);
    connect(btn, &QPushButton::clicked, zt, ztSignal);


}

void Widget::classIsOver(){
//    zt->hungry();
    emit zt->hungry("宫保鸡丁");

}


Widget::~Widget()
{
    delete ui;
}
断开连接:disconnect
disconnect(zt, ztSignal, st, stuSlot);
P13 QT4之前的连接函数写法
笔记:
- 信号可以连接信号
- 一个信号可以连接多个槽函数
- 多个信号可以连接同一个槽函数
- 信号和槽函数的参数,必须是一一对应
- 信号和槽的参数个数,是不是要一致?信号的参数个数,可以多于槽函数的参数个数
- QT4版本对连接函数的写法,好处是直观,缺点是不会检查参数。
// qt4以前的连接代码
    connect(zt, SIGNAL(hungry()), st, SLOT(treat()));
P14 lambda表达式
[](){
	....
}
#include "widget.h"
#include "ui_widget.h"
#include <QPushButton>
#include <QDebug>

Widget::Widget(QWidget *parent)
    : QWidget(parent)
    , ui(new Ui::Widget)
{
    ui->setupUi(this);

    // 初始化控件
    this->zt = new Teacher(this);
    this->st = new Student(this);
//    connect(zt, &Teacher::hungry, st, &Student::treat);

    // 调用函数
//    classIsOver();


//    void (Teacher::*teacherSignal)(QString) = &Teacher::hungry;
//    void (Student::*studentSlot)(QString) = &Student::treat;
//    connect(zt, teacherSignal, st, studentSlot);
//    QPushButton *btn = new QPushButton("下课", this);
//    this->resize(600, 400);
//    connect(btn, &QPushButton::clicked, this, &Widget::classIsOver);


    QPushButton *btn = new QPushButton("下课", this);
    void(Teacher::*ztSignal)(void) = &Teacher::hungry;
    void(Student::*stuSlot)(void) = &Student::treat;
//    connect(zt, ztSignal, st, stuSlot);
    connect(btn, &QPushButton::clicked, zt, ztSignal);
    // qt4以前的连接代码
    connect(zt, SIGNAL(hungry()), st, SLOT(treat()));

    [=](){
        btn->setText("aaa");
    }();

    QPushButton *btn1 = new QPushButton("按钮1", this);
    QPushButton *btn2 = new QPushButton("按钮2", this);

    btn2->move(100, 0);
    int m = 100;
    // mutable: m拷贝一份,并里面修改他的拷贝
    connect(btn1, &QPushButton::clicked, this, [m]()mutable{m=m+100; qDebug() << m;});
    connect(btn2, &QPushButton::clicked, this, [=](){
        qDebug()<< m;
    });

    int b = []()->int{return 100;}();

    QPushButton *btn3 = new QPushButton("关闭窗口", this);
    btn3->move(200, 0);
    connect(btn3, &QPushButton::clicked, this, [=](){
//        this->close();
        st->treat("牛肉");
    });


}

void Widget::classIsOver(){
//    zt->hungry();
    emit zt->hungry("宫保鸡丁");

}


Widget::~Widget()
{
    delete ui;
}
练习:使用按钮来控制窗口的开闭
#include "widget.h"
#include "ui_widget.h"
#include "movie.h"
#include <QPushButton>
#include <QDebug>

Widget::Widget(QWidget *parent)
    : QWidget(parent)
    , ui(new Ui::Widget)
{
    ui->setupUi(this);

    setWindowTitle("第一个窗口");
    QPushButton *bt1 = new QPushButton("打开窗口", this);
    QPushButton *bt2 = new QPushButton("关闭窗口", this);
    bt2->move(0, 100);

    QWidget *one  = new QWidget;
    connect(bt1, &QPushButton::clicked, this, [=](){
        one->show();
    });
    connect(bt2, &QPushButton::clicked, this, [=](){
        one->close();
    });

}
P17 菜单栏和工具栏
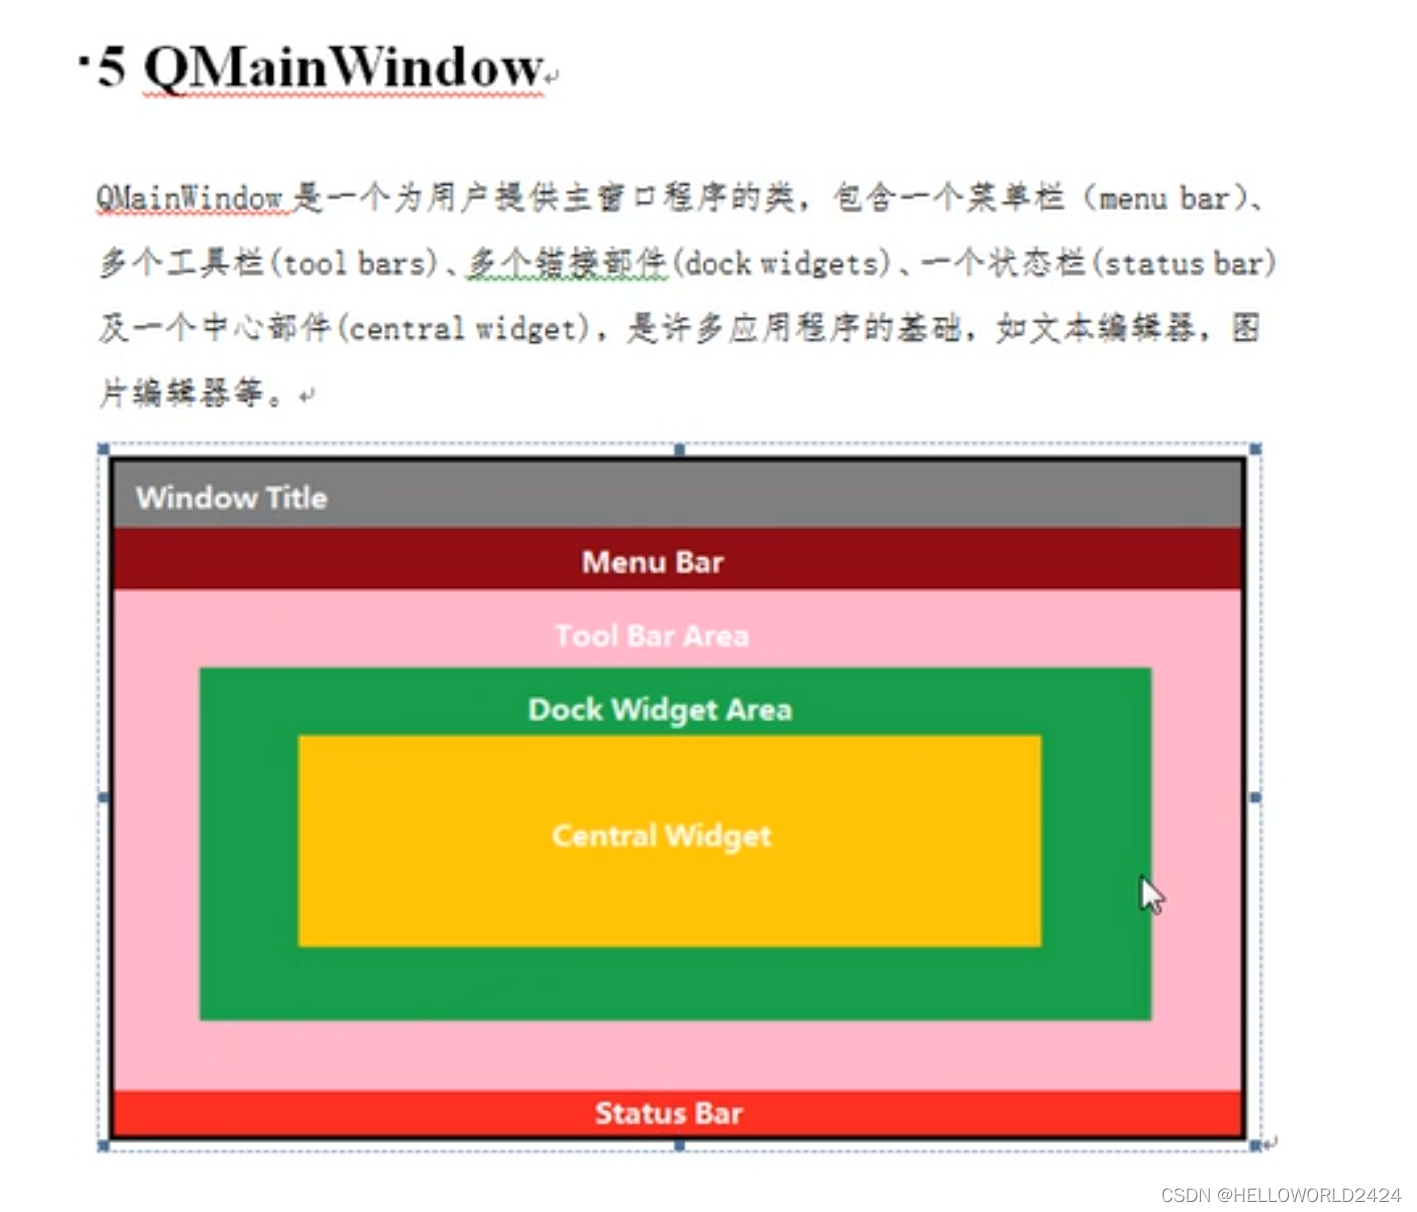
下面是在窗口中添加菜单栏和工具栏的基本代码。
#include "mainwindow.h"
#include "ui_mainwindow.h"
#include <QMenuBar>
#include <QToolBar>
#include <QPushButton>


MainWindow::MainWindow(QWidget *parent)
    : QMainWindow(parent)
    , ui(new Ui::MainWindow)
{
    ui->setupUi(this);

    resize(600, 400);
//    setFixedSize(600, 400);

    // 创建菜单栏
    QMenuBar *bar =  menuBar();
    // 放入屏幕中
    setMenuBar(bar);

    // 创建菜单
    QMenu *fileMenu = bar->addMenu("文件");
    QMenu *editMenu = bar->addMenu("编辑");

    // 菜单项
    QAction *newAction = fileMenu->addAction("新建");
    // 添加分隔线
    fileMenu->addSeparator();
    QAction *openAction = fileMenu->addAction("打开");

    // 工具栏,可以多个
    QToolBar *toolBar = new QToolBar(this);
    addToolBar(Qt::LeftToolBarArea, toolBar);

    // 只允许左右停靠
    toolBar->setAllowedAreas(Qt::LeftToolBarArea | Qt::RightToolBarArea);

    // 设置浮动
    toolBar->setFloatable(false);

    // 设置移动
    toolBar->setMovable(false);

    // 工具栏中设置内容
    toolBar->addAction(newAction);
    toolBar->addSeparator();
    toolBar->addAction(openAction);
    // 工具栏添加控件
    QPushButton *btn = new QPushButton("aa", this);
    toolBar->addWidget(btn);


}

MainWindow::~MainWindow()
{
    delete ui;
}
P18 状态栏和浮动窗口
#include "mainwindow.h"
#include "ui_mainwindow.h"
#include <QMenuBar>
#include <QToolBar>
#include <QPushButton>
#include <QStatusBar>
#include <QLabel>
#include <QDockWidget>
#include <QTextEdit>


MainWindow::MainWindow(QWidget *parent)
    : QMainWindow(parent)
    , ui(new Ui::MainWindow)
{
	// ......前面的代码

    // 状态栏,最多一个
    QStatusBar * stBar = statusBar();
    setStatusBar(stBar);

    // 放标签控件
    QLabel *label = new QLabel("提示信息", this);
    stBar->addWidget(label);

    QLabel *label2 = new QLabel("右侧提示信息", this);
    stBar->addPermanentWidget(label2);

    // 铆接部件(浮动窗口,可以多个)
    QDockWidget *dockerWidget = new QDockWidget("浮动", this);
    addDockWidget(Qt::BottomDockWidgetArea, dockerWidget);
    // 设置后期停靠位置
    dockerWidget->setAllowedAreas(Qt::TopDockWidgetArea|Qt::BottomDockWidgetArea);

    // 设置中心部件 只能有一个
    QTextEdit *edit = new QTextEdit(this);
    setCentralWidget(edit);


}

MainWindow::~MainWindow()
{
    delete ui;
}
P19
添加和引用资源文件
- 将图片文件,拷贝到项目位置下
- 右键项目->添加文件->Qt->Qt resource File -> 给资源起名字
- res生成res.qrc
- open in editor 编辑资源
- 添加前缀,添加文件
- 使用 “:+ 前缀名 + 文件名”
#include "mainwindow.h"
#include "ui_mainwindow.h"

MainWindow::MainWindow(QWidget *parent)
    : QMainWindow(parent)
    , ui(new Ui::MainWindow)
{
    ui->setupUi(this);

//    ui->actionnew->setIcon(QIcon("D:/project/QTday02/02_QtSource/qq.png"));

    // 使用qt的资源,": + 前缀名 + 文件名"
    ui->actionnew->setIcon(QIcon(":/Image/qq.png"));

}

MainWindow::~MainWindow()
{
    delete ui;
}
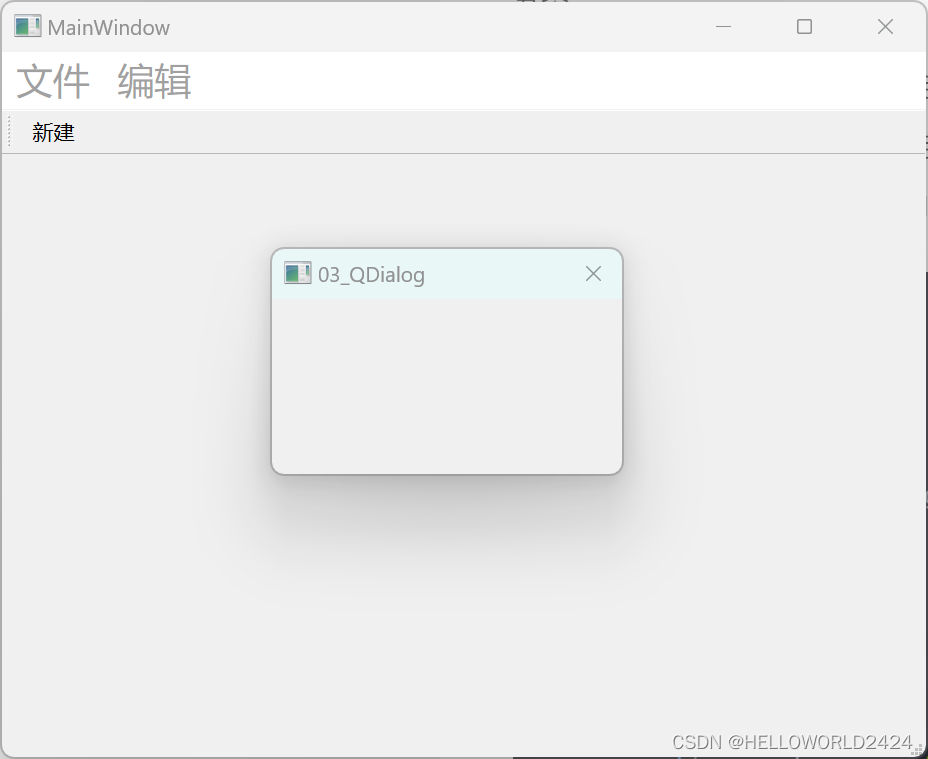
P20 对话框
分类
- 模态对话框 不可以对其他对话框进行操作 阻塞 使用exec
- 非模态对话框 可以对其他对话框进行操作 使用show
- 防止多次打开造成内存泄漏 dlg2->setAttribute(Qt::WA_DeleteOnClose);
#include "mainwindow.h"
#include "ui_mainwindow.h"
#include <QDialog>
#include<QDebug>

MainWindow::MainWindow(QWidget *parent)
    : QMainWindow(parent)
    , ui(new Ui::MainWindow)
{
    ui->setupUi(this);

    // 点击新建 弹框
    connect(ui->actionnew, &QAction::triggered, [=](){
       //对话框 分类
       // 模态对话框(不可以对其窗口进行操作) 非模态对话框(可以对其他窗口操作)

       // 模态对话框
//       QDialog dlg(this);
//       dlg.resize(200, 100);
//       dlg.exec();
//       qDebug() << "模态对话框弹出了";

       // 非模态对话框
       QDialog *dlg2 = new QDialog(this);
       dlg2->resize(200, 100);
       dlg2->show();
       dlg2->setAttribute(Qt::WA_DeleteOnClose);
       qDebug() << "非模态对话框弹出了";

    });

}

MainWindow::~MainWindow()
{
    delete ui;
}
