Mac笔记本安装maven
一、通过brew安装maven
如果你的mac笔记本安装了homebrew可以使用如下命令安装
brew install maven
安装完成后可以使用命令brew list maven来查看maven的安装位置
$ brew list maven
/usr/local/Cellar/maven/3.6.3_1/bin/mvn
/usr/local/Cellar/maven/3.6.3_1/bin/mvnDebug
/usr/local/Cellar/maven/3.6.3_1/bin/mvnyjp
/usr/local/Cellar/maven/3.6.3_1/libexec/bin/ (4 files)
/usr/local/Cellar/maven/3.6.3_1/libexec/boot/ (2 files)
/usr/local/Cellar/maven/3.6.3_1/libexec/conf/ (3 files)
/usr/local/Cellar/maven/3.6.3_1/libexec/lib/ (70 files)
需要注意的是/usr/local/Cellar/maven/3.6.3_1/libexec/conf/这个目录,这个目录下面存放了maven的配置文件
二、修改配置文件使用国内镜像仓库
众所周知,maven的中央仓库服务器在国外,国内的下载速度很慢,如果想修改成国内的镜像仓库,可以修改/usr/local/Cellar/maven/3.6.3_1/libexec/conf/目录下的配置文件settings.xml
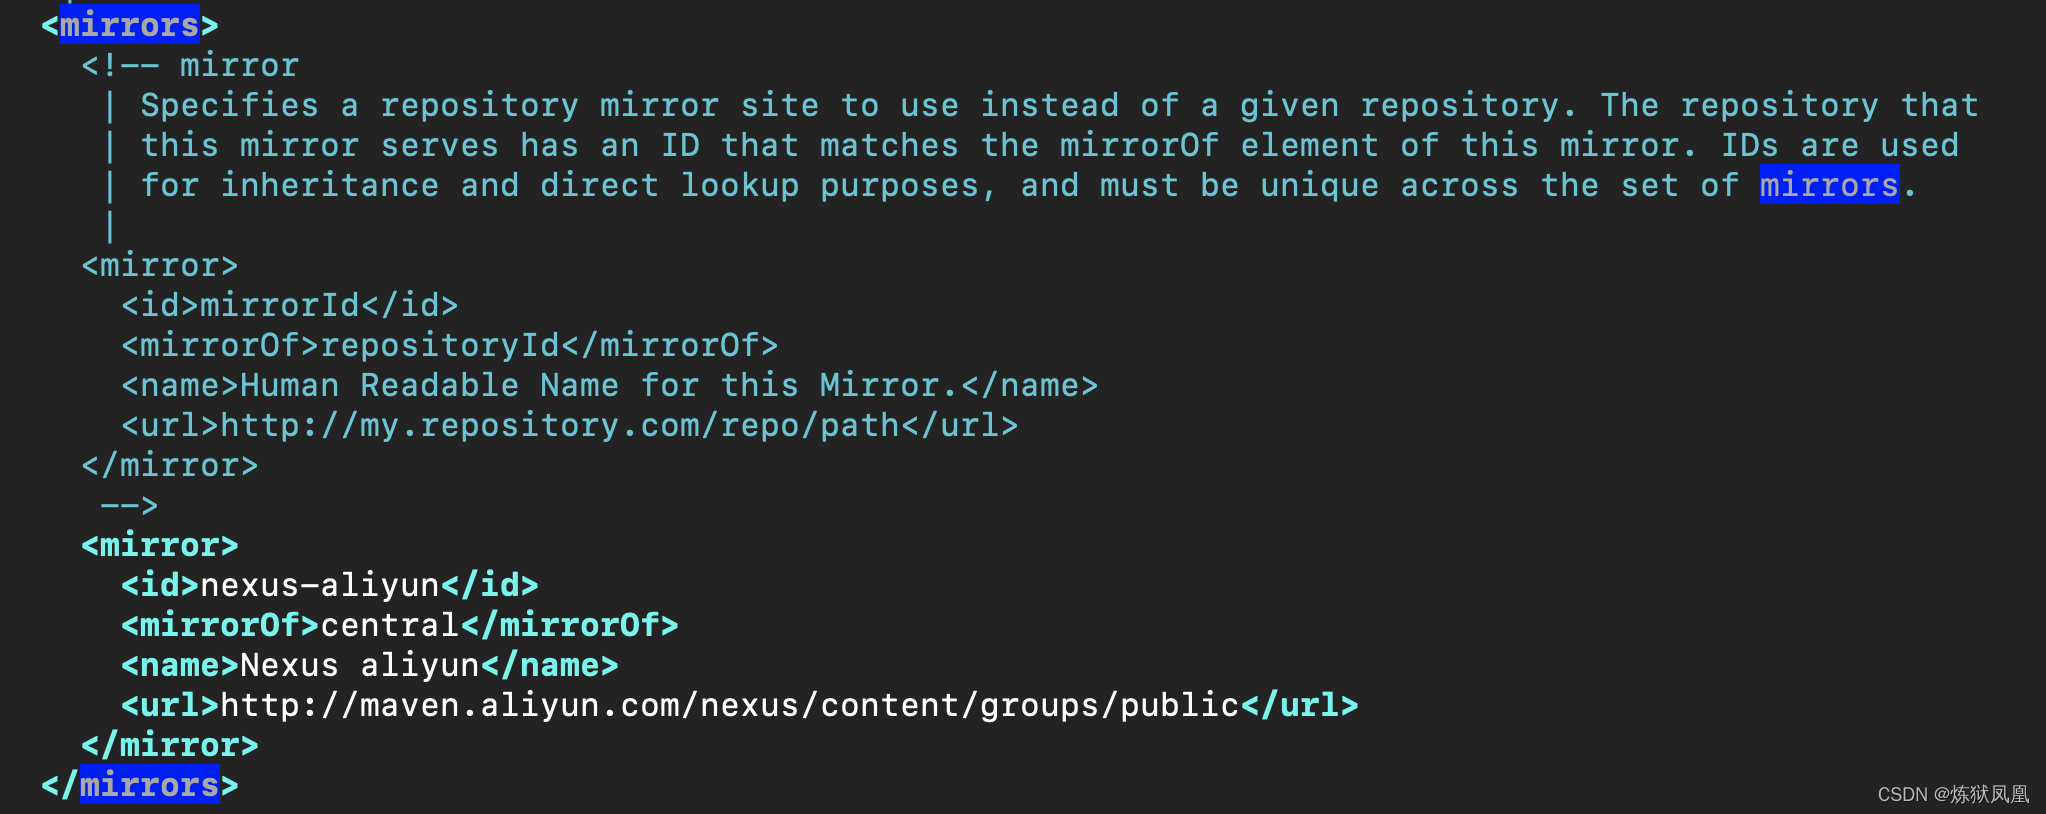
打开这个配置文件,找到mirrors节点,在mirrors节点下面添加子节点:
<mirror>
	<id>nexus-aliyun</id>
	<mirrorOf>central</mirrorOf>
	<name>Nexus aliyun</name>
	<url>http://maven.aliyun.com/nexus/content/groups/public</url>
</mirror>
修改完成之后,如下图所示
然后保存文件就可以了!
三、maven常用命令
- 查看maven的版本: mvn -v
- 编译源代码: mvn compile
- 编译测试代码:mvn test-compile
- 运行测试:mvn test
- 产生site:mvn site
- 打包:mvn package
- 在本地Repository中安装jar:mvn install
- 清除产生的项目:mvn clean
- 生成eclipse项目:mvn eclipse:eclipse
- 生成idea项目:mvn idea:idea
- 组合使用goal命令,如只打包不测试:mvn -Dtest package
- 编译测试的内容:mvn test-compile
- 只打jar包: mvn jar:jar
