Spring Boot 缓存 Cache 入门
1.概述
在系统访问量越来越大之后,往往最先出现瓶颈的往往是数据库。而为了减少数据库的压力,我们可以选择让产品砍掉消耗数据库性能的需求。 当然也可以引入缓存,在引入缓存之后,我们的读操作的代码,往往代码如下:
// UserService.java

@Autowired
private UserMapper userMapper; // 读取 DB

@Autowired
private UserCacheDao userCacheDao; // 读取 Cache

public UserDO getUser(Integer id) {
    // 从 Cache 中,查询用户信息
    UserDO user = userCacheDao.get(id);
    if (user != null) {
        return user;
    }
    // 如果 Cache 查询不到,从 DB 中读取
    user = userMapper.selectById(id);
    if (user != null) { // 非空,则缓存到 Cache 中
        userCacheDao.put(user);
    }
    // 返回结果
    return user;
}
- 这段代码,是比较常用的缓存策略,俗称**“被动写”**。整体步骤如下:
- 1)首先,从 Cache 中,读取用户缓存。如果存在,则直接返回。
- 2)然后,从 DB 中,读取用户数据。如果存在,写入 Cache 中。
- 3)最后,返回 DB 的查询结果。
Spring Cache 缓存让我们可以像使用 @Transactional 声明式事务,使用 Spring Cache 提供的 @Cacheable 等注解,😈 声明式缓存。而在实现原理上,也是基于 Spring AOP 拦截,实现缓存相关的操作。
下面,我们使用 Spring Cache 将 #getUser(Integer id) 方法进行简化。代码如下:
// UserService.java
public UserDO getUser2(Integer id) {
    return userMapper.selectById(id);
}

// UserMapper.java
@Cacheable(value = "users", key = "#id")
UserDO selectById(Integer id);
- 在 UserService 的
#getUser2(Integer id)方法上,我们直接调用 UserMapper ,从 DB 中查询数据。 - 在 UserMapper 的
#selectById(Integer id)方法上,有@Cacheable注解。Spring Cache 会拦截有@Cacheable注解的方法,实现“被动写”的逻辑。
2. 注解
在入门 Spring Cache 之前,我们先了解下其提供的所有注解:
@Cacheable@CachePut@CacheEvict@CacheConfig@Caching@EnableCaching
2.1 @Cacheable
@Cacheable 注解,添加在方法上,缓存方法的执行结果。执行过程如下:
- 1)首先,判断方法执行结果的缓存。如果有,则直接返回该缓存结果。
- 2)然后,执行方法,获得方法结果。
- 3)之后,根据是否满足缓存的条件。如果满足,则缓存方法结果到缓存。
- 4)最后,返回方法结果。
@Cacheable 注解的常用属性,如下:
cacheNames属性:缓存名。必填。[]数组,可以填写多个缓存名。values属性:和cacheNames属性相同,是它的别名。key属性:缓存的 key 。允许空。- 如果为空,则默认方法的所有参数进行组合。
- 如果非空,则需要按照 SpEL(Spring Expression Language) 来配置。例如说,
@Cacheable(value = "users", key = "#id"),使用方法参数id的值作为缓存的 key 。
condition属性:基于方法入参,判断要缓存的条件。允许空。- 如果为空,则不进行入参的判断。
- 如果非空,则需要按照 SpEL(Spring Expression Language) 来配置。例如说,
@Cacheable(condition="#id > 0"),需要传入的id大于零。
unless属性:基于方法返回,判断不缓存的条件。允许空。- 如果为空,则不进行入参的判断。
- 如果非空,则需要按照 SpEL(Spring Expression Language) 来配置。例如说,
@Cacheable(unless="#result == null"),如果返回结果为null,则不进行缓存。 - 要注意,
condition和unless都是条件属性,差别在于前者针对入参,后者针对结果。
@Cacheable 注解的不常用属性,如下:
keyGenerator属性:自定义 key 生成器 KeyGenerator Bean 的名字。允许空。如果设置,则key失效。cacheManager属性:自定义缓存管理器 CacheManager Bean 的名字。允许空。一般不填写,除非有多个 CacheManager Bean 的情况下。cacheResolver属性:自定义缓存解析器 CacheResolver Bean 的名字。允许空。sync属性,在获得不到缓存的情况下,是否同步执行方法。- 默认为
false,表示无需同步。 - 如果设置为
true,则执行方法时,会进行加锁,保证同一时刻,有且仅有一个方法在执行,其它线程阻塞等待。通过这样的方式,避免重复执行方法。注意,该功能的实现,需要参考第三方缓存的具体实现。
- 默认为
2.2 @CachePut
@CachePut 注解,添加在方法上,缓存方法的执行结果。不同于 @Cacheable 注解,它的执行过程如下:
- 1)首先,执行方法,获得方法结果。也就是说,无论是否有缓存,都会执行方法。
- 2)然后,根据是否满足缓存的条件。如果满足,则缓存方法结果到缓存。
- 3)最后,返回方法结果。
一般来说,使用方式如下:
@Cacheable:搭配读操作,实现缓存的被动写。@CachePut:配置写操作,实现缓存的主动写。
@Cacheable 注解的属性,和 @Cacheable 注解的属性,基本一致,只少一个 sync 属性。
2.3 @CacheEvict
@CacheEvict 注解,添加在方法上,删除缓存。
相比 @CachePut 注解,它额外多了两个属性:
allEntries属性,是否删除缓存名(cacheNames)下,所有 key 对应的缓存。默认为false,只删除指定 key 的缓存。beforeInvocation属性,是否在方法执行前删除缓存。默认为false,在方法执行后删除缓存。
2.4 @Caching
@Caching 注解,添加在方法上,可以组合使用多个 @Cacheable、@CachePut、@CacheEvict 注解。不太常用,可以暂时忽略。
2.5 @CacheConfig
@CacheConfig 注解,添加在类上,共享如下四个属性的配置:
cacheNameskeyGeneratorcacheManagercacheResolver
2.6 @EnableCaching
@EnableCaching 注解,标记开启 Spring Cache 功能,所以一定要添加。代码如下:
// EnableCaching.java

boolean proxyTargetClass() default false;

AdviceMode mode() default AdviceMode.PROXY;

int order() default Ordered.LOWEST_PRECEDENCE;
3. Spring Boot 集成
在 Spring Boot 里,提供了 spring-boot-starter-cache 库,实现 Spring Cache 的自动化配置,通过 CacheAutoConfiguration 配置类。
在 Java 后端开发中,常见的缓存工具和框架列举如下:
-
本地缓存:Guava LocalCache、Ehcache、Caffeine 。
Ehcache 的功能更加丰富,Caffeine 的性能要比 Guava LocalCache 好。
-
分布式缓存:Redis、Memcached、Tair 。
Redis 最为主流和常用。
4.Redis示例
4.1引入依赖
    <dependencies>
        <dependency>
            <groupId>org.springframework.boot</groupId>
            <artifactId>spring-boot-starter-web</artifactId>
        </dependency>
        <!-- 实现对数据库连接池的自动化配置 -->
        <dependency>
            <groupId>org.springframework.boot</groupId>
            <artifactId>spring-boot-starter-jdbc</artifactId>
        </dependency>
        <dependency> <!-- 本示例,我们使用 MySQL -->
            <groupId>mysql</groupId>
            <artifactId>mysql-connector-java</artifactId>
        </dependency>
        <!-- 实现对 MyBatis Plus 的自动化配置 -->
        <dependency>
            <groupId>com.baomidou</groupId>
            <artifactId>mybatis-plus-boot-starter</artifactId>
        </dependency>

        <!-- 实现对 Caches 的自动化配置 -->
        <dependency>
            <groupId>org.springframework.boot</groupId>
            <artifactId>spring-boot-starter-cache</artifactId>
        </dependency>

        <!-- 实现对 Spring Data Redis 的自动化配置 -->
        <dependency>
            <groupId>org.springframework.boot</groupId>
            <artifactId>spring-boot-starter-data-redis</artifactId>
            <exclusions>
                <!-- 去掉对 Lettuce 的依赖,因为 Spring Boot 优先使用 Lettuce 作为 Redis 客户端 -->
                <exclusion>
                    <groupId>io.lettuce</groupId>
                    <artifactId>lettuce-core</artifactId>
                </exclusion>
            </exclusions>
        </dependency>
        <!-- 引入 Jedis 的依赖,这样 Spring Boot 实现对 Jedis 的自动化配置 -->
        <dependency>
            <groupId>redis.clients</groupId>
            <artifactId>jedis</artifactId>
        </dependency>
        <!--引入lombok-->
        <dependency>
            <groupId>org.projectlombok</groupId>
            <artifactId>lombok</artifactId>
        </dependency>
        <!-- 方便等会写单元测试 -->
        <dependency>
            <groupId>org.springframework.boot</groupId>
            <artifactId>spring-boot-starter-test</artifactId>
            <scope>test</scope>
        </dependency>
    </dependencies>
Spring Data 使用 Redis 作为缓存的方案的时候,底层使用的是 Spring Data 提供的 RedisTemplate ,所以我们引入 spring-boot-starter-data-redis 依赖,实现对 RedisTemplate 的自动化配置。
4.2应用配置文件
spring:
  # datasource 数据源配置内容
  datasource:
    url: jdbc:mysql://127.0.0.1:3306/llp?useSSL=false&useUnicode=true&characterEncoding=UTF-8
    driver-class-name: com.mysql.jdbc.Driver
    username: root
    password: root
  # 对应 RedisProperties 类
  redis:
    host: 127.0.0.1
    port: 6379
    password: # Redis 服务器密码,默认为空。生产中,一定要设置 Redis 密码!
    database: 0 # Redis 数据库号,默认为 0 。
    timeout: 0 # Redis 连接超时时间,单位:毫秒。
    # 对应 RedisProperties.Jedis 内部类
    jedis:
      pool:
        max-active: 8 # 连接池最大连接数,默认为 8 。使用负数表示没有限制。
        max-idle: 8 # 默认连接数最小空闲的连接数,默认为 8 。使用负数表示没有限制。
        min-idle: 0 # 默认连接池最小空闲的连接数,默认为 0 。允许设置 0 和 正数。
        max-wait: -1 # 连接池最大阻塞等待时间,单位:毫秒。默认为 -1 ,表示不限制。
  # cache 缓存配置内容
  cache:
    type: redis

# mybatis-plus 配置内容
mybatis-plus:
  configuration:
    map-underscore-to-camel-case: true # 虽然默认为 true ,但是还是显示去指定下。
  global-config:
    db-config:
      id-type: auto # ID 主键自增
      logic-delete-value: 1 # 逻辑已删除值(默认为 1)
      logic-not-delete-value: 0 # 逻辑未删除值(默认为 0)
  mapper-locations: classpath*:mapper/*.xml
  type-aliases-package: com.llp.cache.dataobject

# logging
logging:
  level:
    # dao 开启 debug 模式 mybatis 输入 sql
    com:
      llp:
        cache:
          mapper: debug
spring.datasource配置项下,设置数据源相关的配置。- spring.cache配置项下,设置 Cache 相关的配置。
type属性,设置 Cache 使用方案为 Redis 。
spring.redis配置项下,设置 Spring Data Redis 相关的配置。如果没有使用过 Spring Data Redis 的胖友,不用慌,照着改就好。mybatis-plus配置项下,设置 MyBatis-Plus 相关的配置。logging配置项,设置打印 SQL 日志,方便我们查看是否读取了 DB 。
4.3 Application启动类
@EnableCaching //开启缓存支持
@MapperScan(basePackages = {"com.llp.cache.mapper"})
@SpringBootApplication
public class CacheApplication {
    public static void main(String[] args) {
        SpringApplication.run(CacheApplication.class, args);
    }
}
4.4UserDO
@TableName(value = "users")
@Data
public class UserDO {

    /**
     * 用户编号
     */
    private Integer id;
    /**
     * 账号
     */
    private String username;
    /**
     * 密码(明文)
     *
     * ps:生产环境下,千万不要明文噢
     */
    private String password;
    /**
     * 创建时间
     */
    private Date createTime;
    /**
     * 是否删除
     */
    @TableLogic
    private Integer deleted;

}
4.5UserMapper
import com.baomidou.mybatisplus.core.mapper.BaseMapper;
import com.llp.cache.dataobject.UserDO;
import org.springframework.cache.annotation.CacheConfig;
import org.springframework.cache.annotation.CacheEvict;
import org.springframework.cache.annotation.CachePut;
import org.springframework.cache.annotation.Cacheable;
import org.springframework.stereotype.Repository;

@Repository
//统一配置该 UserMapper 使用的缓存名为 users ,类的方法上使用cacheNames将不会生效
@CacheConfig(cacheNames = "users")
public interface UserMapper extends BaseMapper<UserDO> {

    /**
     * @Cacheable 注解,添加在方法上,缓存方法的执行结果。执行过程如下:
     *
     * 1)首先,判断方法执行结果的缓存。如果有,则直接返回该缓存结果。
     * 2)然后,执行方法,获得方法结果。
     * 3)之后,根据是否满足缓存的条件。如果满足,则缓存方法结果到缓存。
     * 4)最后,返回方法结果。
     * 只有一个参数: #a0 或 #p0
     * @param id
     * @return
     */
    @Cacheable(key = "#a0")
    UserDO selectById(Integer id);

    /**
     * @CachePut 注解,添加在方法上,缓存方法的执行结果。不同于 @Cacheable 注解,它的执行过程如下:
     *
     * 1)首先,执行方法,获得方法结果。也就是说,无论是否有缓存,都会执行方法。
     * 2)然后,根据是否满足缓存的条件。如果满足,则缓存方法结果到缓存。
     * 3)最后,返回方法结果。
     * @param user
     * @return
     */
    @CachePut(key = "#user.id")
    default UserDO insert0(UserDO user) {
        // 插入记录
        this.insert(user);
        // 返回用户
        return user;
    }

    //@CacheEvict清理掉缓存,常用于修改和删除
    @CacheEvict(key = "#p0")
    int deleteById(Integer id);

}
4.6UserMapperTest
@RunWith(SpringRunner.class)
@SpringBootTest(classes = CacheApplication.class)
public class UserMapperTest {

    private static final String CACHE_NAME_USER = "users";

    @Autowired
    private UserMapper userMapper;

    @Autowired
    private CacheManager cacheManager;

    @Test
    public void testCacheManager() {
        System.out.println(cacheManager);
    }

    @Test
    public void testSelectById() {
        // 这里,胖友事先插入一条 id = 1 的记录。
        Integer id = 1;

        // <1.1> 查询 id = 1 的记录
        UserDO user = userMapper.selectById(id);
        System.out.println("user:" + user);
        // <1.2> 判断缓存中,是不是存在
        Assert.assertNotNull("缓存为空", cacheManager.getCache(CACHE_NAME_USER).get(user.getId(), UserDO.class));

        // <2> 查询 id = 1 的记录
        user = userMapper.selectById(id);
        System.out.println("user:" + user);
    }


    @Test
    public void testInsert() {
        // <1> 插入记录
        UserDO user = new UserDO();
        user.setUsername(UUID.randomUUID().toString()); // 随机账号,因为唯一索引
        user.setPassword("llp");
        user.setCreateTime(new Date());
        user.setDeleted(0);
        userMapper.insert0(user);

        // <2> 判断缓存中,是不是存在
        Assert.assertNotNull("缓存为空", cacheManager.getCache(CACHE_NAME_USER).get(user.getId(), UserDO.class));
    }

    @Test
    public void testDeleteById() {
        // <1> 插入记录,为了让缓存里有记录
        UserDO user = new UserDO();
        user.setUsername(UUID.randomUUID().toString()); // 随机账号,因为唯一索引
        user.setPassword("llp");
        user.setCreateTime(new Date());
        user.setDeleted(0);
        userMapper.insert0(user);
        // <2> 判断缓存中,是不是存在
        Assert.assertNotNull("缓存为空", cacheManager.getCache(CACHE_NAME_USER).get(user.getId(), UserDO.class));

        // <3.1> 删除记录,为了让缓存被删除
        userMapper.deleteById(user.getId());
        // <3.2> 判断缓存中,是不是存在
        Assert.assertNull("缓存不为空", cacheManager.getCache(CACHE_NAME_USER).get(user.getId(), UserDO.class));
    }

}
4.7过期时间
在 Spring Data 使用 Redis 作为缓存方案时,默认情况下是永不过期的。
127.0.0.1:6379> ttl users::1
(integer) -1
- 在 Redis 命令行中,我们可以看到
users::1的过期时间为-1永不过期。
虽然说,我们可以通 spring.cache.redis.time-to-live 配置项,设置过期时间。但是,它是全局的统一的。这样在实际使用时,是无法满足我们希望不同的缓存,使用不同的过期时间。
spring:
  # datasource 数据源配置内容
  datasource:
    url: jdbc:mysql://127.0.0.1:3306/llp?useSSL=false&useUnicode=true&characterEncoding=UTF-8
    driver-class-name: com.mysql.jdbc.Driver
    username: root
    password: root
  # 对应 RedisProperties 类
  redis:
    host: 127.0.0.1
    port: 6379
    password: # Redis 服务器密码,默认为空。生产中,一定要设置 Redis 密码!
    database: 0 # Redis 数据库号,默认为 0 。
    timeout: 0 # Redis 连接超时时间,单位:毫秒。
  cache:
    type: redis
    redis:
      time-to-live: 1h
4.8 Cacheable(Redis)缓存失效时间解决方案
问题
@Cacheable注解不支持配置过期时间,所有需要通过配置CacheManneg来配置默认的过期时间和针对每个类或者是方法进行缓存失效时间配置。
解决
可以采用如下的配置信息来解决的设置失效时间问题
- 配置信息
import com.fasterxml.jackson.annotation.JsonAutoDetect;
import com.fasterxml.jackson.annotation.PropertyAccessor;
import com.fasterxml.jackson.databind.ObjectMapper;
import org.springframework.cache.CacheManager;
import org.springframework.cache.interceptor.KeyGenerator;
import org.springframework.context.annotation.Bean;
import org.springframework.context.annotation.Configuration;
import org.springframework.data.redis.cache.RedisCacheConfiguration;
import org.springframework.data.redis.cache.RedisCacheManager;
import org.springframework.data.redis.cache.RedisCacheWriter;
import org.springframework.data.redis.connection.RedisConnectionFactory;
import org.springframework.data.redis.serializer.Jackson2JsonRedisSerializer;
import org.springframework.data.redis.serializer.RedisSerializationContext;

import java.lang.reflect.Method;
import java.time.Duration;
import java.util.Arrays;
import java.util.HashMap;
import java.util.Map;
import java.util.stream.Collectors;

@Configuration
public class CacheConfig {

    @Bean
    public CacheManager cacheManager(RedisConnectionFactory redisConnectionFactory) {
        return new RedisCacheManager(
                RedisCacheWriter.nonLockingRedisCacheWriter(redisConnectionFactory),
                this.getRedisCacheConfigurationWithTtl(30 * 60), // 默认策略,未配置的 key 会使用这个
                this.getRedisCacheConfigurationMap() // 指定 key 策略
        );
    }

    private Map<String, RedisCacheConfiguration> getRedisCacheConfigurationMap() {
        Map<String, RedisCacheConfiguration> redisCacheConfigurationMap = new HashMap<>();
        //SsoCache和BasicDataCache进行过期时间配置
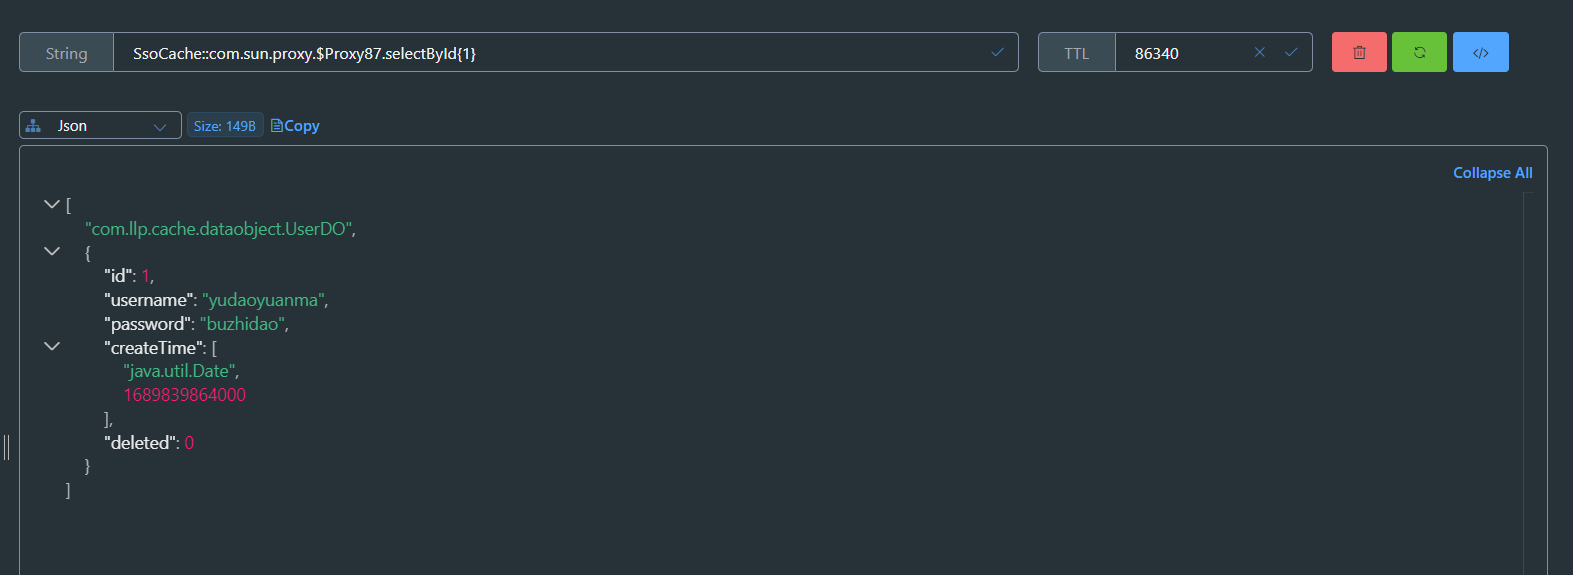
        redisCacheConfigurationMap.put("SsoCache", this.getRedisCacheConfigurationWithTtl(24 * 60 * 60));
        redisCacheConfigurationMap.put("BasicDataCache", this.getRedisCacheConfigurationWithTtl(30 * 60));
        return redisCacheConfigurationMap;
    }

    private RedisCacheConfiguration getRedisCacheConfigurationWithTtl(Integer seconds) {
        Jackson2JsonRedisSerializer<Object> jackson2JsonRedisSerializer = new Jackson2JsonRedisSerializer<>(Object.class);
        ObjectMapper om = new ObjectMapper();
        om.setVisibility(PropertyAccessor.ALL, JsonAutoDetect.Visibility.ANY);
        om.enableDefaultTyping(ObjectMapper.DefaultTyping.NON_FINAL);
        jackson2JsonRedisSerializer.setObjectMapper(om);

        RedisCacheConfiguration redisCacheConfiguration = RedisCacheConfiguration.defaultCacheConfig();
        redisCacheConfiguration = redisCacheConfiguration.serializeValuesWith(
                RedisSerializationContext
                        .SerializationPair
                        .fromSerializer(jackson2JsonRedisSerializer)
        ).entryTtl(Duration.ofSeconds(seconds));

        return redisCacheConfiguration;
    }

    //指定缓存key的生成方式
    @Bean
    public KeyGenerator wiselyKeyGenerator() {
        KeyGenerator keyGenerator = new KeyGenerator() {
            @Override
            public Object generate(Object target, Method method, Object... params) {
                StringBuilder sb = new StringBuilder();
                sb.append(target.getClass().getName());
                sb.append("." + method.getName());
                if (params == null || params.length == 0 || params[0] == null) {
                    return null;
                }
                String join = String.join("&", Arrays.stream(params).map(Object::toString).collect(Collectors.toList()));
                String format = String.format("%s{%s}", sb.toString(), join);
                //log.info("缓存key:" + format);
                return format;
            }
        };
        return keyGenerator;
    }

}
- 使用方式
@Repository
//统一配置该 UserMapper 使用的缓存名为 users ,方法中使用了cacheNames,则类的方法上使用cacheNames将不会生效
@CacheConfig(cacheNames = "users")
public class SsoCache{
    @Cacheable(value = "BasicDataCache",keyGenerator = "wiselyKeyGenerator")
    UserDO selectById(Integer id);

    //二者选其一,可以使用value上的信息,来替换类上cacheNames的信息
    @Cacheable(value = "SsoCache",keyGenerator = "wiselyKeyGenerator")
    UserDO selectById(Integer id);
}
BasicDataCache
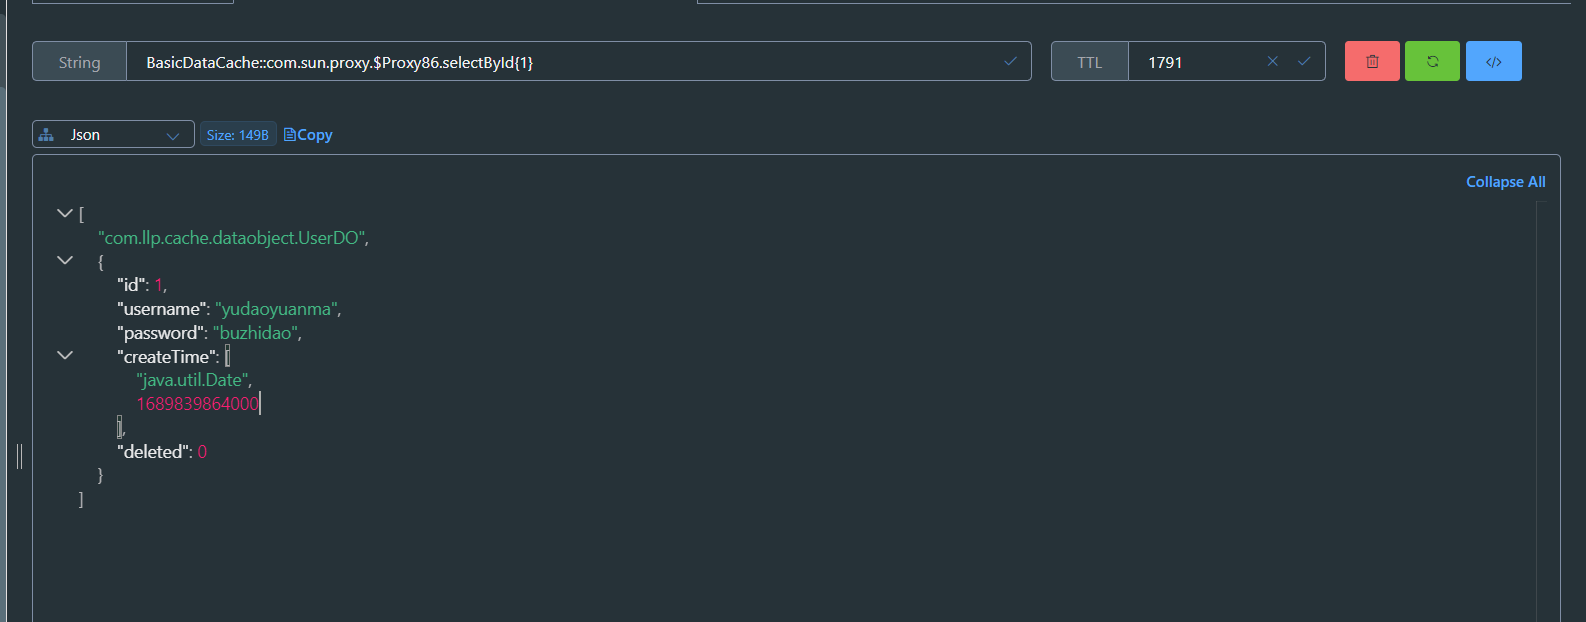
SsoCache
