文章目录
- 前言
- 问题背景
- 实现复杂json数据在el-table表格展示
- el-table-column分割线
- el-table-column高度
前言
在做复杂的动态表单,实现业务动态变动,比如有一条需要动态添加的el-form-item中包含了多个输入框,并实现表单验证,但在element-ui组件库中给出的表单校验中没有这样的格式,解决方法可参考文章:Element-UI 实现动态增加多个输入框并校验。
如果不想要固定格式的动态增加表单,且增加表单的类型不同,比如按钮开关、文本输入框、数字输入框,想要自由增加不同类型的表单并验证,可以参考文章:Element-UI 实现动态增加多个不同类型的输入框并校验(双重v-for表单验证)。
如果还想要还要复制多套表单且可编辑,可以参考文章:Vue 双重v-for渲染表单,再复制表单编辑之深拷贝。
表单由输入框、选择器、单选框、多选框等控件组成,动态增加各种编辑框存储格式为json,复制生成另外一套表单存储格式同样为json,不同的是,一条数据包含多个表单,而一个表单包含多个编辑框。
那么一条数据的多套表单在el-table表格该怎么做展示?下文将做讲解。
问题背景
一条复杂的json数据在el-table表格该怎么做展示?
这里有一条数据,json数据最外层有4个数组,也就说一个el-table-column要分割成4个数据,json数据如下:
[
  [
    {
      "key": "screen",
      "val": true,
      "name": "场景开关",
      "sceneType": 1
    },
    {
      "key": "showInterval",
      "val": 0,
      "name": "展示间隔(秒)",
      "sceneType": 2
    },
    {
      "key": "logicManage",
      "val": {
        "id": 5,
        "content": [
          {
            "key": "N",
            "val": "6",
            "name": "N"
          }
        ]
      },
      "name": "逻辑管理",
      "sceneType": 3
    },
    {
      "key": "controlManage",
      "val": [
        {
          "id": 6,
          "content": [
            {
              "key": "showRegions",
              "val": "|214|215|994|995|2163|",
              "name": "展示地区",
              "type": 9
            },
            {
              "key": "showTimeRange",
              "val": [
                [
                  "04:59",
                  "10:59"
                ],
                [
                  "05:13",
                  "20:25"
                ],
                [
                  "00:00",
                  "07:00"
                ]
              ],
              "name": "展示时段",
              "type": 10
            }
          ]
        }
      ],
      "name": "控制管理",
      "sceneType": 4
    },
    {
      "key": "select",
      "val": [
        {
          "id": 1,
          "dayLimits": 0,
          "showProbability": 100,
          "errorProbability": 100
        },
        {
          "id": 2,
          "dayLimits": 0,
          "showProbability": 100,
          "errorProbability": 100
        }
      ],
      "name": "选择",
      "sceneType": 5
    }
  ],
  [
    {
      "key": "screen",
      "val": false,
      "name": "场景开关",
      "sceneType": 1
    },
    {
      "key": "showInterval",
      "val": 0,
      "name": "展示间隔(秒)",
      "sceneType": 2
    },
    {
      "key": "logicManage",
      "val": {
        "id": 5,
        "content": [
          {
            "key": "N",
            "val": "6",
            "name": "N"
          }
        ]
      },
      "name": "逻辑管理",
      "sceneType": 3
    },
    {
      "key": "controlManage",
      "val": [
        {
          "id": 8,
          "content": [
            {
              "key": "isNetwork",
              "val": true,
              "name": "联网",
              "type": 11
            }
          ]
        },
        {
          "id": 1,
          "content": [
            {
              "key": "isFullScreenTrigger",
              "val": true,
              "name": "全屏触发",
              "type": 1
            },
            {
              "key": "triggerRate",
              "val": 30,
              "name": "触发概率(%)",
              "type": 2
            }
          ]
        },
        {
          "id": 4,
          "content": [
            {
              "key": "exchangeRate",
              "val": 30,
              "name": "互换概率(%)",
              "type": 7
            }
          ]
        },
        {
          "id": 5,
          "content": [
            {
              "key": "isFalsePause",
              "val": true,
              "name": "假暂停",
              "type": 8
            }
          ]
        },
        {
          "id": 2,
          "content": [
            {
              "key": "triggerRate",
              "val": 30,
              "name": "触发概率(%)",
              "type": 2
            }
          ]
        }
      ],
      "name": "控制管理",
      "sceneType": 4
    },
    {
      "key": "select",
      "val": [
        {
          "id": 2,
          "dayLimits": 0,
          "showProbability": 100,
          "errorProbability": 100
        },
        {
          "id": 1,
          "dayLimits": 0,
          "showProbability": 100,
          "errorProbability": 100
        },
        {
          "id": 9,
          "dayLimits": 1,
          "showProbability": 100,
          "errorProbability": 100
        }
      ],
      "name": "选择",
      "sceneType": 5
    }
  ],
  [
    {
      "key": "screen",
      "val": true,
      "name": "场景开关",
      "sceneType": 1
    },
    {
      "key": "showInterval",
      "val": 1,
      "name": "展示间隔(秒)",
      "sceneType": 2
    },
    {
      "key": "logicManage",
      "val": {
        "id": 5,
        "content": [
          {
            "key": "N",
            "val": "6",
            "name": "N"
          }
        ]
      },
      "name": "逻辑管理",
      "sceneType": 3
    },
    {
      "key": "controlManage",
      "val": [
        {
          "id": 8,
          "content": [
            {
              "key": "isNetwork",
              "val": true,
              "name": "联网",
              "type": 11
            }
          ]
        }
      ],
      "name": "控制管理",
      "sceneType": 4
    },
    {
      "key": "select",
      "val": [
        {
          "id": 1,
          "dayLimits": 2,
          "showProbability": 100,
          "errorProbability": 100
        }
      ],
      "name": "选择",
      "sceneType": 5
    }
  ],
  [
    {
      "key": "screen",
      "val": false,
      "name": "场景开关",
      "sceneType": 1
    },
    {
      "key": "showInterval",
      "val": 1,
      "name": "展示间隔(秒)",
      "sceneType": 2
    },
    {
      "key": "logicManage",
      "val": {
        "id": 2,
        "content": [
          {
            "key": "N",
            "val": "3",
            "name": "N"
          },
          {
            "key": "interval",
            "val": "5",
            "name": "间隔(秒)"
          }
        ]
      },
      "name": "逻辑管理",
      "sceneType": 3
    },
    {
      "key": "controlManage",
      "val": [
        {
          "id": 5,
          "content": [
            {
              "key": "isFalsePause",
              "val": true,
              "name": "假暂停",
              "type": 8
            }
          ]
        }
      ],
      "name": "控制管理",
      "sceneType": 4
    },
    {
      "key": "select",
      "val": [
        {
          "id": 2,
          "dayLimits": 2,
          "showProbability": 100,
          "errorProbability": 100
        },
        {
          "id": 1,
          "dayLimits": 0,
          "showProbability": 100,
          "errorProbability": 100
        }
      ],
      "name": "选择",
      "sceneType": 5
    }
  ]
]
可以看到,最外层的数据都包含 sceneType ,这个key使用来得知内部数据结构,解析的时候得到sceneType的类型就可以直接解析它内部。
key 是用于数据下发时用到的键,如不需要下发,只是在界面做编辑和展示,可省略。
实现复杂json数据在el-table表格展示
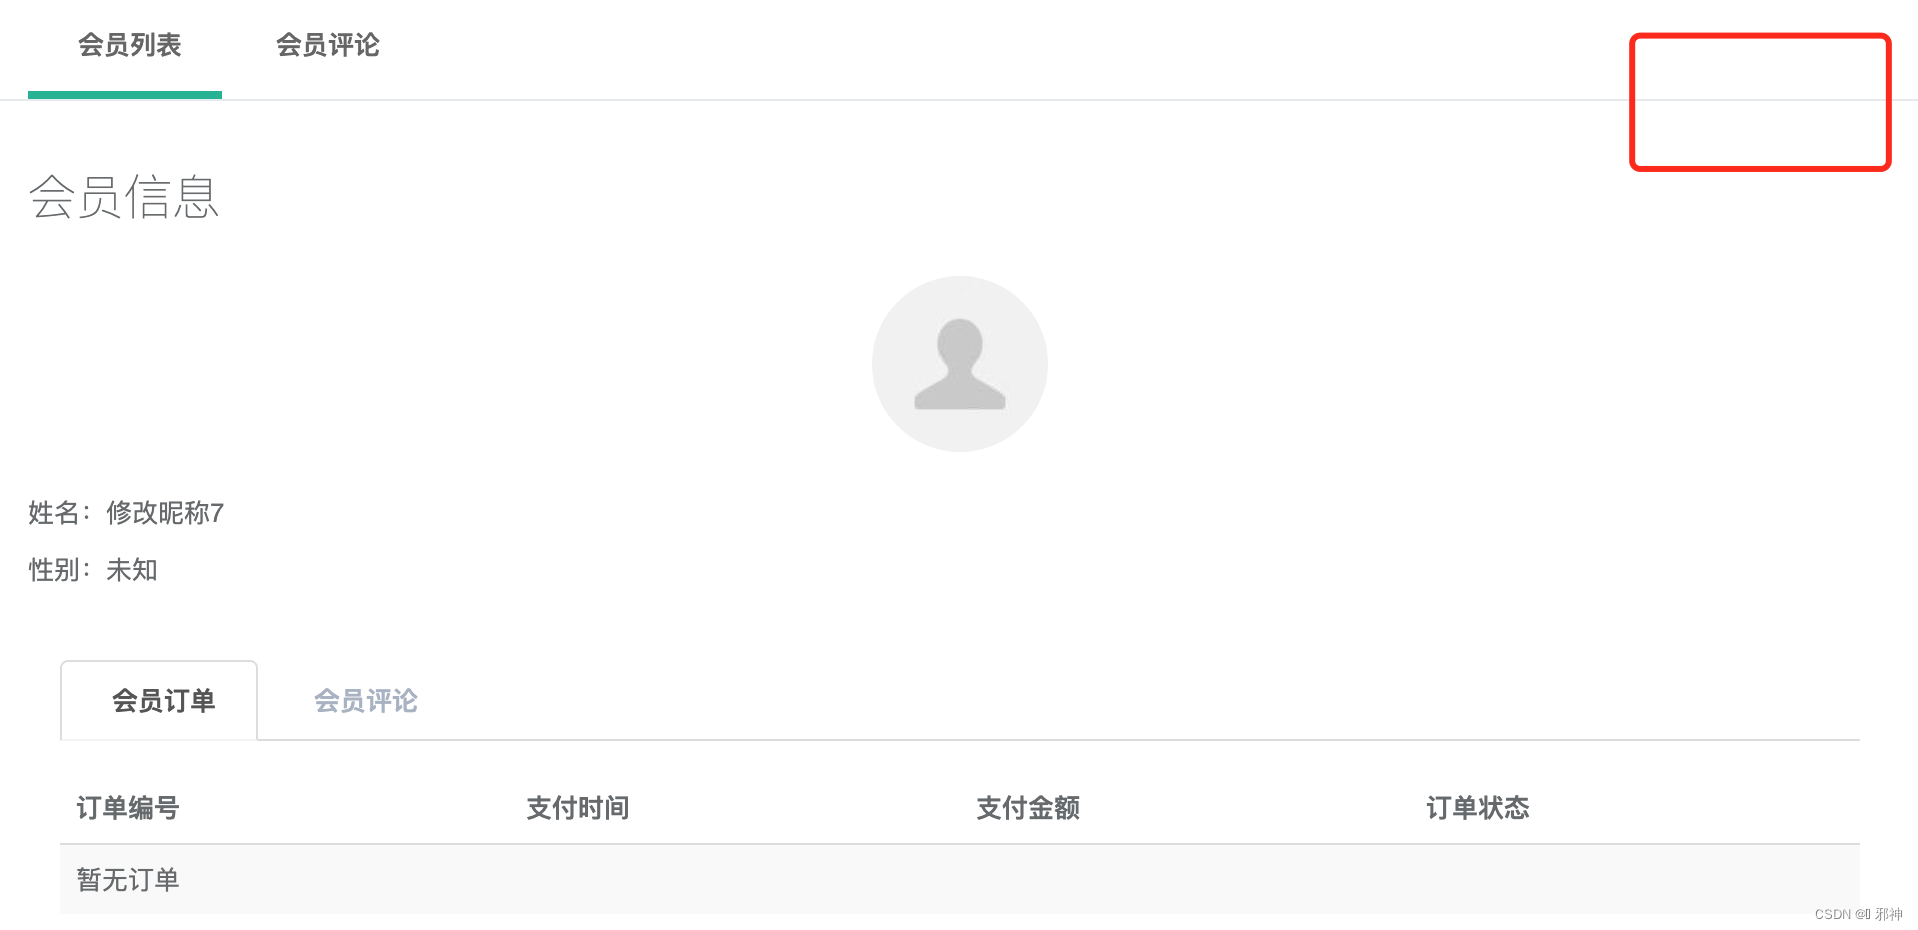
先看实现效果图:
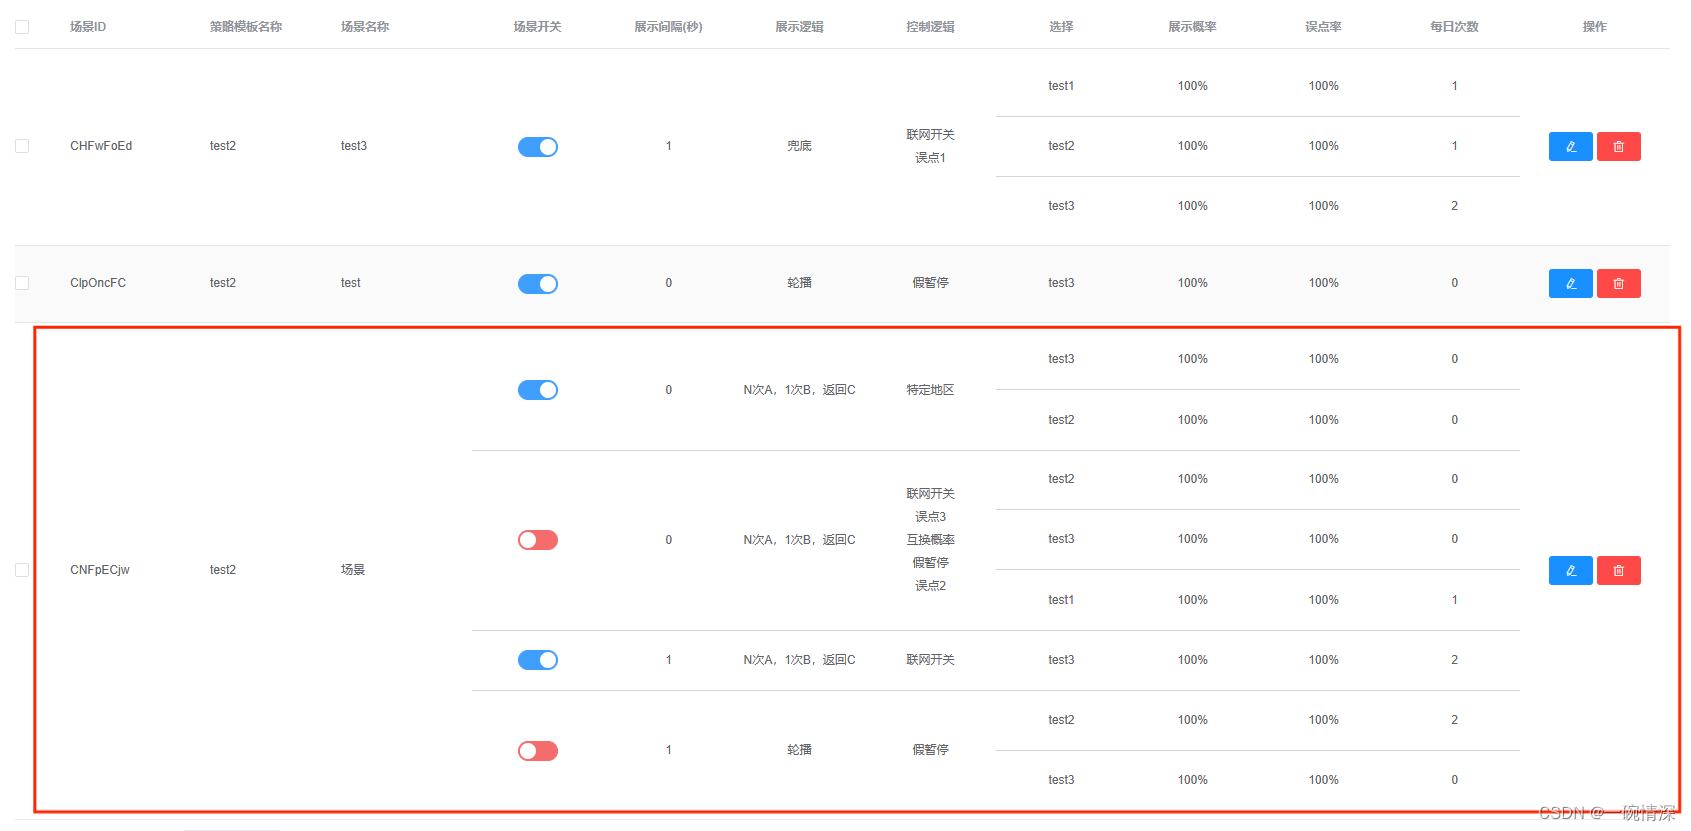
部分代码如下:
- 场景开关根据权限来决定是否显示el-switch开关,无权限直接显示文字
- 多个控制逻辑不做分割,分行显示
<el-table-column label="场景开关" align="center" prop="content">
  <template slot-scope="scope">
    <template>
      <div v-for="(item, index) in scope.row.content" :key="index" class="flex-box self-cell" :style="checkHight(item)">
        <span v-for="(arr, arrIndex) in item" :key="arrIndex">
          <span v-if="arr.sceneType === 1">
            <el-switch v-if="checkPermission(['admin','scene:edit'])" v-model="arr.val" active-color="#409EFF" inactive-color="#F56C6C" @change="changeEnabled(scope.row, arr.val, index, arrIndex)" />
            <span v-else>{{ arr.val ? '开' : '关' }}</span>
          </span>
        </span>
      </div>
    </template>
  </template>
</el-table-column>

<el-table-column label="控制逻辑" align="center" prop="content">
  <template slot-scope="scope">
    <span v-for="(item, index) in scope.row.content" :key="index" class="flex-box self-cell" :style="checkHight(item)">
      <span v-for="(arr, arrIndex) in item" :key="arrIndex">
        <span v-if="arr.sceneType === 4">
          <span v-for="(controlItem, controlIndex) in arr.val" :key="controlIndex">
            <span v-if="controlIndex !== 0"><br></span>
            <span>{{ getName(controlManage, controlItem.id) }}</span>
          </span>
        </span>
      </span>
    </span>
  </template>
</el-table-column>

<el-table-column v-if="columns.visible('content')" label="选择" align="center" prop="content">
  <template slot-scope="scope">
    <div v-for="(item, index) in scope.row.content" :key="index" class="flex-box self-cell" :style="checkHight(item)">
      <span v-for="(arr, arrIndex) in item" :key="arrIndex">
        <span v-if="arr.sceneType === 5">
          <span v-for="(selectItem, selectIndex) in arr.val" :key="selectIndex" class="flex-box-2 self-cell">
            <span>{{ getName(selects, selectItem.id) }}</span>
          </span>
        </span>
      </span>
    </div>
  </template>
</el-table-column>
el-table-column分割线
上面的代码可以看到
- 第一层v-for写入了
class="flex-box self-cell",用于显示分割线 - 需要再分割的v-for写入了
class="flex-box2 self-cell",用于显示分割线
如需要动态决定所需分割的列,可用函数动态修改 flex-box,此处不做讲解,只是复制了flex-box命名为flex-box2,并添加属性 min-width: 9999px;,用于显示第二层分割线的长度。
css如下:
  .flex-box {
    align-items: center;
    display: flex;
    height: 60px;
    justify-content: center;
    padding: 0 6px;
  }

  .flex-box-2 {
    align-items: center;
    display: flex;
    height: 60px;
    min-width: 9999px;
    justify-content: center;
    padding: 0 6px;
  }

  /deep/ .el-table .el-table__cell.table__cell {
    padding: 0;
  }

  /deep/ .el-table .cell {
    padding: 0 !important;
  }

  /deep/ .el-table .cell .self-cell {
    border-bottom: 1px solid #d3d5d9;
    padding: 6px 5px;
  }

  /deep/ .el-table .cell .self-cell:last-child {
    border-bottom: none;
  }
el-table-column高度
第一层v-for还包含 :style="checkHight(item)",用于检测当前行所需要的高度。
从上面的css代码得知,每一行的固定高度为60px,那么,如果分割中的行数再进行分割呢?
分割一次,一条数据的高度应该为120px,如果再分割一次,一条数据的高度为180px,那么就需要写函数来控制。
至于高度应该是多少,还取决于其它列的最高高度。
为什么?先看上面这句话 多个控制逻辑不做分割,分行显示,也就就说控制逻辑高度是不固定的,有多个就换行显示,那么高度动态增加的,不能还是设置60px,效果如图:

可以看到,第二个分割行的高度不止60px,checkHight()函数实现如下:
checkHight(item) {
  let num1 = 60
  let num2 = 60
  for (var i = 0; i < item.length; i++) {
    if (item[i].sceneType === 4) {
      num1 = item[i].val.length * 30
    }
    if (item[i].sceneType === 5) {
      num2 = item[i].val.length * 60
    }
  }
  return [{
    height: Math.max(num1, num2) + 'px'
  }]
}


