为什么使用语言服务器协议?
LSP(Language Server Protocol)语言服务器是一种特殊的 Visual Studio Code 扩展,可为许多编程语言提供编辑体验。使用语言服务器,您可以实现自动完成、错误检查(诊断)、跳转到定义以及VS Code 支持的许多其他语言功能。
然而,在 VS Code 中实现对语言功能的支持时,我们发现了三个常见问题:
首先,语言服务器通常以其本机编程语言实现,这给将它们与具有 Node.js 运行时的 VS Code 集成带来了挑战。
此外,语言功能可能是资源密集型的。例如,为了正确验证文件,语言服务器需要解析大量文件,为它们建立抽象语法树并执行静态程序分析。这些操作可能会导致大量的 CPU 和内存使用,我们需要确保 VS Code 的性能不受影响。
最后,将多种语言工具与多个代码编辑器集成可能需要付出巨大的努力。从语言工具的角度来看,它们需要适应具有不同API的代码编辑器。从代码编辑者的角度来看,他们不能期望语言工具提供任何统一的 API。最终导致了为N种编辑器实现M种语言需要花费N*M的工作和精力。

为了解决这些问题,微软提供了语言服务器协议(Language Server Protocol)意图为语言插件和编辑器提供社区规范。这样一来,语言服务器就可以用任何一种语言来实现,用协议通讯也避免了插件在主进程中运行的高开销。而且任何LSP兼容的语言插件,都能和LSP兼容的代码编辑器整合起来,LSP是语言插件开发者和第三方编辑器的共赢方案。
在 VS Code 中,语言服务器有两部分:
- 语言客户端:用 JavaScript / TypeScript 编写的普通 VS Code 扩展。此扩展可以访问所有VS Code 命名空间 API。
- 语言服务器:在单独进程中运行的语言分析工具。
如上所述,在单独的进程中运行语言服务器有两个好处:
- 该分析工具可以用任何语言实现,只要它能够按照语言服务器协议与语言客户端进行通信即可。
- 由于语言分析工具通常会占用大量 CPU 和内存,因此在单独的进程中运行它们可以避免性能成本。
一、先了解下编程语言扩展
可以做哪些编程语言相关的扩展
我们先看一张图,看看vscode支持我们做哪些编程语言的扩展。

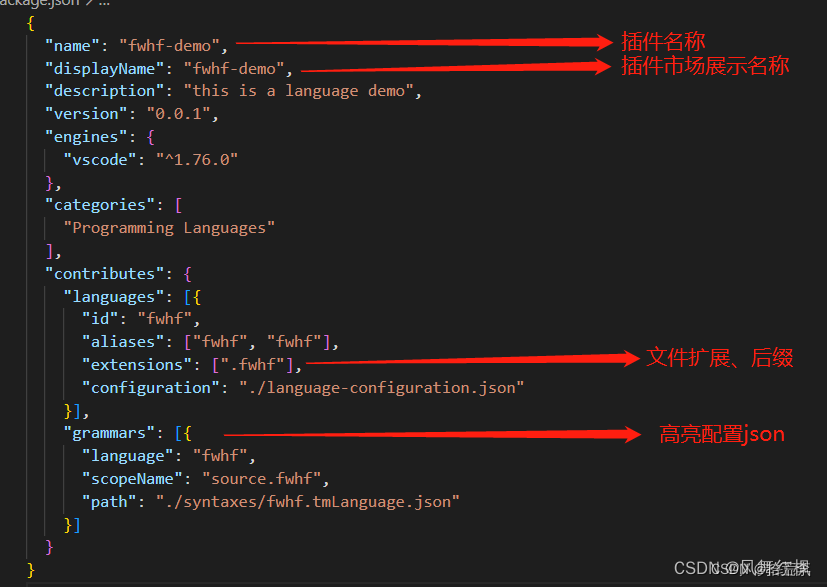
首先,我们在package.json下的contributes下增加对于语言配置的支持:
"languages": [{
     "id": "basic",
     "extensions": [
         ".bas" // 自定义语言扩展名
     ],
     "configuration": "./language-configuration.json"
 }
注释
使用//来表示单行注释,用/**/来表示多行注释。我们这样来写language-configuation.json:
"comments": {
     "lineComment": "//",
     "blockComment": [
         "/*",
         "*/"
     ]
 }
定义之后,我们就可以用Ctrl+K(Windows)或者Cmd-K(Mac)来触发打开或关闭注释了
括号匹配
我们对小括号和中括号进行配对:
"brackets": [
     [
         "[",
         "]"
     ],
     [
         "(",
         ")"
     ],
 ],
括号的自动补齐
可以通过括号的自动补齐功能来防止少写一半括号:
"autoClosingPairs": [
     {
         "open": "\"",
         "close": "\""
     },
     {
         "open": "[",
         "close": "]"
     },
     {
         "open": "(",
         "close": ")"
     },
     {
         "open": "Sub",
         "close": "End Sub"
     }
 ]
在上例中,输入一个",就会补上另一半"。对于其他括号也是如此。
选中区域加括号
在选中一个区域之后,再输入一半括号,就可以自动用一对完整括号将其包围起来,称为auto surrounding功能。
例:
"surroundingPairs": [
     [
         "[",
         "]"
     ],
     [
         "(",
         ")"
     ],
     [
         "\"",
         "\""
     ],
     [
         "'",
         "'",
     ]
 ],
代码折叠
函数和代码块多了以后,给代码阅读带来一定困难。我们可以选择将一个代码块折叠起来。这也是Vim和emacs时代就有的老功能了。
我们以折叠Sub/End Sub为例,看看代码折叠的写法:
    "folding": {
        "markers": {
            "start": "^\\s*Sub.*",
            "end": "^\\s*End\\s*Sub.*"
        }
    }
我们来看下Sub折叠后的效果:

Diagnostic诊断信息(vscode插件扩展方式实现)
语言扩展中一个重要的功能是代码扫描的诊断信息。这个诊断信息是以vscode.Diagnostic为载体呈现的。
我们来看一下vscode.Diagnostic类的成员和与相关类的关系

以小到大,这些类为:
- Position: 定位到一行上的一个字符的坐标
- Range: 由起点和终点两个Position决定
- Location: 一个Range配上一个URI
- DiagnosticRelatedInformation: 一个Location配一个message
- Diagnostic: 主体是一个message字符串,一个Range和一个DiagnosticRelatedInformation.
构造一个诊断信息
下面我们来构造一个诊断信息。
for(var i = 0; i < 10; i ++) {
  for(var i = 0; i < 10; i ++) {
    console.log('*')
  }
}
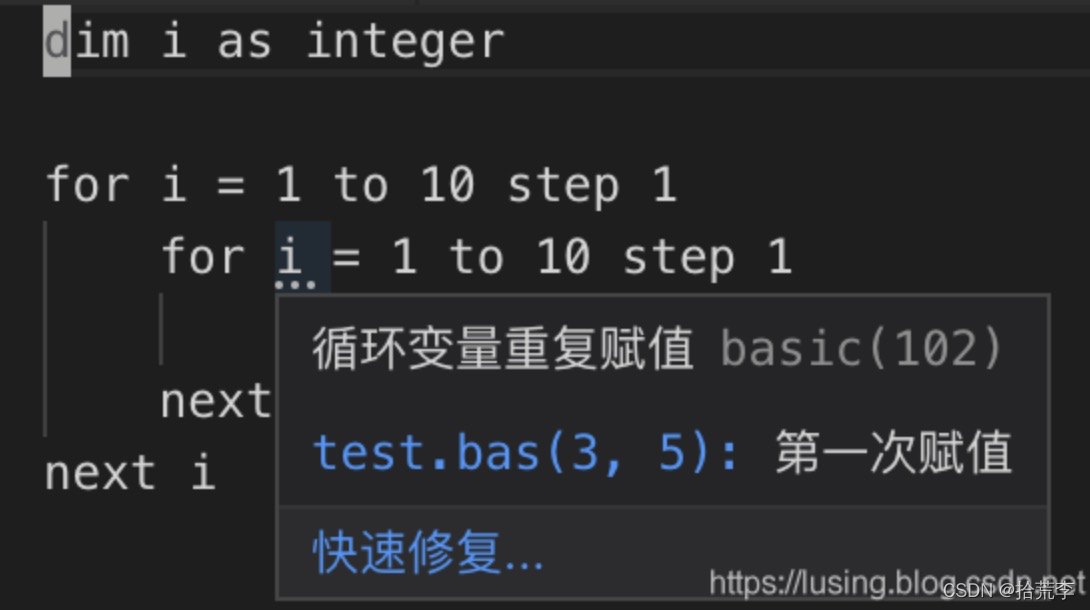
这个例子中,循环控制变量在外循环和内循环中被重用,导致外循环失效。
出现问题的Range是第2行的第9字符到第10字符。位置是以0开始的,所以我们构造(2,8)到(2,9)这样两个Position为首尾的Range.
new vscode.Range(
   new vscode.Position(2, 8), new vscode.Position(2, 9),
)
有了Range,加上问题描述字符串,和问题的严重程序三项,就可以构造一个Diagnostic来。
 let diag1: vscode.Diagnostic = new vscode.Diagnostic(
      new vscode.Range(
          new vscode.Position(2, 8), new vscode.Position(2, 9),
      ),
      '循环变量重复赋值',
      vscode.DiagnosticSeverity.Hint,
  )
诊断相关信息
上一节提到,有Range,有message,有严重程度这三项,就可以构造一个Diagnostic信息出来。
除此之外,还可以设置一些高级信息。
第一个是来源,比如来自eslint某版本,使用了某某规则之类的。这个可以写到Diagnostic的source属性中。
diag1.source = '某某规则';
第二个是错误码,有助于分类和查询。这个是code属性来表示的,既可以是一个数字,也可以是一个字符串。
diag1.code = 401;
第三个是相关信息。以上节例子来说,我们说i已经被赋值过了,那么可以进一步告诉开发者是在哪里被赋值过了。所以要有一个uri,能找到代码的地址。还要有一个Range,告诉在uri中的具体位置。前面介绍过了,这是一个vscode.Location结构。
    diag1.relatedInformation = [new vscode.DiagnosticRelatedInformation(
        new vscode.Location(document.uri,
            new vscode.Range(new vscode.Position(2, 4), new vscode.Position(2, 5))),
        '第一次赋值')];
下面我们把它们集合起来,针对上面的test.js进行错误提示。主要就是将上面的提示信息写到传参进来的DiagnosticCollection中。
import * as vscode from 'vscode';
import * as path from 'path';

export function updateDiags(document: vscode.TextDocument,
    collection: vscode.DiagnosticCollection): void {
    let diag1: vscode.Diagnostic = new vscode.Diagnostic(
        new vscode.Range(
            new vscode.Position(2, 8), new vscode.Position(2, 9),
        ),
        '循环变量重复赋值',
        vscode.DiagnosticSeverity.Hint,
    );
    diag1.source = 'basic-lint';
    diag1.relatedInformation = [new vscode.DiagnosticRelatedInformation(
        new vscode.Location(document.uri,
            new vscode.Range(new vscode.Position(2, 4), new vscode.Position(2, 5))),
        '第一次赋值')];
    diag1.code = 102;

    if (document && path.basename(document.uri.fsPath) === 'test.js') {
        collection.set(document.uri, [diag1]);
    } else {
        collection.clear();
    }
}
触发诊断信息的事件
下面我们在plugin的activate函数中增加到于刚才写的updateDiags函数的调用。
	const diag_coll = vscode.languages.createDiagnosticCollection('basic-lint-1');

	if (vscode.window.activeTextEditor) {
		diag.updateDiags(vscode.window.activeTextEditor.document, diag_coll);
	}

	context.subscriptions.push(vscode.window.onDidChangeActiveTextEditor(
		(e: vscode.TextEditor | undefined) => {
			if (e !== undefined) {
				diag.updateDiags(e.document, diag_coll);
			}
		}));
运行一下,在新启动的vscode中打开test.bas,然后在最后任意编辑一下代码,激活事情就可以触发。运行界面如下:
Diagnostic诊断信息(LSP方式实现)
server代码
documents.onDidChangeContent(change => {
	validateTextDocument(change.document);
});

async function validateTextDocument(textDocument: TextDocument): Promise<void> {
	// In this simple example we get the settings for every validate run.
	const settings = await getDocumentSettings(textDocument.uri);

	// The validator creates diagnostics for all uppercase words length 2 and more
	const text = textDocument.getText();
	const pattern = /\b[A-Z]{2,}\b/g;
	let m: RegExpExecArray | null;

	let problems = 0;
	const diagnostics: Diagnostic[] = [];
	while ((m = pattern.exec(text)) && problems < settings.maxNumberOfProblems) {
		problems++;
		const diagnostic: Diagnostic = {
			severity: DiagnosticSeverity.Warning,
			range: {
				start: textDocument.positionAt(m.index),
				end: textDocument.positionAt(m.index + m[0].length)
			},
			message: `${m[0]} is all uppercase.`,
			source: 'ex'
		};
		if (hasDiagnosticRelatedInformationCapability) {
			diagnostic.relatedInformation = [
				{
					location: {
						uri: textDocument.uri,
						range: Object.assign({}, diagnostic.range)
					},
					message: 'Spelling matters'
				},
				{
					location: {
						uri: textDocument.uri,
						range: Object.assign({}, diagnostic.range)
					},
					message: 'Particularly for names'
				}
			];
		}
		diagnostics.push(diagnostic);
	}

	// Send the computed diagnostics to VSCode.
	connection.sendDiagnostics({ uri: textDocument.uri, diagnostics });
}
主要方法connection.sendDiagnostics
client端代码
/* --------------------------------------------------------------------------------------------
 * Copyright (c) Microsoft Corporation. All rights reserved.
 * Licensed under the MIT License. See License.txt in the project root for license information.
 * ------------------------------------------------------------------------------------------ */

import * as path from 'path';
import { workspace, ExtensionContext } from 'vscode';

import {
	LanguageClient,
	LanguageClientOptions,
	ServerOptions,
	TransportKind
} from 'vscode-languageclient/node';

let client: LanguageClient;

export function activate(context: ExtensionContext) {
	// The server is implemented in node
	const serverModule = context.asAbsolutePath(
		path.join('server', 'out', 'server.js')
	);
	// The debug options for the server
	// --inspect=6009: runs the server in Node's Inspector mode so VS Code can attach to the server for debugging
	const debugOptions = { execArgv: ['--nolazy', '--inspect=6009'] };

	// If the extension is launched in debug mode then the debug server options are used
	// Otherwise the run options are used
	const serverOptions: ServerOptions = {
		run: { module: serverModule, transport: TransportKind.ipc },
		debug: {
			module: serverModule,
			transport: TransportKind.ipc,
			options: debugOptions
		}
	};

	// Options to control the language client
	const clientOptions: LanguageClientOptions = {
		// Register the server for plain text documents
		documentSelector: [{ scheme: 'file', language: 'plaintext' }],
		synchronize: {
			// Notify the server about file changes to '.clientrc files contained in the workspace
			fileEvents: workspace.createFileSystemWatcher('**/.clientrc')
		}
	};

	// Create the language client and start the client.
	client = new LanguageClient(
		'languageServerExample',
		'Language Server Example',
		serverOptions,
		clientOptions
	);

	// Start the client. This will also launch the server
	client.start();
}

export function deactivate(): Thenable<void> | undefined {
	if (!client) {
		return undefined;
	}
	return client.stop();
}
二、语法高亮
vscode扩展高亮
VS Code 的标记化引擎由TextMate 语法提供支持。TextMate 语法是正则表达式的结构化集合,并以 plist (XML) 或 JSON 文件形式编写。VS Code 扩展可以通过grammars贡献点贡献语法。
TextMate 标记化引擎与渲染器在同一进程中运行,并且标记随着用户输入而更新。标记用于语法突出显示,还用于将源代码分类为注释、字符串、正则表达式区域。


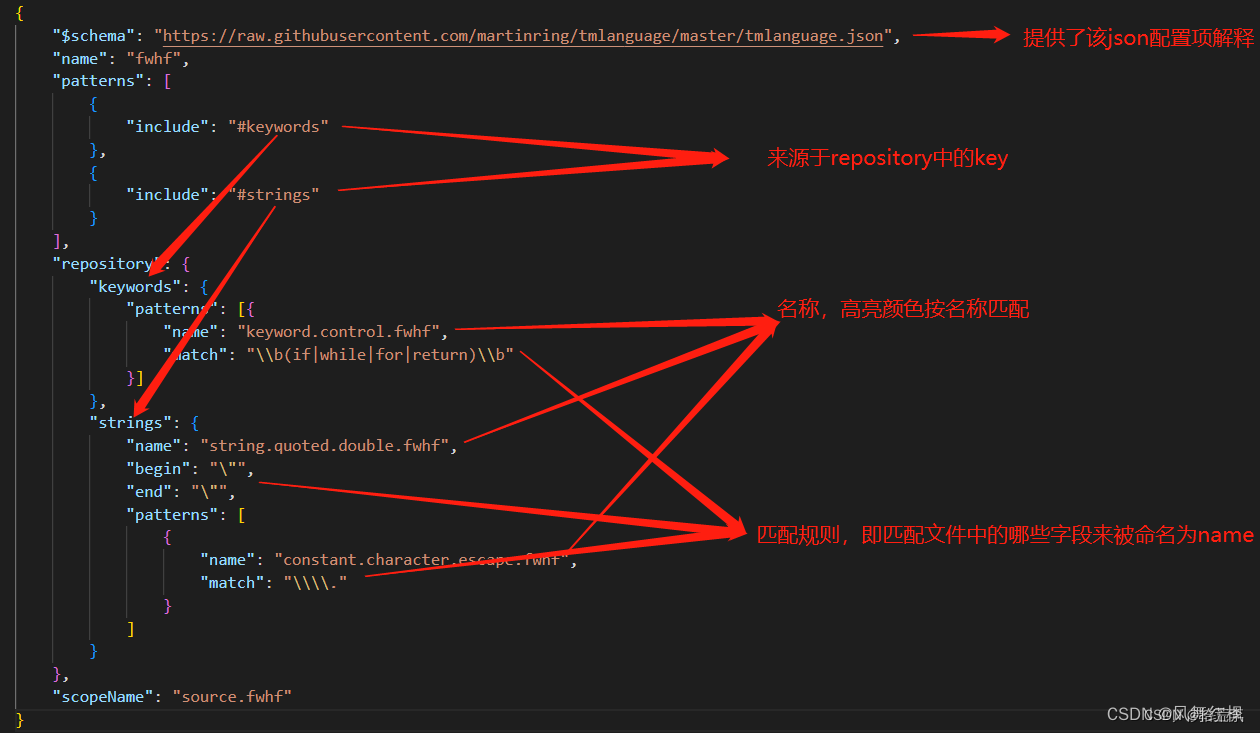
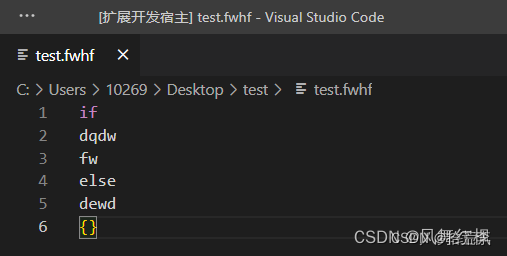
比如我们把 文件名字定义为fwhf(随意).
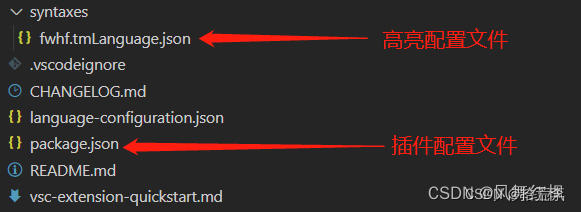
package.json详细介绍
 高亮配置json详细介绍,更多可见文件中的json配置项解释,或者点击这里
调试
参考:https://blog.csdn.net/qq_42231248/article/details/129683141?spm=1001.2014.3001.5502
https://code.visualstudio.com/api/language-extensions/semantic-highlight-guide
https://code.visualstudio.com/api/language-extensions/programmatic-language-features
https://code.visualstudio.com/api/language-extensions/language-server-extension-guide
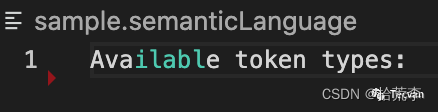
DocumentSemanticTokensProvider 自行分词高亮
简介
「Sematic Tokens Provider」 是 vscode 内置的一种对象协议,它需要自行扫描代码文件内容,然后以整数数组形式返回语义 token 序列,告诉 vscode 在文件的哪一行、那一列、多长的区间内是一个什么类型的 token。
注意区分一下,TextMate 中的扫描是引擎驱动的,逐行匹配正则,而 「Sematic Tokens Provider」 场景下扫描规则、匹配规则都交由插件开发者自行实现,灵活性增强但相对的开发成本也会更高。
实现上,「Sematic Tokens Provider」 以 vscode.DocumentSemanticTokensProvider 接口定义,开发者可以按需实现两个方法:
provideDocumentSemanticTokens :全量分析代码文件语义
provideDocumentSemanticTokensEdits :增量分析正在编辑模块的语义
我们来看个完整的示例:
import * as vscode from 'vscode';

const tokenTypes = ['class', 'interface', 'enum', 'function', 'variable'];
const tokenModifiers = ['declaration', 'documentation'];
const legend = new vscode.SemanticTokensLegend(tokenTypes, tokenModifiers);

const provider: vscode.DocumentSemanticTokensProvider = {
  provideDocumentSemanticTokens(
    document: vscode.TextDocument
  ): vscode.ProviderResult<vscode.SemanticTokens> {
    const tokensBuilder = new vscode.SemanticTokensBuilder(legend);
    tokensBuilder.push(
      new vscode.Range(new vscode.Position(0, 3), new vscode.Position(0, 8)),
      tokenTypes[0],
      [tokenModifiers[0]]
    );
    return tokensBuilder.build();
  }
};

const selector = { language: 'javascript', scheme: 'file' };

vscode.languages.registerDocumentSemanticTokensProvider(selector, provider, legend);
相信大多数读者对这段代码都会觉得陌生,我想了很久,觉得还是从函数输出的角度开始讲起比较容易理解,也就是上例代码第 17 行 tokensBuilder.build()。
我们可以自己定义分词颜色
"semanticTokenColors": {
"userName": "#2E8B57",
	"companyName": "#2E8B57",
	"court": "#6495ED",
	"lawFirm": "#4876FF",
	"law": "#FF8247",
	"time": "#EEB422",
	// "address:lawdawn": "#54a15a"

},
三、从头搭建一个语言服务器
目录结构
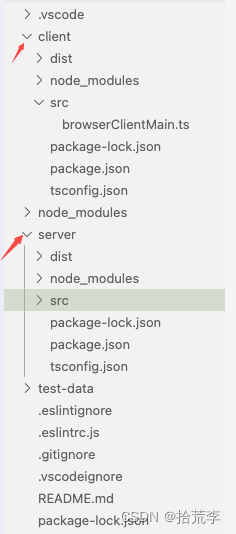
分为client端和server端
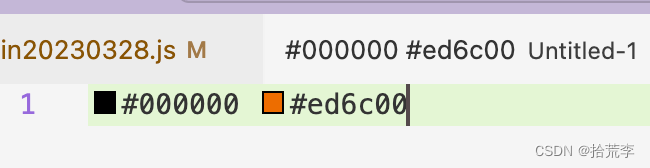
主要功能实现:提取颜色
package.json
 "activationEvents": [
    "onLanguage:plaintext"
  ],
  // "main": "./client/dist/browserClientMain", //桌面端
  "browser": "./client/dist/browserClientMain", // 浏览器端
  "contributes": {
    "configuration": [
      {
        "order": 22,
        "id": "lsp-web-extension-sample",
        "title": "lsp-web-extension-sample",
        "properties": {
          "lsp-web-extension-sample.trace.server": {
            "type": "string",
            "scope": "window",
            "enum": [
              "off",
              "messages",
              "verbose"
            ],
            "default": "verbose",
            "description": "Traces the communication between VS Code and the lsp-web-extension-sample language server."
          }
        }
      }
    ]
  },
main:桌面端入口browser:浏览器端入口
server/src/browserServerMain.ts
/*---------------------------------------------------------------------------------------------
 *  Copyright (c) Microsoft Corporation. All rights reserved.
 *  Licensed under the MIT License. See License.txt in the project root for license information.
 *--------------------------------------------------------------------------------------------*/
import { createConnection, BrowserMessageReader, BrowserMessageWriter } from 'vscode-languageserver/browser';

import { Color, ColorInformation, Range, InitializeParams, InitializeResult, ServerCapabilities, TextDocuments, ColorPresentation, TextEdit, TextDocumentIdentifier } from 'vscode-languageserver';
import { TextDocument } from 'vscode-languageserver-textdocument';


console.log('running server lsp-web-extension-sample');

/* browser specific setup code */

const messageReader = new BrowserMessageReader(self);
const messageWriter = new BrowserMessageWriter(self);

const connection = createConnection(messageReader, messageWriter);

/* from here on, all code is non-browser specific and could be shared with a regular extension */

connection.onInitialize((params: InitializeParams): InitializeResult => {
	const capabilities: ServerCapabilities = {
		colorProvider: {} // provide a color providr
	};
	return { capabilities };
});

// Track open, change and close text document events
const documents = new TextDocuments(TextDocument);
documents.listen(connection);

// Register providers
connection.onDocumentColor(params => getColorInformation(params.textDocument));
connection.onColorPresentation(params => getColorPresentation(params.color, params.range));

// Listen on the connection
connection.listen();


const colorRegExp = /#([0-9A-Fa-f]{6})/g;

function getColorInformation(textDocument: TextDocumentIdentifier) {
	console.log(111);
	const colorInfos: ColorInformation[] = [];

	const document = documents.get(textDocument.uri);
	if (document) {
		const text = document.getText();

		colorRegExp.lastIndex = 0;
		let match;
		while ((match = colorRegExp.exec(text)) != null) {
			console.log('match->', match)
			const offset = match.index;
			const length = match[0].length;

			const range = Range.create(document.positionAt(offset), document.positionAt(offset + length));
			const color = parseColor(text, offset);
			console.log('color-->', color)
			colorInfos.push({ color, range });
		}
	}

	return colorInfos;
}

function getColorPresentation(color: Color, range: Range) {
	console.log(22)
	const result: ColorPresentation[] = [];
	const red256 = Math.round(color.red * 255), green256 = Math.round(color.green * 255), blue256 = Math.round(color.blue * 255);

	function toTwoDigitHex(n: number): string {
		const r = n.toString(16);
		return r.length !== 2 ? '0' + r : r;
	}

	const label = `#${toTwoDigitHex(red256)}${toTwoDigitHex(green256)}${toTwoDigitHex(blue256)}`;
	result.push({ label: label, textEdit: TextEdit.replace(range, label) });

	return result;
}


const enum CharCode {
	Digit0 = 48,
	Digit9 = 57,

	A = 65,
	F = 70,

	a = 97,
	f = 102,
}

function parseHexDigit(charCode: CharCode): number {
	if (charCode >= CharCode.Digit0 && charCode <= CharCode.Digit9) {
		return charCode - CharCode.Digit0;
	}
	if (charCode >= CharCode.A && charCode <= CharCode.F) {
		return charCode - CharCode.A + 10;
	}
	if (charCode >= CharCode.a && charCode <= CharCode.f) {
		return charCode - CharCode.a + 10;
	}
	return 0;
}

function parseColor(content: string, offset: number): Color {
	const r = (16 * parseHexDigit(content.charCodeAt(offset + 1)) + parseHexDigit(content.charCodeAt(offset + 2))) / 255;
	const g = (16 * parseHexDigit(content.charCodeAt(offset + 3)) + parseHexDigit(content.charCodeAt(offset + 4))) / 255;
	const b = (16 * parseHexDigit(content.charCodeAt(offset + 5)) + parseHexDigit(content.charCodeAt(offset + 6))) / 255;
	return Color.create(r, g, b, 1);
}
client/src/browserClientMain.ts
/*---------------------------------------------------------------------------------------------
 *  Copyright (c) Microsoft Corporation. All rights reserved.
 *  Licensed under the MIT License. See License.txt in the project root for license information.
 *--------------------------------------------------------------------------------------------*/

import { ExtensionContext, Uri } from 'vscode';
import { LanguageClientOptions } from 'vscode-languageclient';

import { LanguageClient } from 'vscode-languageclient/browser';

// this method is called when vs code is activated
export function activate(context: ExtensionContext) {

	console.log('lsp-web-extension-sample activated!');

	/*
	 * all except the code to create the language client in not browser specific
	 * and couuld be shared with a regular (Node) extension
	 */
	const documentSelector = [{ language: 'plaintext' }];

	// Options to control the language client
	const clientOptions: LanguageClientOptions = {
		documentSelector,
		synchronize: {},
		initializationOptions: {}
	};

	const client = createWorkerLanguageClient(context, clientOptions);

	const disposable = client.start();
	context.subscriptions.push(disposable);

	client.onReady().then(() => {
		console.log('lsp-web-extension-sample server is ready');
	});
}

function createWorkerLanguageClient(context: ExtensionContext, clientOptions: LanguageClientOptions) {
	// Create a worker. The worker main file implements the language server.
	const serverMain = Uri.joinPath(context.extensionUri, 'server/dist/browserServerMain.js');
	const worker = new Worker(serverMain.toString());

	// create the language server client to communicate with the server running in the worker
	return new LanguageClient('lsp-web-extension-sample', 'LSP Web Extension Sample', clientOptions, worker);
}
调试:
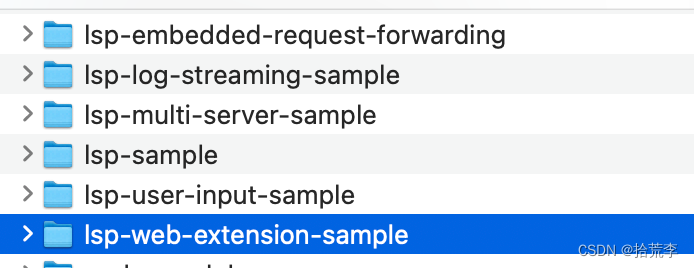
官方插件仓库给了很多例子,大家可以下载下来试试
地址:https://github.com/microsoft/vscode-extension-samples
网上有大神对LSP API作了总结:https://vimsky.com/examples/detail/typescript-ex-vscode-languageserver-IConnection-onDocumentFormatting-method.html
参考:https://code.visualstudio.com/api/language-extensions/language-server-extension-guide
https://code.visualstudio.com/api/language-extensions/syntax-highlight-guide
https://cloud.tencent.com/developer/article/1841066