【编译、链接、装载十五】系统调用与API——printf源码分析
- 一、系统调用介绍
- 1、什么是系统调用
- 2、Linux系统调用
- 3、系统调用的弊端
- 二、系统调用原理
- 1、中断
- 三、linux下系统调用实现
- 1、 strace 查看可知,printf调用了系统函数write
- 2、gdb调试查看——printf
- 3、gdb调试查看——write
- 4、问题:
- 四、查看源码
- 1、glibc——printf源码
- 3、kernal——write源码
- 2、kernal——printf源码
- 五、windows API概览
我们从程序如何链接、 如何使用运行库到运行库的实现机制, 层层挖掘和剖析, 现在已经到了用户层面与内核层面的界限了, 也就是常说的系统调用(System Call) 。系统调用是应用程序(运行库也是应用程序的一部分) 与操作系统内核之间的接口, 它决定了应用程序是如何与内核打交道的。 无论程序是直接进行系统调用, 还是通过运行库, 最终还是会到达系统调用这个层面上。Windows系统是完全基于DLL机制的, 它通过DLL对系统调用进行了包装, 形成了所谓的Windows API。 应用程序所能看到的Windows系统的最底层的接口就是Windows API
一、系统调用介绍
1、什么是系统调用
什么是系统调用在现代的操作系统里, 程序运行的时候, 本身是没有权利访问多少系统资源的。 由于系统有限的资源有可能被多个不同的应用程序同时访问,因此, 如果不加以保护, 那么各个应用程序难免产生冲突。 所以现代操作系统都将可能产生冲突的系统资源给保护起来, 阻止应用程序直接访问。 这些系统资源包括文件、 网络、 IO、 各种设备等。 举个例子, 无论在Windows下还是Linux下, 程序员都没有机会擅自去访问硬盘的某扇区上面的数据, 而必须通过文件系统; 也不能擅自修改任意文件, 所有的这些操作都必须经由操作系统所规定的方式来进行, 比如我们使用fopen去打开一个没有权限的文件就会发生失败。
为了让应用程序有能力访问系统资源, 也为了让程序借助操作系统做一些必须由操作系统支持的行为, 每个操作系统都会提供一套接口, 以供应用程序使用。 这些接口往往通过中断来实现, 比如Linux使用0x80号中断作为系统调用的入口, Windows采用0x2E号中断作为系统调用入口。
不过对于Windows来讲, 系统调用实际上不是它与应用程序的最终接口, 而是API, 所以上面这段对系统调用的描述同样适用于WindowsAPI, 我们也暂时可以把API与系统调用等同起来。
2、Linux系统调用
下面让我们来看看Linux系统调用的定义, 已有一个比较直观的概念。在x86下, 系统调用由0x80中断完成,每个系统调用都对应于内核源代码中的一个函数, 它们都是以“sys_”开头的, 比如exit调用对应内核中的sys_exit函数。
在 Linux 操作系统中,许多系统调用函数会涉及到底层的硬件访问或操作系统内核的功能,这些函数可能会触发底层的中断处理程序,包括 80 中断。一些典型的调用 80中断的系统调用函数包括:
- int 80h: 直接调用 80 中断来实现系统调用的函数,例如 Linux 早期版本中使用的系统调用函数;
- syscall: 通过软中断方式调用内核服务来实现系统调用的函数,目前是 Linux 中主要的系统调用方式。
syscall 和 80 中断都是用于在 Linux 系统中进行系统调用的机制。区别和联系如下:
区别:
- syscall 是通过直接调用 CPU 的指令进入内核空间,从而执行指定的系统调用;而 80 中断则是通过软件中断的方式进入内核空间。
- 在使用 syscall 时,需要将系统调用号、参数等信息依次存入寄存器中;而在使用 80 中断时,则需要将相应的信息存储在寄存器和栈中,并使用软件中断指令触发中断。
- 在使用 syscall 时,可以直接返回到用户空间代码段继续执行;而在使用 80 中断时,则需要使用 iret 指令返回。
》4. 在现代的 x86-64 系统上,syscall 已经成为了主流的系统调用方法,而 80 中断则主要用于一些特殊场合。
联系:
- syscall 和 80 中断都是用于进入内核空间执行系统调用的机制,可以完成类似的工作。
- syscall 和 80 中断都需要相关的系统调用号和参数等信息来指定需要执行的系统调用及其参数。
- syscall 和 80 中断都可以在用户空间代码中直接调用。

 我们没有必要一一列举这个Linux版本的300多个系统调用, 未列举的包括权限管理(sys_setuid等) 、 定时器(sys_timer_create) 、 信号(sys_sigaction) 、 网络(sys_epoll) 等。 这些系统调用都可以在程序里直接使用, 它的C语言形式被定义在“/usr/include/unistd.h”中, 比如我们完全可以绕过glibc的fopen、 fread、 fclose打开读取和关闭文件, 而直接使用open()、 read()和close()来实现文件的读取, 使用write向屏幕输出字符串(标准输出的文件句柄为0)
#include <unistd.h>

int main() {
    char msg[] = "hello world\n";
    write(STDOUT_FILENO, msg, sizeof(msg) - 1);
    return 0;
}
3、系统调用的弊端
使用不便。
操作系统提供的系统调用接口往往过于原始, 程序员须要了解很多与操作系统相关的细节。 如果没有进行很好的包装, 使用起来不方便。
各个操作系统之间系统调用不兼容。
首先Windows系统和Linux系统之间的系统调用就基本上完全不同, 虽然它们的内容很多都一样, 但是定义和实现大不一样。 即使是同系列的操作系统的系统调用都不一样, 比如Linux和UNIX就不相同。
为了解决这个问题, 第1章中的“万能法则”又可以发挥它的作用了。 “解决计算机的问题可以通过增加层来实现”, 于是运行库挺身而出, 它作为系统调用与程序之间的一个抽象层可以保持着这样的特点:
- 使用简便。 因为运行库本身就是语言级别的, 它一般都设计相对比较友好。
- 形式统一。 运行库有它的标准, 叫做标准库, 凡是所有遵循这个标准的运行库理论上都是相互兼容的, 不会随着操作系统或编译器的变化而变化。
这样, 当我们使用运行库提供的接口写程序时, 就不会面临这些问题,至少是可以很大程度上掩盖直接使用系统调用的弊端。例如C语言里的fread, 用于读取文件, 在Windows下这个函数的实现可能是调用ReadFile这个API, 而如果在Linux下, 则很可能调用了read这个系统调用。 但不管在哪个平台, 我们都可以使用C语言运行库fread来读文件。
二、系统调用原理
1、中断
现代的CPU常常可以在多种截然不同的特权级别下执行指令, 在现代操作系统中, 通常也据此有两种特权级别, 分别为用户模式(User Mode) 和内核模式(Kernel Mode) , 也被称为用户态和内核态。
由于有多种特权模式的存在, 操作系统就可以让不同的代码运行在不同的模式上, 以限制它们的权力, 提高稳定性和安全性。 普通应用程序运行在用户态的模式下, 诸多操作将受到限制, 这些操作包括访问硬件设备、开关中断、 改变特权模式等。
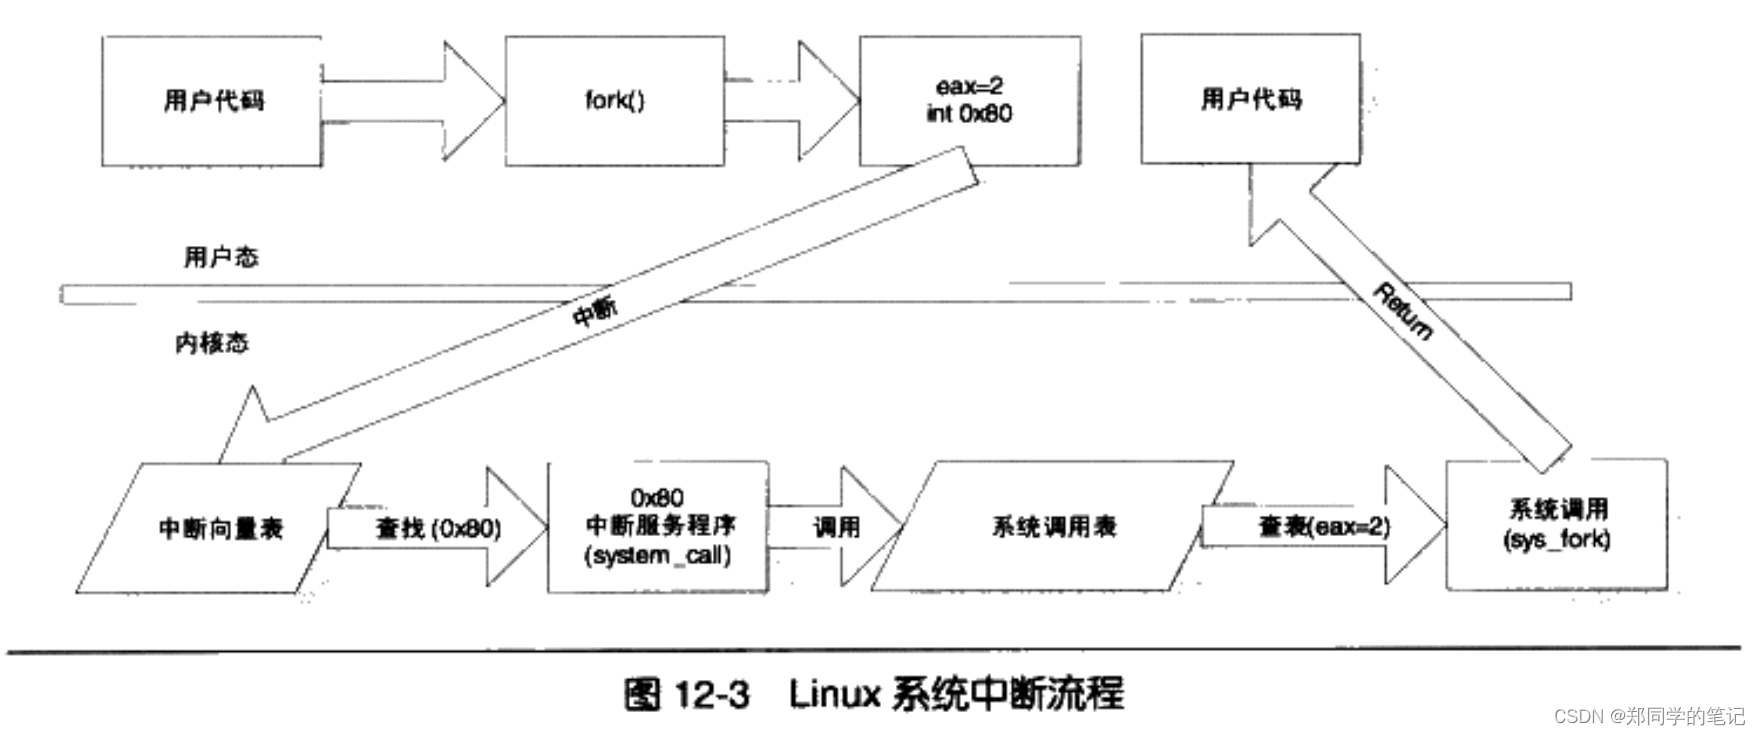
系统调用是运行在内核态的, 而应用程序基本都是运行在用户态的。 用户态的程序如何运行内核态的代码呢? 操作系统一般是通过中断(Interrupt) 来从用户态切换到内核态。
什么是中断呢? 中断是一个硬件或软件发出的请求, 要求CPU暂停当前的工作转手去处理更加重要的事情。 举一个例子, 当你在编辑文本文件的时候, 键盘上的键不断地被按下, CPU如何获知这一点的呢? 一种方法称为轮询(Poll) , 即CPU每隔一小段时间(几十到几百毫秒) 去询问键盘是否有键被按下, 但除非用户是疯狂打字员, 否则大部分的轮询行为得到的都是“没有键被按下”的回应, 这样操作就被浪费掉了。 另外一种方法是CPU不去理睬键盘, 而当键盘上有键被按下时, 键盘上的芯片发送一个信号给CPU,CPU接收到信号之后就知道键盘被按下了, 然后再去询问键盘被按下的键是哪一个。 这样的信号就是一种中断,
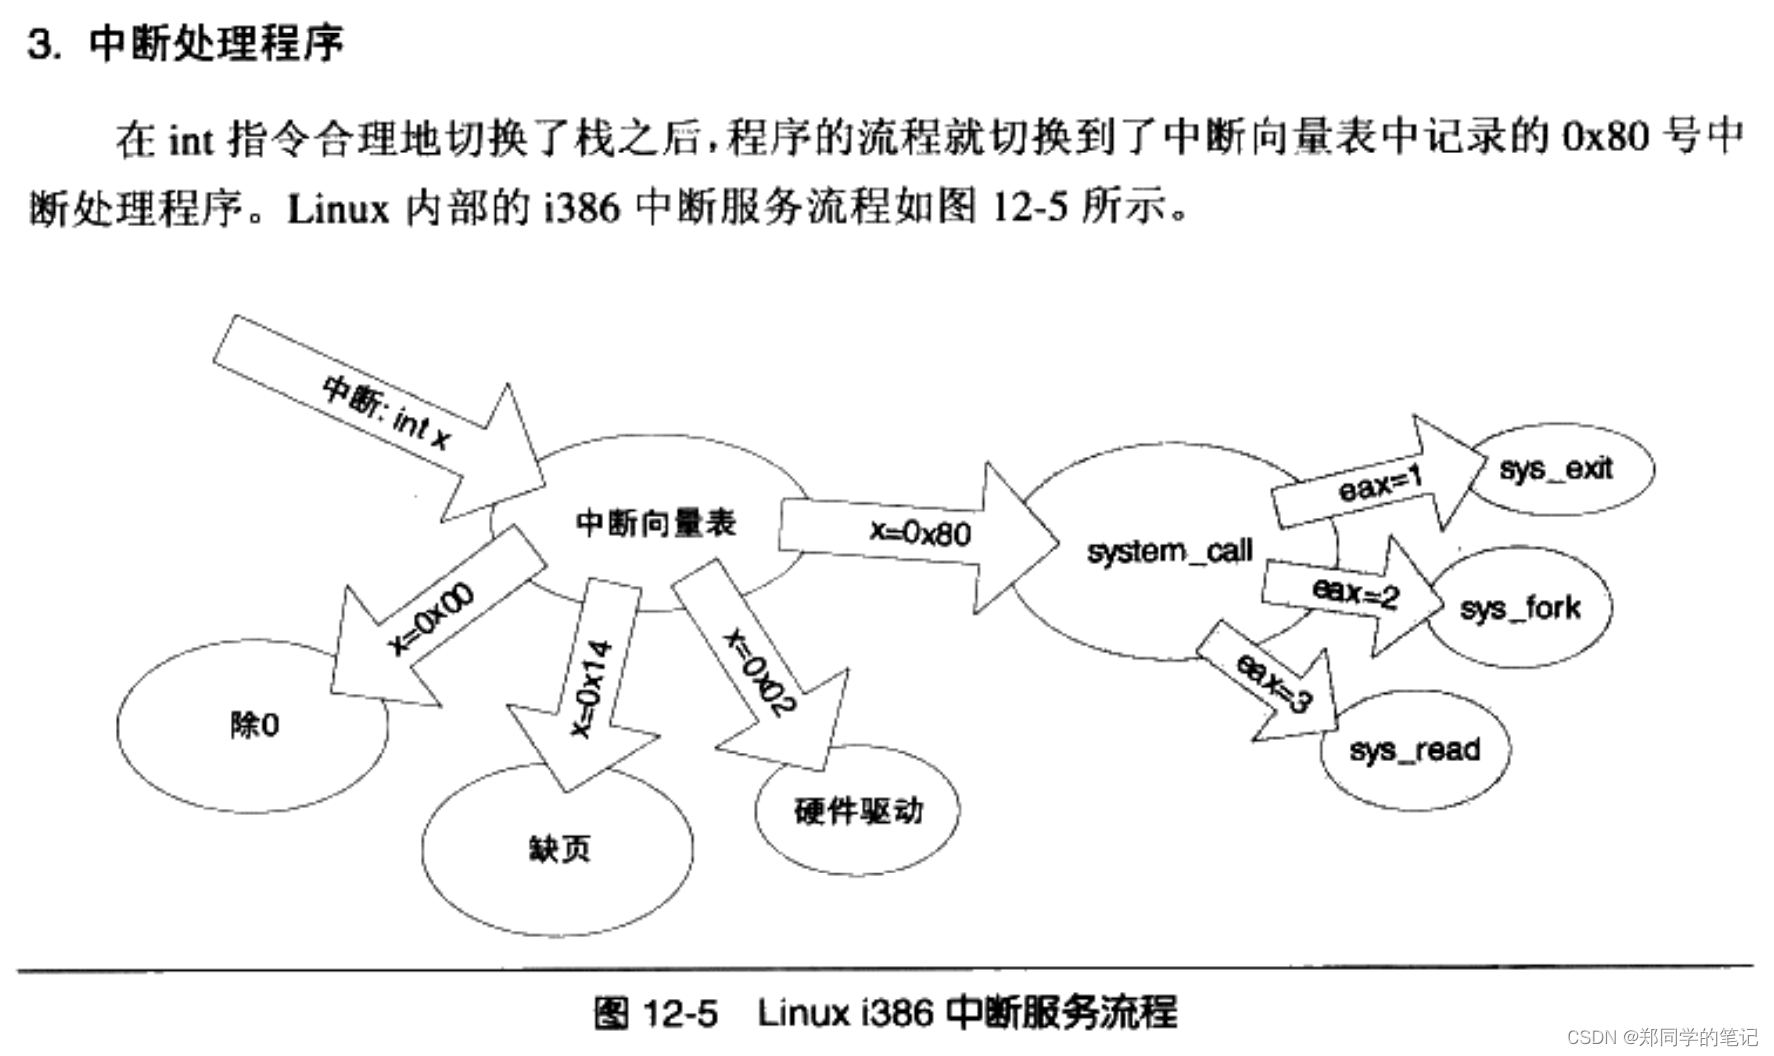
中断一般具有两个属性, 一个称为中断号(从0开始) , 一个称为中断处理程序(Interrupt Service Routine, ISR) 。 不同的中断具有不同的中断号, 而同时一个中断处理程序一一对应一个中断号。 在内核中, 有一个数组称为中断向量表(Interrupt Vector Table) , 这个数组的第n项包含了指向第n号中断的中断处理程序的指针。 当中断到来时, CPU会暂停当前执行的代码, 根据中断的中断号, 在中断向量表中找到对应的中断处理程序, 并调用它。 中断处理程序执行完成之后, CPU会继续执行之前的代码。 一个简单的示意图如图所示

通常意义上, 中断有两种类型, 一种称为硬件中断, 这种中断来自于硬件的异常或其他事件的发生, 如电源掉电、 键盘被按下等。 另一种称为软件中断, 软件中断通常是一条指令(i386下是int) , 带有一个参数记录中断号, 使用这条指令用户可以手动触发某个中断并执行其中断处理程序。
由于中断号是很有限的, 操作系统不会舍得用一个中断号来对应一个系统调用, 而更倾向于用一个或少数几个中断号来对应所有的系统调用。例如, i386下Windows里绝大多数系统调用都是由int 0x2e来触发的, 而Linux则使用int 0x80来触发所有的系统调用。 对于同一个中断号, 操作系统如何知道是哪一个系统调用要被调用呢? 和中断一样, 系统调用都有一个系统调用号, 就像身份标识一样来表明是哪一个系统调用, 这个系统调用号通常就是系统调用在系统调用表中的位置,
以Linux的int 0x80为例, 系统调用号是由eax来传入的。 用户将系统调用号放入eax, 然后使用int 0x80调用中断, 中断服务程序就可以从eax里取得系统调用号, 进而调用对应的函数。
三、linux下系统调用实现
1、 strace 查看可知,printf调用了系统函数write
- demo
#include <stdio.h>

int main()
{
	  char str[] = "helloworld%d\n";
      printf(str,123);
      return 0;
}
- strace跟踪过程,printf调用了系统函数write
[root@localhost test01]# gcc main.c
[root@localhost test01]# ./a.out
helloworld123
[root@localhost test01]# strace ./a.out
execve("./a.out", ["./a.out"], 0x7fff0ed3f360 /* 54 vars */) = 0
brk(NULL)                               = 0x82c000
mmap(NULL, 4096, PROT_READ|PROT_WRITE, MAP_PRIVATE|MAP_ANONYMOUS, -1, 0) = 0x7fbaf80f6000
access("/etc/ld.so.preload", R_OK)      = -1 ENOENT (没有那个文件或目录)
open("/etc/ld.so.cache", O_RDONLY|O_CLOEXEC) = 3
fstat(3, {st_mode=S_IFREG|0644, st_size=113309, ...}) = 0
mmap(NULL, 113309, PROT_READ, MAP_PRIVATE, 3, 0) = 0x7fbaf80da000
close(3)                                = 0
open("/lib64/libc.so.6", O_RDONLY|O_CLOEXEC) = 3
read(3, "\177ELF\2\1\1\3\0\0\0\0\0\0\0\0\3\0>\0\1\0\0\0`&\2\0\0\0\0\0"..., 832) = 832
fstat(3, {st_mode=S_IFREG|0755, st_size=2156592, ...}) = 0
mmap(NULL, 3985920, PROT_READ|PROT_EXEC, MAP_PRIVATE|MAP_DENYWRITE, 3, 0) = 0x7fbaf7b08000
mprotect(0x7fbaf7ccc000, 2093056, PROT_NONE) = 0
mmap(0x7fbaf7ecb000, 24576, PROT_READ|PROT_WRITE, MAP_PRIVATE|MAP_FIXED|MAP_DENYWRITE, 3, 0x1c3000) = 0x7fbaf7ecb000
mmap(0x7fbaf7ed1000, 16896, PROT_READ|PROT_WRITE, MAP_PRIVATE|MAP_FIXED|MAP_ANONYMOUS, -1, 0) = 0x7fbaf7ed1000
close(3)                                = 0
mmap(NULL, 4096, PROT_READ|PROT_WRITE, MAP_PRIVATE|MAP_ANONYMOUS, -1, 0) = 0x7fbaf80d9000
mmap(NULL, 8192, PROT_READ|PROT_WRITE, MAP_PRIVATE|MAP_ANONYMOUS, -1, 0) = 0x7fbaf80d7000
arch_prctl(ARCH_SET_FS, 0x7fbaf80d7740) = 0
access("/etc/sysconfig/strcasecmp-nonascii", F_OK) = -1 ENOENT (没有那个文件或目录)
access("/etc/sysconfig/strcasecmp-nonascii", F_OK) = -1 ENOENT (没有那个文件或目录)
mprotect(0x7fbaf7ecb000, 16384, PROT_READ) = 0
mprotect(0x600000, 4096, PROT_READ)     = 0
mprotect(0x7fbaf80f7000, 4096, PROT_READ) = 0
munmap(0x7fbaf80da000, 113309)          = 0
fstat(1, {st_mode=S_IFCHR|0620, st_rdev=makedev(136, 13), ...}) = 0
mmap(NULL, 4096, PROT_READ|PROT_WRITE, MAP_PRIVATE|MAP_ANONYMOUS, -1, 0) = 0x7fbaf80f5000
write(1, "helloworld123\n", 14helloworld123
)         = 14
exit_group(0)                           = ?
+++ exited with 0 +++
[root@localhost test01]#
- 分析汇编
movabs 0x726f776f6c6c6568,%rax
movl $0x6425646c,-0x8(%rbp)
$0x6f72776f6c6c6568、$0x6425646c是helloworld的16进制,大家可以自己对比下。
h 68
e 65
l 6c
l 6c
o 6f
w 77
o 6f
r 72
l 6c
d 64
[root@localhost test01]# objdump -d -x ./a.out

000000000040052d <main>:
  40052d:	55                   	push   %rbp
  40052e:	48 89 e5             	mov    %rsp,%rbp
  400531:	48 83 ec 10          	sub    $0x10,%rsp
  400535:	48 b8 68 65 6c 6c 6f 	movabs $0x726f776f6c6c6568,%rax
  40053c:	77 6f 72
  40053f:	48 89 45 f0          	mov    %rax,-0x10(%rbp)
  400543:	c7 45 f8 6c 64 25 64 	movl   $0x6425646c,-0x8(%rbp)
  40054a:	66 c7 45 fc 0a 00    	movw   $0xa,-0x4(%rbp)
  400550:	48 8d 45 f0          	lea    -0x10(%rbp),%rax
  400554:	be 7b 00 00 00       	mov    $0x7b,%esi
  400559:	48 89 c7             	mov    %rax,%rdi
  40055c:	b8 00 00 00 00       	mov    $0x0,%eax
  400561:	e8 aa fe ff ff       	callq  400410 <printf@plt>
  400566:	b8 00 00 00 00       	mov    $0x0,%eax
  40056b:	c9                   	leaveq
  40056c:	c3                   	retq
  40056d:	0f 1f 00             	nopl   (%rax)
2、gdb调试查看——printf
-
- 安装glibc-debuginfo
sudo yum install glibc-debuginfo
如果安装失败,手动下载安装,下载地址http://debuginfo.centos.org/
下载:glibc-debuginfo-common-2.17-326.el7_9.x86_64.rpm、glibc-debuginfo-2.17-326.el7_9.x86_64.rpm
安装:
sudo yum install glibc-debuginfo-common-2.17-326.el7_9.x86_64.rpm
sudo yum install glibc-debuginfo-2.17-326.el7_9.x86_64.rpm
yum list glibc
yun install 上面列出的名字。
-
- 调试
- 使用以下命令打开GDB调试器,<executable_file>是可执行文件的名称。
gdb <executable_file>- 并使用printf函数的名称设置断点:
(gdb) break printf- 运行可执行文件,直到程序停止在printf函数处的断点。
(gdb) run- 使用以下命令查看当前行的汇编代码:
(gdb) disassemble $pc,+1000- 退出
(gdb) quit
disassemble $pc,+20
这个命令展示了从当前程序计数器 p c 指向的位置开始的 20 条汇编指令。在 G D B 中,程序计数器( P r o g r a m C o u n t e r ,通常缩写为 P C )是一个寄存器,用于记录当前正在执行的代码的下一条指令的地址。因此, pc 指向的位置开始的 20 条汇编指令。在 GDB 中,程序计数器(Program Counter,通常缩写为 PC)是一个寄存器,用于记录当前正在执行的代码的下一条指令的地址。因此, pc指向的位置开始的20条汇编指令。在GDB中,程序计数器(ProgramCounter,通常缩写为PC)是一个寄存器,用于记录当前正在执行的代码的下一条指令的地址。因此,pc 就代表了当前程序执行的位置。
+20 表示展示从 $pc 指向的位置开始的 20 条指令。这个参数可以根据需要进行调整,以便查看更多或更少的指令。
使用 disassemble 命令可以查看当前代码的汇编指令。这对于调试和优化代码非常有用,因为它使您能够深入了解代码的实际执行过程。
[root@localhost test01]# gdb ./a.out
GNU gdb (GDB) Red Hat Enterprise Linux 7.6.1-120.el7
Copyright (C) 2013 Free Software Foundation, Inc.
License GPLv3+: GNU GPL version 3 or later <http://gnu.org/licenses/gpl.html>
This is free software: you are free to change and redistribute it.
There is NO WARRANTY, to the extent permitted by law.  Type "show copying"
and "show warranty" for details.
This GDB was configured as "x86_64-redhat-linux-gnu".
For bug reporting instructions, please see:
<http://www.gnu.org/software/gdb/bugs/>...
Reading symbols from /root/桌面/test01/a.out...(no debugging symbols found)...done.
(gdb) break printf
Breakpoint 1 at 0x400410
(gdb) run
Starting program: /root/桌面/test01/./a.out

Breakpoint 1, __printf (format=0x4005e0 "helloworld%d\n") at printf.c:29
29	{
(gdb) disassemble $pc,+1000
Dump of assembler code from 0x7ffff7a60450 to 0x7ffff7a60838:
=> 0x00007ffff7a60450 <__printf+0>:	sub    $0xd8,%rsp
   0x00007ffff7a60457 <__printf+7>:	test   %al,%al
   0x00007ffff7a60459 <__printf+9>:	mov    %rsi,0x28(%rsp)
   0x00007ffff7a6045e <__printf+14>:	mov    %rdx,0x30(%rsp)
   0x00007ffff7a60463 <__printf+19>:	mov    %rcx,0x38(%rsp)
   0x00007ffff7a60468 <__printf+24>:	mov    %r8,0x40(%rsp)
   0x00007ffff7a6046d <__printf+29>:	mov    %r9,0x48(%rsp)
   0x00007ffff7a60472 <__printf+34>:	je     0x7ffff7a604ab <__printf+91>
   0x00007ffff7a60474 <__printf+36>:	movaps %xmm0,0x50(%rsp)
   0x00007ffff7a60479 <__printf+41>:	movaps %xmm1,0x60(%rsp)
   0x00007ffff7a6047e <__printf+46>:	movaps %xmm2,0x70(%rsp)
   0x00007ffff7a60483 <__printf+51>:	movaps %xmm3,0x80(%rsp)
   0x00007ffff7a6048b <__printf+59>:	movaps %xmm4,0x90(%rsp)
   0x00007ffff7a60493 <__printf+67>:	movaps %xmm5,0xa0(%rsp)
   0x00007ffff7a6049b <__printf+75>:	movaps %xmm6,0xb0(%rsp)
   0x00007ffff7a604a3 <__printf+83>:	movaps %xmm7,0xc0(%rsp)
   0x00007ffff7a604ab <__printf+91>:	lea    0xe0(%rsp),%rax
   0x00007ffff7a604b3 <__printf+99>:	mov    %rdi,%rsi
   0x00007ffff7a604b6 <__printf+102>:	lea    0x8(%rsp),%rdx
   0x00007ffff7a604bb <__printf+107>:	mov    %rax,0x10(%rsp)
   0x00007ffff7a604c0 <__printf+112>:	lea    0x20(%rsp),%rax
   0x00007ffff7a604c5 <__printf+117>:	movl   $0x8,0x8(%rsp)
   0x00007ffff7a604cd <__printf+125>:	movl   $0x30,0xc(%rsp)
   0x00007ffff7a604d5 <__printf+133>:	mov    %rax,0x18(%rsp)
   0x00007ffff7a604da <__printf+138>:	mov    0x373a4f(%rip),%rax        # 0x7ffff7dd3f30
   0x00007ffff7a604e1 <__printf+145>:	mov    (%rax),%rdi
   0x00007ffff7a604e4 <__printf+148>:	callq  0x7ffff7a55600 <_IO_vfprintf_internal>
   0x00007ffff7a604e9 <__printf+153>:	add    $0xd8,%rsp
   0x00007ffff7a604f0 <__printf+160>:	retq
   0x00007ffff7a604f1:	nopw   %cs:0x0(%rax,%rax,1)
   0x00007ffff7a604fb:	nopl   0x0(%rax,%rax,1)
   0x00007ffff7a60500 <__snprintf+0>:	sub    $0xd8,%rsp
   0x00007ffff7a60507 <__snprintf+7>:	test   %al,%al
   0x00007ffff7a60509 <__snprintf+9>:	mov    %rcx,0x38(%rsp)
   0x00007ffff7a6050e <__snprintf+14>:	mov    %r8,0x40(%rsp)
   0x00007ffff7a60513 <__snprintf+19>:	mov    %r9,0x48(%rsp)
   0x00007ffff7a60518 <__snprintf+24>:	je     0x7ffff7a60551 <__snprintf+81>
   0x00007ffff7a6051a <__snprintf+26>:	movaps %xmm0,0x50(%rsp)
   0x00007ffff7a6051f <__snprintf+31>:	movaps %xmm1,0x60(%rsp)
   0x00007ffff7a60524 <__snprintf+36>:	movaps %xmm2,0x70(%rsp)
   0x00007ffff7a60529 <__snprintf+41>:	movaps %xmm3,0x80(%rsp)
   0x00007ffff7a60531 <__snprintf+49>:	movaps %xmm4,0x90(%rsp)
   0x00007ffff7a60539 <__snprintf+57>:	movaps %xmm5,0xa0(%rsp)
   0x00007ffff7a60541 <__snprintf+65>:	movaps %xmm6,0xb0(%rsp)
   0x00007ffff7a60549 <__snprintf+73>:	movaps %xmm7,0xc0(%rsp)
   0x00007ffff7a60551 <__snprintf+81>:	lea    0xe0(%rsp),%rax
   0x00007ffff7a60559 <__snprintf+89>:	lea    0x8(%rsp),%rcx
   0x00007ffff7a6055e <__snprintf+94>:	mov    %rax,0x10(%rsp)
   0x00007ffff7a60563 <__snprintf+99>:	lea    0x20(%rsp),%rax
   0x00007ffff7a60568 <__snprintf+104>:	movl   $0x18,0x8(%rsp)
   0x00007ffff7a60570 <__snprintf+112>:	movl   $0x30,0xc(%rsp)
   0x00007ffff7a60578 <__snprintf+120>:	mov    %rax,0x18(%rsp)
   0x00007ffff7a6057d <__snprintf+125>:	callq  0x7ffff7a85100 <_IO_vsnprintf>
   0x00007ffff7a60582 <__snprintf+130>:	add    $0xd8,%rsp
   0x00007ffff7a60589 <__snprintf+137>:	retq
   0x00007ffff7a6058a:	nopw   0x0(%rax,%rax,1)
   0x00007ffff7a60590 <__sprintf+0>:	sub    $0xd8,%rsp
   0x00007ffff7a60597 <__sprintf+7>:	test   %al,%al
   0x00007ffff7a60599 <__sprintf+9>:	mov    %rdx,0x30(%rsp)
   0x00007ffff7a6059e <__sprintf+14>:	mov    %rcx,0x38(%rsp)
   0x00007ffff7a605a3 <__sprintf+19>:	mov    %r8,0x40(%rsp)
   0x00007ffff7a605a8 <__sprintf+24>:	mov    %r9,0x48(%rsp)
   0x00007ffff7a605ad <__sprintf+29>:	je     0x7ffff7a605e6 <__sprintf+86>
   0x00007ffff7a605af <__sprintf+31>:	movaps %xmm0,0x50(%rsp)
   0x00007ffff7a605b4 <__sprintf+36>:	movaps %xmm1,0x60(%rsp)
   0x00007ffff7a605b9 <__sprintf+41>:	movaps %xmm2,0x70(%rsp)
---Type <return> to continue, or q <return> to quit---
   0x00007ffff7a605be <__sprintf+46>:	movaps %xmm3,0x80(%rsp)
   0x00007ffff7a605c6 <__sprintf+54>:	movaps %xmm4,0x90(%rsp)
   0x00007ffff7a605ce <__sprintf+62>:	movaps %xmm5,0xa0(%rsp)
   0x00007ffff7a605d6 <__sprintf+70>:	movaps %xmm6,0xb0(%rsp)
   0x00007ffff7a605de <__sprintf+78>:	movaps %xmm7,0xc0(%rsp)
   0x00007ffff7a605e6 <__sprintf+86>:	lea    0xe0(%rsp),%rax
   0x00007ffff7a605ee <__sprintf+94>:	lea    0x8(%rsp),%rdx
   0x00007ffff7a605f3 <__sprintf+99>:	mov    %rax,0x10(%rsp)
   0x00007ffff7a605f8 <__sprintf+104>:	lea    0x20(%rsp),%rax
   0x00007ffff7a605fd <__sprintf+109>:	movl   $0x10,0x8(%rsp)
   0x00007ffff7a60605 <__sprintf+117>:	movl   $0x30,0xc(%rsp)
   0x00007ffff7a6060d <__sprintf+125>:	mov    %rax,0x18(%rsp)
   0x00007ffff7a60612 <__sprintf+130>:	callq  0x7ffff7a7e460 <__IO_vsprintf>
   0x00007ffff7a60617 <__sprintf+135>:	add    $0xd8,%rsp
   0x00007ffff7a6061e <__sprintf+142>:	retq
   0x00007ffff7a6061f:	nop
   0x00007ffff7a60620 <___asprintf+0>:	sub    $0xd8,%rsp
   0x00007ffff7a60627 <___asprintf+7>:	test   %al,%al
   0x00007ffff7a60629 <___asprintf+9>:	mov    %rdx,0x30(%rsp)
   0x00007ffff7a6062e <___asprintf+14>:	mov    %rcx,0x38(%rsp)
   0x00007ffff7a60633 <___asprintf+19>:	mov    %r8,0x40(%rsp)
   0x00007ffff7a60638 <___asprintf+24>:	mov    %r9,0x48(%rsp)
   0x00007ffff7a6063d <___asprintf+29>:	je     0x7ffff7a60676 <___asprintf+86>
   0x00007ffff7a6063f <___asprintf+31>:	movaps %xmm0,0x50(%rsp)
   0x00007ffff7a60644 <___asprintf+36>:	movaps %xmm1,0x60(%rsp)
   0x00007ffff7a60649 <___asprintf+41>:	movaps %xmm2,0x70(%rsp)
   0x00007ffff7a6064e <___asprintf+46>:	movaps %xmm3,0x80(%rsp)
   0x00007ffff7a60656 <___asprintf+54>:	movaps %xmm4,0x90(%rsp)
   0x00007ffff7a6065e <___asprintf+62>:	movaps %xmm5,0xa0(%rsp)
   0x00007ffff7a60666 <___asprintf+70>:	movaps %xmm6,0xb0(%rsp)
   0x00007ffff7a6066e <___asprintf+78>:	movaps %xmm7,0xc0(%rsp)
   0x00007ffff7a60676 <___asprintf+86>:	lea    0xe0(%rsp),%rax
   0x00007ffff7a6067e <___asprintf+94>:	lea    0x8(%rsp),%rdx
   0x00007ffff7a60683 <___asprintf+99>:	mov    %rax,0x10(%rsp)
   0x00007ffff7a60688 <___asprintf+104>:	lea    0x20(%rsp),%rax
   0x00007ffff7a6068d <___asprintf+109>:	movl   $0x10,0x8(%rsp)
   0x00007ffff7a60695 <___asprintf+117>:	movl   $0x30,0xc(%rsp)
   0x00007ffff7a6069d <___asprintf+125>:	mov    %rax,0x18(%rsp)
   0x00007ffff7a606a2 <___asprintf+130>:	callq  0x7ffff7a84dd0 <_IO_vasprintf>
   0x00007ffff7a606a7 <___asprintf+135>:	add    $0xd8,%rsp
   0x00007ffff7a606ae <___asprintf+142>:	retq
   0x00007ffff7a606af:	nop
   0x00007ffff7a606b0 <__dprintf+0>:	sub    $0xd8,%rsp
   0x00007ffff7a606b7 <__dprintf+7>:	test   %al,%al
   0x00007ffff7a606b9 <__dprintf+9>:	mov    %rdx,0x30(%rsp)
   0x00007ffff7a606be <__dprintf+14>:	mov    %rcx,0x38(%rsp)
   0x00007ffff7a606c3 <__dprintf+19>:	mov    %r8,0x40(%rsp)
   0x00007ffff7a606c8 <__dprintf+24>:	mov    %r9,0x48(%rsp)
   0x00007ffff7a606cd <__dprintf+29>:	je     0x7ffff7a60706 <__dprintf+86>
   0x00007ffff7a606cf <__dprintf+31>:	movaps %xmm0,0x50(%rsp)
   0x00007ffff7a606d4 <__dprintf+36>:	movaps %xmm1,0x60(%rsp)
   0x00007ffff7a606d9 <__dprintf+41>:	movaps %xmm2,0x70(%rsp)
   0x00007ffff7a606de <__dprintf+46>:	movaps %xmm3,0x80(%rsp)
   0x00007ffff7a606e6 <__dprintf+54>:	movaps %xmm4,0x90(%rsp)
   0x00007ffff7a606ee <__dprintf+62>:	movaps %xmm5,0xa0(%rsp)
   0x00007ffff7a606f6 <__dprintf+70>:	movaps %xmm6,0xb0(%rsp)
   0x00007ffff7a606fe <__dprintf+78>:	movaps %xmm7,0xc0(%rsp)
   0x00007ffff7a60706 <__dprintf+86>:	lea    0xe0(%rsp),%rax
   0x00007ffff7a6070e <__dprintf+94>:	lea    0x8(%rsp),%rdx
   0x00007ffff7a60713 <__dprintf+99>:	mov    %rax,0x10(%rsp)
   0x00007ffff7a60718 <__dprintf+104>:	lea    0x20(%rsp),%rax
   0x00007ffff7a6071d <__dprintf+109>:	movl   $0x10,0x8(%rsp)
   0x00007ffff7a60725 <__dprintf+117>:	movl   $0x30,0xc(%rsp)
   0x00007ffff7a6072d <__dprintf+125>:	mov    %rax,0x18(%rsp)
   0x00007ffff7a60732 <__dprintf+130>:	callq  0x7ffff7a84f30 <_IO_vdprintf>
   0x00007ffff7a60737 <__dprintf+135>:	add    $0xd8,%rsp
   0x00007ffff7a6073e <__dprintf+142>:	retq
从上文我们可以知道2点
- printf最终肯定调用了系统调用函数write
- printf调用系统调用函数write之前,过程较多(比如_IO_vsnprintf、_IO_vsprintf等),通过汇编分析到系统调用层面,难度较大。
基于以上两点,我们换个角度分析系统调用,比如c语言中,直接调用系统调用函数write。
3、gdb调试查看——write
- demo
使用 write 系统调用可以将指定的数据写入文件或标准输出等设备中。以下是一个 C 语言程序,使用 write 将字符串 “hello world” 输出到控制台:
系统调用函数write位于头文件unistd.h。/usr/include/unistd.h
#include <unistd.h>

int main() {
    char msg[] = "helloworld\n";
    write(STDOUT_FILENO, msg, sizeof(msg) - 1);
    return 0;
}
在该程序中,write 系统调用的第一个参数为文件描述符,STDOUT_FILENO 表示标准输出设备。第二个参数为数据缓冲区的地址,msg 指向要输出的字符串;第三个参数为要写入的字节数,sizeof(msg) - 1 等于字符串长度(不包括字符串结尾的 NULL 字符)。
- 汇编
从下面汇编代码,我看只可以看到,main调用write,仅仅看到调用了write@GLIBC_2.2.5
[root@localhost test02]# objdump -d -x ./a.out

0000000000400410 <write@plt>:
  400410:	ff 25 02 0c 20 00    	jmpq   *0x200c02(%rip)        # 601018 <write@GLIBC_2.2.5>
  400416:	68 00 00 00 00       	pushq  $0x0
  40041b:	e9 e0 ff ff ff       	jmpq   400400 <.plt>


000000000040052d <main>:
  40052d:	55                   	push   %rbp
  40052e:	48 89 e5             	mov    %rsp,%rbp
  400531:	48 83 ec 10          	sub    $0x10,%rsp
  400535:	48 b8 68 65 6c 6c 6f 	movabs $0x726f776f6c6c6568,%rax
  40053c:	77 6f 72
  40053f:	48 89 45 f0          	mov    %rax,-0x10(%rbp)
  400543:	c7 45 f8 6c 64 0a 00 	movl   $0xa646c,-0x8(%rbp)
  40054a:	48 8d 45 f0          	lea    -0x10(%rbp),%rax
  40054e:	ba 0b 00 00 00       	mov    $0xb,%edx
  400553:	48 89 c6             	mov    %rax,%rsi
  400556:	bf 01 00 00 00       	mov    $0x1,%edi
  40055b:	e8 b0 fe ff ff       	callq  400410 <write@plt>
  400560:	b8 00 00 00 00       	mov    $0x0,%eax
  400565:	c9                   	leaveq
  400566:	c3                   	retq
  400567:	66 0f 1f 84 00 00 00 	nopw   0x0(%rax,%rax,1)
  40056e:	00 00
main函数解释如下
0000000040052d <main>:                  // main 函数的入口
  40052d:	55                            // push   %rbp       ; 保存调用该函数之前的堆栈帧指针
  40052e:	48 89 e5                      // mov    %rsp,%rbp  ; 设置当前栈帧的基址
  400531:	48 83 ec 10                   // sub    $0x10,%rsp ; 为局部变量分配栈空间
  400535:	48 b8 68 65 6c 6c 6f          // movabs $0x726f776f6c6c6568,%rax ; 将 "hello, world!" 字符串的 ASCII 码放到寄存器 %rax 中
  40053c:	77 6f 72
  40053f:	48 89 45 f0                   // mov    %rax,-0x10(%rbp) ; 将字符串地址保存到栈帧中的 -0x10 偏移处
  400543:	c7 45 f8 6c 64 0a 00          // movl   $0xa646c,-0x8(%rbp) ; 将换行符 '\n' 的 ASCII 码值(0x0a)保存到栈帧中的 -0x8 偏移处
  40054a:	48 8d 45 f0                   // lea    -0x10(%rbp),%rax ; 将字符串的地址加载到 %rax 中
  40054e:	ba 0b 00 00 00                // mov    $0xb,%edx      ; 将写操作输出的字符数(11,即字符串长度加上换行符)保存到 %edx 中
  400553:	48 89 c6                      // mov    %rax,%rsi      ; 将要输出的字符串地址保存到 %rsi 中(第2个参数)
  400556:	bf 01 00 00 00                // mov    $0x1,%edi      ; 将文件描述符 1(标准输出)保存到 %edi 中(第1个参数)
  40055b:	e8 b0 fe ff ff                // callq  400410 <write@plt> ; 调用 write 函数输出字符串
  400560:	b8 00 00 00 00                // mov    $0x0,%eax      ; 将程序返回值(0)保存到 %eax 中
  400565:	c9                            // leaveq              ; 恢复堆栈帧指针
  400566:	c3                            // retq                ; 返回函数调用
  400567:	66 0f 1f 84 00 00 00 00 00    // nopw   0x0(%rax,%rax,1) ; 填充内存,使得代码对齐
  400570:	00
- gdb调试
[root@localhost test02]# gdb ./a.out
GNU gdb (GDB) Red Hat Enterprise Linux 7.6.1-120.el7
Copyright (C) 2013 Free Software Foundation, Inc.
License GPLv3+: GNU GPL version 3 or later <http://gnu.org/licenses/gpl.html>
This is free software: you are free to change and redistribute it.
There is NO WARRANTY, to the extent permitted by law.  Type "show copying"
and "show warranty" for details.
This GDB was configured as "x86_64-redhat-linux-gnu".
For bug reporting instructions, please see:
<http://www.gnu.org/software/gdb/bugs/>...
Reading symbols from /root/桌面/test02/a.out...(no debugging symbols found)...done.
(gdb) break write
Breakpoint 1 at 0x400410
(gdb) run
Starting program: /root/桌面/test02/./a.out

Breakpoint 1, write () at ../sysdeps/unix/syscall-template.S:81
81	T_PSEUDO (SYSCALL_SYMBOL, SYSCALL_NAME, SYSCALL_NARGS)
(gdb) disassemble $pc,+1000
Dump of assembler code from 0x7ffff7afcb90 to 0x7ffff7afcf78:
=> 0x00007ffff7afcb90 <write+0>:	cmpl   $0x0,0x2dd41d(%rip)        # 0x7ffff7dd9fb4 <__libc_multiple_threads>
   0x00007ffff7afcb97 <write+7>:	jne    0x7ffff7afcba9 <write+25>
   0x00007ffff7afcb99 <__write_nocancel+0>:	mov    $0x1,%eax
   0x00007ffff7afcb9e <__write_nocancel+5>:	syscall
   0x00007ffff7afcba0 <__write_nocancel+7>:	cmp    $0xfffffffffffff001,%rax
   0x00007ffff7afcba6 <__write_nocancel+13>:	jae    0x7ffff7afcbd9 <write+73>
   0x00007ffff7afcba8 <__write_nocancel+15>:	retq
   0x00007ffff7afcba9 <write+25>:	sub    $0x8,%rsp
   0x00007ffff7afcbad <write+29>:	callq  0x7ffff7b19830 <__libc_enable_asynccancel>
   0x00007ffff7afcbb2 <write+34>:	mov    %rax,(%rsp)
   0x00007ffff7afcbb6 <write+38>:	mov    $0x1,%eax
   0x00007ffff7afcbbb <write+43>:	syscall
   0x00007ffff7afcbbd <write+45>:	mov    (%rsp),%rdi
   0x00007ffff7afcbc1 <write+49>:	mov    %rax,%rdx
   0x00007ffff7afcbc4 <write+52>:	callq  0x7ffff7b19890 <__libc_disable_asynccancel>
   0x00007ffff7afcbc9 <write+57>:	mov    %rdx,%rax
   0x00007ffff7afcbcc <write+60>:	add    $0x8,%rsp
   0x00007ffff7afcbd0 <write+64>:	cmp    $0xfffffffffffff001,%rax
   0x00007ffff7afcbd6 <write+70>:	jae    0x7ffff7afcbd9 <write+73>
   0x00007ffff7afcbd8 <write+72>:	retq
   0x00007ffff7afcbd9 <write+73>:	mov    0x2d7270(%rip),%rcx        # 0x7ffff7dd3e50
   0x00007ffff7afcbe0 <write+80>:	neg    %eax
   0x00007ffff7afcbe2 <write+82>:	mov    %eax,%fs:(%rcx)
   0x00007ffff7afcbe5 <write+85>:	or     $0xffffffffffffffff,%rax
   0x00007ffff7afcbe9 <write+89>:	retq
这段汇编代码是 write 函数的汇编代码,用于在 Linux 系统中向文件或者 socket 等设备中写入数据。具体地说,该函数的功能是将指定缓冲区中的数据写入到文件描述符中。
该代码展示了 write 函数的内部实现过程,包括检查并开启异步取消(async-cancellation)功能以及调用系统调用syscall来向文件写入数据等操作。
在开头部分,该代码使用 cmp 指令与常量 0x0 进行比较,以检查是否有多个线程准备调用 write 函数。如果存在,则跳转到 write+25,否则继续执行函数内其他代码。
接下来,代码会将栈顶指针 rsp 减去 8 的偏移量,然后调用 __libc_enable_asynccancel 函数以启用异步取消功能,并将函数返回值保存在栈上。紧接着,代码调用系统调用 syscall 来执行文件写入操作,并通过 move 指令将写入操作的返回值保存在寄存器 %rax 中。
然后,代码再次使用 move 指令将栈上保存的异步取消标记恢复到寄存器 %rdi 中,并将上述写入操作的返回值保存在寄存器 %rdx 中。紧接着,代码调用 __libc_disable_asynccancel 函数以禁用异步取消功能,并将 %rdx 的值作为函数返回值保存在寄存器 %rax 中。
最后,代码使用 cmp 指令来判断写入操作是否成功,并根据结果进行相应的跳转或者返回操作。如果出错,则代码会调用 __set_errno 函数设置错误码并返回。
逐行解释如下
0x00007ffff7afcb90 <write+0>: cmpl $0x0,0x2dd41d(%rip) # 检查是否有多线程正在使用 libc 库
0x00007ffff7afcb97 <write+7>: jne 0x7ffff7afcba9 <write+25> # 如果有,则跳转到 write+25 处
0x00007ffff7afcb99 <__write_nocancel+0>: mov $0x1,%eax # 设置系统调用编号(1 表示 write 系统调用)
0x00007ffff7afcb9e <__write_nocancel+5>: syscall # 调用 write 系统调用
0x00007ffff7afcba0 <__write_nocancel+7>: cmp $0xfffffffffffff001,%rax # 检查是否出现错误(出错时返回 -errno)
0x00007ffff7afcba6 <__write_nocancel+13>: jae 0x7ffff7afcbd9 <write+73>
0x00007ffff7afcba8 <__write_nocancel+15>: retq # 返回调用者
0x00007ffff7afcba9 <write+25>: sub $0x8,%rsp # 为异步取消准备堆栈空间
0x00007ffff7afcbad <write+29>: callq 0x7ffff7b19830 <__libc_enable_asynccancel> # 开启异步取消
0x00007ffff7afcbb2 <write+34>: mov %rax,(%rsp)
0x00007ffff7afcbb6 <write+38>: mov $0x1,%eax # 设置系统调用编号(同上)
0x00007ffff7afcbbb <write+43>: syscall # 调用 write 系统调用
0x00007ffff7afcbbd <write+45>: mov (%rsp),%rdi # 从堆栈中读取之前保存的值
0x00007ffff7afcbc1 <write+49>: mov %rax,%rdx
0x00007ffff7afcbc4 <write+52>: callq 0x7ffff7b19890 <__libc_disable_asynccancel> # 关闭异步取消
0x00007ffff7afcbc9 <write+57>: mov %rdx,%rax # 将返回值保存到 %rax 中
0x00007ffff7afcbcc <write+60>: add $0x8,%rsp # 回收堆栈空间
0x00007ffff7afcbd0 <write+64>: cmp $0xfffffffffffff001,%rax # 检查是否出现错误(同上)
0x00007ffff7afcbd6 <write+70>: jae 0x7ffff7afcbd9 <write+73>
0x00007ffff7afcbd8 <write+72>: retq
0x00007ffff7afcbd9 <write+73>: mov 0x2d7270(%rip),%rcx # 报告取消状态
0x00007ffff7afcbe0 <write+80>: neg %eax # 取反 %eax,即返回值为 -errno
0x00007ffff7afcbe2 <write+82>: mov %eax,%fs:(%rcx) # 在 TLS 中设置 ‘errno’
0x00007ffff7afcbe5 <write+85>: or $0xffffffffffffffff,%rax # 将返回值设为 -1(出错)
0x00007ffff7afcbe9 <write+89>: retq # 返回调用者
4、问题:
- 哪里可以看到所有的系统调用号对应关系
/usr/include/asm/unistd_64.h
#ifndef _ASM_X86_UNISTD_64_H
#define _ASM_X86_UNISTD_64_H 1
#define __NR_read 0
#define __NR_write 1
#define __NR_open 2
#define __NR_close 3
#define __NR_stat 4
#define __NR_fstat 5
#define __NR_lstat 6
#define __NR_poll 7
#define __NR_lseek 8
#define __NR_mmap 9
#define __NR_mprotect 10
#define __NR_munmap 11
#define __NR_brk 12
#define __NR_rt_sigaction 13
#define __NR_rt_sigprocmask 14
#define __NR_rt_sigreturn 15
#define __NR_ioctl 16
#define __NR_pread64 17
#define __NR_pwrite64 18
#define __NR_readv 19
#define __NR_writev 20
#define __NR_access 21
#define __NR_pipe 22
#define __NR_select 23
#define __NR_sched_yield 24
#define __NR_mremap 25
#define __NR_msync 26
#define __NR_mincore 27
#define __NR_madvise 28
#define __NR_shmget 29
#define __NR_shmat 30
#define __NR_shmctl 31
#define __NR_dup 32
#define __NR_dup2 33
#define __NR_pause 34
#define __NR_nanosleep 35
#define __NR_getitimer 36
#define __NR_alarm 37
#define __NR_setitimer 38
#define __NR_getpid 39
#define __NR_sendfile 40
#define __NR_socket 41
#define __NR_connect 42
#define __NR_accept 43
#define __NR_sendto 44
#define __NR_recvfrom 45
#define __NR_sendmsg 46
#define __NR_recvmsg 47
#define __NR_shutdown 48
#define __NR_bind 49
#define __NR_listen 50
#define __NR_getsockname 51
#define __NR_getpeername 52
#define __NR_socketpair 53
#define __NR_setsockopt 54
#define __NR_getsockopt 55
#define __NR_clone 56
#define __NR_fork 57
#define __NR_vfork 58
#define __NR_execve 59
#define __NR_exit 60
#define __NR_wait4 61
#define __NR_kill 62
#define __NR_uname 63
#define __NR_semget 64
#define __NR_semop 65
#define __NR_semctl 66
#define __NR_shmdt 67
#define __NR_msgget 68
#define __NR_msgsnd 69
#define __NR_msgrcv 70
#define __NR_msgctl 71
#define __NR_fcntl 72
#define __NR_flock 73
#define __NR_fsync 74
#define __NR_fdatasync 75
#define __NR_truncate 76
#define __NR_ftruncate 77
#define __NR_getdents 78
#define __NR_getcwd 79
#define __NR_chdir 80
#define __NR_fchdir 81
#define __NR_rename 82
#define __NR_mkdir 83
#define __NR_rmdir 84
#define __NR_creat 85
#define __NR_link 86
#define __NR_unlink 87
#define __NR_symlink 88
#define __NR_readlink 89
#define __NR_chmod 90
#define __NR_fchmod 91
#define __NR_chown 92
#define __NR_fchown 93
#define __NR_lchown 94
#define __NR_umask 95
#define __NR_gettimeofday 96
#define __NR_getrlimit 97
#define __NR_getrusage 98
#define __NR_sysinfo 99
#define __NR_times 100
#define __NR_ptrace 101
#define __NR_getuid 102
#define __NR_syslog 103
#define __NR_getgid 104
#define __NR_setuid 105
#define __NR_setgid 106
#define __NR_geteuid 107
#define __NR_getegid 108
#define __NR_setpgid 109
#define __NR_getppid 110
#define __NR_getpgrp 111
#define __NR_setsid 112
#define __NR_setreuid 113
#define __NR_setregid 114
#define __NR_getgroups 115
#define __NR_setgroups 116
#define __NR_setresuid 117
#define __NR_getresuid 118
#define __NR_setresgid 119
#define __NR_getresgid 120
#define __NR_getpgid 121
#define __NR_setfsuid 122
#define __NR_setfsgid 123
#define __NR_getsid 124
#define __NR_capget 125
#define __NR_capset 126
#define __NR_rt_sigpending 127
#define __NR_rt_sigtimedwait 128
#define __NR_rt_sigqueueinfo 129
#define __NR_rt_sigsuspend 130
#define __NR_sigaltstack 131
#define __NR_utime 132
#define __NR_mknod 133
#define __NR_uselib 134
#define __NR_personality 135
#define __NR_ustat 136
#define __NR_statfs 137
#define __NR_fstatfs 138
#define __NR_sysfs 139
#define __NR_getpriority 140
#define __NR_setpriority 141
#define __NR_sched_setparam 142
#define __NR_sched_getparam 143
#define __NR_sched_setscheduler 144
#define __NR_sched_getscheduler 145
#define __NR_sched_get_priority_max 146
#define __NR_sched_get_priority_min 147
#define __NR_sched_rr_get_interval 148
#define __NR_mlock 149
#define __NR_munlock 150
#define __NR_mlockall 151
#define __NR_munlockall 152
#define __NR_vhangup 153
#define __NR_modify_ldt 154
#define __NR_pivot_root 155
#define __NR__sysctl 156
#define __NR_prctl 157
#define __NR_arch_prctl 158
#define __NR_adjtimex 159
#define __NR_setrlimit 160
#define __NR_chroot 161
#define __NR_sync 162
#define __NR_acct 163
#define __NR_settimeofday 164
#define __NR_mount 165
#define __NR_umount2 166
#define __NR_swapon 167
#define __NR_swapoff 168
#define __NR_reboot 169
#define __NR_sethostname 170
#define __NR_setdomainname 171
#define __NR_iopl 172
#define __NR_ioperm 173
#define __NR_create_module 174
#define __NR_init_module 175
#define __NR_delete_module 176
#define __NR_get_kernel_syms 177
#define __NR_query_module 178
#define __NR_quotactl 179
#define __NR_nfsservctl 180
#define __NR_getpmsg 181
#define __NR_putpmsg 182
#define __NR_afs_syscall 183
#define __NR_tuxcall 184
#define __NR_security 185
#define __NR_gettid 186
#define __NR_readahead 187
#define __NR_setxattr 188
#define __NR_lsetxattr 189
#define __NR_fsetxattr 190
#define __NR_getxattr 191
#define __NR_lgetxattr 192
#define __NR_fgetxattr 193
#define __NR_listxattr 194
#define __NR_llistxattr 195
#define __NR_flistxattr 196
#define __NR_removexattr 197
#define __NR_lremovexattr 198
#define __NR_fremovexattr 199
#define __NR_tkill 200
#define __NR_time 201
#define __NR_futex 202
#define __NR_sched_setaffinity 203
#define __NR_sched_getaffinity 204
#define __NR_set_thread_area 205
#define __NR_io_setup 206
#define __NR_io_destroy 207
#define __NR_io_getevents 208
#define __NR_io_submit 209
#define __NR_io_cancel 210
#define __NR_get_thread_area 211
#define __NR_lookup_dcookie 212
#define __NR_epoll_create 213
#define __NR_epoll_ctl_old 214
#define __NR_epoll_wait_old 215
#define __NR_remap_file_pages 216
#define __NR_getdents64 217
#define __NR_set_tid_address 218
#define __NR_restart_syscall 219
#define __NR_semtimedop 220
#define __NR_fadvise64 221
#define __NR_timer_create 222
#define __NR_timer_settime 223
#define __NR_timer_gettime 224
#define __NR_timer_getoverrun 225
#define __NR_timer_delete 226
#define __NR_clock_settime 227
#define __NR_clock_gettime 228
#define __NR_clock_getres 229
#define __NR_clock_nanosleep 230
#define __NR_exit_group 231
#define __NR_epoll_wait 232
#define __NR_epoll_ctl 233
#define __NR_tgkill 234
#define __NR_utimes 235
#define __NR_vserver 236
#define __NR_mbind 237
#define __NR_set_mempolicy 238
#define __NR_get_mempolicy 239
#define __NR_mq_open 240
#define __NR_mq_unlink 241
#define __NR_mq_timedsend 242
#define __NR_mq_timedreceive 243
#define __NR_mq_notify 244
#define __NR_mq_getsetattr 245
#define __NR_kexec_load 246
#define __NR_waitid 247
#define __NR_add_key 248
#define __NR_request_key 249
#define __NR_keyctl 250
#define __NR_ioprio_set 251
#define __NR_ioprio_get 252
#define __NR_inotify_init 253
#define __NR_inotify_add_watch 254
#define __NR_inotify_rm_watch 255
#define __NR_migrate_pages 256
#define __NR_openat 257
#define __NR_mkdirat 258
#define __NR_mknodat 259
#define __NR_fchownat 260
#define __NR_futimesat 261
#define __NR_newfstatat 262
#define __NR_unlinkat 263
#define __NR_renameat 264
#define __NR_linkat 265
#define __NR_symlinkat 266
#define __NR_readlinkat 267
#define __NR_fchmodat 268
#define __NR_faccessat 269
#define __NR_pselect6 270
#define __NR_ppoll 271
#define __NR_unshare 272
#define __NR_set_robust_list 273
#define __NR_get_robust_list 274
#define __NR_splice 275
#define __NR_tee 276
#define __NR_sync_file_range 277
#define __NR_vmsplice 278
#define __NR_move_pages 279
#define __NR_utimensat 280
#define __NR_epoll_pwait 281
#define __NR_signalfd 282
#define __NR_timerfd_create 283
#define __NR_eventfd 284
#define __NR_fallocate 285
#define __NR_timerfd_settime 286
#define __NR_timerfd_gettime 287
#define __NR_accept4 288
#define __NR_signalfd4 289
#define __NR_eventfd2 290
#define __NR_epoll_create1 291
#define __NR_dup3 292
#define __NR_pipe2 293
#define __NR_inotify_init1 294
#define __NR_preadv 295
#define __NR_pwritev 296
#define __NR_rt_tgsigqueueinfo 297
#define __NR_perf_event_open 298
#define __NR_recvmmsg 299
#define __NR_fanotify_init 300
#define __NR_fanotify_mark 301
#define __NR_prlimit64 302
#define __NR_name_to_handle_at 303
#define __NR_open_by_handle_at 304
#define __NR_clock_adjtime 305
#define __NR_syncfs 306
#define __NR_sendmmsg 307
#define __NR_setns 308
#define __NR_getcpu 309
#define __NR_process_vm_readv 310
#define __NR_process_vm_writev 311
#define __NR_kcmp 312
#define __NR_finit_module 313
#define __NR_sched_setattr 314
#define __NR_sched_getattr 315
#define __NR_renameat2 316
#define __NR_seccomp 317
#define __NR_getrandom 318
#define __NR_memfd_create 319
#define __NR_kexec_file_load 320
#define __NR_bpf 321
#define __NR_userfaultfd 323
#define __NR_membarrier 324
#define __NR_mlock2 325
#define __NR_copy_file_range 326
#define __NR_pkey_mprotect 329
#define __NR_pkey_alloc 330
#define __NR_pkey_free 331
#endif /* _ASM_X86_UNISTD_64_H */
- write系统调用号1
#define __NR_write 1
如下汇编,把系统调用号1,放到寄存器eax,然后进行系统调用syscall
   0x00007ffff7afcba9 <write+25>:	sub    $0x8,%rsp
   0x00007ffff7afcbad <write+29>:	callq  0x7ffff7b19830 <__libc_enable_asynccancel>
   0x00007ffff7afcbb2 <write+34>:	mov    %rax,(%rsp)
   0x00007ffff7afcbb6 <write+38>:	mov    $0x1,%eax
   0x00007ffff7afcbbb <write+43>:	syscall
- syscall发起系统调用,内核怎么知道是哪个进程的
在 Linux 操作系统中,每个进程都有一个唯一的标识符 PID(Process Identifier),内核可以根据这个 PID 来识别是哪个进程发起了系统调用。
当进程通过 syscall 系统调用发起系统调用时,系统会进入内核态,操作系统内核会根据当前进程的 PID 和系统调用号来确定具体执行哪个系统调用,并为该进程提供服务。在系统调用结束后,操作系统会将处理结果返回给用户进程,并将控制权返回给用户态。
此外,在进行系统调用时,操作系统也会对参数和权限等方面进行安全性检查,以保证各个进程的安全性和稳定性。
- 进程的pid如何传给内核的
在 Linux 系统中,进程的 PID 是由内核为其分配并维护的。当进程被创建时,内核会为它分配一个唯一的 PID,并将其存储在内核数据结构中。这个 PID 可以通过系统调用获取,如 getpid() 等。
当进程需要进行系统调用时,它会通过使用 syscall 指令向内核发出请求。在这个过程中,进程的 PID 被保存在寄存器 %rdi 中,并随着其他参数一起传递给内核。
在内核中,当系统调用处理程序被执行时,内核会从寄存器中提取进程的 PID,并根据其它参数来判断具体的系统调用类型和后续的行为。通过PID的检查,内核可以确定哪个进程发起了系统调用,并对其进行相应的处理。
- syscall:调用系统调用,完成新线程(或进程)的创建。是采用中断向量表吗
在 x86_64 架构中,系统调用的实现是通过 syscall 指令来触发陷入内核态,并将系统调用号码和参数传递给操作系统内核。与中断向量表不同,syscall 指令不是通过中断号码来触发中断响应,而是直接向操作系统内核发起系统调用请求。
因此,通过 syscall 指令来调用系统调用不需要涉及到中断向量表。当操作系统内核收到 syscall 指令发起的系统调用请求时,会根据系统调用号码和参数,调用相应的系统调用处理程序,并返回处理结果给用户程序。
需要注意的是,虽然 syscall 指令不是通过中断向量表来实现的,但是它所触发的操作和中断响应类似,都需要涉及到内核态和用户态的切换,因此需要进行一些安全性和权限的验证。此外,不同的系统调用号码和参数会触发不同的操作,所以在调用系统调用时需要特别小心。
四、查看源码
1、glibc——printf源码
- 下载glibc源码
wget http://mirrors.ustc.edu.cn/gnu/libc/glibc-2.28.tar.gz
- 解压并查看,glibc实现的printf的源码在
glibc-2.28\stdio-common\printf.c
#include <libioP.h>
#include <stdarg.h>
#include <stdio.h>

#undef printf

/* Write formatted output to stdout from the format string FORMAT.  */
/* VARARGS1 */
int
__printf (const char *format, ...)
{
  va_list arg;
  int done;

  va_start (arg, format);
  done = vfprintf (stdout, format, arg);
  va_end (arg);

  return done;
}
3、kernal——write源码
- 下载
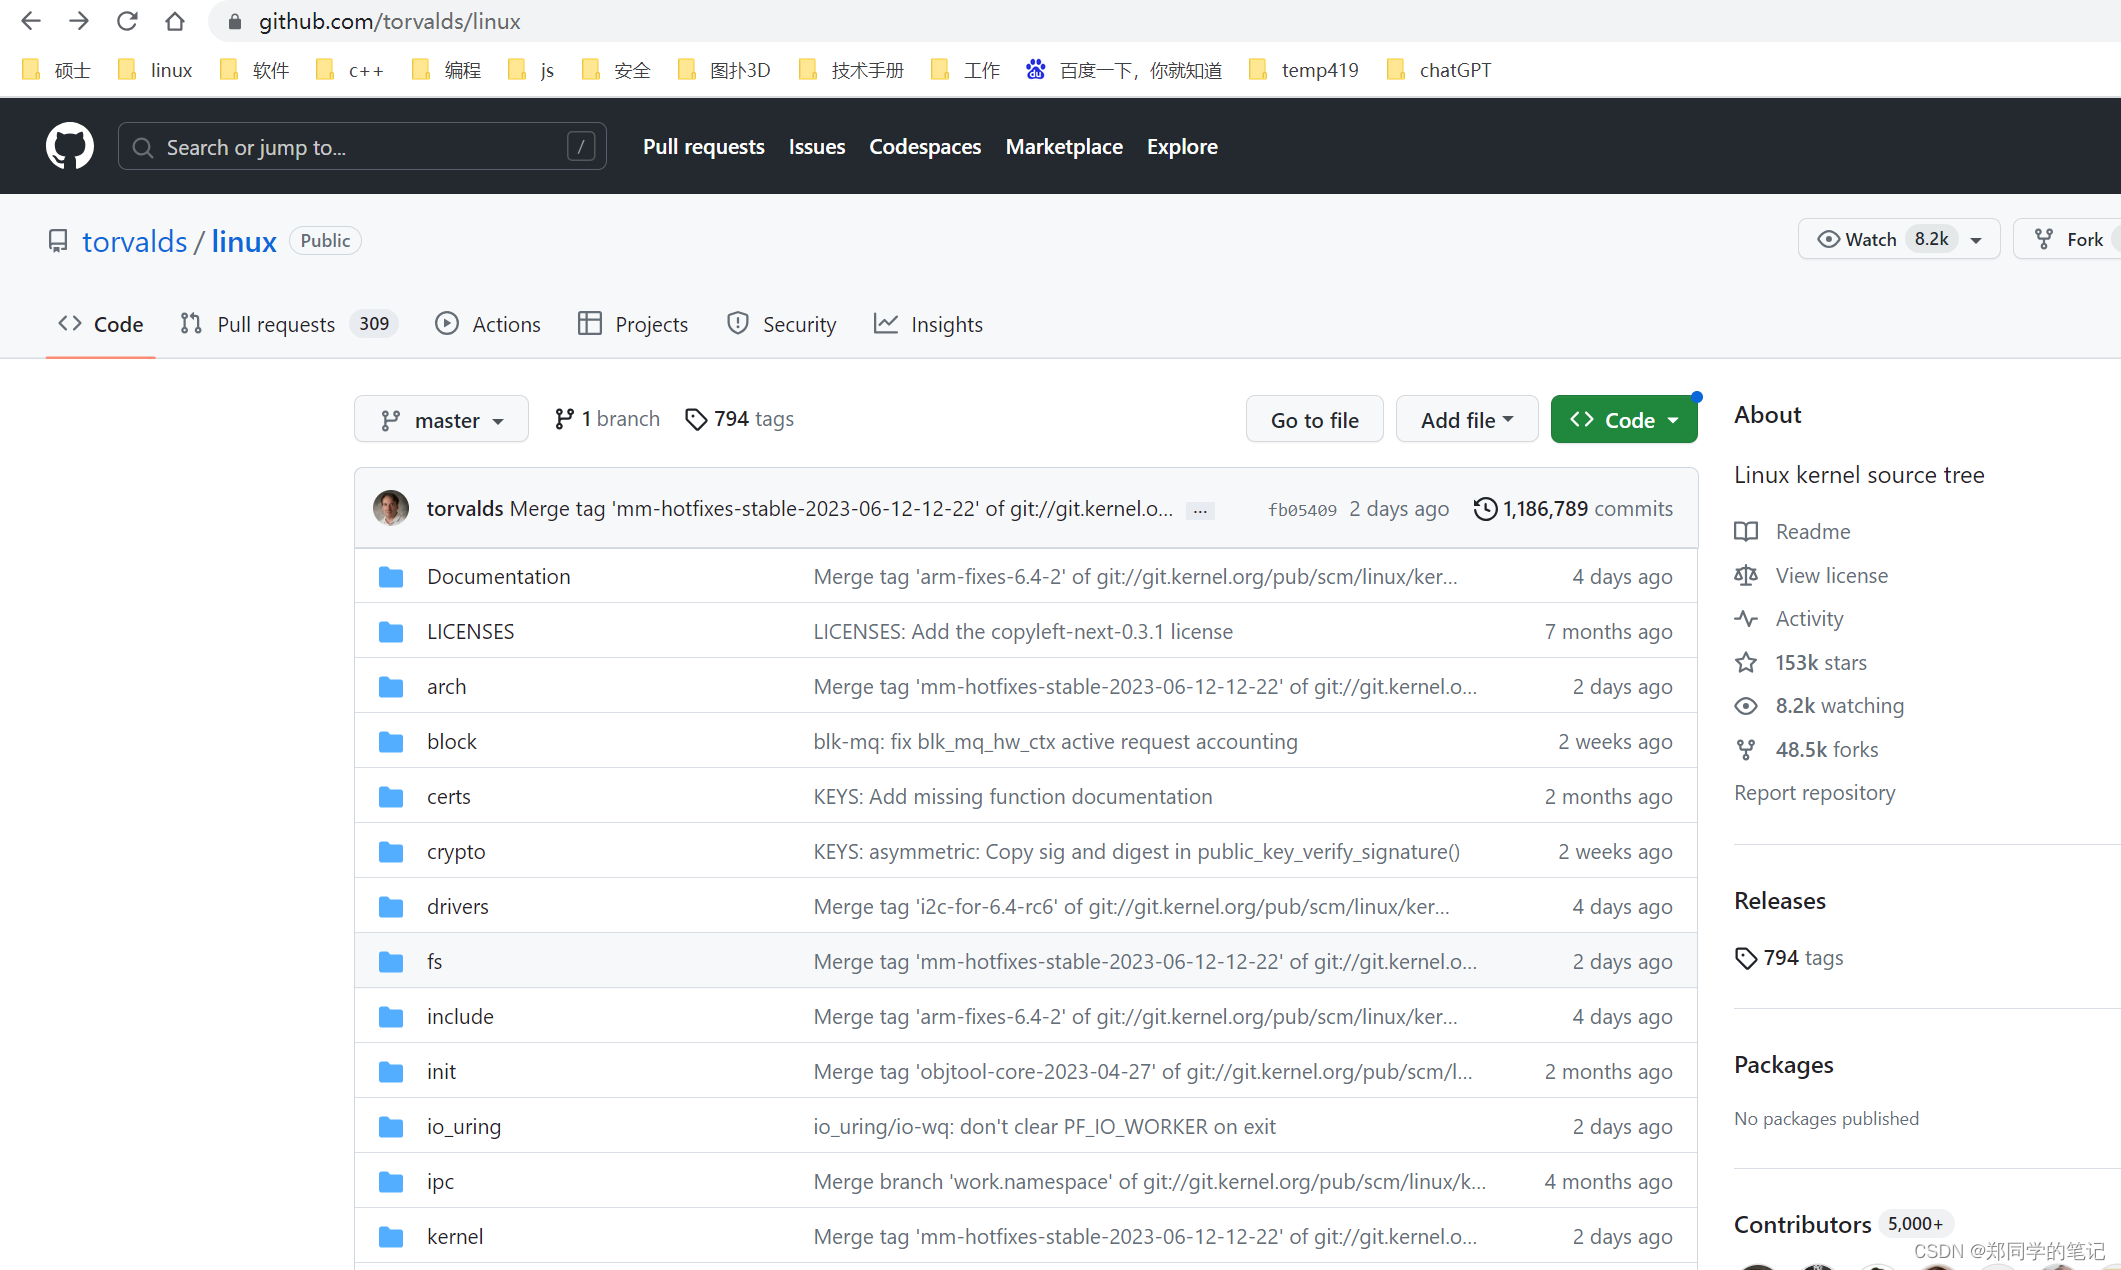
wget https://vault.centos.org/7.4.1708/updates/Source/SPackages/kernel-3.10.0-693.21.1.el7.centos.plus.src.rpm
当然,也可以尝试在github上下载https://github.com/torvalds/linux/tree/master
- 安装或者解压
原本应该安装的,但是我这本一直安装失败,所以就干脆不装了,直接解压查看。
如果你安装成功,源码目录在/usr/src/kernel目录下。
- 我选择解压,先解压下载的文件1,再解压2.如下图
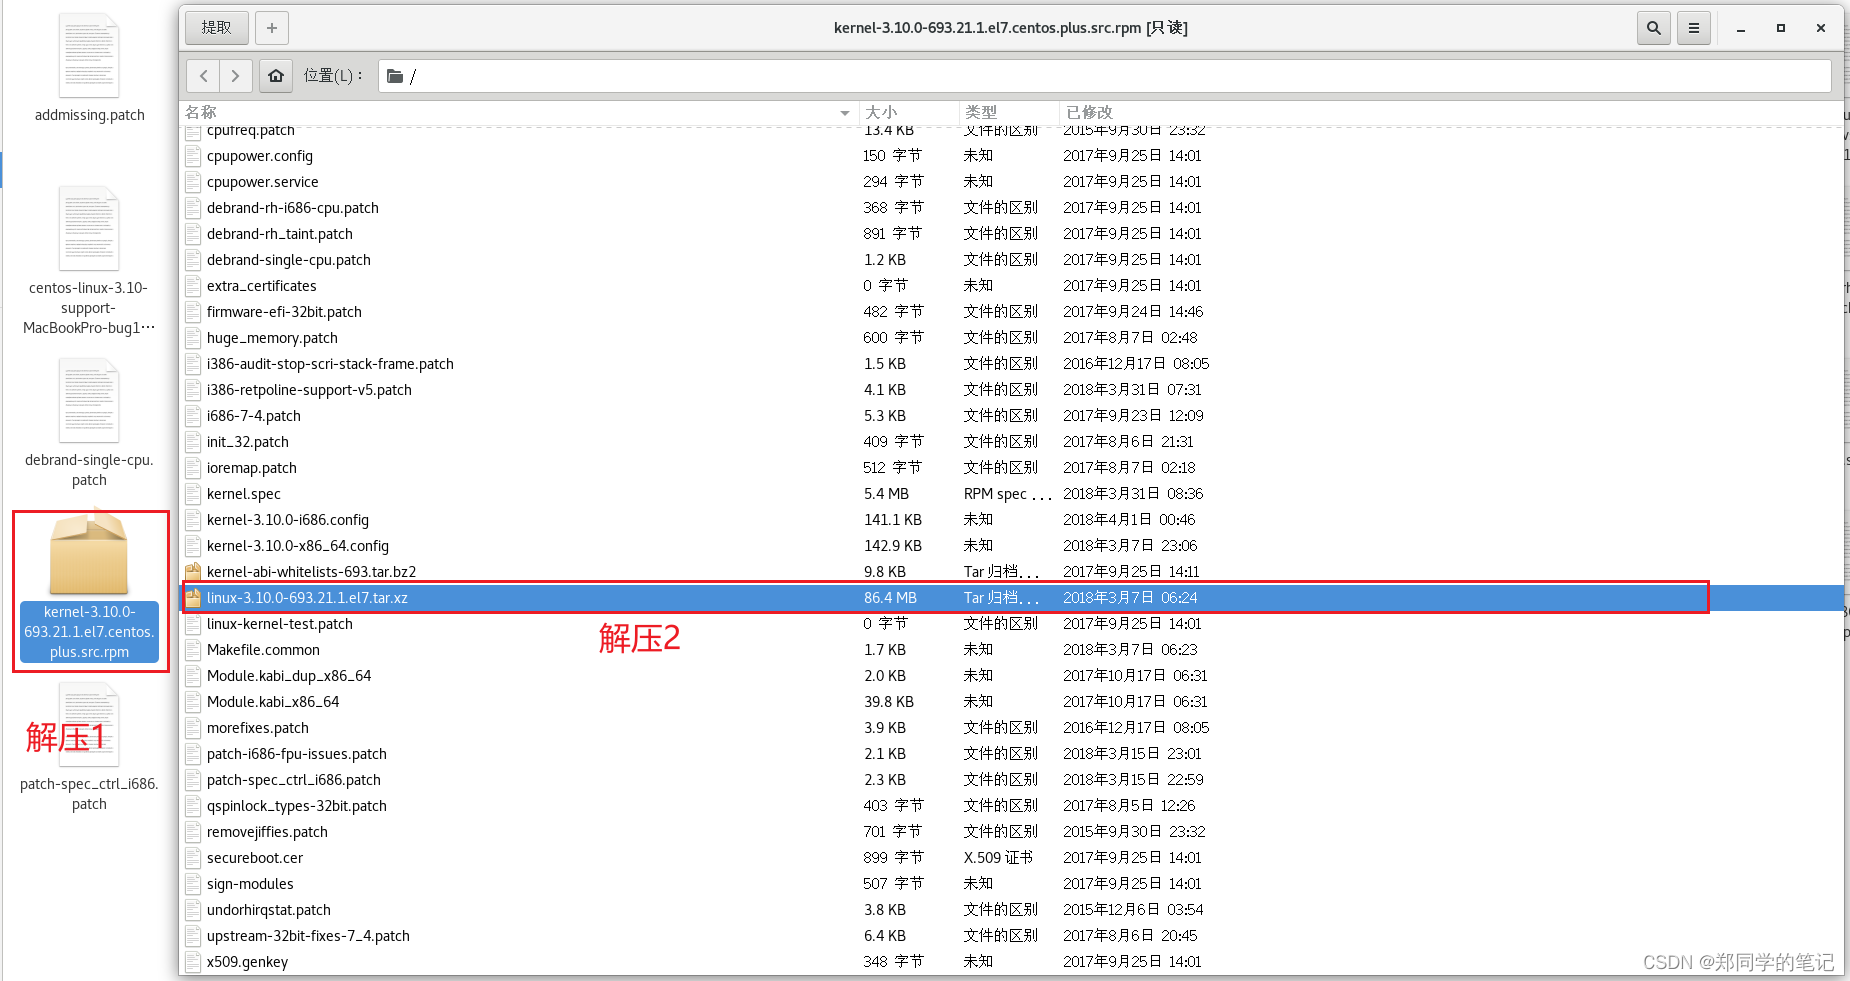
- 解压后
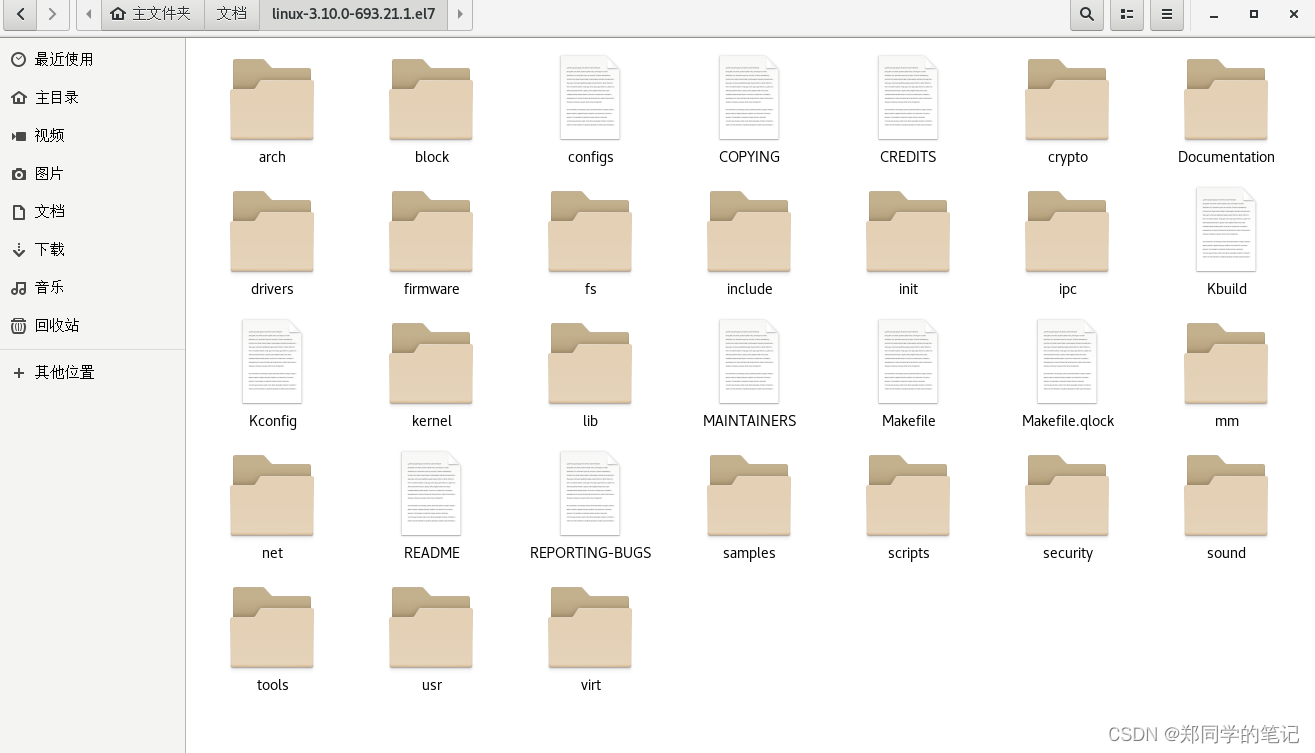
- write系统调用定义在在目录
linux-3.10.0-693.21.1.el7/arch/x86/syscalls/syscall_64.tbl

- write系统调用函数在在目录
linux-3.10.0-693.21.1.el7/fs/read_write.c
SYSCALL_DEFINE3(write, unsigned int, fd, const char __user *, buf,
		size_t, count)
{
	struct fd f = fdget_pos(fd);
	ssize_t ret = -EBADF;

	if (f.file) {
		loff_t pos = file_pos_read(f.file);
		ret = vfs_write(f.file, buf, count, &pos);
		file_pos_write(f.file, pos);
		fdput_pos(f);
	}

	return ret;
}
2、kernal——printf源码
在kernel源码里面,找到了一份printf的源码,相对比较好分析,和理解,我们在此记录下。
- printf.c
linux-3.10.0-693.21.1.el7/arch/x86/boot/printf.c
#include "boot.h"
int printf(const char *fmt, ...)
{
	char printf_buf[1024];
	va_list args;
	int printed;

	va_start(args, fmt);
	printed = vsprintf(printf_buf, fmt, args);
	va_end(args);

	puts(printf_buf);

	return printed;
}
如代码,所示,上面va是可变函数和参数处理,puts函数最终应该会调用系统中断。
我们接着看,由于printf.c只有一个头文件,boot.h,我们可以在boot.h中找到puts的实现。
/* tty.c */
void puts(const char *);
可知,puts实现在tty.c中
我们查看tty.c可知,puts函数最终会调到tty.c中的intcall
static void __attribute__((section(".inittext"))) bios_putchar(int ch)
{
	struct biosregs ireg;

	initregs(&ireg);
	ireg.bx = 0x0007;
	ireg.cx = 0x0001;
	ireg.ah = 0x0e;
	ireg.al = ch;
	intcall(0x10, &ireg, NULL);
}
- 而intcall定义在头文件boot.h中
/* bioscall.c */
struct biosregs {
	union {
		struct {
			u32 edi;
			u32 esi;
			u32 ebp;
			u32 _esp;
			u32 ebx;
			u32 edx;
			u32 ecx;
			u32 eax;
			u32 _fsgs;
			u32 _dses;
			u32 eflags;
		};
		struct {
			u16 di, hdi;
			u16 si, hsi;
			u16 bp, hbp;
			u16 _sp, _hsp;
			u16 bx, hbx;
			u16 dx, hdx;
			u16 cx, hcx;
			u16 ax, hax;
			u16 gs, fs;
			u16 es, ds;
			u16 flags, hflags;
		};
		struct {
			u8 dil, dih, edi2, edi3;
			u8 sil, sih, esi2, esi3;
			u8 bpl, bph, ebp2, ebp3;
			u8 _spl, _sph, _esp2, _esp3;
			u8 bl, bh, ebx2, ebx3;
			u8 dl, dh, edx2, edx3;
			u8 cl, ch, ecx2, ecx3;
			u8 al, ah, eax2, eax3;
		};
	};
};
void intcall(u8 int_no, const struct biosregs *ireg, struct biosregs *oreg);
- 我们去文件bioscall.c 查看intcall的实现
/* -----------------------------------------------------------------------
 *
 *   Copyright 2009 Intel Corporation; author H. Peter Anvin
 *
 *   This file is part of the Linux kernel, and is made available under
 *   the terms of the GNU General Public License version 2 or (at your
 *   option) any later version; incorporated herein by reference.
 *
 * ----------------------------------------------------------------------- */

/*
 * "Glove box" for BIOS calls.  Avoids the constant problems with BIOSes
 * touching registers they shouldn't be.
 */

	.code16gcc
	.text
	.globl	intcall
	.type	intcall, @function
intcall:
	/* Self-modify the INT instruction.  Ugly, but works. */
	cmpb	%al, 3f
	je	1f
	movb	%al, 3f
	jmp	1f		/* Synchronize pipeline */
1:
	/* Save state */
	pushfl
	pushw	%fs
	pushw	%gs
	pushal

	/* Copy input state to stack frame */
	subw	$44, %sp
	movw	%dx, %si
	movw	%sp, %di
	movw	$11, %cx
	rep; movsd

	/* Pop full state from the stack */
	popal
	popw	%gs
	popw	%fs
	popw	%es
	popw	%ds
	popfl

	/* Actual INT */
	.byte	0xcd		/* INT opcode */
3:	.byte	0

	/* Push full state to the stack */
	pushfl
	pushw	%ds
	pushw	%es
	pushw	%fs
	pushw	%gs
	pushal

	/* Re-establish C environment invariants */
	cld
	movzwl	%sp, %esp
	movw	%cs, %ax
	movw	%ax, %ds
	movw	%ax, %es

	/* Copy output state from stack frame */
	movw	68(%esp), %di	/* Original %cx == 3rd argument */
	andw	%di, %di
	jz	4f
	movw	%sp, %si
	movw	$11, %cx
	rep; movsd
4:	addw	$44, %sp

	/* Restore state and return */
	popal
	popw	%gs
	popw	%fs
	popfl
	retl
	.size	intcall, .-intcall
这是一段 x86 汇编语言写的程序,其作用是封装了 Intel x86 CPU 的 BIOS 调用。这个功能的特点是避免了使用 BIOS 调用时寄存器可能被 BIOS 修改的问题,因为它将寄存器状态压栈,然后在调用 BIOS 之后恢复状态。
该汇编代码可以被认为是一个名为 intcall 的函数,其具有以下行为:
自修改 INT 指令以保证程序的可重定位性。
保存 CPU 寄存器的状态。
将输入状态复制到堆栈帧中。
进行系统调用(通过修改 int 指令,调用一个 BIOS 中的函数)。INT
将输出状态从堆栈帧中复制出来。
恢复状态并返回执行。
.byte 0xcd 是 int 指令的编码(取决于参数指定的中断号)。这里使用了 .byte 伪操作指令来声明字节数组
五、windows API概览
- API的全称为Application Programming Interface, 即应用程序编程接口。
- Windows API是指Windows操作系统提供给应用程序开发者的最底层的、 最直接与Windows打交道的接口。
Windows API是以DLL导出函数的形式暴露给应用程序开发者的。 它被包含在诸多的系统DLL内, 规模上非常庞大, 所有的导出函数大约有数千个(以Windows XP为例) 。 微软把这些Windows API DLL导出函数的声明的头文件、 导出库、 相关文件和工具一起提供给开发者, 并让它们成为Software Development Kit(SDK) 。SDK可以单独地在微软的官方网站下载, 也可能被集成到Visual Studio这样的开发工具中。


参考
1、《程序员的自我修养链接装载与库》