1. 背景
我们 shopeepay 团队是一个比较大的前端团队(80+成员),团队内部分布着 react native、javascript npm包、react component npm包、serverless、普通的react工程等多种类型的项目,每种项目类型中的每个项目都有它们自己的配置和工作流。比如代码格式化配置不统一(eslint、prettier 和 typescript),构建工具及其配置不一致(rollup、webpack、tsc、babel、esbuild 使用混乱)。并且这些混乱会增加维护和交接成本并且对新人不友好。
基于以上因素,我们团队开发了hippo,旨在解决以下问题
-
不同项目或者团队小组使用不同的cli工具和工作流命令(比如开发阶段一些项目称为dev,一些项目称为 serve),不同的cli或构建工具带来了混乱
-
当团队成员需要开发新项目时,通常有两种形式
- 每次都需要考虑使用哪些技术栈,包括构建工具选取和配置,代码格式化标准配置和测试用例配置等。
- 基于原有项目拷贝
这些方式会进一步导致 “熵增”,可能造成一个团队中不同人开发的项目目录结构各不相同,构建工具与配置不一致的问题进一步放大
-
当一个项目越来越大,开发人员的数量也在增长时,我们无法保持代码的质量,并确保它始终遵循我们的最佳实践
- 有些人可能会使用eslint ignore修改eslint规则,或者当他在CI pipeline中看到lint错误时直接关闭该规则。
- 有些人发现了一个优化点,但是确发现很难使它适用于所有相同类型的项目
- 有些标准只存在于文档中,很难确保每个人都知道并遵循它们。
2. hippo是什么?
hippo 是一个用于提高我们前端团队工程效率的前端工作流和规范的工具。它为我们团队的前端开发统一定义了整个工作流和规范并提供了一些命令来帮助不同的项目使用它并实现一套标准工作流。
同时hippo 也提供了易于横向扩展的插件机制,方便团队接入不同类型的项目接入。
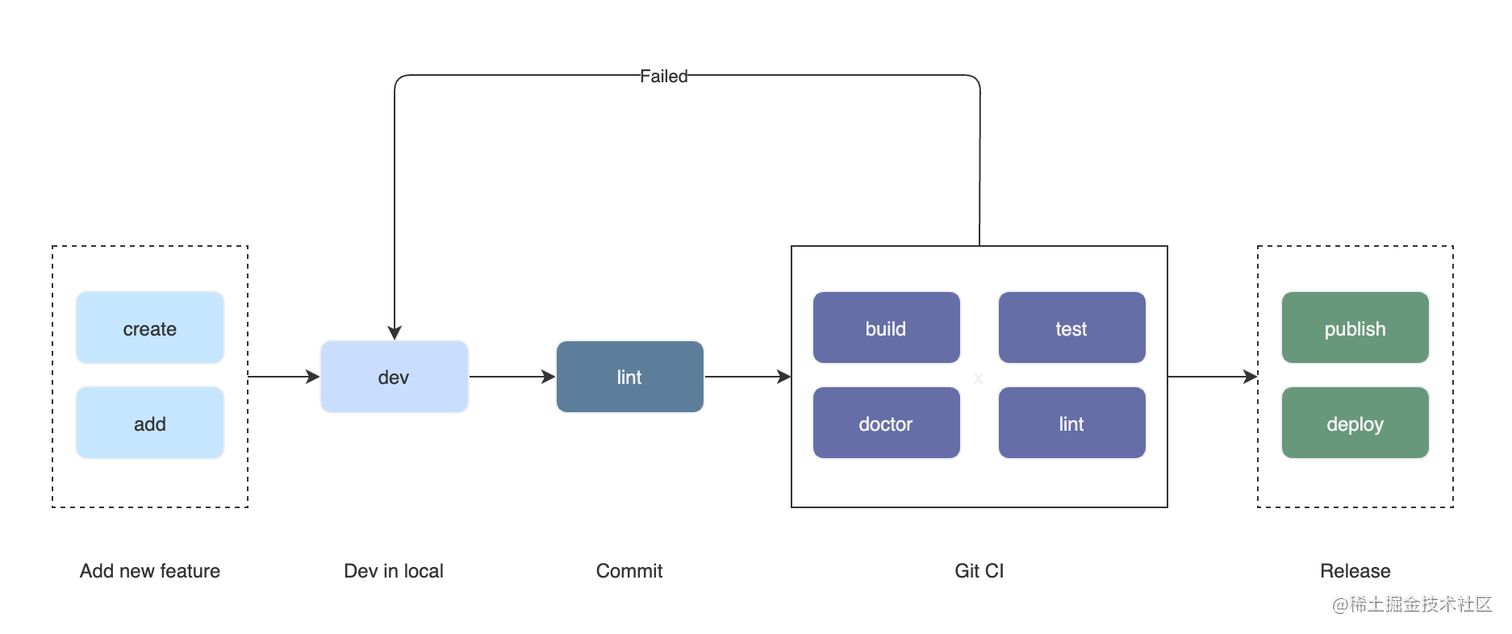
目前 ShopeePay 团队的项目工作流分为初始化、本地开发、代码校验、代码测试、打包构建和发布等步骤。分别对应以下命令
为什么称之为 hippo?
hippo即河马🦛 ,河马是杂食性动物,什么都能吃,所以我们称为hippo的含义是打造团队统一的工具链。
3. hippo架构设计
一张图概括hippo 架构
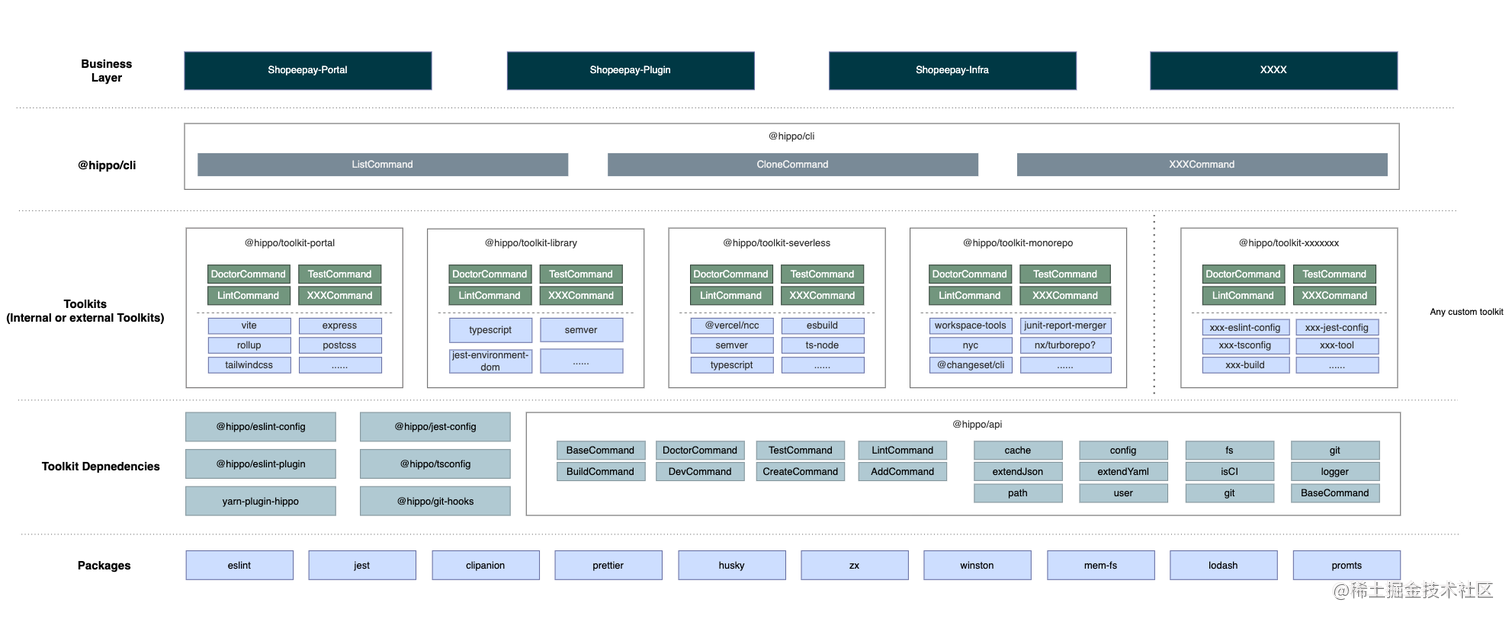
hippo架构大致分为四层
- 顶层是
@hippo/cli, cli 只提供了一个基础内核和一些基础命令(比如version、help和一些与monorepo相关的命令),负责获取并注册各个toolkit实现的工作流命令并与命令行终端交互 - 第二层是
toolkit。toolkit是用于提供某种类型项目的工作流命令,通常是多个命令的集合。一个toolkit对应一种类型的项目,需要按需实现@hippo/api中的抽象工作流命令 - 第三层是
@hippo/api。它是 hippo 核心包,提供了一些核心工作流命令(create、dev、lint、build、test、doctor等)的抽象实现,同时也提供了一些核心工具方法(比如fs操作、git 操作、logger等)。@hippo/cli和toolkit可以使用@hippo/api提供的工具方法,同时toolkit针对该类型项目按需实现@hippo/api中的核心工作流命令 - 最底层是
@hippo/api依赖的一些第三方基础包
@hippo/cli和@hippo/api本身不包含任何与业务强相关的逻辑
hippo 工作流如下
UserHippoToolkitopt[When "type" is valid]Input a command1Check if there is a valid "type" in "package.json"2Get the commands3Return the commands4Register the commands5Return the result6UserHippoToolkit
3. hippo的实现
3.1 @hippo/cli
这里我们使用 clipanion 来实现cli。官网介绍它的优势如下
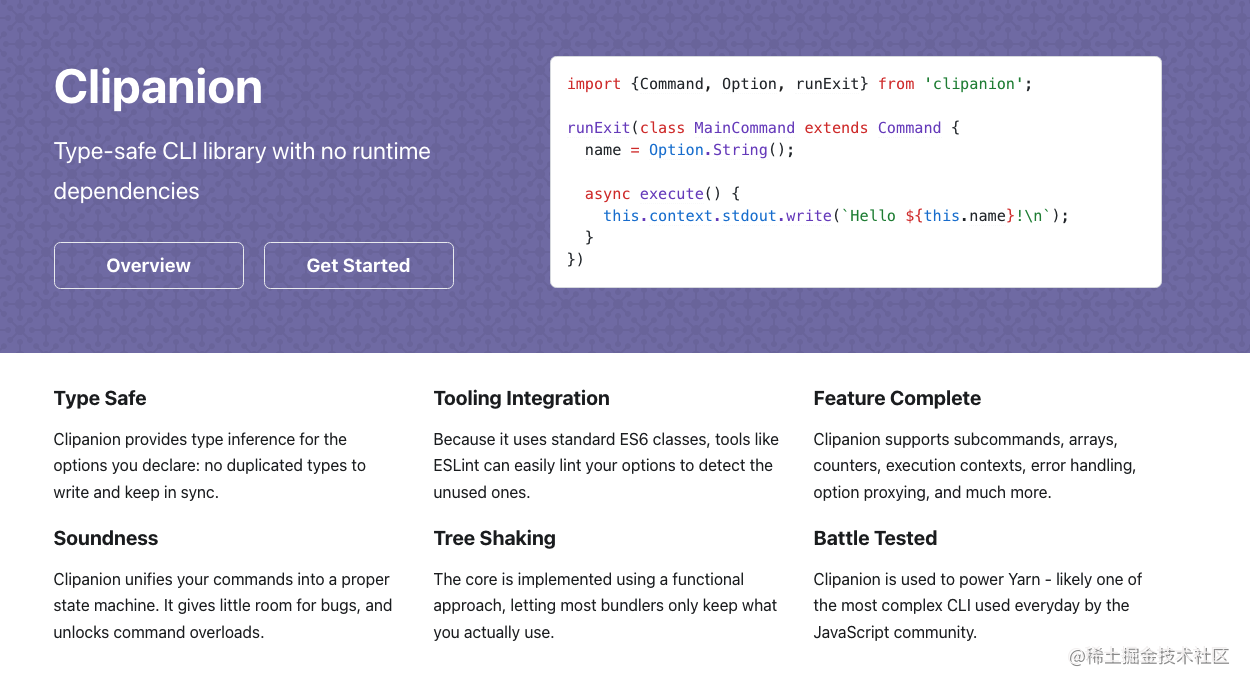
同时 berry/yarn3 也在使用它
在@hippo/cli中,我们需要内置一些monorepo命令并根据当前执行命令的cwd获取对应的toolkit命令并注册到cli中,核心逻辑如下
ts
复制代码
import { Cli, Builtins, apis } from '@hippo/api'; import { values } from 'lodash'; import pkgJson from '../package.json'; import CloneCommand from './commands/CloneCommand'; import FocusCommand from './commands/FocusCommand'; import InitCommand from './commands/InitCommand'; import CreateCommand from './commands/CreateCommand'; import ListCommand from './commands/ListCommand'; import toolkit from './utils/toolkit'; import { HippoToolkit } from './interfaces'; const { version, name } = pkgJson; /** * Check the version when the command is executed */ apis.npm.checkVersionAndLog(name, version); const [, , ...args] = process.argv; const cli = new Cli({ binaryLabel: `ShopeePay Hippo`, binaryName: `hippo`, binaryVersion: version, }); cli.register(InitCommand); cli.register(FocusCommand); cli.register(CreateCommand); cli.register(ListCommand); /** * Find the current toolkit and register its plugin commands */ const toolkitType = apis.config.getToolkitType(); if (toolkit.isValidToolkit(toolkitType)) { const commands = toolkit.requireModule( toolkitType as string, 'commands' ) as HippoToolkit['commands']; values(commands).forEach((plugin) => { cli.register(plugin); }); } cli.register(Builtins.HelpCommand); cli.register(Builtins.VersionCommand); cli.runExit(args);
可以看到,我们内置 clone、focus、create、list、help和version命令
clone
此命令主要用于急速clone一个庞大的monorepo git仓库。clone命令使用部分clone的方式来显著减少开始使用存储库所需的数据量。通过延迟仓库所有blob下载(直到需要时),允许用户快速处理非常庞大的git 仓库
内部使用了 microsoft/scalar 的 clone 命令
focus
focus命令主要用于我们团队的monorepo仓库,可以根据传入的workspace来安装此workspace和其依赖的workspace的依赖。类似于 pnpm 中的 pnpm install --filter ...package_name 命令。
-
为什么不直接使用pnpm命令呢?
因为我们团队中使用 berry/yarn3 来管理monorepo,它也没有提供类似于pnpm install --filter ...package_name 的命令。yarn3只提供了 yarn worspaces focus package_name 命令,然而此命令并不会安装 package_name 依赖的workspace的依赖,所以我们实现了hippo focus命令来达到与pnpm一样的效果
-
为什么不使用pnpm来管理monorepo?
因为当时pnpm没有支持patch命令,这对于我们非常重要。(现在pnpm已经支持patch命令了,后续我们可以考虑将yarn3切换为pnpm)
list
list命令会列出@hippo/cli 内置了哪些 toolkit
help
cli帮助命令
version
查看cli 版本的命令
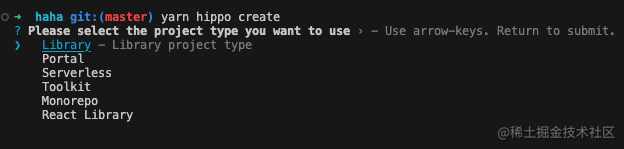
create
理论上create命令应该放到 toolkit 中,但是在创建一个项目之前,我们不知道用户想要创建哪种类型的toolkit项目,所以我们只能将此命令提升到@hippo/cli,让用户明确选择一个toolkit类型,同时也可以先在cli中收集要创建的项目名称等信息,接着将收集的项目信息传入并调用对应toolkit中的create命令。核心逻辑如下
ts
复制代码
import { BaseCommand, Command, Option, apis, TemplateData } from '@hippo/api'; import { find } from 'lodash'; class CreateCommand extends BaseCommand { ... async run() { // 获取toolkit列表 const toolkits = toolkit.getList(); // 用户选择toolkit const response = await prompts({ type: 'select', name: 'toolkitType', message: 'Please select the project type you want to use', choices: toolkits, initial: 0, }); const toolkitType = response.toolkitType; const targetToolkit = find(toolkits, { value: toolkitType }); // 收集项目名称、描述等信息 const templateData = await CreateCommand.getTemplateData( targetToolkit?.title ); // 获取对应toolkit的create命令并执行 const create = toolkit.requireModule(toolkitType, 'create' await create(templateData); } }
同时 @hippo/cli 会根据当前执行命令的cwd获取对应的toolkit命令并注册到cli中,这样在一个toolkit项目中,当调用hippo build、hippo lint等工作流命令时,就会执行到相应的toolkit中的实现的工作流命令
当一个新的toolkit开发完毕之后,@hippo/cli 可以安装它最为一个内置toolkit。但这种方式每次新增toolkit之后需要修改cli代码并且发版本,同时使用方还需要更新,效率比较低。
所以为了优化操作流程,在
toolkit.requireModule方法中我们也会同时require当前项目的node-modules目录中安装的toolkit,这意味着项目中只需要安装对应的toolkit,hippo cli也会resolve它们并且注册相应的命令
3.2 @hippo/api
此包主要提供了一些工具方法和工作流命令的抽象实现。抽象命令核心逻辑如下
BaseCommand
ts
复制代码
import { Command, Option } from 'clipanion'; import { $ } from 'zx'; import * as apis from '../utils'; export default abstract class BaseCommand extends Command { verbose = Option.Boolean('--verbose', false, { hidden: true }); /** * Set apis as an property */ apis = apis; async execute() { $.verbose = this.verbose; await this.run(); } abstract run(): void; }
BuildCommand
ts
复制代码
import { Command } from 'clipanion'; import BaseCommand from './BaseCommand'; export default abstract class BuildCommand extends BaseCommand { static paths = [['build']]; static usage = Command.Usage({ description: 'Build the resources', examples: [['Build the resources', '$0 build']], }); }
TestCommand
ts
复制代码
import { argv } from 'zx'; import { Command, Option } from 'clipanion'; import { runCLI } from 'jest'; import { omit } from 'lodash'; import type { Config } from '@jest/types'; import BaseCommand from './BaseCommand'; import { fs, createLogger } from '../utils'; const { CI } = process.env; export default abstract class TestCommand extends BaseCommand { static paths = [['test']]; static usage = Command.Usage({ description: 'Run unit test using Jest', examples: [['Run unit test using Jest', '$0 test']], }); logger = createLogger('hippo-test'); /** * All the last args to pass to "Jest" directly */ args = Option.Proxy(); /** * Get the jest configs * @returns */ abstract getJestConfig(): Promise<Config.InitialOptions>; async run() { /** * Get the toolkit dev function */ const jestConfigs = await this.getJestConfig(); const jestCliArgs = omit(argv, ['_']); if (jestConfigs) { try { if ( process.env.NODE_ENV === null || process.env.NODE_ENV === undefined ) { /** * When we use jest in normal scenes, jest would add this env automatically in its bin(https://github.com/facebook/jest/blob/39667e3680fb463eb8caedfa7e1f9edb3f0b69a2/packages/jest-cli/bin/jest.js#L13). * In hippo we directly used runCLI from jest to run test, so this env variable is null in hippo. */ process.env.NODE_ENV = 'test'; } // We need add some options when it is in "CI" environment const ciArgs = CI ? { maxWorkers: 3, ci: true, } : {}; const { results } = await runCLI( { config: JSON.stringify(jestConfigs), // We don't collect coverage by default coverage: false, ...ciArgs, ...jestCliArgs, } as Config.Argv, [fs.cwd] ); // Exit the process when these are failed tests const { numFailedTests } = results; if (numFailedTests > 0) { process.exit(1); } } catch (e) { this.logger.error('%o', e); process.exit(1); } } } }
test命令使用jest来运行,同时在toolkit中只需要继承api中的LintCommand,然后实现 getJestConfig 方法返回相应的jest配置即可
LintCommand
ts
复制代码
import { path } from 'zx'; import { Command, Option } from 'clipanion'; import * as t from 'typanion'; import { filter } from 'lodash'; import { ESLINT_FILE_EXT } from './constant'; import eslintCheck from './eslint'; import typeCheck from './typeCheck'; import print from './print'; import BaseCommand from '../BaseCommand'; import { createLogger, fs, git as getAddedFiles } from '../../utils'; import { HippoLintConfig } from '../../interfaces'; export default abstract class LintCommand extends BaseCommand { static paths = [['lint']]; static usage = Command.Usage({ description: 'Check the code by ESLint, tsc according to the hippo type setting', examples: [['Lint a workspace', '$0 lint']], }); /** * Tag if it is strict mode(warn message also trigger process.exit) */ strict = Option.Boolean('--strict'); /** * Auto Fix Option * Only works for 'ESLint' */ fix = Option.Boolean('--fix'); /** * If Check Commit Files * Only works for 'ESLint' */ checkCommit = Option.Boolean('--check-commit'); /** * Lint Source Option * Only works for 'ESLint' */ src = Option.String('--src'); /** * Limit the max warn numbers */ maxWarnings = Option.String('--max-warnings', { validator: t.isNumber() }); /** * Logger */ logger = createLogger('hippo-lint'); /** * Get the Lint Configs */ abstract getLintConfigs(): Promise<HippoLintConfig>; async run() { const lint = await this.getLintConfigs(); // Get the files from git diff const gitCommittedFiles = this.checkCommit ? await getAddedFiles() : undefined; this.logger.debug('The committed files are %o', gitCommittedFiles); /** * Execute the type check. If you don't add this path in config, we won't do any type check */ const tscResults = lint?.lintConfig?.typescript ? await typeCheck(lint.lintConfig.typescript) : null; /** * Get the eslint files */ const eslintFiles = this.getLintFiles(ESLINT_FILE_EXT, gitCommittedFiles); this.logger.debug('The lint file pattern is %o', eslintFiles); const eslintResults = await eslintCheck( { fix: this.fix, strict: this.strict, eslintrc: lint?.lintConfig?.eslint as string, eslintIgnore: lint?.ignorePath?.eslint, }, eslintFiles ); // Print the result const { errorCount, warningCount } = print({ eslint: eslintResults, tsc: tscResults, }); /** * Exit the process when check commit and errorCount is not 0 * Exit the process when check commit and warnCount is not 0 and it is strict mode * Exit the process when the warn count is more than the limit */ if ( errorCount > 0 || (this.strict && warningCount > 0) || (this.maxWarnings && warningCount - this.maxWarnings > 0) ) { process.exit(1); } } /** * Get the lint file pattern for different path * @param {string[]} ext File extension list * @param {string[]} files File List * @returns */ getLintFiles(ext: string[], files?: string[]) { if (files && files.length) { return filter(files, (fileName) => ext.includes(path.extname(fileName))); } const pattern = `**/*.{${ext.map((e) => e.replace(/^./, '')).join(',')}}`; return path.resolve(fs.cwd, this.src || fs.cwd, pattern); } }
可以看到,在api lint命令中,内部会调用Eslint和 Typescript API来校验代码,在toolkit中只需要继承api中的LintCommand,然后实现 getLintConfigs 方法传入相应的eslint和typescript配置文件路径即可
其他hippo api抽象命令实现逻辑大同小异,这里就不在赘述了。
以上代码只是核心逻辑,不包含完整的逻辑
3.3 @hippo/toolkit-*
开发的toolkit名称必须要以 @hippo/toolkit- 开头。toolkit需要依赖 @hippo/api 并且按需实现对应的工作流命令。比如
BuildCommand
ts
复制代码
import { BuildCommand as BuildBaseCommand } from '@hippo/api'; export default class BuildCommand extends BuildBaseCommand { logger = this.apis.createLogger('library-build'); async run() { // do something... } }
LintCommand
scala
复制代码
import { LintCommand as LintBaseCommand } from '@hippo/api'; import { path } from 'path'; export default class LintCommand extends LintBaseCommand { async getLintConfigs() { return { ignorePath: { eslint: path.resolve(__dirname, '../../configs/.eslintignore'), }, lintConfig: { eslint: path.resolve(__dirname, '../../configs/.eslintrc.yml'), typescript: { extends: path.resolve(__dirname, '../../configs/tsconfig.json'), }, }, }; } }
同时toolkit除了工作流命令,仍然可以实现其他命令。只需要继承 @hippo/api 中的 BaseCommand , 同时导出到 commands 属性中即可(@hippo/cli 会从toolkit的 commands 属性中获取所有命令依次注册到cli中)
ts
复制代码
import { BaseCommand, Option, Command } from '@hippo/api'; export default class OtherCommand extends BaseCommand { static paths = [['other']]; async run() { // do something... } }
toolkit 的入口文件一般如下:
ts
复制代码
export const displayName = 'Monorepo'; export const description = 'A monorepo project'; export const name = 'monorepo'; export { version } from '../package.json'; export { default as create } from './create'; export * as commands from './commands';
目前我们内置了6种toolkit
4. hippo规范
从上文得知,在toolkit lint命令中,一般会返回相应的eslint配置文件,eslint配置文件其一般为
yml
复制代码
extends: '@hippo/eslint-config/recommended'
4.1 @hippo/eslint-config
@hippo/eslint-config 是我们提供了一套eslint 规范,目前我们团队都严格遵循此规范,它基于 eslint-config-airbnb-base 并且修改了一些我们认为不合理的规则,同时也继承了我们实现 @hippo/eslint-plugin 。
此外,@hippo/eslint-config 也支持 all-in-one 特性,即使用方不需要安装任何 eslint-config-* 或 eslint-plugin 依赖
目前社区上主流的 eslint config 都需要使用方在自己的项目中安装额外的eslint plugin依赖,比如
- eslint-config-airbnb-base
- eslint-config-standard
- eslint-config-alloy
- ...
然而
@hippo/eslint-config内置了config必要的eslint plugin
- eslint-plugin-import
- eslint-plugin-react
- eslint-plugin-react-hooks
- eslint-plugin-react-native
- eslint-plugin-eslint-comments
- @typescript-eslint/eslint-plugin
- @hippo/eslint-plugin
使用方只需要安装
@hippo/eslint-config即可,降低心智负担
目前 @hippo/eslint-config 提供了四种config set,分别为
recommended
提供给node项目或者纯JavaScript项目使用
js
复制代码
require('@rushstack/eslint-patch/modern-module-resolution'); module.exports = { extends: [ 'airbnb-base', 'eslint:recommended', 'plugin:@typescript-eslint/recommended', 'prettier', 'plugin:@hippo/recommended', 'plugin:eslint-comments/recommended', ], reportUnusedDisableDirectives: true, settings: { 'import/resolver': [ require.resolve('eslint-import-resolver-node'), require.resolve('eslint-import-resolver-typescript'), ], // Append 'ts' extensions to Airbnb 'import/extensions' setting 'import/extensions': ['.js', '.mjs', '.jsx', '.ts', '.tsx', '.d.ts'], }, rules: { // The reason why Airbnb turned on this rule is that they discourage to use loops // Details in https://github.com/airbnb/javascript/issues/1103 // That doesn't make sense to us since we allow to use `while` and early-return technique relies on `continue` in loops 'no-continue': 'off', } }
react-native
提供react native项目使用
js
复制代码
require('@rushstack/eslint-patch/modern-module-resolution'); module.exports = { env: { 'react-native/react-native': true, }, extends: [require.resolve('./react'), 'plugin:react-native/all'], settings: { 'import/resolver': [ require.resolve('./utils/aliasResolver'), require.resolve('eslint-import-resolver-typescript'), { [require.resolve('eslint-import-resolver-react-native')]: { // which extensions will be searched extensions: ['.tsx', '.ts', '.js', '.jsx', '.mjs'], }, }, ], }, rules: { // FIXME: we might need to develop a similar but specific rule for react-native '@typescript-eslint/no-use-before-define': ['error', { variables: false }], 'react-native/no-color-literals': 'off', 'react-native/sort-styles': 'off', }, };
注意,这里我们配置了一个额外的 aliasResolver,这是因为我们的 RN项目中使用了别名,是通过 babel-plugin-module-resolver 此babel plugin支持的。为了让 eslint-plugin-import 中的需要resolve文件的规则能解析到正确的文件路径,所以我们需要自定义一个 resolver。其内部原理比较简单与babel-plugin-module-resolver 基本一致。
react
提供给保持老的JSX transform(turned JSX into React.createElement(...) calls)的react项目使用
js
复制代码
require('@rushstack/eslint-patch/modern-module-resolution'); module.exports = { extends: [ 'airbnb/rules/react', // don't import a11y rules 'airbnb/hooks', require.resolve('./recommended'), ], rules: { // Since we already use TypeScript, we don't quite need this rule 'react/require-default-props': 'off', // Since we already use TypeScript, turning on this rule will conflict with ts type detection 'react/static-property-placement': 'off', 'react/function-component-definition': 'off', 'react/jsx-filename-extension': [1, { extensions: ['.tsx'] }], // No worries since we write in TypeScript 'react/jsx-props-no-spreading': 'off', }, };
react-17
提供给使用了新的 new-jsx-transform JSX transform的react项目使用
js
复制代码
require('@rushstack/eslint-patch/modern-module-resolution'); module.exports = { extends: [require.resolve('./react'), 'plugin:react/jsx-runtime'], };
如何支持 all-in-one 特性?
这里我们使用 @rushstack/eslint-patch/modern-module-resolution
我们在每个config set之前会调用
js
复制代码
require('@rushstack/eslint-patch/modern-module-resolution');
它将改变resolve eslint-plugin-* 或 eslint-config-* 的方式从用户项目中的node_modules变为我们config中的node_modules,从而完美的支持 all-in-one 特性
4.2 @hippo/eslint-plugin
@hippo/eslint-plugin 实现了一些我们团队的Eslint rule,由于篇幅有限这里就不再赘述了。