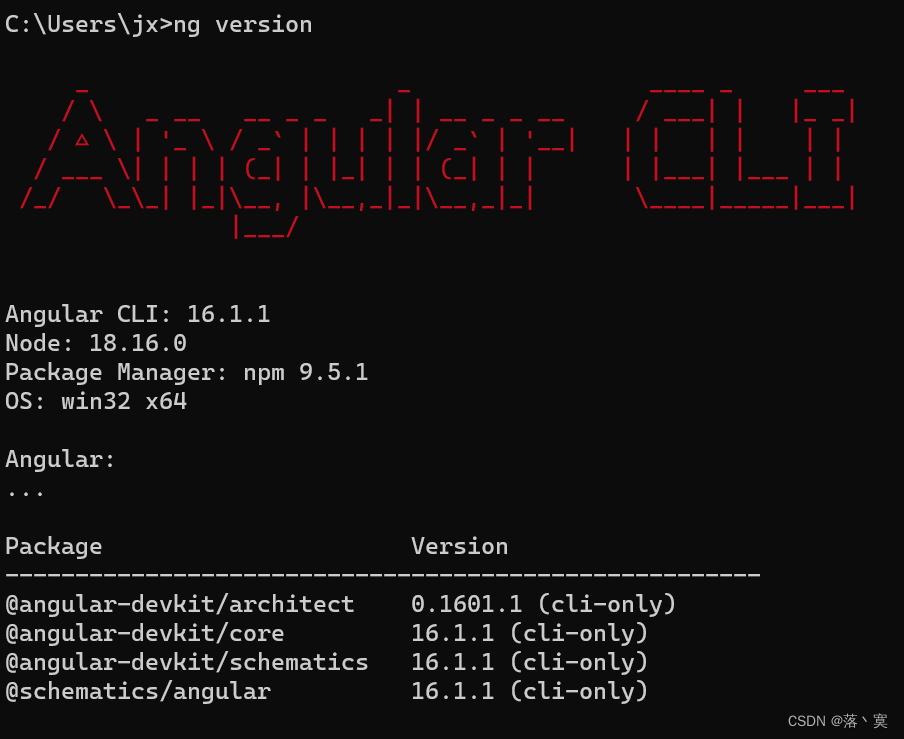
Angular版本:16.1.1
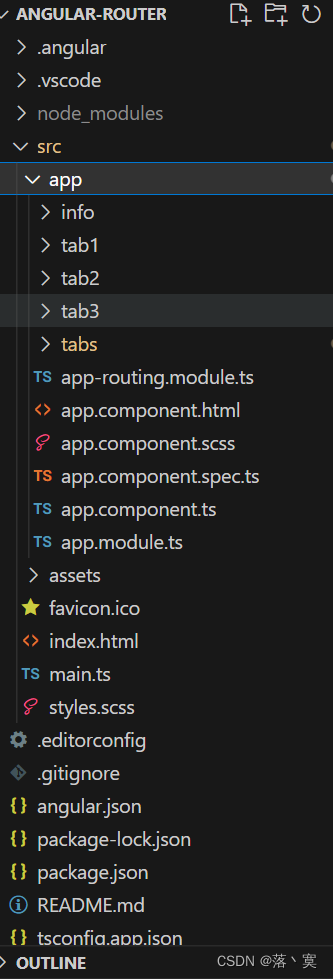
项目结构:
angular.json配置:
{
  "$schema": "./node_modules/@angular/cli/lib/config/schema.json",
  "version": 1,
  "newProjectRoot": "projects",
  "projects": {
    "angular-router": {
      "projectType": "application",
      "schematics": {
        "@schematics/angular:component": {
          "style": "scss"
        }
      },
      "root": "",
      "sourceRoot": "src",
      "prefix": "app",
      "architect": {
        "build": {
          "builder": "@angular-devkit/build-angular:browser",
          "options": {
            "outputPath": "dist/angular-router",
            "index": "src/index.html",
            "main": "src/main.ts",
            "polyfills": [
              "zone.js"
            ],
            "tsConfig": "tsconfig.app.json",
            "inlineStyleLanguage": "scss",
            "assets": [
              "src/favicon.ico",
              "src/assets"
            ],
            "styles": [
              "src/styles.scss"
            ],
            "scripts": []
          },
          "configurations": {
            "production": {
              "budgets": [
                {
                  "type": "initial",
                  "maximumWarning": "500kb",
                  "maximumError": "1mb"
                },
                {
                  "type": "anyComponentStyle",
                  "maximumWarning": "2kb",
                  "maximumError": "4kb"
                }
              ],
              "outputHashing": "all"
            },
            "development": {
              "buildOptimizer": false,
              "optimization": false,
              "vendorChunk": true,
              "extractLicenses": false,
              "sourceMap": true,
              "namedChunks": true
            }
          },
          "defaultConfiguration": "production"
        },
        "serve": {
          "builder": "@angular-devkit/build-angular:dev-server",
          "configurations": {
            "production": {
              "browserTarget": "angular-router:build:production"
            },
            "development": {
              "browserTarget": "angular-router:build:development"
            }
          },
          "defaultConfiguration": "development"
        },
        "extract-i18n": {
          "builder": "@angular-devkit/build-angular:extract-i18n",
          "options": {
            "browserTarget": "angular-router:build"
          }
        },
        "test": {
          "builder": "@angular-devkit/build-angular:karma",
          "options": {
            "polyfills": [
              "zone.js",
              "zone.js/testing"
            ],
            "tsConfig": "tsconfig.spec.json",
            "inlineStyleLanguage": "scss",
            "assets": [
              "src/favicon.ico",
              "src/assets"
            ],
            "styles": [
              "src/styles.scss"
            ],
            "scripts": []
          }
        }
      }
    }
  }
}
package.json:
{
  "name": "angular-router",
  "version": "0.0.0",
  "scripts": {
    "ng": "ng",
    "start": "ng serve",
    "build": "ng build",
    "watch": "ng build --watch --configuration development",
    "test": "ng test"
  },
  "private": true,
  "dependencies": {
    "@angular/animations": "^16.1.0",
    "@angular/common": "^16.1.0",
    "@angular/compiler": "^16.1.0",
    "@angular/core": "^16.1.0",
    "@angular/forms": "^16.1.0",
    "@angular/platform-browser": "^16.1.0",
    "@angular/platform-browser-dynamic": "^16.1.0",
    "@angular/router": "^16.1.0",
    "rxjs": "~7.8.0",
    "tslib": "^2.3.0",
    "zone.js": "~0.13.0"
  },
  "devDependencies": {
    "@angular-devkit/build-angular": "^16.1.1",
    "@angular/cli": "~16.1.1",
    "@angular/compiler-cli": "^16.1.0",
    "@types/jasmine": "~4.3.0",
    "jasmine-core": "~4.6.0",
    "karma": "~6.4.0",
    "karma-chrome-launcher": "~3.2.0",
    "karma-coverage": "~2.2.0",
    "karma-jasmine": "~5.1.0",
    "karma-jasmine-html-reporter": "~2.1.0",
    "typescript": "~5.1.3"
  }
}
tsconfig.app.json:
/* To learn more about this file see: https://angular.io/config/tsconfig. */
{
  "extends": "./tsconfig.json",
  "compilerOptions": {
    "outDir": "./out-tsc/app",
    "types": []
  },
  "files": [
    "src/main.ts"
  ],
  "include": [
    "src/**/*.d.ts"
  ]
}
tsconfig.json:
/* To learn more about this file see: https://angular.io/config/tsconfig. */
{
  "compileOnSave": false,
  "compilerOptions": {
    "baseUrl": "./",
    "outDir": "./dist/out-tsc",
    "forceConsistentCasingInFileNames": true,
    "strict": true,
    "noImplicitOverride": true,
    "noPropertyAccessFromIndexSignature": true,
    "noImplicitReturns": true,
    "noFallthroughCasesInSwitch": true,
    "sourceMap": true,
    "declaration": false,
    "downlevelIteration": true,
    "experimentalDecorators": true,
    "moduleResolution": "node",
    "importHelpers": true,
    "target": "ES2022",
    "module": "ES2022",
    "useDefineForClassFields": false,
    "lib": [
      "ES2022",
      "dom"
    ]
  },
  "angularCompilerOptions": {
    "enableI18nLegacyMessageIdFormat": false,
    "strictInjectionParameters": true,
    "strictInputAccessModifiers": true,
    "strictTemplates": true
  }
}
styles.scss全局样式表清除部分默认样式
/* You can add global styles to this file, and also import other style files */
*{
    margin: 0;
    padding: 0;
    border: 0;
}
一、ng命令添加4个页面组件(tabs,tab1,tab2,tab3,info),angular会自动把组件导入到app.module.ts中
import { NgModule } from '@angular/core';
import { BrowserModule } from '@angular/platform-browser';

import { AppRoutingModule } from './app-routing.module';
import { AppComponent } from './app.component';
// 所有页面导入根模块
import { TabsComponent } from './tabs/tabs.component';
import { Tab1Component } from './tab1/tab1.component';
import { Tab2Component } from './tab2/tab2.component';
import { Tab3Component } from './tab3/tab3.component';
import { InfoComponent } from './info/info.component';

@NgModule({
  declarations: [
    AppComponent,
    TabsComponent,//声明所有页面组件
    Tab1Component,
    Tab2Component,
    Tab3Component,
    InfoComponent
  ],
  imports: [
    BrowserModule,
    AppRoutingModule
  ],
  providers: [],
  bootstrap: [AppComponent]
})
export class AppModule { }
二、在app.component.html里添加路由占位标签,根据路由规则,会把路由匹配的页面插入到这里显示,这里的<router-outlet></router-outlet>会将路由规则中一级路由匹配到的组件插入,因为app.component.html是项目根模块中的页面
<!-- index.html加载本页面组件,本页面只有一个路由占位标签 -->
<!-- 路由占位,会将本模块(这里是根模块)的一级路由对应页面插入进来显示 -->
<!-- 这里会将我们的一级路由的页面插入进来显示,当路由到tabs页面时也就是带导航选项卡的页面 -->
<!-- 本案例的一级路由有2个页面,分别是tabs和info,输入http://localhost:port/默认导航到tabs/tab1显示导航页,这个在定义的路由规则中可以看到 -->
<!-- 可以看到tabs页面组件中同样存在此占位标签,将tabs子路由的页面插入到tabs页面中<router-outlet></router-outlet>显示 -->
<router-outlet></router-outlet>
app.component.scss和app.component.ts默认无修改内容
三、在app.routing.module.ts里编写路由规则
import { NgModule } from '@angular/core';
import { RouterModule, Routes } from '@angular/router';
import { TabsComponent } from './tabs/tabs.component';
import { Tab1Component } from './tab1/tab1.component';
import { Tab2Component } from './tab2/tab2.component';
import { Tab3Component } from './tab3/tab3.component';
import { InfoComponent } from './info/info.component';
// 一级路由匹配到的页面在定义该路由规则所在的模块的组件中的<router-outlet></router-outlet>中插入显示
//相应的,一级路由下匹配到的页面的子路由在相应页面的<router-outlet></router-outlet>中显示
//这里一级路径在app模块(本项目根模块)中定义,则一级路由页面插入到app.component.html里的<router-outlet></router-outlet>中
// 这里一级路由有2个分别为tabs和info页面,tabs页面的子路由匹配到的页面插入到tabs页面组件中的<router-outlet></router-outlet>中显示
// tabs子路由有三个页面,在tabs中通过路由指令routerLink指定路径,配合tabs页面的<router-outlet></router-outlet>即实现首页导航
const routes: Routes = [
  // 一级路由,输入http://localhost:port/默认导航到/tabs/tab1,
  //tabs是首页,带多个导航选项卡,点击切换不同内容
  //输入http://localhost:port/info则进入info页面,也可通过

  {
    path:"tabs",
    component:TabsComponent,
    children:[
      //tabs的子路由,实现了一个首页导航tab切换选项卡,
      //输入http://localhost:port默认导航到/tabs/tab1页面
      {
        path:"tab1",
        component:Tab1Component
      },
      {
        path:"tab2",
        component:Tab2Component
      },
      {
        path:"tab3",
        component:Tab3Component
      },
      {//这里路径为空则会重定向到tabs/tab1
        //比如http://localhost:port/tabs就会默认到http://localhost:port/tabs/tab1
        path:"",
        redirectTo:"tabs/tab1",
        pathMatch:"full"

      }
    ]
  },
  {
    path:"info",
    component:InfoComponent
  },
  //这里路径为空就会重定向到tabs/tab1
  //比如http://localhost:port就会默认到http://localhost:port/tabs/tab1
  {
    path:"",
    redirectTo:"tabs/tab1",
    pathMatch:"full"
  }


];

@NgModule({
  imports: [RouterModule.forRoot(routes)],
  exports: [RouterModule]
})
export class AppRoutingModule { }
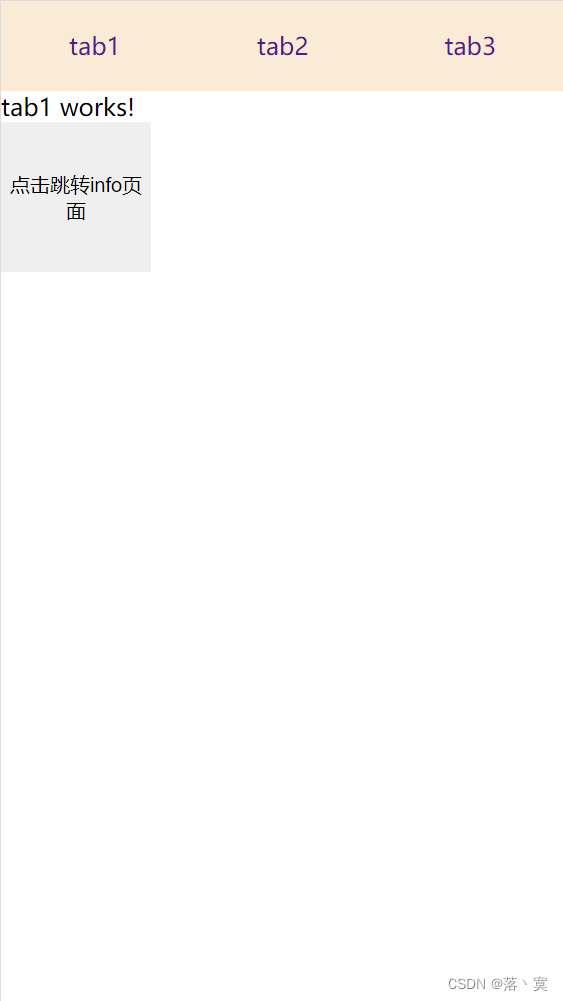
四、在tabs.component.html里编写页面,显示三个导航切换卡,tabs中的<router-outlet></router-outlet>标签会根据tabs组件子路由的规则插入组件显示,实现顶部<a></a>标签中的路由指令routerLink切换底部不同组件内容显示
<nav>
    <a routerLink="/tabs/tab1">tab1</a>
    <a routerLink="/tabs/tab2">tab2</a>
    <a routerLink="/tabs/tab3">tab3</a>
</nav>
<!-- 路由占位,将tabs的子路由匹配到的页面插入到这里,上面a标签中的routerLink指令即是路由指令 -->
<!-- 点击上面任意a标签根据路由指令路径匹配到相关页面后插入到这里显示,即实现导航页 -->
<!-- 本页面有三个导航切换标签,点击tab1或其他会相应在<router-outlet></router-outlet>插入tab1页面或其他页面显示,这里实现了顶部导航切换,底部相应内容显示 -->
<!-- 在tab1中设置了一个按钮,点击会跳转到info页面,info和tabs为一级路由中定义的路由页面,会在app.component.html里的<router-outlet></router-outlet>中显示,即离开导航页,也就看不到导航选项卡 -->
<router-outlet></router-outlet>
tabs.component.scss
nav{
    width: 100%;
    height: 60px;
    background-color: antiquewhite;
    display: flex;
}
a{
    flex: 1;
    text-align: center;
    height: 60;
    line-height: 60px;
    text-decoration:none;
}
tabs.component.ts
import { Component } from '@angular/core';

@Component({
  selector: 'app-tabs',
  templateUrl: './tabs.component.html',
  styleUrls: ['./tabs.component.scss']
})
export class TabsComponent {

}
五、编写tab1,tab2,tab3,info页面组件
1、tab1
tab1.component.html
<p>tab1 works!</p>
<button (click)="go()">点击跳转info页面</button>
tab1.component.scss
button{
    width: 100px;
    height: 100px;
}
tab1.component.ts
import { Component } from '@angular/core';
import { Router } from '@angular/router';

@Component({
  selector: 'app-tab1',
  templateUrl: './tab1.component.html',
  styleUrls: ['./tab1.component.scss']
})
export class Tab1Component {
  constructor(private router:Router){

  }
  go(){
    this.router.navigateByUrl("info");
  }
}
2、tab2
tab2.component.html
<p>tab2 works!</p>
tab2.component.scss和tab2.component.ts默认无修改内容
3、tab3
tab3.component.html
<p>tab3 works!</p>tab3.component.scss和tab3.component.ts默认无修改内容
4、info
info.component.html
<p>info works!</p>
info.component.scss和info.component.ts默认无修改内容
至此全部编写完成,执行ng serve运行,默认首页http://localhost:4200/tabs/tab1,点击不同导航选项卡,下面显示不同组件的内容,点击tab1下的按钮会直接跳转到http://localhost:4200/info,info组件会替换tabs组件在app.component.html中显示,也就不会有顶部导航选项卡,因为导航选项卡是tabs组件中的


Angular实现简单的首页顶部导航tabs切换


![[Eigen中文文档] 在 BLAS/LAPACK 、英特尔® MKL 和 CUDA 中使用 Eigen](https://img-blog.csdnimg.cn/358fbb477d3443c9abc1a775be3f46a6.png#pic_center)